
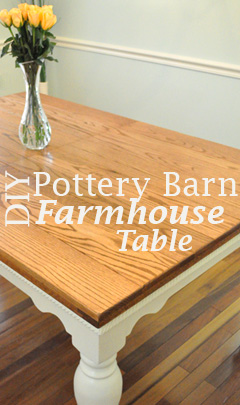
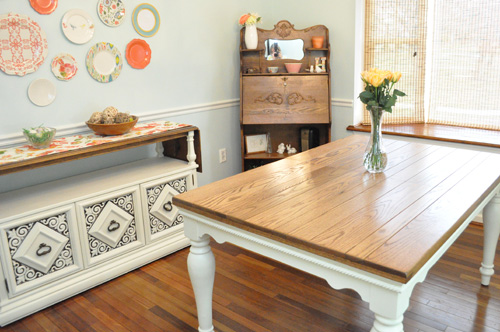
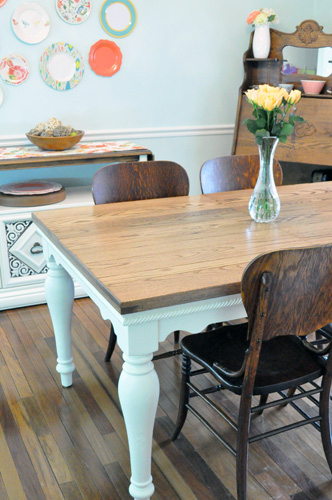
If you keep up with Jocie and The Better Half, you know that she’s been busy giving our dining room a makeover. She has done a great job, and so far Jocie has painted the walls, refinished an old buffet, created a very cool plate wall, and incorporated some furniture we just inherited. Well Jocie has been pining for a farmhouse table to go with the new decor, and she really liked the Keaton Dining Table from Pottery Barn. Don’t bother clicking on that link. The PB table costs $1,600 + $100 delivery! That’s a bit out of our price range, and instead I built a Pottery Barn farmhouse table knockoff for about $400.
The secret behind this DIY farmhouse table is that I purchased a table on Craigslist and built a new tabletop. How else could I have gotten table legs, latches, extension rails, screws and all the other hardware for only $60?!
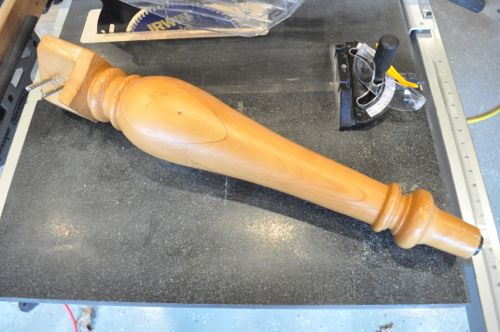
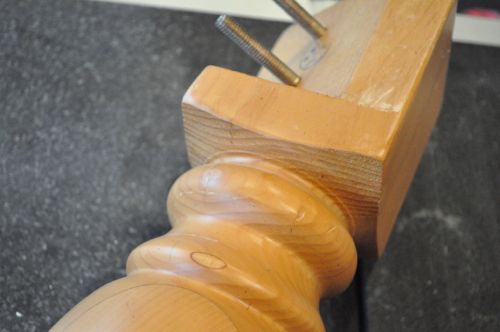
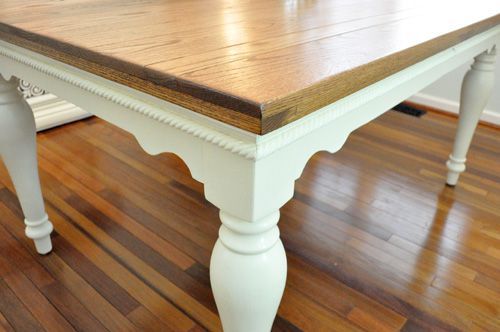
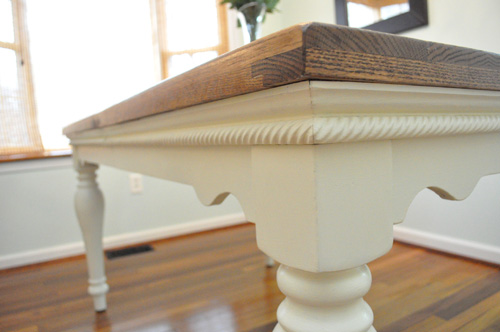
The legs and most of the molding were solid wood, and everything was a little worn. The damage was nothing that a little wood filler and sanding couldn’t resolve.
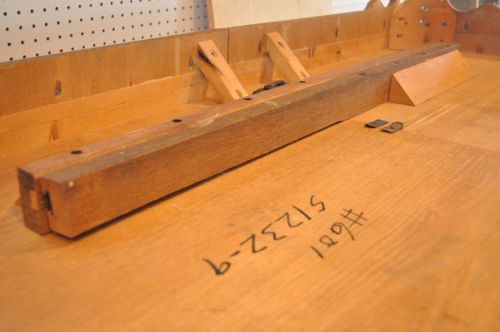
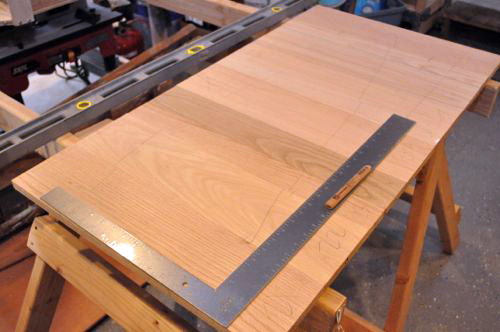
I carefully labeled all the supports, extension rails and pieces of the table apron. I also took a few pictures to refer back to when it came time to reassemble everything.
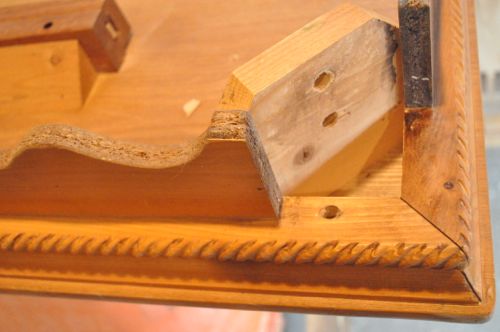
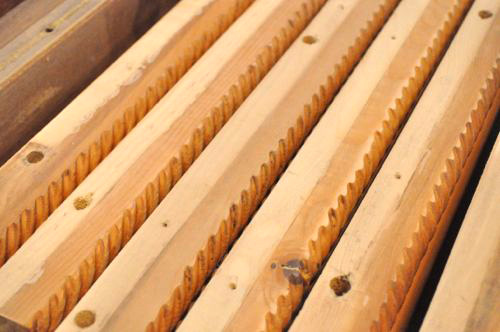
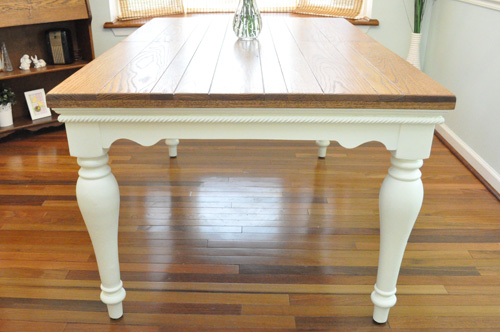
After I cleaned up the rope molding and the rest of the apron, I gave the pieces to Jocie for her to paint. She’s been really pleased with Old White Annie Sloan Chalk Paint, and Jocie painted the pieces to match the buffet.
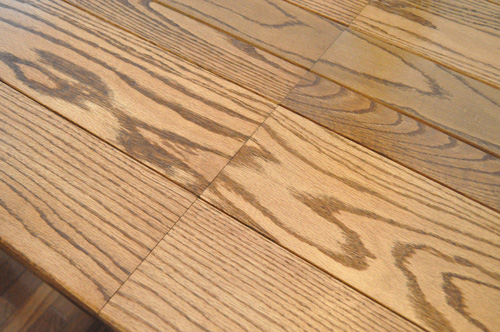
Surprisingly, the PB table has a pine top which is a relatively soft wood. I wanted something more durable, and most of the cost for this knockoff is due to the fact that I opted for an oak table top. If I’d gone with pine, it would have probably cost closer to $300.
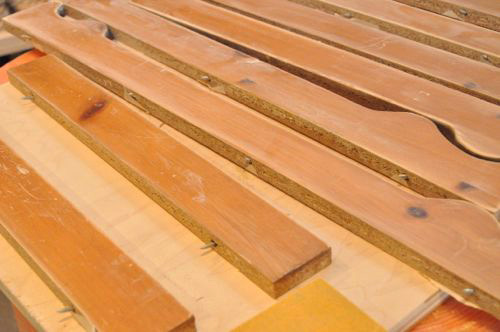
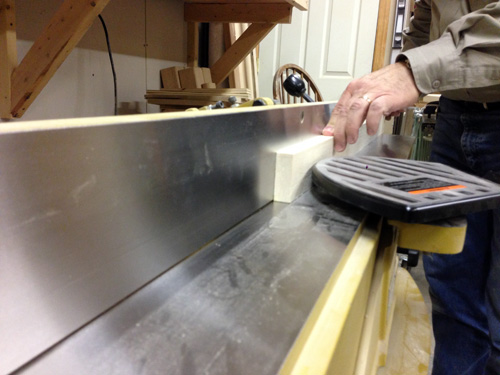
I purchased a variety of 1x oak boards at my local HD, and I started by jointing the boards at my shop. When Joe offered to help me joint the wood at his shop (on a jointer), I couldn’t refuse.
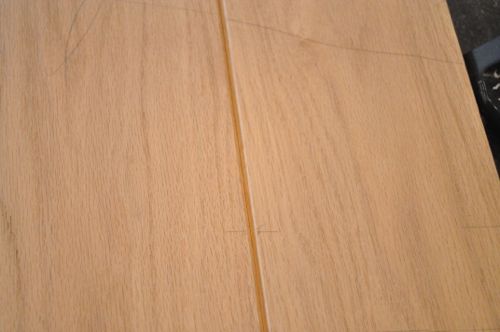
I ordered the boards with alternating wood grain patterns. That was another tip Joe gave me, and the argument is that it helps cancel out seasonal cupping. Here’s a look after jointing and cutting one side of the table to approximate length.
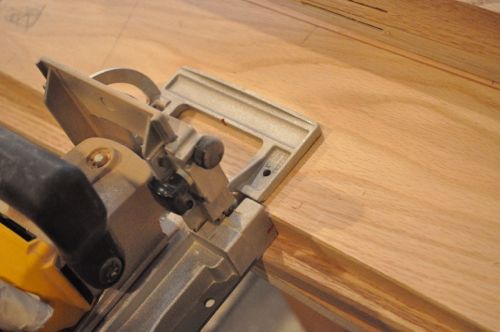
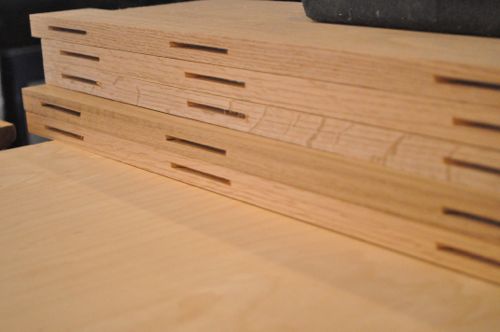
Next, I used a biscuit jointer to cut slots for about 100 biscuits. All the table joints have four biscuits and the leaf joints have three biscuits.
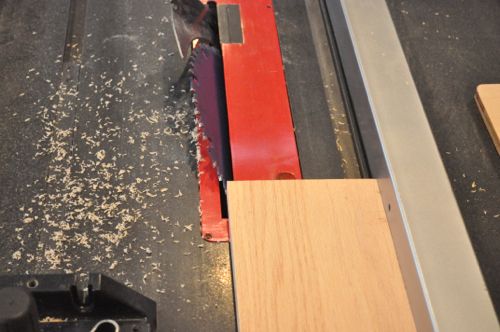
Jocie wanted a small chamfered edge at all the joints so I ran the boards through my table saw.
Glue up was a slow process because I didn’t want to glue too many boards at the same time. I used Titebond II which is a water-resistant glue. Hopefully, water never makes it into any of the joints, but I didn’t want to take any chances.
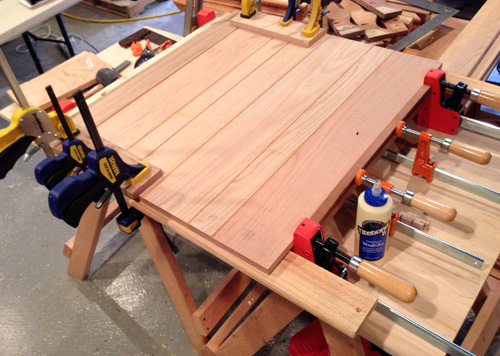
Here’s a look at the two table sides and the leaf in the middle after glue up. If you remember my article about building a sled for my table saw, this was why. I needed to be able to trim the 30″ x 40″ sections after gluing.
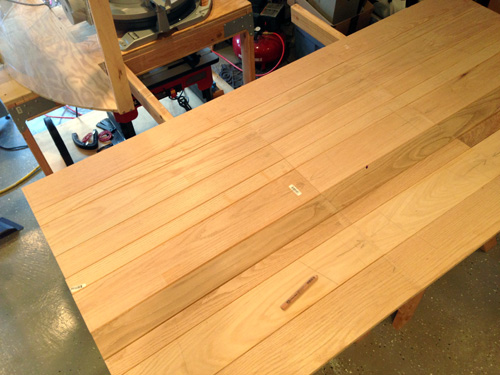
Even though these are all 1x boards, there was quite a bit of variation, and I used a belt sander to even out the underside. Next, I cut lap-joints and glued and screwed a frame which gives the table top a thicker appearance, and it helps support all the glued joints.
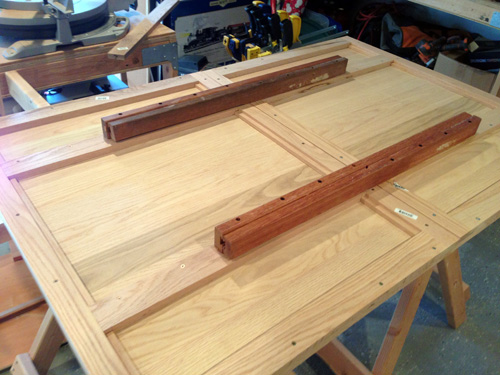
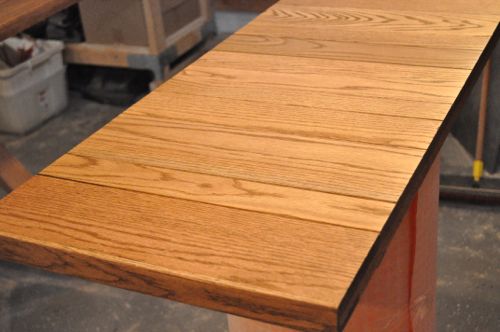
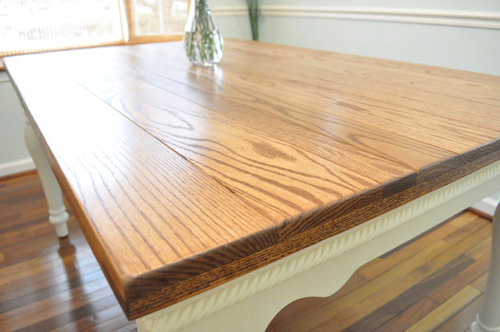
Here you can see I’ve attached the extension rails. After that, I sanded the top of the table with a random orbital sander, progressing from 60 to 100, 120, 150, and 220 grit sandpaper.
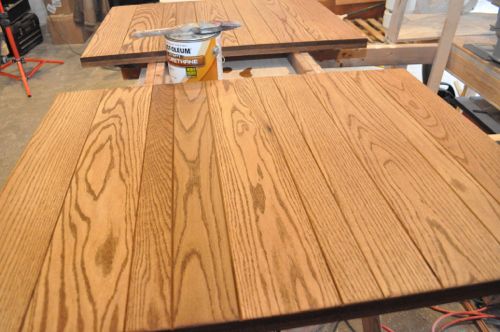
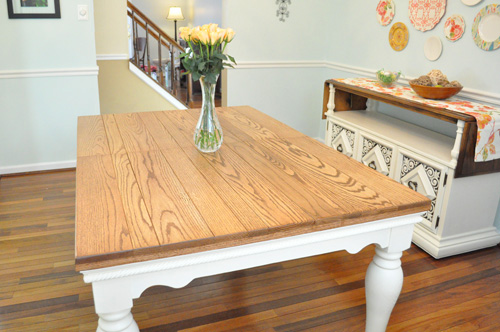
Next, I stained everything with Rust-oleum Early American wood stain. The best part about this stain is that my tabletop was ready for poly in only 1 hour!
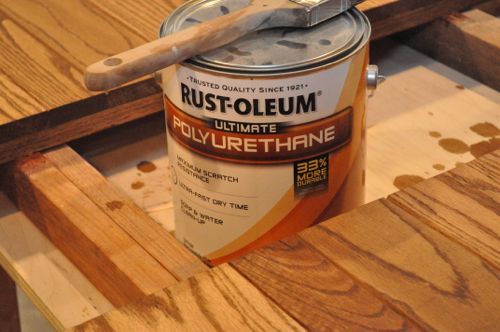
I applied three coats of Rust-oleum satin polyurethane to protect everything. I expect this table will get lots of use so eventually I’ll need to reapply.
After finishing the wood, I glued and screwed the apron back in place and attached the legs. Jocie gave everything one last coat of paint, and the table was done! Now I just have to come to grips with the fact that the table is going to be used… by small children… sometimes with crayons.


That looks great! Enjoy the new table.
Looks great! Good pics, too!
beautiful work – how sturdy is it with the leaf in it?
It’s very sturdy- not going anywhere.
Nice! My wife, like most I’d imagine, loves Pottery Barn. Every time I look through the catalog or walk through the store, I can’t help but think that most of the pieces they sell could be made at home for much cheaper. In my opinion, your table looks much nicer than the one at PB. Excellent work.
Nice project Ethan. I saw Jocie was redoing your dining room and I was guessing the table saw sled was for a large new table top. 🙂
Ethan did an amazing job on this table!! seriously, this is the most sturdy piece of furniture in our house by far (even with the leaf in).
I love that you retooled an older table. This is fantastic! My kind of redecorating. Congrats to both of you on a job well done.
This is gorgeous! Much nicer than you would have gotten at PB.
Look at you, a woodworker now. Trust me, now that you have gotten a little whiff of hardwood dust, it’s like a disease. Good job on the table.
Thanks Jeff. People are already asking what my next project will be, and I have a feeling it’ll involve those dining room chairs. The thing is my grandfather built those so I’m loath to make too many changes. We’ll see.
I like the chairs. Unless they are broken or loose I wouldn’t change them. Maybe a lighter color stain so they are closer to the table
The backs of the chairs are veneer and in VERY bad shape! 🙁
The table looks great! Really like the stain selection, too.
I love the transformation! Very nice!
Great job looks nice.
Very nice! Looks very natural with the recycled table bottom. Only a matter of time now before you’re making those legs yourself with a lathe. Are you on Lumberjocks?
I troll LJ for ideas sometimes, but I’m not posting about my woodworking there. Just not enough time in the day to keep up with everything.
Yeah that’s mainly what I use it for as well.
I’m a longtime lurker on LJ. Haven’t posted any of my stuff yet either. Poiboybf, are you on there?
It truly looks great! A quick question on technique, what is the benefit of using the table saw to chamfer the edges vs. a router with a piloted bit?
or a small hand plane 🙂
Mostly I went with a TS because it was convenient. Jocie didn’t want a curved / eased edge and I don’t have the right router bit to achieve the same thing. Either way woulda worked.
really nice!!!
do you have pegs to hold/align the leaf and the tabletop (and force proper orientation of the leaf so the boards match up)?
Thanks for the compliments everyone! The table turned out amazing (so I’m sure Jocie will be asking for more PB knock offs now).
you can count on it! is that a request?!?
Wow Ethan, you did an awesome job. I can see why Jocie will be wanting more knock offs after this.
The table is gorgeous! You guys did a great job!
Ethan, That table top looks fantastic! Jacque and I may just start finding pieces that need to be redone and bring them to you! Really great job!
Thanks Matt! I’m still learning some of the tips and tricks, but I’m pleased with how it turned out. We just had a big family gathering yesterday, and it was great to seat everyone at the new table.
And baby makes 5… so we need a new kitchen table with more chairs. I fell in LOVE with a table on Craigslist!!! The table has a lot of beautiful character, but the top is in pretty rough shape. We’re not up for rebuilding a top like you did (it’s looks fantastic by the way!), but I’m thinking we can get away with just some fresh poly. I’ve never used it before – is it pretty straightforward? Any tips on making it even and nice looking? How long do you think we need to let it cure before we use the table? Is it worth doing multiple coats?
Hey Liz,
Depending on how the top was made, you might be able to just sand it down and apply some fresh poly for a “new” look. Poly is pretty easy to apply. I used Rustoleums water-based poly and a good quality synthetic bristle brush. Don’t apply it too thick. Try to keep it even and don’t back-brush after the poly starts to dry. Hope this helps!
Jeremy never gets his staining to look that nice! Any tips?
One good tip is to use paint thinner to reveal any glue or sanding defects before applying stain. The thinner will quickly evaporate and it won’t raise the wood grain either. Plus, it’ll make swirl marks or glue drips very obvious.
Ethan, That table top looks Great! Jemma and I just start bringing pieces together that needs to be done and bring them to you! for remodeling Really good project!
Loved the article and the table looks great!
Very nice- looking table! Once your wife has seen that you did a great job on that……..Thankfully, my wife would certainly know that something like this would be beyond my capabilities! ( although that wouldn’t stop her from looking at consignment stores and flea markets for something to renovate). Don’t be concerned about the kids marking it up. Someday it will be passed on to them, and justice will be served!
Hats off to you! A job well done!
You know how “Wayne and Garth” used to revere their rock legends? I give you their praise: “We’re not worthy!”
Love the table, you did a great job! Hopefully my hubby will be making a farm-house table for us this winter. Wondering if you have thought of making a bench for one side of the table.
Is the old top under the new top or did you remove the old table top?
Beautiful, I think everybody would love to have a farm house table, especially if they have a big family and have family dinners. I would love to have a husband that could make awesome things like this. My dream. LOL
Love the way you have given finishing to the woods and coating of paints.looks perfect for my home !!!Job Well Done.
Hi, I’m new here, just today! Absolutely stunning table and I agree about the chairs. Leave them alone. Think of the sentiment of your gap making them and now you also do wood working. I’d maybe reinforce the veneer with glue and clamp but maybe use them elsewhere for extra seating if they are too unstable. Maybe my house? LOL!
My hubby is tiling our FR, after having already done our DR and kitchen, after too many years! Yay! Just in time for Christmas! 😜
Look forward to more browsing here….