
We’re really excited to share this step-by-step guide for building a concrete patio with a decorative bluestone border. We partnered with Joe Bianco, President of SDG Home Solutions, to document how a contractor and their crew would tackle this home improvement project.
This article shares pictures and tips covering everything from demolition to the finishing touches. We hope it’s a great resource for you, especially if you’re considering a new concrete patio in the near future.
Concrete Patio Remodel
Here’s Joe introducing the project and sharing why his crew is demolishing the existing patio.
The Challenge with This Patio
If you missed it in the video, the problem with the existing concrete patio is that it slopes toward the house. That is a huge problem, because water from rain and melted snow has been pooling against the foundation of the home. Recently, that water found its way into the basement, creating a serious mold problem.
Tip: If you see water pooling against your home, immediately take steps to re-grade the area or install appropriate drainage. Water damage can be extremely expensive to fix, especially if mold growth starts.
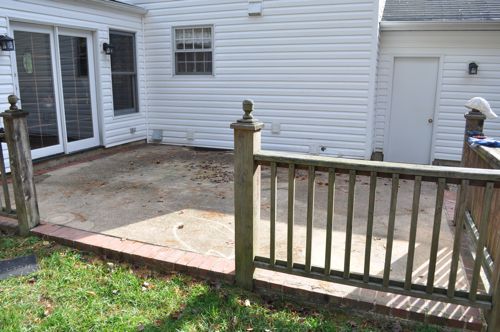
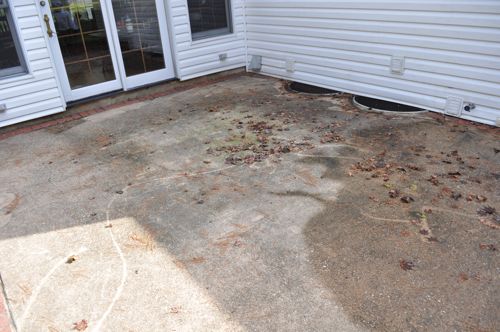
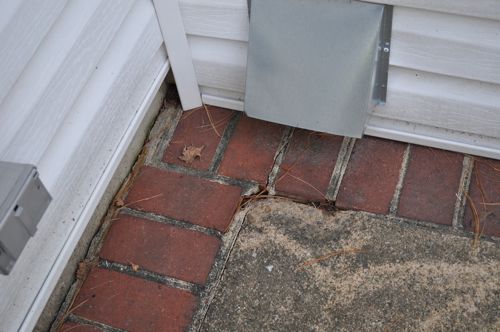
The homeowners, Rick and Patricia, first noticed the water infiltration in September, 2011 after hurricane Irene brought heavy rain to Maryland. They’ve already gone through an extensive interior mold remediation process involving high-ozone shock treatments. Now, they’re ensuring the problem never happens again by fixing it at its source: the poorly graded patio.
The Plan for the New Patio
The plan is to remove the existing concrete patio and pour a new one with the appropriate slope, adding a decorative bluestone inlay around the perimeter. Joe’s crew will also be adding a small grilling area adjacent to the patio.
Window Wells: If you look closely at the pictures above, the top of the window wells are at the same level as the patio. Ideally, they would be a few inches taller to better prevent water from entering the window well. An unexpected twist for this project is that the house framing juts out about 3″ over top the existing patio and window wells. That prevents Joe’s crew from making any modifications to the window wells without significant additional effort and associated high cost. However, with the patio’s downward slope, window well covers, and gravel in the base of the wells for drainage, Joe’s team is confident water will not be an issue.
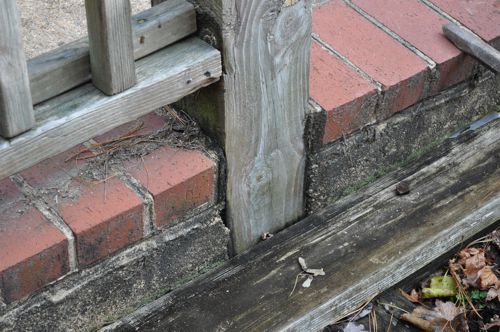
Railings: The existing railing posts are right up against the concrete. As the wood in these posts expands and contracts, moisture becomes trapped, resulting in wood rot. IRC code dictates railings when there’s a 30″ or more drop. The new patio will be significantly less than that, so the homeowners opted not to incorporate a railing on the new patio.
Step 1: Demolish the Existing Patio
With pneumatic jackhammers and sledge hammers in tow, the crew began the demolition process, putting all the large waste in a 10 yard, roll-off dumpster. For a concrete pad of this size, you’ll find rebar and wire mesh embedded in the concrete for increased tensile strength.
Tip: You can rent an electric jackhammer from your local tool rental store. These tools are relatively simple to use and will save you a lot of time during demolition.
Tip: In most areas, you can arrange for a roll-off dumpster of various sizes. Be sure to specify you’ll be loading the dumpster with concrete before you buy, so you can understand any weight limits.
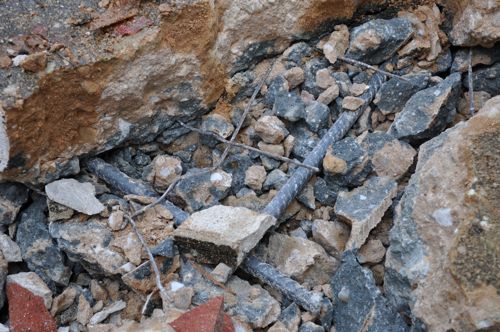
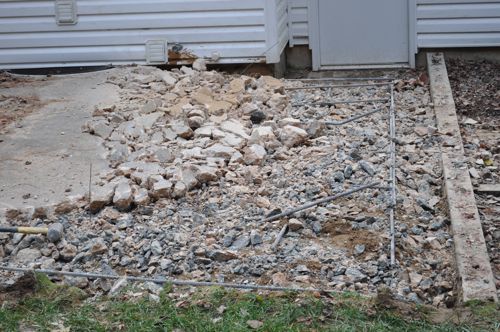
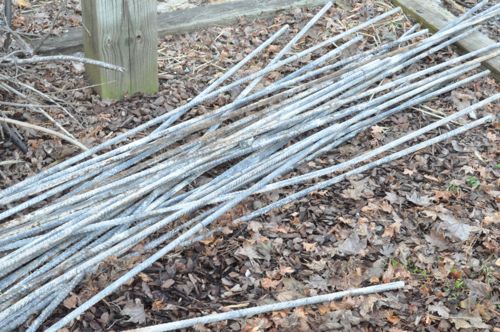
The crew was able to salvage the rebar, and it will be reused for the new patio, eliminating some of the materials cost and preventing otherwise useful metal from entering the dump (or even being recycled, which still has a cost).
Tip: If existing rebar can be preserved after demolishing a patio, it could represent a savings of more than $150.
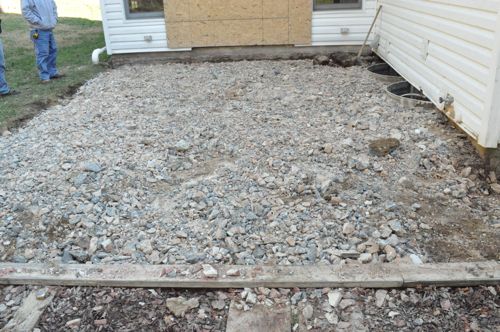
Likewise, some of the crushed rock will be reused underneath the new patio to establish a strong base.
Step 2: Plan the New Patio
Now that the large chunks of concrete have been removed, the crew began planning the layout for the new patio.
Starting at the inside corner of the house and at the same level as the previous patio, they marked a level line on the foundation of the house. The level line is perfectly level across the foundation.
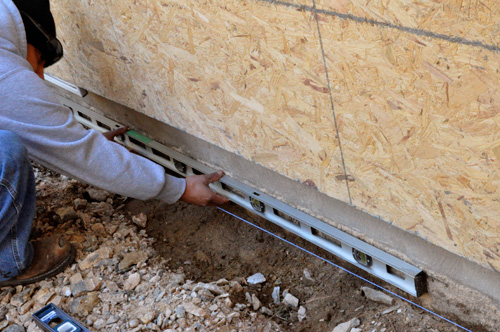
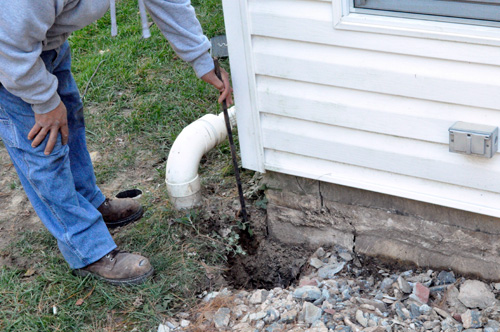
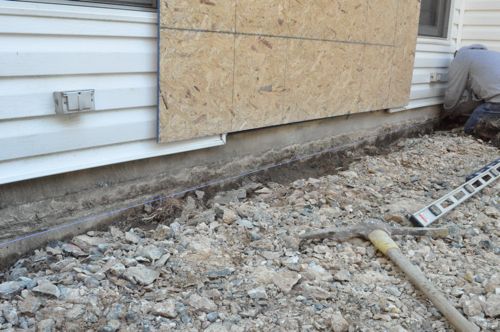
In this picture, which shows the edge of the patio away from the house, the blue line indicates the top of the new patio.
Joe determined he wanted a 2″ drop over the entire 15′ length to facilitate runoff, which is why the blue line is 2″ below level. You can also clearly see how the old patio had about 1″ rise over the level line, forcing water to run towards the house on the original patio.
Tip: On average, a 1″ drop for every 8′ will provide sufficient runoff for a patio.

Now that the crew has established the slope, they ran another line to create the front edge. It’s important to note that the slope only occurs in one direction (rather than falling away from the house in two directions, which would create an un-level front). For that reason, this front edge is completely level. A string level would be helpful for this process, but you can manage without one.
This first picture shows the string attached to the house at the level line for the front of the patio.
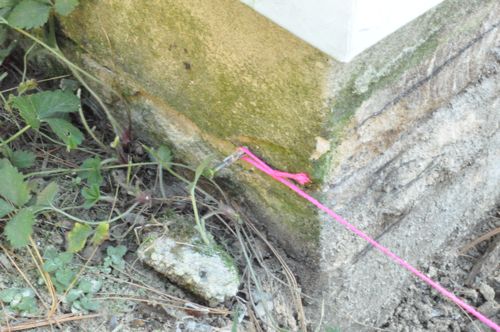
And this picture shows the string at the other corner of the front of the patio. The crew member is checking the string for level, as this will string will serve as a guide for the forms.
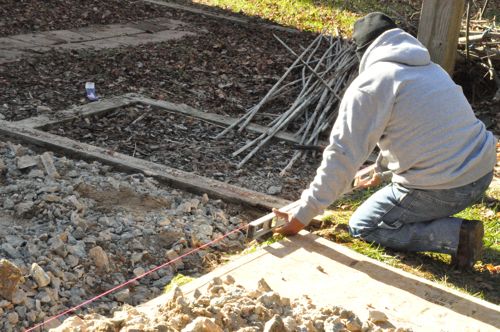

The crew continued placing stakes and running lines around the perimeter, as well as where the bluestone inlays would occur (because the concrete around the perimeter inlays will need to be a different height until filled with the surface stone and mortar). All the front-to-back lines had the same 2″ slope away from the house, and all the side-to-side lines were level.
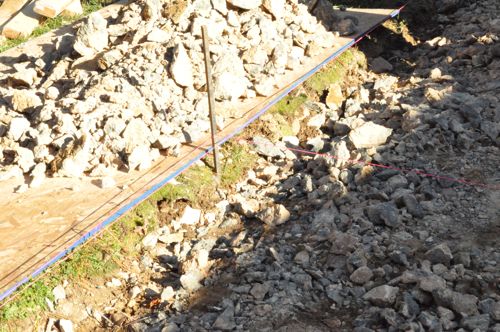
Step 3: Build the Forms for the Concrete
These string lines serve two purposes. First, they determine where the crew needed to add or remove dirt to achieve a uniformly 4″ thick pad. If the pad is thicker, the homeowners are paying for unnecessary concrete, and if the pad is thinner, the concrete is too weak.
Second, the lines act as guides for building the forms. You can see in the picture how the top of the form is at the same height as the line. The easiest way to achieve this is by building the forms to the correct dimensions and using wooden stakes attached to the forms, supporting them at the correct height.
Tip: Stakes for forms are available near the concrete and lumber sections in most home improvement stores.
Tip: Sometimes concrete patios will heave and shift with moisture changes in the soil. For that reason, most patios should be poured with a 4″ gap below the siding to prevent buckling.
Fortunately, the original slab sat on that soil for about 20 years and never heaved, so that’s not a concern here.
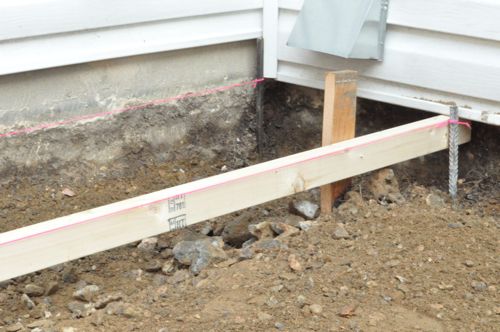
Tip: For even more pictures about building concrete forms, check out another how-to about pouring a concrete shed base. In that article, we share tips for building the form, making sure it’s square and anchoring it at the appropriate height.
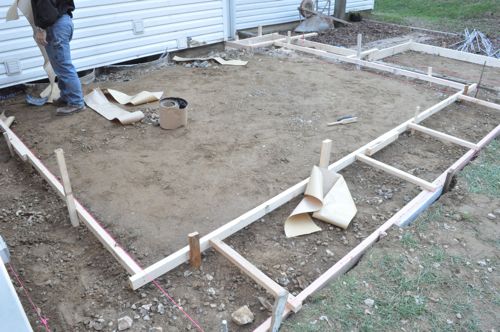
This picture illustrates the perimeter of the inner patio (which will have a surface of concrete), and the outer perimeter (which will be poured 1.5 inches lower so that the bluestone can be installed in a mortar bed).
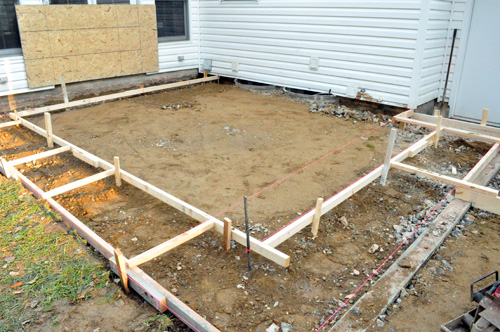
The crew also also compacted the dirt to prevent voids from forming as a result of the weight of the concrete.
Tip: Compacting dirt is an important step in the process. Failing to compact the dirt could lead to weak spots in the concrete, and ultimately, cracks. Don’t skip this relatively simple step in your own patio remodel.

Step 4: Install a Waterproof Barrier
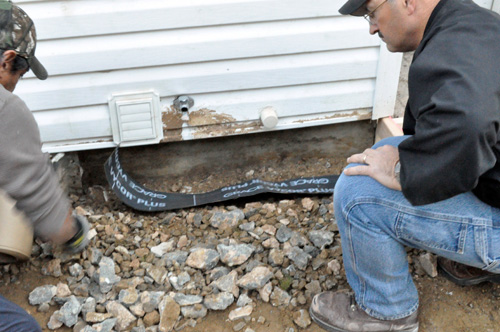
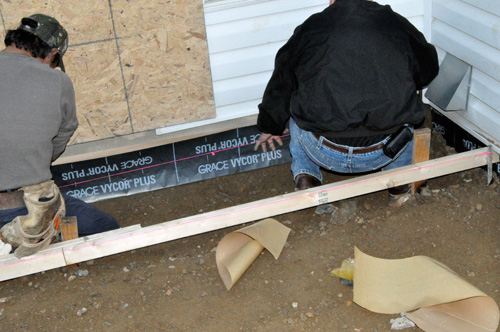
Next, Joe’s crew installed a waterproof membrane called Vycor. Vycor is not the least expensive material, but it’s worthwhile because concrete will erode the alternative metal flashing over time. An asphalt-type membrane will last much longer, and it’s code approved for this area. The waterproofer has a sticky side that adheres to the foundation. (It must be clean and dry before starting). Joe’s crew overlapped all edges by at least 2″ and let the bottom edge curl under the soon-to-be-poured concrete.
With the siding this close to the patio, in most situations, the bottom few courses of siding would be temporarily removed and the Vycor membrane would be lapped behind the siding to prevent water infiltration. If you recall, this side of the house extends out from the foundation a few inches, and the siding hangs down about 2 inches lower than the structure behind. This creates a drip edge that will prevent water from “wicking” up the structure behind the siding.
Step 5: Lay Rebar
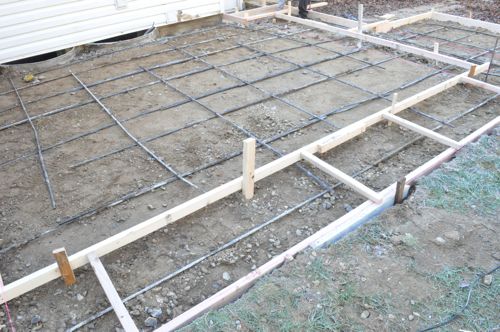
Before scheduling the concrete truck, Joe’s crew reused all the rebar from the original patio, securing it with rebar ties. Concrete has very good compression strength (resistance to being pushed together) and very poor tensile strength (resistance to being pulled apart). Placing rebar, wire mesh, and/or adding fibers to the concrete mix greatly improves the tensile strength of concrete, helping to prevent cracks.
For more information about the characteristics of concrete, check out the basics on Wikipedia. The crew had an abundance of rebar at hand, and they decided to use it all, creating squares approximately 2′ x 2′.
The concrete truck arrived the next day. This specific provider mixes all the concrete on site, and can incorporate admixtures like accelerant, air entraining admixtures, and reinforcing fibers on request. The truck can measure exactly how much concrete was used, so the homeowner isn’t paying any extra for unused product.
This patio is about 400 sq. ft. and 4″ thick, and it required 4.5 yards of concrete. The crew added accelerant, which reduces the risk of damage by freezing from cold weather.
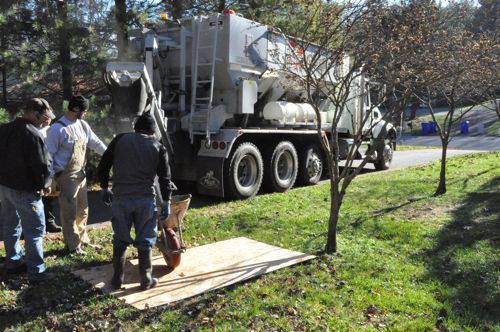
Here’s a really short video showing how the sand and rock are fed into mixer “on-demand”.
Step 6: Spread the Concrete
From the truck, the crew wheeled the concrete over to the forms. They made a small ramp for the wheelbarrow with supports underneath to keep the form in place.
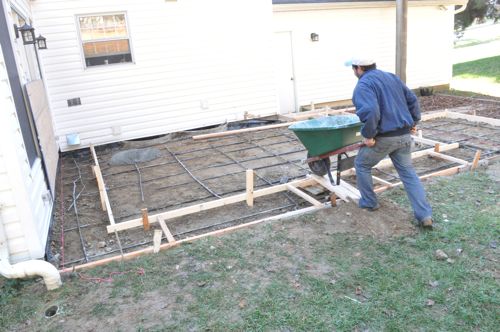
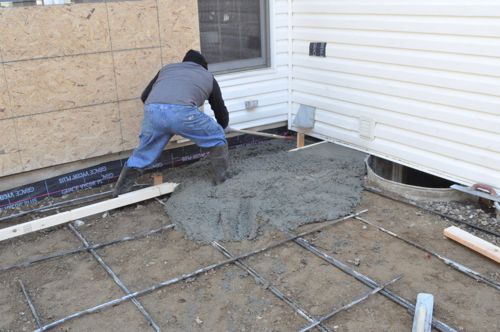
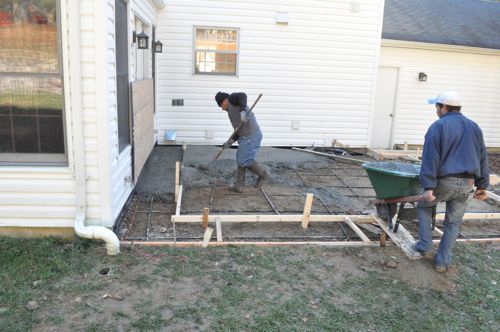
The crew began spreading the concrete with a garden rake to the approximate height of the final patio, with more concrete being delivered in 30 second intervals.
Step 7: Strike Off the Concrete
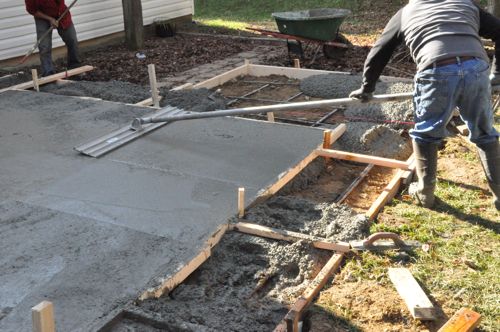
Working in small sections, they used a long, straight 2×4 as a screed to strike off the concrete at the form height and maintain the proper slope away from the house. At times the screed may not be able to reach an adjacent form board. In that situation, you can use a hand float to establish a “wet line”. A wet line is a level section of concrete used as your guide for the screed in lieu of a form board.
Tip: The technique for leveling here is somewhat of an art. While not complicated, it is important to maintain the steady downward slope away from the house to avoid small depressions where water could pool on the surface.
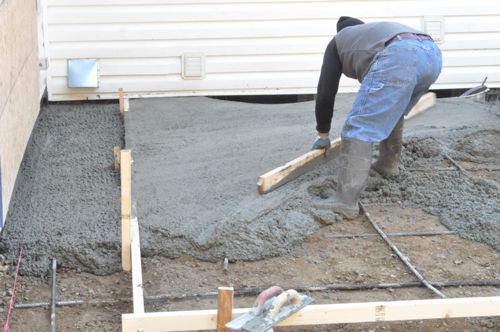
Like the original patio, the concrete is at a level with the window wells. Even though Joe’s team could not modify the wells, as noted above, they are confident that water infiltration will not pose a problem because of (1) the well covers to be installed, (2) the patio slope, and (3) the gravel in the bottom of the well for drainage.
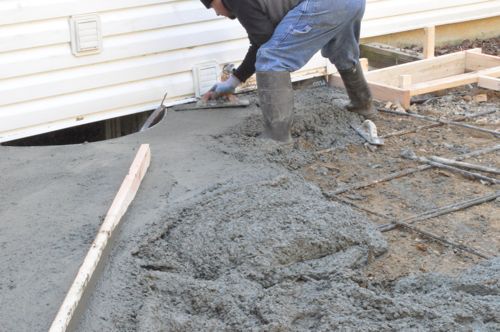
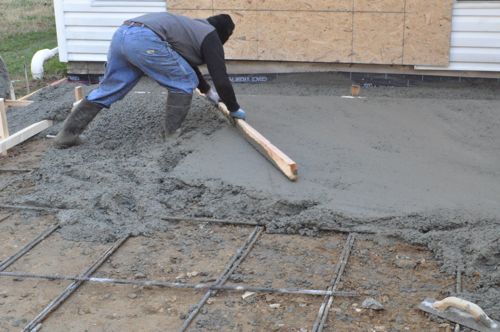
Rebar should be located in the vertical middle of the slab. One solution involves placing the rebar on small supports or “chairs.” Instead, Joe’s team levered the rebar with a shovel to bring it off the ground to achieve the same result.
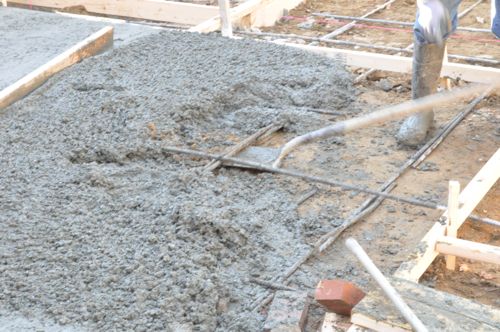
A bull float, made out of magnesium, helps bring the cream to the surface and smooths out lines from the screed process for a better finish. This is an important step in putting a beautiful finish on the concrete.
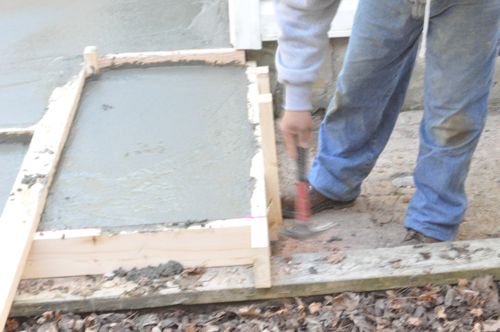
This is a picture showing how they lightly hammered on the sides of the form to bring out any air bubbles.
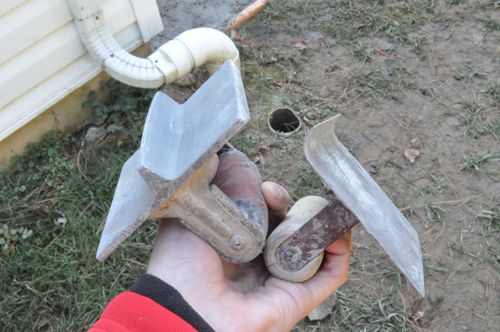
And here’s a picture of the jointer and edger tools.
Step 8: Finish Edges and Joints
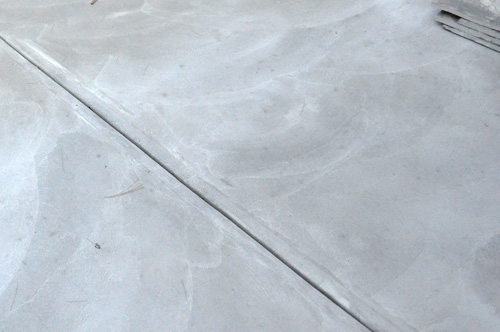
After a couple hours passed and the concrete had partially solidified, the crew cut a joint down the middle of the slab. This is important, because if the concrete were to crack, it would do so at the joint, and it could be easily concealed. The crew also applied a brush finish to create a textured surface. Otherwise, the concrete would be extremely slippery when wet.
Step 9: Lay the Bluestone
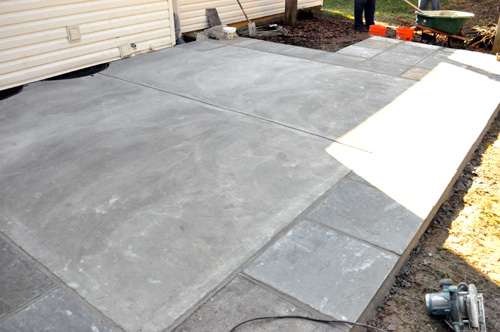
To add some visual interest and make the patio more attractive, the homeowners asked Joe to ring the perimeter in bluestone. To accommodate the bluestone, the crew poured the concrete patio about 1-1/2″ lower around all the edges and grill area. That enabled them to set the stone in a bed of mortar, bringing everything up to the same level.
Tip: Setting a natural stone around your patio can increase visual interest and make the patio look more professional.
Laying bluestone is similar to laying tile in your kitchen or bathroom. You’ll want to decide on a layout, setup guides, work to keep everything at the right level, and fill all the joints afterwards.
Bluestone can be challenging because it’s a natural stone and not always uniform. Each piece is approximately 23-1/2″ square, but there is noticeable variance in size and thickness. Some of the stones even had a slight curve.
The day started by planning the layout with the goal of minimizing the number of cuts and placing cut stones in out-of-the-way locations.
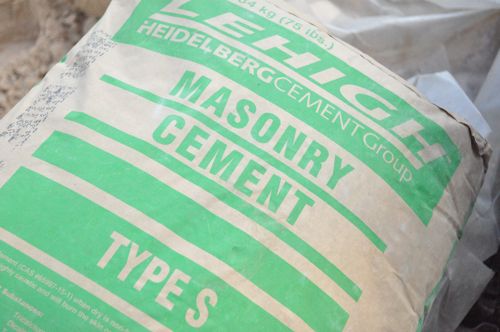
The crew used TYPE S masonry cement, mixing it with sand and water at the job site. TYPE S is a cement rich mixture, suitable for below grade work like retaining walls, brick patios, and more.
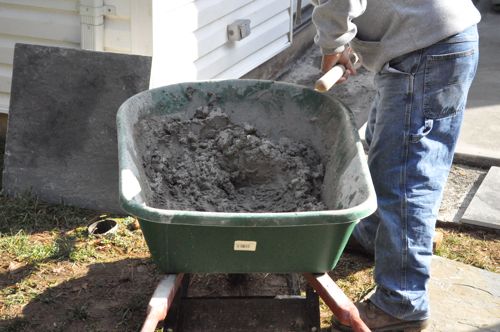
It’s really important to get the mortar to the right consistency. If the mortar is too dry, it’s easy to crack the stone while working. If the mortar is too watery, the stone will bond poorly and eventually come loose as the elements take their course.
Tip: The mortar consistency should be “gritty mashed-potatoes.” It should easily stand up, but will ooze some as you work the stone in place.
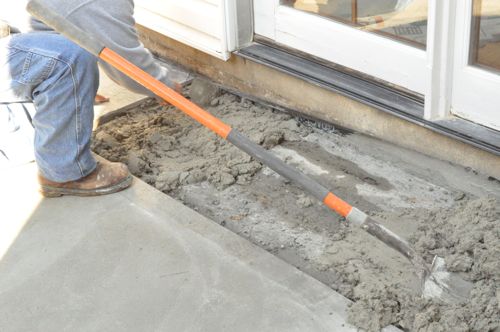
Beginning at the inside front corner, the crew shoveled a bed of mortar into place.
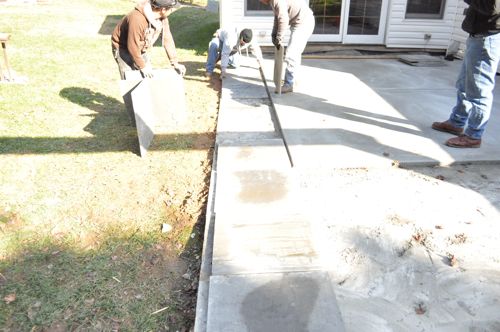
Each stone was set in place and pressed into the mortar. If the stone ended up too tall, the crew would pull the stone off and scrape away a little mortar. If it was too low, they’d add some. It’s important to check both sides of the stone for the better surface and place that face up.
Tip: While it’s important to get the underlying concrete as uniform as possible, some variation can be absorbed by the mortar.
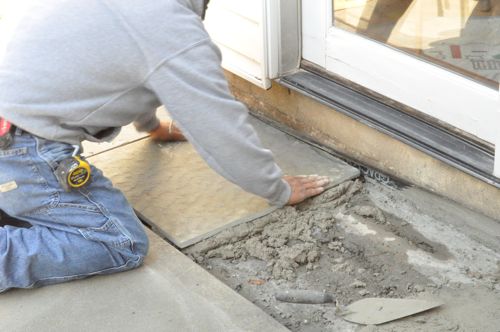
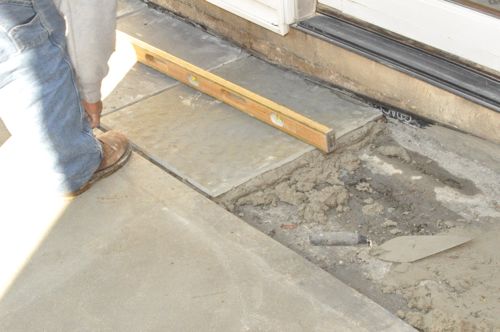
The crew used a spare 2×4 to gently tamp the stone down, adjusting each corner to ensure it was consistent was the patio and any adjacent stones. This is where a slightly curved stone would be very difficult to set properly, because the whole surface could not be made even with the concrete. By purchasing extra stone, the crew was able to be more selective and eliminate potential problems due to natural variations in the stone.
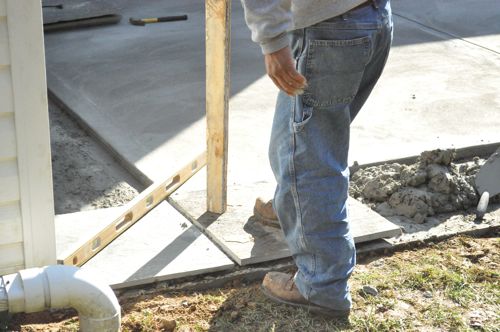
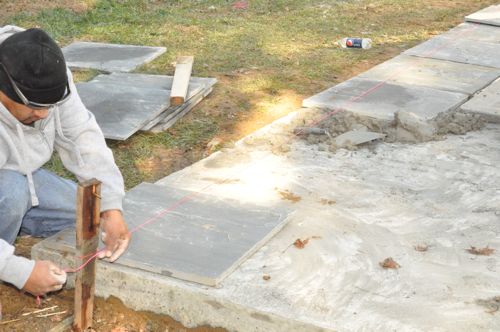
The crew laid several stones in this fashion, and then setup a string line as a guide for the appropriate height.
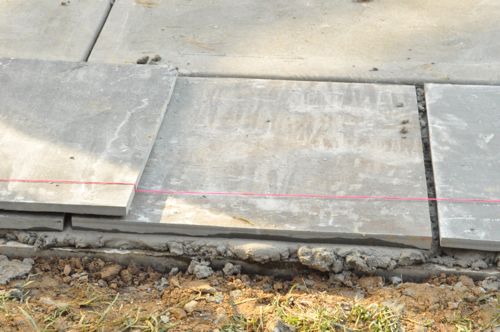
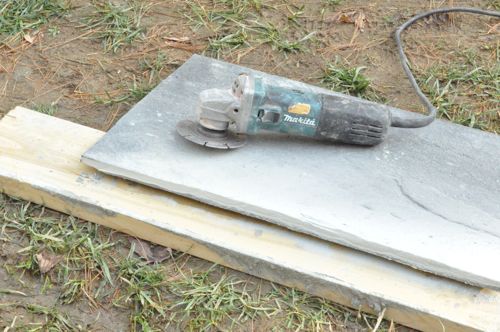
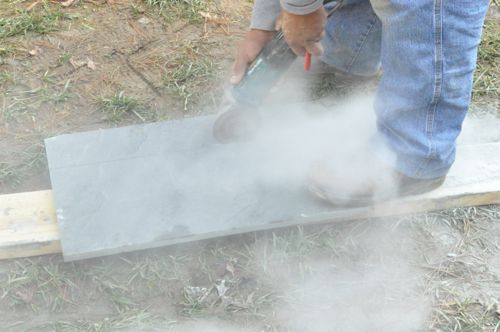
To cut the stone, they used a small angle grinder with a diamond masonry blade. It worked well, but created a lot of dust.
This picture shows the inside corner of the house where they cut one of the bluestones to fill the void against the house.
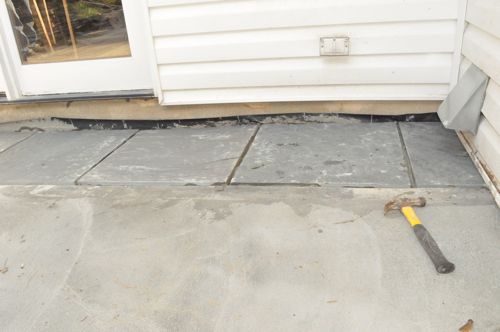
After all the stone was laid, the crew filled and tooled all the joints with a steel blade striker, for a smooth, flat joint.
Tip: Be sure to pack the mortar joint tight, filling any voids.
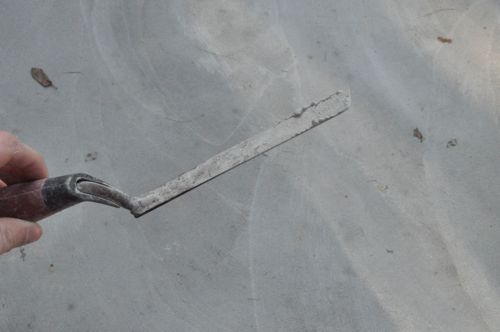
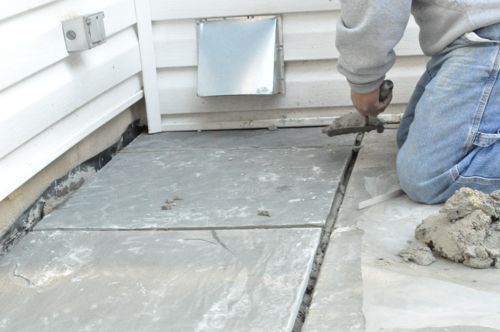
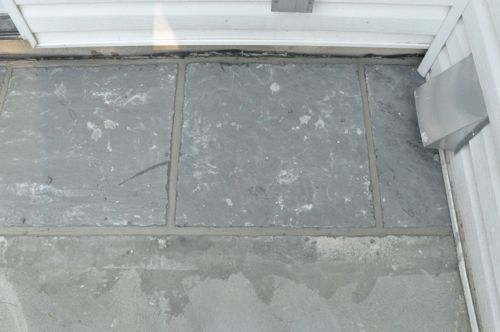
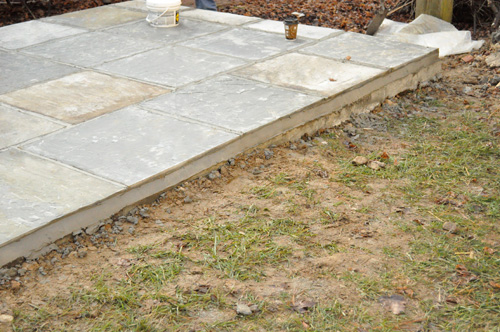
The crew worked mortar into the joint next to the house and along the exposed edge of the patio.
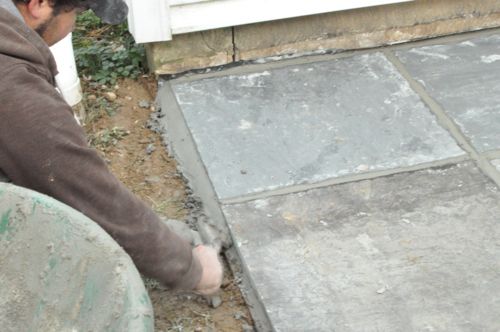
Joe’s crew was careful to clean up the stone and mortar as they worked.
Tip: Mortar on the stones can be cleaned off with a diluted solution of Muriatic acid (HCl) and a stiff bristled brush. Be careful with HCI, and wear appropriate safety gear when handling the acid. HCI is also used to etch concrete, so be mindful when working near the new slab.
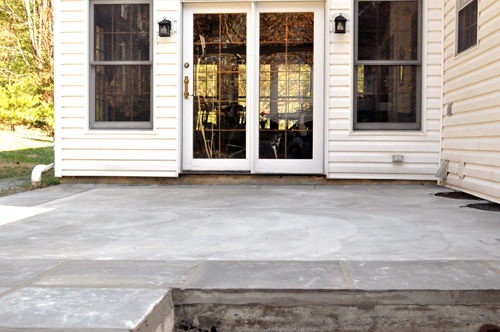
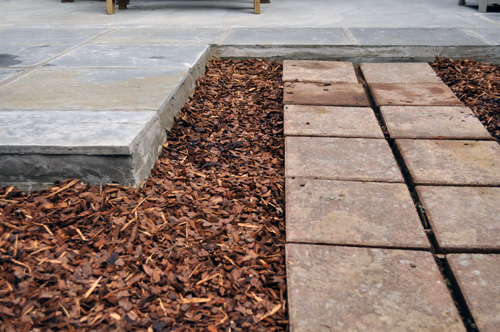
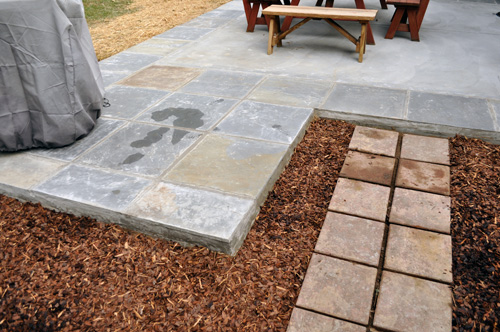
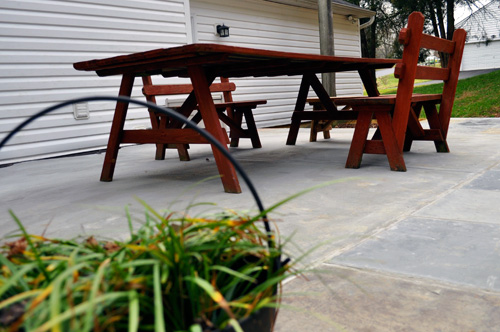
The mortar was dry in about 24 hours. The crew cut the excess Vycor and made one final sweep. The final product looks pretty darn good.

If you enjoyed this article on building a concrete patio, we hope you’ll explore some of our other expert level how-to guides.
We want to express a big thanks to Joe Bianco, president of SDG Home Solutions for allowing us to shadow him during this concrete patio remodel. Thank you to Rick and Patricia, the homeowners, who also agreed to let us participate.
This final step-by-step guide would not be so complete if it weren’t for the questions and comments from regular readers like Jeff, Joe, Paintergal, Icarus, MissFixIt, betterOutdoorLivingatHome, and Todd. Thank you all.


Fantastic guide. I hope you’re proud of that write up. I love the way you were able to incorporate reader tips in the complete guide. Good catch with the HCl too about being careful around the finished slab. Please sir, I want some more!
Thanks Jeff. I’m really pleased with how everything came together. I hope this becomes the norm as we produce more of these guides. Keep all the good questions and tips coming!
I know how much effort goes into detailing a “how to” project. Your detailed outline and photos of this process is not only incredible, but understandable even at my level. Thank you AND keep em coming.
Janet, I think this is the first time I’ve seen you comment here. Just wanted to extend a welcome and say thanks for stopping by!
great job guys on this How-To. i almost feel like i can tear up my back patio now … ok maybe not quite there but this sure does motivate me. also You probably put it earlier but i just noticed that you have added the “Print this Post” feature, very nice touch btw.
Yep – got that one in over last weekend. An “E-mail this Article” button is also on the way soon… I’m going to be rearranging the header of the articles so you can see the authors picture in the header, rather than the footer, along with some other cosmetic changes up there.
As always, thanks for the feedback!
Really nice writeup, my only comment about it is that its a bit large in single page form.
Joe, thanks for the feedback. One reason for that is we wanted to preserve a single “print” capability. I need to look into pagination for large articles and see what I can come up with for a capability. One thing we are sensitive to is sites that make you constantly click for the next step with really long load times. I personally would rather be able to see the whole article together, but I know that’s preference.
Would anyone else like to add their thoughts on this one? Would a table of contents (the steps) at the top of the post help? (i.e., you could click one of the links and it would take you down to that step…)
could you offer both options? each step on a page, and then everything as one page for those who want it?
I will definitely look into a few options and see what I can come up with!
I really like the setup right now, cause it really is a pain to have to select the next button everytime for the next page, and then have to go back a couple cause i want to reread something, plusi hate the sites that want to throw in the advertisment in between the next page. It gets annoyingl. i understand sites need to pay the bills but i think leaving the advertisements on the side like you guys is the best way to go . That being said Having it the one page is a good idea to be able to access ALL the information at once also. And i guess having a table of contents that quick link you to that specific step would be a good idea too, but would only make sense for large articles like this one, not the smaller how to’s.
I don’t know how many others read this way but I usually read the articles in my rss reader. When articles are split, only the first part shows up. I will always read that page but many times I just skip the rest.
Nice write-up Ethan. I’m with you guys on having the article on one page. It seems most other DIY sites have you click through a new webpage for each step of the process and it gets old; especially if you need to skim back a few pages here and there.
OK. I see what you did. I was confused at first. Yes, I agree! I like the how-to’s in one post. Definitely makes it easier to refer to.
The plan is to document the projects as we follow or do them, and then to build a single “permanent” how to guide based on those articles. Our thinking is that this will help us put out new content more frequently, and it will allow you all to offer suggestions and questions along the way that we can incorporate into the final project guide. It worked really well on this one thanks to the excellent comments we received over the last 4 days.
Good job, but I’ve learn from experience with using mortar on stone. DON’T if you want to to last and not shrink or pop. You need to mix brick/mason sand in a strong mix with portland Type I or II cement and Masonry acrylic adhesive concentrate. It’s not as easy to work with like the mortar but it grabs better and wont shrink and crack like mortar will. Those joints are huge too, keep them to a minimum of a 1/2″ to 3/8″ Clean up would be easier also.
The type S is a mortar that should be reserved for brick or block work mainly. Mainly people use mortar for stone work and its a big no no. Mainly because its easier to work with but that’s just more laziness and less lack of skill/knowledge.
At least you used type S and not type N though.
Marco – Think this is the first time I’ve seen you here, so welcome! Interesting feedback on the Type S cement. We definitely appreciate the alternative perspective. Hope to see you around in the future.
Question for Marco- I am needing to patch a rock cooking fireplace outside, cementing some more rocks into place where some have fallen off. Any suggestions for the proper materials I should use?
Clean the area very good, even spray some water to wash away dust. Just use some coarse sand and portland cement. 3 parts sand to 1 part cement. You want it strong and the mix not to wet so it holds. If you can get acrylic modifier from a masonry supply house mix that into the mix water or just use the masonry glue(milk color) quickcrete sells at home depot and lowes. Watch though as the glue with make the mix wetter when mixing.
Depending on how the stones are you may need to let the first one set up a little before working in another so it doesn’t move the first one. Finish the joints if any nice and smooth.
If you really want after two days wash with a mild acid wash scrubbing old and new work and it should be good.
Nice write-up and photos. Couple of things I noticed that were not quite right:
1) Rebar is prone to corrosion if it is laid flat on the dirt. Rebar should be centered in the concrete slab using stand-offs.
2) No gavel layer was placed to minimize moisture and frost heave on the slab.
Cheers!