
It was murderously hot here in the Charm City suburbs last weekend. The heat index topped a full 115 degrees on Saturday! But fear not, the heat didn’t deter us from tackling our long-awaited shed storage shelves project. We’re excited about this project because we’ve been looking forward to sharing a plywood shelving article for some time now, and this article gives us the perfect avenue for that.
In case you’ve forgotten (or more likely if you’ve just started reading here), here’s the new shed. It looks great on the outside, but without some shelving and storage hooks for tools inside, most of the interior space would go to waste.
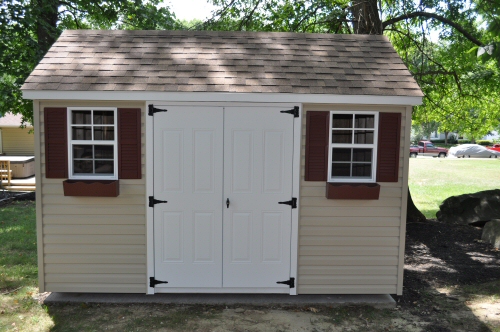
This shed is a high-quality build, with 2×4 studs 16″ on center, 3/4″ pressure-treated plywood subfloor, and 1/2″ plywood walls.


Our goal for this project is to build three sturdy plywood shelves. The bottom shelf will be a large 24″ deep work surface; the middle an 8″ deep storage shelf that won’t obscure the work surface of the bottom shelf; and the top, a 14″ overhead storage shelf. We chose these shelf sizes to provide adequate work and storage area without interfering with the person standing in front of the shelf working.
Ultimately, we’ll build a similar set-up on both sides of the shed, but for this article, we’ll focus only on the left side.
![]()
In hopeful preparation for these shelves, we’ve filled the yard with tools from the shed that we’ll need to store in this space. This helped us try out different articles to make sure the shelving heights worked for our storage goals.


The five largest yard tools we need to store are all lined up and ready for action. Hopefully when we’re done, these will all fit neatly in their own place in the new design.

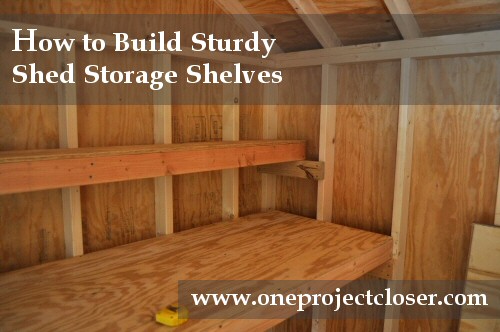
How to Build Shed Storage Shelves
We started our shelving project with the middle shelf – an 8″ shelf that will rest about 55.5″ off the shed floor.
Step 1: Measure, mark, and install side rail supports.
We mark both sides of the shed wall at 49″. We leave a 6.5″ gap to account for the support 2×4 (3.5″ high), and the shelf itself (4″ high completely built). We use 3.25″ #10 decking screws to fasten the 2×4 supports to the stud walls. These screws are more than sufficient for the weight loads we’ll be putting on these shelves.


Step 2: Cut Front and Back Rails to Length
We’re going to use 2x4s for the front and back of the shelf. The 2x4s will rest on the supports we’ve just installed. These rails must be cut to the width of the shed. We used our Kobalt mitre saw for this task. For a deep shelf, a third 2×4 could be placed at the middle of the shelf spanning side-to-side parallel to the front and back.

Step 3: Cut Plywood to Fit the Shelf Surface
We use our Bosch job site table saw and a Craftsman circular saw to make the two cuts for our plywood surface. The table saw makes quick work of the rip cut, but the circular saw is a little easier to manage for the shorter cross-cut.


Step 4: Layout the Shelf Components and Confirm Fit
We dry-fit the components of our shelf to ensure a very tight fit. We want the shelf to have a nice fit and finish, and getting the cuts right is essential for this.

Step 6: Assemble the 2×4 Frame
We use 3.25″ #10 decking screws, the same as those used to attach the side rails to the shed.


Step 7: (Optional) Confirm the Frame Fits
Given that wood is a fickle material, it’s never a bad idea to check twice for fit. We check the frame to ensure a tight fit on the rails.

Step 8: Attach the Plywood Surface
We attach the plywood surface with 1.5″ #6 all purpose wood screws. One optional step here would be to also use construction adhesive to attach the plywood tops.


Step 8: Install the Shelf on the Rails


Step 9: Fasten the Shelf to the Studs
Fastening the shelf at every stud provides significant additional weight-holding capability, especially towards the back of the shelf. On deeper shelves, more 2x4s must be run side-to-side to increase shelf strength. On deeper shelves where weight isn’t a major concern, 2x4s can be run front-to-back to avoid plywood sag. Front-to-back 2x4s do not add a significant amount of overall strength to the shelves.

Step 10: (Optional) Test Your Shelf’s Strength
Our new shelf has no trouble holding Ethan and barely flexes under his weight.

Step 11: Repeat as Necessary
With the middle shelf fastened, we construct and install the bottom shelf using the same technique. This shelf has several horizontal cross members to keep the plywood from sagging in the center.


Installing the Overhead Shelf
The top plate of the wall is exposed in this style shed, and we decided we wanted our plywood shelf to cover it. We also decided that this shelf would be easier to install in place, rather than building it outside. We measure below the surface of the top plate to find the right spot for the support 2×4.

We install both 2×4 supports, just like for the other two shelves.

Then, we install the cross members, cut the plywood, and install everything in place.

The Finished Product
Here’s the finished product for this article. We should’ve snapped a pic before piling everything in the shed, but with the heat still beating down on us, we rushed the completion. Still, the pictures show just how much space these shelves add.

And just as we had hoped, our five largest yard tools now fit neatly beneath our large work shelf.

Stay tuned in the next few weeks for the shelving on the other side of the shed, and some nifty latching hooks we’ll be installing on the back of the shed to hang our shovels, rakes, and other gardening and lawn tools.
Tools Required to Build Shed Shelves
- Mitre Saw / Chop Saw – For cutting 2x4s. We didn’t snap a pic of it for this tutorial, but we used our Kobalt Compound Mitre saw for all 2×4 cuts.
- Table Saw and/or Circular Saw – Either work for cutting plywood. If you need a 24″ shelf, the rip capacity of most table saws will be exceeded.
- Drill Driver and/or Impact Driver – We found an impact driver to be much better for driving long 3.25″ screws through the 2x4s. Stay tuned tomorrow for an article on the impact driver that made a difference.
- Tape Measure
Materials
- 2×4 dimensional lumber for shelf supports
- 1/2 inch sanded plywood for shelf surface
- 3.25″ #10 or #12 screws for fastening 2×4 components
- 1.5″ #8 screws for fastening plywood to the shelf base
Tips and Tricks
- You can strengthen the shelf by installing diagonal braces (available at the big box stores) from the studs to the shelf base.
- You can also strengthen the shelf by adding more length-wise 2x4s. Depth-wise 2x4s will help avoid plywood sag on the shelf, but do not add strength.
- If you want a backsplash, you might consider installing peg board on the back wall before installing the shelves.

Looks, good! I built myself some shelves in the garage using some leftover 2x3s and plywood. They’re hanging off the wall and the ceiling, so I used lag bolts instead of just wood screws. They work a whole lot better than the poorly supported junk that was there before. It is quite fun trying to hang a pre-assembled shelf that is ~8’x3’6″, by yourself, over a garage door, one without a hoist (then I got a bit smarter).
I see those 12V Lion porter cable tools you’re using, I have heard good things about them. I personally have the 18V NiCad set, I am very happy with it.
Hey Joe, we’ve got a 12v driver and impact from PC. They’re good but didn’t last the whole project. The tool that really impressed us and got us through was a Craftsman right angle impact. Look for Fred’s review tomorrow.
Good stuff, I can see how you might need a right angle impact driver for that top shelf…
is there a reason you started with the middle shelf first? Wouldn’t building the top shelf be easier?
Hey Icarus, Good question. The reason we started with the middle was our table saw only has a 18″ rip capacity. It’s a great saw but you can’t cut sheet good in half. So starting with the smaller shelves meant we didn’t have any waste or have to make extra cuts.
Wait, the Steel City only has an 18″ rip? I’m surprised at that… or were you using a portable for this project? My Ridgid R4511 allows for a 30″ rip. Good to hear from you guys again!
I have got to build these shelves in my shed. I have been needing to do this for a while but just didn’t know how to start. Thanks for having such a great site!!
Welcome to the site, catdonna!
great article, love the way you guys really do step by step.seem to answer any questions even before i think of them thanks
Thanks for stopping by and commenting! We enjoy writing these articles, but it’s ever more rewarding to see the discussion that ensues.
Another great article. just reread it and I have to say you have really put the STEP BY STEP into step by step thanks
Nice use of space guys. It’s always useful to go vertical. Have you guys ever tried the torx head deck screws? I’ll never go back to using phillips head screws now. They tons easier to drive and much more forgiving if you aren’t perfectly lined up straight.
I’ve seen them in the stores but haven’t purchased yet…. Good to know that they’re worth a try. I generally use a Senco screwgun for anything major and I believe they do have the torx head drivers for those as well, but phillips seem to work pretty well (have to change the bit every couple hundred screws).
A box of Phillips Square drive screws cost the same as the regular Phillips screws and comes with the special driver bit required. These are just as good (if not better than) torx screws in my opinion and the free driver bit with the box of screws means not having to keep extra bits on hand.
Brady, good tip. I do like using square head screws, just usually don’t think of buying them while I’m at the store. They tend to work exceptionally well in auto feed screw guns as well.
Nice ideal
Great post!
I like the way you took it step by step in the post. I wont do much else than go for a swim in that kind of heat. Having sufficient shelving in a shed is very important. They are the first things that go in the shed after its standing……. not the lawn mower or any other stuff. Having adequate shelving, wall hooks and rafter hangers are the key in my mind. Thanks for the read…….. Dave
That looks great!! and our little starage shed really needs some shelfs, so when my husband gets over recovering from his shoulder surgery i am going to show him what i want. Thanks for posting this
Thanks for the encouraging comment!
We have a small shed similar to the one you worked on. The shelves we added really do not make optimum use of the space. Hopefully, we get use your ideas to improve the storage potential.
what kind of $$ and time does this project require?
For us about 1 full day for two people working together. Materials were probably around $100 or so – not too much.
What is the height of the bottom shelf from the floor?
thanks
I think it’s about 30 inches; however, we measured it to be able to fit bicycles underneath it, so I think if you are building your own shelves, you should use a similar gauge for whatever you want to store beneath it.
This is another article I keep coming back to… What do you recommend doing when I am trying to build free-standing shelves in the basement… Should I fasten supports or the whole structure to the concrete or simply bolster the strength of the shelves (3 rows high)?
I just got a new shed and love these shelves. Before I start, I was wondering if I could make the shelf bases using 2 x 3 instead of 2 x 4? I ask cause I have some supply of 2 x 3’s plus think the reduction in weight will help me as I’ll probably be doing the install alone. My shed may be a bit larger at 14′ x 10′ and plan to supplement with the metal shelf supports. I do not plan to excessively load up the shelves with weight.
Doug,
My shed is 12×16 and I built these out of 2x3s with no issue. I’m pretty sure I could park a car up there!
they look very sturdy and you made it look so easy. I am in the process of painting my shed so shelves are next, thanks
Pretty great work, you guys. This is a nice set of shelves.
I’m glad I popped over to this side of OPC today. We’re in the planning process of building an extra garage/storage shed for our boat, son’s vehicle and lawn equipment. Your shelf tutorial Fred will come in handy for all the smaller lawn care stuff. Thanks to Ethan’s shelf test I know it’s the type of shelving we’ll want.
Thanks again for providing a very well documented project plan. I completed my shed shelving project this weekend. I’m just a DIY guy so it took me about 10 total hours working alone. I only have one add’l coat of varnish to apply before I load up my new shed and free up some prime work space in my garage.. The only variation I made to your plan was adding 2 heavy-duty angle bracket supports on the first and second shelves (requiring 2 extra wall studs). I ordered the brackets from HD before starting the project because I figured a 9+ foot 2×4 span would need it but was surprised how solid the shelves felt even w/o the brackets. I added them just because my kids will probably be climbing on them when I’m not looking and it’s better safe than sorry.
I will be looking at your site for some add’l project and/or woodworking plans/ideas.
Keep up the good work.
My shed could definitely use some shelves like these. Great tutorial, maybe with this to motivate me I’ll finally get my shelves done. Thanks for sharing!
So, by just looking at the pictures I think it’s easy to do. I hope it is when I do it my own. Good luck to me!
Fred…Thanks for putting this up. Gotta be one of the best tutorials I’ve seen in a while….Well documented!
We want some mo’! Any new articles coming about sometime soon?? 😛
Hey Supimeister,
We probably should put up some type of message to clarify where the site stands today. Ethan briefly put up a message back in July explaining that he was leaving full time work with OPC to pursue another job. He has since landed that new job and has been working there for more than a month.
Right now, the part of our site that is still active is The Better Half (you can find the links at the top). We’re sort of debating how we want to handle going forward at this point. Jocie continues to maintain TBH, while Kim still keeps our coupons and deals articles as up-to-date as possible.
Blogging has become tough business over the past few years. Changes in Google’s search algorithms coupled with the rise of literally thousands of home improvement-focused sites have made competition for readers fierce.
We were fortunate in that every month Ethan worked for us full time we were able to pay our bills, however; we saw the writing on the wall that with revenues declining, we simply wouldn’t be able to afford to pay him a full time salary for much longer. So we collectively decided it was time for him to pursue new interests so he could make sure his family is taken care of!
Of course, since Ethan isn’t full time, there’s no one here to put up the content!
I’m sure that’s probably not the news you were hoping for. It certainly isn’t the future that we had hoped for with the site, but the site was a fantastic success for years, and we feel very proud that we were able to contribute in such a cool way to the web ecosystem.
Thanks for the update Fred… I guess I totally missed Ethan’s post… I still check out The Better Half and enjoy giving my wife crafty ideas. OPC is still a great site!
John
I particularly like the 24″ deep work table under the window like that. Great use of space, thanks Fred.
Wondering about step 5.
10×12 vinyl shed no shelves. It appears I will have to build a free standing wooden frame to attach shelving to. Your suggestions would be appreciated. Thanks
I just found this on google. I followed the directions to the letter and it came out great. Thankyou for sharing.
Looks great. This is perfect for me. I have a shed that is 95% similar to this.. my dimensions are even the ones you have. Thanks for posting this. Once it warms up here (Central MA), I am starting in on re-designing my shed interior and this give me some great ideas!!!
What would be the main reason to use screws over nails. I have a nail gun which makes framing the shelves 10 times faster. I have to build 6 8′ and 6 6′ shelves for my 12×16 shed.
Thanks
I just love the work that was done on the shelving. I will have to add this to my hubby’s honey do list, which I will be helping along with him. We are just trying to downsize & organize in our new shed!
I really enjoyed your precise step by step guide for building shelves for my shelves for my 10×12 shed.
Will definitely be using your plans,
Thanks!
I don’t understand the 61/2 in gap…to 2×4 on end plus 1/2 plywood..= 6.5 inches?
Thank you
Great information! Building my shelves this weekend, can you tell me approximately how 2×4 are needed?
Thank you!