
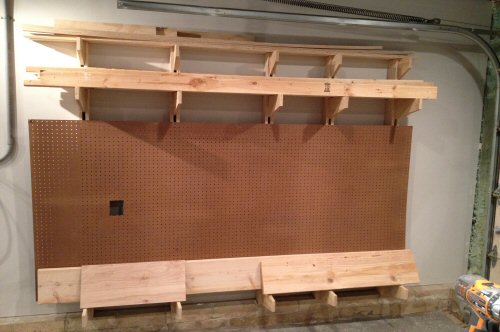
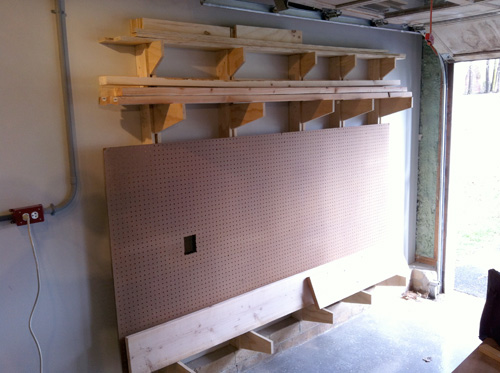
We’ve finished building three heavy-duty work benches and one of two folding wood sawhorses. Another important part of a workshop is good lumber storage. Up until now we’ve been piling boards on the floor, and it’s been a pain to keep moving them to make room for projects. Our solution is a simple wall-mounted wooden lumber rack. This article shares the instructions for building this rack.
I found the idea on Woodsmith Shop, and with a few modifications, built one that fully meets our needs.
Tools & Materials
I had one-half of a sheet of plywood left over from building the workbenches. If I didn’t have that handy, this lumber rack would cost about $55, since I would have had to purchase two whole sheets. By eliminating two of the vertical supports and being careful to minimize waste, you can build this rack with only one sheet of plywood, almost cutting the total cost in half.
Materials:
- (1.5 sheets) 3/4″ plywood (for a nicer look, consider cabinet grade plywood)
- (100) #8 x 1-1/4″ flathead screws
- (8) 3″ x 1/4″ lag screws
- (8) 1/4″ washers
- Wood glue
Tools:
Many of the cuts can be made using a circular saw. If you take that route, I suggest using guides to ensure perfectly straight cuts, because circular saws are otherwise difficult to control. We use our table saw and mitre saw, because they make the cuts much easier, since we can use built-in guides.
- Miter saw (or circ. saw)
- Table saw (or circ. saw)
- Jig saw
- Drill / driver
- Impact driver (optional)
- Clamps (optional)
- Stud finder
- Level
- Speed square
How to Build a Lumber Storage Rack
Step 1: Rip the Plywood
The entire structure is built out of plywood, and that means this project involves making a lot of rip cuts. A cabinet saw would have been really useful. I don’t have one so I made the best out of what I do have.
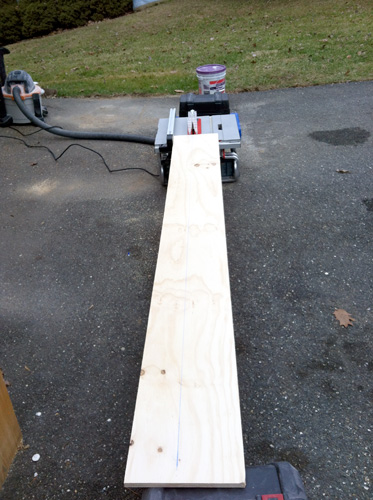
Here are the pieces you’ll need to cut with your table saw. I shortened my vertical supports (fourth item below) because I had to work around a garage door. Leave them at 79″ if you have the space. Also, do not rip the entire length of the plywood to make your vertical supports, because you’ll be using the excess at the end of the sheet for further shelf supports. (In other words, before cutting the vertical supports, you should cross-cut the plywood at 79″)
- (1) 3″ x 96″ (lower cleat)
- (1) 5″ x 96″ (upper cleat; requires a 45 degree angle on the table saw; more specifics below)
- (2) 6″ x 96″ (to be cut for shelf supports)
- (10) 4″ x 79″ (vertical supports)
- (1) 17″ x 24″ (this will be leftover from vertical supports, to be cut for more shelf supports)
Tip: Using these dimensions, you can have the big box store rip the plywood in half (24″ x 96″) making it easier for subsequent cuts.
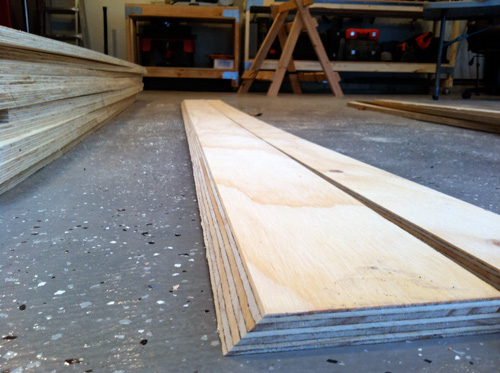
The upper cleat needs to have an angled backside, from which you will hang the vertical supports. You want the width on the longest side to measure 5″, and cut it at a 45° angle. This will make the shorter side approximately 4-1/4″.
Tip from Experience: Looking back, both the upper and lower cleats could have been identical (5″ tall with a 45° angle) to better distribute the weight. The design this lumber rack is derived from used removable dowels to “lock” the vertical support in place. For that reason, the bottom cleat is more of a place holder than anything else. I didn’t incorporate the dowels, and would recommend making the bottom cleat angled, which essentially eliminates the need for the dowels in the original design.
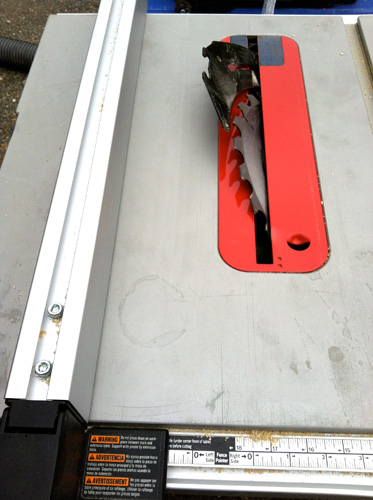
This picture shows the top cleat after its been ripped. The top of the cleat has the angle, and the bottom is flat. It is 5″ wide at its widest point.
Step 2: Cut the Shelves
Next, cut the 6″ wide pieces with your miter saw into 6″ x 15″ rectangles. Do the same with the piece of plywood leftover from cutting your vertical supports.
Your goal is to create 15 identical shelf supports that look like this:
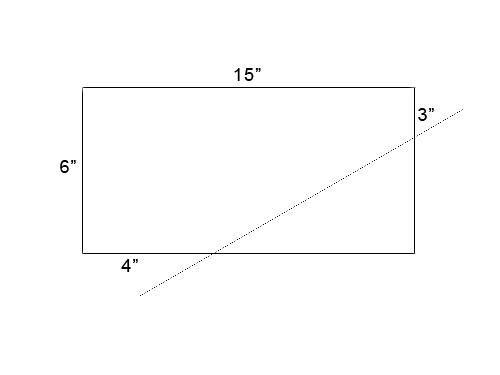
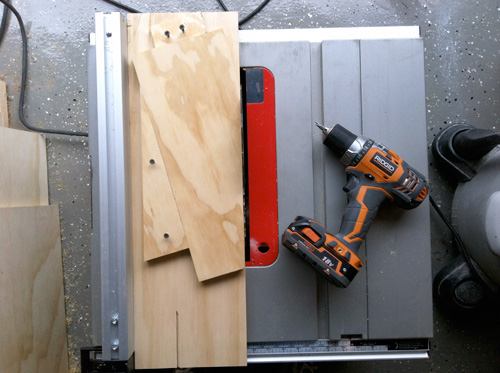
The easiest way to make the diagonal cut is to setup a jig for your table saw. (And no, the drill/driver wasn’t sitting there while I was cutting!)
Here’s several of the shelving supports. Note they are sitting on the table upside-down.
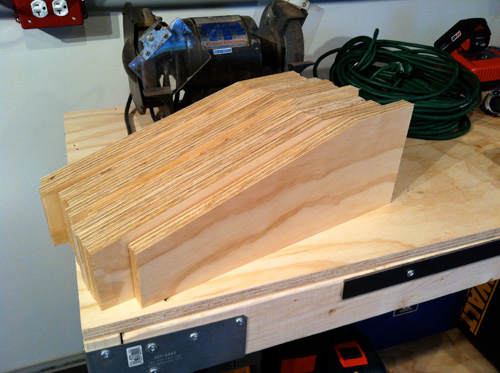
Tip from Experience: Consider cutting a short lip on the top of each shelf support to prevent materials from sliding off. We omitted this in our first build and have not had problems, but we think it would make a slightly better design.
In some of the pictures you’ll see that five of my shelf supports are shorter than 15″, and that’s because I had to make adjustments to work around the garage door. Just like the vertical supports, keep them full length if you have the space.
Step 3: Mark the Vertical Supports
You need to cut two notches on the vertical supports that will accommodate the upper and lower cleats. I placed my upper cleat 6″ down from the top and the lower cleat 12″ up from the bottom. With these measurements, I can have a shelf at the very bottom for sheet goods and two shelves at the top for 2×4’s and the like. Position your cleats as necessary, but work to keep approximately the same distances from top and bottom. Here’s a diagram showing where I planned the cleats and shelves:
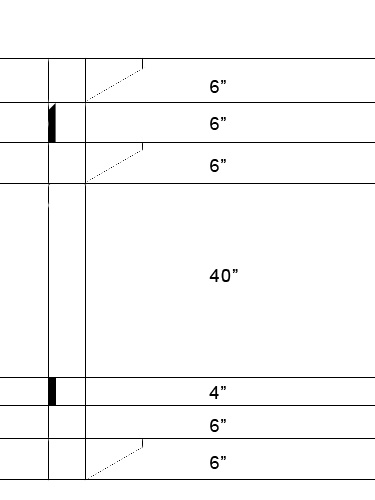
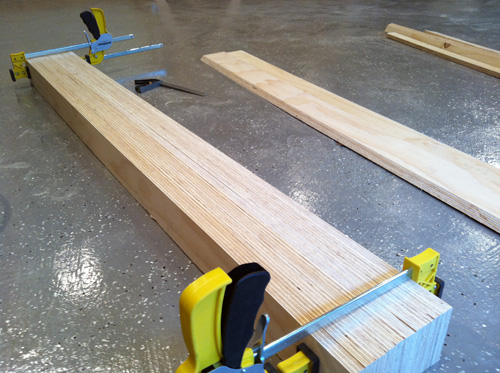
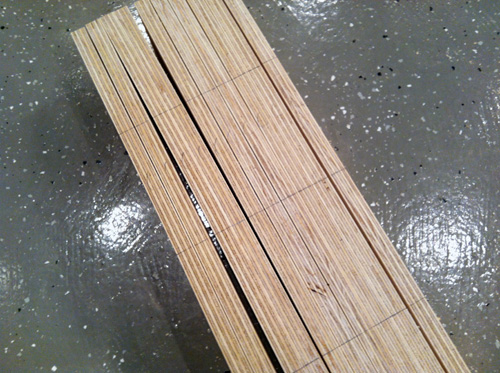
To make things easier, I clamped all the vertical supports together and marked lines. The upper notch should measure 6″ long and the lower notch should measure 4″ long. The extra inch is to allow for clearance below the cleats.
Step 4: Cut the Notches
Now it’s time to cut the notches in the vertical supports. Using a square, the lines I just marked and a piece of scrap, I traced an outline.
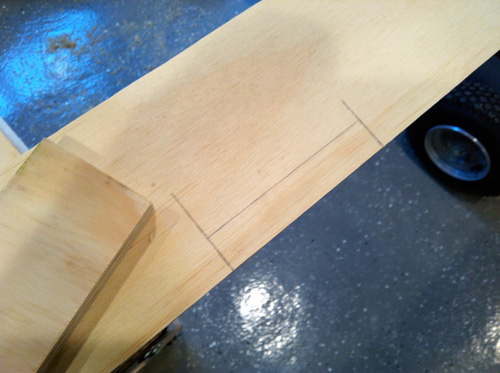
Use your jig saw to cut along the lines. To make the long cut, start midway and curve onto the line like in the picture. Then cut in the opposite direction to carve out the rest. Alternately, you can drill holes at the corners big enough to fit the t-shank blade.
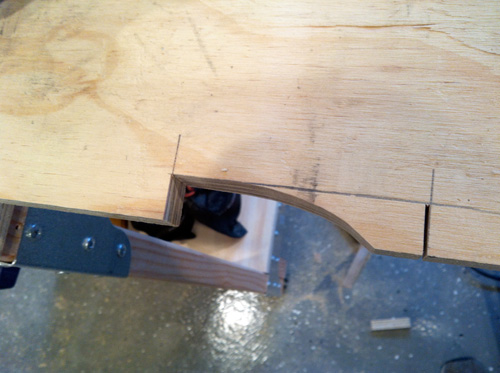
Remember, the upper notch needs be angled to fit the upper cleat. I used a piece of scrap from ripping the upper cleat to mark the angled line.
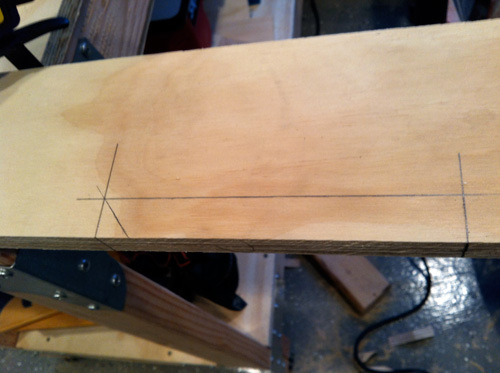
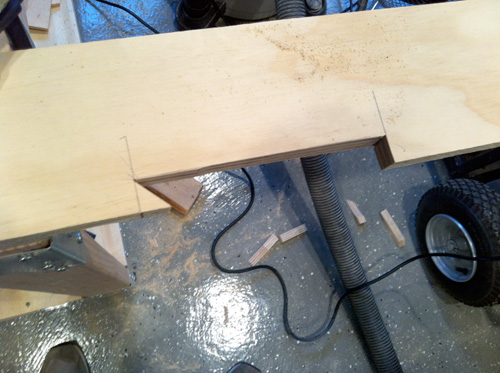
The angled cut in the supports fits neatly over the upper cleat.
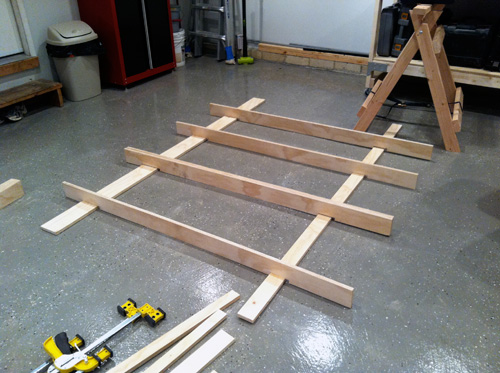
Step 5: Glue and Screw the Shelf to the Vertical Support
Each shelf support will be sandwiched between two vertical supports. Glue and screw everything, and remember that the shelf extends away from the notches. Put four screws, staggered on each side.
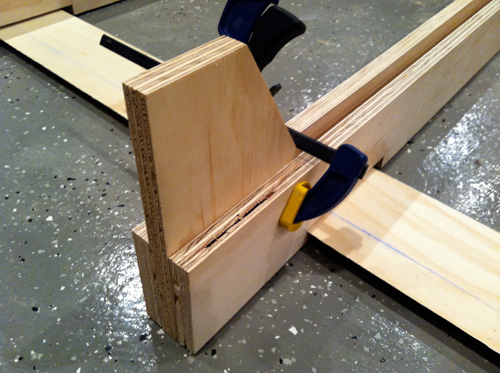
Here I’ve got two of the uprights finished. You can see the shelf at the top followed closely by the second shelf. The third shelf is place at the bottom for storing sheet goods.
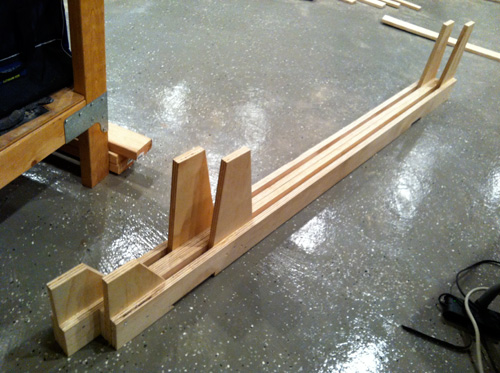
Step 6: Hang the Upper and Lower Cleats
The two cleats are held in place with lag screws. I didn’t have my lovely assistant, so I used some spare boards and a lot of blue tape to get things into position. I wanted the bottom of each vertical support to just barely sit on the block below. If you don’t have similar concerns, you can hang the upper cleat at whatever height is convenient. I’d recommend positioning it to keep the rack up off the floor for easier cleaning.
Remember to orient the cleat such that the angle is going into the wall (so that the vertical supports will hang from it).
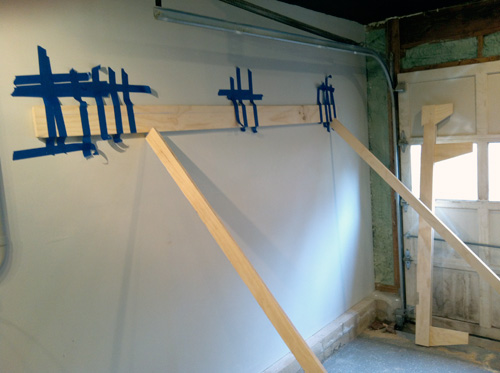
Use the stud finder to locate studs and pre-drill the holes, and put a washer on each lag screw before screwing it in. Use four lag screws per cleat.
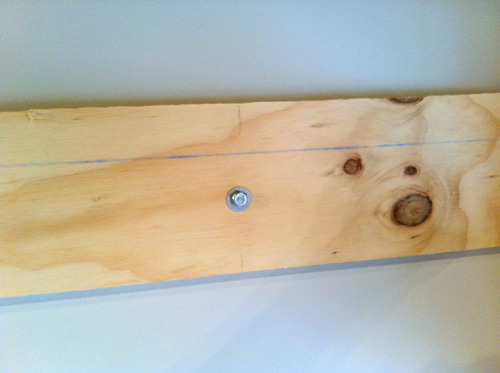
Here you can see the lower cleat in position.
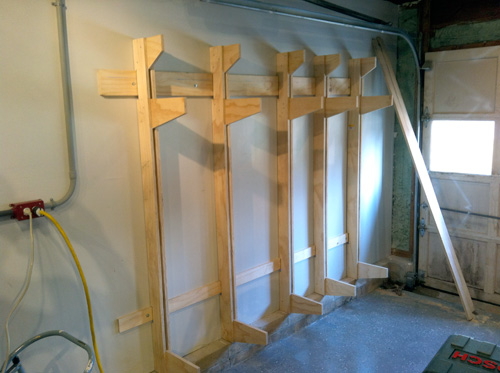
Final Pictures
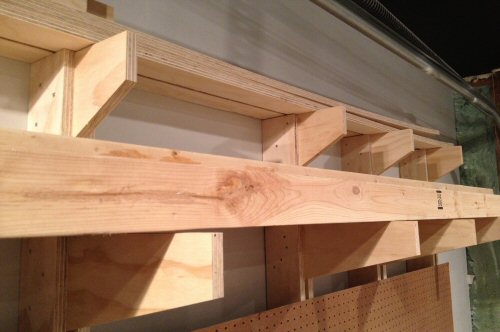
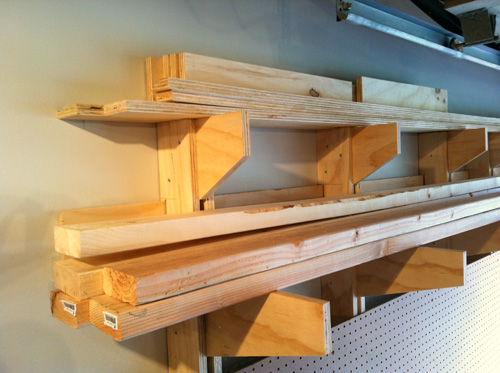
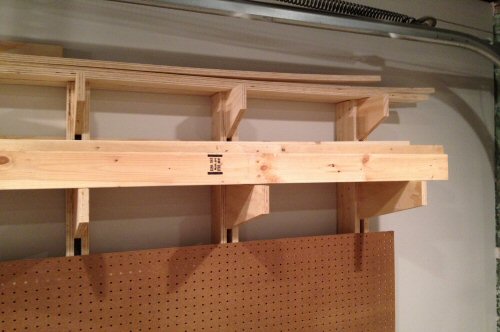
I’m really pleased with how this lumber rack turned out. It’s strong enough to hold my weight (and a lot more), and it keeps everything off the floor. The shelves can accommodate sheet goods and dimensional lumber of any length since they can slide left and right. Plus, they can easily be removed.
If I did this project again, I would incorporate the tips to angle the lower cleat and cut a lip into the shelf supports. Even so, this lumber rack will serve us well.




I like it, though it looks like you could use a lip on the end of the bottom shelf to keep things from sliding off (since the sheet goods have to lean against the wall). I am not sure I would eliminate two of the supports, one maybe, but only three supports seems like too little.
Are the supports placed unevenly?
The supports can move side-to-side so they can be spaced evenly or not depending on the length of material you need to store. You’re right about the lip on the bottom (something I mentioned in the post), and if I did it over, I’d definitely add that.
Great article. “Use the stud finder to locate studs ” since you built this from scratch, I’m surprised you didn’t come up with little cheats to mark where the studs are for future projects.
Alternatively, instead of a lip on the bottom shelves, you could possibly cut them to angle upward as they project from the wall. This would keep sheets leaning against the wall, and not allow them to slip out at the bottom. It also wouldn’t create a lip that would wear or break over the years.
Hey William,
I like you’re idea of a an angle better than the lip- great input! Is this something you’d done before?
No, but it just reminded me of the way glass repairmen carry their loads on the sides of their trucks. The supports under the glass are slanted to allow the glass to lean, and so that the bottom edge doesn’t kick out.
Something else I just thought of is to cover the top edges of the shelves with something to protect the sawn edge of the plywood. I was thinking that years of sliding lumber in and out of the shelves would probably cause the plywood to eventually splinter or delaminate on that edge. Something like a piece of sheet metal or flashing bent over each shelf piece, or a piece of angle iron (or similar) fastened to the top edge would protect the plywood and aid in the sliding of the lumber across the edge. It might also protect the lumber itself from damage, particularly if you’ve got nice wood that you’re using for cabinetry or a more artistic piece of woodwork.
You can still add a lip on the ends of the bottom brackets. Rip 1.5″ strips of 3/4 ply and make a sandwich of the strips with the bracket in the middle. It would only have to protrude above the bracket like 1/2″. Or just use a jigsaw and make a small right triangle shape cut about 3/4″ in from the end. it would only have to be a 1/2″ deep. It’s just to keep the outermost sheet from sliding off.
I had a scrap problem more than a lumber problem so I built a bin for scraps and sheets. It’s on wheels and pivots out from the wall.
Good suggestions Jeff. So far, nothing has fallen, and until that happens, odds are I won’t make any modifications. Time will tell. I hear ya about the scrap though. A bin that wheels and pivots?
P.S. How’s your new table saw? You recommend it?
So far I love the saw. I’m in the middle of building an extension wing and dropping in a router lift. It was big and heavy (267 lbs) and took some time to set up but the time was worth it. It is so accurate. I wish it had cast iron wings instead of stamped steel but that’s a minor issue. It doesn’t affect its use, just my preference. I’m going to get a better blade when I start on my cabinetry projects. Stock isn’t bad but it’s a combo blade.
The bin is 4′ tall, just over 1′ wide, and 8′ long. It is hinged to a wall stud so it can’t fall over but swings out on wheels so both sides of the bin can be reached. Modified from one I saw in Family Handyman. http://www.familyhandyman.com/DIY-Projects/Home-Organization/Garage-Storage/garage-storage-projects-plywood-rack
I was thinking this exact thing Jeff. I was also thinking that with some ingenuity you could easily build a stop that sits between the posts that could rotate out of the way when you didn’t need it anymore.
I’ve got plans I found in a book for a similar bin as Jeff posted above, except its sort of A-Frame style with sheets on one side and board bins on the other. Anyone have any experience with both wall mounted racks and bins? Which do you like better. I like the wall mount because it can hold longer pieces but I also like the portability of a cart.
Jake, I have seen a cart similar to what you are describing. I think it all depends on how much space you have. A cart has to be wider than what we’ve got hanging on the wall to be stable, which means even if you roll it up against the wall, its going to take up more space. In our workshop we’ve got a 4″ wide foundation perimeter around the wall, which means we’d be taking up even more space with the cart. All those things said, my vote is for wall-mounting the storage. I’ve also seen ceiling-mounted storage, but never for plywood – only 2x materials. If you build the cart, we’d love to have you guest post here (and give you an obscene amount of project points, or a gift card or something, as a thank you :-))
I’ll have to keep that in mind. I should have taken pictures of the miter saw table/stand I built this past weekend. Would have been a good one too.
This came out great Ethan! I think everything looks more organized when it’s up and off the floor, and this wall wood storage is the perfect use of an empty wall. I just wish I had your space to do it. 🙂
Ethan,
Great tutorial! I NEED to do some kind of lumber storage in our garage, but sadly I don’t have as much wall space. However, I think I can adapt your plans to create something that will work for me.
Brittany aka Pretty Handy Girl
I can’t wait to see how you adapt it to work for you. I love your blog as much as this one!
Great idea – I need to organize all my scrap lumber in the garage. Add that to the project list.
My father is making cedar- strip canoes in his garage, and has long, thin strips of cedar EVERYWHERE. Even with all his wall cabinets, I think he’d have the space for something like this to organize his wood strips. Thanks for this great idea.
Great way to get the lumber off the floor. Do you have any warping?
I haven’t noticed any additional warping. I’m buying stock from the local HD or Lowe’s so often it comes into the shop warped a little. I feel like the five supports do a great job supporting everything across the entire length so I don’t expect much (if any) warping.
I’ve worked alone for years, and have never wasted most of a roll of blue tape holding a horizontal board in place; two 10d nails, equidistant from the ceiling, nailed partway into the studs, provides a rest for the cleat while you screw it into the studs. Fasten one end, check for level, and fasten the rest, then remove the nails. You’ll have two tiny holes which no one will ever notice. I use the same trick for installing crown molding, etc., solo, and caulk hides the nail holes.
A couple of other notes:
– Don’t use steel for a cap on the supports, as it will leave blue stains on oak, cedar, and other tannic (or wet) wood.
– The horizontal members can be 4″ tall w/o compromising strength, esp if glued as shown, allowing additional storage height.
– If you do use 6″ supports, you can drill holes in them up to 3″ for storing bar clamps or similar items; a piece of PVC or even cardboard tube (carpet tube) will hold z-flashing, KV track, carpet metal, and similar metal items
– I’d glue blocks between verticals and make the horizontals adjustable, perhaps adding a second layer to the horizontals outside the verticals to prevent sagging; use 3/8″ carriage bolts thru the verticals and the tails of the horizontals with a wing nut to secure.
– Rout the outer edges of everything with a 1/4″r bit and sand before assembling; your knuckles will thank you later.
i definitely like the recommendation to rout the edges… very wise…
awesome ideal and your plans always make it look like an average guy can tackle it. I NEED THIS BAD…….Thanks, also looks like the garage floor is holding up great, how long ago did you put that finish on.
Wonderful instructions written in idiot proof language. The photos were also very instructive.
Great job. I was wondering about warping but I see from your comment above that you haven’t encountered any.
Your concept of wall mounted storage for lumber is the same concept used in commercial or industrial applications. It’s called cantaliver racking.
This would be a great project to do for my garage. Thanks for sharing!
Sweet!