
I’ve decided to build a few accessories to better utilize my table saw, and my first add-on is a table saw sled. With a sled, making cross cuts is fast, safe and very accurate. Sleds are useful for trimming sheet goods, mitering small pieces, making repetitive cuts and more. I know this sled will come in handy for a lot of projects including one that I’ve recently started (but haven’t written about just yet).
I made my sled in about four hours, and that includes time to “dial in” the sled fence. It slides very smoothly, and I expect to get many good years out of this sled before I need to replace it.

Tools & Materials
Fred & Kim had some leftover materials from when they redid their kitchen including a panel that would normally be used alongside a refrigerator. The veneer makes for a nice, smooth surface so I used that and some scrap plywood to build my table saw sled. Here’s the full list:
- 1/2″ plywood (base)
- 3/4″ plywood (fence and stiffener)
- Solid maple (runners)
- 3/4″ wood screws
- 1-1/4″ wood screws
Here are the tools you need for this project:
- Table saw
- Jigsaw
- Clamps
- Straight-edge
- Drill/driver
- Countersink bit
- Framing square
- Precision shims (from dado set)
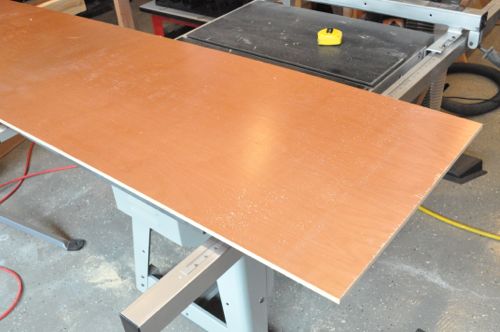
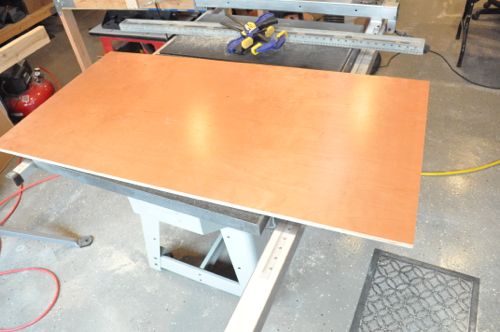
Step 1: Cut Base to Size
I started by cutting the plywood panel to size for my base. I cut mine pretty big, and that’s because I need it to handle a 40″ board (for the mystery project). It’s easy to shorten a sled, and I may do that eventually. For now, the base measures 45″ long and 24″ wide.
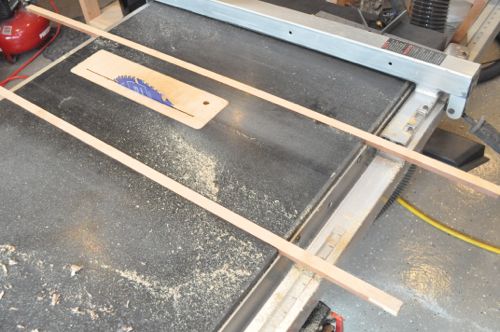
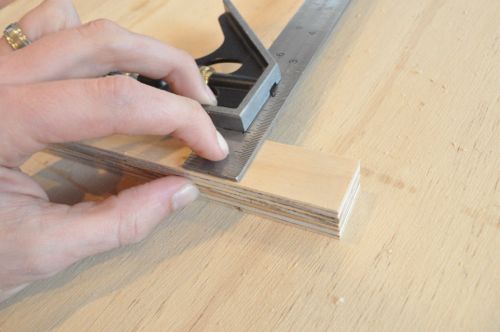
Step 2: Cut Runners
Runners are the thin boards that slide through the miter gauge slots. Sometimes you’ll see sleds with only one runner, and they’re easier to make because you don’t have to worry about the sled binding up. However, sleds with only one runner aren’t as steady so I recommend two runners.
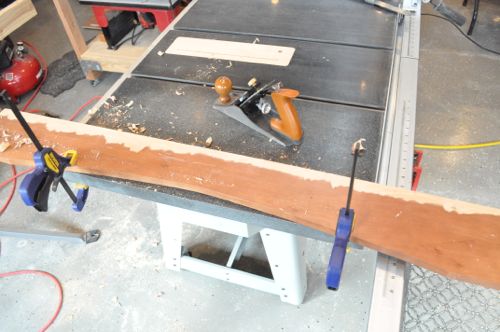
Maple is a relatively hard wood which makes it a good choice for the runners. Another remnant from the kitchen remodel was a solid piece of maple, and I used a hand planer to fine tune the thickness. I wanted both runners to be snug but still allow the sled to move freely.
After I was satisfied with the thickness, I ran the board through my table saw to make the runners.
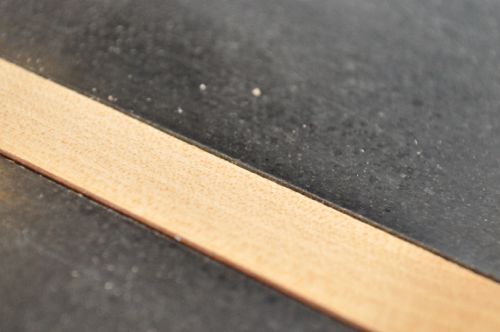
Don’t assume your miter slots are perfectly identical. Measure and cut the runners independently, and label the them after you finish. The goal is for each runner to be flush with the table top and able to slide but without wiggle room.
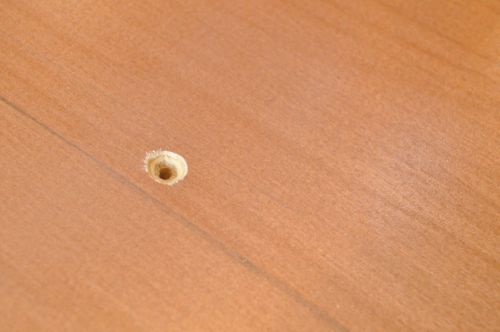
Step 3: Attach Runners
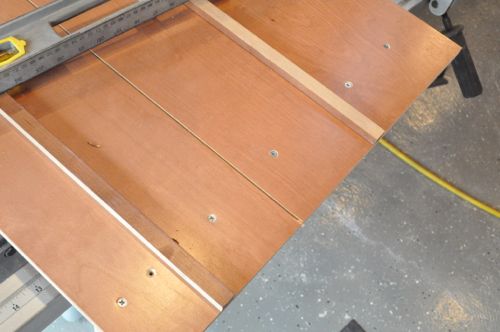
I set my runners in the miter slots and positioned the plywood base overtop. I used the table saw fence to keep everything aligned. Using a straight edge, I marked lines for drilling holes.
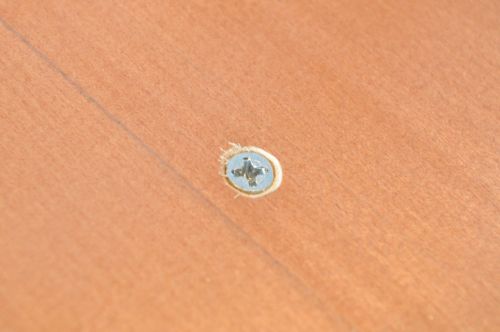
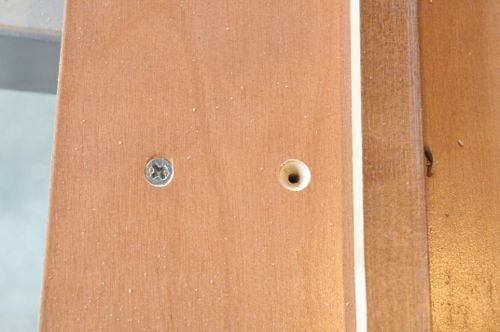
I predrilled five holes for each runner and used a countersink bit so the screw heads would be below the surface.
To attach the runners, I used 3/4″ wood screws. At this point I checked the sled to see how easily it moved, and I was pleased to find a smooth motion without any wobbling.
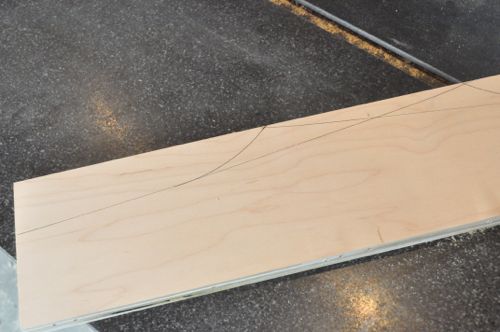
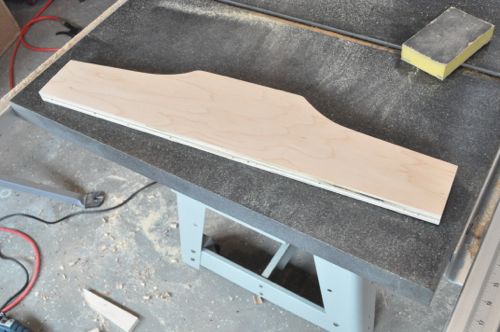
Step 4: Build the Fence
I made the fence from 3/4″ plywood, and it measures 5″ tall at the middle. I cut a gentle slope which makes it easier to clamp stop-blocks or the workpiece.
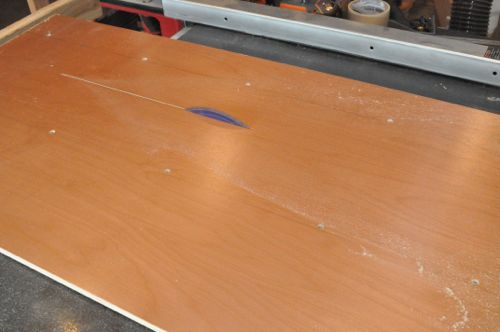
Step 5: Attach Fence
Before attaching the fence, I set the runners in position and made a kerf cut almost the entire length of the sled.
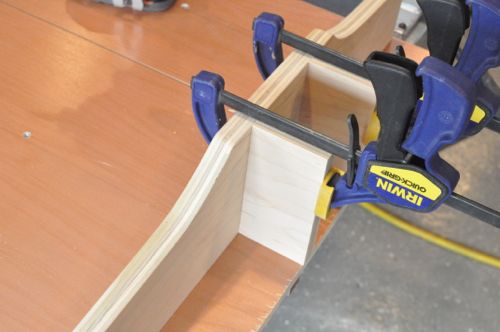
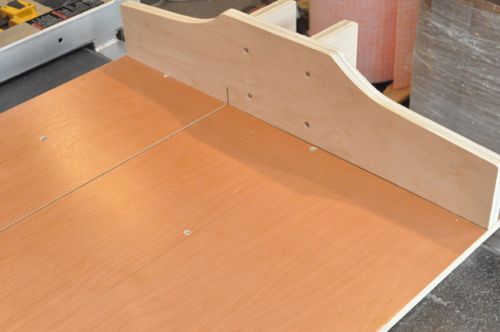
Using a framing square, I set my fence perpendicular to the cut and held it in place with two clamps. Next, I drill and countersink two 1-1/4″ screws, one at each end.
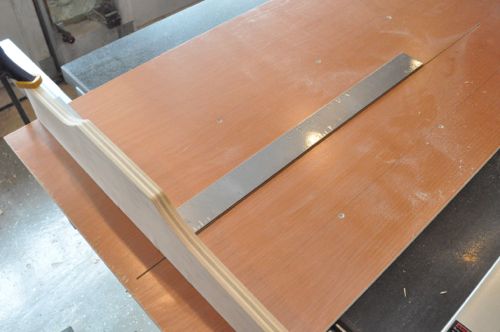
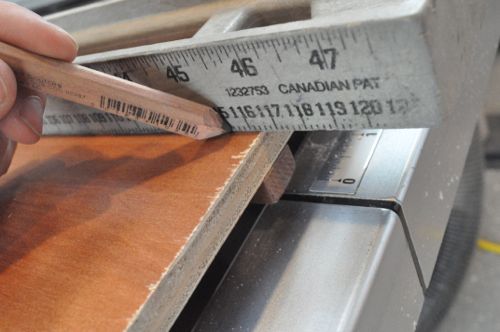
Step 6: Calibrate the Fence
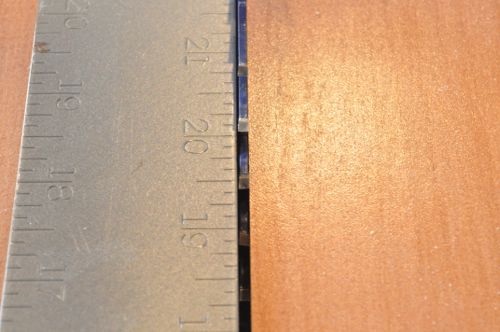
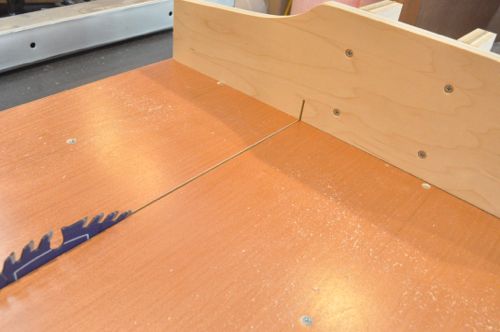
To fine tune the sled fence, I grabbed my framing square again and set it against the fence alongside the blade. Right next to the fence, you can see everything looks good.
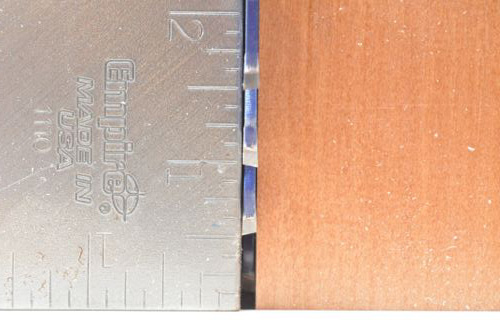
However, at the other end of the square, it looks like the fence is off by about 1/16″.
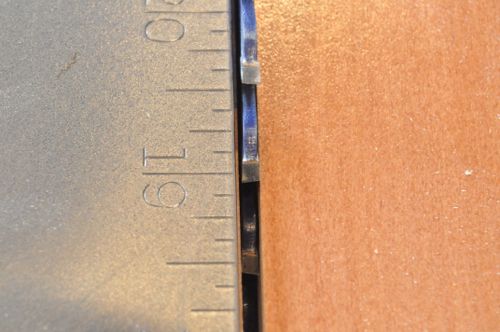
To fix that, I started by clamping a block to the base of the sled right up against the fence. Next, I removed the screw holding that side of the fence so that it would pivot. The shims from my dado stack are super thin (0.004″), and I shimmed the fence until it was aligned along the entire length of the square.
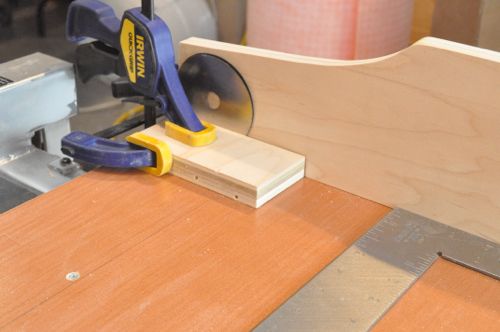
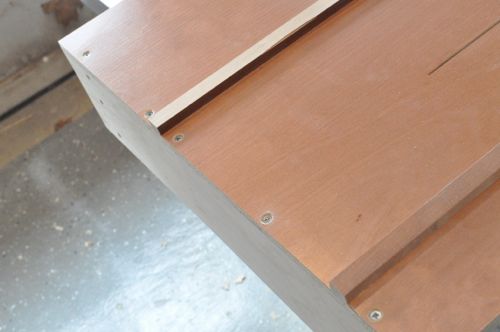
When I was satisfied, I clamped the fence tight to the block and drilled a new screw hole.
After another quick check, I add three more screws to lock the fence in place.
Step 7: Add Fence Supports
With a sled, you’re pushing and pulling on the fence all the time. To make sure it didn’t move, I added a couple of support blocks.
Step 8: Attach Stiffener
The stiffener board spans the kerf cut and holds the sled together. It doesn’t need to be perpendicular to the blade so I just mounted it flush with the edge of the base.
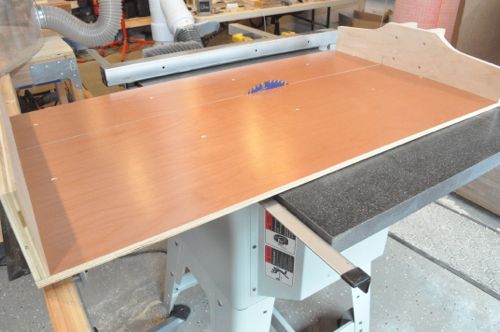
Step 9: Complete Kerf Cut and Test
I set my table saw blade to about 1-1/2″ above the sled and completed the kerf cut. As before, the sled moved well so I didn’t need to make any adjustments to the runners, and I haven’t even waxed the sled yet.
If there was any problem, I would have scribed a thick line on each side of the runners. Moving the sled back and forth through the miter slots would reveal where it was rubbing, and scraping the runner with a chisel would have eliminated the problem areas.
To be absolutely certain the fence was properly aligned, I used the 5-cut squaring method. I first read about this method on The Wood Whisperer, and he references a helpful flash animation showing how it’s done. In short, this method involved a sequence of cuts that will magnify any error so the fence can be dialed in to a thousandth of an inch.
My only limitation is that I don’t own a digital caliper so I had to make do with a combination square. Even so, I estimate my sled is accurate up to 0.0039″ per foot, and that’s just fine by me.
I’m excited to put the sled to use, and you’ll be hearing more about it when I unveil my most recent woodworking project.

Very nice. I have all the tools listed, perhaps I could try to make this one weekend on a slightly smaller scale.
Nice work! It must feel good to be getting a workshop set up and fitted out with all your own tools, jigs, etc.
next step blacksmithing?
as a side note.. I realized I do the same thing with my work, make things that make simple repeatable things easier, so I can worry about the harder work. for a programmer, that means writing scripts, for a woodworker, that means jigs, guides, etc. for a blacksmith, that means tools.
Not sure I’m up for blacksmithing yet! I was thinking more like a collapsable out-feed table. 🙂
Nice sled Ethan. I think that’s the biggest one I’ve seen so you’ve peaked my interest as to why. I read that Wood Whisperer article too and I was thinking while reading your article that your build process seemed awfully familiar. It’s nice to see it’s as easy as he makes it out to be. One thing to note that you did, but didn’t mention why is to have the hardwood runners with the grain running vertical. If you cut them such that the grain runs horizontally they could bind in the miter slots when they expand in more humid conditions.
It really was easy to put together. The one thing WW didn’t do is reinforce the fence a little, and I think that’s a worthwhile extra step.
Great addition about the grain of the wood, and I even remember thinking that the veneer might help a little with all that.
My sled is also similar to the WW sled but I borrowed a blade guard from the fine homebuilding one as well. Mine is slightly different dimensions but still as large as my saw top. I think I’m going to make a smaller one too for small parts. I do a lot more small trimming with it than I do large panels. The largest pieces I’ve cut to date were the panel doing the original calibration and then a bunch of 3-3/4″ thick newel posts. With a stop block all of the newels were exactly the same. Zero chip out as well.
Wow, I didn’t even really know that this was a thing, but now I obviously need it.
Would you believe I don’t have one of these yet? Thanks for the great tutorial!
Sleds are easy to make. I actually made two. However, I rushed through the first one and I wasn’t pleased with it at all. I took my time with the sled I show here.
Very nice looking. My mdf sled is envious of your sexy veneer plywood sled. Also, although I admit to not having a clue what you’re using this big beast for, I’d recommend not cutting it down to smaller size. You never know when you’re going to need to make big TS cuts in the future. As a frame of reference, I have 3 TS sleds of varying sizes. Then again, I am crazy like Crazy Glue. Great tutorial. Long live the wood whisperer!
Why didn’t you use any wood glue? Screws have a way of getting loose (either due to backing out under vibration or due to weakening the wood in contact with the teeth) over time, which would result in a fence out of square. I there a strategic reason for no glue?
The 5 cut method doesn’t really allow for the use of glue between the fence and the sled deck. Small adjustments have to be made to the fence and then rescrewed in place. Personally my sleds get heavy use and have to be rebuilt long before the screws ever let loose.
Jeff beat me to it. Glue would help, and I could see using glue on the runners. For dialing in the fence, it would be a mess.
is that a starrett combo square you are using?
It’s an Empire combo square. However, I did just inherit some of my grandfathers tools – braces, rasp, angle finder, contour tool and squares. I’ll have to try and date some of ’em.
Can’t wait to see the mystery project! It’s a huge sled so I’m curious as well. It looks nice though…I really like the veneer.
Next up is to make a miter sled. I saw it on WWMM and looks just as handy for very accurate miter joints.
making a sled this size, wow, just a small do-it-myself most of the time I think I could really use this and love the article but just maybe not this hugh….You guys are ready for everything it seems.