
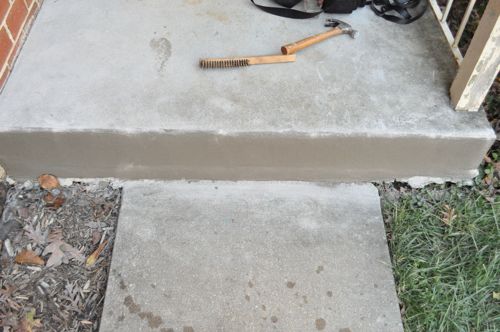
Ever since Jocie and I purchased our home in 2006 the concrete stoop has had this long, ugly crack, and this past summer some yellow-jackets tried to take up residence within the crack. That was enough for me to bump the concrete repair to the front of my to-do list.
If you look around online, the typical repair involves filling the crack with a flexible patching compound followed by a sealant. The result is a structurally sound and visibly unattractive repair. I wanted something better because this is a repair that everyone will see when they come to our front door.
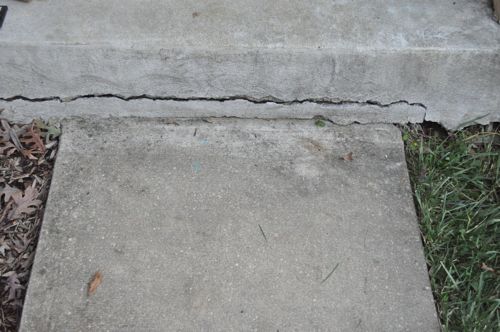
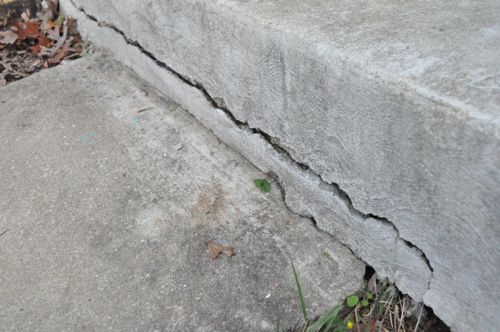
Tools & Materials
Quikrete generously sent me a bucket of FastSet Repair Mortar which is used for repairing concrete, masonry and stucco. The mortar is polymer modified, rapid setting and features a “low-sag formula” which makes it ideal for vertical and overhead repairs.
It’s important to know that this crack has not moved or expanded at all for the past 6 years. If there was any chance of movement, the appropriate product for this repair would be a flexible, polyurethane concrete crack sealant.
Temperatures
Fortunately temperatures here in Maryland are still above 32° F even at night. Otherwise the water (mixed with the dry mortar) would freeze and cause the repair to crack. If the temperatures are too low, pros often use accelerant to speed up concrete set time and insulating blankets to trap heat. During the hot summer months, pros use retarder to slow the set time.
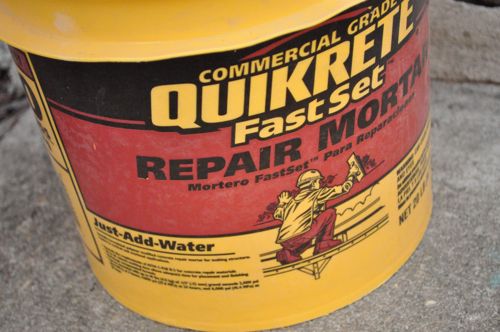
I don’t own any concrete tools. Instead, I used an old drywall knife and a grout float. I also grabbed a wire bristle brush and hammer.
Step 1: Clean Crack
I started this repair by cleaning the crack with my wire brush and removing any small, broken pieces. I used a broom to clear away any leftover debris.
Step 2: Mix Repair Mortar
I combined a portion of the 20 lb. bucket with warm water (speed up set time) until it was thoroughly mixed and a stiff, gel-like consistency.
Step 3: Apply Mortar
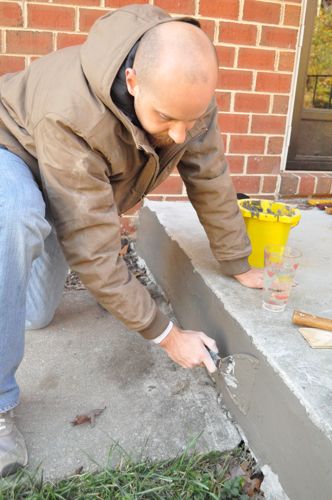
Before starting, I sprinkled some water over the concrete to wet the surface. Using my drywall knife I applied mortar to the crack and skim coated the rest of the face of the concrete. Much like painting, it’s easier to spot a partially repainted wall so I used the corners as transitions.
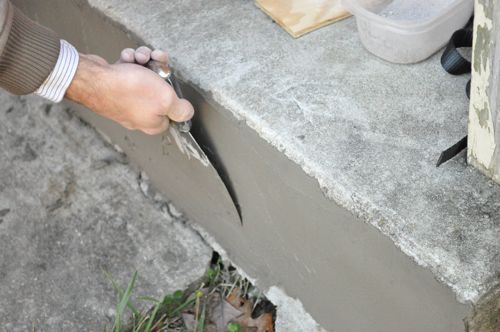
Step 4: Tool Mortar
I continued tooling the mortar after the initial set to achieve a smooth uniform look.
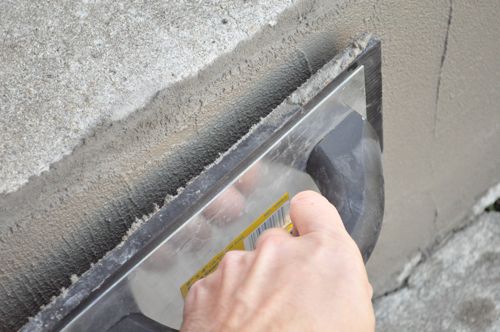
As the mortar hardened, I switched to my grout float because I could apply heavy pressure and better round the corners.
Step 5: Pulverize Old Concrete and Use on Transitions
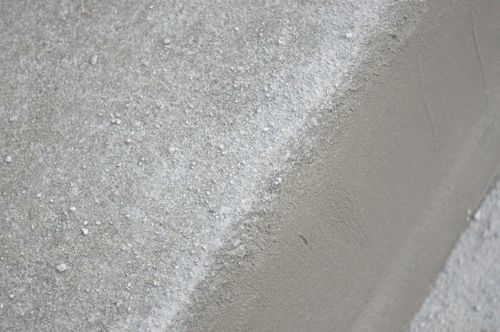
I used a hammer to pulverize a few chunks of concrete into a fine powder, and I lightly dusted the top edge where the repair meets existing concrete. My goal was to further hide the transition from new to old.

Step 6: Allow to Cure
Aside from ensuring the repair doesn’t dry too quickly during the first 24 hours, there are no special procedures to cure FastSet Repair Mortar.
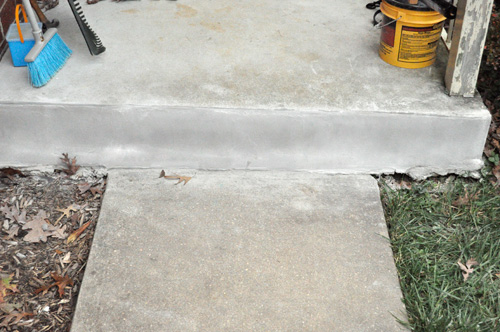
Finished
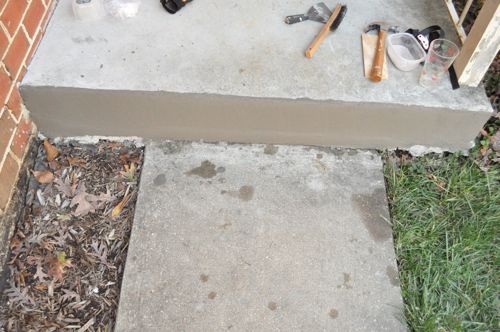
Even with the warm water, the cooler temperatures slowed cure time. After 24 hours the mortar color was much lighter and it began to blend with the existing concrete. I used the wire brush again to smooth out a few places along the corner.
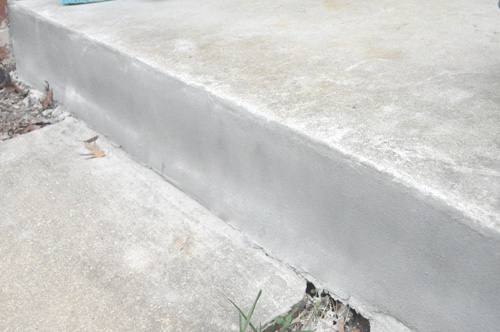


The detail steps (dusting with concrete powder and wire brushing) make this look like a pro quality repair! Great work.
Thanks Brady. I got the idea for the concrete powder from thinking about how to re-point some brick. It’s next to impossible to match existing brick mortar from 20+ years ago. I haven’t actually tried it yet, but it worked well enough on the concrete.
That’s not a repair. Thats a cover up. And soon the same crack will appear. Guaranteed!!!
Skeeter if this is not the proper way to repair then how should it be repaired? I have a small crack that I want to fix and this looked okay to me but I really don’t know how to go about doing this. Would you post how to properly repair a concrete crack? Thanks!
Skeeter is right, a cover-up! The crack is caused by the pavement below the porch settling. Unless that is stabilised, the crack will open up again as further settlement occurs. The only true solution is to remove entire concrete and repour entire concrete on re-compacted and stable base
Using Quikcrete like that is a rather temporary fix. It is best – although much more expensive to use a product with epoxy in it to mend the crack before covering it with the concrete overlay.
Color me surprised. I thought it would turn out like lipstick on a pig but it looks really nice. After a little weathering no one will ever know.
HA! Thanks Jeff. It’s a small porch and now that I’m finished, I’m debating giving the rest of it a quick skim coat to make it look really uniform.
How about that. you ignored this for 6 years and it took less than 60 minutes (+ 24 dry time) to resolve, right?
hahahahaha!!!
That is a much nicer fix than the one we attempted. Definitely need to check this out.
Thanks!
Ethan, Why dont you all live in Georgia? We could use your expertise in fixing the concrete on the bottom portion of our cedar sided home:)
Pretty good fix. I’m also impressed with how well it turned out. The pulverized powdering is a good trick.
Turned out great! Looks so much better now than the first picture.
Made it look easy. Better than 1 of my own recent efforts 😉
Looks great. Love the blending Techniques.
I have seen the quick fixes at big box stores that don’t work, good to see you address this issue
Great job. I needed this one!
Outcome looks great! I like the attention to detail on transitions. I wonder why the crack appeared but hasn’t expanded at all though…seems like the crack could still be suspect to expand
I also use these methods when repairing concrete structures in buildings and homes with old looks: cement is very hard to work with if you zero experience…..
I recently pulled up the carpet in 3 of our bedrooms and found what appear to be surface cracks on the foundation – should I fill/repair these before the new flooring goes down?
Hi Ranch-Burger,
I depends on the new flooring, and the extent of the cracks. For instance, minimal cracks can easily just be covered up with new carpet / carpet pad. For tile, you may want to consider sealing it with crack-isolation membrane. I know this isn’t a definitive answer, but I hope it helps.
Let us know what you end up doing.
Foundation? Usually the walls cover the foundation. How did you spot them? That is more likely lightweight pumped in underlayment…..which always cracks.
hmmmmm weird…..In my area we usually install the floor system over the foundation and then add the walls. Nice having something to walk on.
Depending on your area of the country Radon may also be a concern with those cracks. If you have the floor torn up it would be a good time to test for it and if it’s high, install mitigation measures.
Hi Ranchburger,
wondering if it is your basement floor, you mentioned foundation, if these are indeed your foundation walls you should be doing a different repair, an epoxy injection/ 2 part process. filling a crack on a basement floor are quick easy.
nice tricks! super helpful
Bookmarked and on my ” do soon” bucket list. O.K., I live a simple life! Thanks for making it even simpler.
This is great. Do you have any tips on setting concrete in 80 degree temperature? I want to make sure it won’t crack.
Hey Eva
My experience with heat and cement cracking is wait til it has set and is finished tooling and mist with a garden hose to keep the concrete from setting to fast. As concrete sets the chemical reaction makes it get hot so I usually mist concrete after the entire job is broom or wood float finished. Be careful not to spray to hard just a fine mist should do the trick hope this helps.
Had some concrete problems on our front steps, some areas crumbling on step’s edges and a major horizontal crack on a horizontal surface. I cleaned the areas, applied a coat of a liquid bonding agent, placed some compressed ” chicken wire” in the large horizontal crack, then placed a 2×10 piece( wood surface brushed with motor oil to allow easier removal) flush against the step with the crumbling edges. The 2×10 was held in place with some concrete blocks. I filled the broken areas on the step’s edge and allowed the concrete repair to set up. I then packed the horizontal crack and placed the board against it, held in place by the blocks. I was pleased at the results, though I must admit my repair was done as aesthetically as Ethan’s!
That is one heck of a bandaid. Sorry but this is not a repair, a repair would be mud jacking. Cracking concrete is a sign of soil compaction or voids forming under a slab. Simply smearing concrete over a crack is not a fix. You’ll be doing this over and over again for the duration.
Tim could you explain “mud jacking” and how it is accomplished? Is this something that the “average” homeowner can do on their own?
Mud jacking is a system that uses expanding foam or concrete. The company will come assess if it is needed. The drill holes at cetain areas and literally pump in foam or concrete depending on your choice of company. It is done slowly and meticulously as over filling can lift too high or damage pipes underground. Not recommended to try yourself….
I have a drain chanel on my concrete patio slab & crack has developed in this chanel…would I use same repair process & product you used?
That’s not repairing that’s covering up the issue. The “fix” will pop off in a year and it will look like the way it does before the “fix” The proper way to fix the issue is bust out the concrete re-pour the step
the ultimate fix is your way, truly…. but for those who can’t afford to get concrete (and believe me, there are quite a few of us who literal can’t afford a bag or two, the mixing equipment….) This will work….and as long as the concrete is stable, it will hold for longer than your estimate….maybe not much longer…but longer. and you have to admit that it looks good which is what he wanted.
I have a couple hairline cracks in the concrete on my back porch that allow water to leak into the fruit celer below. How can I steal them without making the porch look bad ? I have considered painting with a sealer but have never seen a paint that held up without peeling in time. Also if chairs or patio table move on it, paint scratches off.
Any suggestions ?
How about “How to repair cracks in a stone chimney and hearth (inside and out)”!
Great job in the repair. Looks awesome. A coat or two of concrete stain and sealer would look great. Thanks for the tips for us ” regular folks” !
Could this method be used to fix cracked sidewalks or curbs,
When you have a crack like that, you need to chisel the edges, drill holes about 6 inches apart on each side of the crack and drive blue concrete screws in each side. Then apply your patch. This will hold the two sides of the crack together and reduce the chance of your patch falling out.
Forgot to mention. Leave the screw heads about 1.4 to 1.2 from being completely driven in. This gives your patch something to bite.
What Matt is saying is the proper way to make a patch last the longest it is and will always be a patch and in northern part of our Great country freeze and thaw of winter will knock it off no matter how it is done. Patching and skim coating is done when homes are being sold so new homeowner does not see the proublem at hand. I have integrity and wouldn’t do a repair like that.
I know folks are trying to help u but I think u did a great job considering u are not a pro and have limited funds, and just a plain homeowner. My husband did both things to our problem like this.
1 he fixed it himself. After 3 yrs he then called in a pro and guess what, the fix the pro did was not as good as hubbys . So the moral of the story, you never know until u try and try again. Good job.
I have an identical crack in my front step. It showed up in the first year the house was built and has not changed in 14 years. I don’t think it requires mud packing or foundation support. It’s certainly worth trying this simple inexpensive fix first.
I Antonio Roseiro I need Reparinge Cracke Concrete And Mai Varanda fronte House
[…] Home repair hack via oneprojectcloser […]
Can you add pigment to this product if you are trying to match coloured concrete?
Hey, it’s been years. How does the front porch step look today? Did it crack?
I did not know that slab jacking with foam was a newer version of mud jacking which used to be used to level out cement slabs. Also, the fact that foam jacking is so much less expensive than replacing the sidewalks is very impressive. I think that this would be a great option for anyone who does not want to pay more money in the long run to replace their sidewalks or driveways.
The folks who say this is due to settling are correct…but their assertion that this is a temporary fix is wrong. Ethan, please post an update to prove us both right. If, as another poster said, the crack has remained stable over time, then it’s done settling. I think it’s gonna stay fixed for the long haul. It’s not a sinkhole, for crying out loud: just a little settling that has stabilized. Good, job, Ethan!
Try pumping caulking ( NO SILICON)
into crack, then fiber glass mesh
then cement.