
We’re back with our next Pro-Follow, and this one hits close to home. If you entered Fred’s Husky Tool Tote Giveaway, you probably read the brief update at the end where he shares that today’s Pro-Follow comes to you from my house.
Earlier this month, Jocie and I noticed that our water bill was significantly higher than usual.
Seeing nothing amiss in our home, we called the utility company expecting there had been a clerical error or perhaps a malfunctioning water meter. Instead, they suggested we might have an underground leak between our house and the meter, and they were right. I called a plumber I trust, and this article explains how he and his crew repaired the underground leak.
All of our Pro-Follow articles showcase professional contractors on actual job sites, and we share how they tackle home improvement projects with tips along the way. If you like learning from the pros, become an email subscriber and never miss an update.
Steps to Repair a Broken, Underground Pipe
The plumbers presented two strategies for fixing the leak. One approach would be to replace the entire length of copper pipe between my house and the meter by securing a cable at one end and pulling the old pipe and a new one (attached at the other end) through the ground. This would require minimal digging and less labor; however, copper is expensive and this solution would be too. I opted for the second approach, which was to dig down to the pipe at the leak location and replace a small section of the pipe.
Pro-Tip: On newer construction, you may see black, high-density polyethylene (HDPE) pipe in lieu of copper, because it is less expensive.
Pro-Tip: Copper water pipe has an expected lifespan of 50-60 years.
Step 1: Have All Underground Utilities Marked
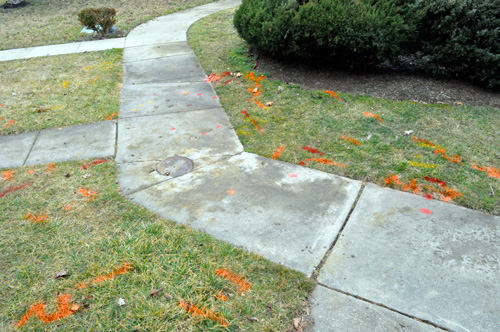
Upon closer inspection of my yard, the general location of the leak was pretty obvious because of the mud, but before work could start, the plumbers needed all the underground lines located. Here in Maryland, we call Miss Utility before every dig. An Emergency Excavation Notice was filed, and within a few hours, all underground communications, gas, and power were marked.
Step 2: Turn off Water at the Main on the Street
First, they needed to turn off the water supply at the meter found at the sidewalk. This picture shows the meter, which has been completely submerged by the leak. Judging by how fast the meter was moving, the leak was sizable.
[See also: How to Turn off the Water at the Street]

Step 3: Hand Dig Down to the Leak Location
Unfortunately, power, water and communications all enter my house at about the same point (right around the leak), which meant that they needed to dig very slowly and carefully to avoid damaging anything.
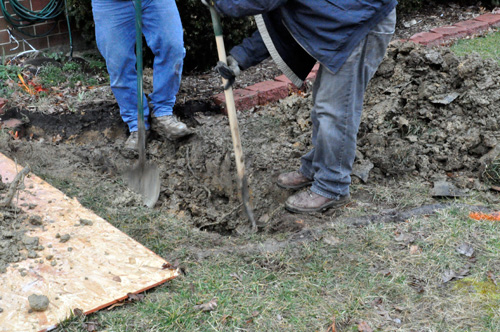
Pro-Tip: Communication lines like phone and cable service are usually found within 24″ of the surface. Water supply lines are typically buried 36-42″ deep, or deeper if you live in an extremely cold climate.
Pro-Tip: When digging, orient your shovel along the buried line (rather than across) until it has been fully exposed. You’re much less likely to inadvertently cause damage. It should go without saying: never use mechanical tools to dig near underground utilities.
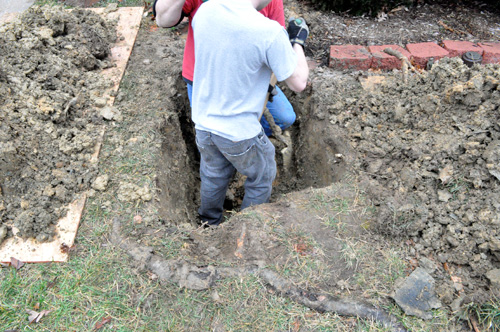
In time, they found black power lines, and they excavated around them to provide adequate clearance.
Step 4: Pinpoint the Location of the Leak
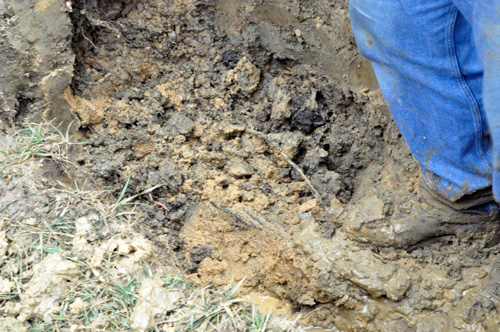
The plumbers would turn on the water supply for brief moments to help determine the location of the leak.
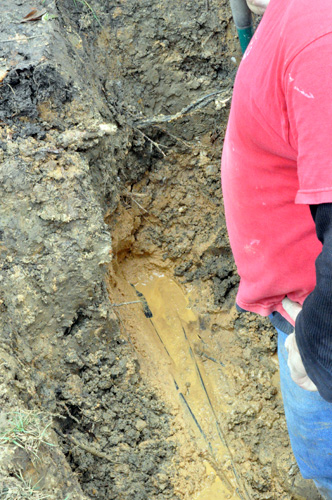
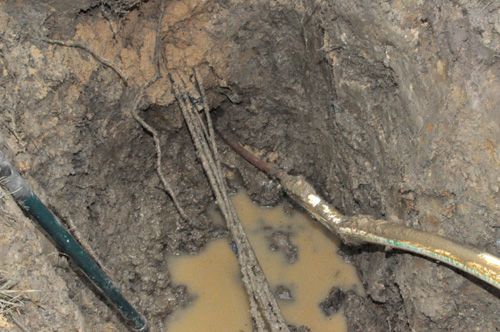
Eventually, they found the water line within a PVC sleeve. Builders would often run water supply lines through a short segment of PVC as it passed through the foundation, so it was odd that we should find the sleeve extended about 7′ away from the house. Upon turning on the water supply, it was found that the leak occurred somewhere inside this PVC sleeve.
Pro-Tip: While not the case in this home, in the late 80s builders frequently used a material called polybutylene for water piping. This material was once thought of as “the pipe of the future” because it was flexible, easy to work with, and cheap. Unfortunately, the lifespan of polybutylene turned out to be relatively short (15 years). One repair method for failed polybutylene pipe is to run copper piping through the polybutylene. If you run into a leak in an underground supply pipe that looks like PVC, and your house was in the 80s, you should be aware of this potential situation.
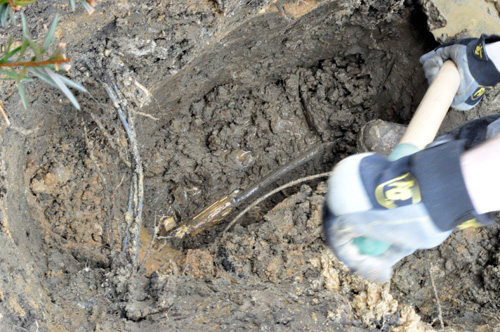
Step 5: Cut Away and Remove the Old Pipe, Install the New Pipe
This close to the house, they determined it would be best to replace an 8′ section going all the way inside. They cut the pipe just before the PVC sleeve, and we headed inside to cut and remove the old pipe.
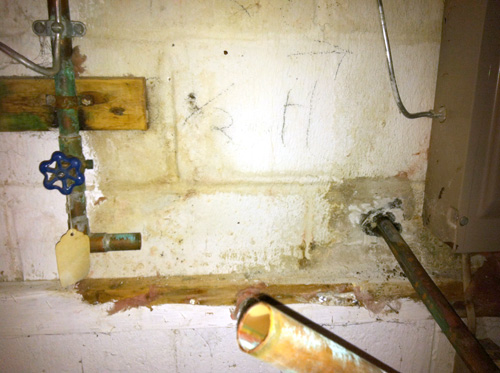
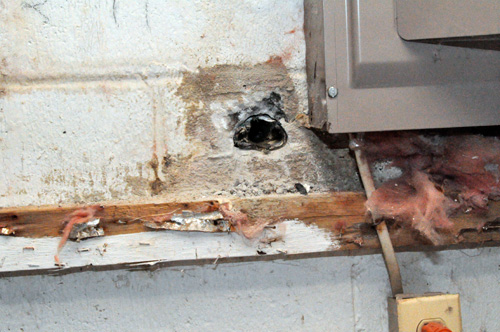
The crew attempted to push a new piece of copper pipe through the hole and PVC sleeve, but it would not go. To feed the new line, they snaked a cable through the PVC sleeve. The plan was to solder a softer, more flexible copper pipe onto the cable and pull it through (much like the alternative approach I shared at the beginning.)
Here’s a picture of the new 3/4″, K copper supply line.
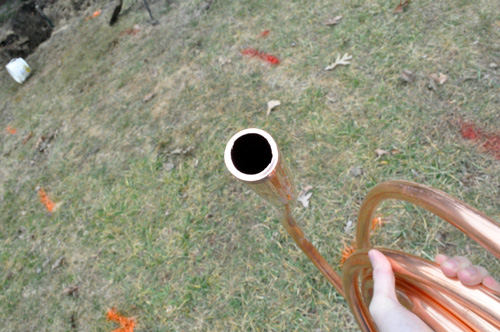
Pro-Talk: Copper pipe wall thickness is designated by letter K, L or M. Type K copper pipe is much thicker than L or M. Type L is the second thickest.
They soldered the pipe to a coupling fitted on the cable, and setup a winch outside to pull the pipe through.

Pro-Tip: See our full tutorial to learn how to solder copper pipe.
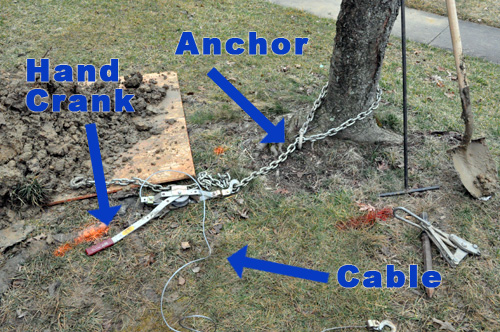
When everything was set, the crew began pulling the pipe through, and it actually dislodged the PVC sleeve. If you look closely at the picture below, you’ll see a sharp bend in the PVC. The plumbers are not sure how that occurred, but that is definitely the reason why they could not feed the replacement pipe through by hand.
Step 6: Make Connections with the Existing Pipe
Step 6a: Outdoor Joints
A solder joint isn’t appropriate for a buried line, so instead they used a pack-joint coupling to connect the new pipe to the existing supply line in the ground outside. Unfortunately, I don’t have a picture of this step, but you can Google for pack-joint coupling and find a good amount of information on it. Next, they turned on the water to flush out any dirt or debris.
Step 6b: Indoor Joints
Next, the crew went about connecting the new line inside my house, which involved simple copper soldering. If you’re curious about that fitting in the middle, it’s a compression fitting called a SharkBite. When they installed the new, 90° elbows, one of the joints wasn’t properly soldered. When they turned on the water, a small pin-hole leak was evident. Unfortunately, it’s impossible solder a pipe when it’s full of water. To address this, they cut the pipe in the middle, drained the water, re-soldered the elbow and then used a SharkBite (which doesn’t require soldering) to repair the cut. In Maryland, SharkBite fittings are fully code-compliant for indoor use.

Step 7: Seal up the Pipe Entrance Points into the House to Prevent Leaks
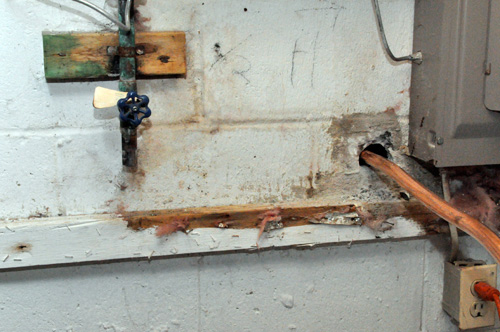
Here’s a closeup showing where the pipe enters my house. You can see the plumbers placed a new PVC sleeve that extends a few inches beyond the foundation, and they used a clear, silicone sealant to fill the space around the copper pipe. They also used a hydraulic cement to repair the area around the PVC sleeve.

Step 8: Check and Confirm That the Pipes Are Leak-Free
The crew re-tested the line and confirmed that the pipes were leak-free.
Of course, they repaired the front lawn, and I’ll be reseeding the area in the next few days.
If you enjoyed this article, check out some of the other Pro-Follows we have going on right now.


Ethan,
Sorry to hear about your troubles, but glad to see a pro-follow come out of it. I was surprised to see that your water line comes in right next to the residential power and also that your water line was so closely run to the power outside. We don’t live far from you, and in our neighborhood we have gas right next to our power line.
A couple of years ago we had a stump for a fallen Bradford Pear removed that sat right on top of that. We called Miss Utility ahead of time but were then told by our contractor that he needed to call Miss Utility himself. I believe he mentioned it was for liability. Did you call or did your plumber?
Hey Simon, The left, front corner of my house has all the power, communications and water while the other corner has gas. The plumber told me that today, an inspector would never sign-off on having my panel so close to the water main. They target at least a 6′ clearance so I expect more recent houses wouldn’t have the utilities buried on top of each other. The plumbers called Miss Utility, but I’ve made the call before. I bet your plumber just wanted to be sure and that makes sense since he’s the one responsible. Locating lines is free so I hope he didn’t charge you for it!
Hey Ethan,
Good to hear that code changed for this – it certainly seemed pretty strange.
No charge for us; he was a reputable contractor. I had 240 reasons plus one very good reason not to work on that stump myself. Our neighborhood in Columbia has had plenty of trouble with Bradfords snapping in winds.
Its great that you were able to make the best of a bad situation… does the cost of the repair count as a business expense now?
I am curious if we would ever notice this, my water meter is at my house, in the basement with a remote readout on the side of the house, I think there is only a small shutoff at the street. I believe this is common in the northeast as it is the same on both of my parents houses as well (well, only one data point really, they’re right next to each-other).
The lifespan of copper pipe kind of scares me, because my house is almost 50 years old now… and now that I think about it, my sump pump has been going off more than usual, and its right next to where my water supply line comes in. (now I am getting nervous!)
So did you find the break in the original pipe? was it related to that kink in the PVC? did you find out what that kink came from?
You talk about how expensive copper is, but if you are replacing a copper pipe, cant you just scrap the old copper and come out about even?
Haha. Unfortunately, I don’t think the IRS (or Fred and Kim) would take that standpoint. If so, I’d start writing about cars. 🙂
You’d have thought that I would notice my front yard getting swampy but unless you actually walked over the area, you couldn’t tell there was a leak at all. That’s why we expected some sort of billing error.
I never actually saw “the leak” but we suspect the pipe was weakened at that bend and over time it broke. We really don’t know how that kink occurred. Initially, the plumbers thought the builder had installed some 45 degree elbows (but that wasn’t the case).
I hadn’t thought about scrapping the old pipe, which is probably exactly what my plumber did….. I still don’t think you’d come out even, but it’d be close.
Ouch! Not an article you wanted to do, but informative none the less.
So that manhole cover in your sidewalk is where the meter is? In MN we have our meters inside the house with a municipal shutoff buried well below frost in the middle of the front yard. The 1″ flexible copper line goes under the basement footings and comes up through the floor in the utility room.
No matter where plumbers work it seems that it’s always a dirty job. Clay soil in MD?
Jeff – tons of clay around here. MN has some crazy-deep frost line, too, right? Somewhere around 6 ft? I don’t envy folks digging up your way. =]
In the northern half of MN we have to have our footings at 60″ or deeper. Even digging simple deck piers can be a major project without powered equipment. Our roofs have to be engineered for high snowload too.
Two questions: One how much of a cost difference is there between the two approaches you mentioned at the start of the story? And also, why isn’t a solder joint appropriate for a buried line?
Acidity in the soil will eat a typical silver solder joint over time. Brazing is an acceptable alternative for underground work. See here:
http://en.wikipedia.org/wiki/Brazing
There are also other acceptable methods for joining pipe underground, one being the one used by the plumber in the article.
I understand why the plumber couldn’t solder the coupled joint inside your house, but I wonder why they chose the snake bite coupling instead of soldering a coupling on? It seems like the snake bite is similar to the fernco style fittings you can use on PVC connections?
The shark bites are a lot like the old “chinese fingers” games I played with as a kid. I am not familiar with the fernco-style connectors, but if they are push-together type joints, they are likely very similar. Shark bites make quick work of copper plumbing, but I’ve never really gotten myself to trust them for hidden work.
The ferncos are a flexible tubing that clamps on both sides of a pvc connection with a worm drive style clamp. It sounds like the snake bite is a little different.
I had to make that same repair shortly after moving into my house. Discovered it when we had a nice little spring in the front yard, even in dry weather. Which was nice until we tested the water and it was confirmed chlorinated.
Two ideas: First, while you have the hole open near the foundation, place a blue mark on the house somewhere above ground level to show the location of the water line. Much easier to find it again years later. Second, if that is the main shut off in your picture, consider replacing it with a ball valve. Makes it quicker and easier to turn the water on and off.
Unfortunately, several years after this repair we did have a second leak in another section and decided to replace the supply line all the way to the outdoor shut off. When you get bids, ensure you specify K-copper, and then check that it’s marked as such when it is installed.
JD – Really good tips on both accounts. Thanks for adding these! It is important to make sure you are getting the properly-rated copper for underground use.
I should’ve done a pro follow myself when the city was here a few years back and replaced the sewage line on my neighbors house that tree roots destroyed. They dug so deep it was crazy.
cool post. Looks like a dirty job.
Same thing happened to us a few years ago. When we went to shut off the water at the street, the valve broke and so then we had to call the water company to come out just to get the water off. As is typical with utilities companies in our area, it first took forever to get them to answer the phone, then they took their time getting to our place. Our water prices are already double that what most people in the area pay, but the usage that month was outrageous b/c of the leak. Busted water pipe=no fun!
In our area, the only thing that really gets the quick attention of a utility company is a gas leak.
I remember having to help my dad fix a leak in polybutylene pipe back in the 90’s. The leak was under the garage slab, but it was close enough to the edge that we busted some concrete block at the edge of the foundation and dug up under the slab a bit. Our leak was extremely apparent. It left a frozen river between our house and the neighbor’s.
Polybutylene was the subject of a class action law suit at the time. We managed to get in on the suit after the leak, and it wasn’t too long before a plumbing contractor came and replaced all our PB with copper at no cost to us. I guess people figured out that PB was basically a time bomb waiting to go off. Oh, and our polybutylene looked like grey PVC, but more flexible.
Good on you for getting compensation for this! Kim’s old neighborhood had this and it was “going” slowly from one house to the next. We were fortunate in that her townhome never had to have it replaced. Unfortunately, we were told that the builder’s and legal settlement were no longer liable to her for repairs. I guess the prior owner never got in on it. The replacement cost in the neighborhood was about $2500/house. Yikes.
I have an underground pipe that I think was cracked from tree roots. It is PVC or something like that. So this article is helpful
BENJAMIN RAUCHER
Copper has gotten so expensive we have been forced to use pex most of the time for longer runs such as this. The customers like the 25 year warranty that comes with the pex as well.
I had no idea that you might have to dig up your yard to get to the main water line for your home. I just moved into an older home, and I am worried about there being a few problems with the plumbing. It is good to know that if there is a problem I will have to dig to find where the leak is coming from.