
Contractors can’t always foresee every possible scenario when they bid a job, and they often have to assume that previous tradesmen have done their work appropriately. Unfortunately, that’s not always the case, and even simple jobs became much more involved. Professional contractor and carpenter Steve Wartman and his crew began the process of replacing a patio door when they uncovered a poorly built header. Steve couldn’t in good conscience continue with the project until they replaced the header, and here’s how they did it.
If you’re new to One Project Closer, this article is one of many Pro-Follows, derived from shadowing licensed, professional contractors on actual job sites. Every Pro-Follow is chock full of tips and experience straight from the contractor. If you enjoy seeing the pros in action, check out our completed Project Guides section and become an email or RSS subscriber.
Window and Door Header Requirements
Calculating window and door header requirements is complicated because they depend on a variety of factors including the size of the opening, the weight of everything above it, snow loads, if it’s an interior or exterior wall, and more. One rule of thumb says 2″ of header for every 1′ opening width which means a 6′ opening should have a 2×12″ header. However, it’s often necessary to involve a structural engineer as Fred and Kim did when they removed a load bearing wall. An engineer will be able to determine the necessary size of the header, type of wood, and the number of king studs and jack studs.
Non load bearing windows and doors do not require a structural header. For instance, in the basement remodel, all the doors have simple 2×4″ framing around them.
Pro-Tip: You can access a free copy of the 2012 International Building Code here. Section R502.5 shares allowable girder and header spans.
The Problem
Steve and his crew began the process of removing the old double-doors leading from a basement to the outdoors.
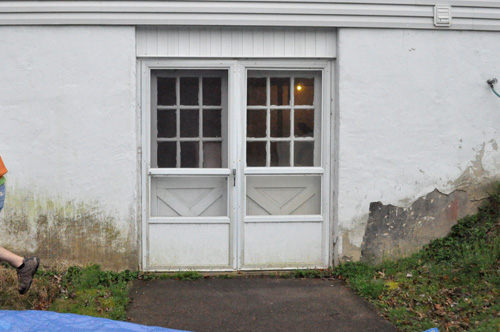
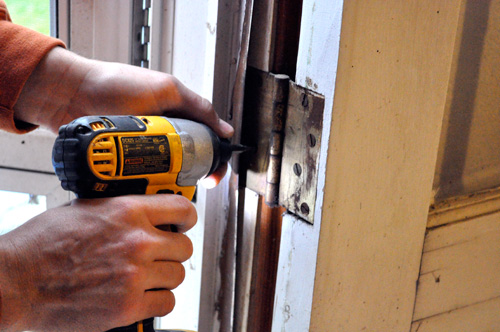
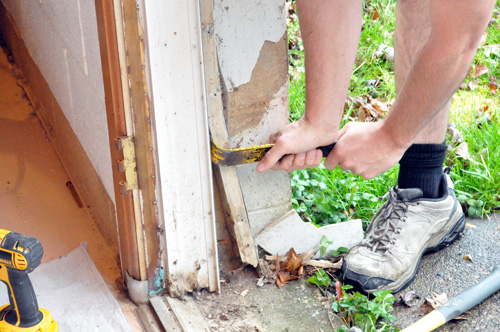
After removing some trim, it quickly became apparent that the header was not built to code.
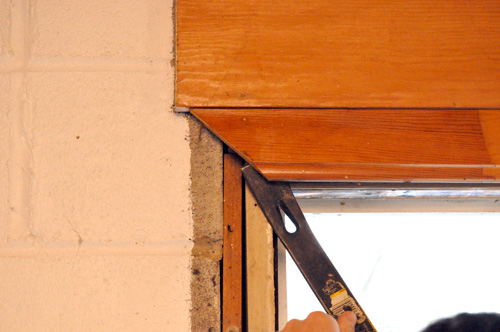
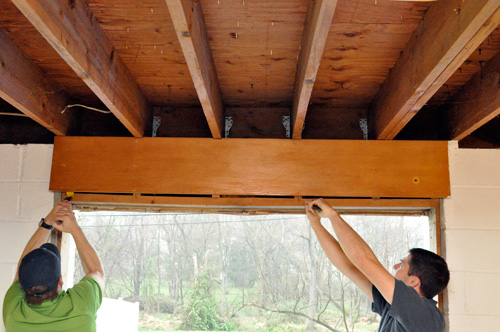
What you’re seeing here is a header built with a 2×6″ bottom plate, 2×4″ cripple studs, and a 2×4″ top plate resting on the adjacent block walls. This header spans a 6′ opening and supports 4 floor joists (with 2 stories and a roof above it). The lowest point is at the middle and it sags down about 1/2″. Wait, it gets worse.
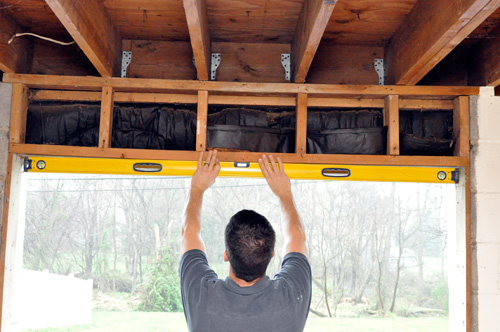
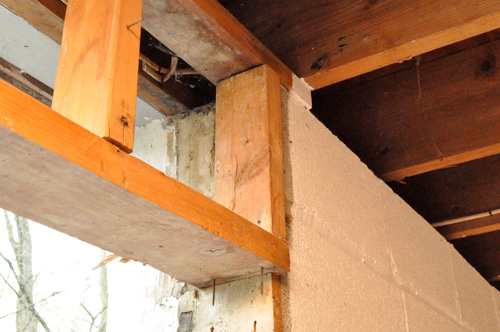
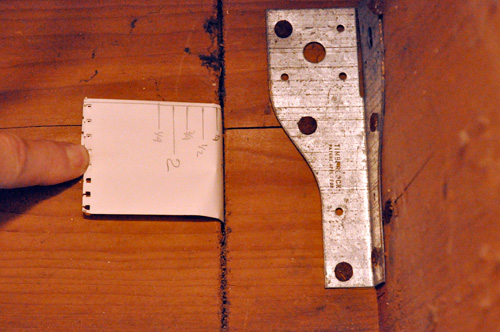
The guys quickly found that the header wasn’t supporting very much weight as it moved about with only a small amount of pressure. It seems the band board was doing all the work, and on closer inspection, Steve found two cuts in the band board on either side of one of the joists. From the picture, you can see they measured the depth and found each cut was over an 1″ deep!
Step 1: Build a Temporary Wall
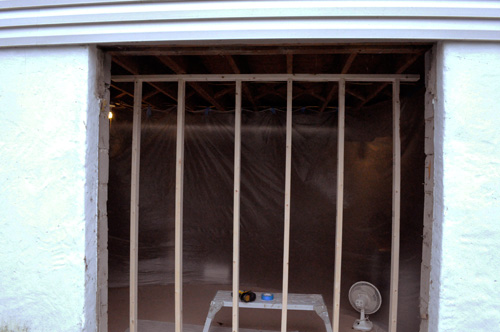
Before removing anything else, Steve and his crew built a temporary wall to support everything above the opening. They used 2×4″ studs with a stud underneath each floor joist and a total of six studs.
Pro-Tip: When building a temporary structure, fasten everything with screws to make disassembly easier.
First, the guys moved the top plate and bottom plate into position about 2′ away from the foundation. Next, they put in a few screws to hold the top plate against the floor joists.
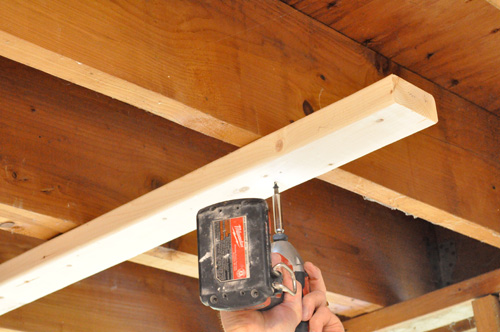
They measured each stud individually. The goal was not to raise the floor joists, just to achieve a super-tight fit at the current height.
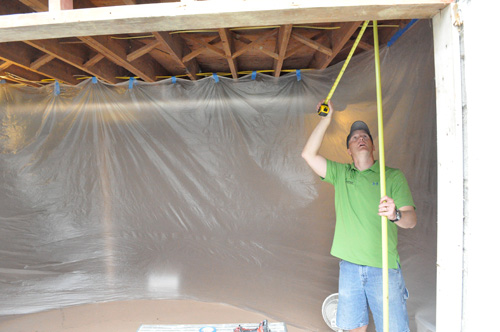
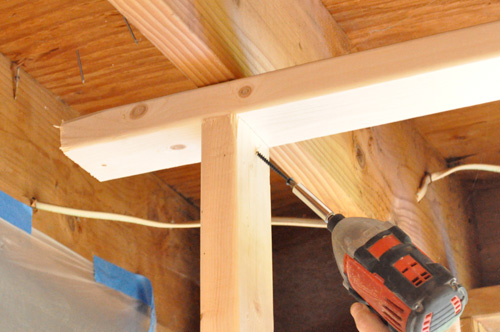
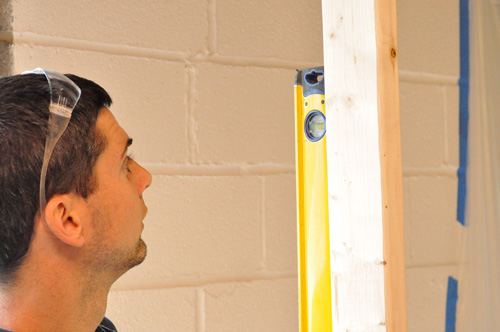
They also made sure each temporary stud was plumb.
Step 2: Remove the Old Header
The old header came free without too much trouble.
Step 3: Cut Block Wall
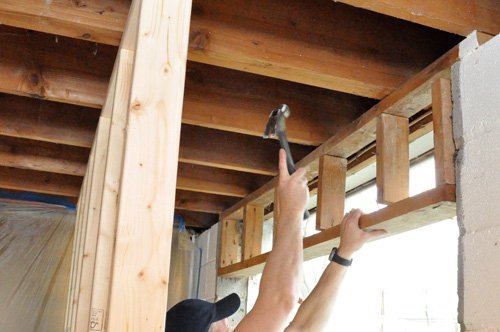
The new header will consist of three, pressure-treated, 2×10″ boards, supported on either side by the block wall. Steve needed to cut away a portion of the block wall, and they marked off an area 7″ wide x 9-1/2″ tall x 4-3/4″ deep on each side.
Pro-Tip: Pressure-treated lumber measures slightly larger. For instance, the true dimensions of an untreated 2×10″ are 1-1/2″ x 9-1/4″. However, a pressure treated 2×10″ measures up to 1/8″ taller and thicker.

Using a grinder and masonry cutoff wheel, they made cuts along the lines. While not big enough to cut the entire depth, this helps prevent the block from cracking.

They followed the grinder with a rotary hammer and chisel bit.


Step 4: Build New Header
The guys cut the 2×10’s to length and checked the boards for a crown (up and down curve). Orienting the boards crown-side-up, they nailed two of them together placing four nails every 16″ on center (oc). Since Steve knew the floor joists above the door opening were bowed, he decided it would be better to fit two of the 2×10’s in place and add the third one later. This allows them to more easily maneuver and still prevents the new header from bending under the pressure.
Pro-Tip: These framing nails are 3″ long, and when nailing two pieces of 2x together, angling the nail gun prevents the nail tip from protruding on the opposite side.

Step 5: Position Header Across Opening
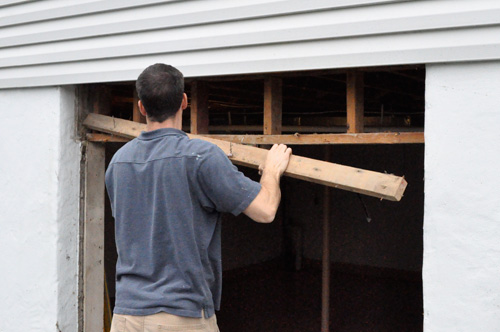
To slide the header in place, Steve used a spare 2×6 to push the header up and a maul sledge-hammer to push the header over.

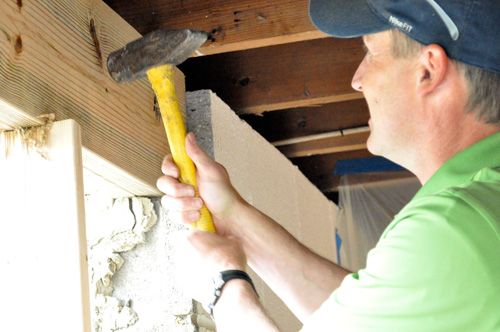

The guys repeated the process for the last 2×10, and put four nails every 16″ oc.
Step 6: Nail to Joists
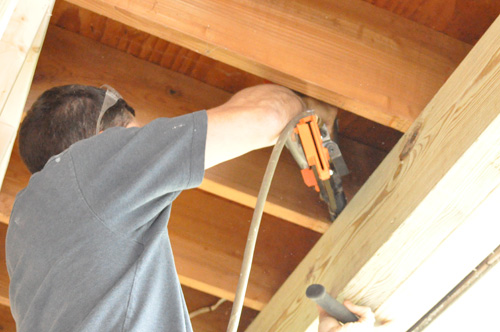
Steve’s crew finished the header by driving nails into the floor joists.
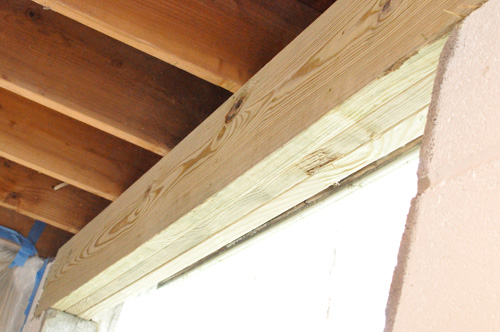
Finished
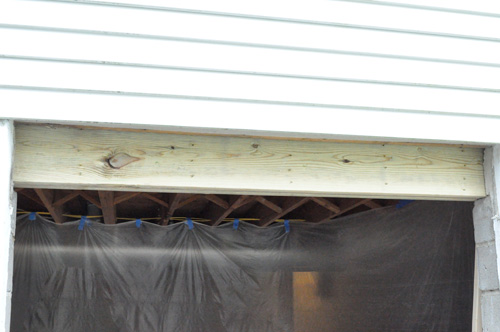
With this unexpected twist resolved, Steve turns his attention back to installing the new patio doors. Look for that Pro-Follow article in the next few days. Stay tuned!


Great article. Used houses always come with fun surprises!
My method of choice for temporary walls is adjustable shoring poles and solid wood beams. I place scraps of cardboard on top of the beam to protect any finish ceiling textures. I like it because it’s a lot easier to set up and take down but realize not everyone has access to steel shoring poles. Just wanted to point out an alternative for future readers.
Thanks for the addition Jeff. I think Steve has shoring poles (or something similar). They weren’t available so Steve made a quick trip to HD.
Great post, Ethan. You may have addressed or implied it, but can you tell us whether the sag was addressed, please? You mentioned the center was off by 1/2″ on the old header. If it wasn’t or didn’t need to be addressed, was that because that 1/2″ would have had too large or an impact on the structure above?
Good question Simon. The 1/2″ sag was eliminated when they got the new header in place, and that’s why they needed the 2×6 and maul hammer. It was a lot of work to squeeze everything in place. While getting a straight header is important, they didn’t want to shift the floor too much. Otherwise, there would be nail pops, tile cracks, etc.
Those steel shoring poles Jeff mentions would probably have helped them by providing some lift on the floor so they wouldnt have to cram the header under there.
Those look like 1×4 or 1×6 jack studs under the header… is there even a king stud?
Also, did they need to do anything to make sure that the block wall under the heads could support the weight?
Those were 1×6’s! No king stud or anything. Looks like the builder decided to cut a few corners.
I’ll check on the block wall. However, it was already supporting all of the other joists so I doubt that’s much of a concern. The wall should have been supporting the weight from the beginning.
One more thought… at least on the left side (not sure about the right side), the block was filled so that further reinforces the wall underneath the header.
Great example of how surprises come up all the time, especially in what seems like a rudimentary weekend project. What scares me is something like this is completely over my head (no pun intended). If someone told me my Load Bearing Door header or beam needed replacing because it wasn’t strong enough, I’d have to believe them. So I guess a roundabout question is, since this header is too weak, is it possible to make one too strong?
When I noticed the 2×4’s and how they were positioned, it was obvious that this header wasn’t right. Otherwise, I don’t think I’d be able to say “this header isn’t big enough” or something similar. Even so, looking at that IBC link for headers and girders should give you a good idea of what to expect. It’s definitely possible to over-engineer a header, but the only downside to that is the cost of materials.
That’s interesting… Great procedure, btw.
cool post. How do you cut concrete block with enough precision to get a joist to slide right in place? It seems like even under the best of conditions, you’d be lucky to accurately cut a cement block to the nearest 1/4″ or so. Did they end up notching either the header or the joists at all to compensate for this?
Using the grinder to set that edge let them be really precise. Even with it though, since the joists sagged a little in the middle, they used a 2×6 to wedge the header up into place (along with some hammering). Steve had some metal plates that he could use as “shims” but he didn’t need any.
I like the use of the shopvac for concrete dust removal while cutting. I guess if you can’t fit 12″ or 14″ wet saw in there, that’s the best alternative.
One thing that really impresses me w/ Steve and his crew is how cleanly they work. You can see the plastic in the background. They setup tarps to prevent their boots / equipment from getting wet or muddy, and they put down drop cloths in the workspace. Cutting block makes a ton of dust and the shop vac was definitely a good idea.
Yeah those are nice touches. Even at an older house they still respect the property and that says a lot about their workmanship.
Sad to see that some builders take shortcuts to make a buck and then the homeowner has to pay for it later on down the road. Good find and good fix though. At least someone caught it before any major damage occurred.
Kudos to Steve and his crew for being CRAFTSMAN, and not merely laborers who might have let that pass and not have gone to the trouble of fixing it or explaining the concern to the homeowner(s).
Kudos!!!!!
We have an old cinder block garage shed building built in 1967 with ( 2 ) 9 foot wide garage door openings. These 9 foot openings are only supported by a makeshift header consisting of 6 cinder blocks sitting horizontally across the top of the opening. Tbe row of 6 blocks have a 2 x 10 on top and a 2 x 10 below them. However, this row of blocks does not extend to the single cinder block columns on both sides of the garage door openings. We just put a new metal roof on ( removed the old galvanized ribbed original roof), We added OSB board for extra coverage under the metal. The middle of each garage door opening is now slightly sagging. You can barely see the light in between the cinderblocks and the sandwiched 2 x 10s. There is only a slight waviness in the new roof line. It was originally built 1967. do you think since it has not collapsed in 50 years, is there any chance it will ever collapse? The rafters are quarter sewn oak ( very heavy. ) The new metal total weighs 537 pounds, which is probably what the old metal weighed. The OSB board is adding alot of weight, don’t know how much it weighs. OSB is .401 inches thick. I have lots of photos I could send you. We have not gone any further on the project because we do not know what to do about this header situation Any Advice.
Hello,
I have a similar project I need to do on my daylight basement door frame. The problem is that the header is mostly covered by the upstairs deck and a gas line. In order to avoid messing with the deck and gas line I’m planning on taking the upstairs door off and pulling up some of the subfloor to drop the header in from above. Does this sound possible. I could send photos if that helps. Thanks!
It is September of 2020 and your efforts are still helping people such as myself. This with all the photos has helped me to understand. I have 3 sliding doors that need to go into concrete block openings. The opening are higher than the doors. The openings were already there and eventually were filled in with mylar screening. I need to build headers for the doors. I was trying to figure out how to attach wood headers to the concrete on both sides. What you have done here is for load bearing purposes. I don’t have to consider that. The load bearing is already done above where the headers will go. Now Im thinking I need to just install 2×6’s on either side of the openings and then attach a header to the 2×6’s. Thank You.