

I LOVE having two girls, mainly because I love hair, makeup, nails, clothes…and of course, jewelry. My girls are almost 2 and 4, so everything is scaled down to Target, Old Navy, and dollar section jewelry (I don’t think its worth it to buy expensive stuff and have it ruined, broken, lost, etc). Over the past 4 years, I have made TONS of hair bows, headbands, flower embellishments, and finally and most recently, I undertook making jewelry for them.
*Make sure and keep reading to find out how to get a Jocie Original for FREE!*

I have made jewelry since middle school when I made some pretty ugly and primitive wire and bead bracelets and earrings. I apologize if I gave you these as gifts and, in my enthusiasm, convinced you to wear them. lol. Suffice to say, I do not really know what I am doing when it comes to jewelry.
But, I saw a picture on Pinterest of these beautiful, little girls necklaces for sale on Etsy and thought I could easily replicate them for cheaper than buying them. Sadly, the Pinterest link leads to nowhere, so if you know this Etsy shop owner, let me know, so I can give credit where credit is due!
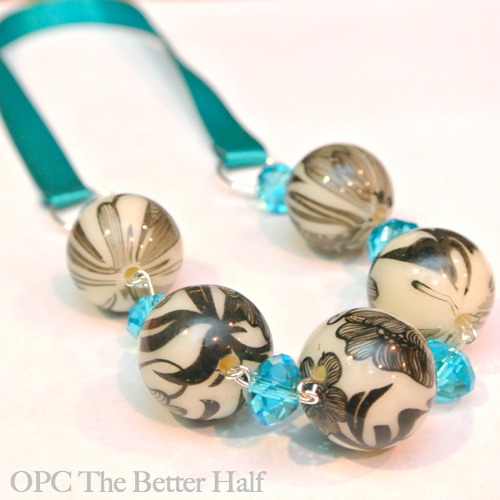
Ribbon and Pearl Necklaces
I have made a few versions of this necklace, making some improvements along the way to make it more child-friendly. It may not be the way the pros do it, but it is simple, cheap, and effective. Here is the way I made the final version.
Supplies Needed
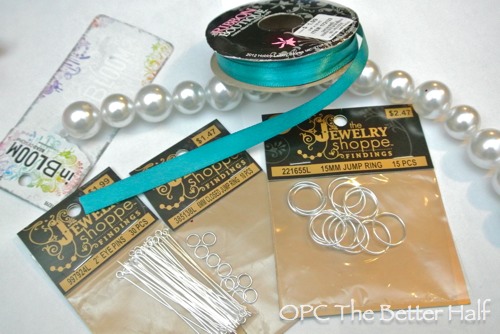
- Ribbon
- 5 Plastic Pearls
- 2″ Eye Rings
- 6MM Closed Jump Rings
- 15 MM Jump Rings
- Hot Glue Gun and Glue
- Velcro Dots
- Round Nose Plier
- Flat Nose Plier
- Wire cutter
Pearl and Wire
First, I threaded one pearl onto one 2″ Eye Ring.
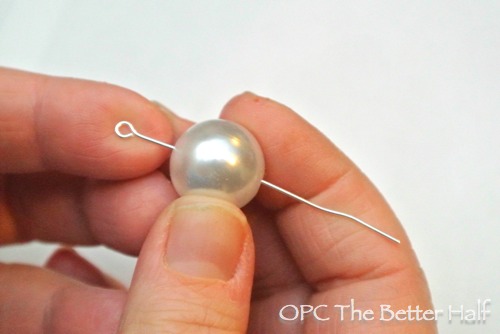
Then, using wire cutters, I cut the 2″ Eye Ring about 1/2″ from the end of the pearl.
Side note, my jewelry pliers I bought years ago for 7 or 8 bucks as a part of a jewelry making kit. They aren’t very expensive and are worth the money spent in the time and frustration you will save yourself!
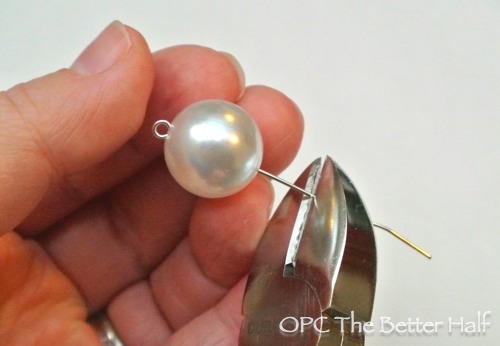
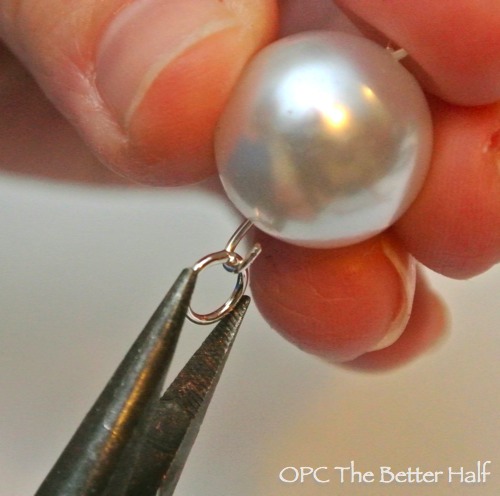
Using the Round Tip Jewelry Pliers, I rounded the end of the 2″ Eye ring until it was halfway closed.
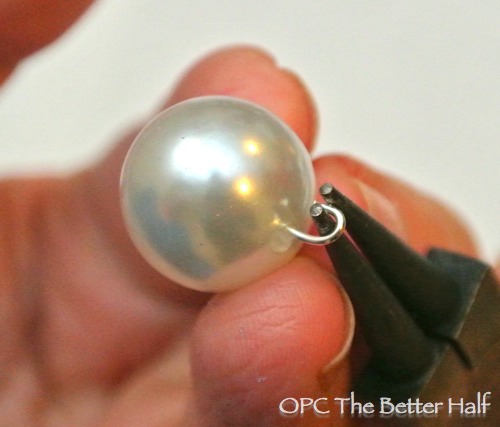
With the help of my flat nose pliers, I picked up a 6MM jump ring and looped it into the halfway open eye ring.
I bought CLOSED jump rings to provide extra strength and durability to the necklace. The jump rings do not need to be open because I was using eye rings on each side.
If the eye ring loop was mostly open, I used the round nose pliers to continue rounding the loop. I then used the flat nose pliers to clamp the opening of the eye ring completely shut.
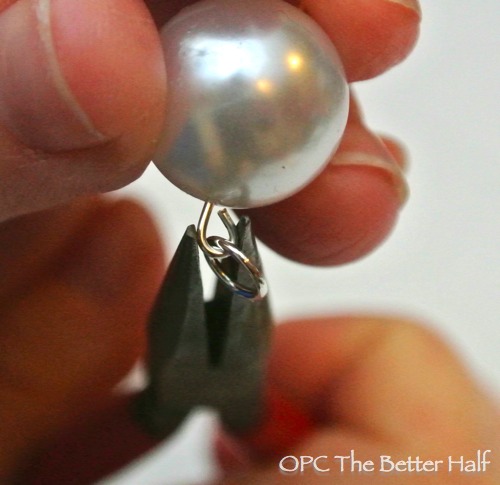
I next grabbed another 2″ eye ring and used my flat nose pliers to slightly open the ring and loop the 2″ eye ring onto the previous 6MM jump ring. Once looped, I used the flat nose pliers to firmly shut the open eye ring.
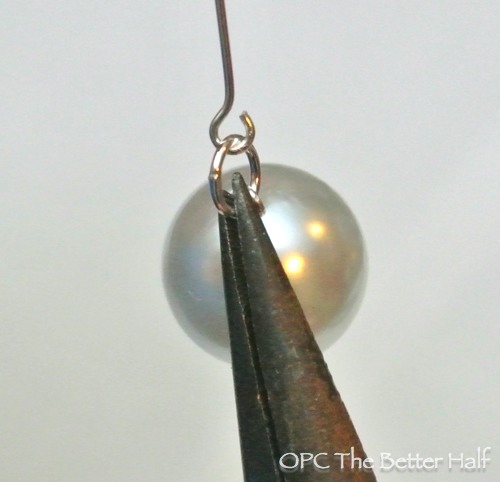
I repeated all the above steps, starting with stringing a pearl onto the eye ring until I had 5 pearls and an eye ring on each end.
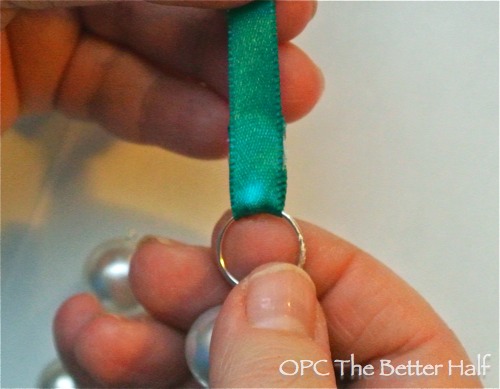
Then, I added a 15 MM Jump Ring to each end, opening the eye ring with my flat nose pliers and looping on the jump ring.
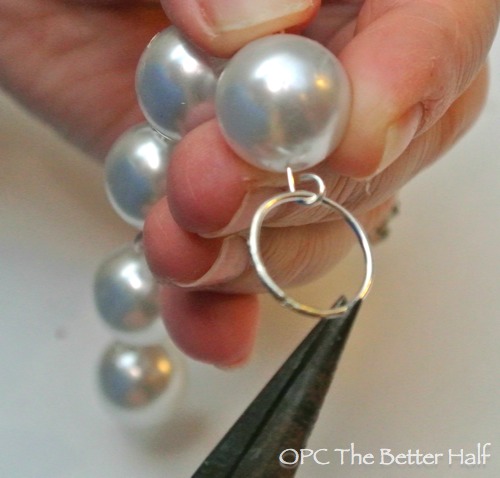
OPTIONAL: For my younger daughter, when she wanted her necklace off, she just pulled it off! AHHH Because I used Open 15 MM Jump Rings, the jump rings stretched open, essentially breaking the necklace. I could not find CLOSED 15 MM Jump Rings anywhere, so I borrowed my dad’s soldering iron to close the rings myself. It doesn’t look amazing up close (because I have no clue what I am doing), but you can’t really see it from a foot away and it keep the necklace from breaking. The jump ring in this photo has been soldered.
Interchangeable Ribbon
The second section of the necklace is far more simple. I picked a fabric ribbon to add to the pearl and wire section of the necklace. This ribbon was a little more narrow than I would have liked, but it was the color I wanted and I couldn’t find a wider ribbon in this color and sheen.
For a children’s necklace, I cut approximately a 6 inch piece of ribbon because I wanted the necklace to lie close to the collar-bone and not dangle too far down. When in doubt, hold the pearl and wire section up to the child where you want the necklace to lie, then measure the remaining length to wrap around the back of the neck.
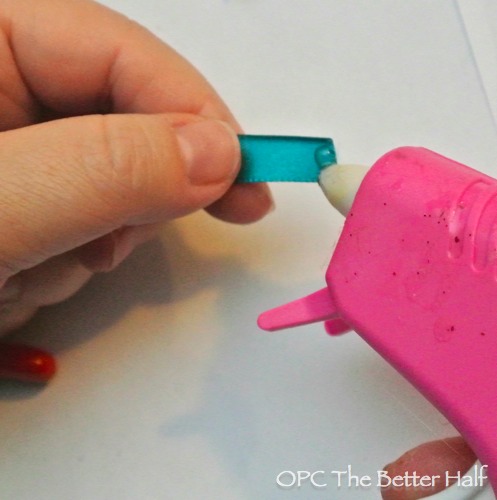
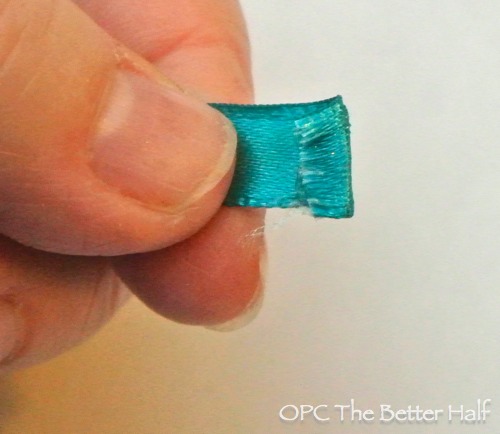
On each side of the ribbon, I placed a VERY SMALL bead of hot glue on the tip and wrapped the edge under to create a cleaner line and keep it from fraying. You could also use nail polish or a stencil cutter to create the same result.
I had played around the idea of how to fasten the ribbon to the wire and pearl portion of the necklace in a way that would look seamless but also allow the necklace to be taken on and off. This was important to me because if the necklace was long enough to be put over the girl’s heads, it dangled too far down. I also hoped that by having a fastener of sorts, it would open if a child pulled on it, rather than breaking.
After searching and playing with a couple of ideas, I came across velcro dots! They are cheap, easy to use for the crafter and the wearer, and do not show. I have been really pleased with the results!
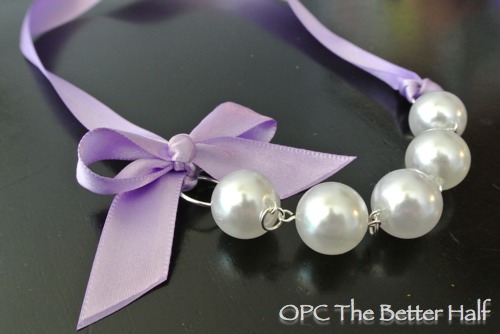
Another great bonus to this design is that the ribbon can be changed out depending on the outfit! woot woot! That means pearls for every outfit with very little extra effort, time, or cost.
Back to the tutorial:
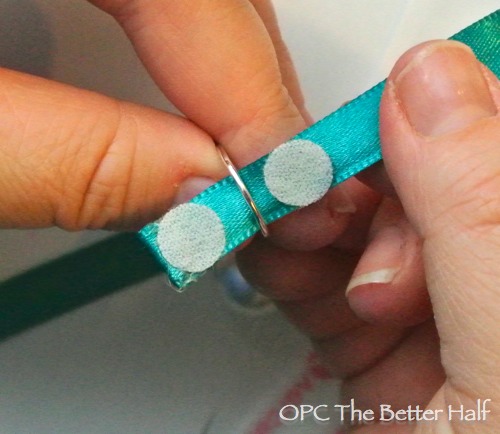
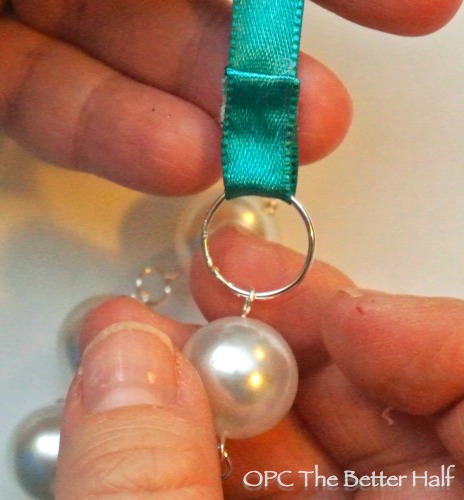
Place one half of a velcro dot onto the back side of the end of the ribbon. Then thread the ribbon through the 15 MM jump ring on one end of the pearl and wire strand. This is just to gauge the placement of the velcro dots.

Allowing little overlap, place the other side of the velcro dot on the opposite side of the jump ring. When velcroed together, no velcro should show.
Once I did this for both sides of the ribbon, attaching them to each side of the pearl and wire section, I added a small bow using the same ribbon. I used hot glue to attach it, which worked like a charm. Although, on one of my necklaces I made for my niece, I didn’t add enough hot glue to the interior of the bow and the bow came untied. Lesson learned: go crazy with the glue! haha
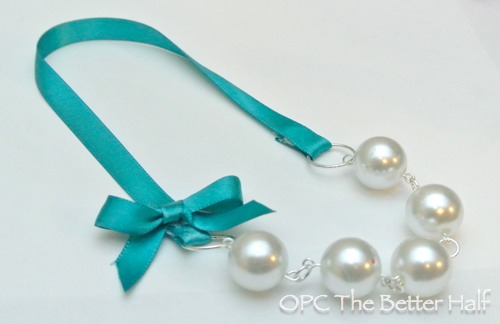
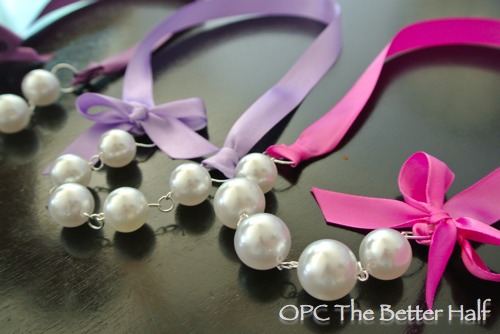
Here are some I made with my friend, Ruth for all our little girls!
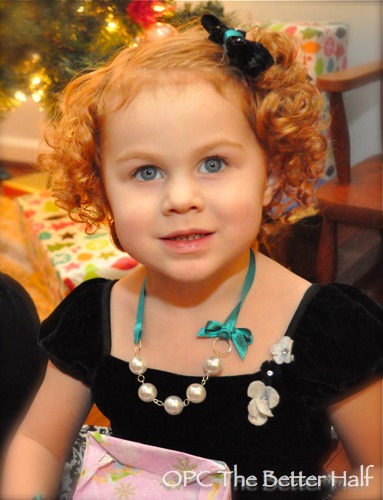
Izzie, my oldest wore hers to go to church Christmas eve and insisted that she wanted a matching bracelet. The bracelet was far less involved – I just strung some small pearls on round elastic and tied a bow on it! She sure was fancy!
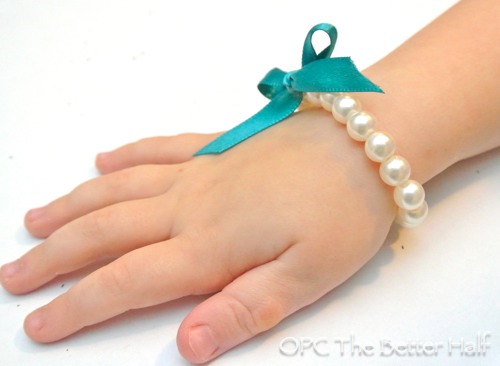
Oops, when Daddy took the pictures, the bow had flipped around, but I promise, it was super cute! Lucy, our youngest refused to wear the necklace (she has BIG opinions these days), so I only have a picture of Izzie. 🙂
And I also made a grown-up version for my mom, so she could match the girl’s on Christmas Eve at church.
Want it FREE?
If you don’t feel like making this on your own, this Aqua Ribbon and Pearl Necklace has been added to our Reader Rewards Center! By commenting on posts and visiting our site, you can get free stuff. No tricks, totally free! To learn more or find out what other cool stuff you can get, visit our Rewards Center Homepage.
What do you think? What are your jewelry making tips?
As always, thanks for reading!

Don’t forget to check us out on Facebook and Pinterest!
Shared this at: Shaken Together Life, One Artsy Mama, Imprintalish, Sewing Barefoot

Those are as cute as can be! Nice job! Adorable model too!
Well done article! One detail I want to add, though, is that you used a lead-free solder to fix those loops. It’s always important to be safety and health conscious!
Cute. I am curious as to why “necklace” is spelled “neckless” in the Rewards Center.
Ghaa! Auto-correct spelling error. Thanks for picking up on that and letting us know.
🙂
This is adorable!! My girls are REALLY into necklaces lately (4 and 5 years old) but I dont have the patience to make one.
Great directions and pics for adorable necklaces!
I love this! I have a huge section in my craft closet with beautiful beads! The ribbon adds the perfect touch!
Thanks so much, Jacque!
Such a cute necklace! Thanks for sharing at my Twirl & Take a Bow Party. Have a great week.
Leslie
I wish I knew how to do this or even fix jewelery I need to go to Michael’s and pick up some supplies and get crafty.
Cute as always.
Oh my! I think my “little” will definitely need one of these when she gets a bit bigger!
Adorable! I haven’t taken a stab at jewelry making before, but this may twist my arm 🙂
This is adorable!! I love it and very classy!! I am hosting a new Pinterest Power party and would love for you to link up this and any other projects that you have!!
http://www.thetaylor-house.com/2013/01/10/pinterest-power-party-1.html
Chrissy
Jocie these are adorable and as always more cute on your daughter. I shared it on facebook so my neice-in-law with three little girls can make some. I’ll be making some to put aside for our granddaughter that’s to be born sometime in April too. 🙂 It’ll be awhile before she can really wear them ofcourse, but not if just for a photo.
How pretty! I wish I had jewelry making talent!
Um, all I have to say is – MY BIRTHDAY IS IN APRIL *wink* I love the grown up one!
Jocie – these are so adorable! I’m sure your girls love them!! Thanks for linking up to the weekly creative 🙂 Have a great week!
Shannon @ Sewing Barefoot
So cute. My son is 3 weeks old, so we are still in the ‘excited for him to have opinions’ phase. I am sure that as soon as he starts having opinions, we will be pining for his ‘vegetative state’ phase again.
Adorable! I hate with the Pin leads to nowhere, but now we can pin this so people can find OPC!
Great tutorial! Izzie looks adorable. The bracelet is cute too.
This is absolutely adorable!!
Thanks for this–I was so frustrated when I found the link on pinterest, but it didn’t go anywhere. I love the Velcro! Can’t wait to make some.
Thank you so much for this! I have been searching for something similar to this but refuse to buy anything, being a crafter myself. I love the Velcro and interchangeable ribbons! Love it!! Thanks!!