
Pouring concrete is on the cusp of what many do-it-yourselfers will tackle, but with the right preparations and knowledge you can really build something worthwhile. It’s not an overly difficult project, especially when you enlist a handful of friends to help. This article covers site selection, digging concerns, tools, materials and techniques we used to pour an 8′ x 12′ slab for a new shed.
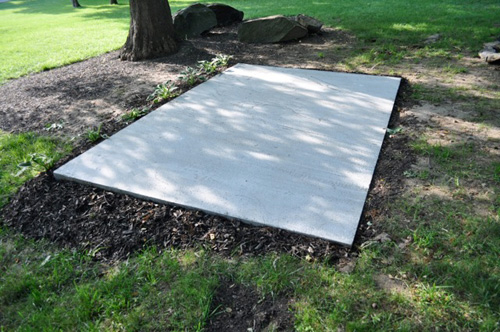
Pouring a shed pad is a great solution for sheds that will be built or delivered onto relatively level ground. For installations on sloped ground, you’ll need to get more creative with a shed foundation designed for slopes and hills. This alternative method for supporting a shed uses post-and-beam construction over poured concrete footers to achieve a level surface for the shed.
Preparation Steps
To achieve a successful pour, there are some preparations that need to take place. Make sure the pad is located in a convenient place, unobstructed by trees or rocks. Do yourself a favor and avoid big slopes that will require lots of digging and more concrete.
Prep Step 1: Locate Underground Lines
After you choose a location, you need to have any underground lines located. In Maryland, we call Miss Utility, but every state will have a similar resource. These services are free, required by law and very simple to use. Call at least 48 hours prior to the start of your project, and they will come out and mark any buried power, communication, gas and water lines. Click here to learn more about digging guidelines, and what the different colors means. Our shed was positioned in a place with no underground lines. That’s why you don’t see anything marked in our pictures.
Prep Step 2: Permits and HOA Rules
It’s important to get the OK from any homeowners association, and, if necessary, obtain a permit. We went about getting approval from the HOA architectural committee and the adjacent neighbors. In our county, an 8′ x 12′ shed does not require a permit. Check local code to make sure you comply.
Prep Step 3: Plan for the Right Weather
Having the right weather can make your concrete pour much easier. We waited for spring to arrive and ground temperatures to rise well above freezing before starting. Concrete can be successfully poured in colder temperatures but you need to use warm water and insulated blankets to ensure the concrete cures properly. We actually had ideal, 70° days and no rain for the entire week.
Tools and Materials
Here are the tools and materials we used to complete this project:
- Tape measure
- 4′ level
- Laser distance measure (pictured below)
- Spray paint (for marking the ground)
- Shovels, garden rake, garden hoe, loppers, water hose, string
- 2′ x 6′ lumber, wooden stakes, screed board, rebar, rebar ties, double-headed nails
- Gravel,
- Concrete (we used Quickrete no. 1006 — see below)
- Concrete mixer
- Handsaw, trowel

For this project, we used QUIKRETE® Crack-Resistant Concrete Mix (No. 1006). It’s a construction grade blend of portland cement, sand, gravel & special reinforcing fibers that reduce shrinkage cracks and improve impact resistance. Check out their full line of products to see which is right for your project. QUICKRETE also has a useful calculator to determine how many bags of concrete you’ll need. We wanted a 4″ x 12′ x 8′ slab and used about 55, 80 lb. bags.
Step 1: Mark the Location of the Shed
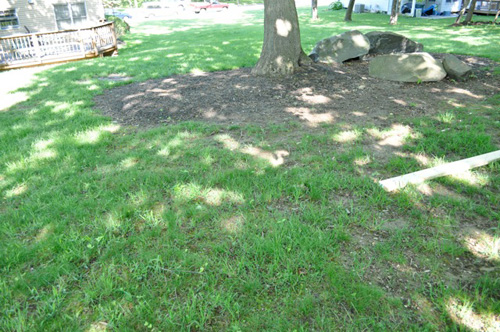
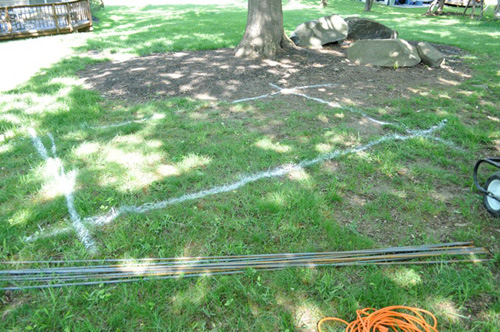
This shed will be placed on the property line and we used a laser distance measurer to ensure we had the right distance from the house. We didn’t want to accidentally end up on the utility easement or a neighbor’s property. Using a tape measure and spray paint, we marked off the location of the concrete pad.
Step 2: Dig Out the Foundation
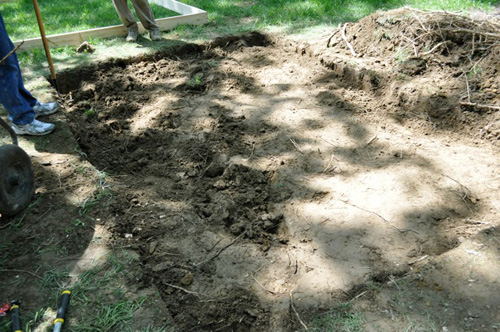
At this point we should have taken a quick measurement of the slope of the ground. This is important because then you’ll know how deep you need to dig. We ended up shuffling the dirt around a bit more than necessary because we dug too deep in certain places. An easy way to find the slope is to put to stakes in the ground with a line between them. Level the line and measure the change in height from the line to the ground.
Regardless, we removed the top layer of earth to get down to more solid ground and ensure the top of our form would sit at least 1″ above ground. We dug deep enough to account for a few inches of gravel and to ensure the slab was 4″ thick. Dig an area bigger than the desired pad because you need room to set the form in place. The loppers came in handy for cutting tree roots and the garden hoe for cutting in the edges.
Step 3: Build the Concrete Form
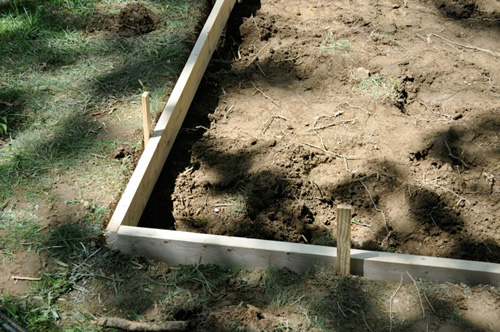
You can purchase kits to make your concrete form, but we choose to stick build it from 2 x 6 boards. The goal was a 12′ x 8′ pad so we purchased two 12′ boards and two 10′ boards and cut them to size. Make sure you get good, straight lumber and keep in mind that the inside measurement is what matters. The form is removed after the concrete cures. Double-headed nails are not a requirement but they are very easy to pull out afterwards.
Step 4: Set the Form in Place and Level
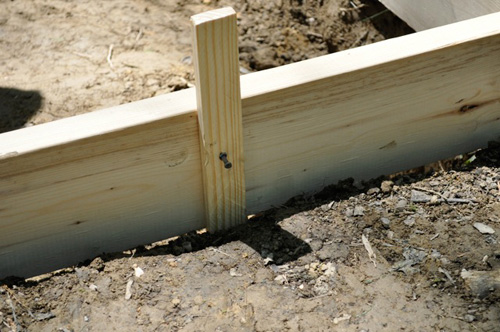
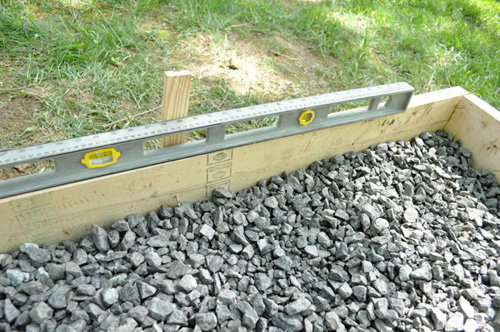
We moved the form in place and began checking to make sure it was square. The easiest way to accomplish this is to measure the distance on the diagonal (from one corner to the opposite). It takes some back-and-forth to make sure they measure the same but this is very important. Next, we hammered a couple wooden stakes on the outside edge of each side of the form. Using the level as a guide, we hammered down or pulled up on the stakes to achieve level. This also takes some back and forth so go slow. Once everything is square and level, introduce a slight slope to allow water to run downhill.
Step 5: Install Gravel to Achieve Uniform 4″ Depth
Gravel is useful for areas with poor drainage because it allows water to run through without eroding the soil. We put down a couple inches of all-purpose gravel being mindful to maintain the 4″ minimum concrete depth.
Step 6: Install Reinforcing Bar
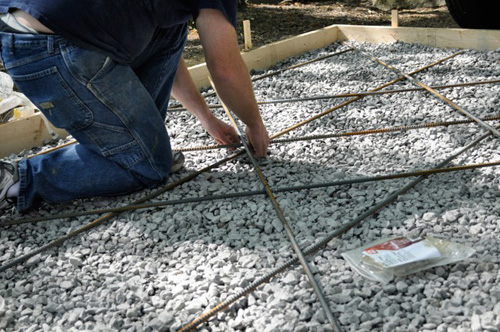
Reinforcing bar (rebar) are ribbed steel bars used to provide tensile strength to concrete. We placed several bars, reaching into each corner and attached to each other with ties.
Step 7: Mist the Gravel and Rebar with Water
Concrete gains strength through the chemical process of hydration as water combines with the Portland cement. There’s a fine balance because you don’t want too much water or too little. Before pouring the concrete, we misted the form and gravel with a hose. You don’t want water to pool together but everything should be wet. Periodically repeat the process as needed.
Step 8: Mix and Pour Concrete
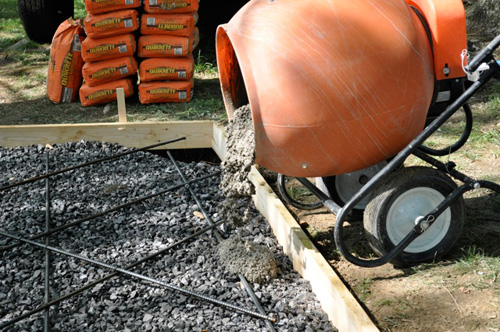
We rented a mixer from Big Orange. It claimed to be able to mix four 80 lb. bags at the same time but we cut it back to two bags to prevent any spills. You can measure out the water and slowly add it being careful not to add too much. We choose to use the hose and slowly add water till it was a mash potato consistency. The mixer was worthwhile because it eliminated un-mixed pockets of concrete and helped us work faster.
As we dumped each batch, two people would use a shovel and garden rack to spread the concrete throughout the form and into the corners. We mixed a lot of concrete till the form was filled just above the brim.
Step 9: Cut Temporary Stakes Level
Use a handsaw to cut the temporary stakes level with the surface of the frame.
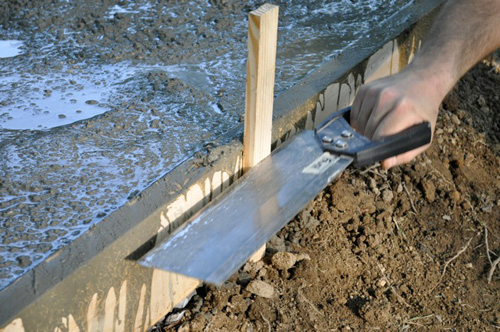
Step 10: Use a Screed Board to Level the Surface
Next, we cut all the wooden stakes so that they didn’t extend over the top of the form. We used a 12′ screed board to strike off the concrete level with the top of our form, making several passes. We worked in a “sawing” fashion, filling in low areas as we progressed from one side to the other.
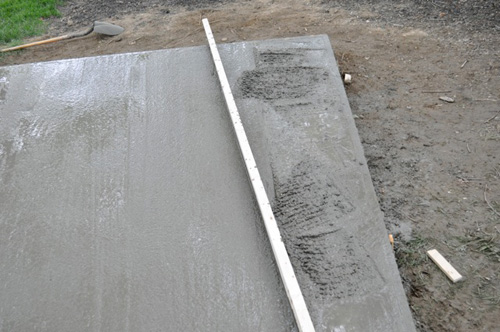
Step 11: Finish and Edge and the Concrete
Our pad is for a shed so we didn’t much care what the surface looked like after it cured. If you’re pouring a stoop, steps or anything else that will be visible, consider using a trowel, float or brush to finish the surface. A brush finish provides texture and is ideal for steps or other areas that will be slippery when wet. A trowel / concrete float finish is usually applied to interior floors. Troweling takes place after the surface moisture has evaporated, and the concrete has lost its sheen. You can also use a bevel tool to create a clean, professional edge. After the concrete has begun to solidify, run the bevel tool around the perimeter.
Step 12: Ensure Proper Curing by Keeping the Concrete Moist
Properly cured concrete is much stronger, and will have a longer lifespan. We mentioned earlier that it’s important to prevent concrete from drying too quickly as that results in a poor bond. There are a couple different methods for curing concrete, and we choose to periodically mist the slab with water over the next few days. Leaving the form in place is another helpful measure for retaining moisture. We were fortunate to have moderate weather for the entire week following.
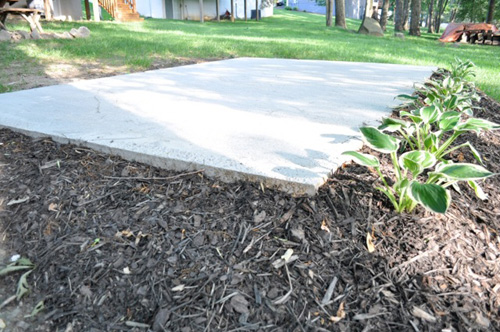
Final Pictures



Great post! Photos and text were just perfect. I have doing bits of construction projects for decades and while the end result is usually great, the process just is not as clean as yours. Certainly a clean job site. OSHA would certainly approve. Thanks again! Dave
WOW, this was so helpful. I wish I had read it before having two small concrete pads poured recently. I will defiinately use it for other projects though. I would love to know what this projects total cost was.
Any idea how to pour a circle?
Thank YOu,
jeannie
Found the article interesting.
jeannie asks about pouring a circle. Circles can be a difficult. It all depend upon how small or large the circle will be. Larger ones can be formed with flexiboard or long runs of masonite siding cut down to the correct height. The siding usually comes 8-12′ wide and 12-16ft long. Just saw the length of it and you have your form. Remember, flexible wood will require many stakes to keep it from shifting when the concrete is poured.
Smaller circles are trickier. You need a form material that is very flexible. I use landscape edging that is made of 4″ x 10ft lengths of thin metal. These I picked up at a Home Depot type home improvement center.
Good Luck
Hey Huaa,
Thanks for the additional info. It sounds like you’ve got some experience with all this, and we always appreciate good reader insight. I don’t think I’ve seen you comment before, and I hope you’ll stop by again.
Nice tutorial. For a slab this size, another good way to keep moisture in while it cures is just to drape plastic over it. a $10 roll of painters drop sheeting will do the trick. It doesn’t need to be thick, it just needs to keep the concrete wet.
Had a shed pad poured 12×15 by a concrete contractor and its 5.5 inch out of level from one side to other. I don’t trust him to fix how can I know it’s fixed properlly
What are the dimensions of the wooden stakes?
I know this article is a little old, but I hope that you might still check the replies? I have a couple of questions…I am desperately trying to level out the ground underneath where I am going to lay pavers. The process is similar to that of preparing the ground for pouring concrete and I know how to do the steps following leveling the ground initially, but I am having difficulies understanding how to do so. As I sit now, I’ve got my area dug out, but it’s not evenly dug out and is quite frustrating because I feel like I’m “digging in circles” so to speak trying to level the area. I’m about to just give up to be honest, (which I guess is why I’m reaching out to someone many miles away for help lol).
I really appreciate your detail in your article, there were a couple of things you said that actually made sense to me (unlike the 100s of other videos/posts/blogs I’ve tried learning/getting information or instructions from). One thing that ESPECIALLY made more sense than any other method was how you got your shed base square by measuring the distance across from corner to opposite corner (diagonally) until they were the same measurement. My question is this, since yours was an 8×10 shed, and there is the pythagorean theorem that says that a^2 + b^2 = c^2 (in which a is 8, b is 10 in your shed foundation). I am a math nerd and so this theorem is very familiar to me abd i use it wuite often to solve equations with stidents i tutor, but in case you arent, basically I’m wanting to know if your diagonal measurements you used to square your foundation ended up being roughly 12.81 ft (which would be the “c” in the theorem) each? If this is so, and it should be I think, then that helps me a lot on the squaring of my project, which is the next step, but I can’t get past the leveling 🙁
I realize this is a very strange request, but your article is the first and only one that halfway actually explained HOW you leveled and how you squared your area, which is what I’m not understanding……..so……. If you could, PLEASE help me figure out what I am doing wrong! my email is [removed] and if you email me I would like to give you my phone number so that I could better explain and also better listen to your ideas or suggestions on what it is I’m doing wrong. It’s getting cold and irrally want to get this finished before it turns completely cold and impossible for me to work outside til spring! You would have a follower and a promoter of your blog for life if you really respond to me about this, no doubt, but I know its a long shot…..so i understand if you don’t :/
I much appreciate this article!!! And I’d very very very much so would LOVE your insight on my project if you don’t mind helping me figure things out a little 🙂
Thank you,
Brittany
Hi Brittany,
Your Pythagorean Theorem for 8’x10′ is 12.81′, but Ethan was making a 8’x12′ concrete pad which is 14.42′.
Make the box square using your 14.42′ strings or ropes. Spread gravel to level the ground and then rebar or mesh. Lots of people use mesh and I see the only challenge is to keep it in the middle about 2″ deep in the slab.
Did you section it off and pour it in increments? How did you mix, pour and float 55 bags of product with only one mixer?
We worked fast, but actually the set time on this concrete was a few hours – so by working diligently, we just didn’t run into any problems.
This is a very well written, easily understood, yet detailed article. I think that this will help us immensely, when my husband and I start on our own project. Thanks : )
The best article on pouting s concrete pad for a shed. Hands down
Thank you for such a fantastic description on how you accomplished your slab. Too many times steps aren’t there and it’s always the one’s I needed! How would you go about pouring a slab in a garage with a dirt floor? I’m not made of money which is what the concrete companies think with overpriced quotes they give you. So I’m curious to see if this same technique would apply in my situation? I’m all about DIY and not afraid of hard work so any tips would be awesome! Thank you again.
Sure, the principal applies, you just need 10x more mixers to do it quickly………. all the work and time and people you’ll have to pay…….
Do the math first, and maybe you wont think they are trying to rip you off but trying to save you from having a crappy garage floor.
Great write up. My only comment is that the rebar should not be laid on top of the gravel bed. It should be set up on plastic chairs (though small concrete blocks would do in this application) so that it actually ends up within the slab and not essentially underneath it.
What about drainage? do you need a slight slope for runoff? I’m concerned water will collect under the shed.
To have square
just make both diagonals the same
I really l8ked your step by step directions but as a master gardener I wonder why you didn’t look at the placement of the pad being so close to the trunk. I don’t know what kind of tree it is but I’m pretty sure you’re gonna have some root impeadance down the road
My guess, would be that although this would be useful for a shed, it’s probably more for a bench and what better place to set a bench than under a tree.
Hi there,
First off, wonderful article. It was well detailed and covered most of the common trouble areas. I was wondering however if you had any advice for prepping a site that is extremely uneven. Our neighborhood was quite literally built on the side of a cliff and it really shows when doing any kind of landscaping or construction work around the house. The ground on my property is mostly rock and clay with a dramatic slope into the neighboring property. In the area where I would like to place my shed, there is a 6in drop over 2 feet up to the neighbors fence. Any advice for dealing with this sort of leveling would be much appreciated.
I’m putting up an 8 x 10 ft shed so the concrete base should be 8 x 10 correct?
Thank you.