

Hi there OPC Readers! It’s Katie from Upcycled Treasures and today I will be sharing how I upcycled an old side table into a chalkboard clock DIY style.

A clock wasn’t my first intention for this $4 thrift store find I purchased nearly a year ago.

However, being that only parts of the table were made of real wood, I decided to paint it with primer, followed by paint, not realizing that the primer needed more time to cure. The end result? Paint that peeled right off. Woops. At least it stuck to the table top.
I also later realized that there was damage to the bottom of the table. So I moved the table onto it’s side to see if I could fix it, only when I looked straight at the table top I saw something else… a clock! I immediately dismantled the table with a screwdriver and set the top aside.

Of course I went back and forth as to what kind of clock I wanted before I did anything to it. French, nautical, vintage? Being indecisive actually led me to my final decision, to make it a chalkboard clock! This way I can change it whenever I want.
After I had removed the top from the table there were holes in the back where the screws were. No one will see the back since it will be facing the wall, but I filled those in with putty and then sanded over them anyway.
I already had a small clock kit on hand, but purchased a high torque clock kit from Hobby Lobby since I wanted larger clock hands. I did end up using the “second” hand from my smaller clock kit though, since the larger one didn’t come with it.

I painted the clock with 3 coats of chalkboard spray paint, letting it dry in between coats.

Afterwards I measured out the center point and drilled a hole for the clock kit to go through. However, drilling first would be much smarter and you won’t have to worry about touch-ups 🙂

I then added a frame hanger to the back, which I already had on hand.

The clock kit tells you what size your clock needs to be for it to fit through. I realized I needed to sand the back of the table top down a bit to make the clock kit fit properly.

Afterwards, I painted one more coat of chalkboard paint to the front of the clock to clean it up a bit.

Once it was dry, I seasoned it with chalk to avoid “ghost marks”. So I essentially rubbed chalk all over the clock, and then wiped it off with a rag.

While working on this project I actually came across this Pottery Barn Clock which instantly inspired me. I wanted to embrace the indent circle that goes around the entire table top, and felt that double circles would do the trick. To create the inner circle I used a lamp shade {thrift store find for a future project and I already removed the “shade” part}, placed it in the center and traced around it with chalk.

I then went over the indented circle with chalk.

Since I needed more contrast with my clock hands I painted them with some Paris Grey chalk paint.


I then measured out and marked where to place my numbers. You could simply draw your numbers on with chalk, but I decided to use the chalk transfer method, which you can read more about here. I used a small, dry paintbrush to clean up the chalk a bit.

I then re-traced my circles.


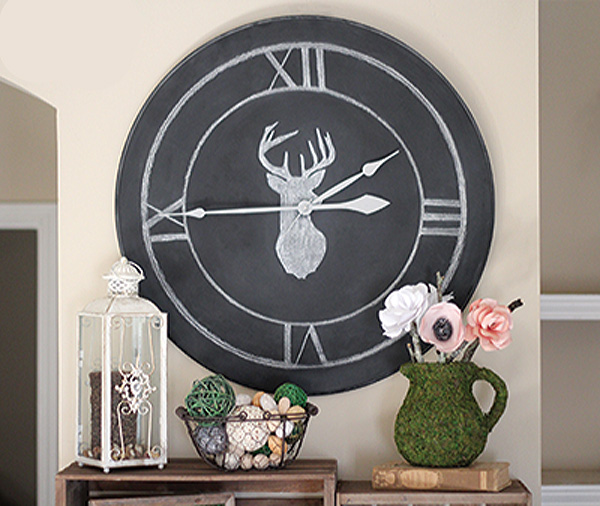
I knew I wanted to add something to the center of the clock, so I went with a deer silhouette using the chalkboard transfer method again.

This is what it looked like before I cleaned it up with a small, dry paintbrush.

To avoid the chalk smearing once I was all finished I sprayed it with a couple light coats of Aqua-net hairspray. I originally tested out some other hairspray I had but it came out in spritz and left marks on the chalkboard. So be sure to test your hairspray first! I stood about 12-15 inches away from the clock and sprayed a couple very light coats.
And here she is all finished and hung up, woo-hoo!

Here is the before and after:

So what do you think?
Thanks so much for reading along on this Chalkboard Clock DIY,


Yeah. That’s awesome.
Hi Katie, love your chalkboard clock and great tutorial!! Oooooh but I’m liking that thrift store table too – could’ve have some great fun with that little baby!
This is so cute! What a great job upcycling the table!
This turned out beautifully! I absolutely love it! Definitely want my own!
Awesome project! I love the deer in the middle. Great touch!