
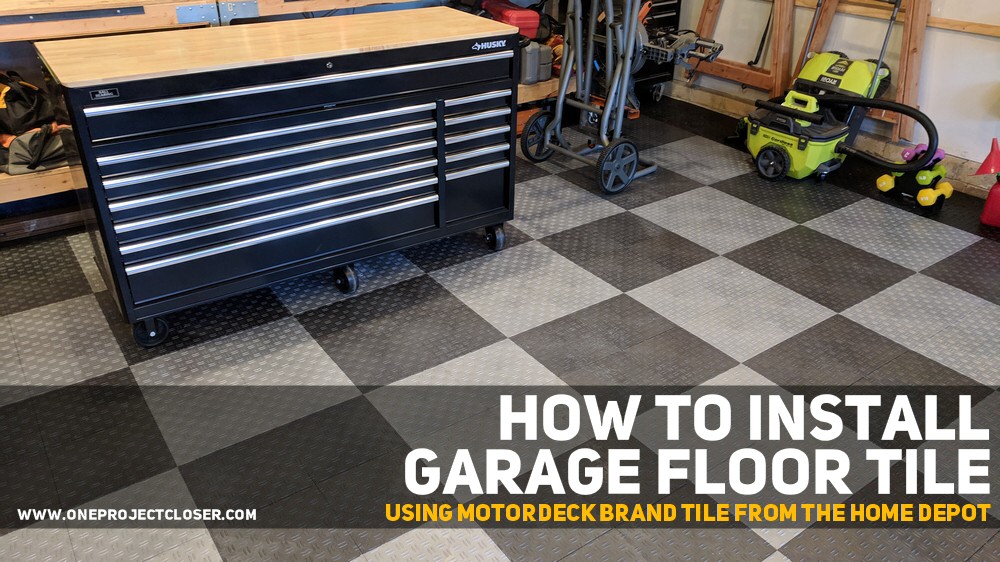
This post was sponsored by The Home Depot. We love THD and do about 95% of our home improvement shopping there (whether they’re sponsoring us or not). It doesn’t hurt that their nearest store is about 5 minutes from our house! Today’s article is about the installation of Motordeck brand polypropylene tile flooring, a product available exclusively at Home Depot’s online store. Remember, always check our Home Depot Coupons page for the latest deals from the Depot!
Our Workshop Floor Situation
If you’ve been reading here for awhile, you know that the One Project Closer workshop is actually a two-car garage attached to the side of my house. About six years ago we applied an epoxy garage floor coating to this floor. It held up well for about three years. In years four and five we saw a significant amount of flaking. By year six we had significant flaking and knew we needed another solution.
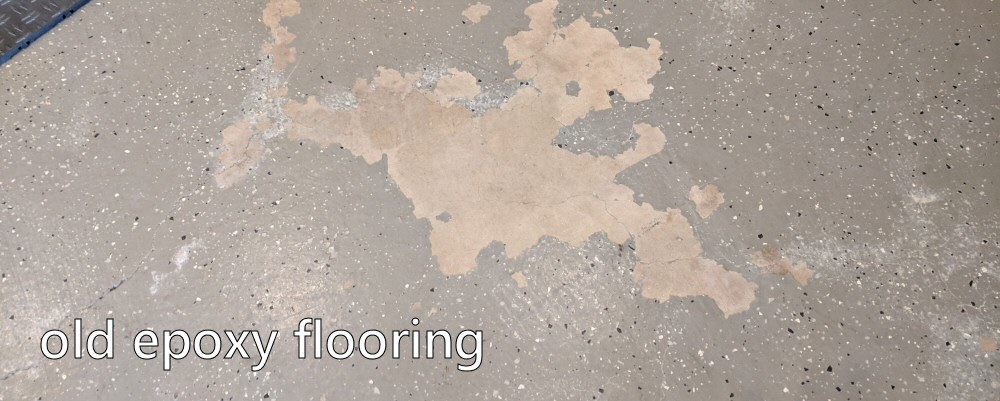
There are plenty of sites online that warn about DIY epoxy kits not holding up, especially on older garage floors. The reality is that when we applied that coating our garage floor was already 25 years old and there was simply no way to get all of the oil out of the slab. If you can’t fully clean the slab, you are guaranteed to have problems with an epoxy coating adhering over time.
So I went looking for another solution that would make our workshop floor look good. Specifically I wanted a product that would:
- Look really good, since we take a lot of photos in our garage
- Not require significant prep work or be dependent on a “clean” slab to work
- Be able to handle the load of cars and rolling tool chests without issue
- Last for at least 10 years
- Be simple to install (not a requirement, but definitely a preference)
Garage Floor Tile Types
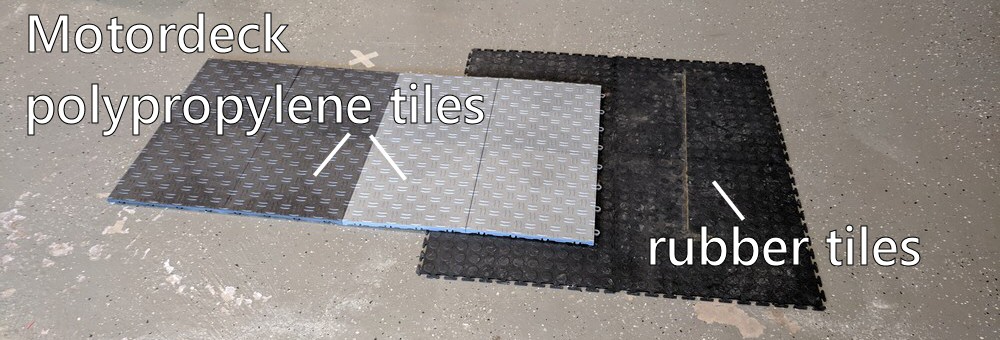
If you search around online, you’ll find that this list of criteria is fully met in a range of garage floor tiles. These tiles come in two primary varieties: rubber and polypropylene (plastic). We bought a few sample tiles just to see how they performed sitting on our shop floor for a few weeks.
Both rubber and polypropylene tiles:
- come in square tile sections (typically 12″ x 12″ up to 20″ x 20″ tiles).
- “float” directly on the garage floor (i.e., they are not glued down).
- require almost no preparation of the flooring surface.
- can handle automobile and rolling tool chest loads.
- run between $2-$4 / square foot – with polypropylene typically more expensive.
The major differences between the flooring:
- Rubber tiles typically have a surface-visible interlocking mechanism that makes them easier to replace but also is not as strong as the plastic interlocking mechanism.
- Rubber tiles are a little quieter to walk on since the polypropylene tiles “click” against the concrete slab (we found a way to help abate this described below).
- Rubber tiles get dirty more easily, and because they have a surface interlocking mechanism don’t look as “clean” as the polypropylene tiles. (Ultimately this was a major reason we chose the polypropylene tile.)
- Rubber tiles are slightly harder to keep clean.
Our Selection: Motordeck Tiles from Home Depot
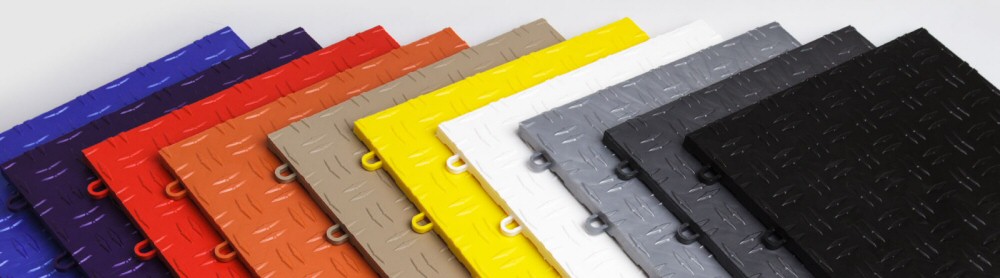
We selected Motordeck tiles not only because polypropylene tiles have the look we wanted for the workshop, but also because they are backed by a 12 year limited warranty (e.g., the manufacturer will replace a tile that breaks or warps under load for 12 years after purchase).
Motordeck tiles come in ten colors and can mixed and matched in your design.
Planning a Tile Design for the Garage Floor
After deciding on Motordeck, I was very excited to begin planning the pattern for the floor. Our garage is approximately 22′ x 22′ (484 sq. ft.). I decided to use Microsoft PowerPoint to design the floor, basically by creating a grid of small squares (each representing as 12″ x 12″ tile) and coloring them using the “fill color” tool in PowerPoint.
You can download my PowerPoint Tile Design Ideas file if you’d like something to start with for your own design.
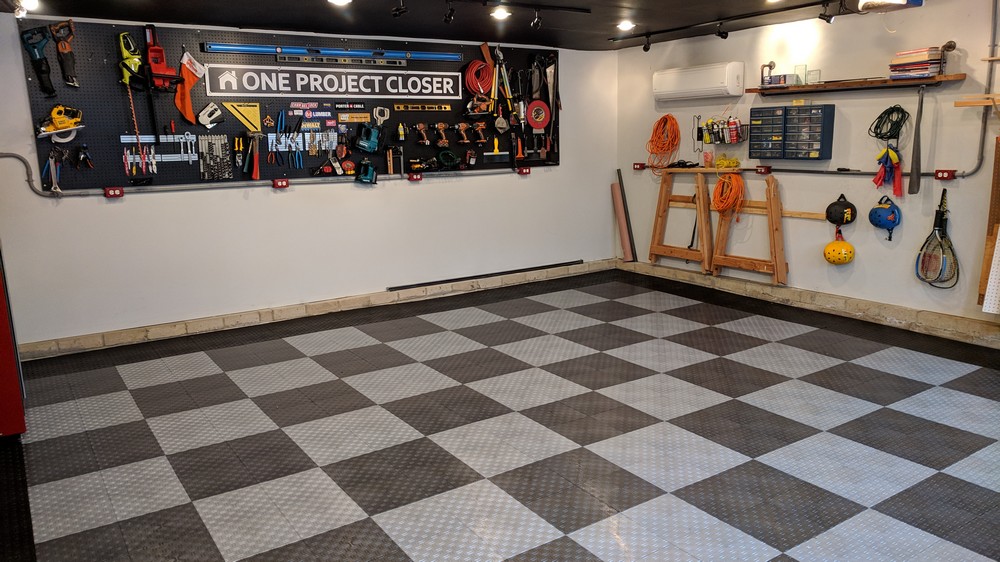
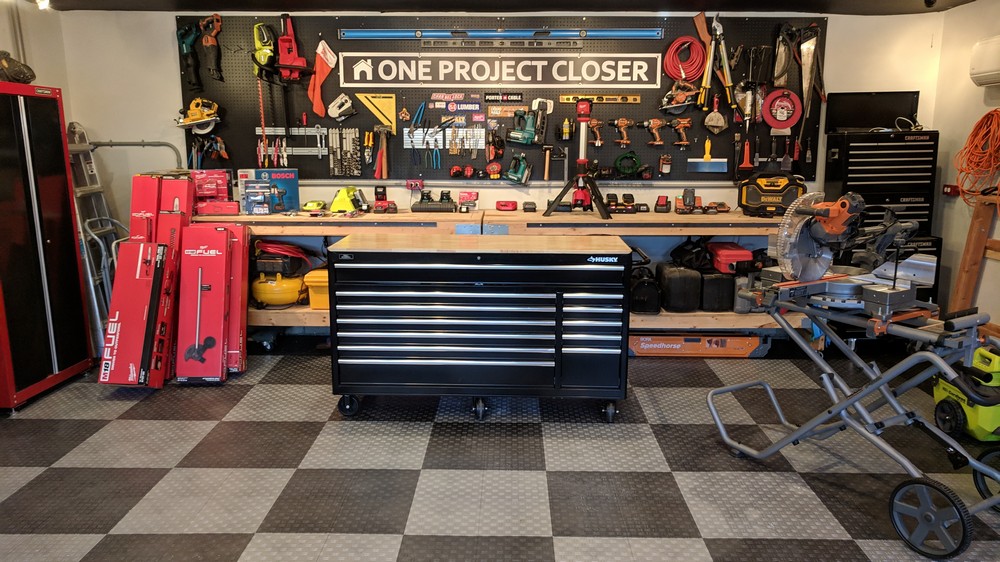
The sky is the limit with regards to tile design – you can do anything from individual tile patterns to 8-bit art drawings. We knew we wanted the floor to be predominately greys and blacks to match our color scheme on the blog. We also knew we wanted something that wouldn’t detract from photographs and would also hide dirt and dust.
Ultimately we went with the simple (some might say “boring”) pattern in the upper left.

Beware Complex Designs!
The one good thing about picking the simple pattern: it turns out Motordeck tile is shipped in 2 x 2 squares (i.e., four tiles are pre-attached to one another for a 24″ x 24″ block). If you choose a design that uses individual 12 x 12 tiles (as many do above), you’ll have to separate the tiles before you lay them, and as we learned during the install, separating tiles is a pain.
Tools & Materials You’ll Need for the Install
- Motordeck Polypropylene Tile Flooring in the quantity needed for your design
- Motordeck entry tiles (for the area that faces the garage doors)
- Landscaping fabric (optional) (we recommend 2x the square footage of your floor so it can be doubled-up)
- Table saw (preferable) or miter saw w/ at least 12″ cut capability. An all-purpose blade will work.
- Note: a table saw will allow you to cut the 24″ x 24″ tile sheets for up against walls. A miter saw will require you to separate the tiles in 12″ x 12″ individual tiles to cut, which is a pain.
- Scissors (for cutting landscaping fabric)
- Vacuum (for cleanup after cutting)
- Broom (for prepping the floor)
Garage Tile Flooring Installation Instructions
Step 1: Prepare the Floor for the Installation
The best part about polypropylene tiles is that they require very little installation preparation. Clear everything out of the floor and sweep the room clean.
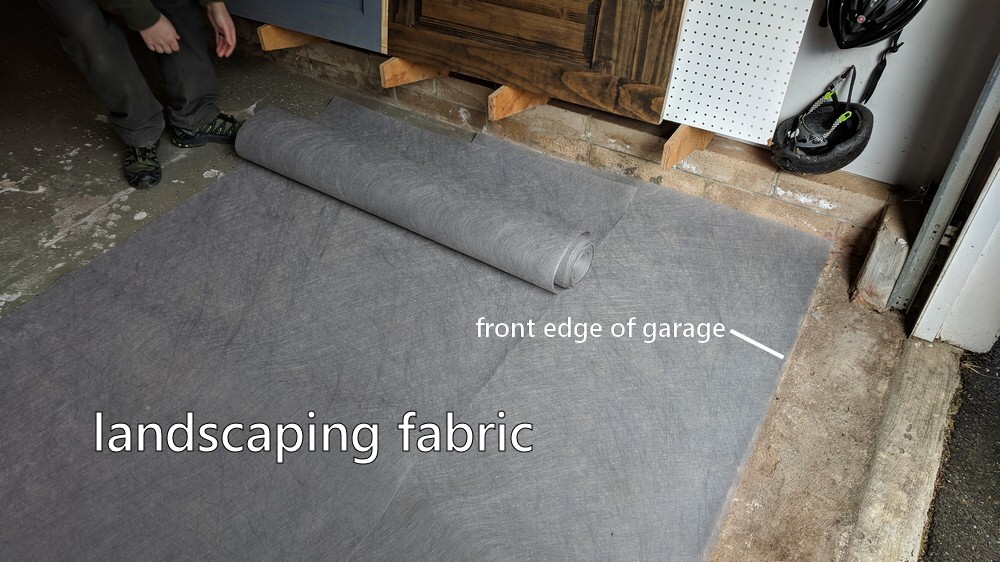
Step 2: Roll out Landscaping Fabric
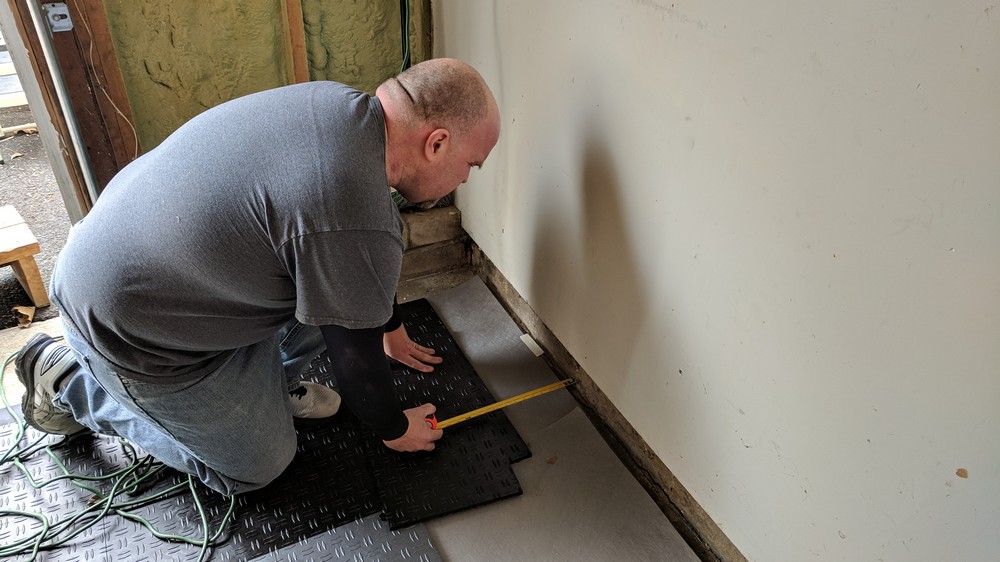
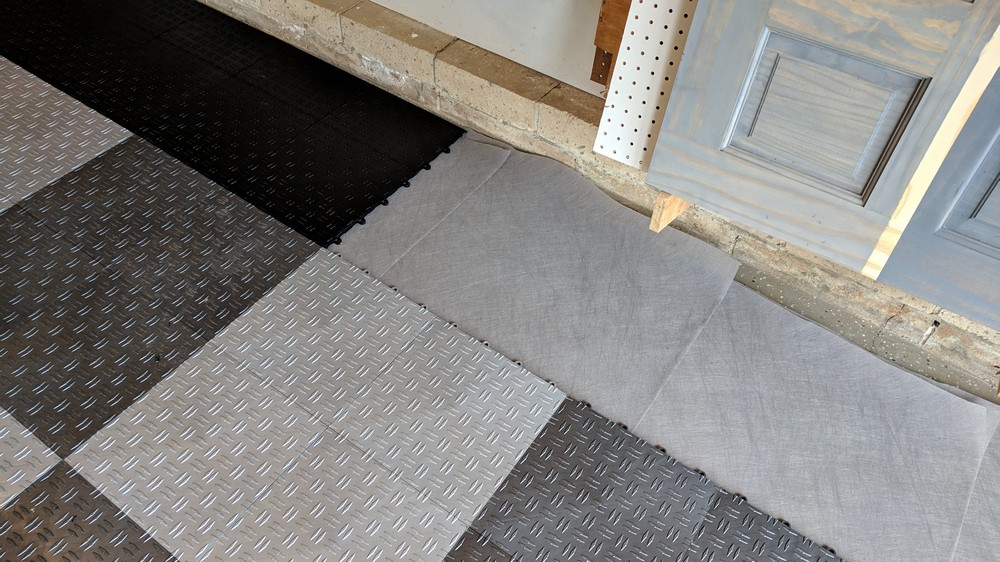
This is a completely optional step, but we found that landscaping fabric significantly muted the “clicking” sound between the tile and the garage floor, and that doubling up the landscape fabric had an even better muting effect on the floor. You don’t have to be exceptionally precise with the fabric, as you rarely walk up against a wall. We rough cut the fabric leaving an inch or two gap up against the wall.
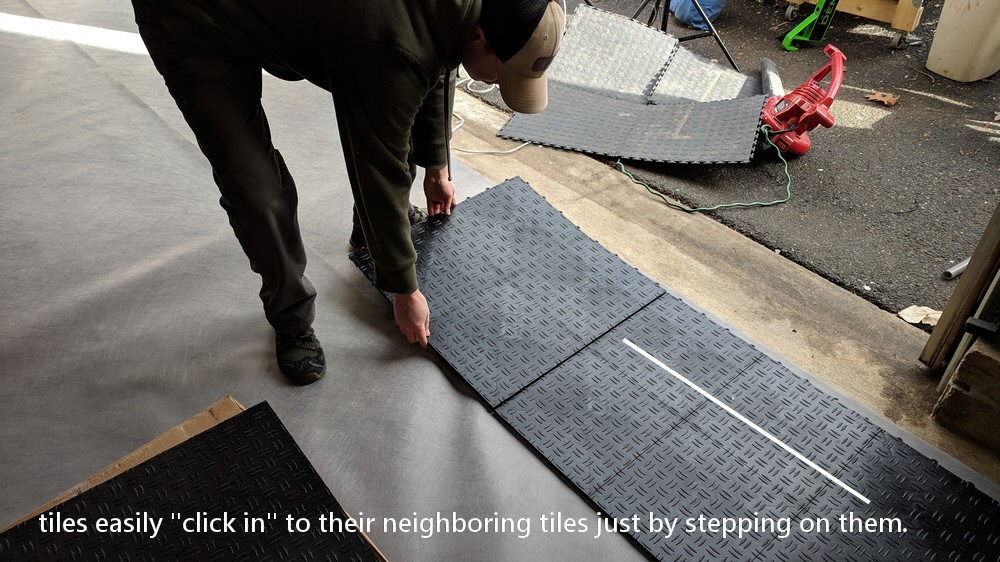
Step 3: Start Laying Tile According to Your Pattern
One of the things we liked best about Motordeck tile is it can be laid starting at any end of your garage. We started at the front end of the garage with a whole row of tiles.
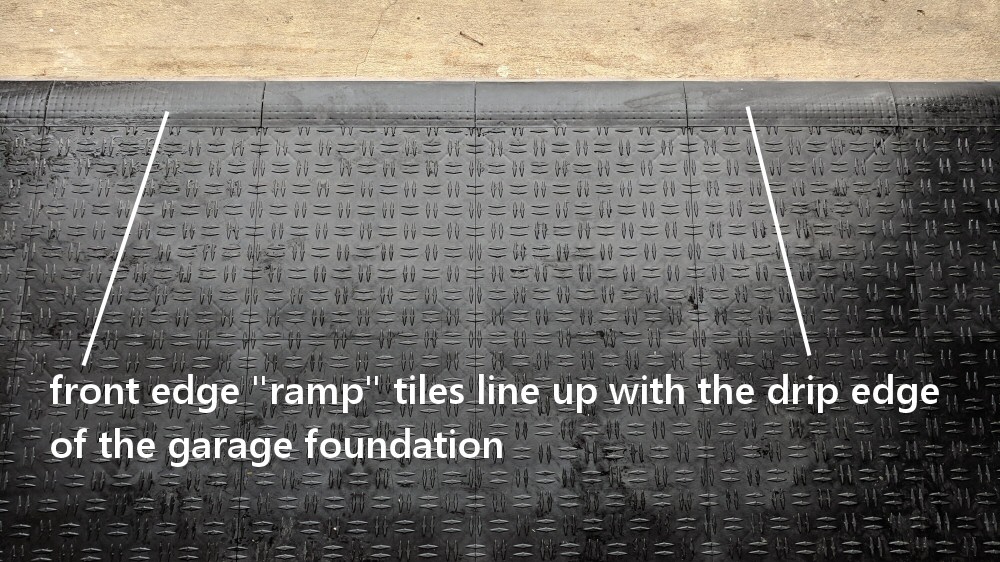
Then we connected the front ramp tiles, aligning them with the front edge of the garage floor.
The tiles snap together very easily. You just lay the tiles adjacent to the laid floor and then “snap” the hooks from one set of tiles into the loops on the other set.
When the floor is relatively small it’s easy to reposition it. As the contiguous floor gets larger, the weight of the tiles becomes noticeable and the tile group gets much harder to move. After you’ve connected 20-30 tiles, make sure the floor is in the position it should be as it will be impossible to move after that.
Step 4: Continue to Lay the Tiles
In our installation we decided to lay all tiles that did not require cuts first. It’s definitely easier to set up the table saw one time at the end of the installation and knock out all the cuts at once.

Step 5: Cut Tiles to Fit Against Walls and Obstacles
The final part of the installation involves cutting tiles to fit against walls and obstacles. Motordeck tiles cut very easily with an all-purpose blade on a table saw. The only thing to remember is Motordeck recommends a 1/2″ expansion space against each wall – so cut the tiles to leave that small gap all the way around the perimeter.
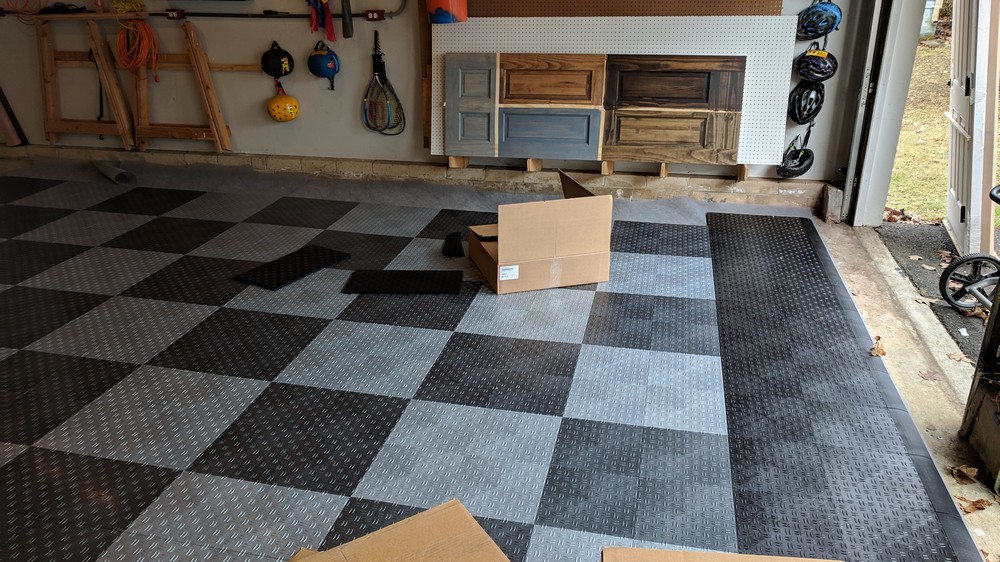
Step 6: Cleanup and Marvel at Your New Floor!
Installation really is simple. We completed our 420 sq. ft. floor in just five hours and that included taking photos and videos as we worked. As long as your installation pattern is simple (so that you don’t have to break apart the two-by-two tile groups, we think you can lay about 100-150 sq. ft. per hour depending on obstacles.
Total Cost to Install Motordeck Flooring
Motordeck’s tiles range from $2.90 – $3.04 per square foot (the colors have slightly different prices). We purchased a little more than 484 sq. ft. since Motordeck is sold in 24 sq. ft. packs (basically 6 sheets of 4 pre-connected tiles). Due to the pattern we chose, we ended up with a total of about 24 sq. ft. of waste comprising a few of each of the black, grey, and dark grey tiles.
21 boxes of tiles + 1 set of “trim tiles” + landscape fabric = just shy of $1,800 for this two car garage.
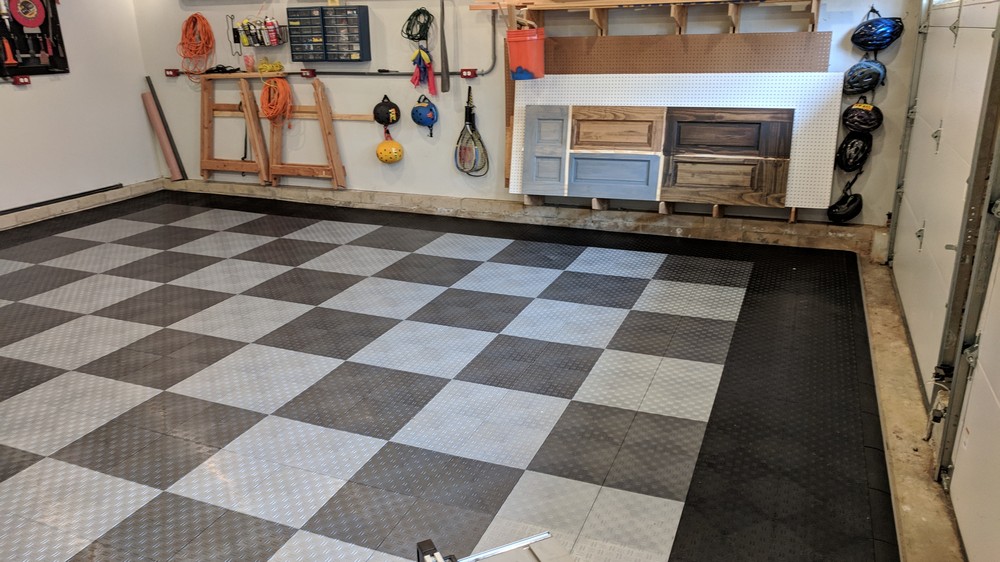
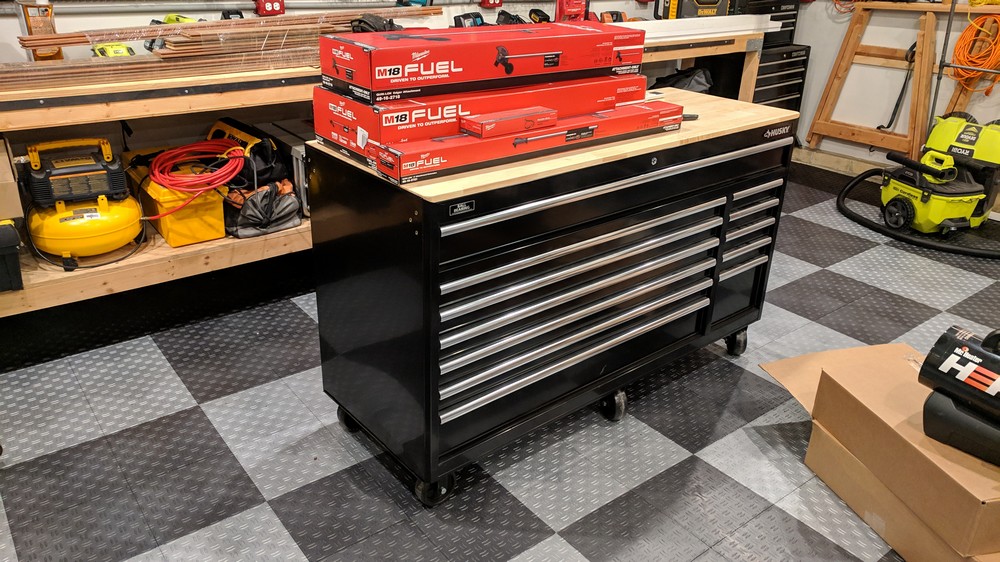
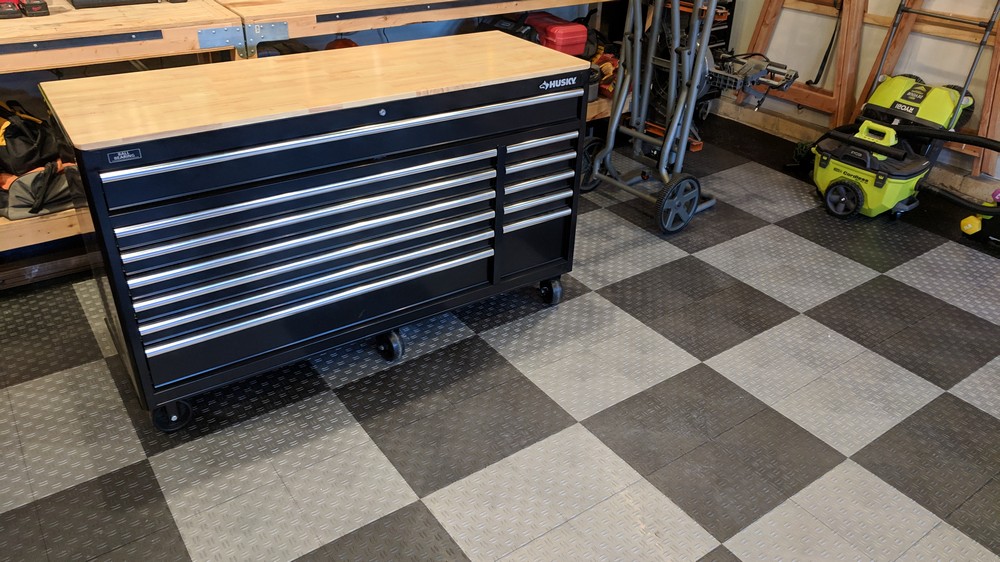
The Finished Project w/ Stuff Moved In
We’re loving this new floor! It feels and looks great. Our tool chests move around with ease (which is something we were concerned about with the install). Overall the Motordeck has classed up our garage/workshop quite a bit!
Links for Buying Motordeck Tile @ The Home Depot
Motordeck Tile is available exclusively at The Home Depot and comes in 10 colors as well as two patterns (double diamond plate and coin). These links are affiliate links, so if you buy any product through these we get a small commission. We always appreciate it when you use our links to buy things as it helps us keep producing these guides and reviews!
Double-diamond plate style tiles:
- Black Double Diamond Plate
- Alloy (Light Grey) Double Diamond Plate
- Graphite (Dark Grey) Double Diamond Plate
- Red Double Diamond Plate
- Royal Blue Double Diamond Plate
Coin-patterned style tiles:
- Black Coin Tile
- Alloy (Light Grey) Coin Tile
- Graphite (Dark Grey) Coin Tile
- Red Coin Tile
- Royal Blue Coin Tile
If you have an entry into the room you’re finishing, you’ll need an edging kit. Edging kits come in male and female varieties for use on either the hoop or peg side of the tiles.
Male Edging Kits:
Female Edging Kits:

What in the world is that yellow, blue and black crazy pattern in the examples. I’ve been looking at it for a while trying to figure out what I’m missing. Ha! Shop space looks great!
Adam
That was my idea for fire and water fighting each other from two different sides of the floor!
What happens with melting snow?
How does it handle oil drips ?
Is the poly flooring strong enough to allow a loaded engine hoist to be wheeled around?
Thanks
All good questions, Ted.
Melting snow – most will evaporate; however, I have read some posts that if excessive it can get between the tiles and get trapped. I have read about folks needing to pull up some tile temporarily to dry things out after a musty smell. The tiles are definitely not completely water tight when snapped.
Oil – haven’t tested with dirty oil yet but clean oil just wipes off and I suspect as long as you don’t let it sit for an excessive period you’ll be OK with dirty oil. The tiles clean nicely.
Loaded Engine hoist – yes – you should be fine. Tiles are rated for 44,000 lbs/sq. ft. – The big issue is you can’t use jack stands with too small of a surface area under their legs – you’ll need to put some plywood under the stand to distribute the weight across the tile.
How do I know if I need to order male or female edging?
You pick one and you start your tiling according to them. One side of the tile is male, the other female.
Hi I read your great installation article. I bought the Motor Deck Diamond Alloy Modular Tile for my garage floor with Threshold trim My garage dimension is 17 feet by 18 feet. You mentioned to get landscape fabric. Could you let me know which one to buy at Home Depot, the one you had on the photo is the same color of the tile. And how much I would need. I have never done anything like that. Actually I live in Los Angeles and if you knew of someone who could install it for me that would be awesome
Thank you so much
Would these tiles be suitable for an outside upper deck?
The underside of these tiles are designed to allow air flow to avoid mold and mildew or moisture buildup under the tile. Would the landscape fabric interfere with this process?