

Thank you so much for joining us at One Project Closer for this tutorial on How to Make a Modern DIY House Number Sign. This post in sponsored by the Home Depot Prospective Campaign. Post may also contain affiliate links. Opinions (and typos) are 100% our own, and we appreciate you supporting our site in order to continue to provide free content to our readers.
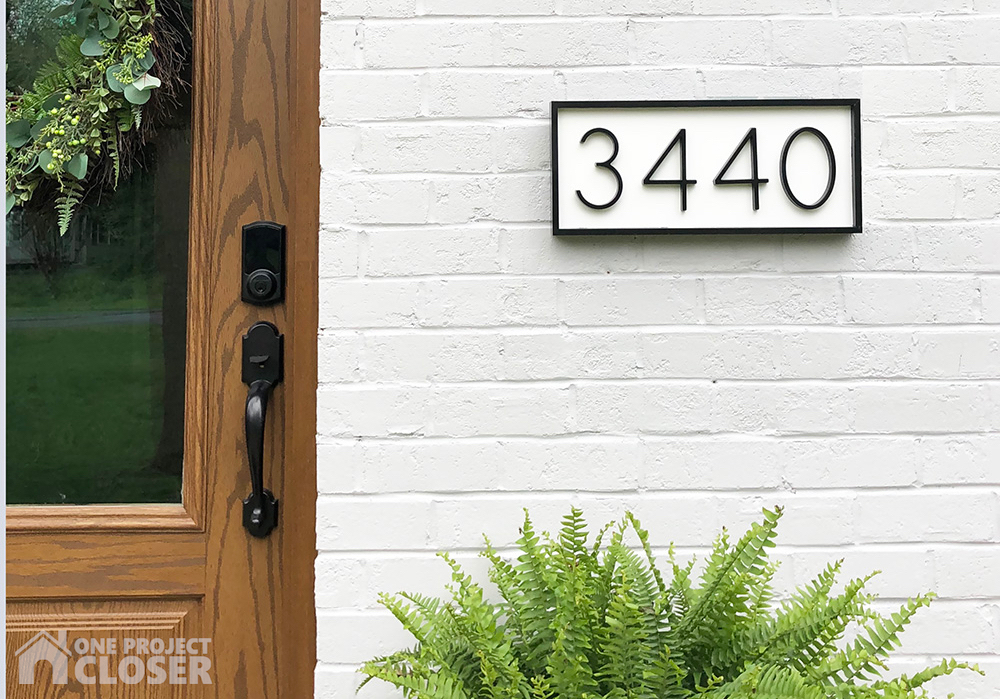
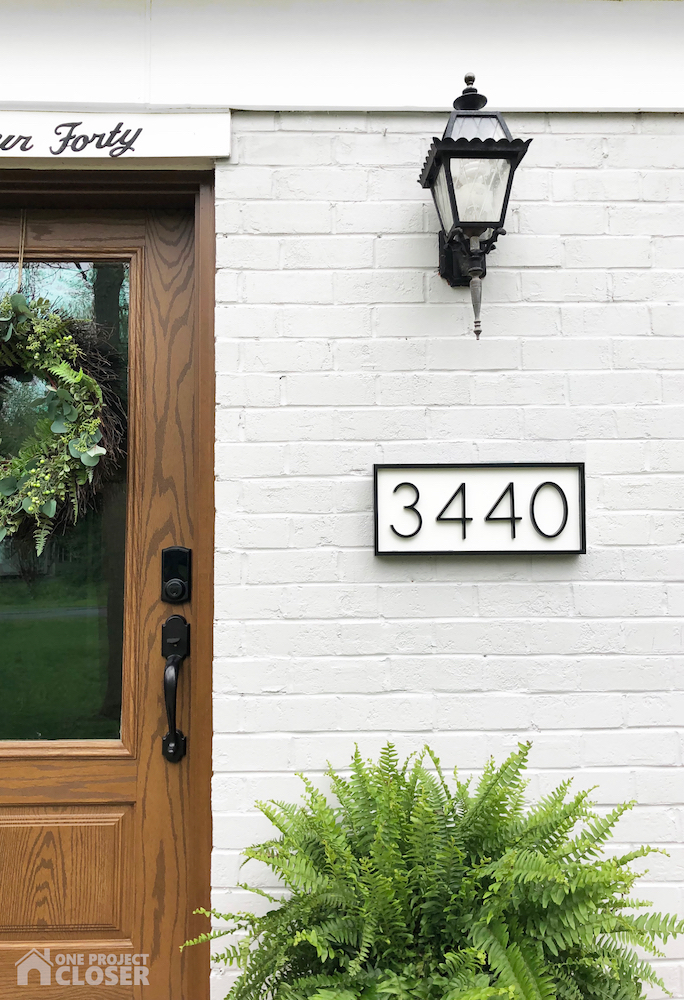
DIY Modern House Number Sign
Make Time: 1 hour + dry time
Cost: $30 (ish)
Difficulty Level: Moderate
Materials Needed:
- Sanded Plywood
- Trim
- Black Paint
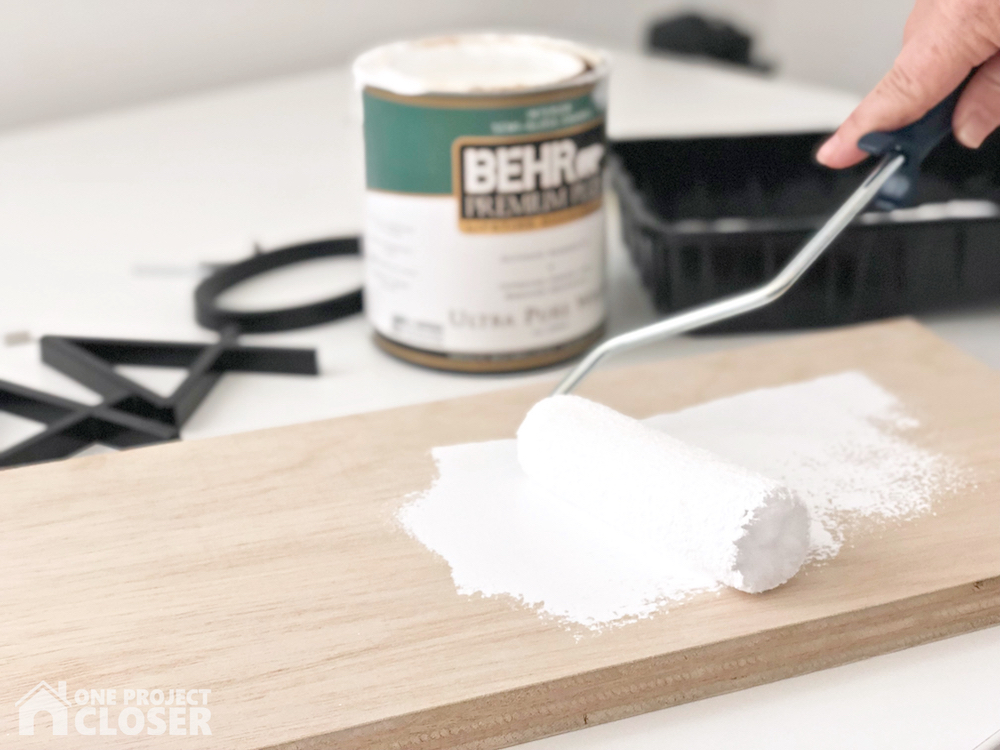
- White Paint
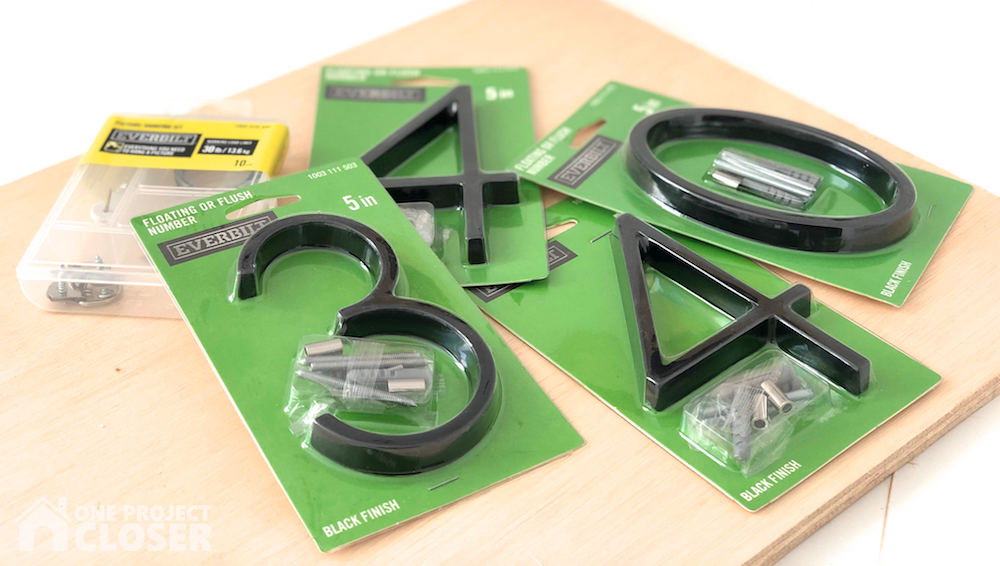
- House letters
- Nail marker
- Blue tape
- Screws
- 4 paint sticks
- Wood Glue
Be sure to check out our amazing Home Depot Coupons and Deals Page before you shop!
Tools Used:
- Miter Saw
- Table Saw
- Hammer
- Finish Nailer
- Nail Punch
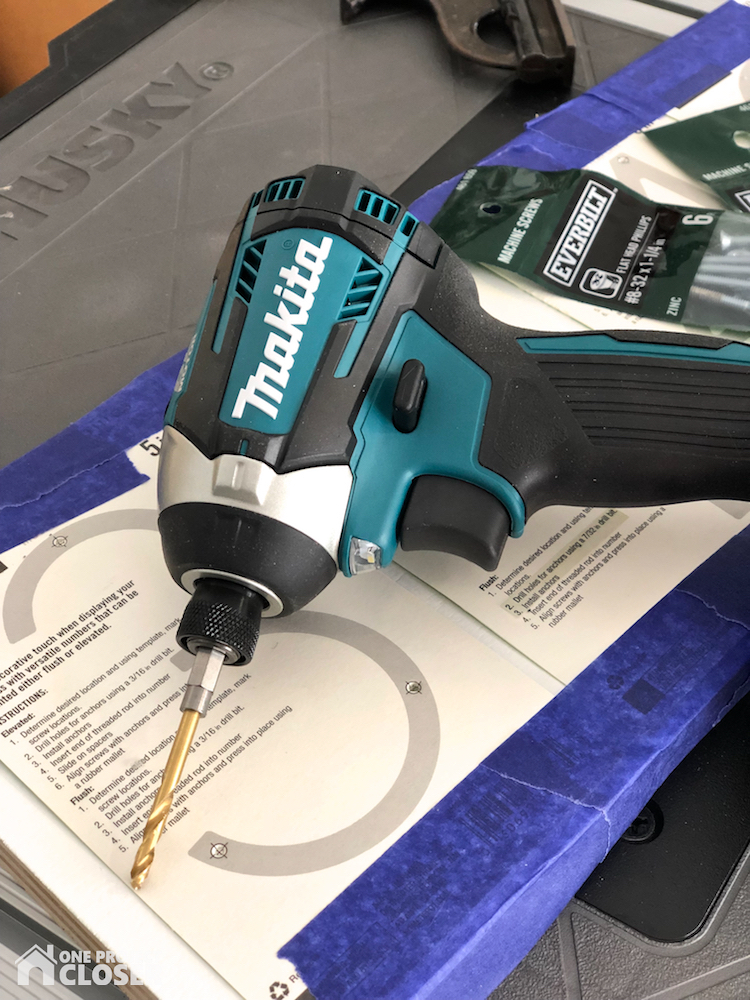
- Makita Impact Driver
- Husky Screw Driver Set
STEP ONE
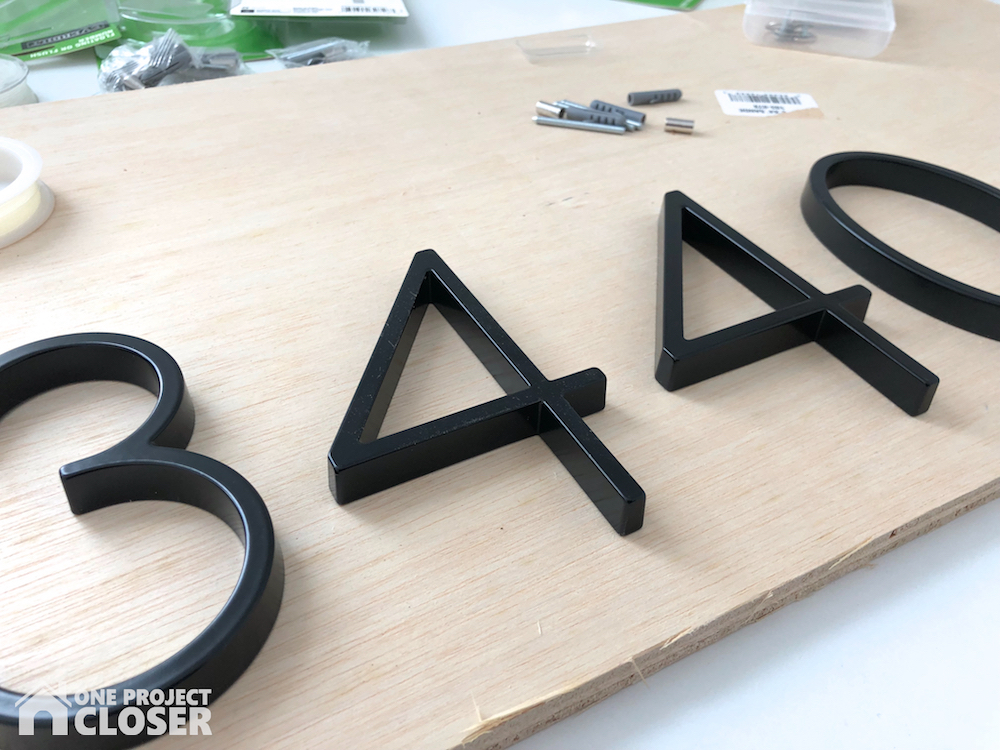
Arrange house numbers on uncut plywood to determine the size of your sign. I arranged the letters to have 1 – 1-1/4 inches all around the outside of the numbers. The size will vary according to what numbers you use, but my sign was 17-1/2 x 7-1/4″.
Once you determine the size, use a table saw to cut the plywood to size.
STEP TWO
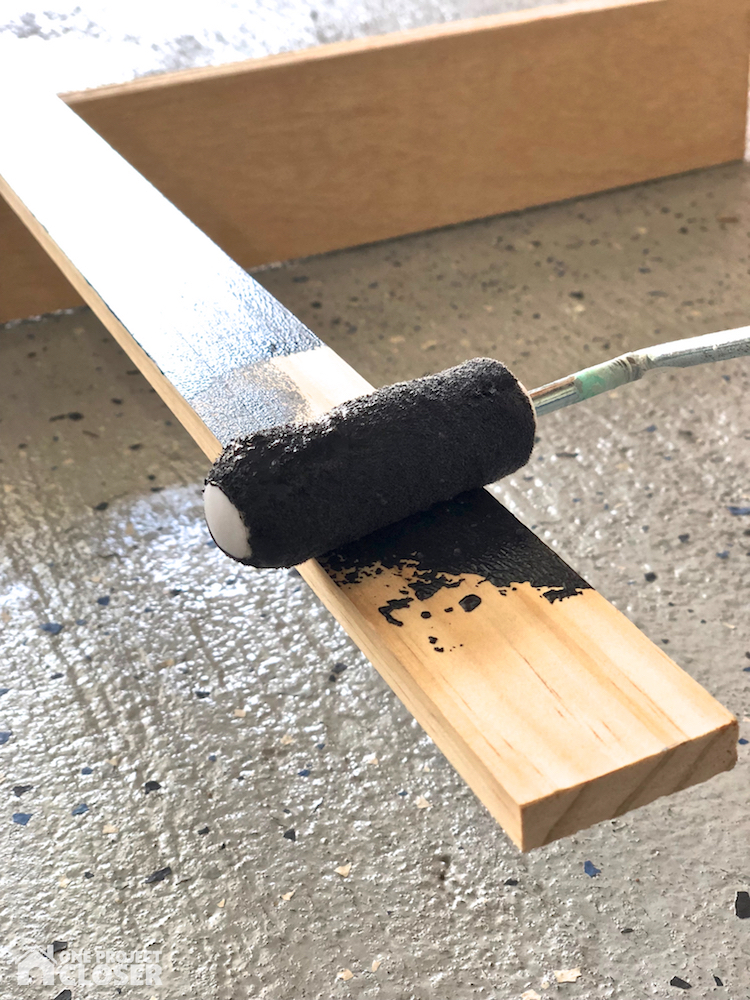
Paint the sanded plywood white and the uncut trim piece black. Use a roller to create a smooth finish without brush strokes, using fine grain sandpaper in between coats of paint.
STEP THREE
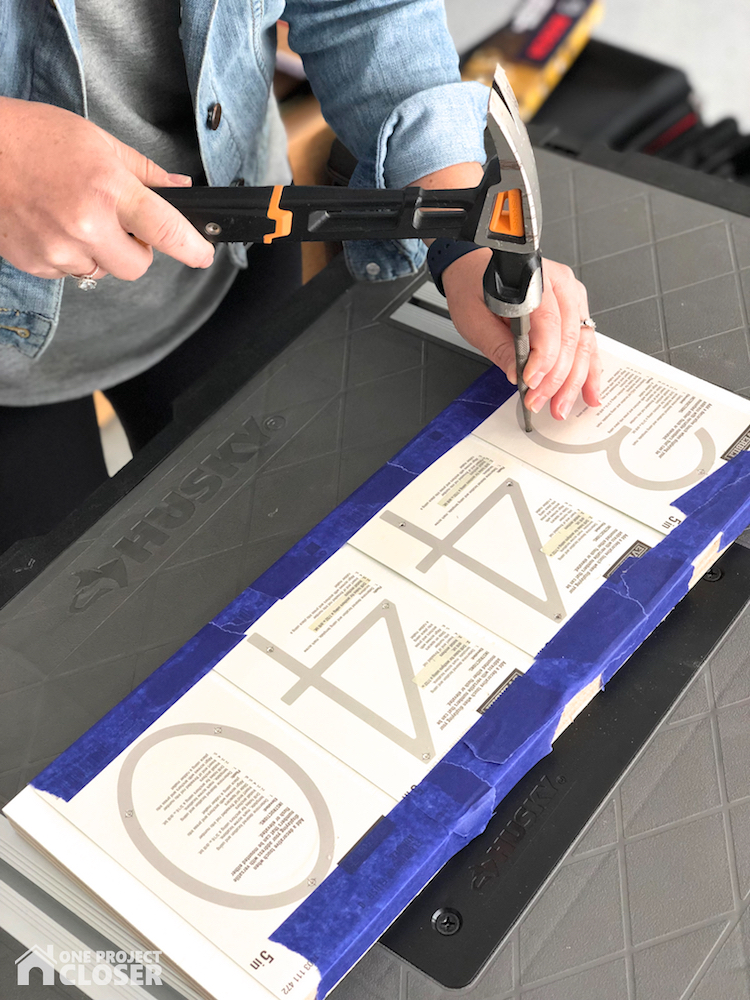
Once the paint is dry on the sanded plywood, use the house number guides to determine where holes need to be drilled. Tape the guides in place with blue tape to prevent them from moving.
Use the Nail Set and hammer to mark where each hole will be drilled (a Punch would be preferred but we couldn’t find ours). This will help the drill bit stay right where you want it without sliding.
STEP FOUR
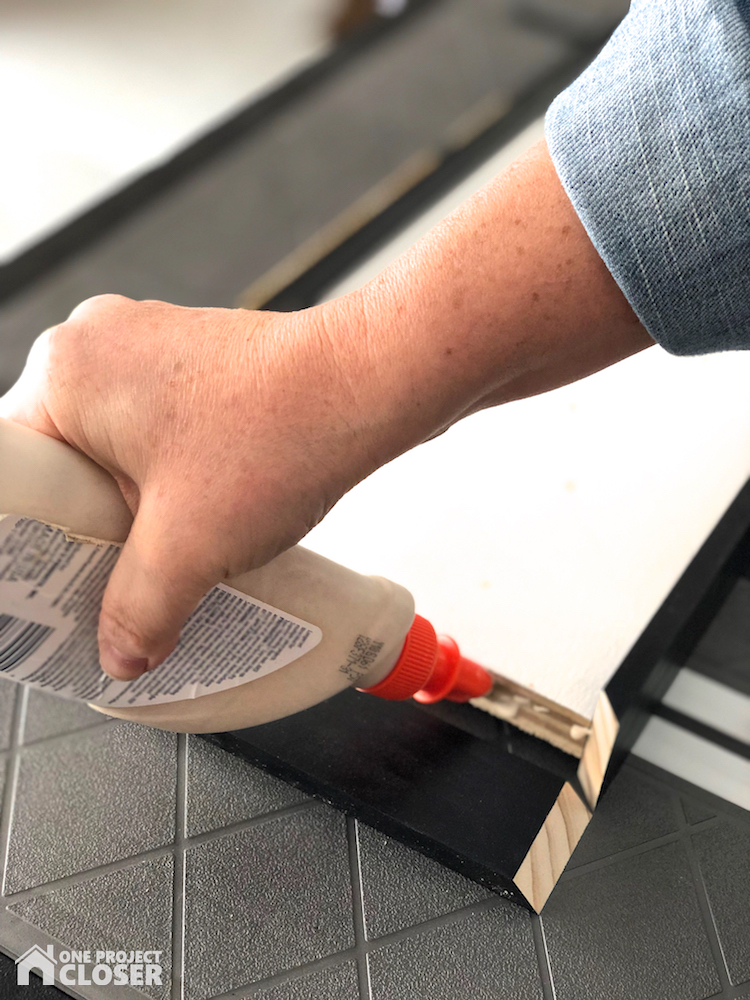
Use a miter saw to cut the trim at 45 degrees. Start with one edge, making sure the trim pieces fit together around the outside of the plywood without gaps. It is super helpful to have another pair of hands to help hold the unattached pieces of the frame to ensure they fit together.
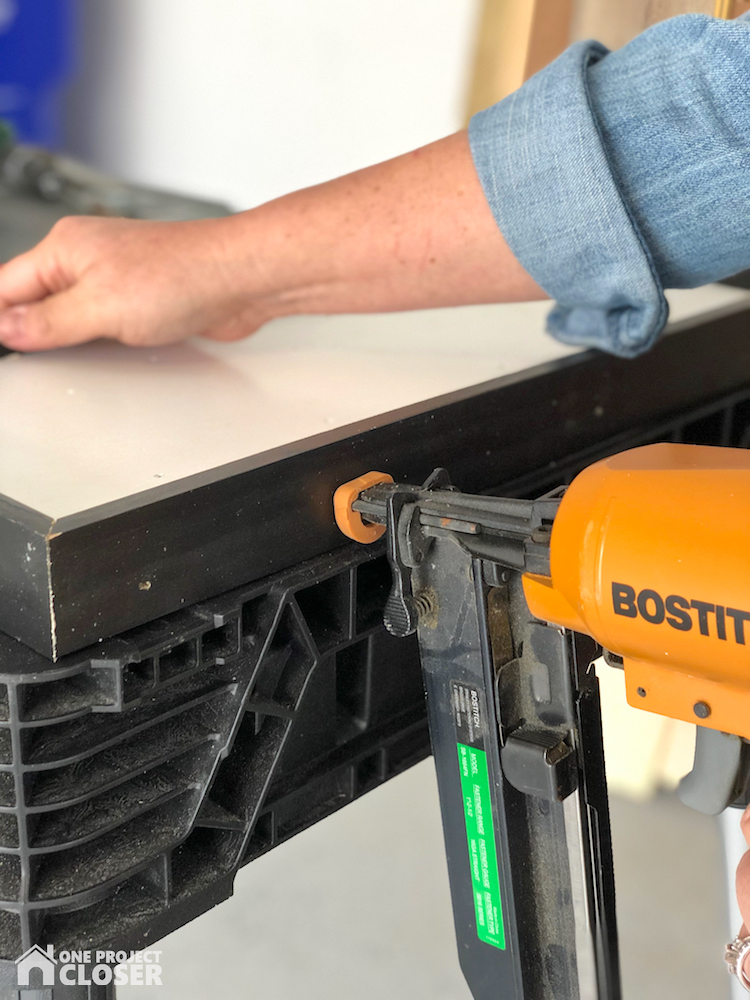
Once the trim is cut to size, use paint sticks (2 high) to raise the sanded plywood so that it will be situated in the middle of the frame. Start with one trim piece at the time. Apply wood glue to the edge of the sanded plywood that you will be affixing the trim to.
Use a finish nailer to nail it in place. Work around the edge of the sign, affixing using the same method.
STEP FIVE
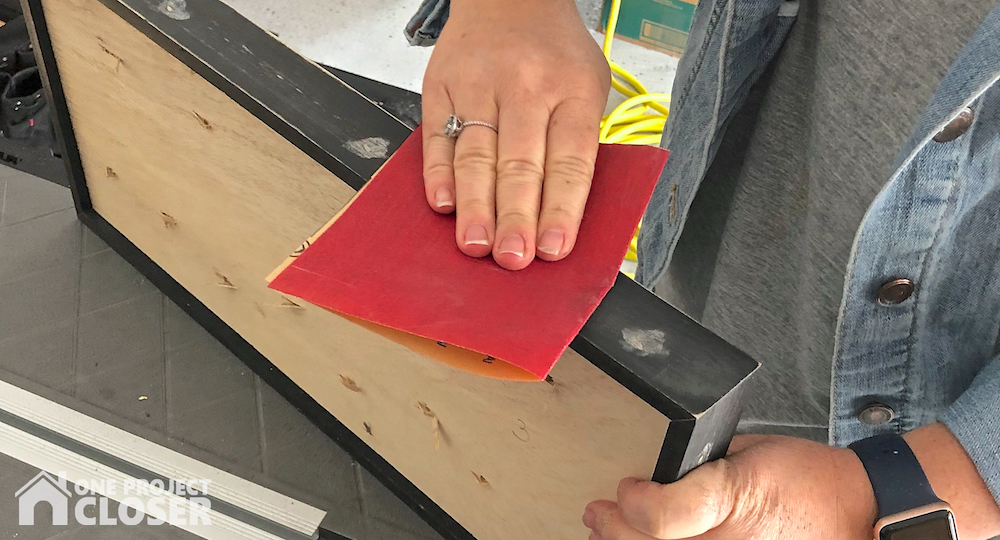
Fill holes, allow to dry, sand then paint. Touch up and dings or nicks and around the edges.
STEP SIX
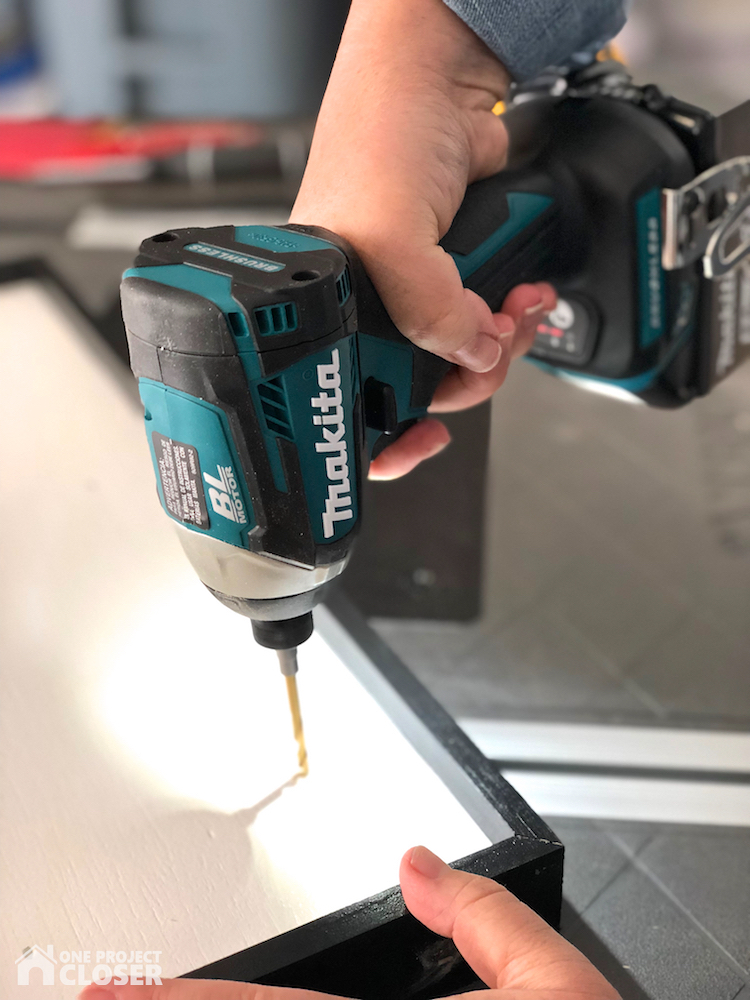
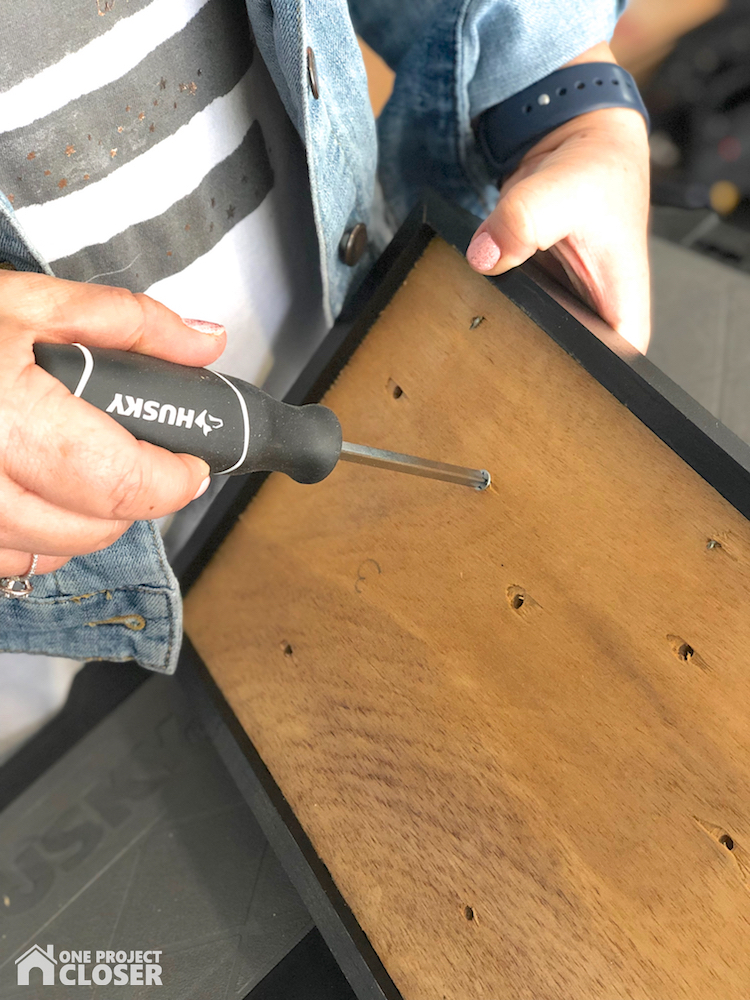
Then, using your Mikita Impact Driver, drill holes for the screws where you have marked using the Punch. This is a great tool that packs a lot of punch but is still lightweight.

STEP SEVEN
Then seal with with a non-yellowing, polycrylic or clear enamel. You could skip sealing the sign, but since our sign will be on the front of the house without any shelter, we wanted to make sure it would not warp or rot quickly. When sealing, be sure to seal the back also!
True story here – I used an old polycyclic and it was super yellow. UUUUUUUGGGGHHHH. So I had to sand it, repaint and reseal. So frustrating.
STEP EIGHT
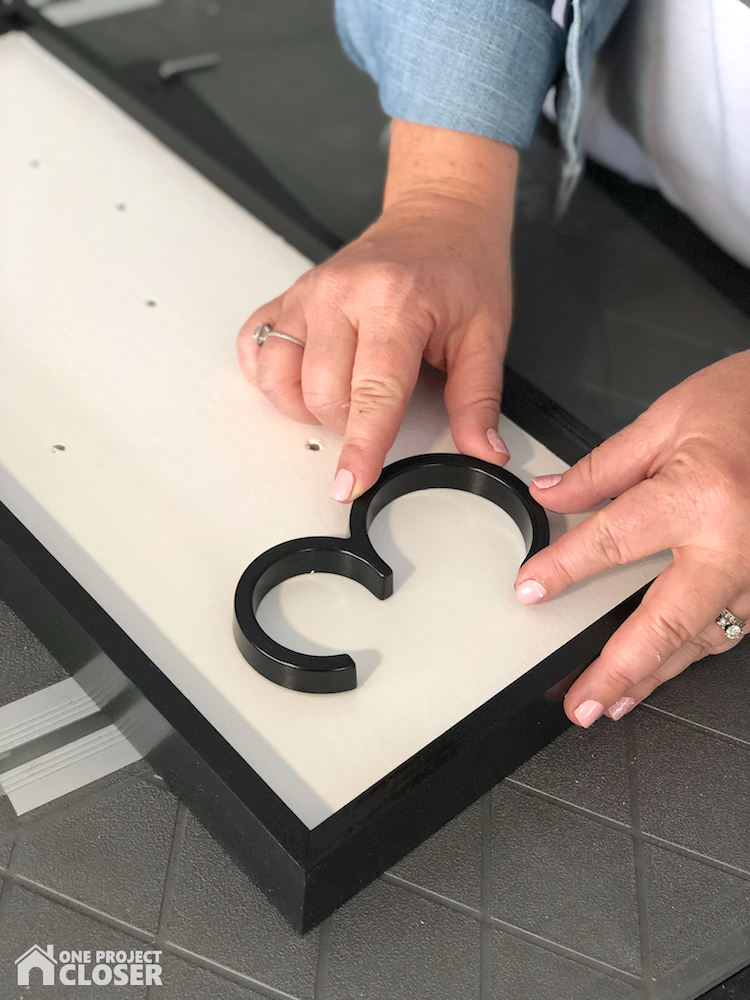
Once dry, attach numbers using screws and Husky screwdriver. Okay, a few thoughts… I bought these specific house numbers because I thought they were the prettiest!! And I stand by that. But what I didn’t realize was that were were literally the only number that use headless screws and anchors to affix them. Not a big deal, except the anchors and screws were way to long to work with our sanded plywood. It was a bit of an ordeal. In the end, we bought pan-head, machine screws.
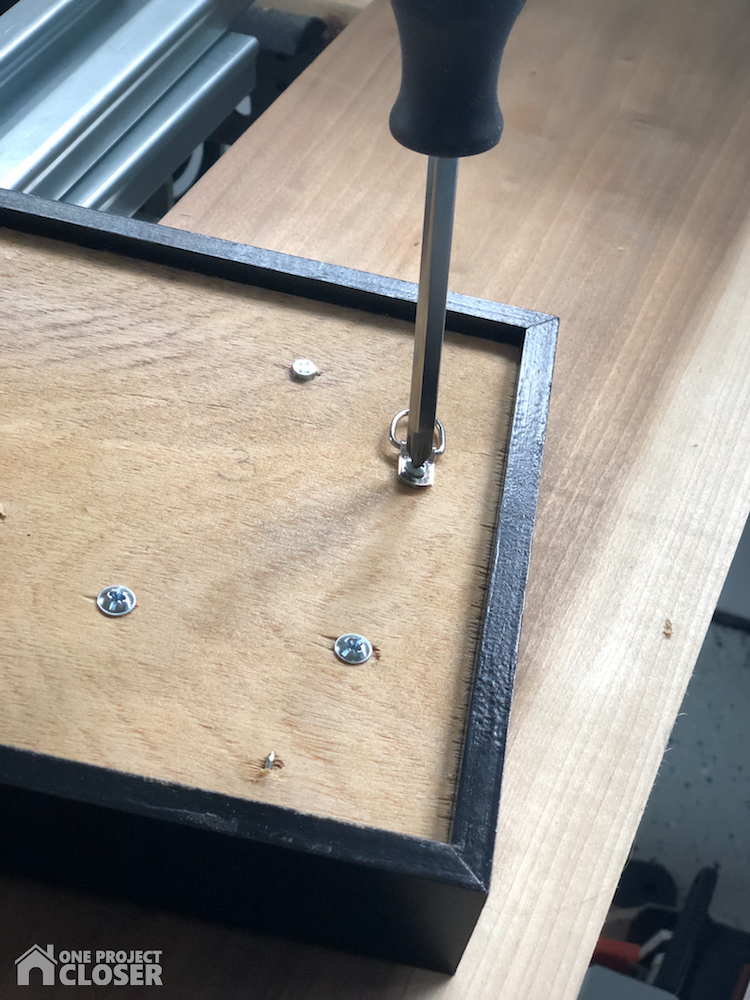
Affix a picture hanging wire on the back and hang that mother up!!
ENJOY!!!!

Jocie Hagan
One Project Closer

Looks great!Great directions, too!
Very nice. I bought those same numbers and had the same issue. Thanks for the fix, cheers!