
Thank you so much for joining us at One Project Closer for this tutorial on How to Replace Brake Rotors on a car from amateur mechanic and guest writer, David. This post is sponsored by the Home Depot Prospective Campaign. Post may also contain affiliate links. Opinions (and typos) are 100% our own, and we appreciate you supporting our site in order to continue to provide free content to our readers. Professional auto mechanics may have a different way of completing this project – this advice does not replace common sense or the need to consult a professional. DIY at your own risk.
This is yet-another-How-To for changing front brake rotors, but with a twist–using the right tools! All cars vary in how the wheel, brake, suspension, and steering components are situated (or crammed into) the wheel wells, so this job is often a test of your ability to contort your hands, arms, and body in unnaturally interesting ways in order to get leverage on stuck bolts within tight spaces. This inevitably leads to busted up knuckles, pulled ligaments, a sore neck and back, and enough violence and profanity to skip PG-13 and go straight to an R rating. This How-To shows how quickly and simply this job can be with the *right* tools to make this a G-rated adventure the whole family will be thankful for. I’ve done this job several times on several cars while using subpar tools. I encourage you–not only can a DIYer tackle this, but it’s actually possible to complete this project with your composure intact.
DIY Rotor Replacement
Project Time: 1 hour
Cost: $100
Difficulty Level: Moderate
Materials Needed:
- Heavy duty zip ties
- Work gloves
- Brake cleaner
- Clean cloth
Tools Needed:
- Car jack and jack stands
- Impact wrench (cordless or air-powered)
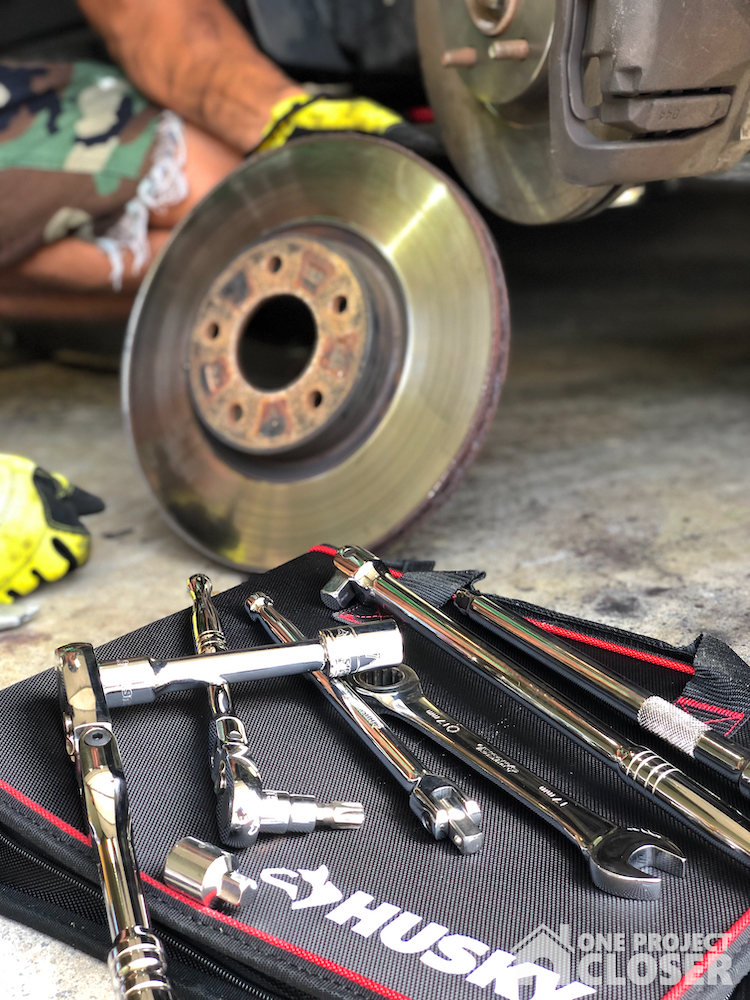
- Husky Mechanics Tool Set (432-Piece)
- Husky 1/2 in. Drive Deep SAE Impact Socket Set (11-Piece)
- 3/8″ and 1/2″ breaker bars
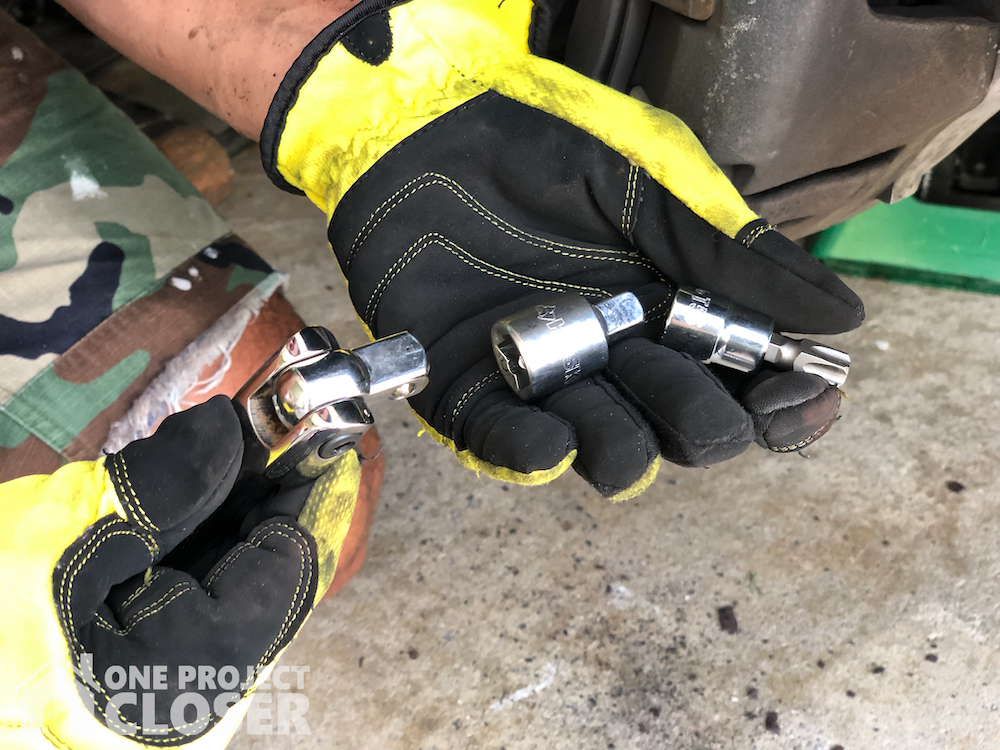
- 1/2″ female to 3/8″ male drive adapter (optional)
- Torx bit socket set
- 3/8″ drive metric sockets
- 3/8″ and 1/2″ flex head ratchets (or regular ratchets for added difficulty)
- Rubber mallet
- C clamp
- Torque wrench
Other Featured Products to help organize and carry your tools:
Be sure to check out our amazing Home Depot Coupons before you buy to save yourself some money!
STEP 1
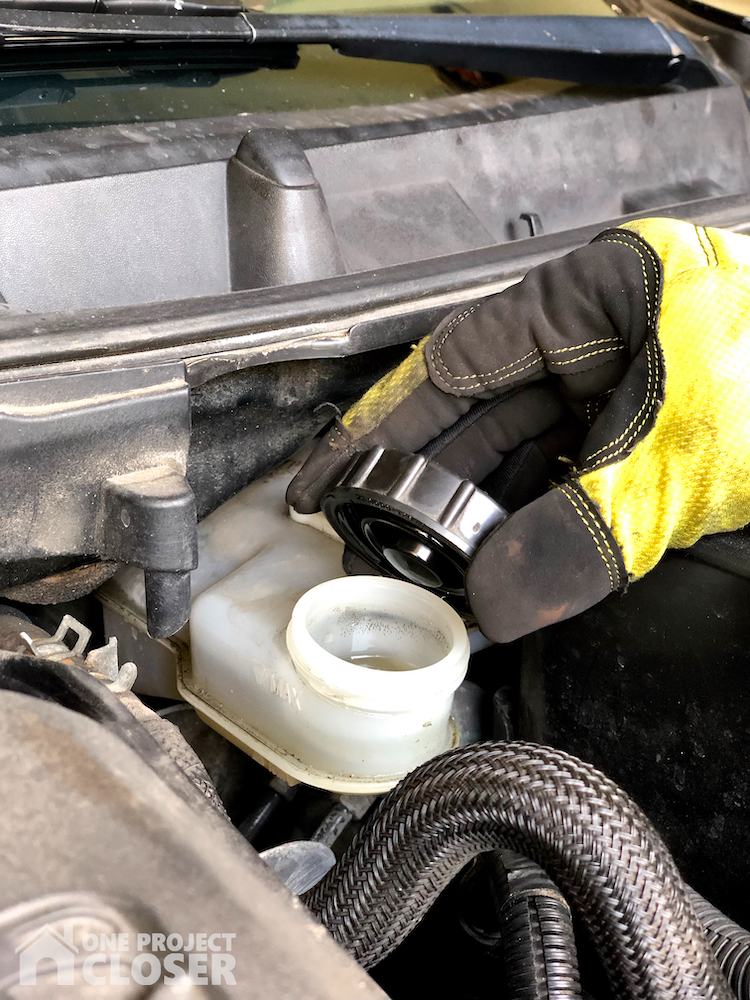
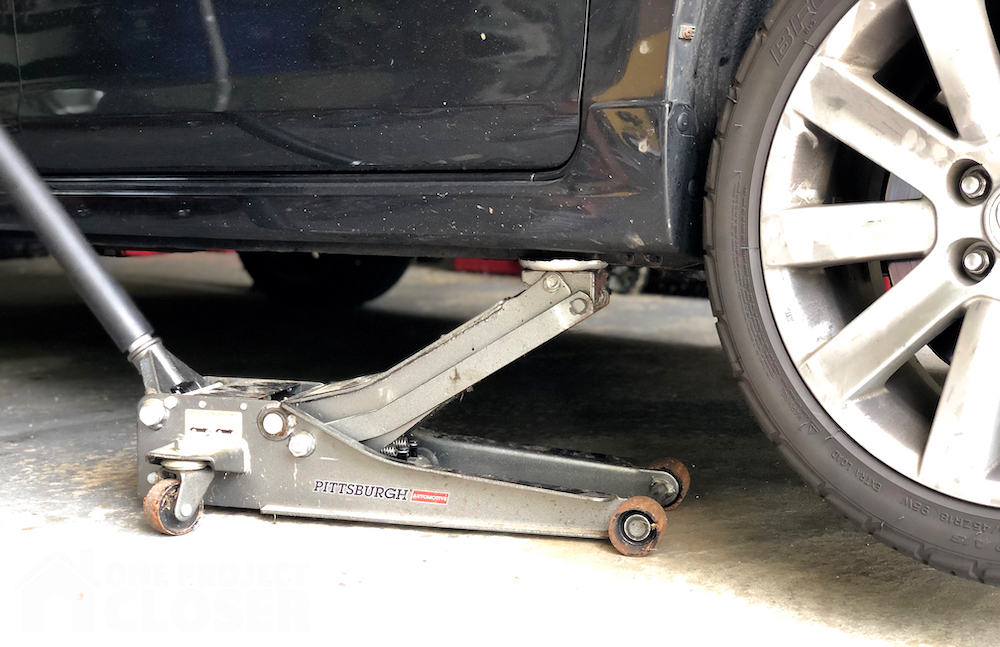
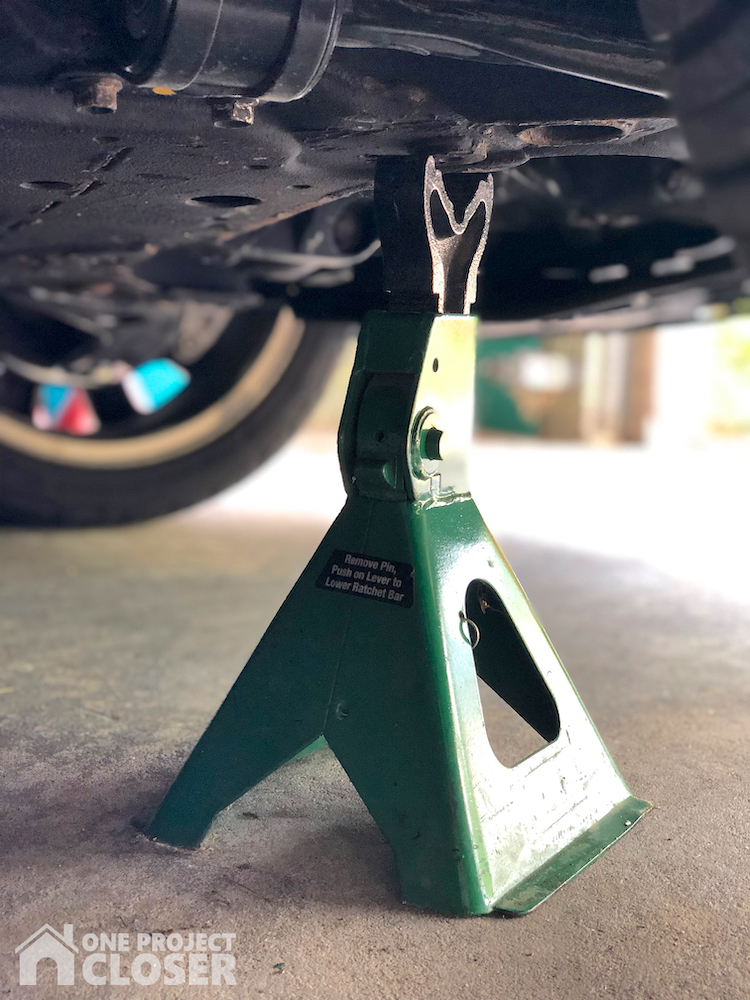
Prep the car for the job. First, pop the hood and remove the cap to the brake fluid reservoir–this removes brake fluid pressure to make STEP 10 easier. Then jack up the car and USE JACK STANDS. I used the indicated jack points on my Mazda for the jack. You can put the jack stand anywhere under the solid metal frame while staying close to the wheel. Lower the jack enough to put all the car’s weight onto the jack stand, but leave the jack in place.
STEP 2
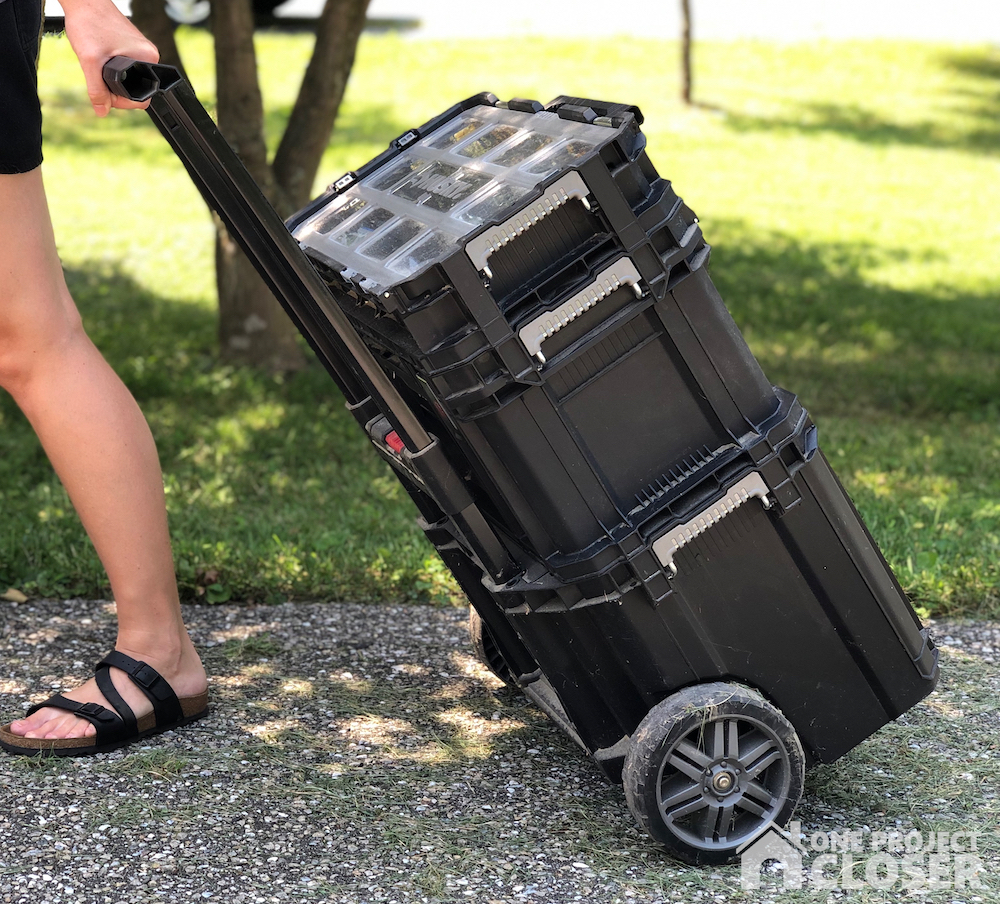
*Note: I used the Husky Mechanics Tool Set (432-Piece) and the Husky 1/2 in. Drive Deep SAE Impact Socket Set (11-Piece) for most of this project.The mechanics tool set gave me lots of options for making the tack easier. Cars often have larger bolts, odd bolt and screw heads, and small spaces to work in – this 432 piece set from Husky ensures that I have a variety of tools to fit every need. Given the size of this mechanics set, I used the Husky 22 in. Connect Rolling System Tool Box to organize it all. This makes the tools super portable and easy to find. When on the go and don’t want to take all my tools, I like to use my Husky 19 in. Pro Hybrid Tote with Tool Organizer to take just the tools and materials I need for smaller projects.
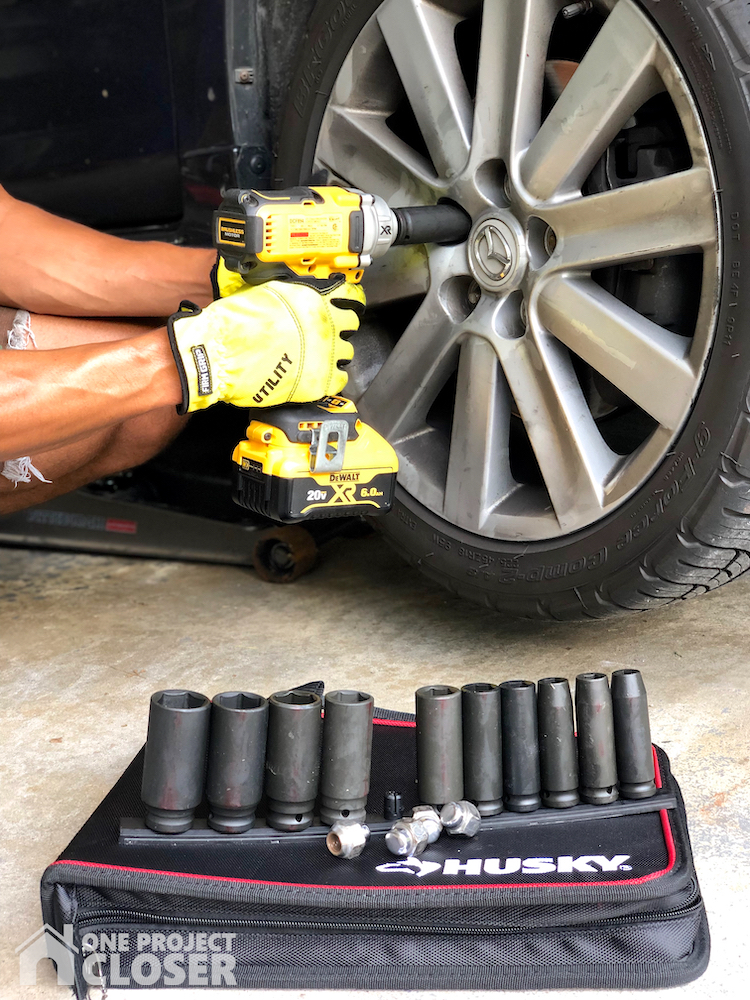
The Husky Impact Socket Set was really helpful because it includes many large sockets, which is particularly helpful when doing car work.
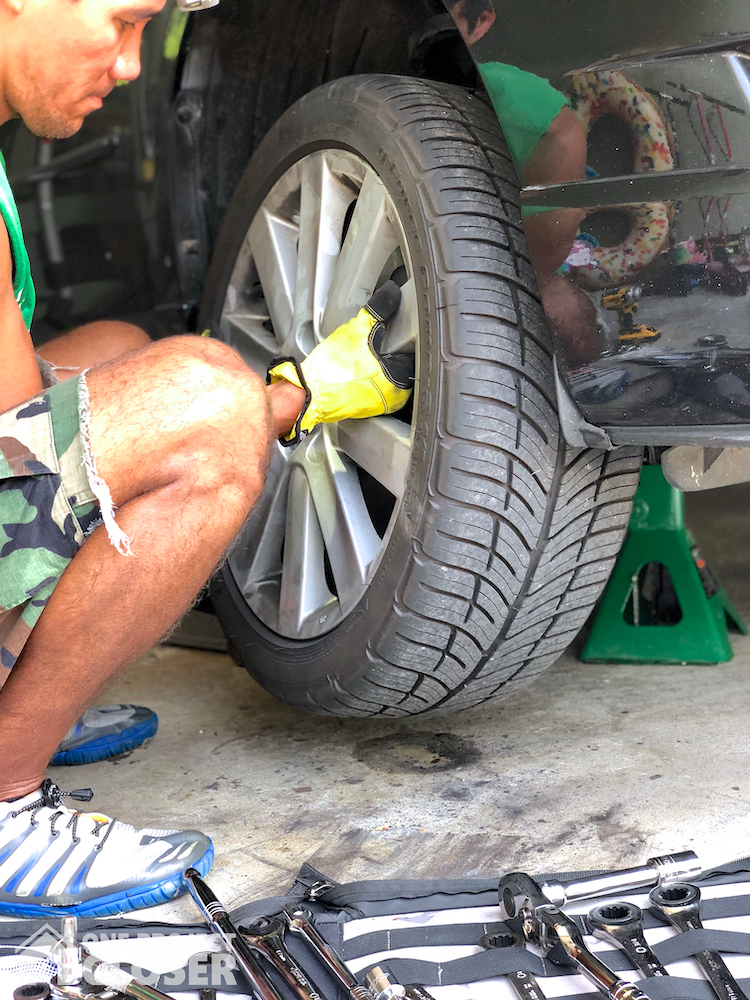
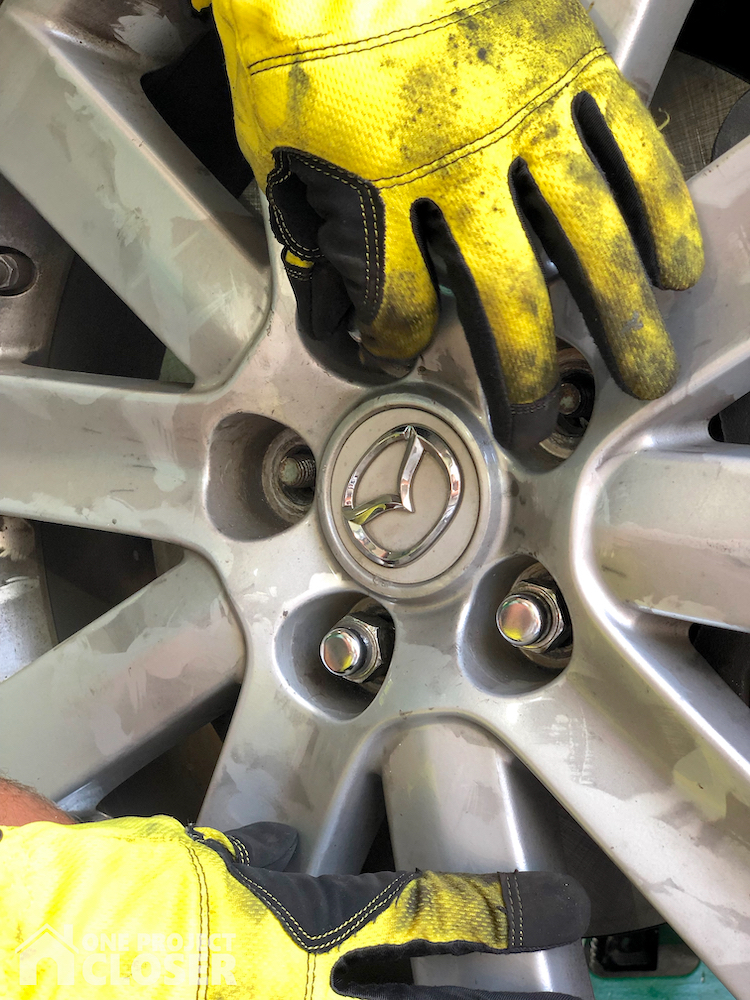
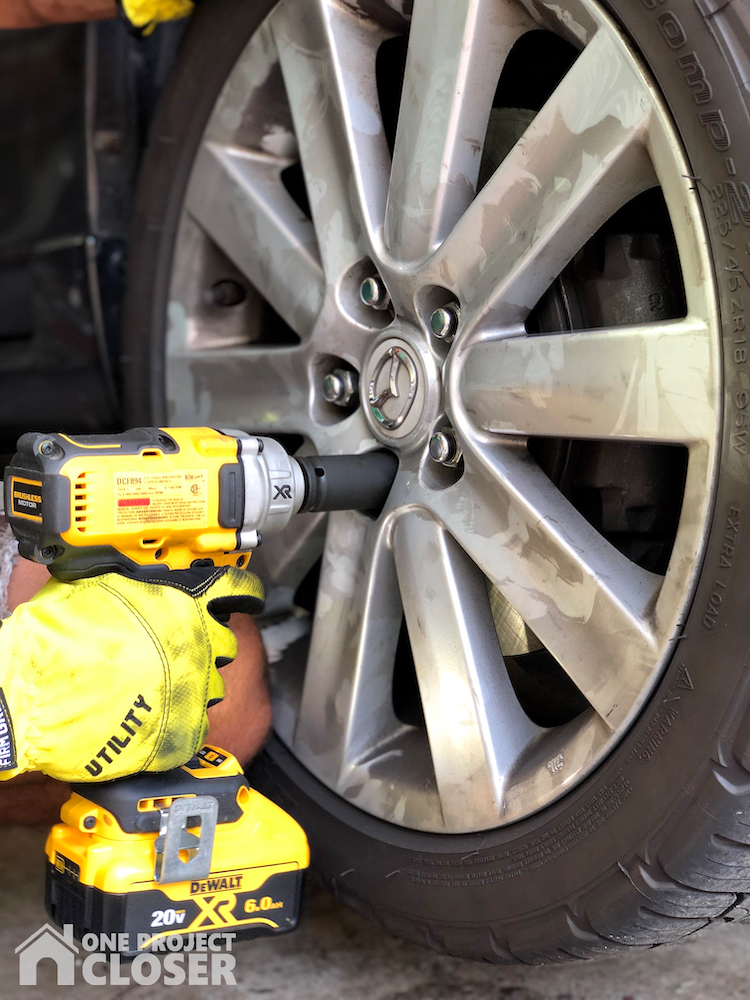
Take off all lug nuts (order doesn’t matter). An impact wrench makes this go quickly. I used a cordless impact wrench with the Husky impact-grade socket set. You can do this with an air impact wrench (with air compressor) or manually with a 1/2″ breaker bar or 1/2″ ratchet. Remove the tire and set aside.
STEP 3
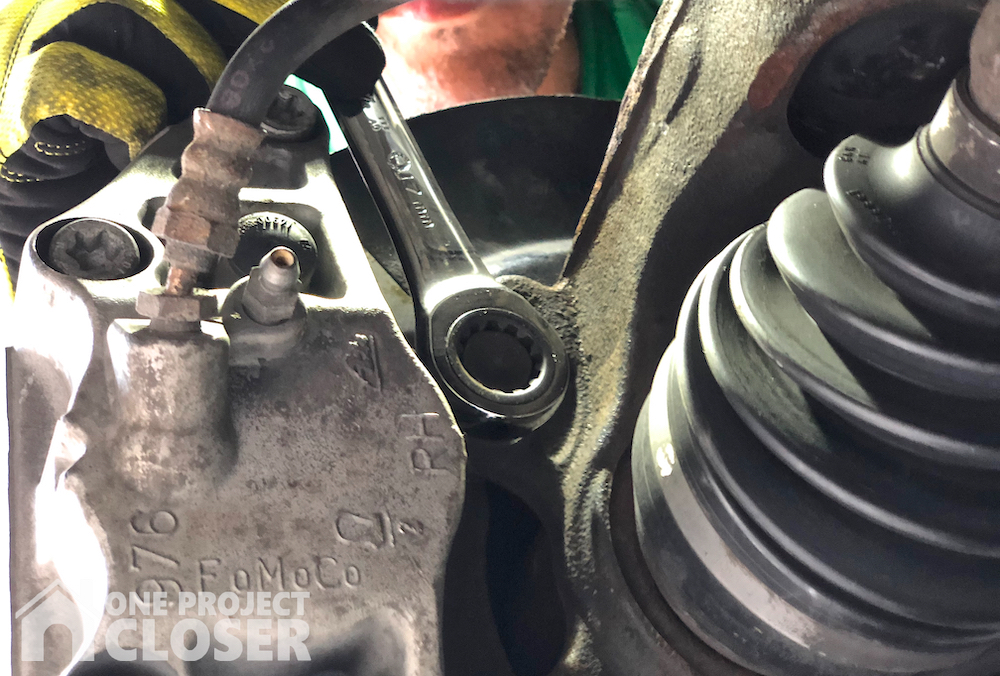
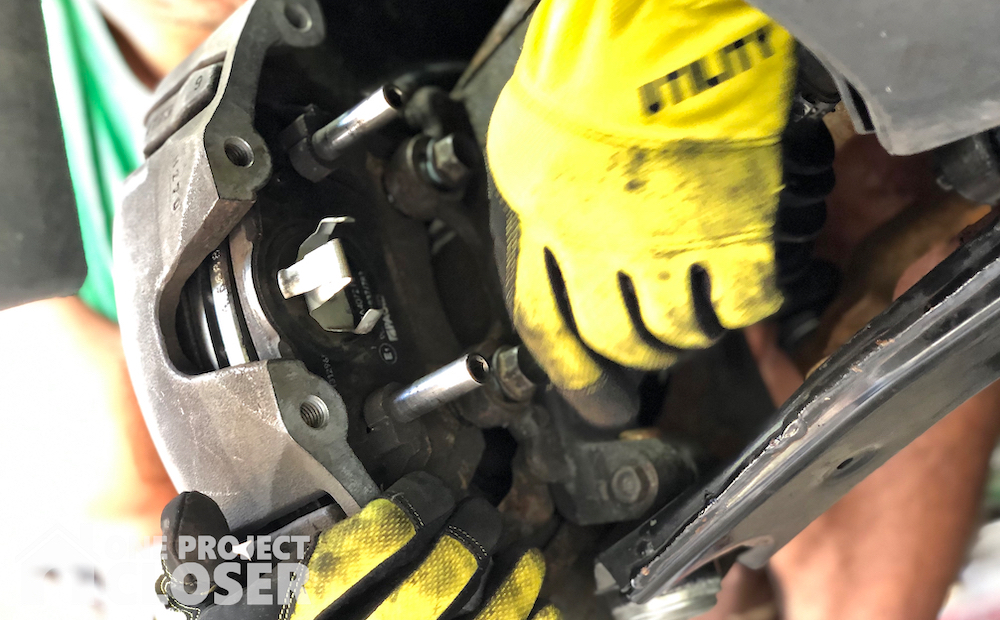
Remove the brake piston housing from the brake caliper mounting support frame. Note: this is a 2-piece brake caliper–if you want to treat it as one piece, then skip this step, but it will make later steps more difficult and likely PG-13.
Remove the bolts from the backside of the brake piston housing. The 4 housing bolts on my Mazda uses Torx heads and were very tight, so I used a 3/8″ drive T55 Torx bit socket with a 3/8″ breaker bar to break the 4 bolts loose.
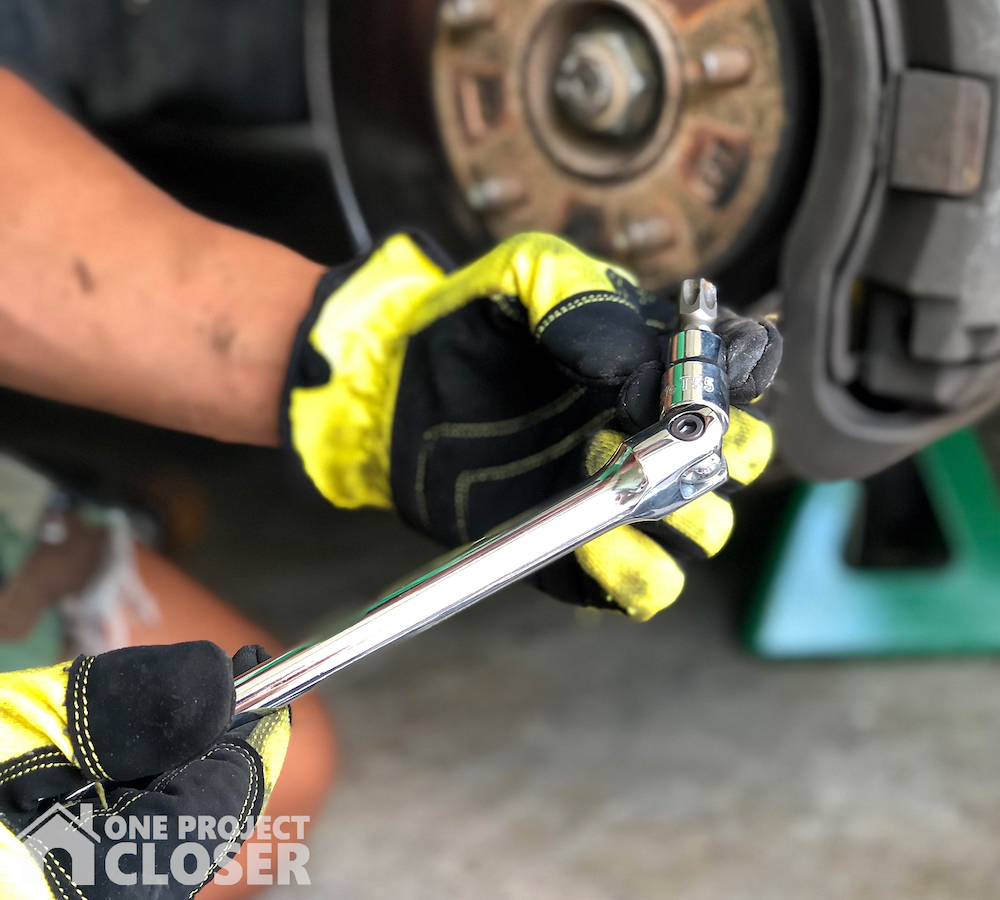
If you don’t have a breaker bar, get one. Or you can hammer on the side of a ratchet or a wrench (with a hammer, or other blunt object), but this usually leads to profanity-laced tirades after smashing some fingers or knocking the wrench off the bolt for the 20th time.
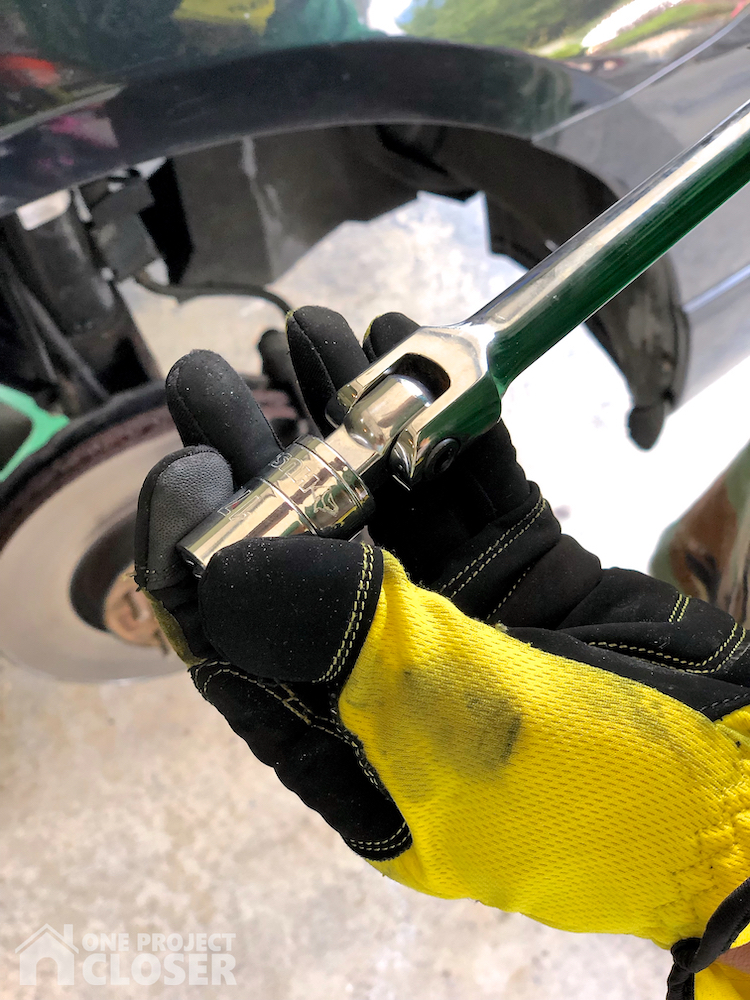
One Torx bolt gave me some trouble, so I used the 1/2″ breaker bar (it’s 5 inches longer than the 3/8″ one) with a Husky 1/2″ female to 3/8″ male drive adapter, and it broke that bolt loose easily! No cursing required!
Swap the breaker bar for a 3/8″ flex head ratchet to finish unscrewing the brake piston housing bolts. The Husky Torx bit socket, flex head ratchet, and drive adapter made this waaaay faster than the previous times I’ve done this job. At this point, I’m actually smiling instead of seething with anger, thanks to using the right tools.
STEP 4
Remove the brake piston housing and secure it so that the weight of the housing isn’t held by the rubber brake line (this can damage it). I used heavy duty zip ties to secure the brake piston housing to the suspension spring.

STEP 5
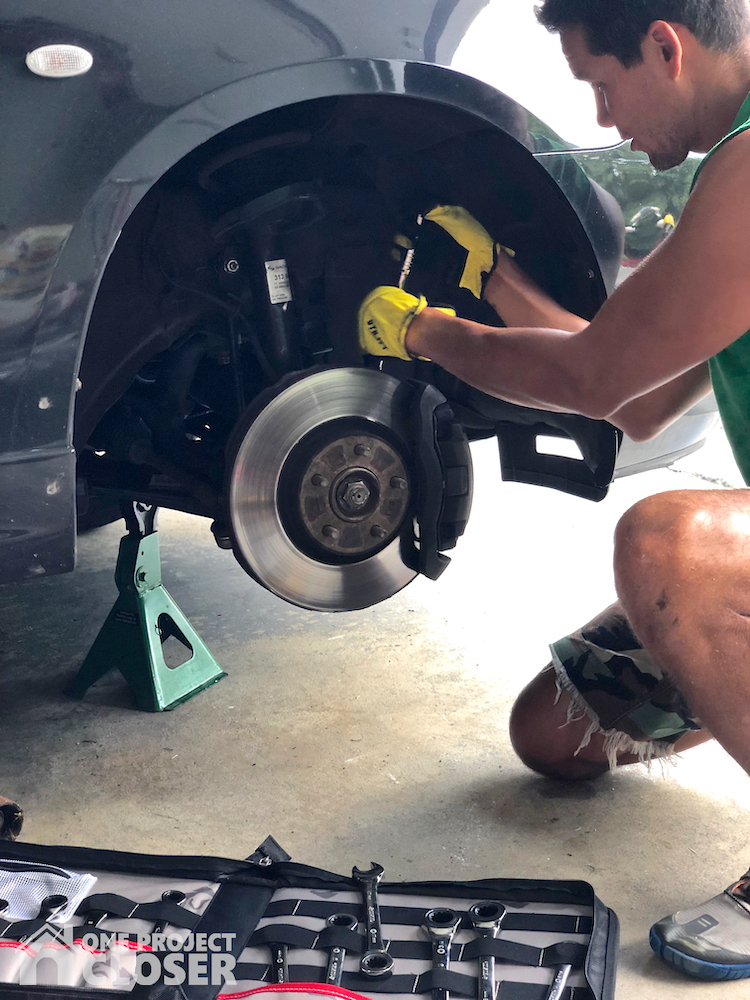
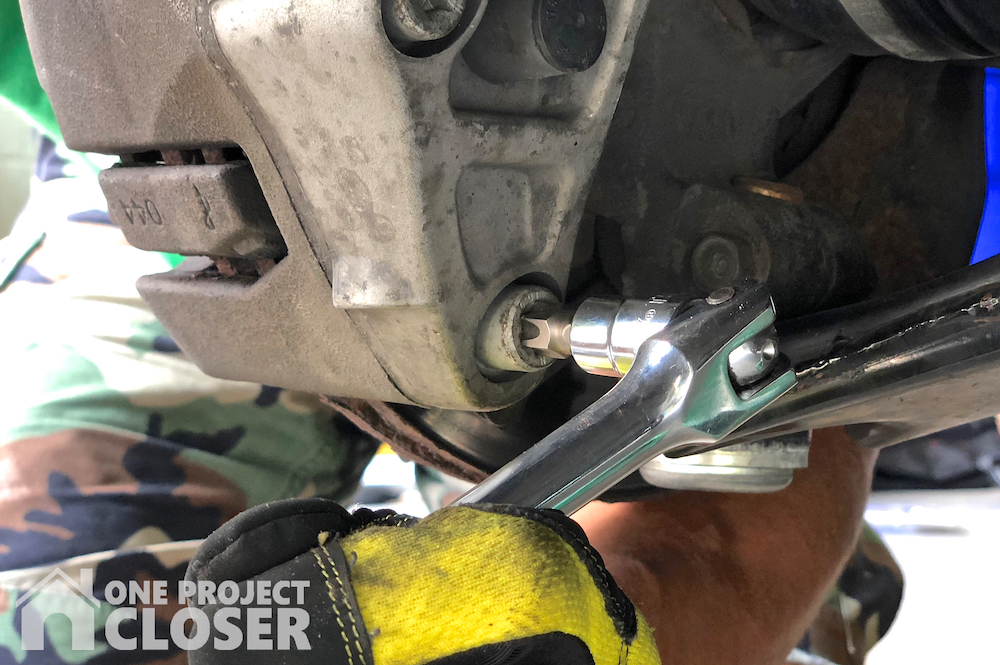
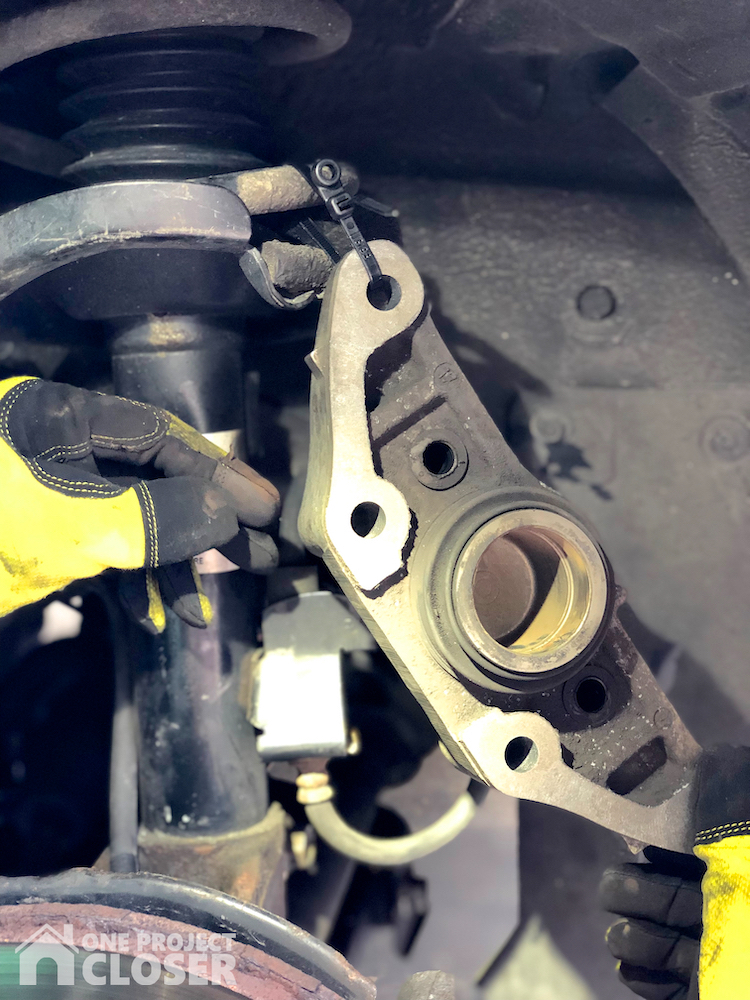
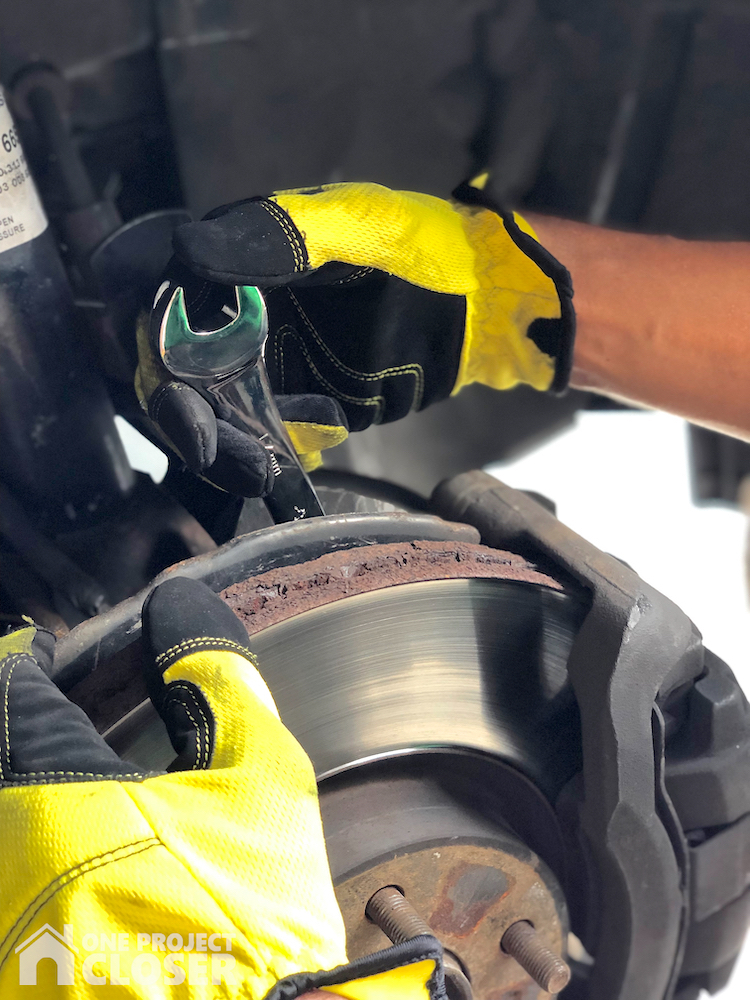
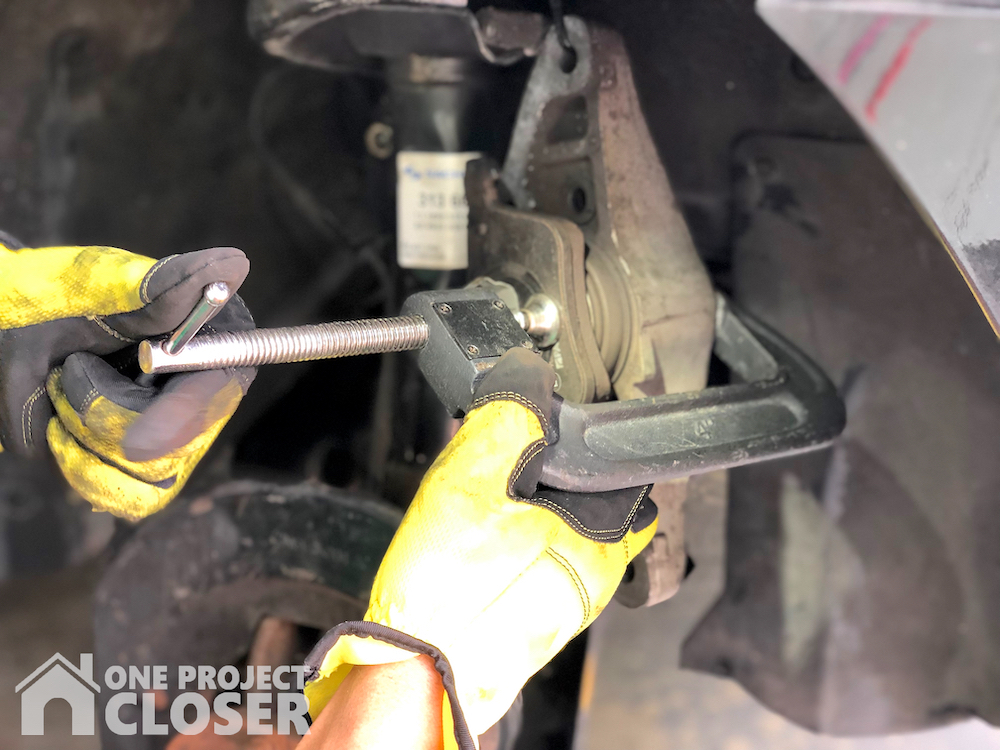
Remove the caliper mounting support frame by removing the bolts from the backside. Again, these were very tight, so I used a 1/2″ breaker bar with a 17mm socket to break these 2 bolts loose.
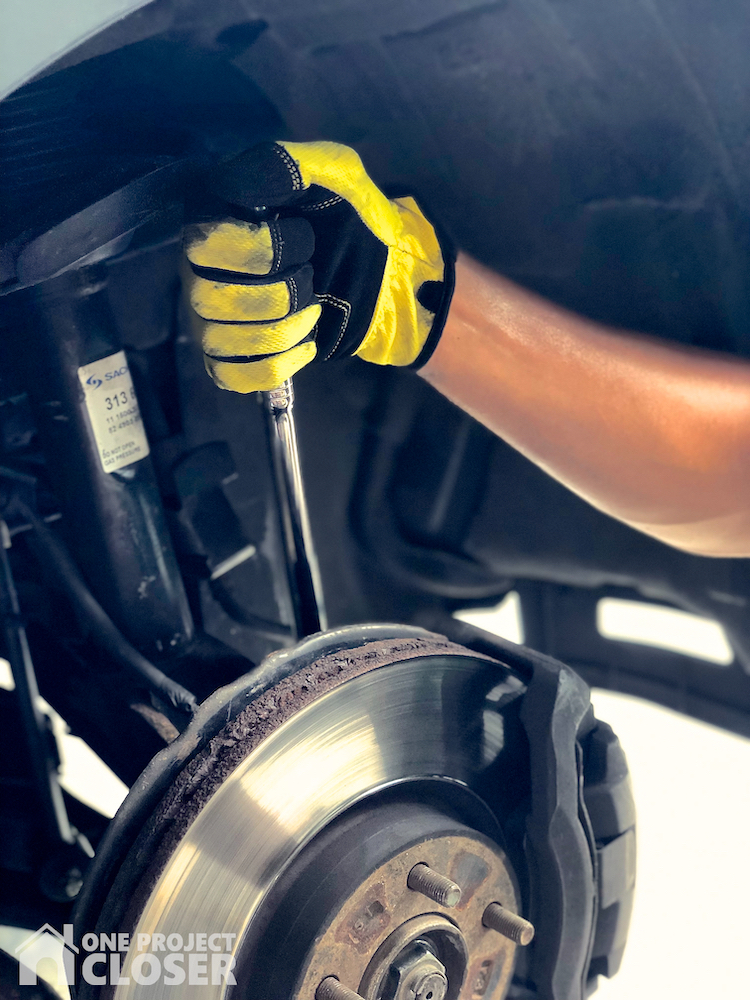
To finish unscrewing these bolts, I used a 17mm ratcheting combination wrench for the top bolt and a 1/2″ flex head ratchet with 3 inch extension for the bottom bolt. The space (or lack thereof) available made this combination of tools the easiest (and quickest) way. Note: the last 2 pictures for this step show the brake piston housing still installed because I forgot to take those pics during the actual removal, so I went back and staged those two snapshots to show how I used those tools.
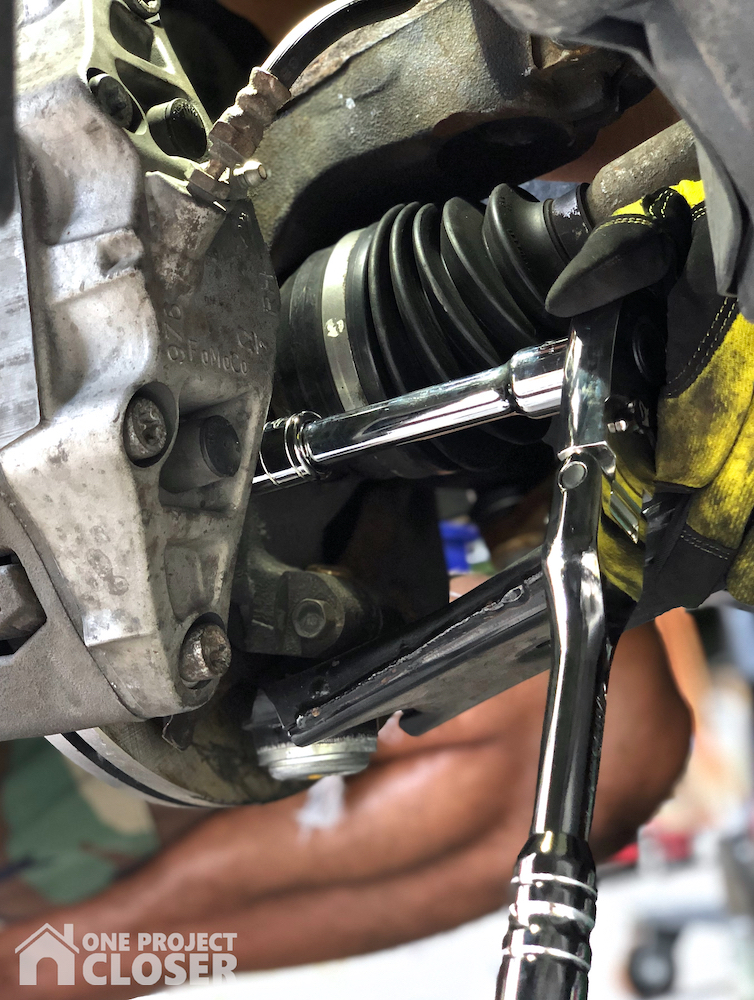
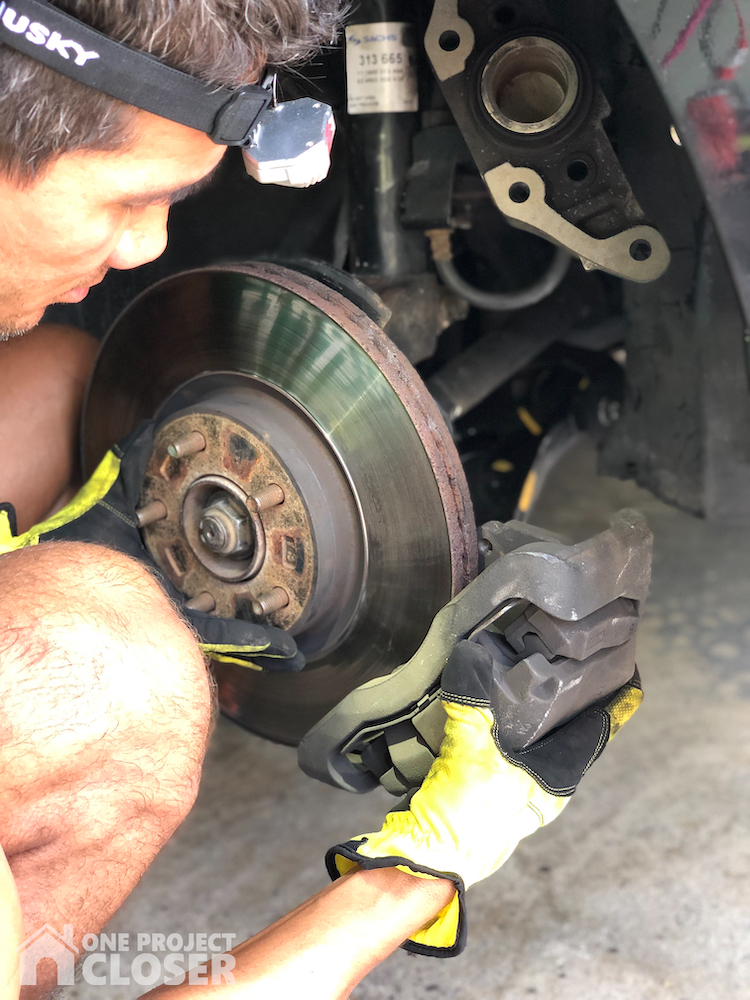
Remove the caliper mounting support frame and set it aside.
STEP 6
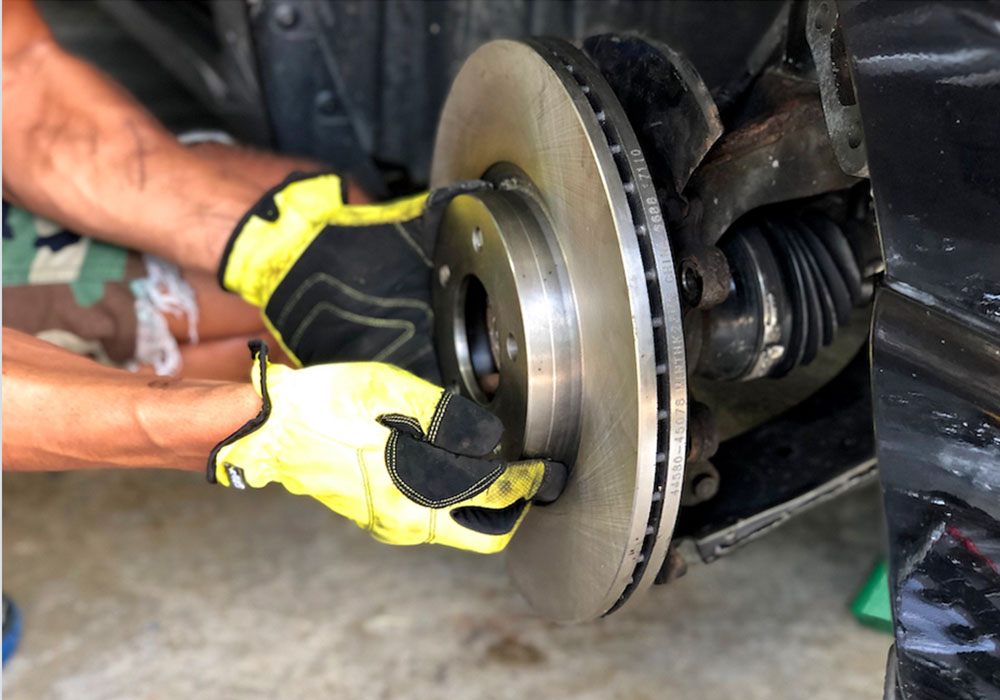
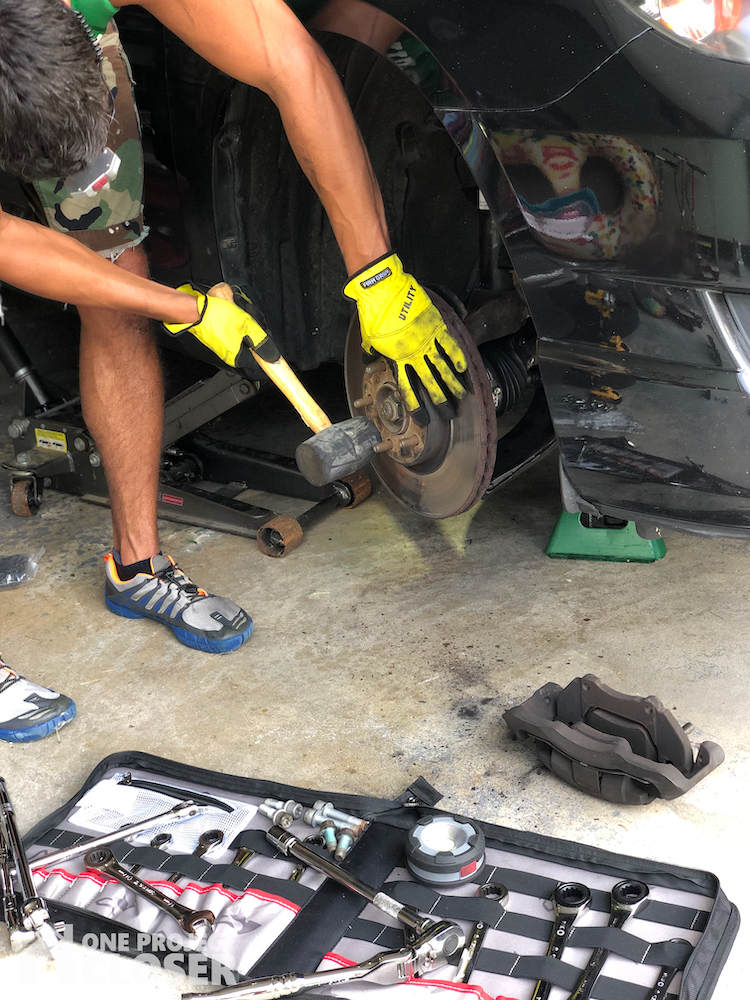
Remove the brake rotor. This is usually rusted on. Using a rubber mallet, I hit the rotor surface (the shiny part) a lot on the outer edge, going in a circle all the way around the rotor several times. Don’t be shy with the mallet–give it a good walloping. When the rotor starts to loosen, you can pull it off by hand. Set the old rotor to the side.
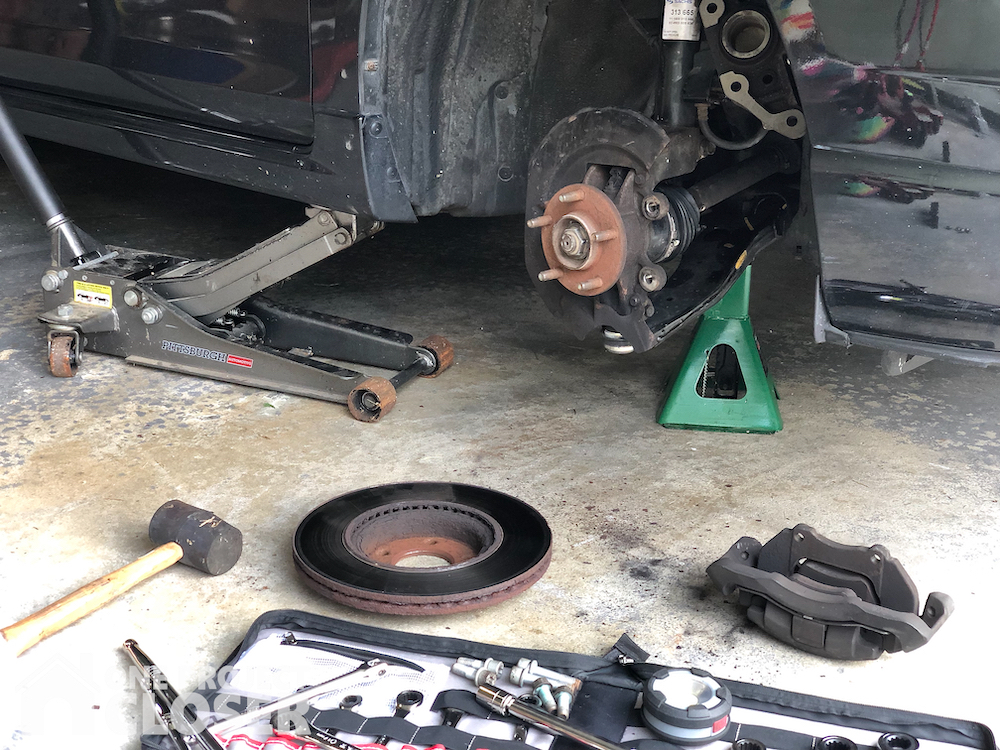
STEP 7
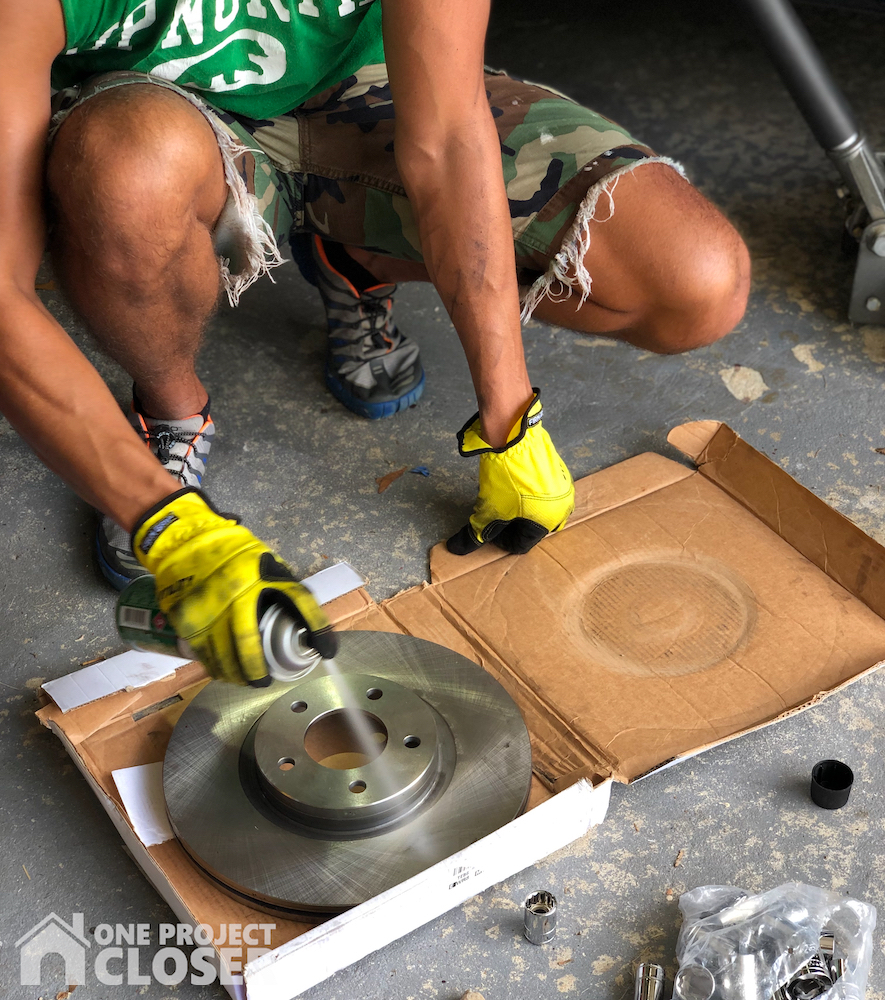
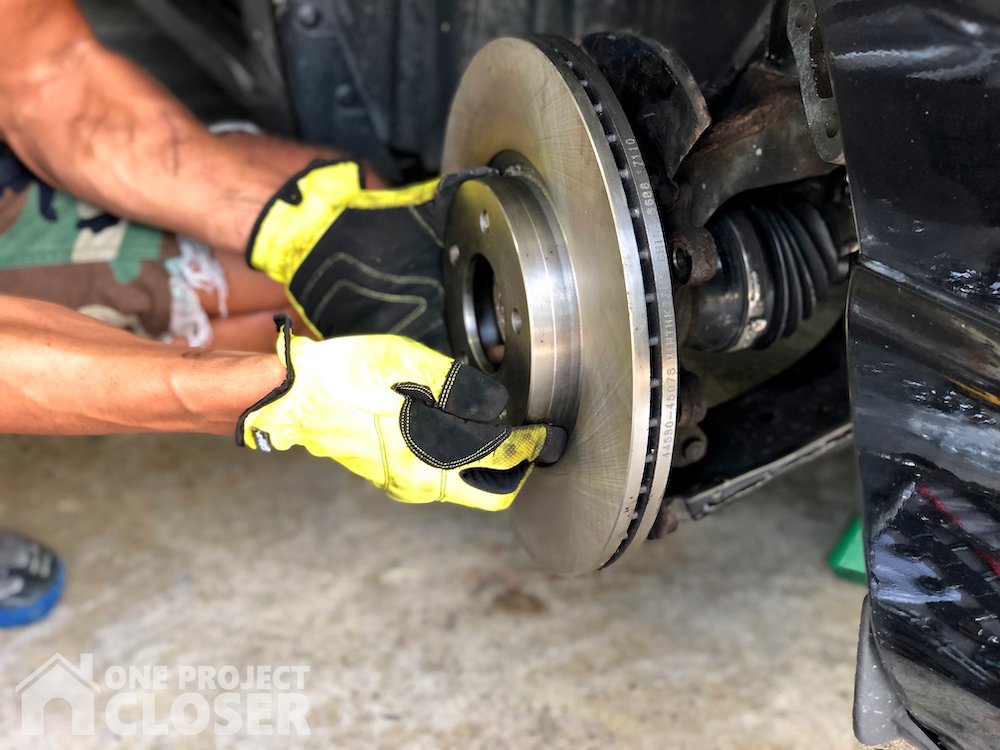
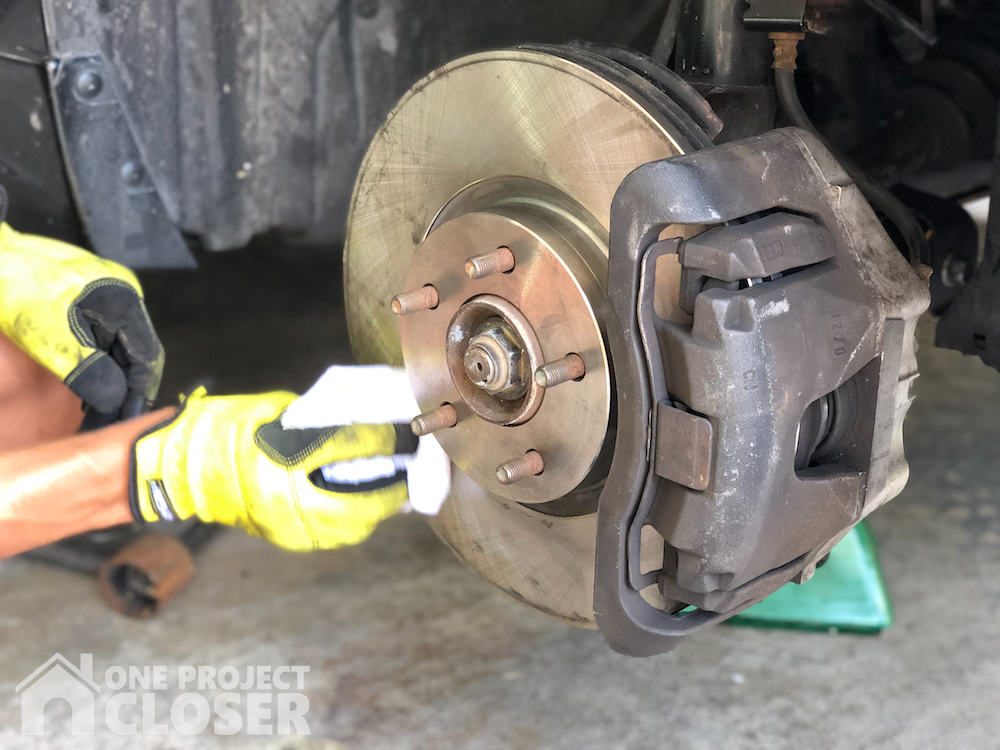
Prep and install the new rotor. Spray brake cleaner on the new rotor, let it sit for 10-20 seconds, and wipe it off with a clean cloth. Do the same for the other side of the rotor. It’s normal for new rotors to have oil, grease, or other gunk on them. When you put the new rotor onto the wheel studs, it should be pretty loose, and it’ll stay that way until you re-install the caliper mounting support frame.
STEP 8
Install new brake pads into the caliper mounting support frame. I didn’t do this because I had done my pads recently. This is straightforward–there’s only one way they can fit.
STEP 9
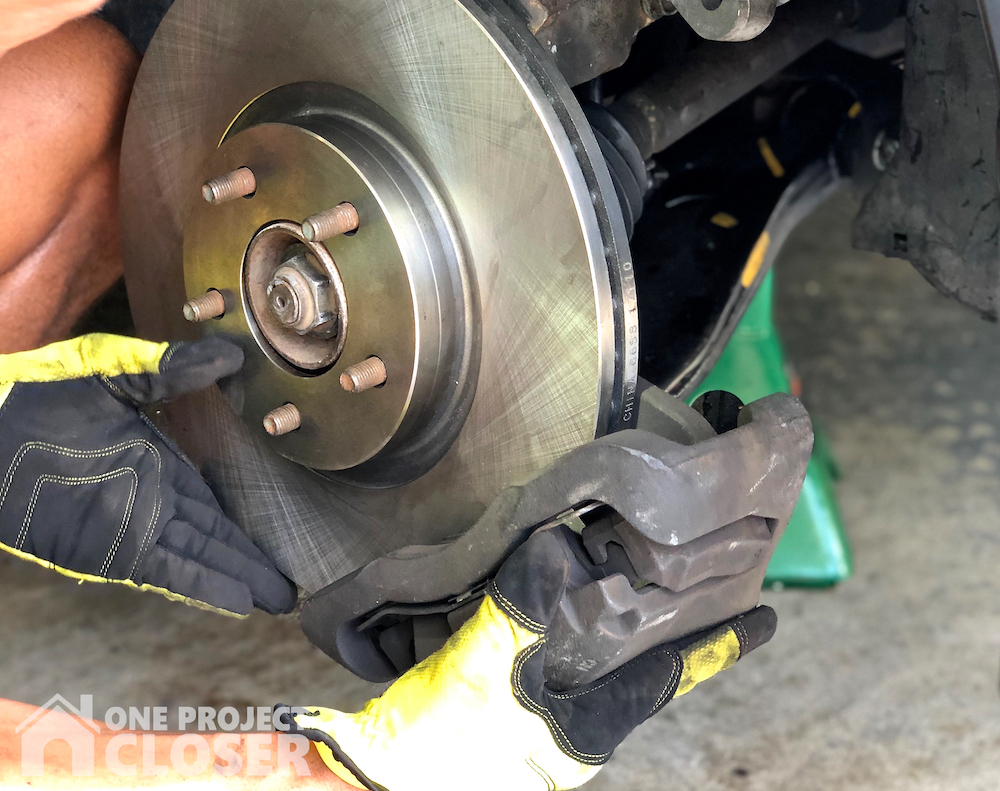
Re-install the caliper mounting support frame. Have a bolt ready in one hand while you guide the support frame on with the other hand. This one of those steps that’s easier if you separated the brake piston housing from the caliper mounting support frame–less weight, and no brake line to work around.
STEP 10
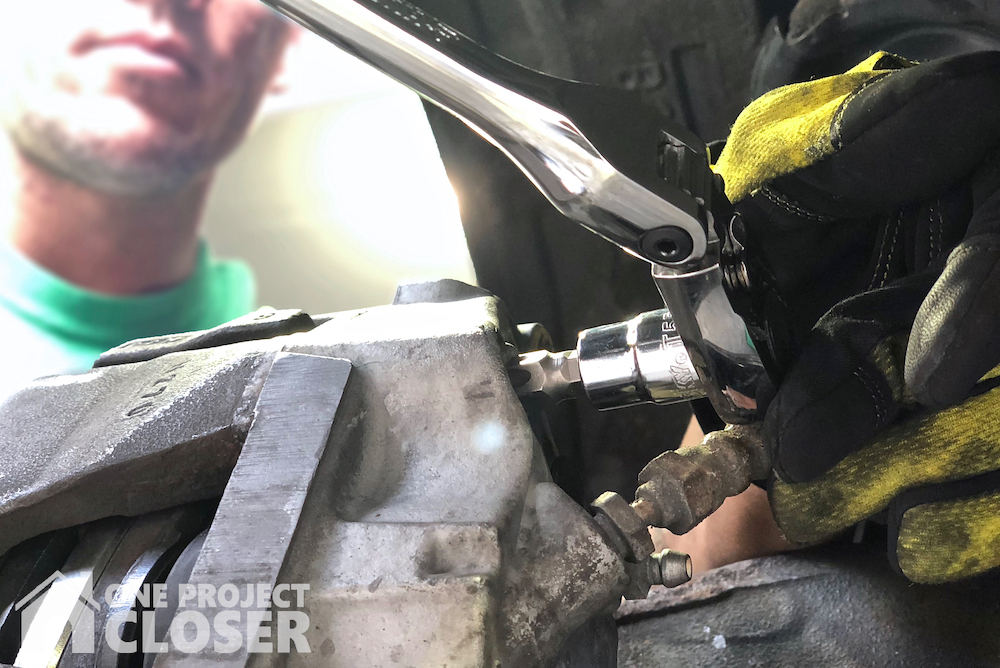
Re-install the brake piston housing. But first, you have to compress the brake piston in order to make room for the increased thickness of the new rotor. Use a C clamp and a hard, thin object on the piston for the clamp to push against (don’t clamp directly on the ring of the piston–it can damage the piston). I used an old brake pad.
After the housing is re-attached to the caliper mounting support frame, clean the rotor again if you got your dirty hands all over them while doing the last couple steps.
STEP 11
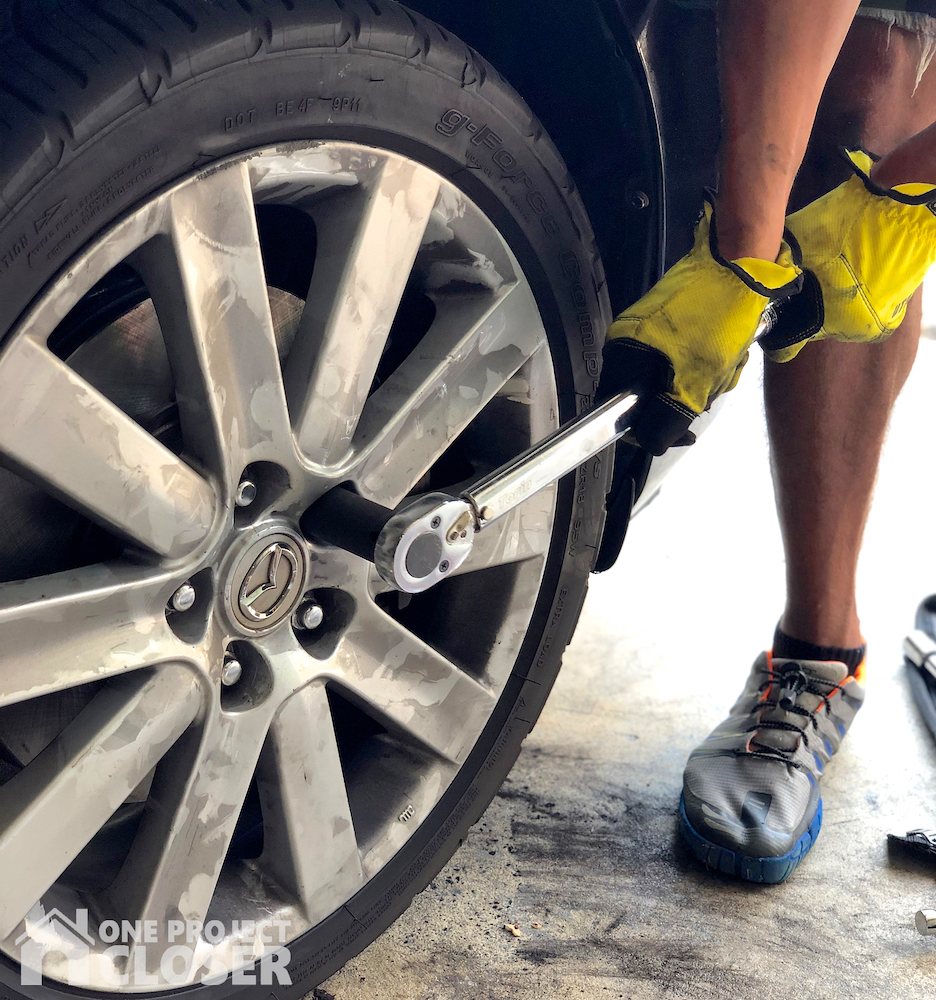
Put the wheel back on. The fastest way is to barely thread on all lug nuts by hand, then zip them on the rest of the way with a cordless impact wrench. Don’t forget to tighten the lug nuts to spec with a torque wrench. Order matters, so tighten them in a star pattern. After lowering the car, I usually use the torque wrench again just to make sure.
STEP 12+
Remove the jack stand, lower the car, and do the other side, following the same steps. Then fist bump family and friends with your non-bleeding and unbruised knuckles.

I’m David. I enjoy learning how things work by working on them, such as cars, electronics, and homes. I’m awesome at watching YouTube videos and reading forums to convince myself I know enough to attempt a new DIY project.
