
A couple of weeks ago we published a two-part series showing how a local roofing contractor shingled a roof with architectural shingles. This Project Guide is a combination of those two articles, and it covers replacing the existing roof decking, installing underlayment and ice dam protection, laying the first row, laying shingles in the field, flashing, ridge shingles and vents, and more. This how-to is a great resource for anyone looking to shingle a roof or better understand what to expect of a roofing contractor.
We want to thanks readers like Jeff Williams, Reuben, David P., Mike, Perry and R.W.H. for your comments and emails. Your feedback and insights help make these Project Guides even more comprehensive. We’ve included several suggestions for tackling certain aspects differently to ensure readers are fully informed for the best possible results.
Safety
Safety is a very important consideration for a roofing project, and you can read the OSHA fall protection guidelines here. To be OSHA compliant for low slope roofing projects, each crew member should be protected by guardrail system, safety net system, or a personal fall arrest system. You might notice that the guys in these pictures are not tied-off, and that’s a dangerous risk. We recommend following the guidelines to ensure a safe work site.
Step 1: Remove Existing Roof and Underlayment
The original plan was to preserve a portion of the existing roof since the shingles still had some life left in them. However, the plywood sheathing underneath the shingles was beginning to fail. So instead the whole roof was removed and the decking was being replaced.
The guys began by removing the existing shingles and underlayment from the existing house. They worked methodically so as to avoid throwing pieces of shingle and nails onto the ground below.

To remove the shingles and underlayment, the guys used roofing spades to dig underneath and pry up the nails.
Pro-Talk: Underlayment is often referred to as felt paper or tar paper.


Step 2: Remove Roof Sheathing
This picture gives you an idea of the condition of the existing roof plywood, and you can see how it sagged between rafters. Also, walking the roof you could feel the plywood give beneath your feet. Since the plywood was failing, the homeowners decided to replace the entire roof.

The guys removed the old roof decking piece by piece.


Step 3: Install New Sheathing
Plywood and OSB are really the only two options for roof decking, and the NRCA recommends 1/2″ decking (OSB or plywood) for 16″ oc rafters or 5/8″ plywood for 24″ oc rafters. Extra care must be taken with OSB because moisture can cause it to delaminate. If you’re using OSB, lay felt paper (or better yet, shingle the roof) before any rainfall.

The guys installed sheathing clips in between rafters for increased support.


They used a combination of nails and staples to secure the OSB, and pictured here is a heavy-wire stapler.


Shingles and Materials Arrive
While the sheathing was being replaced, the new shingles, felt paper, ridge vents and more arrived on the truck.

It was very cool to see them setup a conveyor belt to transport the heavy packs of shingle onto the roof.

They delivery guys positioned all the materials at strategic places around the entire roof, and they stacked everything on the ridges. For this job, they’ll be installing architectural shingles that match the shed built earlier this year.

Step 4: Install Drip Edge
Steve’s crew had already put down felt paper on the addition, and the roofers removed the first course. Since this is a hip roof, they installed a drip edge along the entire perimeter, overlapping joints by a few inches. When the time comes, a metal fascia will tuck up underneath the drip edge to cover the fascia board.

Step 5: Lay Leak Barrier Underlayment
In lieu of felt paper for the first course, the roofers laid Leak Barrier MS300 which creates a watertight seal to better prevent water and ice (like ice dams) from finding a way underneath.
Pro-Tip: This type of underlayment is highly recommended in areas where the average temperature for January is 30º F or less.


MS300 is a long roll of rubberized sheeting which adheres directly to the roof decking. If you remember, Steve’s crew had laid felt paper over the addition to act as a temporary waterproof barrier. Even though it is not well shown in the pictures, the roofers removed the first course of felt paper and lapped the MS300 underneath the next course. This is important because otherwise water could penetrate beneath the underlayment.


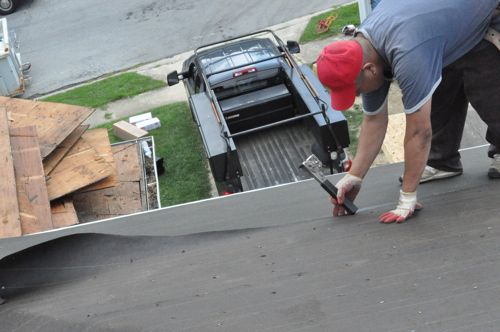
The MS300 and felt paper was secured using staplers, and, when the shingles go on, the roofing nails will hold it place too.
Pro-Tip: This type of underlayment is considered “self-healing” meaning it will seal around the fasteners to remain waterproof.
Pro-Tip: In some areas this underlayment is required by local building codes and should be applied starting at a roof’s eaves and extending upslope a minimum of 24″ from the exterior wall line.

Step 6: Lay Felt Paper Underlayment
Felt paper is installed under the shingles, starting at the lowest point and working up toward the ridge. Each course is overlapped by about 1″ to ensure water is shed down the tar paper and will not go underneath. Underlayment performs two primary functions: it provides temporary weather protection, and acts as a secondary weatherproofing barrier if moisture infiltrates the asphalt shingles.
Step 7: Snap Chalk Line
The guys snapped a chalk line to act as a reference for the starter course of shingle.

Step 8: Begin Starter Course
Ideally, a manufactured starter strip should be used, placing the adhesive strip adjacent to the eave and creating the correct headlap. If a starter strip is not available and shingles are used, it’s good practice to cut off the lower portion of the shingle so that the adhesive strip can better protect from blow-off.
The roofers installed (uncut) shingles in a reverse orientation to waterproof the joints of the first course of shingles.

You can see the first course of shingle is installed flush with the starter course and the joints are staggered.

The starter course (and subsequently the first course) extends past the drip edge by about an 1″.


Step 9: Laying Shingles in the Field
The shingles have two faint blue lines, and the upper one is used for lining up the next course. Again, all joints are staggered, and adjacent shingles are butted against each other.
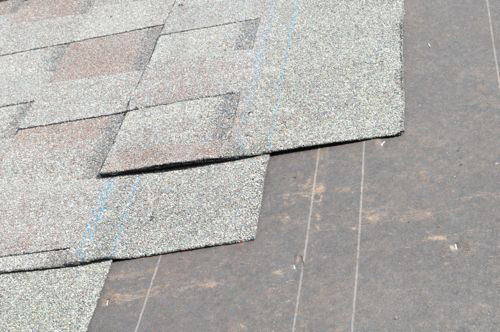
Each shingle gets five nails, approximately evenly spaced, and they are positioned along the other blue line.


Step 10: Cut Along Hip Rafters
All the shingles are cut along the hip rafter with a utility knife or, in this case, the Ridgid Roofing Cutter.


Step 11: Lay Hip Shingles
The roofers used hip and ridge shingles which came bundled like typical shingles, but they break into three pieces.
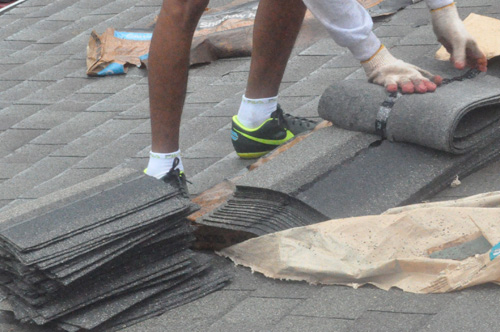
Each shingle overlapped the previous one, and they were secured with two nails on either side.
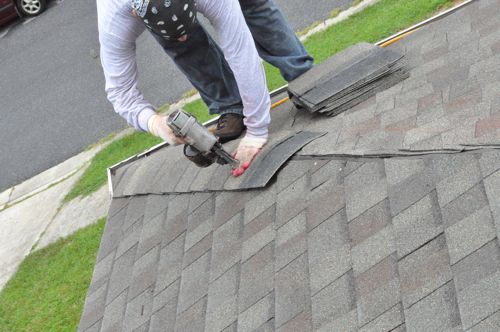
The first couple of hip shingles were cut to match the corner.
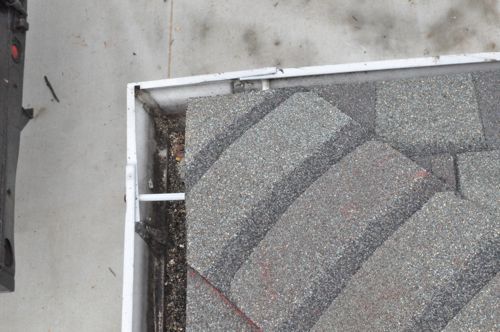
They snapped chalk lines to ensure all the hip shingles were straight.

The hip shingles continued all the way to the ridge, and that last shingle was cut to length so as to avoid covering the open ridge rafter.
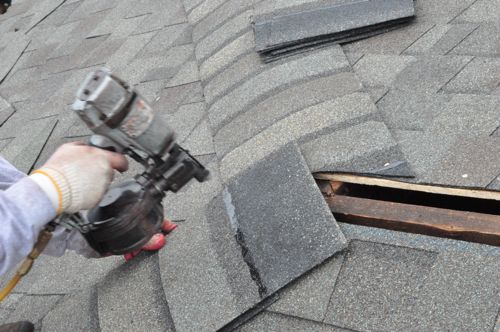
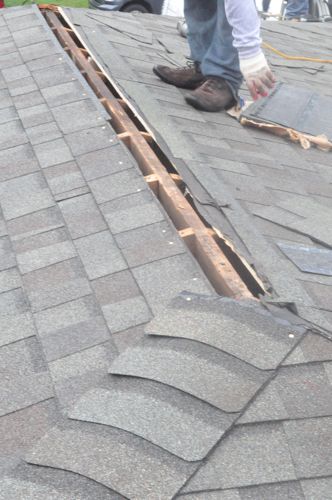
After both hips were finished, the guys would place a shingle along the ridge.

The guys would cut a second shingle to overlap the back half of the first one.
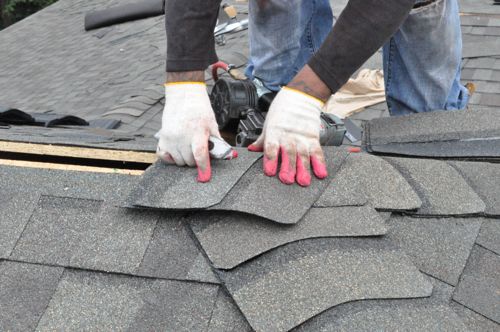
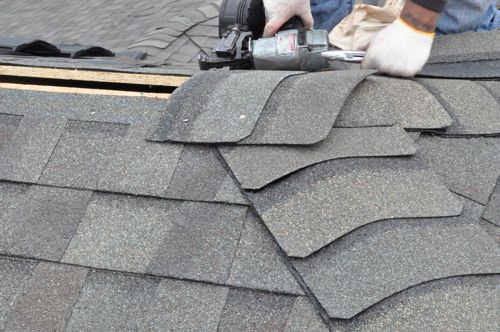
To make the shingle flush, they would cut a short slice parallel with the ridge.

Bending and overlapping these flaps, the guys would put two more nails to anchor it in place.

That’s how the guys terminated each line of hip shingles.
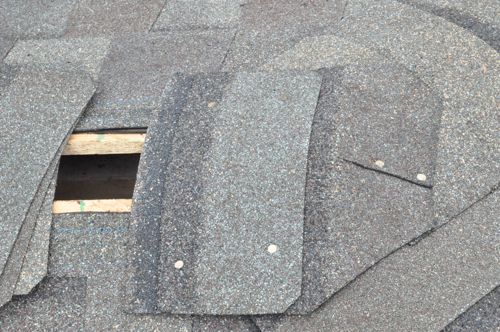
Step 12: Flashing
There are several categories of flashing including perimeter edge, penetrations, valleys and vertical surfaces. For this install, the roofers only needed to address vertical surfaces. Here’s how they did it.
Step Flashing
These pieces of step flashing waterproof the corners where the roof meets a wall, and they’re sized to half the width of a shingle.
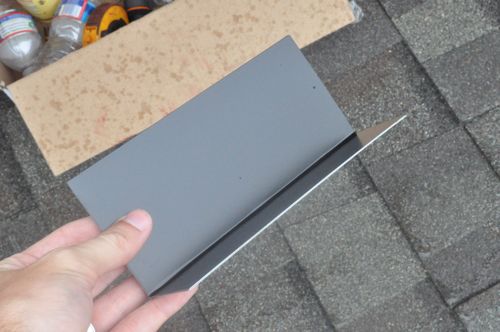
After laying the starter course, the guys would position a piece of step flashing so that the bottom edge would be just shy of the next shingle.
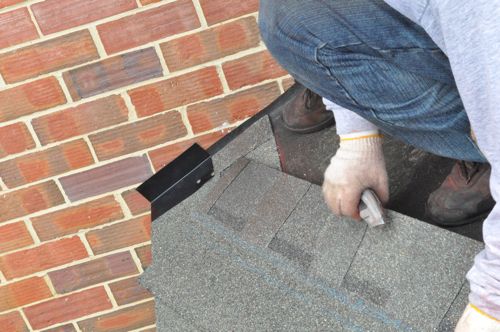
They continued the step flashing all the way along the wall, placing one nail in both upper corners (when there wasn’t brick). For most of this project, the siding acts as counterflashing. Where this does not occur, the roofers used a metal counterflashing (not pictured) mounted to the brick.
Pro-Talk: Counterflashing is installed over the top edge of other types of flashing and should overlap at least 2″.
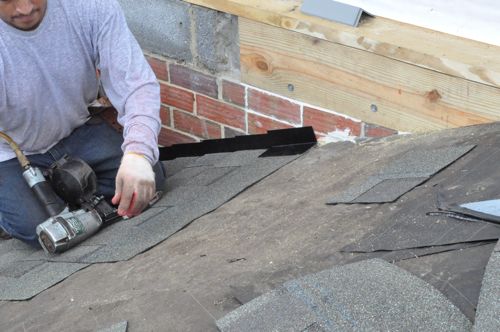
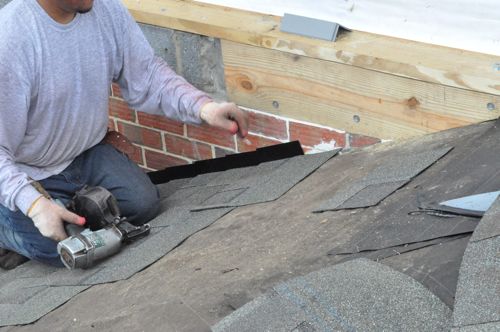
At the ridge, the guys cut slits on two piece of flashing and did an over-under overlap so that the flashing could bend around the ridge.

Chimney Flashing
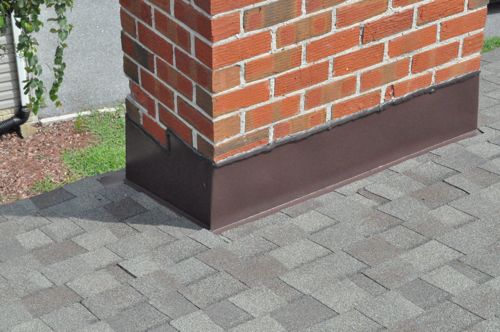
The roofers van actually had a brake installed on top for making flashing, and they cut / bent four pieces of counterflashing for around the chimney.
Pro-Talk: A sheet metal break, sometimes called a siding brake or an aluminum brake, is used for cutting and bending flashing.

Before the guys started installing the counterflashing, they put step flashing all around the chimney, woven between the shingle courses. From the image below, you can tell the roofers opted for backer flashing on the upslope side of the chimney. Instead we recommend a cricket to better prevent debris (like leaves) from accumulating. To see how to build a roof cricket, check out this great how-to from Rob over at A Concord Carpenter.
Pro-Talk: A cricket is a ridge structure designed to divert water on a roof. Generally found on the high side of a chimney or the transition from one roof area to another.
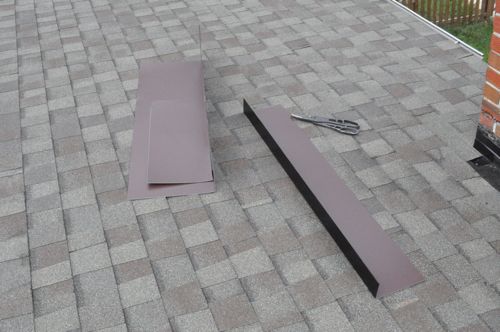
Starting on the lowest side (the side most downhill), they trimmed the apron to the desired length.
Pro-Talk: The apron is flashing around a chimney’s downslope face.
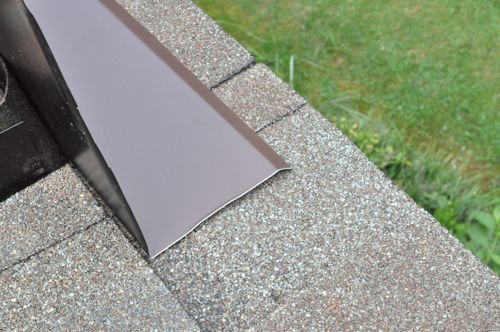
The roofers made angle cuts that’ll allow them to wrap the counterflashing around the corner, and the guys surface-mounted the counterflashing by driving masonry anchors into the mortar joints. While recognized as a suitable approach by the NRCA, we prefer to see a wedge of counterflashing inserted 1″ into the mortar joint and covered with sealant.

Next, the guys moved onto the sides. They cut both edges flush with the chimney and also cut steps to match the brick.
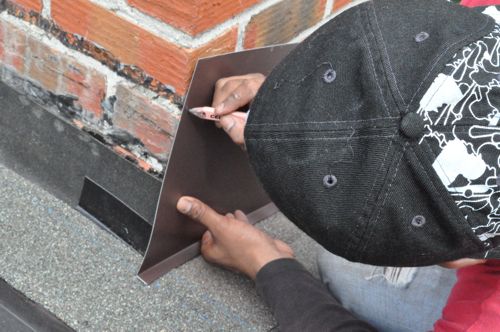


Lastly, they guys installed backer flashing on the upslope side, and you can see that this piece is much bigger than the rest. The increased length is because it slides underneath a few courses of shingle.


Again, everything is secured with masonry nails along the edge of the flashing.

The corners were cut (much like the first piece) and wrapped around the edges.
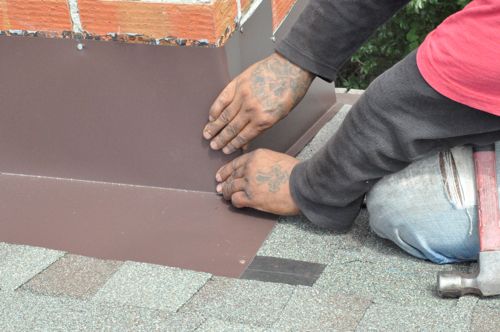
With the flashing in place, the guys nailed the few courses of shingle.


Step 13: Install Ridge Vents
Next the crew would install the ridge vents, and they would start by trimming any overlapping shingles and cutting back tar paper to expose the ridge.


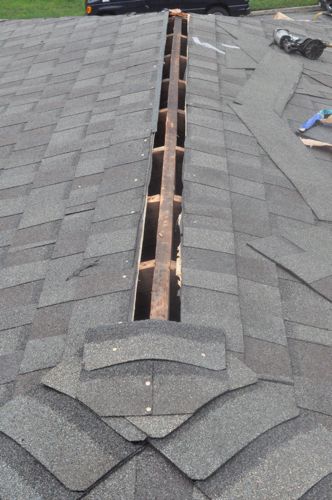
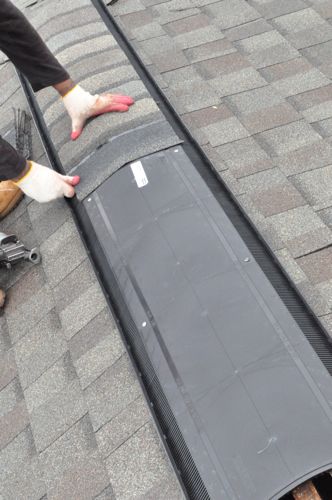
Next, the guys would position the ridge vent.

Adjacent pieces of ridge vent “connected” by inserting these tabs into the next segment. Excess length was cut with a utility knife.
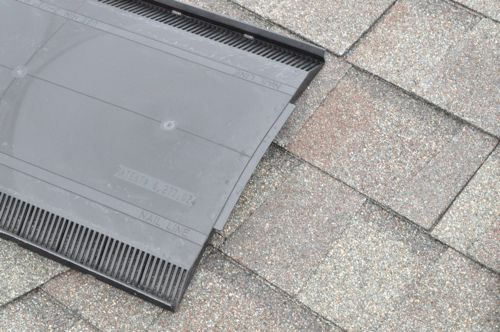
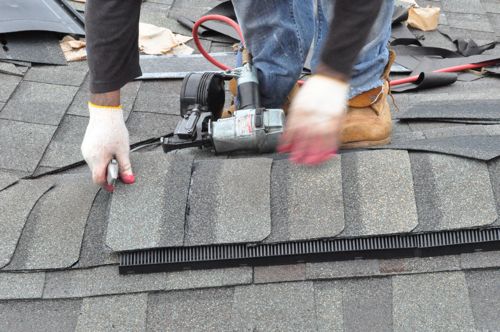
The ridge vents were hand-nailed with 2″ nails to reach into the decking below. Also, the guys were careful to place the nails in the nail line indicated on the vent.

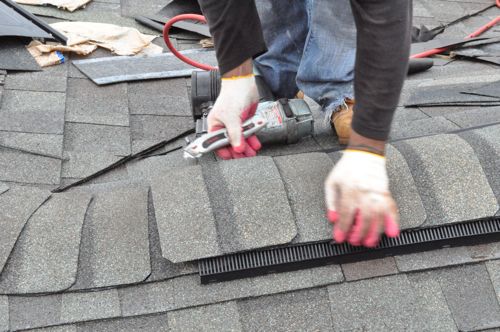
Starting at one end, the guys nailed shingles over the vent.

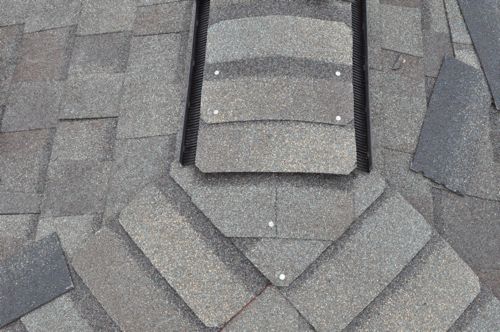
On the very last piece, they cut a shingle to look like a mirror image and nailed it in place.
Step 14: Self-Adhering Membrane
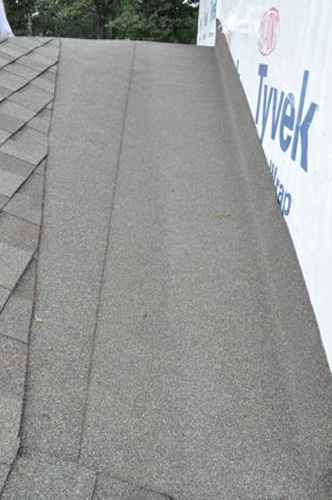
This self-adhering membrane is a SBS modified bitumen roll, and they’ve been in use in the U.S. since the mid 1970’s. These rolls can be used as an entire roofing system for low-slope applications, and the roofing crew used it in lieu of shingles on a roof cricket. This cricket would be very difficult to shingle because the wall of the addition comes in at an odd angle only a short distance away. Furthermore, this section of the roof isn’t visible from the ground so it won’t be noticeable.
The membrane adhered to the roof, and the guys placed a few nails into the wall right along the edge to hold it in place.

Step 15: Roof Sealant
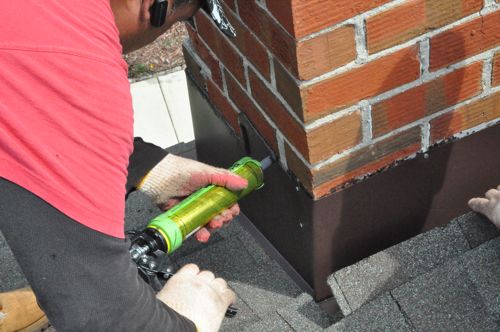
The last thing the guys from did was go around the roof and seal edges (like around the chimney) and any visible nails.

Finished


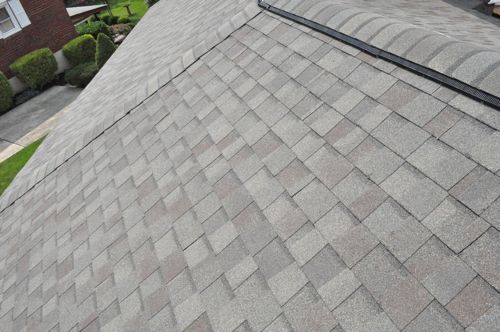
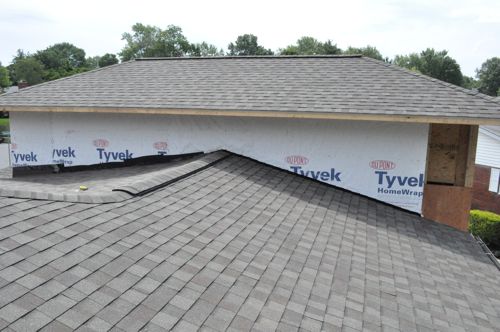


Great summary post. I’m sure I’ll be referring back to this before I re-shingle my garage in about a month.
If you remember to, send in some pics!
WOW! I think I better not try this one at home! Leaving it to the pros!
Great exhaustive post. I also really appreciate when you link to the tools you use. It helps someone like me who is looking to buy tools and wanting to know what others recommend.
Very cool. Like Frazzled5 says, I’ll leave this one to the pros although maybe, just maybe, i could handle a garage roof.
I didn’t notice this the first time around but where are all the stink stacks and other roof protrusions? Love the inclusions and other tips this time around. This will be one of the essential roofing guides on the web.
Hey Jeff,
Nothing gets by you! The ridge vents eliminated some of the existing protrusions, and the roofers snuck the stick stacks in while I wasn’t looking. I went back and they’re there, and the roofers used multi-size, self-sealing, aluminum flashing around the vent pipes.
Wow, the pictures really speak for themselves here. Good point to keep in mind is sometimes the plywood doesnt need to be completely replaced, but only the pieces that show visible water damage. It can really keep the cost down.
Wow! Incredibly informative. I’ll definitely reference this post when I write my next roofing blog post. Thanks Ethan!
-Nick
Helped my dad re-shingle a house years ago. Don’t think I’ll ever do that again! Wouldn’t sealing the flashing at the chimney be about as effective as embedding it? If the roofers weren’t careful, couldn’t they damage the chimney by cutting it, tucking the flashing in?
Cut it with a grinder, carefully, follow in step like pattern with brick downward where the lead needs to be, roll and tuck small pieces of lead to hold in the big pieces then add small amount of mortar to fill in where you cut out
Also in new england I think it’s better to put the drip edge over the ice/water shield.
Also, it is code to have crickets on a chimney of certain sizes in some areas. In Indiana it is required at 30″ and Ohio it is 24″ to name a couple. Great info!
I have a few questions. Where the 2 hips meet a ridge, you have to slit the last peice to form around the ridge. Woould it not be better to make your cut on the top part, and roll it around, rather than the face, so you do not see the cut? Also does red chalk wash off? I thought only blue did. On your back chimney flashing, is it better to cut it flush, to the sides, as they did, or let it go past 2-3″ on each side to get the water away from the side? Just currious. Great post.
Good article, ive done alot of roof but never a hip roof, i dont rake my shongles and i like to use multiple bundles to ensure im mixing the colour. I see pros rack the shingles and i can see where batch colours were off. My roof is a sidesplit so i have a hip roof on the upper part, my question is how do you layout you chaulk lines when you have no 90 deg edge up the roof. 3 tab shingles seem to walk out of alignment if i dont make my lines and rely on the cut marks. Urgh.
Very good info… My question,I live in Florida I,m having a house built ,,,the structure for the roof was put on and plywood sheets were cut to fit felt paper was put on a week later.the hurricane hit and tore off all the felt paper the roof was bare for 2 weeks in rain conditions now its a total of 4 weeks with no shingles in the rain, also the plastic moisture has been torn up should i make them replace the paper before the finally install the shingles… HELP
Thank you for this post. It is always important to know how things work
That chimney flashing wasnt installed proper and will eventually fail without proper maintenance and reapplying the sealant every so often.
The top edge of the flashing should be bent in an upside down “L” shape and a kerf should be cut into the chimney grout, a bead of sealant into the kerf, then the flashing inserted into it. That way over time the sealant doesn’t crack and allow water to get in behind the flashing and pool up along the bottom where the decking meets the chimney causing rot and decay
Hi you think is so difficult but not so difficult I did it my roofing myself,I call 4 different company!the price was so high I couldn’t believe it,so I did it myself and came very good.