
I’m a big fan of under cabinet lighting in kitchens. It’s a great way to provide additional, direct light for a space that would otherwise be obscured by shadow. And done right, all the wires and bulbs are completely hidden.
Installing under cabinet lighting is a great DIY project, especially when you have the right materials and a few tricks to hide the wires. It’s best done during a kitchen remodel when you’ll have access to walls for fishing wire but can be achieved afterward too. I’m going to provide a closer look at my kitchen to show you how it’s done.
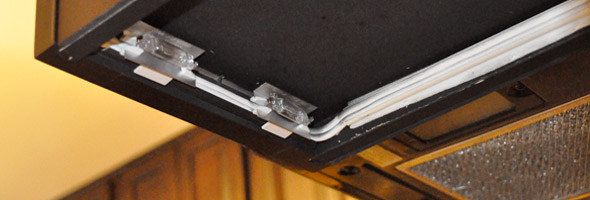
Lighting Choice
There’s a couple different options when it comes to under cabinet lighting.
Stand-alone units
Stand-alone units are individual fixtures that you mount to the underside of a cabinet. They are often large rectangles that feature xenon, fluorescent or halogen bulbs. They can be hardwired or utilize a built-in switch.
Puck / Disk lights
These are very similar to stand-alone units and just like the name implies, these are tiny, rounded lights. This style uses a xenon or halogen bulb and you can daisy-chain several lights together.
Track lights
I think track lighting, aka low voltage linear lighting, is the best solution. These lights are hard-wired and easy to conceal. All the pictures in my kitchen are low voltage lights. They use xenon bulbs that result in great coverage giving your kitchen a very professional look.
Installing Low Voltage Lighting
Be aware that I’m not a licensed electrician. You should always consult a licensed electrician for any electric work in your home that you are not qualified to perform. Just because this is low voltage lighting, doesn’t mean you can’t get hurt! There’s still lots of electrical current. In any event, use this information at your own risk 🙂
Materials
Make sure all the materials you purchase are UL listed. It’s a good idea to pick one manufacturer as they will be able to recommend compatible components (i.e. correct sized wire and transformer).
- Cable- This isn’t normal romex- it’s 12/2 Low Voltage Cable. Most cable features self-sealing insulation over copper wire, designed to be pierced with a socket.
- Sockets- Sockets snap down on the cable, creating an electrical connection for the bulbs. They also have a reflector that helps direct light and heat into the open space.
- Track- This is simple plastic track that you can cut to size. It can be flexed, notched or curved depending on application. Some feature adhesive while others need to be secured with a staple or screw.
- Bulbs- I have clear xenon bulbs in my kitchen and have been very happy with their performance. If you take a close look, you’ll see two loops on either end that hook around the socket. These loops also carry current to the thin filament, creating light. Your sockets / bulbs may be slightly different but follow a similar design.
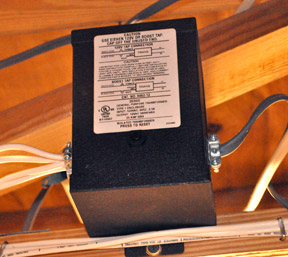
- Transformers- Since this is low voltage lighting, you need a transformer to convert the electricity from 120V to 12V.
Installation
Low voltage linear lighting takes advantage of how kitchen cabinets are made. If you check the underside, you’ll notice a shallow recess of about 7/8″ and cabinet shelves are not flush with the inside frame. These tiny spaces are just enough to hide the cable and lights.
First, plan the location for your cable. Run it along the front, inside edge on the underside of the cabinets (blue lines). For any vertical runs, place the cable inside the cabinet. Check out the pictures of my kitchen below.
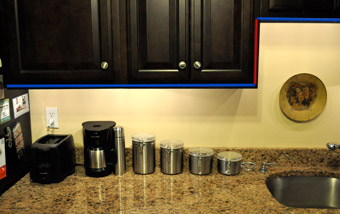
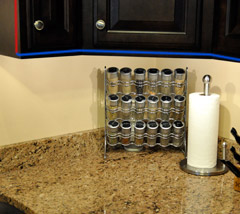
Next, drill holes for the cable. You’ll need to drill at the junction between two cabinets (underneath) and inside the cabinet for vertical runs. Holes should be just big enough for the cable- a ¼” spade bit should suffice. The picture below shows the cable entering an adjoining cabinet for a vertical run.
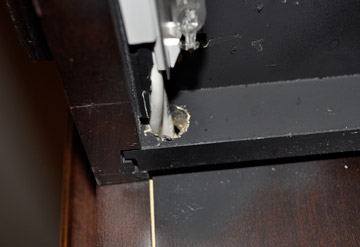
Affix your cable track along all the different segments, even inside the cabinets. Notice in the two pictures below how the cable track is secured to the inside of the cabinet frame. Place your cable in the track tacking care that any writing on the cable is still visible. These pictures show the cable entering and exiting a cabinet.
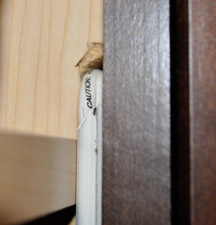
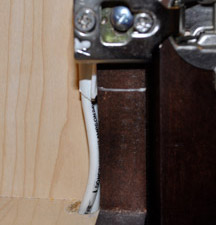
Select a location for your transformer. Remember, follow manufacturer guidelines about orienting your transformer and space requirements. You need to pick a location that you can run your cable and still tie into the house electric. My transformer is in my basement and the toughest part is fishing the cable down to it. Wiring most transformers is straight-forward and some even include “jumper wires”.
Install the sockets on the track by centering them on the cable and pressing firmly until they click into place- piercing the cable. Make sure the socket is oriented so that the reflective shield is adjacent to the cabinet. The sockets will have a recommended spacing that you should follow, generally 4″ – 6″ apart. Next, install the bulbs for each socket. It’s a good idea to purchase a few spare bulbs for later use.
Tips
- Consider LED linear lighting too
- Don’t forget to wire a switch for turing the lights on and off.
- Use the correct-sized wire for the lights. Many low-voltage light manufacturers sell the correct wire to match the voltage and load of the fixtures.
- Follow the instructions and guidelines for the transformer.
- Not all transformers are UL listed to be recessed into a wall.
What do you think? Any tips for installing low-voltage lighting?


I loved undercabinet lighting! I’m so happy we installed it finally.
I got IKEA Dioder lights for under my cabinets, they have both puck and stick versions, and the white only ones are just $30, so for two sets (and a soldering iron, to splice where I needed a really long one, and the klein strippers for the itty bitty wires, and extension cords, etc. etc.) it was only ~$100, and they use almost no power. they could be a little brighter I guess, but its WAY better than nothing, and they are SO thin (1/4″).
Great article! I’ve been looking for something like this to do in my kitchen. Bookmarked! Does Lowes or HD carry these items? How much time did it take to get these running?