


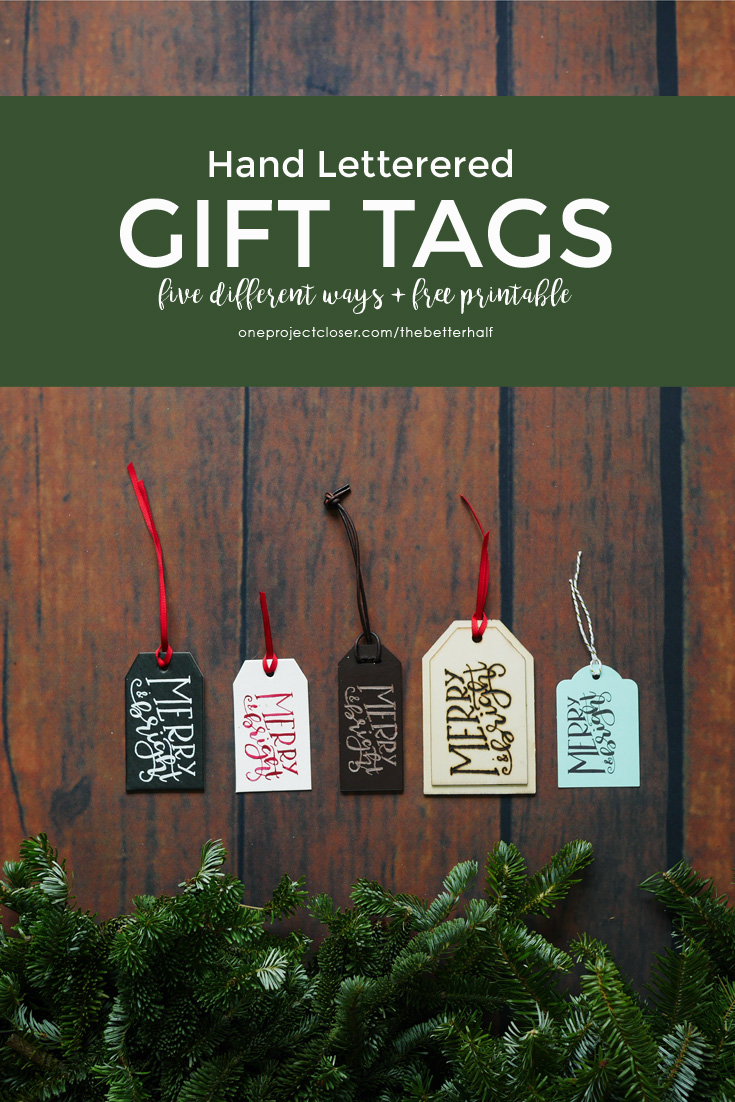
We’re so excited to have you join us for another fabulous year of Handmade Gifts using Young Living Essential Oils! If this is your first year joining us, here are 75 hostess gifts and ideas perfect for the Holidays! As for this year, I’ll be sharing how to make Scented Gift Tags (5 different ways) plus a free printable.
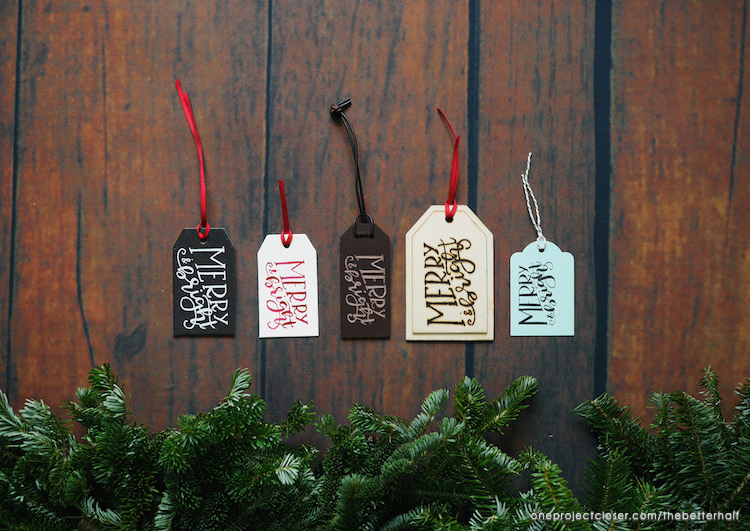
That’s right, I’m going to show you how to make scented gift tags 5 ways with this free printable, watercolor, leather, wood burned, and chalkboard tags! That’s a bit much even for me, but I wanted to make sure that no matter your skill or comfort level, this is possible for anyone.
Gift Tag Materials
Are you a Young Living fan? Most of you know, I’m obsessed. In addition to living a more natural life style, I love using my oils for giving our home the scents of the season without the fuss of live trees and foliage. You can really use any Young Living oils to scent your gift tags but my favorites are: Northern Lights Black Spruce, Christmas Spirit, Idaho Balsam Fir, Cinnamon Bark, Peppermint, and Pine. I often do all sorts of combos of those scents, so go ahead and get creative!
As for the tags, most of these materials can be bought in the store and best price usually comes from using a coupon! You girls know what I’m saying. But if you love two dollar shipping and don’t want to leave your couch, here’s my amazon store that is already loaded with all the supplies needed for these projects, plus my hand lettering favorites!

Now, prepare yourself. This is a long video. Its ALL FIVE different tags, all in one video! If you would prefer to watch one at a time, keep scrolling down. But otherwise, enjoy five whole minutes of hand lettering goodness! LOL
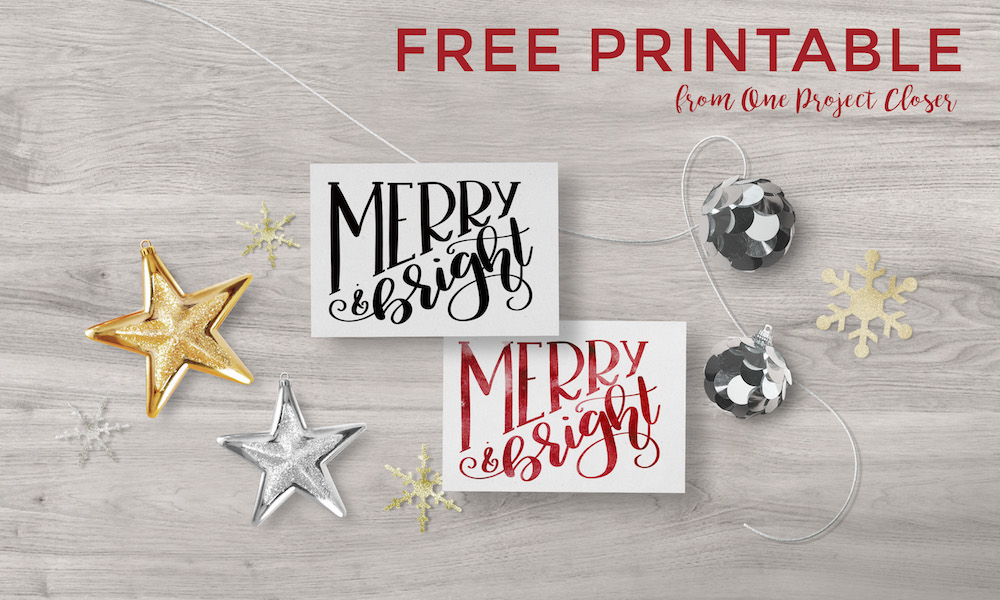
Free Merry & Bright Printable
All of these gift tags begin by using this free printable I created for the gift tags, but would also make a beautiful printed piece of art on your wall or mantel. I have it available in both black and white AND red watercolor! To start, download and print to the desired size for your tag or printed art. Be sure to click “print preview” to decide how large or small it will print. And ENJOY!

1. Scented Leather Gift Tags

I love that these gift tags are really the gift themselves and can be used as ornaments, key rings, luggage tags or on your purse! Really, they are perfect!
Materials:
- Leather Tags
- [amazon_textlink asin=’B015DVN4E4′ text=’Dremel Micro’ template=’ProductLink’ store=’opcwp-20′ marketplace=’US’ link_id=’b5f4eb46-da2d-11e7-934d-3fba73809a52′]
- Young Living Essential Oil
These leather tags from Etsy are the absolute cutest, but a bit expensive. If you have even the most [amazon_textlink asin=’B073VDZCR8′ text=’basic leather working tools’ template=’ProductLink’ store=’opcwp-20′ marketplace=’US’ link_id=’f6744d2e-da2d-11e7-8560-457dfde78aa8′] you can easily make your own tag.
Once you have your leather tag, print off my super cute “Merry & Bright” Printable (click the red button above in the post). Place the printable on top of the tag and trace with a pen using medium pressure. You do not need any sort of transfer material since the pressure of the pen in leave an indent on the leather. Remove the paper and then use your Dremel Micro to etch the lettering in the gift tag. Use long strokes and then go back to thicken the down strokes of the letters.
Once the lettering is done and you are ready to gift, add a few drops of your favorite oil to the back of the leather tag. It’s that easy!
Check out the full process in my video!
2. Printed Paper Tags
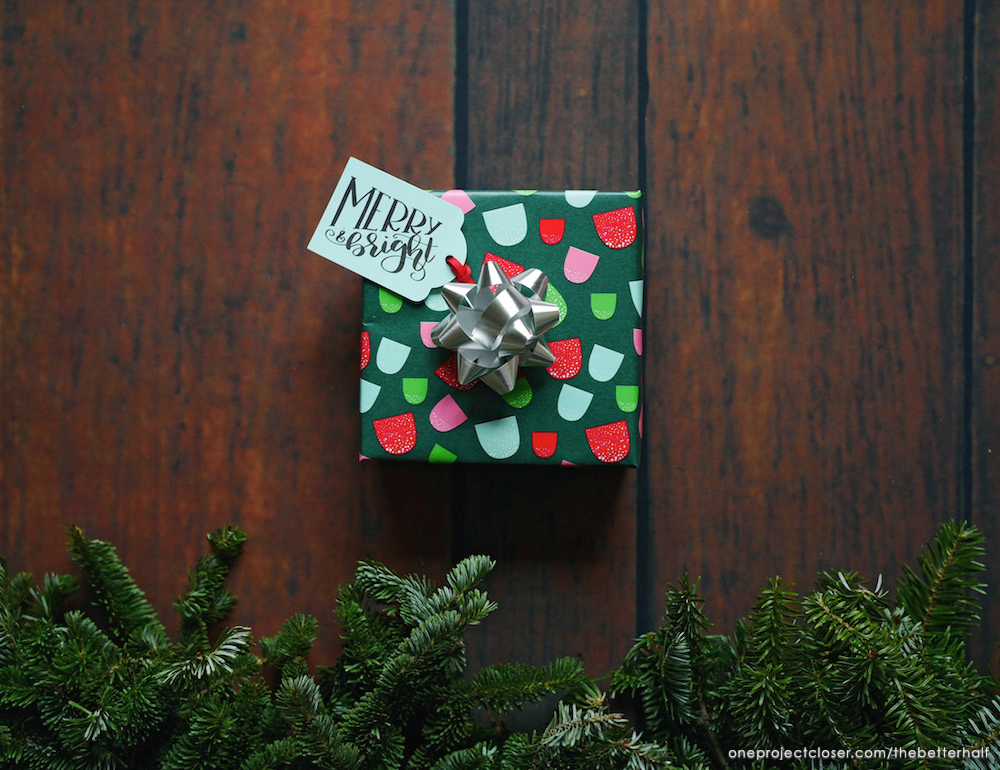
These are the tags that really anyone can make, and for cheap! You can make large bathes of these tags with very little effort, jus my free printable and some cardstock and ribbon. If you haven’t already, click on the red button at the top of the post for access to this free printable gift tag.
Materials:
- Solid Cardstock
- [amazon_textlink asin=’B018HB6D54′ text=’Fiskars Label Punch’ template=’ProductLink’ store=’opcwp-20′ marketplace=’US’ link_id=’f81d9ba5-da2e-11e7-a9ec-cb96d0034e95′]
Print this printable gift tag, formatting to the desired size onto your cardstock. Cardstock really does work so much better and I like using cardstock that is fairly flat and without texture. If using a label punch, be sure to allow enough space around the printable to work the punch and not have them overlap. Once printed, use the punch to cut them or simply use a paper cutter or scissors! BOOM! Super easy!!!
Once the labels are done, add a few drops of your favorite Young Living oils to a cotton ball or cotton round and place the cotton along with the tags in a sealed plastic bag for serval hours. Your tags will smell amazing without any oils residue or marks.
Check out the full process in my video!
3. Watercolor Tags

I love that these gift tags are really the gift themselves and can be used as ornaments, key rings, luggage tags or on your purse! Really, they are perfect!
Materials:
- Watercolor Gift Tags
- [amazon_textlink asin=’B00004THXI’ text=’Watercolor Paint’ template=’ProductLink’ store=’opcwp-20′ marketplace=’US’ link_id=’525a1452-da30-11e7-8683-d5258ff0ef87′]
- [amazon_textlink asin=’B01N2H33UN’ text=’Transfer paper’ template=’ProductLink’ store=’opcwp-20′ marketplace=’US’ link_id=’7cffbebb-da30-11e7-b2ff-81f9c3f97716′]

I bought my watercolor gift tags precut from Michaels but you could easily make your own using the [amazon_textlink asin=’B018HB6D54′ text=’Fiskars Label Punch’ template=’ProductLink’ store=’opcwp-20′ marketplace=’US’ link_id=’f81d9ba5-da2e-11e7-a9ec-cb96d0034e95′] and [amazon_textlink asin=’B004KPLLF4′ text=’thick watercolor paper’ template=’ProductLink’ store=’opcwp-20′ marketplace=’US’ link_id=’28cd554d-da30-11e7-b93e-d170061d4468′].
Once you have your tags made (or bought), print off my “Merry & Bright” Printable (click the red button above in the post). Place the transfer paper shiny side down on top of the tag, and then the print out on top of that. Trace the design with a pencil using light pressure. Be careful not to drag your hand across the paper or press to hard or you will leave too much residue of the transfer paper.
Next, go back over your traced design using watercolor paint and a #00 or #1 paint brush. My faves are Windsor & Newton with a 40% coupon. <3
Once the labels are are completely dry, add a few drops of your favorite Young Living oils to a cotton ball or cotton round and place the cotton along with the tags in a sealed plastic bag for serval hours. Be careful the wet oil does not touch your watercolor paint. Your tags will smell amazing without any oils residue or marks.
Check out the full process in my video!
4. Wood Burned Wooden Tags

Real talk, friend. These are probably the tags that require the most finesse. BUT, once you get the hang of it, wood burning is some much fun. And you will impress the crap out of everyone you’ve ever met. Michael’s, Hobby Lobby, and Amazon sell tons of cute ready-to-burn unfinished wood products, including these cute [amazon_textlink asin=’B01180NO6M’ text=’wood gift tags.’ template=’ProductLink’ store=’opcwp-20′ marketplace=’US’ link_id=’663ec8ab-da32-11e7-bb0c-a7e20092f71b’].
Materials:
- [amazon_textlink asin=’B01180NO6M’ text=’Wooden Gift Tags’ template=’ProductLink’ store=’opcwp-20′ marketplace=’US’ link_id=’7fd2f09d-da32-11e7-af2e-6b80a91e0a66′]
- [amazon_textlink asin=’B005P1TRAS’ text=’Wood Burning Tool’ template=’ProductLink’ store=’opcwp-20′ marketplace=’US’ link_id=’97f97f84-da32-11e7-892e-41ebcfd987b4′]
- [amazon_textlink asin=’B01N2H33UN’ text=’Transfer Paper’ template=’ProductLink’ store=’opcwp-20′ marketplace=’US’ link_id=’d9aa3528-da32-11e7-a8db-75c80a3805d7′]
- Young Living Essential Oil
Once you have your wood tag, print off my super cute “Merry & Bright” Printable (click the red button above in the post). Place the transfer paper shiny side down on top of the tag, and then the print out on top of that. Trace the design with a pencil using medium pressure. Be careful not to drag your hand across the paper or press to hard or you will leave too much residue of the transfer paper. Remove the paper and then use your Wood Burning tool to burn the lettering into the wood gift tag. Use long, slow strokes (that’s what she said, LOL) and then go back to thicken the down strokes of the letters.
Once the lettering is done and you are ready to gift, add a few drops of your favorite oil to the back of the wooden tag. BOOM! You’re done!
Check out the full process in my video.
5. Chalkboard Tags
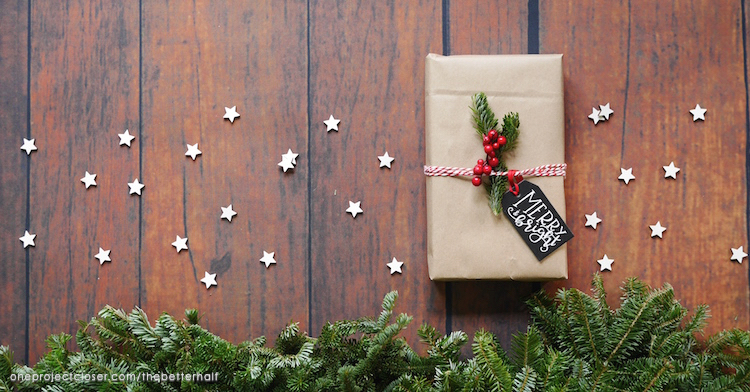
If you are unsure about making mistakes with hand lettered tags, Chalkboards are the medium for you! If you mess up, grab a baby wipe and start over. Otherwise, these are the cutest, trendy gift tag and are environmentally friendly in that they can be reused for many birthdays and holidays to come!
Materials:
- [amazon_textlink asin=’B00P1SXLWU’ text=’Chalkboard Gift Tags’ template=’ProductLink’ store=’opcwp-20′ marketplace=’US’ link_id=’ac502f55-da34-11e7-b33f-bdf3806234cd’]
- Chalk
- [amazon_textlink asin=’B009DSSSX6′ text=’Chalk Markers’ template=’ProductLink’ store=’opcwp-20′ marketplace=’US’ link_id=’d3e8719c-da34-11e7-8773-45b41c3a56a2′]
I bought my Chalkboard gift tags precut from Michaels but you could easily make your own using wood gift tags and chalkboard paint. Plus, they would be more durable. Just be sure to sand them really well first for a smooth canvas!
Once you have your tags made (or bought), print off my “Merry & Bright” Printable (click the red button above in the post). Turn the printable face down and use the side of a piece of chalk to coat the back of the paper. Turn the chalked printable chalk-side down upon your gift tag. Trace the design with a pencil using light to medium pressure. Be careful not to drag your hand across the paper or press to hard or you will leave too much chalk residue on the gift tag.
Next, go back over your traced design using a chalk marker. Chalk Ink brand is my fave but whatever brand you use, be sure to use a small tip – it will make lettering so much easier! You can always go back and thicker strokes, but if its too thick you can’t do anything about it.
Once the labels are are completely dry, add a few drops of your favorite Young Living oils to a cotton ball or cotton round and place the cotton along with the tags in a sealed plastic bag for serval hours. If you make your own wooden chalkboard tags, you can add the oil directly to the back if it is unfinished wood.
Check out the full process in my video.
Hand Made Holiday Hop
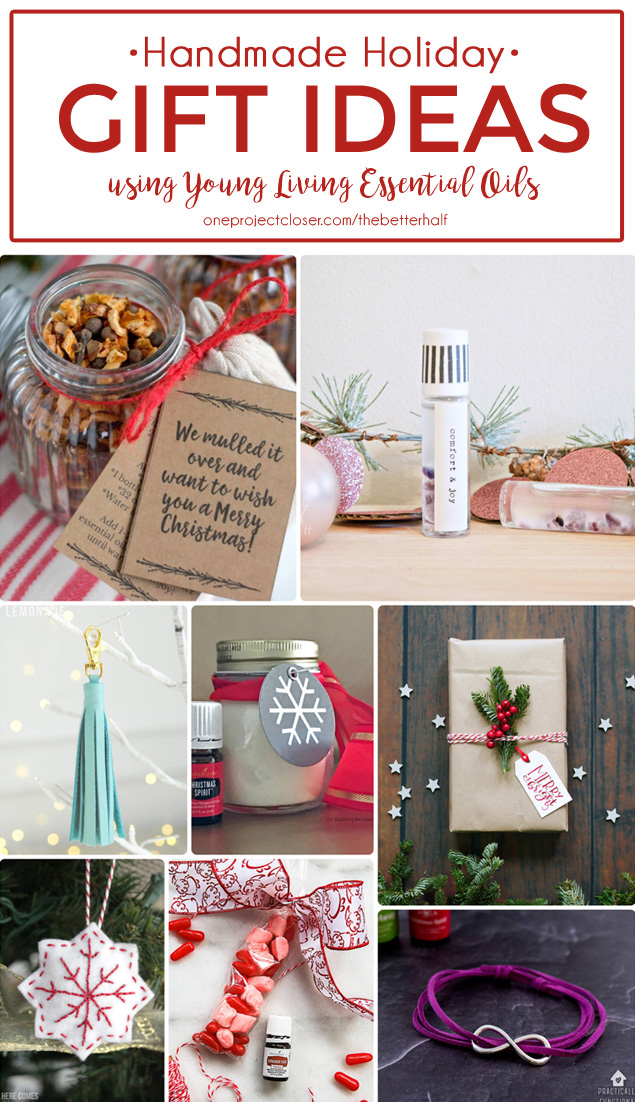
This post is just one of many amazing handmade holiday gift ideas using Young Living Essential Oils brought to you by top bloggers around the web! Tonight is our fourth annual FB party, showcasing all these amazing handmade gift ideas and giving away lots of goodies. We hope you will join us and tell your friends. RSVP here and attend from the comfort of your couch!
Get all the great DIY handmade gifts here:
Scented Gift Tag Printables by One Project Closer
Mulling Spices Gift by Shaken Together
Melt-in-your-Mouth Butter Mints by Unskinny Boppy
Scented Sachet Ornaments by Here Comes the Sun
Gemstone Infused Roll-on by DIY Showoff
Infinity Diffuser Bracelet by Practically Functional
Leather Tassel Keychain Diffuser by Making Lemonade
Easy DIY Holiday Candles by Eat Sleep Be
Pin for later!
Love these ideas but don’t have time to make them today? Do yourself (and your friends) and pin for later!

Jocie Hagan
One Project Closer
Come say hi on Facebook, Instagram, & Pinterest!

What great ideas jazz up gifts! Who wouldn’t love to get a uniquely wrapped present and gift tag! Thanks for the printables! You are so creative!
The Name Tag and how to do the tassel I the love that one.