
Paslode sent me information about some new nails they released at the beginning of this year. The Engineered Lumber Nails are designed for use with engineered products like LVL and LSL, and Paslode claims they drive flush the first time. If you know me, you know I love testing manufacturers’ claims, so I had them send me a box.

Nailing engineered products can prove challenging because they are denser than typical dimensional lumber, and you’re more likely to “short shoot” the nail. And if the nail isn’t flush, you’ll need to pull it or finish it off with your hammer. Either way, you’re wasting time. Paslode boasts that by using their nails, you’ll avoid those interruptions and you’ll save wear and tear on your compressor by keeping it at a lower setting.
So what makes the Engineered Lumber Nails different? Paslode developed a proprietary coating and a proprietary geometry designed specifically to optimize the drive performance of the nail when used with engineered lumber.
You won’t find engineered lumber at HD or Lowe’s (at least around here), so I took a trip to 84 Lumber and bought some laminated veneer lumber (LVL). You can see in the video that LVL is an engineered wood composed of many thin layers held together with adhesive. On a job site, it’s great for things like headers and rim boards.
I used the new Paslode PowerFramer PF350S and my Porter Cable compressor to drive over 120 Engineered Lumber nails. Check out the 40 second video to see how well they performed.


The first two nails I used to set the depth adjustment, and those short breaks in between rows were to give my compressor a moment to catch up. If any of the nails missed, I didn’t want it to be because the compressor was lagging behind.
You can see in this picture that every nail was flush or just below the surface. For those of you that were counting, I didn’t video all 120 nails. It’s probably for the best as watching someone put in nails isn’t that captivating.

I can’t comment on how well they compare to other nails but it would seem that Paslode is on to something.
Engineered Lumber Nails are brite 30 degree paper tape collated nails with a full round head. They come in 1,000 count packs and here are the prices and sizes:
- 3 x .120 ELN – MSRP of $29.00/box
- 3 x .131 ELN – MSRP of $34.67/box
- 3-1/4 x .131 ELN – MSRP of $39.46/box
(Vernon Hills, IL) – Driving nails into engineered lumber just got easier as Paslode (www.paslode.com) introduces its made-in-the-USA Engineered Lumber Nails. These new nails are designed to increase a contractor’s productivity and maximize profitability.
The building industry is using more engineered lumber than ever before. But harder materials like LVL, LSL and PSL make it difficult to sink nails flush the first time. Contractors waste time fixing or pulling standing and bent nails. Turning up the pressure on compressors to try and overcome this problem doesn’t always work and it means increased fuel costs and more wear and tear on tools and equipment.
“Paslode’s mission is to make professional contractors more productive, so they are more profitable,†said Steve Golich, Marketing Manager for Paslode. “Our new Engineered Lumber Nails do just that. They are designed for superior drive performance in the hardest LVL, LSL and PSL.â€

Derek Pater recently contacted us to do a review of his unique roofing protractor system. The tool simplifies many of the calculations that go into building a roof, and is useful for all types of roof designs. Unfortunately, none of us here at OPC are planning to build a roof anytime soon, so we couldn’t help Derek out (except for providing him that link and letting you know about the tool if you’re planning to build a roof).
What was more interesting to us was some of the materials Derek forwarded along in his roofing protractor guide (which is available for download at that link if you want more information about the product). For instance, page 4 of the guide provides a great beginner’s guide to roof types that Derek has authorized us to reprint here. It is by no means a complete list of roof types (in fact, the list is restricted to those that are good candidates for his product). But, it is interesting nonetheless. Now, the next time you are driving by that house with the fantastic roof you just must have on your next house, you’ll know just what to call it 🙂
Editors Note: This article was originally published in December of 2008. Since that time we’ve added further roof types, terms and graphics to create a more complete list.
 Roofing Design Types & Terms
- Gable: The upper portion of a sidewall that comes to a triangular point at the ridge of a sloping roof.
- Hip Roof: A type of roof containing sloping planes of the same pitch on each of four sides. A hip roof contains no gables.
- Gable Roof: A type of roof containing sloping planes of the same pitch on each side of the ridge. A gable roof typically contains a gable at each end.
- Skillion Roof: A Skillion Roof slopes from one side of the building to the other in a single span and no ridge. As a result the external walls are of varying heights.
- Lean-to Roof: A roof with one slope only that is built against a higher wall.
Jerkinhead Roof: Consists of a Gable Roof with a truncated Hip Roof section at the top to reduce the height of the Gable. - Dutch Gable: Is a combination of a Hip roof with a small Gable at the top and a sloping roof below.
- Gambrel roof: A type of roof containing two sloping planes of different pitch on each side of the ridge. The lower plane has a steeper slope than the upper. A gambrel roof usually contains a gable at each end, just like a standard gable roof.
- Mansard roof: A type of roof containing two sloping planes of different pitch on each of four sides. The lower plane has a much steeper pitch than the upper, often approaching vertical. It contains no Gables.
- Gazebo Roof: Often Hexagonal or Octagonal but usually symmetrical in their design.
- Saltbox Roof: A type of roof with asymmetrical roof faces. The asymmetry produces one facade that is two stories high dropping to a single story. A saltbox roof contains a gable at each end.
- Pyramid Hip Roof: A type of roof where all four sides come to a point at the roof peak.
- M-Shaped Roof: A type of roof similar to a double-pitched roof except that it rests on two load bearing walls only. It also features a central gutter at a right angle to the front facade.
- Butterfly Roof: A type of roof formed by two gables that pitch sharply from either side toward the center to resemble a butterfly’s wings.
- Combination Roof: A combination of two or more roof types.
- Dormer: A structural element that protrudes from the sloping plane of the roof surface.
- Flat Roof: A type of roof that has no slope and may terminate with or without eaves.
- Shed Roof: A type of gabled roof with a single roof face falling away from the main building.
If you’re looking for a roofing term not listed here, we’ve found a good resource from FloridaDisaster.org. Click here to see a more extensive guide.
Roof Type Pictures
Here’s a visual of each of these types of roofs. It’s worth noting that these roof types can be mixed and matched in a single, large home to create a unique look. For example, it’s not uncommon for a Gazebo roof to augment any one of these styles in a design.


What do you think? Did you learn something? We did!
In July, I attended the Milwaukee Tools Symposium where they shared some of the cool new products we’d see in the near future. If you recall, there were several tools I couldn’t talk about, mostly hand tools. That was a real disappointment because Milwaukee came up with a couple really innovative ideas. Well I’m happy to report the embargo has been lifted! Here’s what I really wanted to tell you but couldn’t.
New Milwaukee 6 in 1 Combination Pliers
Among all the hand tools, the new combination pliers are what really caught my eye. Milwaukee’s goal was to combine several popular hand tools that you’d find in a plumber or electrician’s tool box. They did that by integrating wire strippers, wire cutters and needle nose pliers. The pliers have ridges for reaming pipe (up to 1 ½”) and bolt cutters for #6 and #8 bolts. These features plus a Loop Maker make this a very impressive tool. I also really liked the one-handed locking / unlocking mechanism- good for righties and lefties. For even more pictures, check out what I uploaded to the OPC Facebook Page.


New Milwaukee PEX / Tubing Cutter
Even non-professionals can appreciate the ingenuity of Milwaukee’s new PEX / Tubing Cutter. I tried it out myself and one-handed cutting through tubing (1″ or less) was easy. The blades are replaceable and the metal core creates an “indestructible frame.” The thing that makes this PEX cutter stand out from the rest is the Rework Groove for fixing mistakes. If you’ve ever worked with PEX, you know the materials can be pricey, and the cost of mistakes can add up. With the Rework Groove, Milwaukee enables you to correct mistakes by stripping Pex couplings.


New Milwaukee 6 in 1 Lineman’s Pliers
The last tool I want to tell you about is the new Lineman’s. Similar to the new combination pliers, these incorporate a reaming head design, bolt cutters and cutting edges. In addition, they’ve got a great design for pulling fish tape. The grips feel good in your hand, and I really enjoyed trying these out.


Some of the other tools they just unveiled include diagonal cutting pliers, tongue and groove pliers, and various snips. Check out this post by Jay over at COP Tool for all the specs.
Here’s the full press release Milwaukee just sent out:
MILWAUKEE, WI- Following the successful launch of their new Hand Tool business in 2010, Milwaukee Tool continues to rapidly expand the tool line with the launch of several new products in October 2011. With a focus on delivering innovative solutions that increase productivity, the new products will fall into three new categories which include Pliers, Snips, and PEX Cutting. Committed to their core user, Milwaukee will incorporate features into each Hand Tool that provide application specific solutions for the Electrical, Mechanical, HVAC, MRO, and Remodeling trades.
“We are committed to rapidly grow our new Hand Tool business,†says Tim Albrecht, Director of Marketing – Hand Tools for Milwaukee Tool. “We continue to add more resources to this business unit and further invest in its development. Milwaukee Tool’s approach of understanding our core user’s needs, and then creating new-to-world designs that solve key user problems, has set us apart.
The new hand tools specifically include Quick Adjust Reaming Pliers, Tongue and Groove Pliers, Aviation Snips, and a PEX/Tubing Cutter. Additionally, Milwaukee will introduce a family of 6 in 1 tools that will reduce the number of Hand Tools needed to complete common applications such as reaming pipe, cutting nails, pulling wire, cutting bolts, and more. The 6 in 1 tools will be offered as Lineman’s Pliers, Diagonal Cutting Pliers, Combination Wire Pliers, and Long Nose Pliers.
“One example of the advances in Hand Tool design that will set Milwaukee Tool apart is our 6 in 1 Combination Wire Pliers. These pliers feature a new-to-world design that incorporates all functions of long nose pliers, wire strippers, and reaming/deburring tools,†says Albrecht. “We have replaced three tools in the user’s pouch with one Milwaukee Hand Tool; creating less weight to haul around, at a better value…a prime example of what we call Disruptive Innovation,†says Albrecht
Backed by Milwaukee’s Limited Lifetime Warranty, each of the new products is drop forged, machined for maximum precision, and treated to resist rust. Durable over-molded grips add comfort and last longer than traditional rubber dipped handles.
Dedicated to delivering advanced solutions to increase productivity, Milwaukee’s Hand Tool category will continue to grow and offer innovative products.
A couple of weeks ago I ran a short post asking people which big box supplier they preferred:Â Lowe’s or Home Depot. There was some great debate about brand loyalty, customer service, knowledgeable staff, and more. A few people even chimed in that they prefer Menards. Too bad they’re only found in the midwest.
I enjoyed reading the back and forth, but I’d argue that the majority of people would sacrifice those desirable traits listed above for a consistently better price. So which retailer has the better prices? That’s a tough question, and to attempt an answer, I did some covert shopping.
In my very simple, non-scientific price survey, I selected a bunch of random products that I expected both retailers to carry. I narrowed my search to tools and accessories, and stayed away from retailer specific brands like Kobalt and Ryobi. This comparison was done in-store only for the currently listed price. Online deals and sales may be different.
DeWalt 12″ Dual Bevel Compound Sliding Miter Saw


- Home Depot price: $499
- Lowe’s price: $499
- VERDICT: TIE
Irwin Vise-Grip Groovelock Pliers


- Home Depot price: $17.97, $14.97
- Lowe’s price: $19.98, $15.98
- VERDICT: Home Depot
Stanley Powerlock 30′ Tape Measure


- Home Depot price: $13.67
- Lowe’s price: $11.48
- VERDICT: LOWE’S
Bosch JS470E Jigsaw


- Home Depot price: $159
- Lowe’s price: $139
- VERDICT: LOWE’S
Porter Cable 6 Gallon Pancake Compressor


- Home Depot price: $169
- Lowe’s price: $179
- VERDICT: HOME DEPOT
Irwin 8pc Speedbor Bit set


- Home Depot price: $19.97
- Lowe’s price: $17.97
- VERDICT: LOWE’S
Summary
If you look at the price differences, both stores are very competitive to the point that it may not be worthwhile to run back and forth. Online shopping makes it easy for people to compare prices, but waiting days for a package to arrive won’t always cut it. Maybe the take home message is that when you’re shopping at these retail giants, prices don’t really matter. It’s only things like customer service, knowledgeable staff, and convenient location that set a store apart.
Extreme How-To surveyed 1 million people on which home improvement centers have the highest customer satisfaction. Guess which one leads the pack? See the answer here.
What’s your experience with how prices compare? Do you make an effort to shop at local stores even though they probably don’t have the best price? How much more would you pay for superior customer satisfaction?
This morning we shared the process of hanging drywall in the soon-to-be, official OPC workshop. Hanging drywall is not one of my favorite things, so anything that makes it faster is a friend of mine.
Have I mentioned how hugely helpful a screw gun can be? With drywall, you want the screw head just past the surface making it easy to mud over, and screw guns feature a nice little depth adjustment to ensure every screw is properly countersunk.  The other big benefit is how fast you can work. With a screw gun, you’re not grabbing individual screws. Instead, you use a collated strip, and the screw gun automatically loads the next screw. Furthermore, there’s no stopping and starting. You lock the trigger on, push the nose to engage the clutch and drive the screw.
Rather than try to keep explaining it, we thought you’d enjoy a quick video demonstrating how fast you can work. In this video, you’ll see me using the screw gun to put in 28 screws (enough for one piece of drywall). Can you guess how long it took? Put your guess in the comments and then watch the video! I’ll give you a hint- don’t look at the video length. We sped it up.
What do you think? Is a screw gun a good investment? Any pro drywallers want to share their favorite brand?
It’s a little embarrassing, but I attempted an impromptu poll from my new Google+ account. It completely flopped, and I had no responses. I think it’s something to do with the fact that I’ve only got about 40 people in my circles. That’s OK because I’ll try again in today’s post, and it’s a good opportunity for you to earn some project points!
When I take a hard look at Lowe’s and Home Depot, they have a lot in common. So what makes you pick one over the other? Did you have a bad experience, or is it something more mundane? I’d love to learn which you prefer, Lowe’s or Home Depot, and why? Remember, this is a family show so keep it clean.


They Have a Lot in Common
If you examine their return policies, both allot 90 days, and you can return items purchased online. Both allow customers to purchase online and pickup in store even though this is a recent development for Home Depot (May 2011). The price match guarantee is almost identical. Basically, if you can provide a competitor’s current ad, they’ll beat the price by 10%. Of course restrictions apply to things like labor & installation, clearance items and more.
Each retailer provides similar online promotions, and we keep a couple pages with all the current promotions for Lowe’s and Home Depot. If you plan on making an online purchase, check out these pages. Even if you don’t, give em a +1 to help us out.
Where Do I shop?
In my own experience, I usually shop at HD because its closer by about a half mile, plus I know some of the employees. For instance, Lawrence is a master plumber who has never steered me wrong, and Greg is the store manager. I do shop at Lowe’s occasionally, and it’s usually because they seem to have a better selection for things like vanities, sinks and light fixtures.
Images courtesy of jimg944, Drew Bloomfield SMJJP
 When Ethan went full time with One Project Closer back in March, we knew he’d need a place to work. Â For the last five months, he’s been roughing it — mornings are at the Panera Bread in our neighborhood (thank goodness for free WiFi!), and afternoons are in the basement at his house, with the occasional break to travel for PR events or to work with Habitat for Humanity in their Sandtown, Baltimore City chapter.
(For the benefit of those of you new to our site: Ethan and Jocie own half of the site, and Kim and I own the other. Ethan works on our site full time. Â The rest of us have day jobs, and we help out in the evenings and weekends. For example, Kim maintains all of our home improvement coupons; I write about projects and tools we’re using around our house; and Jocie occasionally chimes in with a fun craft activity. And of course with four kids under seven-years-old between us, there’s always work to do on that front!)
We decided that the best place for a full time work location for Ethan is our home’s two-car garage. The only problem: it’s been filled with our family’s garage junk which has long prevented it from being used for vehicles, much less a workshop. (You know the stuff we’ve got in there: gardening tools, mulch, oil, gas, camping stuff, etc. etc. etc).
We’ve got a laundry list of things to get done before Ethan can move in to a new workshop, and the biggest one was finding a good place for as much of the junk as we could. A shed seemed to make sense, so we started in that direction.
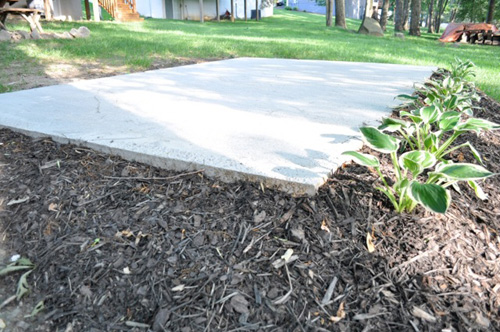
A few weeks back, we poured a concrete foundation suitable for an 8×12 shed. (By the way, it’s a simple project if you’ve got the patience… You can definitely DIY it… See our instructions at that link).

Normally, we would build a shed ourselves. It’s little more than 2x4s, plywood, siding, shingles, doors, and windows. But, our timetable for the garage workshop is just too tight. We’d like to get Ethan moved in before the fall. So we decided to order a shed from a local dealer in Ellicott City, Maryland called Best Sheds. In an article later this week, we’ll explain in detail why we think bestsheds.com and other options like it beat out the big stores for shed prices and quality.
We designed the shed to look as much like our house as possible, except that we have aluminum siding and we wanted the shed to have vinyl, so we matched that to our neighbor’s house instead. We also wanted architectural shingles (the ones that have depth), rather than the traditional 3-tab shingles we have on our house. Here’s a picture of our house. The neighbor’s is peaking in over to the left, but we’ll skip the full frontal picture since they didn’t give us permission.

Best Sheds had a bunch of nice sheds on their lot in Ellicott City, but nothing matched what we wanted. So, we picked out materials and ordered the shed sight-unseen. We’d hoped it would turn out nicely. Best Sheds anticipated a 3-4 week lead time. It actually turned out to be almost 6 weeks before the shed arrived, but it was worth the wait.
Shed Delivery Day, In Pictures
Pulling up to the house…


Backing down into the yard…


Getting lowered down onto the pad…


(We switched to video at this point to show you the actual placement of the shed. Ethan sped this up quite a bit because the original video was four minutes long).
Final Placement and Pictures
The shed fits perfectly on the 8×12 slab. It’s always nice when it works out that way.


Shed Interior: You Get What You Pay For
I’ll be writing about this extensively later this week in a separate shed comparison article, but it is worth noting here that this shed is all plywood construction with a pressure-treated plywood subfloor. It’s built with 2×4 lumber (rather than 2×3), and the flower boxes are made from rot-proof synthetic material. Overall, it has a very, very solid feel. Here’s a peek inside, with additional footage coming later.

I just got back from the great state of Wisconsin where Milwaukee Tools had me out to see their latest tool developments. It was a lot of fun to learn what Milwaukee has been working on, get a tour of their amazing facility and try everything out for myself. I was impressed with a lot of tools and accessories. Unfortunately, I can’t reveal everything as Milwaukee had me sign a waiver, and I think they were serious.
Most media events you hear something like “We want to be the number one tool provider in North America,” but that wasn’t Milwaukee’s goal. Their mission is to be top dog for plumbers, electricians, HVAC and facilities professionals. That means they’re leveraging all their resources for a very specific target, and I think that’ll result in better products for those user groups. On the flip side, that also means people like woodworkers won’t be hearing much from Milwaukee in the coming days.

Accessories
You might think it’s tough to get excited about accessories. Spend a day working with junkie accessories, and you’ll have a change of heart. Milwaukee brought out two Sawzall blades that caught my attention.
The first is The Ax, 6″ blade. The first tooth on the blade is a unique “Fang Tip” that bites into the wood for quicker plunge cuts. The other teeth feature “Nail Guard,” which basically prevents the teeth from fully seating around a nail and causing the tooth to break. Check out the demonstration video of The Ax making a plunge cut, cutting through nails and lastly through pressure treated wood.
And here’s what the blades look like after. See the Fang Tip and how the teeth wear better?


The second blade is a their new Flush Cut, and this blade is perfect for window and door cut-outs. Milwaukee was smart and made the blade longer so that it’s easier to cut along a 2×4. The blade is also off-set so that it’s lower than the recip. saw providing clearance for your hands. In the same vein, most recip. blades have a slight downward angle, but the Flush Cut is perfectly in-line.

See those black guards? When you make a cut, keep the blade level and those guards will prevent the blade from cutting into the subfloor or dulling on concrete. It’s cool to think “Hey, I coulda really used that last week,” and that’s what I thought about the Flush Cut.

Milwaukee also demonstrated a couple drill bits including this 30° bit holder, and


…this fun take on making a bit holder more useful.

Corded Tools
Next we shifted over to corded tools like SDS Rotary Hammers and grinders. I love how Milwaukee had several competitors tools for us to try out. We couldn’t tell which model they were but Milwaukee said they were the latest available.


I really liked how the Milwaukee grinders are completely tool free. There’s a lever for rotating or removing the guard, and you can swap out accessories by hand. I tried it myself, and it was really easy.
Here’s a shot of Dan from Tools in Action trying out a grinder.

Hand Tools
We saw a lot of hand tools but I can’t tell you anything about them. I will say the hand tools are more impressive than what DeWalt just unveiled, and electricians should hold off about a month before replacing any tools.
Diagnostic
In the world of diagnostic tools, we took turns with a new thermal imaging gun that can pair the heat map image with an actual photograph. It also has a built in LED light and the M12 battery can be charged separately (rather than having to charge the gun).


Cordless Tools
Milwaukee has been really successful with their M12 and M18 cordless lines, and they’re going to keep innovating. Some of the things I can share include the awesome heated jacket (now available in camo),

… an inspection scope (that helped me win a t-shirt),


… a quality cordless jigsaw (check out my artistic sea-monster creation),


Milwaukee has some new developments that are really exciting. Look for a big shift in cordless tools in Q1 of 2012.

A Tour of Milwaukee HQ
We ended the day with a tour of the Milwaukee facility and it was really cool. Again, I can’t share much but they let me photograph a bit of their history. Enjoy!


Last week was a busy week. You’ve read the coverage of the Bosch media event, and immediately following, Craftsman was kind enough to invite us to visit the Craftsman Experience Studio. Imagine a wonderland of tools, televisions and all the equipment for live streaming in the same place. Hey, that kinda sounds like my dream man-cave! For even more pictures of the studio, check out our new Facebook page. Like our page to stay current on all the OPC goings-on.


About the Studio
A little over a year ago, Craftsman opened the doors to the Craftsman Experience where visitors will find hands-on activities and clinics for woodworking tools, automotive and mechanics tools, and lawn and garden products. Everything is designed for video and audio recording to be streamed over the internet, and they recorded everything we did. We’ll be sure to let you know if OPC makes a TV debut (but probably not). Scattered throughout the studio are sets for productions like “The Down and Dirty Radio with Frank Fontana”. If you live in the Chicago area, it’s definitely worth checking out.


Blogger Summit
Craftsman had a handful of bloggers out for a “blogger summit” to play with the some of latest tool offerings. The underlying goal was to put tools into the hands of people that might not otherwise tackle common do-it-yourself projects. To accomplish this, they created five stations for everyone to learn a simple project like building a small shelf or sawhorses. In my opinion, the best project was creating an ogre sword.
It was a great mix of mom bloggers like The Redheaded Mommy, dad bloggers like Backpacking Dad, author and speaker C.C. Chapman. Timothy from Charles and Hudson was there as was Mike Senese who you’ll recognize from the TV show “Pumpkin Chuckin”. It was a lot of fun seeing friends and meeting new people.

New Tools From Craftsman
All the DIY projects were a fun diversion, but I was curious about the new tool offerings from Craftsman. I wanted to know what they’ve been up to for the past year. They showcased many cordless offerings from the new generation of Nextec tool line.
- Auto-Hammer
- Drill / Driver
- Right Angle Driver
- Rotary Tool
- Multi-Tool
- Air-Pump
- Rapid Charger
- Grass Trimmer
- 3-in-1 Garden Tool
- Hedge Trimmer
The Standouts
All of these tools are designed for home-owners and casual do-it-yourselfers, and here’s what stood out to me.
- Rapid Charger
There’s nothing more frustrating than running out of charge in the middle of a project. With this rapid charger, Craftsman claims you can go from a completely dead battery to a 25% charge in 3 minutes! This is only true for dead batteries. You can’t go from 50% to 75% in the same time.

- Air-Pump
Craftsman created an inflator that lets you set a psi and walk away. It has on-board storage, and everything wraps up for a very compact footprint. This pump is ideal for bike tires, soccer balls and lots of other small applications.

- Grass Trimmer
Rather than a common line trimmer, this lawn tool utilizes high density plastic flails that last much longer. Plus, they can be conveniently stored right on the trimmer. The biggest problem with cordless trimmers is that they don’t last very long, and this one is no exception. This trimmer is best used for maintenance trimming on small lawns.

It was a lot of fun to get a behind the scenes look at the Craftsman Experience. There are even more pictures on our Facebook page if you’re interested. Thanks Craftsman for the opportunity!
Soil testing measures characteristic and the amount of specific nutrients in your lawn or garden. Common tests identify the levels of phosphorus, potassium, calcium, magnesium, sodium, sulfur, copper and zinc within a given sample. Knowing these results equips you to change soil acidity with lime and add appropriate levels of nitrogen, phosphorus and potassium, thereby encouraging a thriving lawn and plant life. This post will explore soil characteristics, testing and how to interpret those results. Click here to skip down to interpreting soil analysis results.
 and Spreader")
Soil Classification
Soil texture refers to the presence of silt, clay and sand also known as soil separates. Soil separates are distinct because each falls into a certain range of particle sizes. Clay particles have the smallest diameter, followed by silt. Sand particles are the biggest. It makes sense that soil should be classified by the levels of soil separates as each has different chemistry, porosity (water-holding) and permeability (water-providing).
- Clayey Soil
Clay soil is composed of the smallest particles with a diameter less than 0.002mm. Clay soil is extremely sticky and plastic (moldable) when moist. It’s hard to break up and is often referred to as “Cohesive soil” meaning the particles are tightly packed and adhere to each other. The structure is that of overlapping plates or plate-like. This type of soil has excellent water-holding capacity but very poor water-providing capabilities making it difficult for vegetation to make use of the water. It will often stay saturated long after rainfall or snow has melted. Clay soil is typically alkaline with a pH ranging from 7 – 9. Some flowers like Day Lilies and Black-Eyed Susan actually prefer clayey soil, and Bermuda Grass is hardy enough to grow in clayey soil. - Silty Soil
Silty soil particles fall in the middle, ranging from 0.002–0.05mm in diameter. Silt particles are somewhat plastic, but will break into small bits, feeling smooth and silky. These particles are granular, resembling cookie crumbs. Silt is often found on flood plains as it is water-soluble and will travel downstream. Silty soil features decreased porosity and significantly increased permeability as compared to clay soil. pH ranges from acidic to alkaline so a soil analysis is very important. With all these characteristics, a wide variety of plant species can thrive in silty soil. - Sandy Soil
Sandy soils fall into a spectrum of very fine to course. All particles are larger than clay or silt, ranging from 0.5 – 1.0mm in diameter. Sandy soil is loose and granular with very weak plasticity. Sandy soil porosity is comparable to clay because sand has several large pores while clay has many, many small pores. The larger pores and increased particle size mean sandy soil is extremely permeable, releasing water very quickly. Vegetation planted in sandy soil needs to be drought resistant as sand releases moisture so readily. The blanket flower is a tough, drought-resistant plant. Fescue and Bermuda Grass are good choices for grass in sandy conditions.
Loam is a term used to describe soil that has relatively equal concentrations of clay, silt and sand (20,40,40 concentration respectively). Loam is ideal for gardening, growing crops and grasses as it has high levels of nutrients, retains waters well and maintains high permeability.
Did you know that every state, Puerto Rico and the Virgin Islands has a state soil? Much like state flowers and birds, a state soil is a soil with special significance. Here in Maryland, the state soil is called Sassafras. It was established in 1901 making it one of the oldest soil series in the U.S. Click here to find your state soil.
Soil Texture Triangle
A soil texture triangle is divided into 12 sections, and is used to standardize soil classification. Each side is scaled for the percent of soil separate found. Clay percentages are mapped from left to right (yellow line). Silt percentages are read from the upper right to lower left (green line) and sand is read from the lower right to the upper left (blue line). You only need the intersection of two soil separate levels to determine the correct assignment. For instance, 30% clay and 40% silt result in a clay loam classification and indicate 30% sand.

Soil Analysis
Soil testing is a means to determine soil fertility. It takes a “snapshot” of the amount of nutrients, composition and level of contaminants present at the time of the sample. It also provides information to optimize your soil in the future.
Field Test Soil Texture
Soil texture can be determined in the field by feeling for sand particles and using plasticity and flexibility to estimate the amount of silt and clay. An experienced hand will be able to provide an instant, accurate soil texture, but most homeowners will require additional help. To try and approximate your soil texture, use this flow chart provided by The National Resources Conservation Service (NRCS).
Send in a Sample
In some areas, homeowners can actually mail in soil samples to be analyzed by a lab. This is a great option as long as the samples are taken appropriately. Samples should be taken at the right time and depth to obtain the correct mix for an accurate reading. Here are some tips to keep in mind:
- Plan ahead- Allow for a few months after testing to take action. For instance, if you apply lime, leave enough time for it to take effect before planting. Keep in mind what you are planting. For instance, cool season grasses should be fertilized in early spring or late fall. Plot a timetable to match.
- Clean equipment- Make sure all the equipment used to gather samples is thoroughly cleaned. Avoid using brass, bronze or galvanized tools as these will contaminate the samples.
- Number of samples- Collect around seven samples from each area to be tested, and mix the subsamples together.
- Separate areas- Keep unique areas separate. For example, don’t group the vegetable garden and front yard together. Test them individually.
- Depth- Most samples should be taken at a four inch depth.
Professional Soil Testing
A professional service will analyze your soil and make recommendations about lime application (quantity and frequency), fertilizer and aeration. Incorporating this information will ensure better growing conditions, improved efficiency and minimize runoff.
Professionals specializing in soil analysis will have access to various test kits to determine factors like pH, levels of soluble salts, phosphorus, potassium, nitrogen, iron, calcium, magnesium, sulfur, organic matter, soil texture and temperature. These kits and supplies can easily cost hundreds of dollars.
Interpreting Soil Test Results
All of the results describe the amount of a nutrient that is available for plant uptake. Most test results will include fertilizer recommendations (nitrogen – phosphorus – potassium), lime recommendations and additional comments.
pH
pH indicates the soil acidity. A value of 6.6 or lower is considered acidic, and higher than 7.3 is considered basic. Neutral soil falls in between. If your soil is acidic, a buffer index will determine how much lime should be applied to bring the pH up to neutral.
Nitrogen (N)
Nitrogen is a primary nutrient for plant growth and is supplied naturally through precipitation, manure and organic matter. Fertilizer can be applied to increase the amount of N present but care should be taken to avoid over-application resulting in excess NO3.
Phosphorus (P), Potassium (K), Zinc (Za), Iron (Fe), Copper (Ca) and Manganese (Ma)
These levels are reported in parts per million (ppm). Phosphorus and potassium should test higher than 40 and 220 respectively. Small quantities of zinc are sufficient and should measure above 0.3. Soil with high pH may have lots of iron, but it is unavailable for plants. Copper and manganese have not been confirmed as a contributing factor in all areas.
Sodium
High levels of sodium can cause soil to be hard and cloddy when dry and to take water very slowly.
Calcium
Soils with a neutral pH usually have adequate calcium. Low calcium can be increased with lime.
Soluble Salts
Soluble salts levels at 2,600 ppm or more are classified as saline. These can be caused by excessive fertilization, insufficient watering and poor drainage.
Organic Matter
Organic matter is reported as a percent of the total soil. Ideally, it would be around 5% however it’s often closer to 1 to 3%.
Soil Triangle image courtesy of U.S. Department of Agriculture
