
[This article was originally published in 2008. I have aggregated all of the articles from our Self Leveling project into a new, more complete article with links to each of the individual articles, including the one below. Complete article: How to Pour Self Leveler Over a Large Area]
Our basement floor is approximately 1000 sq. ft. To make pouring the self-leveling underlayment (aka mortar, cement) over the radiant heating wire easier, we divided the room into quarters to make the pours manageable. I couldn’t find good information online about the best way to create temporary barriers, so we improvised. Here’s what we did; and what we learned:
Building Barriers from Spare 2×4 Studs
After laying the heating wire out on the floor, we created barriers just beyond the perimeter of the wire using extra 2×4 studs I had leftover from framing. We then caulked the crease between the 2×4 and the slab on both sides. Caulking on the inner side prevented the self-leveling underlayment (in our case, LevelQuik ES) from running under the board and out into the open area. Caulking on the outer side provided added assurance against leaks, and extra strength to hold the board in place. The outer caulk seal is important since the barrier is prone to being kicked and stepped on during the pour.
After the boards were sealed, we used masking tape “loops” to attach wax paper to the inside of the board (unfortunately, I don’t have a picture of this). We added the wax paper to avoid the SLU sticking to the temporary barrier as it cured. Overall, these temporary barriers proved very successful, although the pour didn’t come out completely level for other reasons. Here’s what we learned about the barriers:
Lessons Learned (Avoid Our Mistakes)
(1) The wax paper idea didn’t work. We left the excess wax paper hanging over the top of the board towards the outside. We ended up stepping on the paper and ripping it away from the board in the middle of the pour. It was impossible to put back into place once the SLU touched the barrier. Fortunately, the SLU tended not to stick the boards, even without wax paper. So, we won’t bother with this step in future pours.
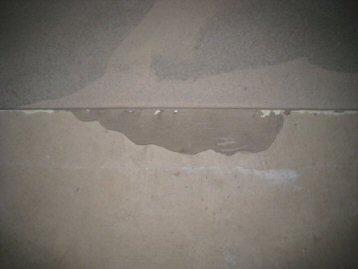
(2) In three places on the barriers the inner caulk seal failed. As a result, the underlayment pooled underneath the barrier in a hollow section. This was most likely due to a poor caulking job on my part. I used a hammer and chisel to remove these pooled sections of mortar pretty easily. But, this lesson proves that the outer seal as an extra precaution is a good idea. Here’s a picture of the pooling:
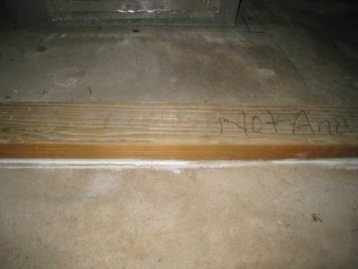
(3) Pull up the barriers as soon as possible. One barrier that we pulled up immediately after the SLU had set came up without any problems. We used a razor blade to remove some residual caulk. The remaining barriers I left in place for about 30 days. For those barriers, the caulk hardened a bit and created too strong of a bond, causing it to rip some of the wood away when I pulled up the studs. It took considerably longer to clean the edge of the SLU for the next pour area. FWIW, here’s a picture of the scraps.

Other Helpful SLU Articles
What do you think? Was this information useful? What did you use to contain a self-leveling underlayment you poured?

My only other thought was, pour in the corners / tight spaces. It seems easier to spread from the corner rather than into it.
In addition to caulking the barriers, one might try to duct tape them to the floor. This has worked successfuly for me.
Pietro – thanks for the addition. We didn’t try duct tape but glad it worked for you.
Have read your site with interest because I have a large slc project coming up. Wondering how the joints between pours worked out? It seems like it could be difficult getting pours exactly level? I am planning on using a gauge rake type setup so maybe this won’t be an issue.
Mike – it was very easy to get the edges level. Raking is essential… We used a slotted squeegee. There’s lots of articles on this site to help with SLC … Just use the google search in the upper right.
Thanks for reading,
Fred
I am going to SLC a small kitchen 8×8 maybe. Where can I find expansion tape? I am researching ahead of time for any materials I may need and I noticed on several websites it states expansion tape? However, trying to find out if Home Depot or Lowes has it in Alabama,,, that I cannot research online. I will obviously have to go to one or both to find.
how do you keep the SLC from ruining drywall and other wall materials? I am not sure if I understand that particular aspect clearly.
Michelle, instead of expansion tape you could use rigid foam if you are looking for a spacer for the edge of the SLC… We didn’t use an expansion tape on our job and ended up with no problems; however, we were working on a slab as opposed to a plywood subfloor. Make sure to use a lathe over a wood subfloor or you will end up with the SLC delaminating.
I like your article but have a few questions regarding the us of SLC.
How do I gauge the amount of SLC required for the space? I’m renovating a unit with a very uneven slab. The differences in level is only a few millimeters here of there but its noticeable. I want to bring up the rest of the floor to the high point. How do I ensure I’m using but the right amount for the room? Just pour it over, spread as evenly as possible and wait for the magic to happen? And with doing multiple pours over quadrants, do I need to do anything at the join of each quadrant?
Thanks! 🙂
Brad, thanks for the questions. SLC will come with instructions on the bag that say how many cubic feet it will cover (typically about 1.5 cu. ft. per bag)… That means you could cover 1 sq. ft. 18 inches high… If you need to spread 1/2 inch over your floor, you can spread 1 bag out to cover 36 square feet (or an area 6×6 wide)… at 1/4 inch you can do 72 sq. ft. and at 1/8 inch you can do 144 sq. ft. If you are REALLY trying to get level and you are only a few millimeters off, I might recommend just screeding out thinset on the floor … SLC is better if you are trying to cover a large area and it’s actually hard to be precise with it. We ended up coating this floor with DITRA afterwards, and before we did it, our tile guys still ended up screeding the floor our with thinset to make sure it was perfectly level. Not everyone would do that step, but we were installing large 20×20 tiles.
I have a large pour of self leveling concrete that I need to do over a concrete basement floor. Can I mix 2-3 bags of leveler at one time in a trash can, then pour? I figure I need 3 trash cans, 9 bags to achieve my project. Thanks for any help.