
Thank you so much for joining us at One Project Closer for this review of RYOBI 60 PC Drilling and Driving Kit and RYOBI ONE+ 6PC Combo Kit. This post is sponsored by the Home Depot Prospective Campaign. Post may also contain affiliate links. Opinions (and typos) are 100% our own, and we appreciate you supporting our site in order to continue to provide free content to our readers.
I want to share a bit about the new Ryobi ONE+ 6 piece combo kit and the 60 piece bit set. Both are a great value, and if you’re in the market for a combo kit or a nice bit set, they are worth your consideration.
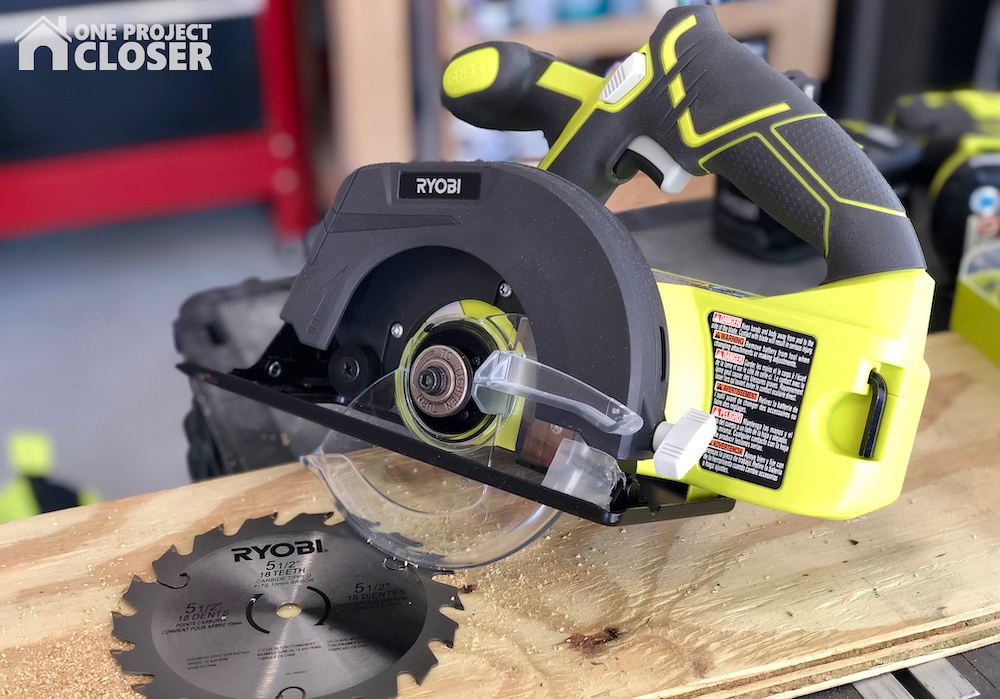
The combo kit is especially nice if you’re new to the ONE+ platform and looking to get a jump on a number of tools. It includes a drill driver, impact driver, reciprocating saw, circular saw, oscillating multi-tool (OMT), and a flashlight. It also includes a charger, two batteries (1.5Ah and 4Ah), and a big bag for $299 at The Home Depot.
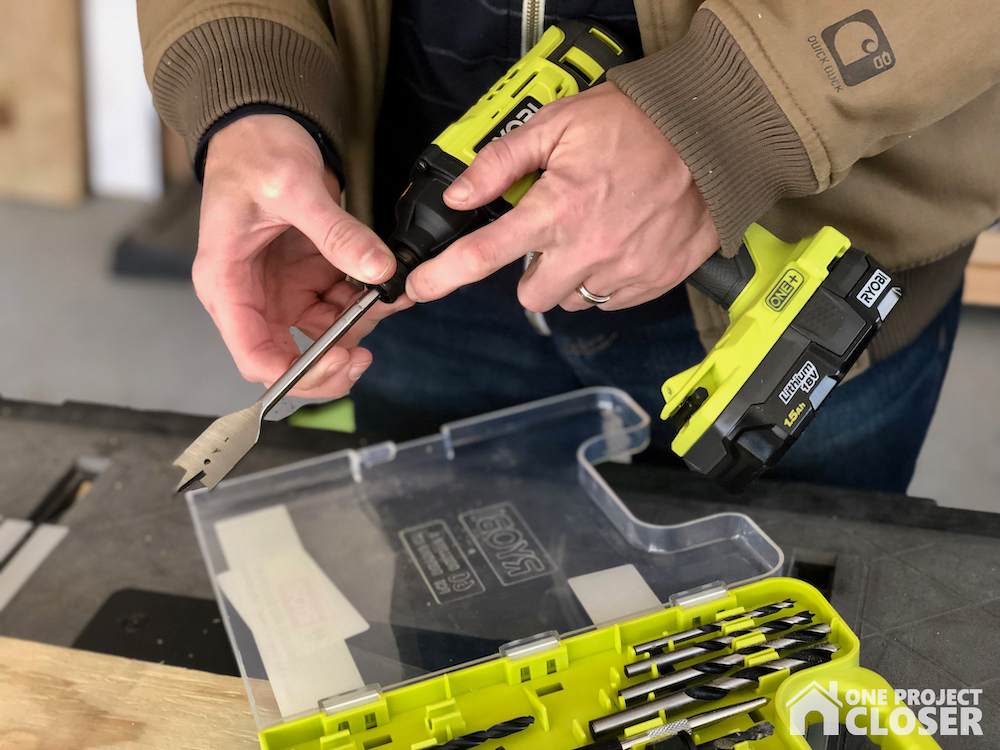
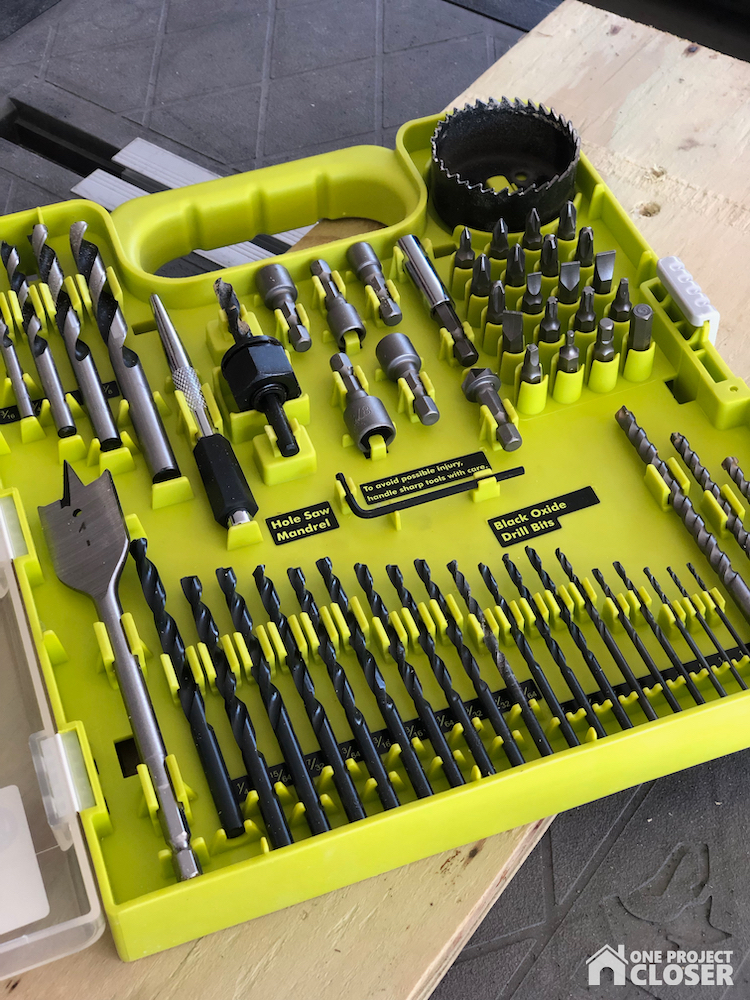
Is it odd that I’m really excited about the bit set? The 60 piece, multi-material, drill and driving bits are good for wood, metal, masonry and plastic. That covers a lot of bases, and it’s all stored in a nice clamshell that keeps everything organized. The bit set is currently priced at $21.97 which is a great deal for DIYers and pros alike.
Read on for more details about both offerings from Ryobi!
Ryobi 18v ONE+ 6-pc Combo Kit
If you’re familiar with Ryobi, you’ve probably come across the ONE+ line up before. ONE+ is the Ryobi 18 volt platform, and they have a significant number of tools available. You need a grease gun? They’ve got that. Pex crimp? Yeppers. Soldering station, wet-dry vac, and band saw? Uh huh. So it’s no surprise that Ryobi can bundle some of the more common tools together. Here’s a few details about each.
This combo kit includes the drill driver and impact driver that are often the first two purchases for anyone jumping into the world of power tools. The 1/2″ drill can power through all kinds of materials with up to 500 in. lbs. of torque. Meanwhile, the impact driver boast 1800 in. lbs. of torque. You may be wondering why you want both. The answer is clear after you give the impact a try- it makes driving all kinds and sizes of fasteners a breeze.

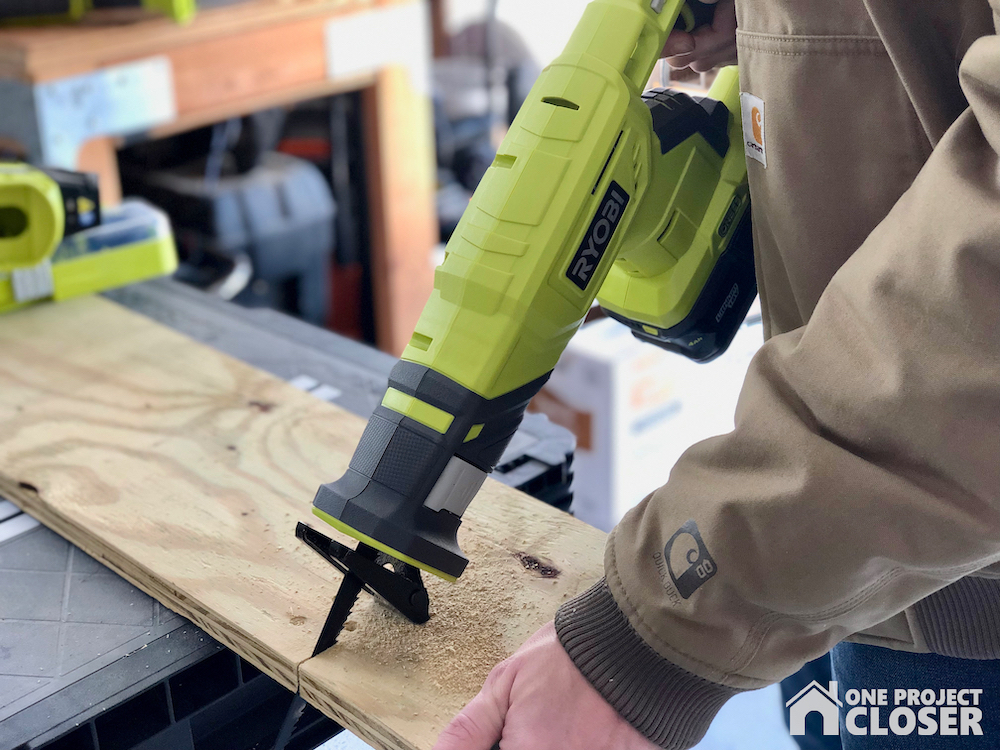
I was please to see Ryobi included the reciprocating saw. Recip saws are useful for lots of different jobs ranging from demo to framing to building a deck. This recip features a 1″ stroke and variable speed trigger.
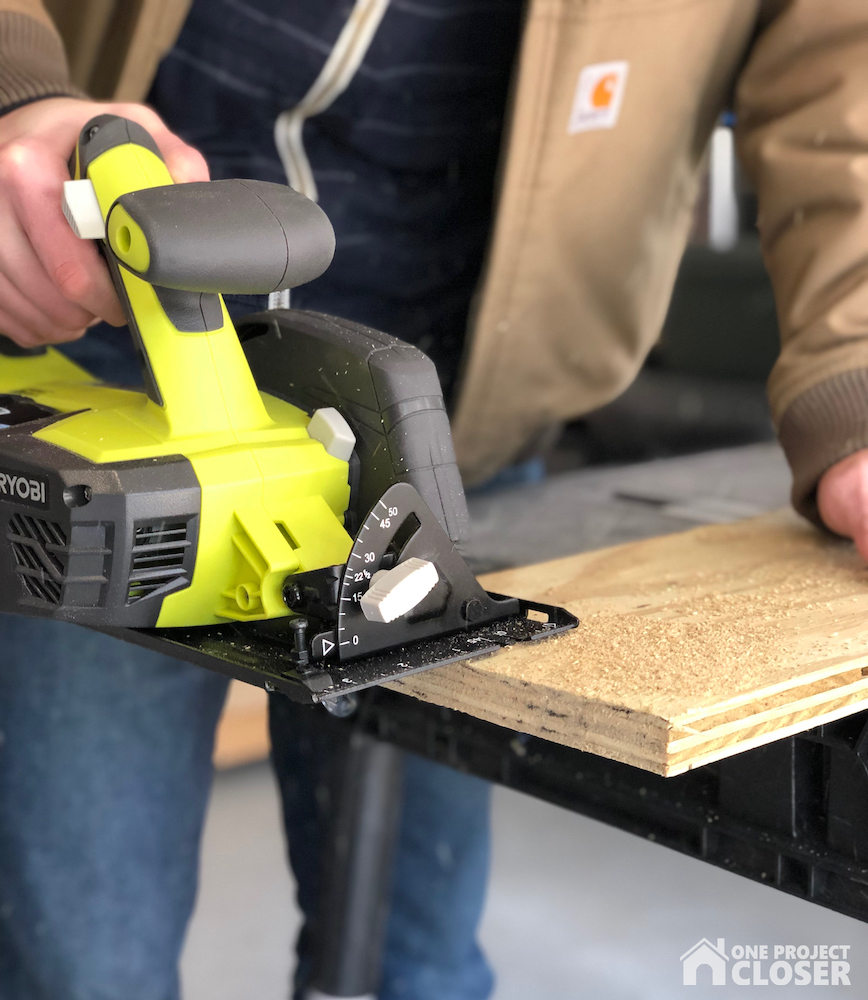
Next up is the 5-1/2″ circular saw. This is smaller than the more common 7-1/4″ or even the 6-1/2″ which means you have a more limited depth-of-cut. Even so, the lack of a cord and the compact design make it easy to manuever.
The multi-tool is another exciting item. I’ve used my multi-tool for cutting door jambs, plumbing cut outs, scraping caulk off the wall, and tons more. OMTs are one of those tools that make life easier, and before long you wonder how you ever managed without one.
Lastly, Ryobi included a 160 lumen, LED work light.
60-pc Multi-Material Drill and Drive Kit
I like this bit set for a few specific reasons. First, you can drill through a variety of materials including wood, metal, brick and plastic. All the driver bits are impact rated to withstand the higher torque applications. And lastly, it’s a great value.
Head on over to your local Home Depot or go online to for the RYOBI ONE+ 6PC Combo Kit and RYOBI 60 PC Drilling and Driving Kit.
Thank you so much for joining us at One Project Closer for this post on DIY Modern Dining Table Plans and Tutorial. This post is sponsored by the Home Depot Prospective Campaign. Post may also contain affiliate links. Opinions (and typos) are 100% our own, and we appreciate you supporting our site in order to continue to provide free content to our readers.

I told Jocie that if love were measured in dining room tables, she should feel the abundance. This is, in fact, the second dining room table that I’ve built, and the first one turned out great (IMO). So why build another? The first table missed the mark in that Jocie’s vision and my execution didn’t quite coincide. That probably never happens to you, right? This time around we made sure to better communicate, and I’m pleased to say, the table is absolutely amazing.

You can see from the pictures that the table is a bit more modern with a black metal frame and a much thicker top. We opted for a bench along one side and four chairs on the other. This dining table is also a good bit bigger. We were able to host family over Christmas, and we really packed a lot of people at the table.
Now building this table isn’t for everyone. It requires a good bit of skill and some tools that not everyone will have on hand. I tagged my brother-in-law for the welding, and I had the shop at the lumber yard do a bit of work to make my life easier. Read on to learn how we put this table together.
How to Build a Wood + Steel Modern Dining Table
Make Time: A week plus finish time
Cost: $800
Difficulty Level: Advanced
Materials Needed:
- 8/4 x 8′ pine boards for the tabletop and bench
- 1-1/4″ square steel tube
- Threaded feet (sometimes called elevator bolts), corresponding nuts
- Wood biscuits
- Wood glue
- 2″ wood screws
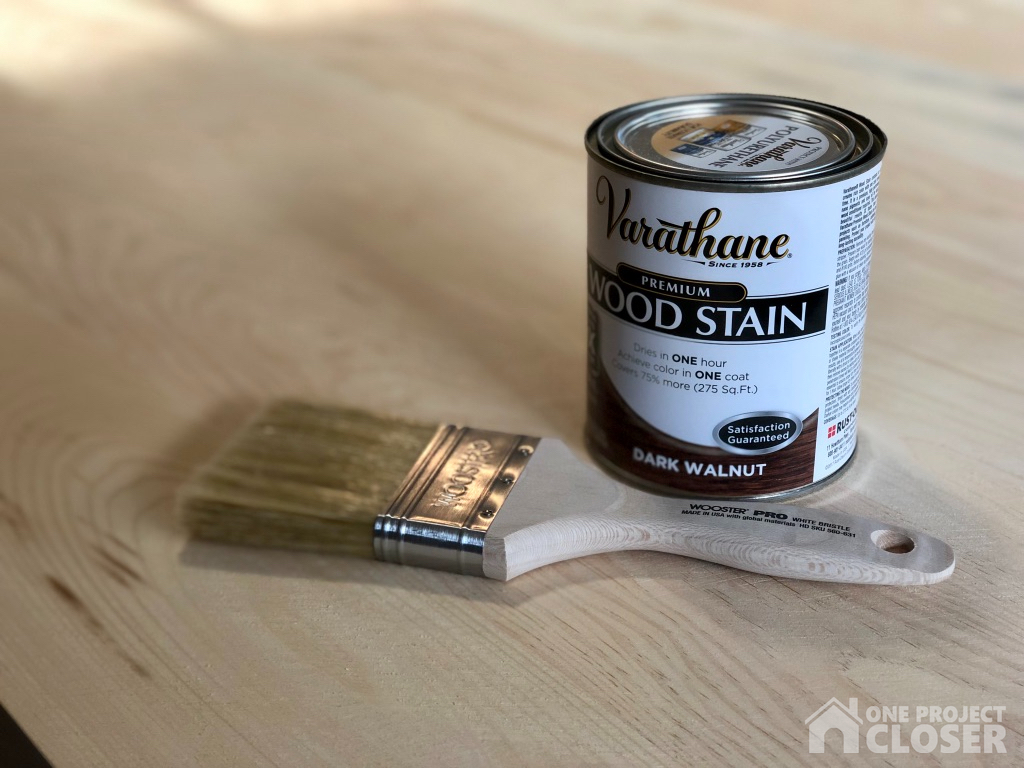
- Stain and polyurethane
- Metal primer and paint
Be sure to check out our amazing Home Depot Coupons before you buy to save yourself some money!
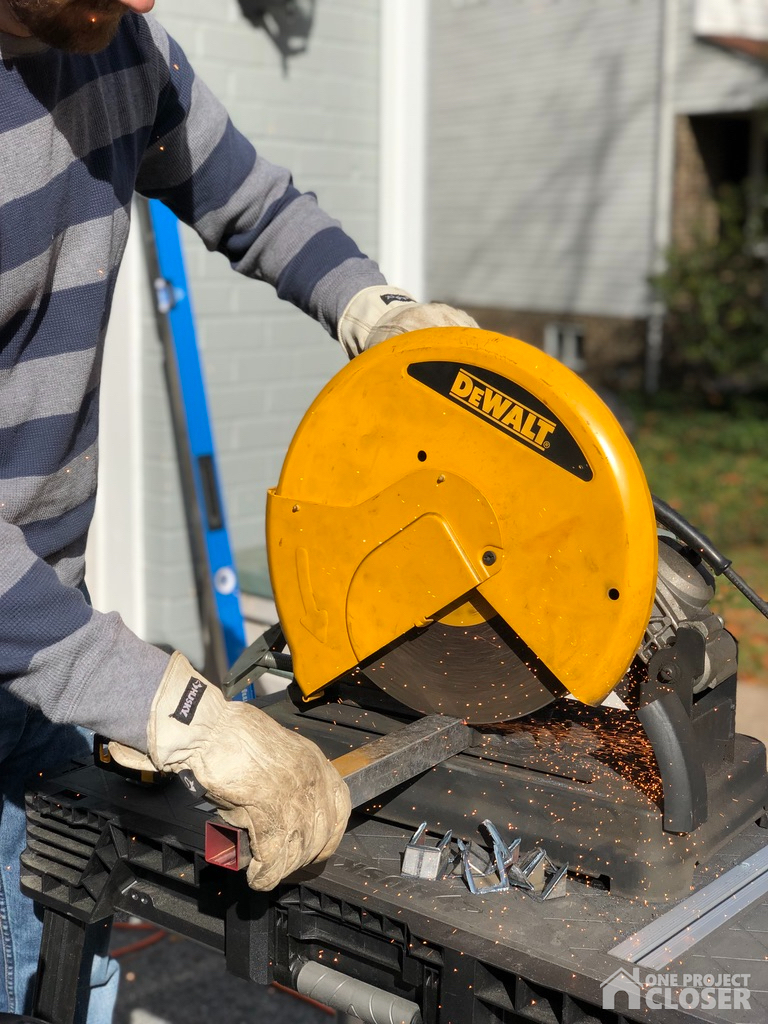
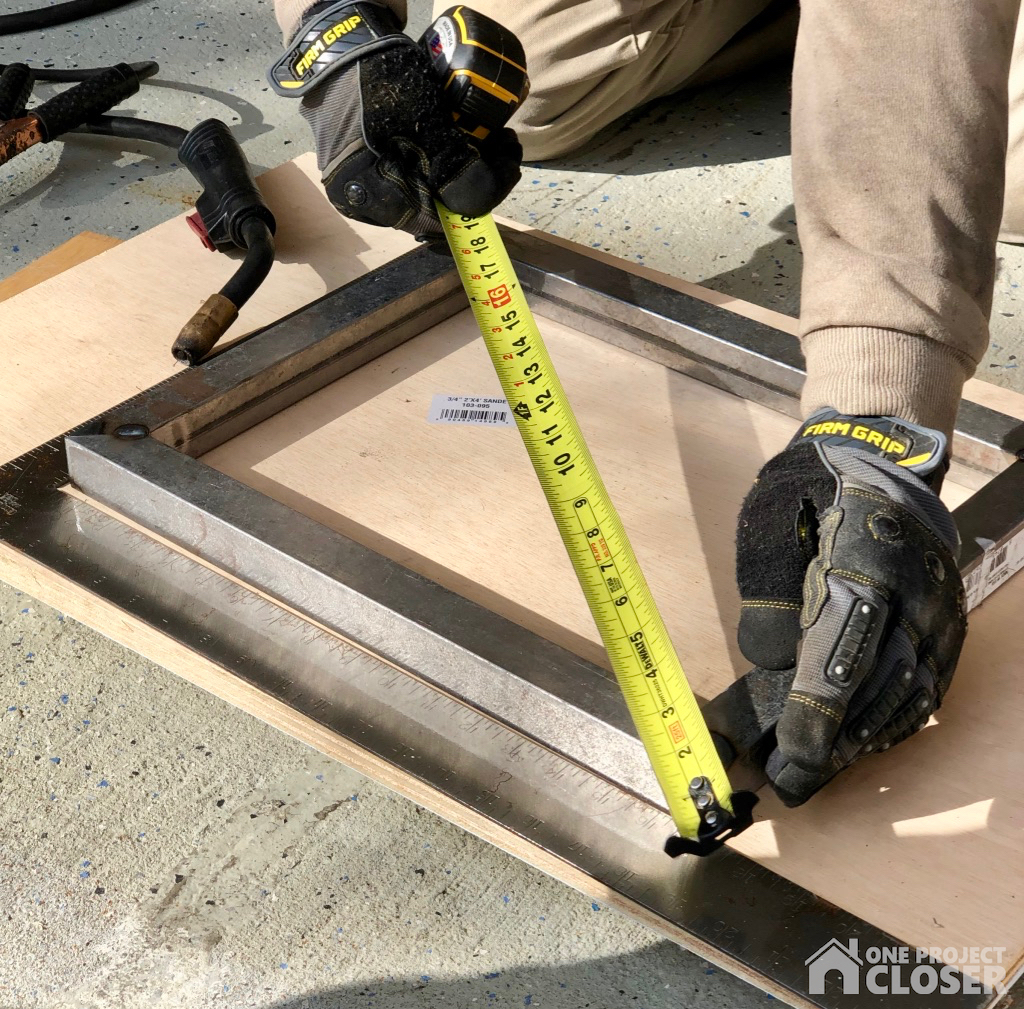
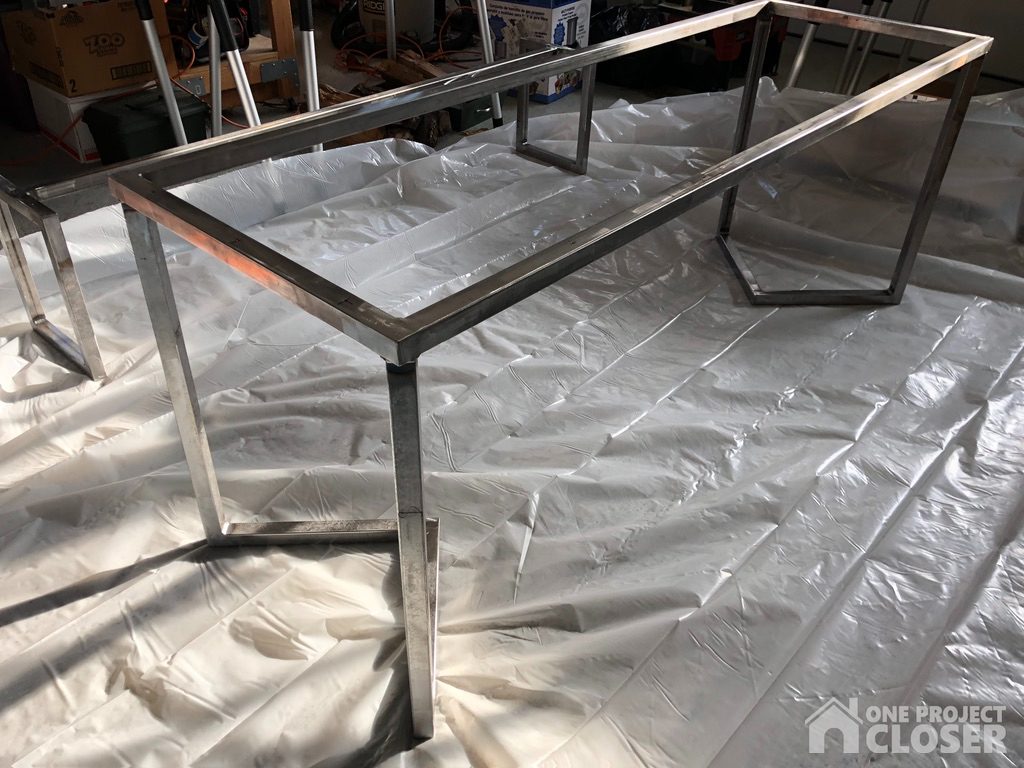
STEP ONE – Building the metal frame
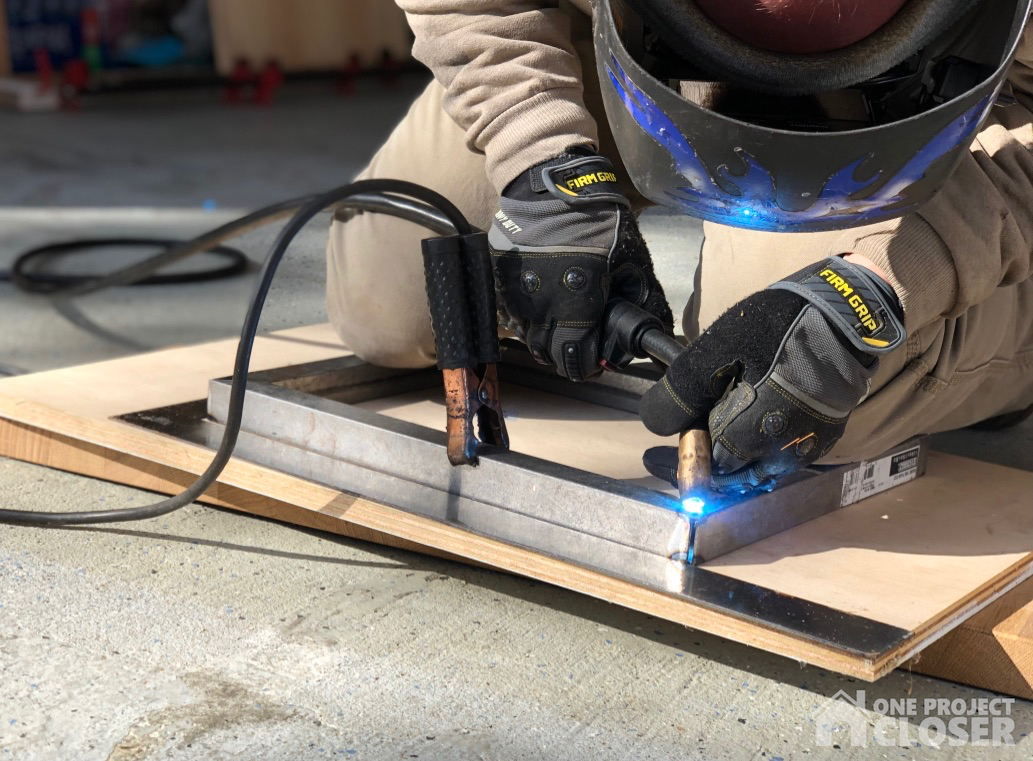
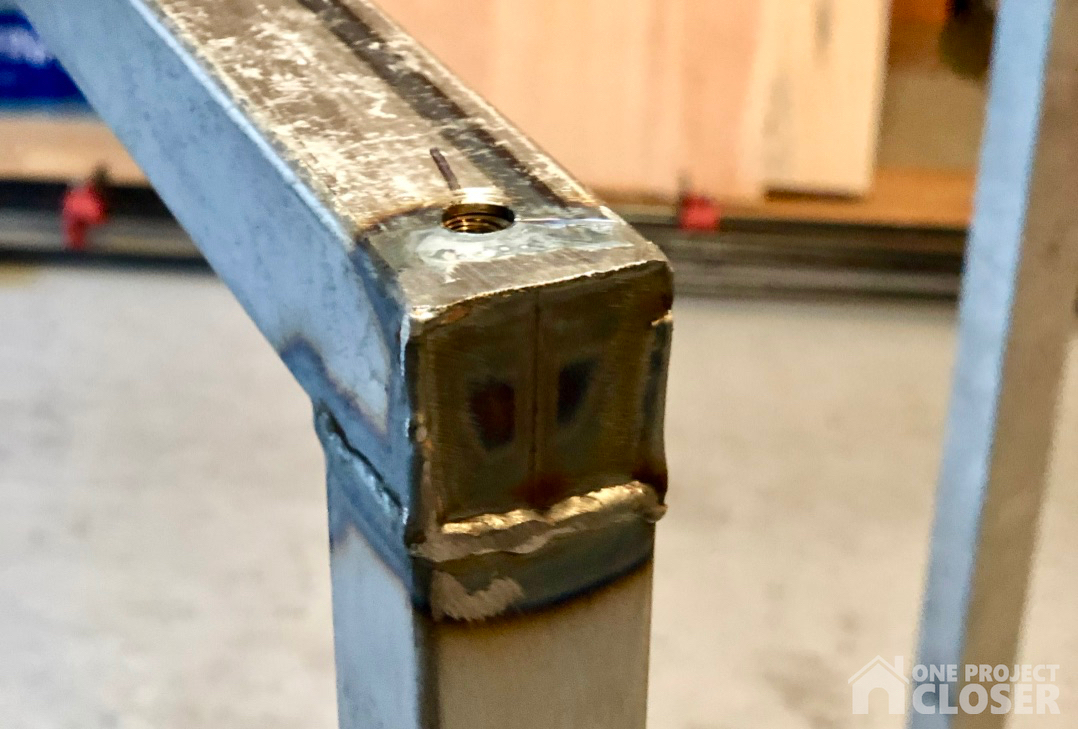
The table and bench frame are made with 1-1/4″ square steel tube. My brother-in-law is awesome, and he brought over an arc welder, chop saw, grinder and all the necessary safety gear. It took us a solid day to weld all the joints. We would often setup the joint, tack it in place, and recheck all our angles before actually welding the joint. After that, we would clean up the weld with a cut-off wheel and flap disc.


For the feet of the table and bench, we added a nut inside the tube for the adjustable feet. This is great because the floor may not be perfectly flat. I also predrilled holes for later to secure the wood to the frame.
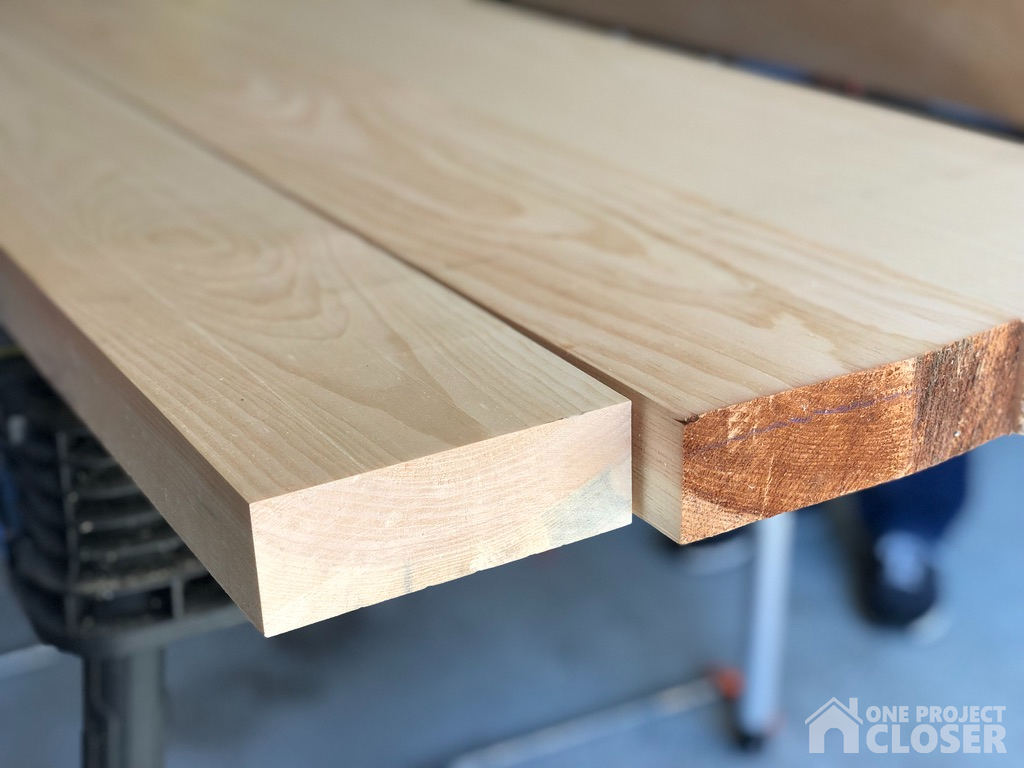
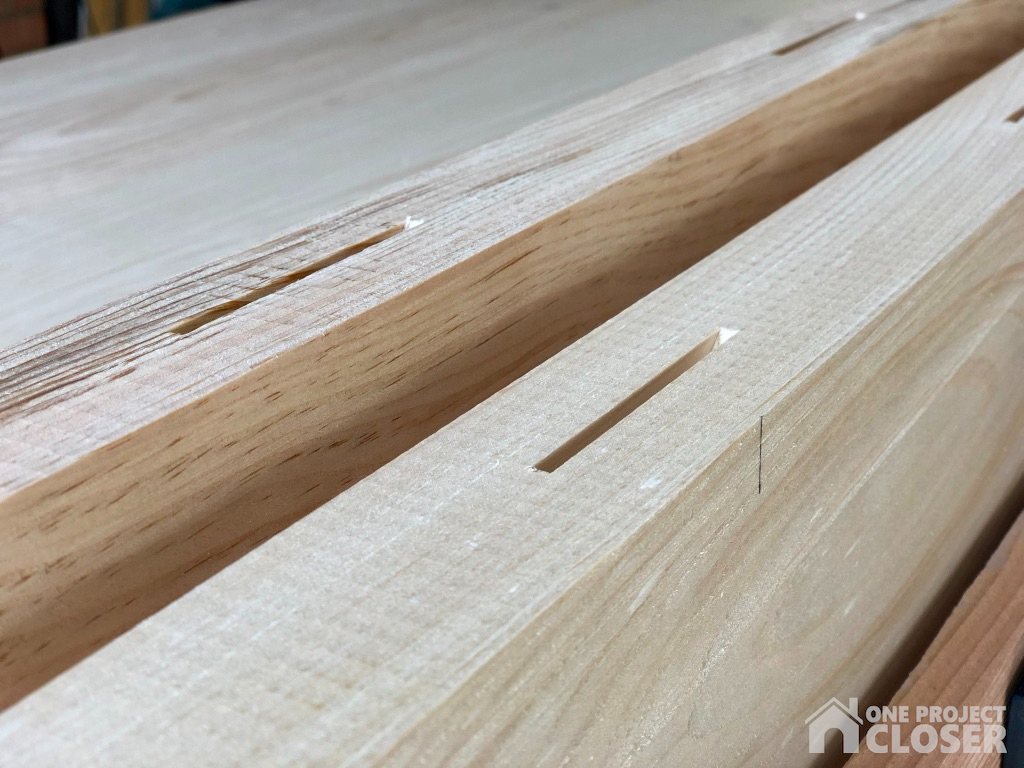
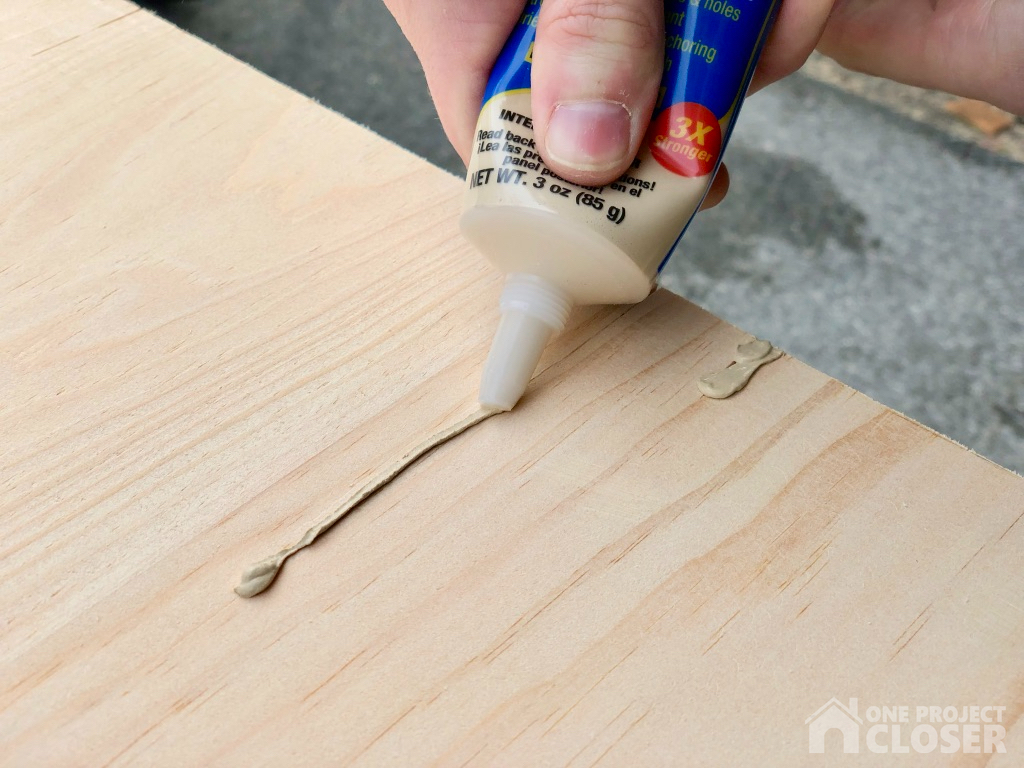
STEP TWO – Cutting biscuits and glue up
For this project, Jocie wanted the top about 2″ thick, and you won’t find boards that thick at the local big box store. I headed over to a local lumber yard and the selection was amazing. The mahogany was especially beautiful, and it was especially expensive. I wasn’t prepared to fork over $1400 just for the lumber so I went with white pine. It’s much softer but also cheaper. I did splurge by having the lumber yard run the boards through a drum sander and a joiner which made the glue up a lot easier.
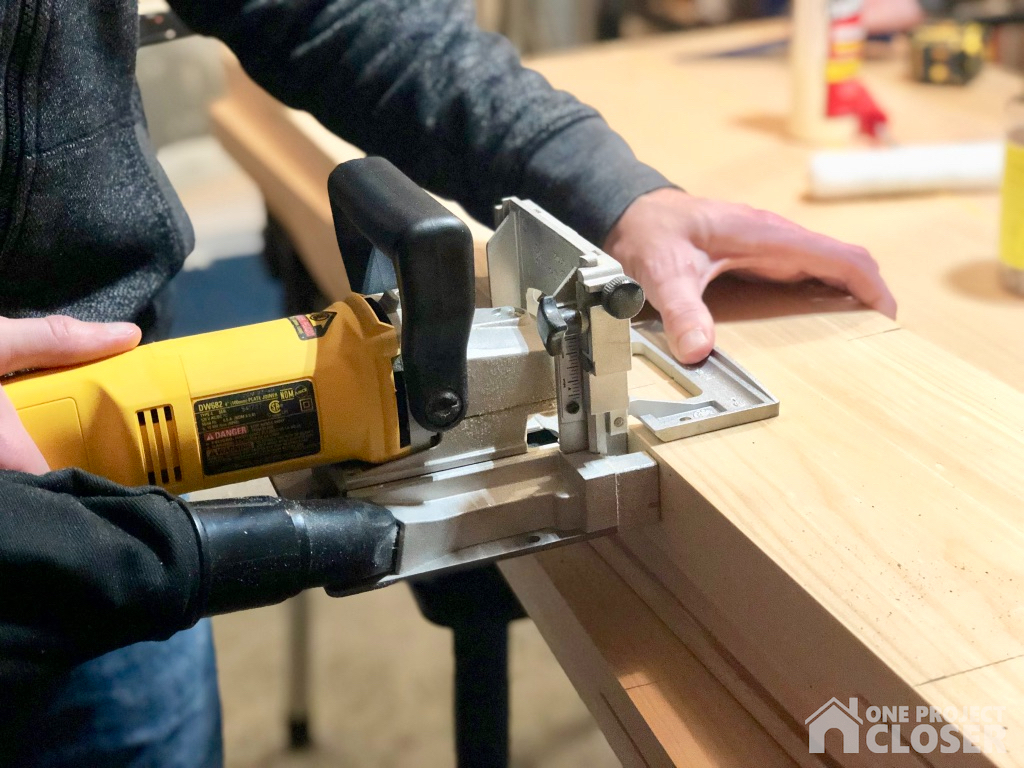
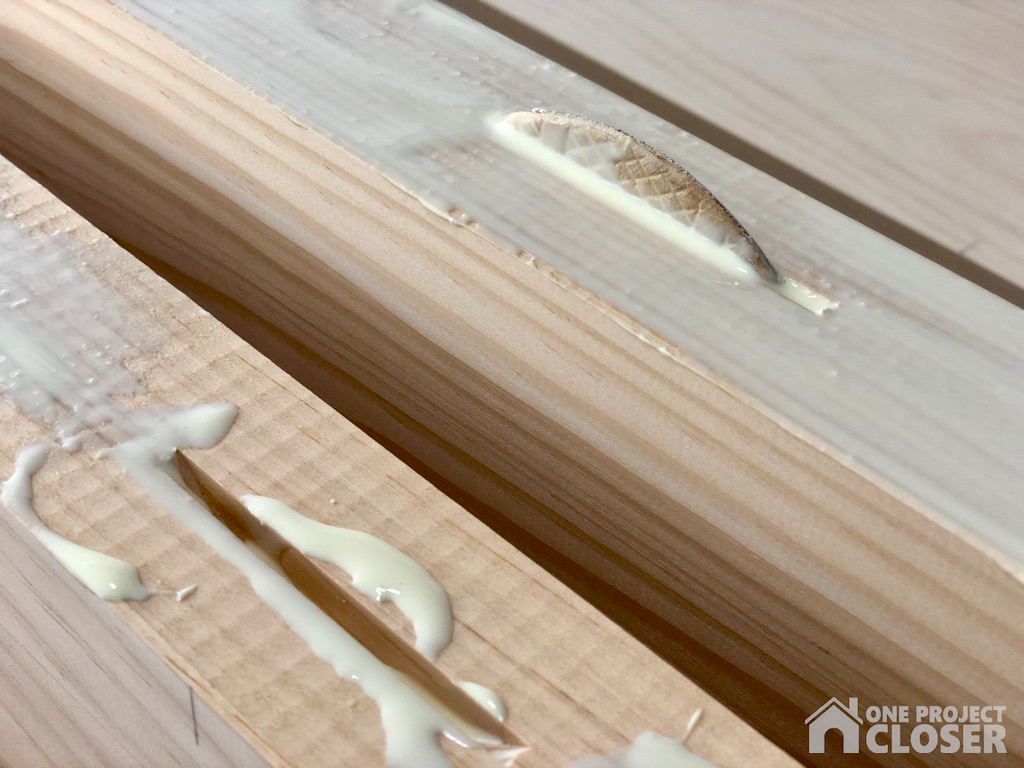
I used my DeWalt biscuit jointer to cut #20 sized biscuits on all the boards including the benchtop.
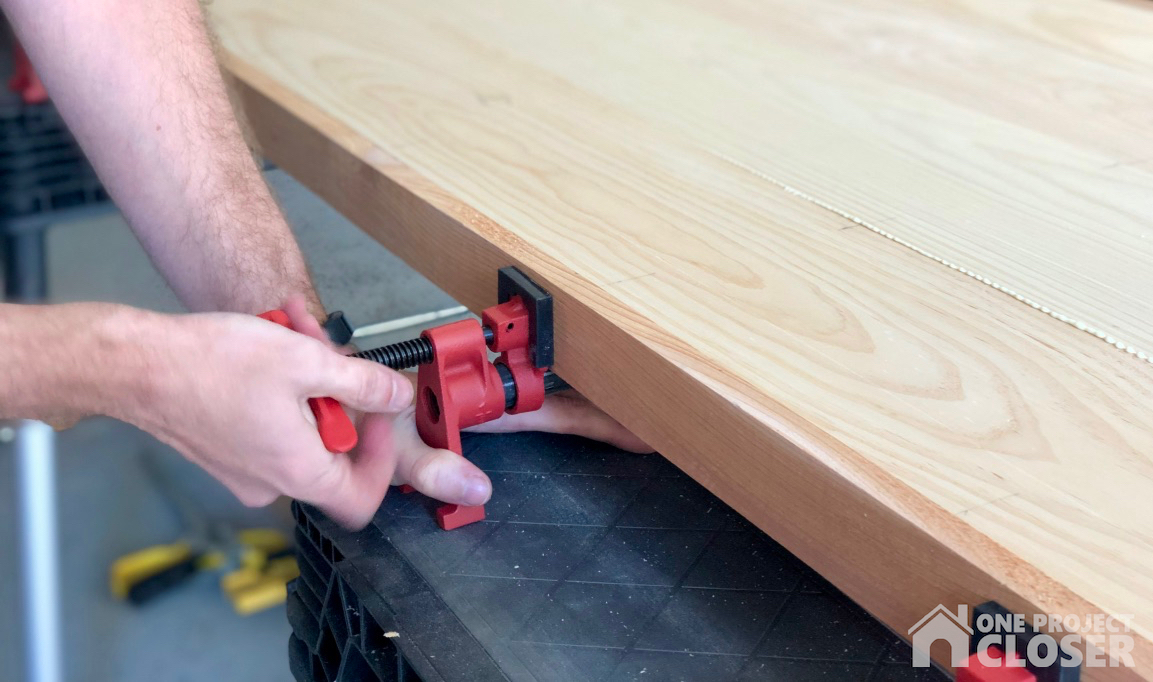
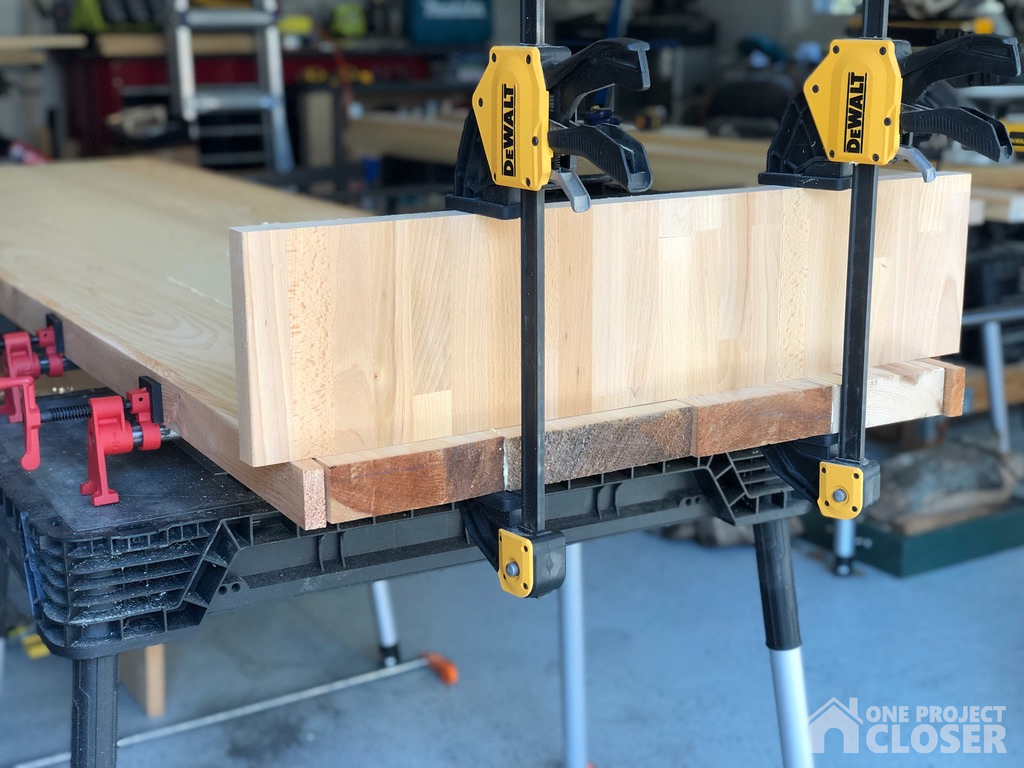
I opted to glue a few boards at a time to make better use of some of my shorter clamps. And I always used some scrap wood to protect the edges. I also used some other scrap to make sure the boards stayed flat.
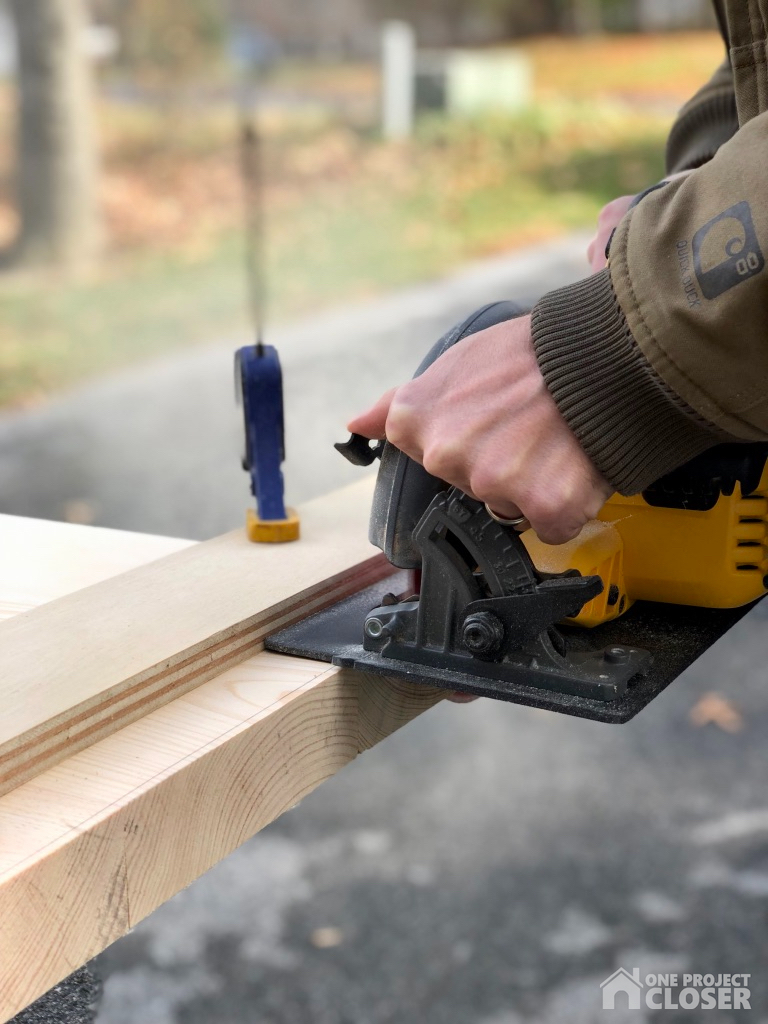
After the gluing was completed, I trimmed off the ends with a circular saw.
STEP THREE – Sanding
It took a lot of sanding before I was happy with the face of the tabletop and benchtop. I started with an aggressive belt sanding to remove dried glue. After that, I used my orbital sander working through 80, 100, and 150 grit sanding discs.

It was about this time that I realized there was a crack in one of the boards, and I’m not sure how it got there. Regardless, I used a bow tie on the underside and a little touch up with wood filler.
STEP FOUR – Staining and Painting
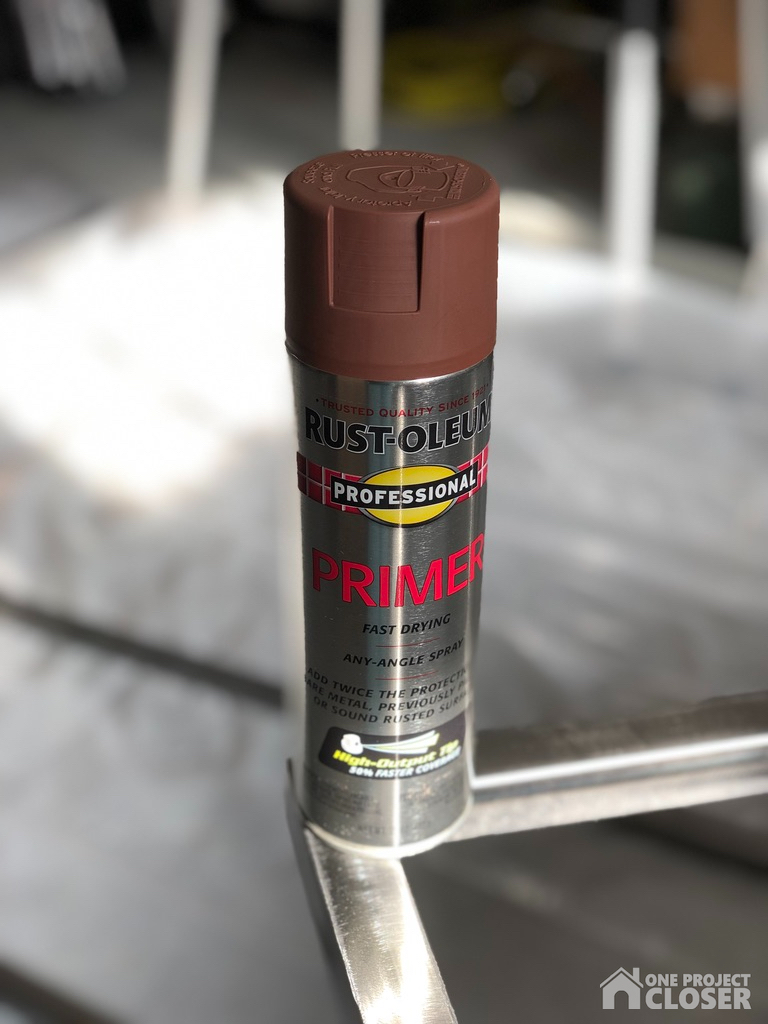
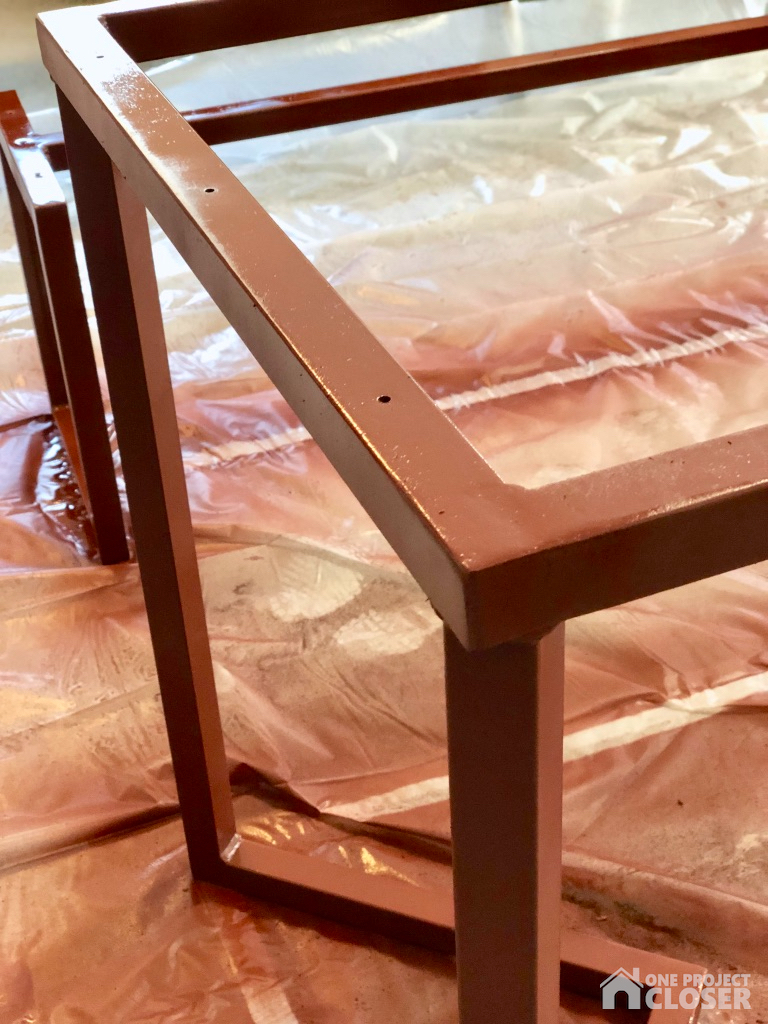
Jocie handled most of the staining, painting the metal frame and even sealing the wood. She started with a metal primer spray paint and followed that up with a oil-based paint in our sprayer.

Before staining, it’s important that the wood is clean and completely free of dust. I broke out the new NXT shop vac from Ridgid.

This vac is great. It’s a 16 gallon, wet/dry shop vac. The large wheels and handle make it easy to maneuver, and Ridgid includes all the accessories you’d expect with on-board storage. Combined with a 6.5 peak HP motor, this shop vac delivers rugged construction and lasting durability.
Jocie used a dark walnut stain, and the pine soaked it up. After it dried, she applied about 6 coats of polyeurethane to seal and protect the wood.

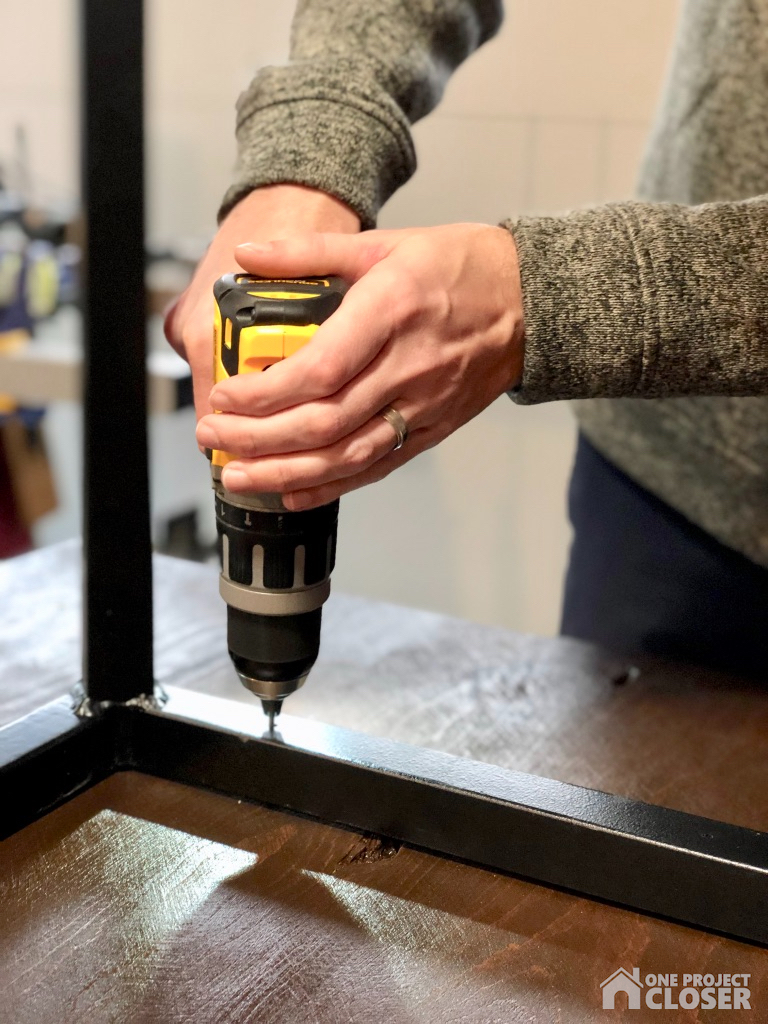
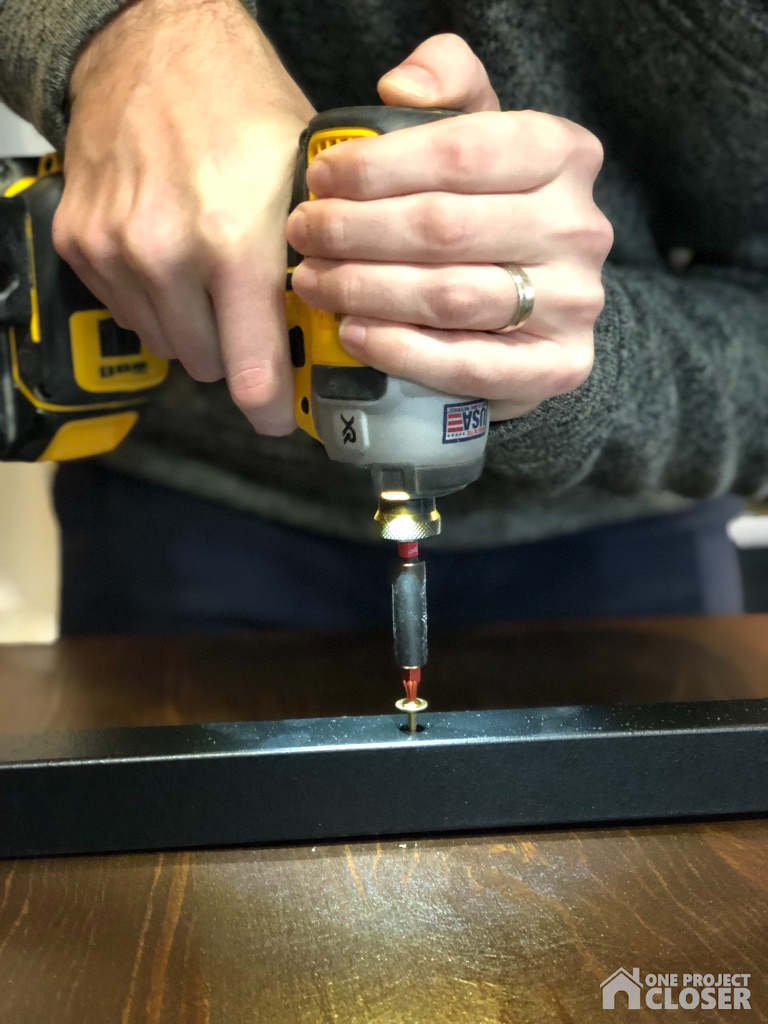
STEP FIVE – Assembly
At this point, all that was left was attaching the tops to the frames. I used long wood screws with a wide head. Hats off to Jocie who helped me carry this beast inside (without dropping it!).
I love the way the table looks, and I love how many people can sit together. We’ve already had a blast hosting and playing board games. Fingers-crossed this is the last table I build for some time. 🙂


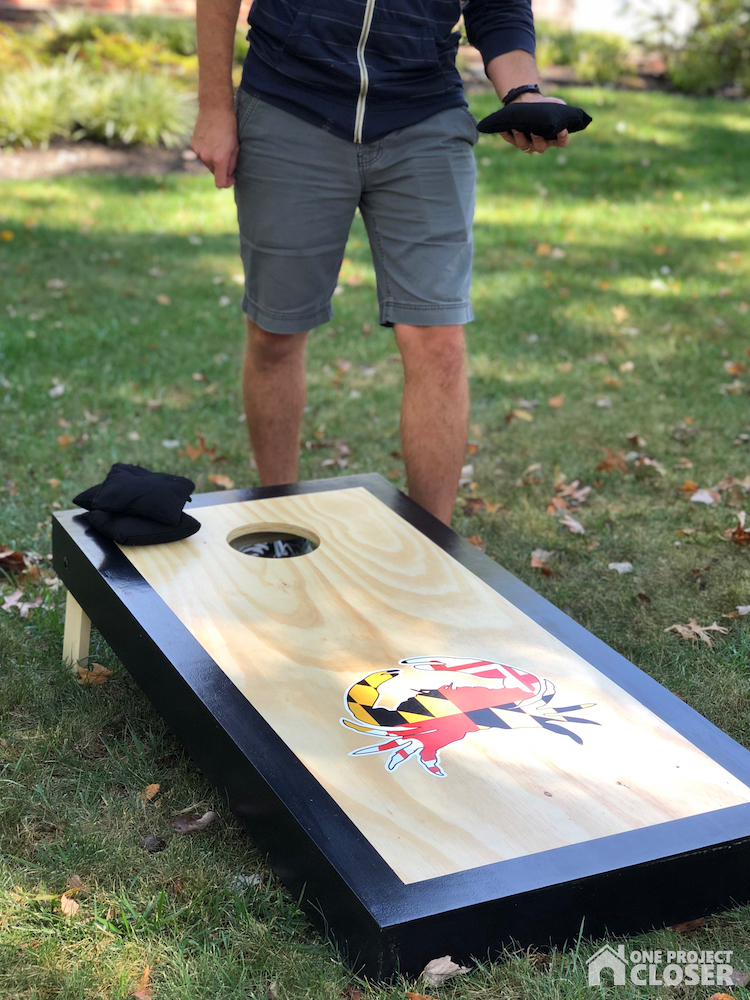
Thank you so much for joining us at One Project Closer for this tutorial on How Build a Regulation Cornhole Set. This post is sponsored by the Home Depot Prospective Campaign. Post may also contain affiliate links. Opinions (and typos) are 100% our own, and we appreciate you supporting our site in order to continue to provide free content to our readers.
If you know me, you know I love fun, semi-competative yard games. I enjoy playing kan-jam, boccee, and kubb. And of course, cornhole is right at the top of the list.
I’ve made several cornhole sets over the past few years, and each set gets a little bit better. Read on to learn what I recommend for materials, joinery and finishing.
DIY Cornhole Boards
Project Time: 5hrs plus dry time
Cost: About $80 depending on what decals and bags you buy
Difficulty Level: Moderate
Materials Needed:
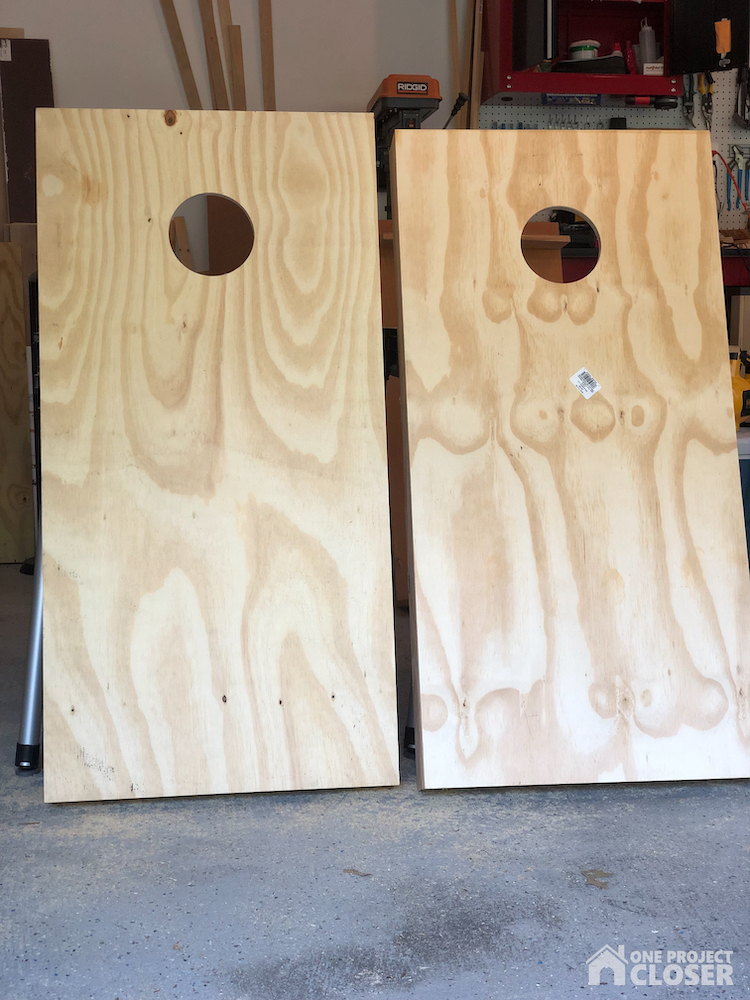
You can make cornhole boards out of a variety of materials. What I’ve found works best is 3/4″ plywood. 2x4s or 2x3s for the frame will often warp causing the boards to lay uneven. Thinner plywood is lighter, and that’s a good thing when you’re lugging the boards around. However, 1/2″ plywood will bounce a bit when you’re playing.
- (3) sheets of 2×4′ 3/4″ plywood
- Pocket-hole screws
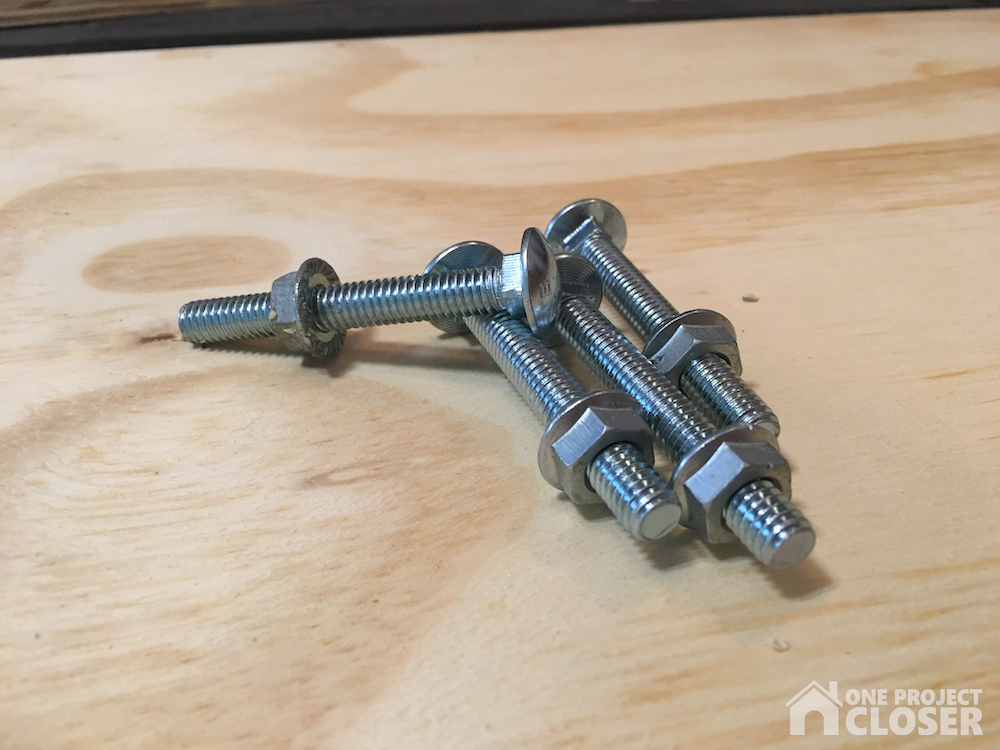
- (4) carriage bolts
- (8) nuts and washers
- Scrap wood for the legs
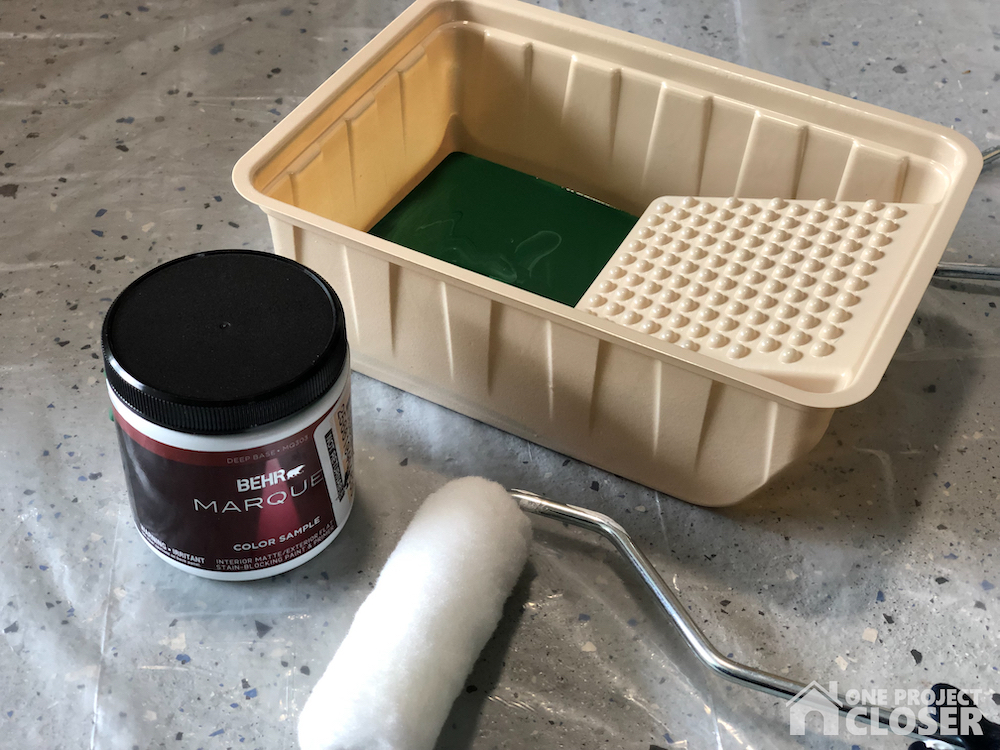
- Two paint samples (to coordinate with your cornhole bags and design)
- Two foam rollers + foam brush
- Blue tape
- Polycrylic or polyurthane
Tools Needed:
- Impact driver
- Drill
- Clamps
- Pocket-hole jig
- Sander
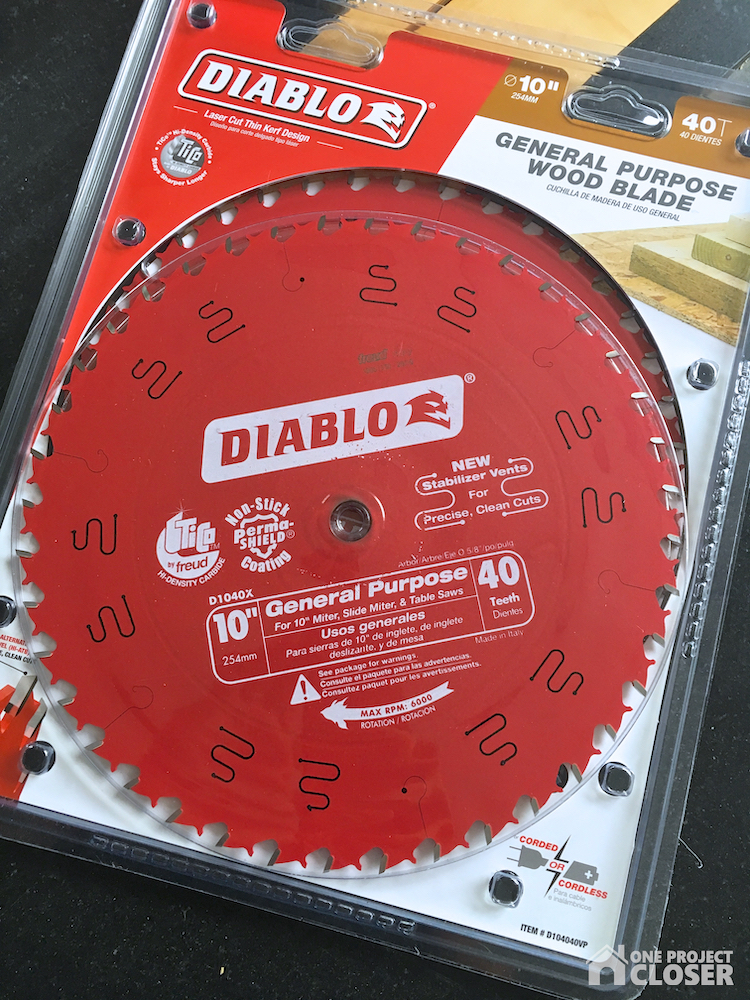
- Table saw with Diablo 10 in. x 40-Tooth General Purpose Saw Blade
- Hole saw, router or jigsaw
Be sure to check out our amazing Home Depot Coupons before you buy to save yourself some money!
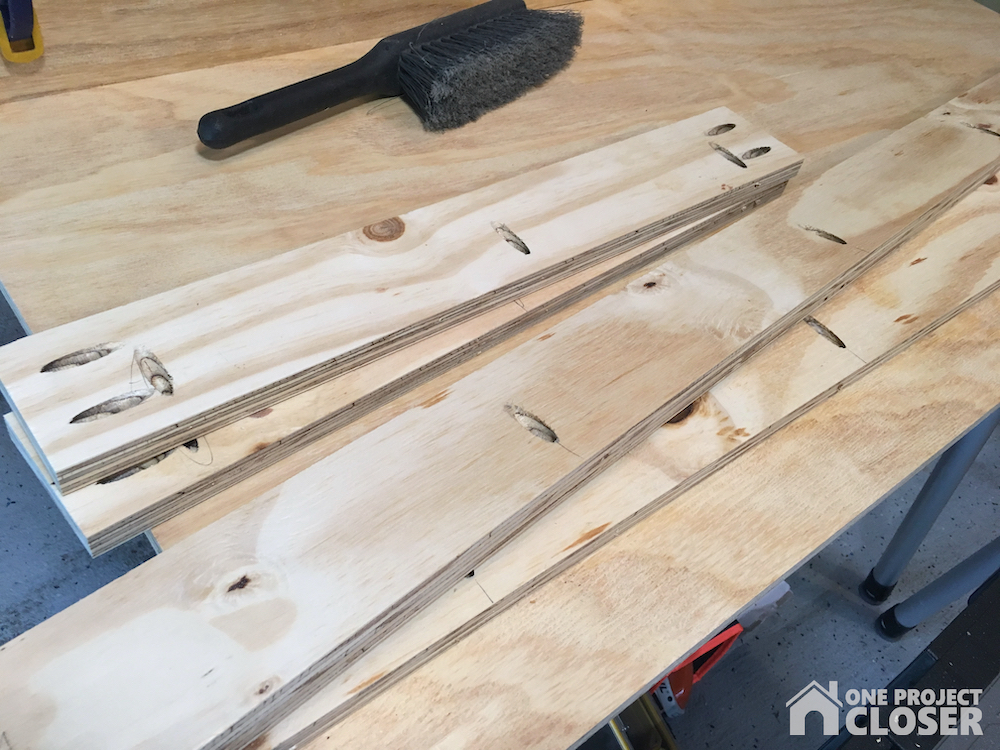
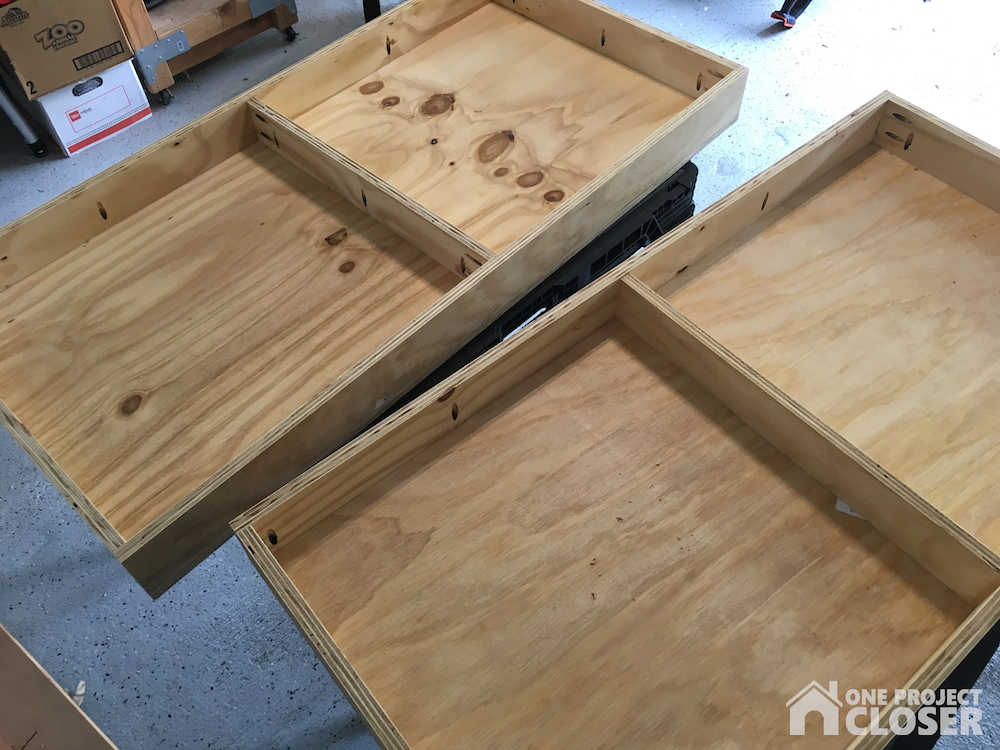
STEP 1: Build the sides
Grab one sheet of plywood, and start by cutting all your side pieces. Regulation cornhole boards are 2-1/2″ to 4″ tall at the front edge. Pick a height for all your side pieces, and don’t forget to account for the thickness of the plywood face. You will be able to cut all side pieces plus two cross supports from one sheet of 2×4′ plywood.
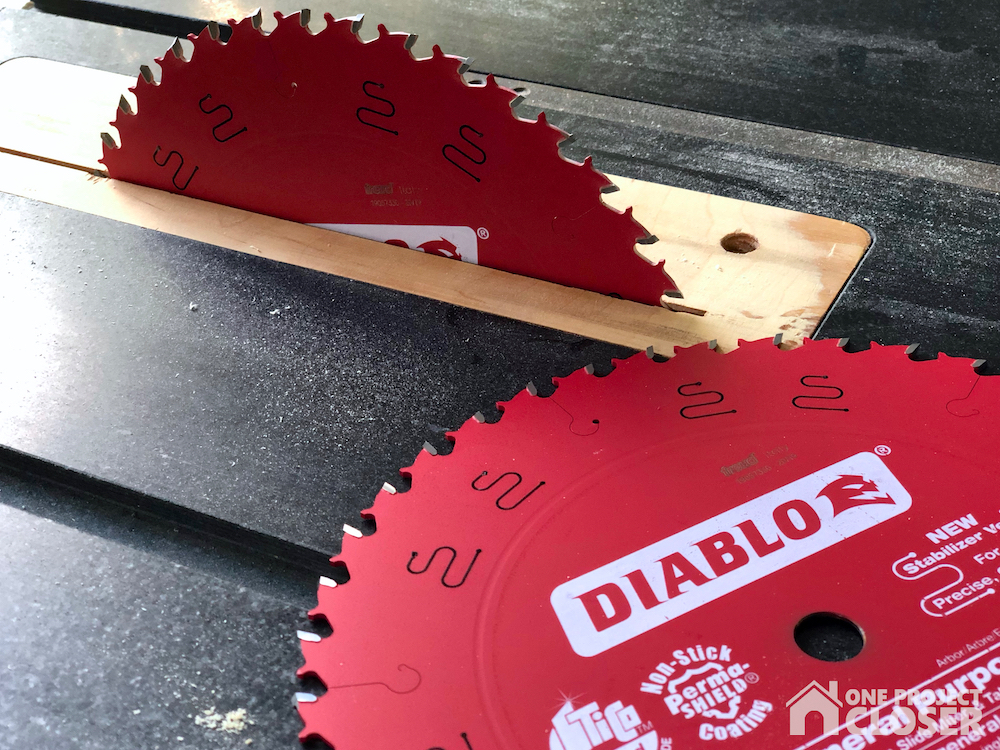
I used a 10′ Diablo blade on my tablesaw, and I was really pleased with the results. You can pick up a two-pack of these blades for about $30 from Home Depot, and they cut a variety of materials – plywood, OSB, pressure-treated, and more.
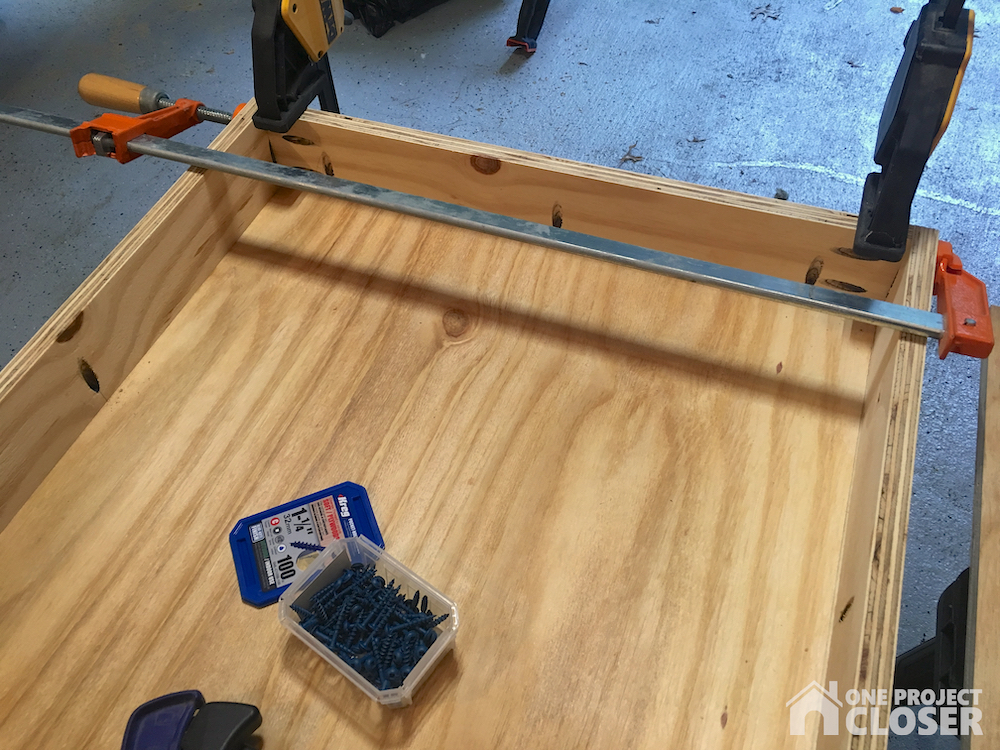
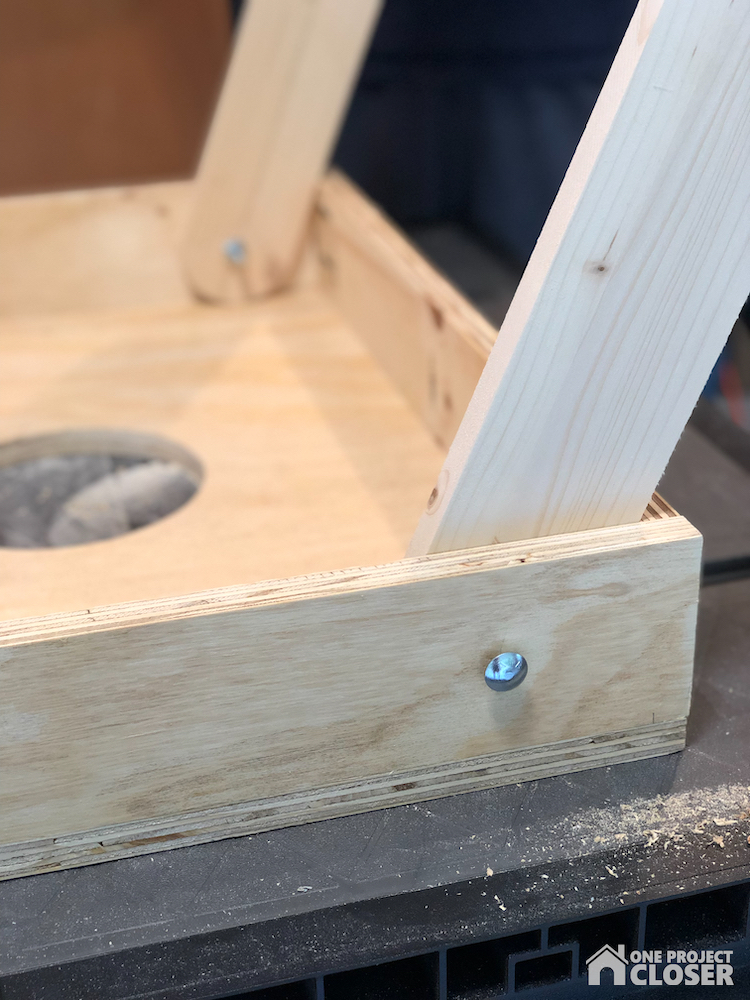
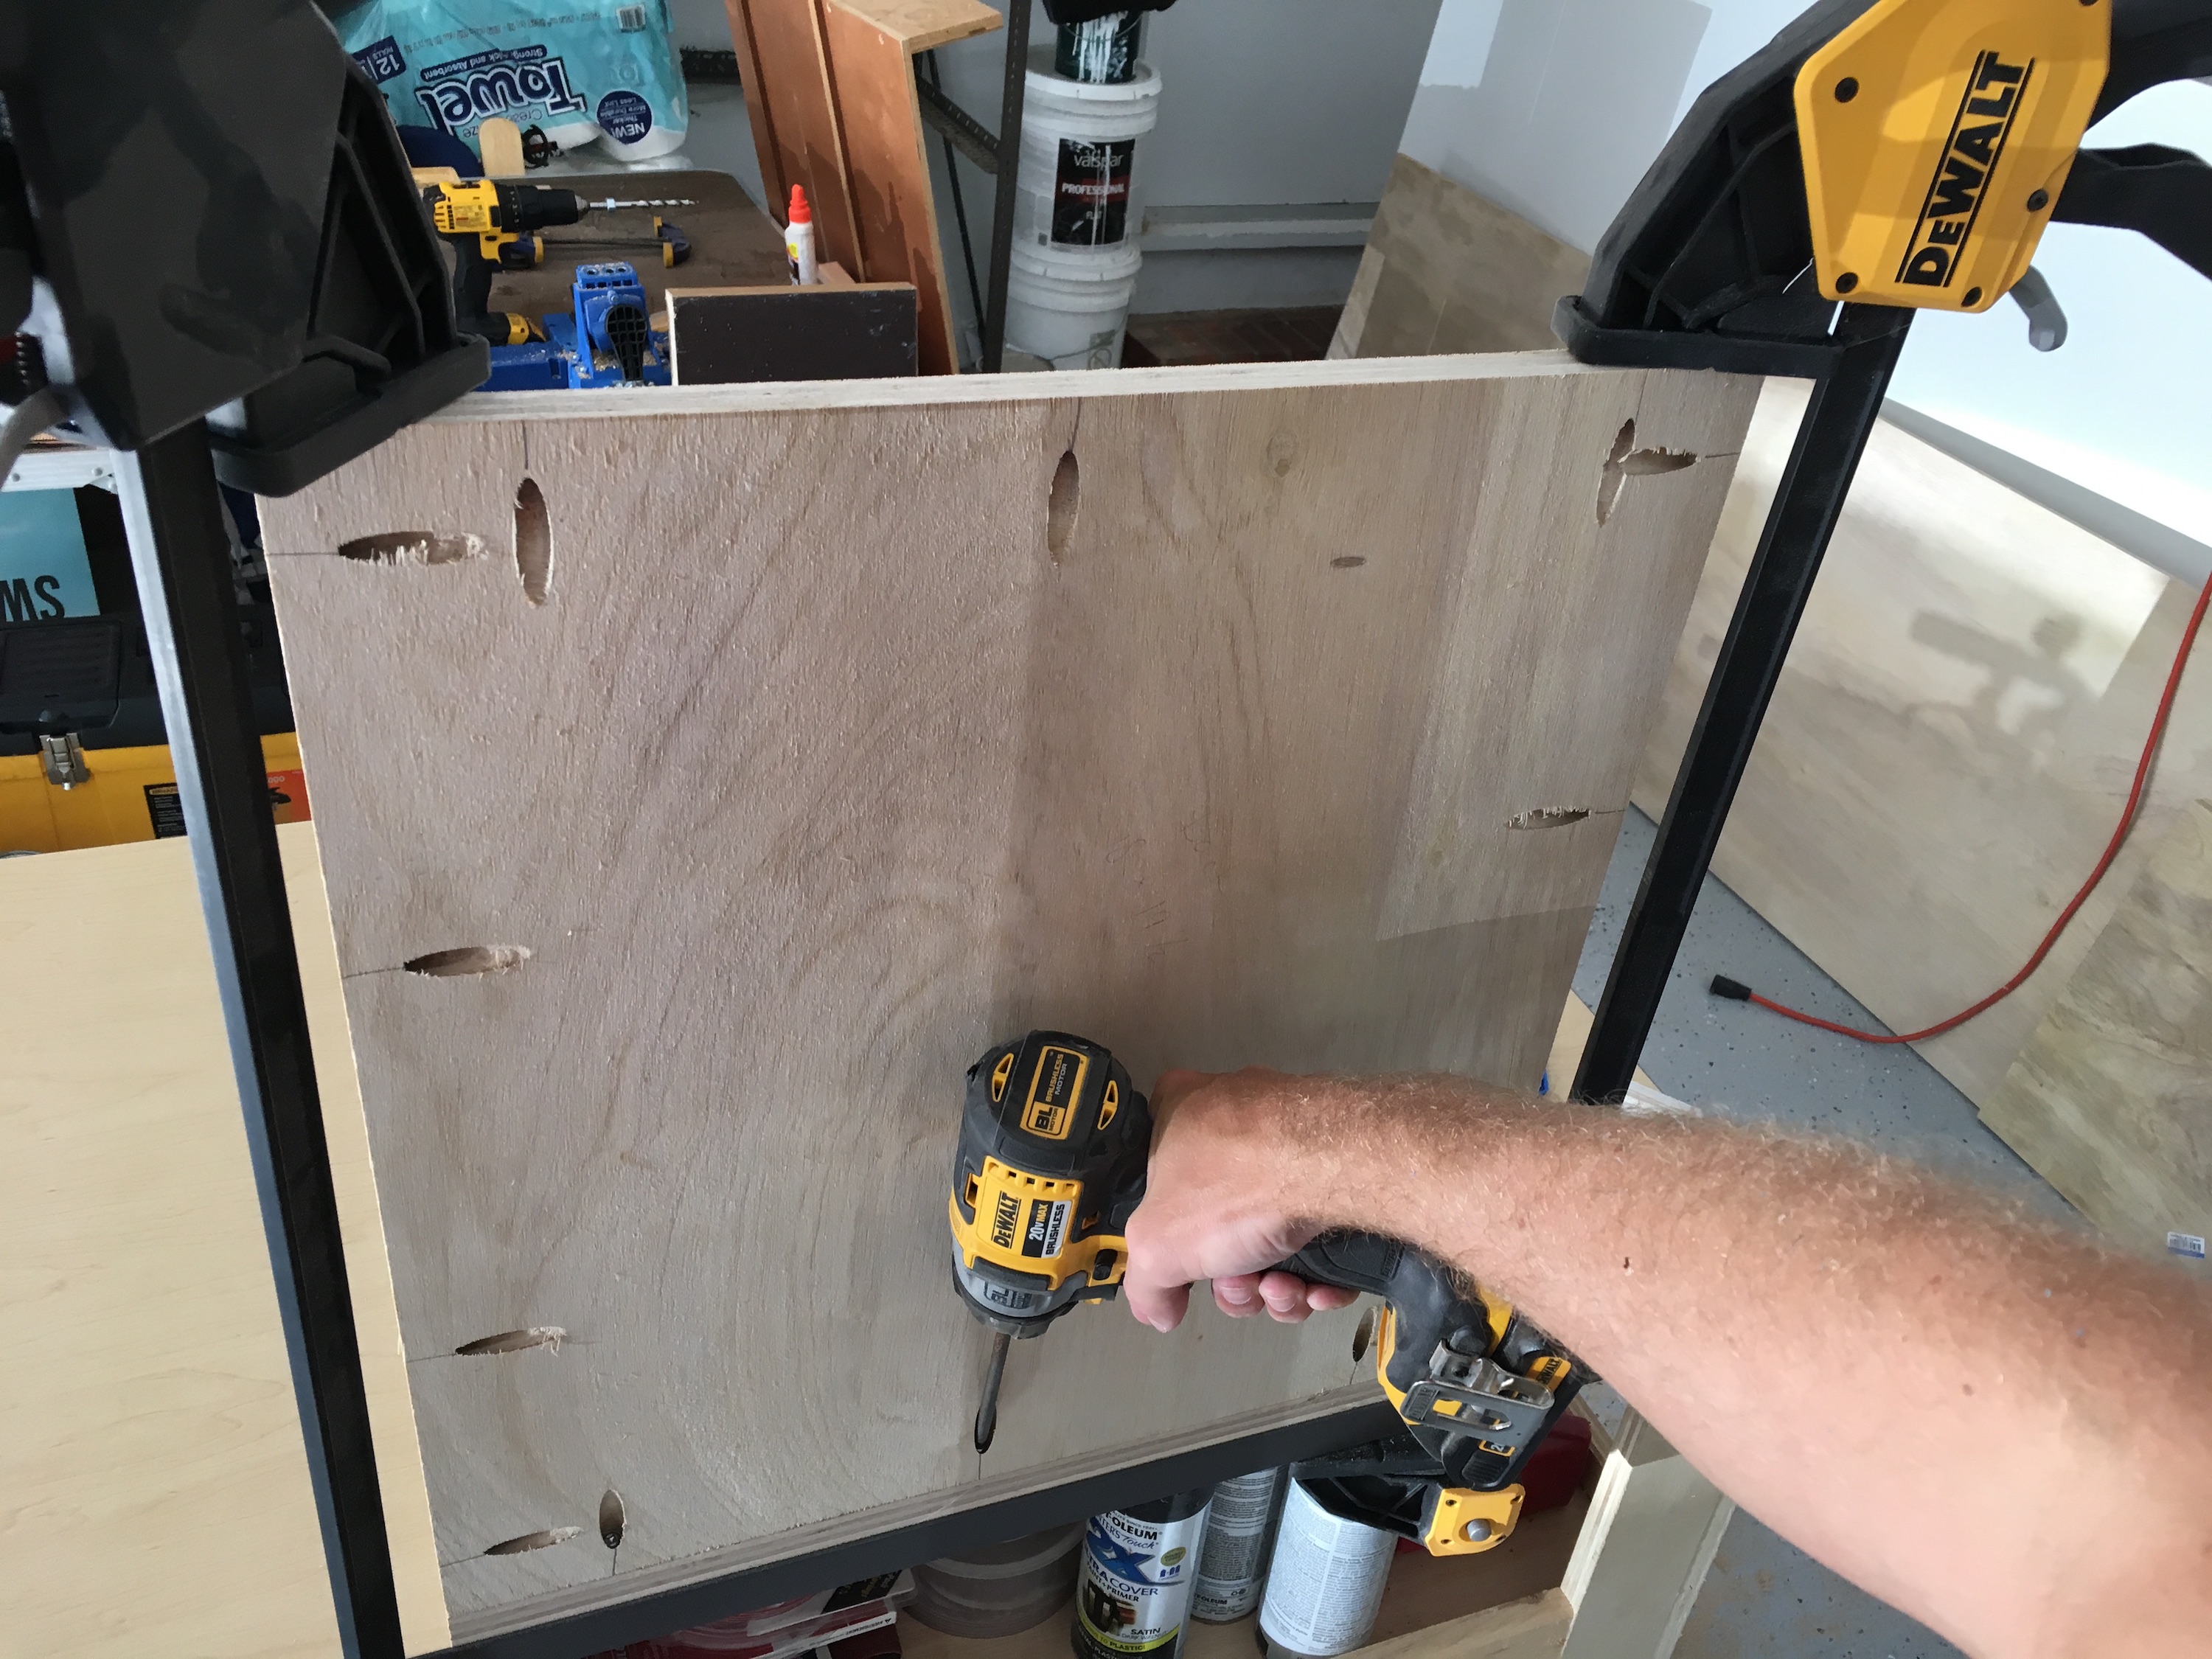
STEP 2: Attach sides and cross supports
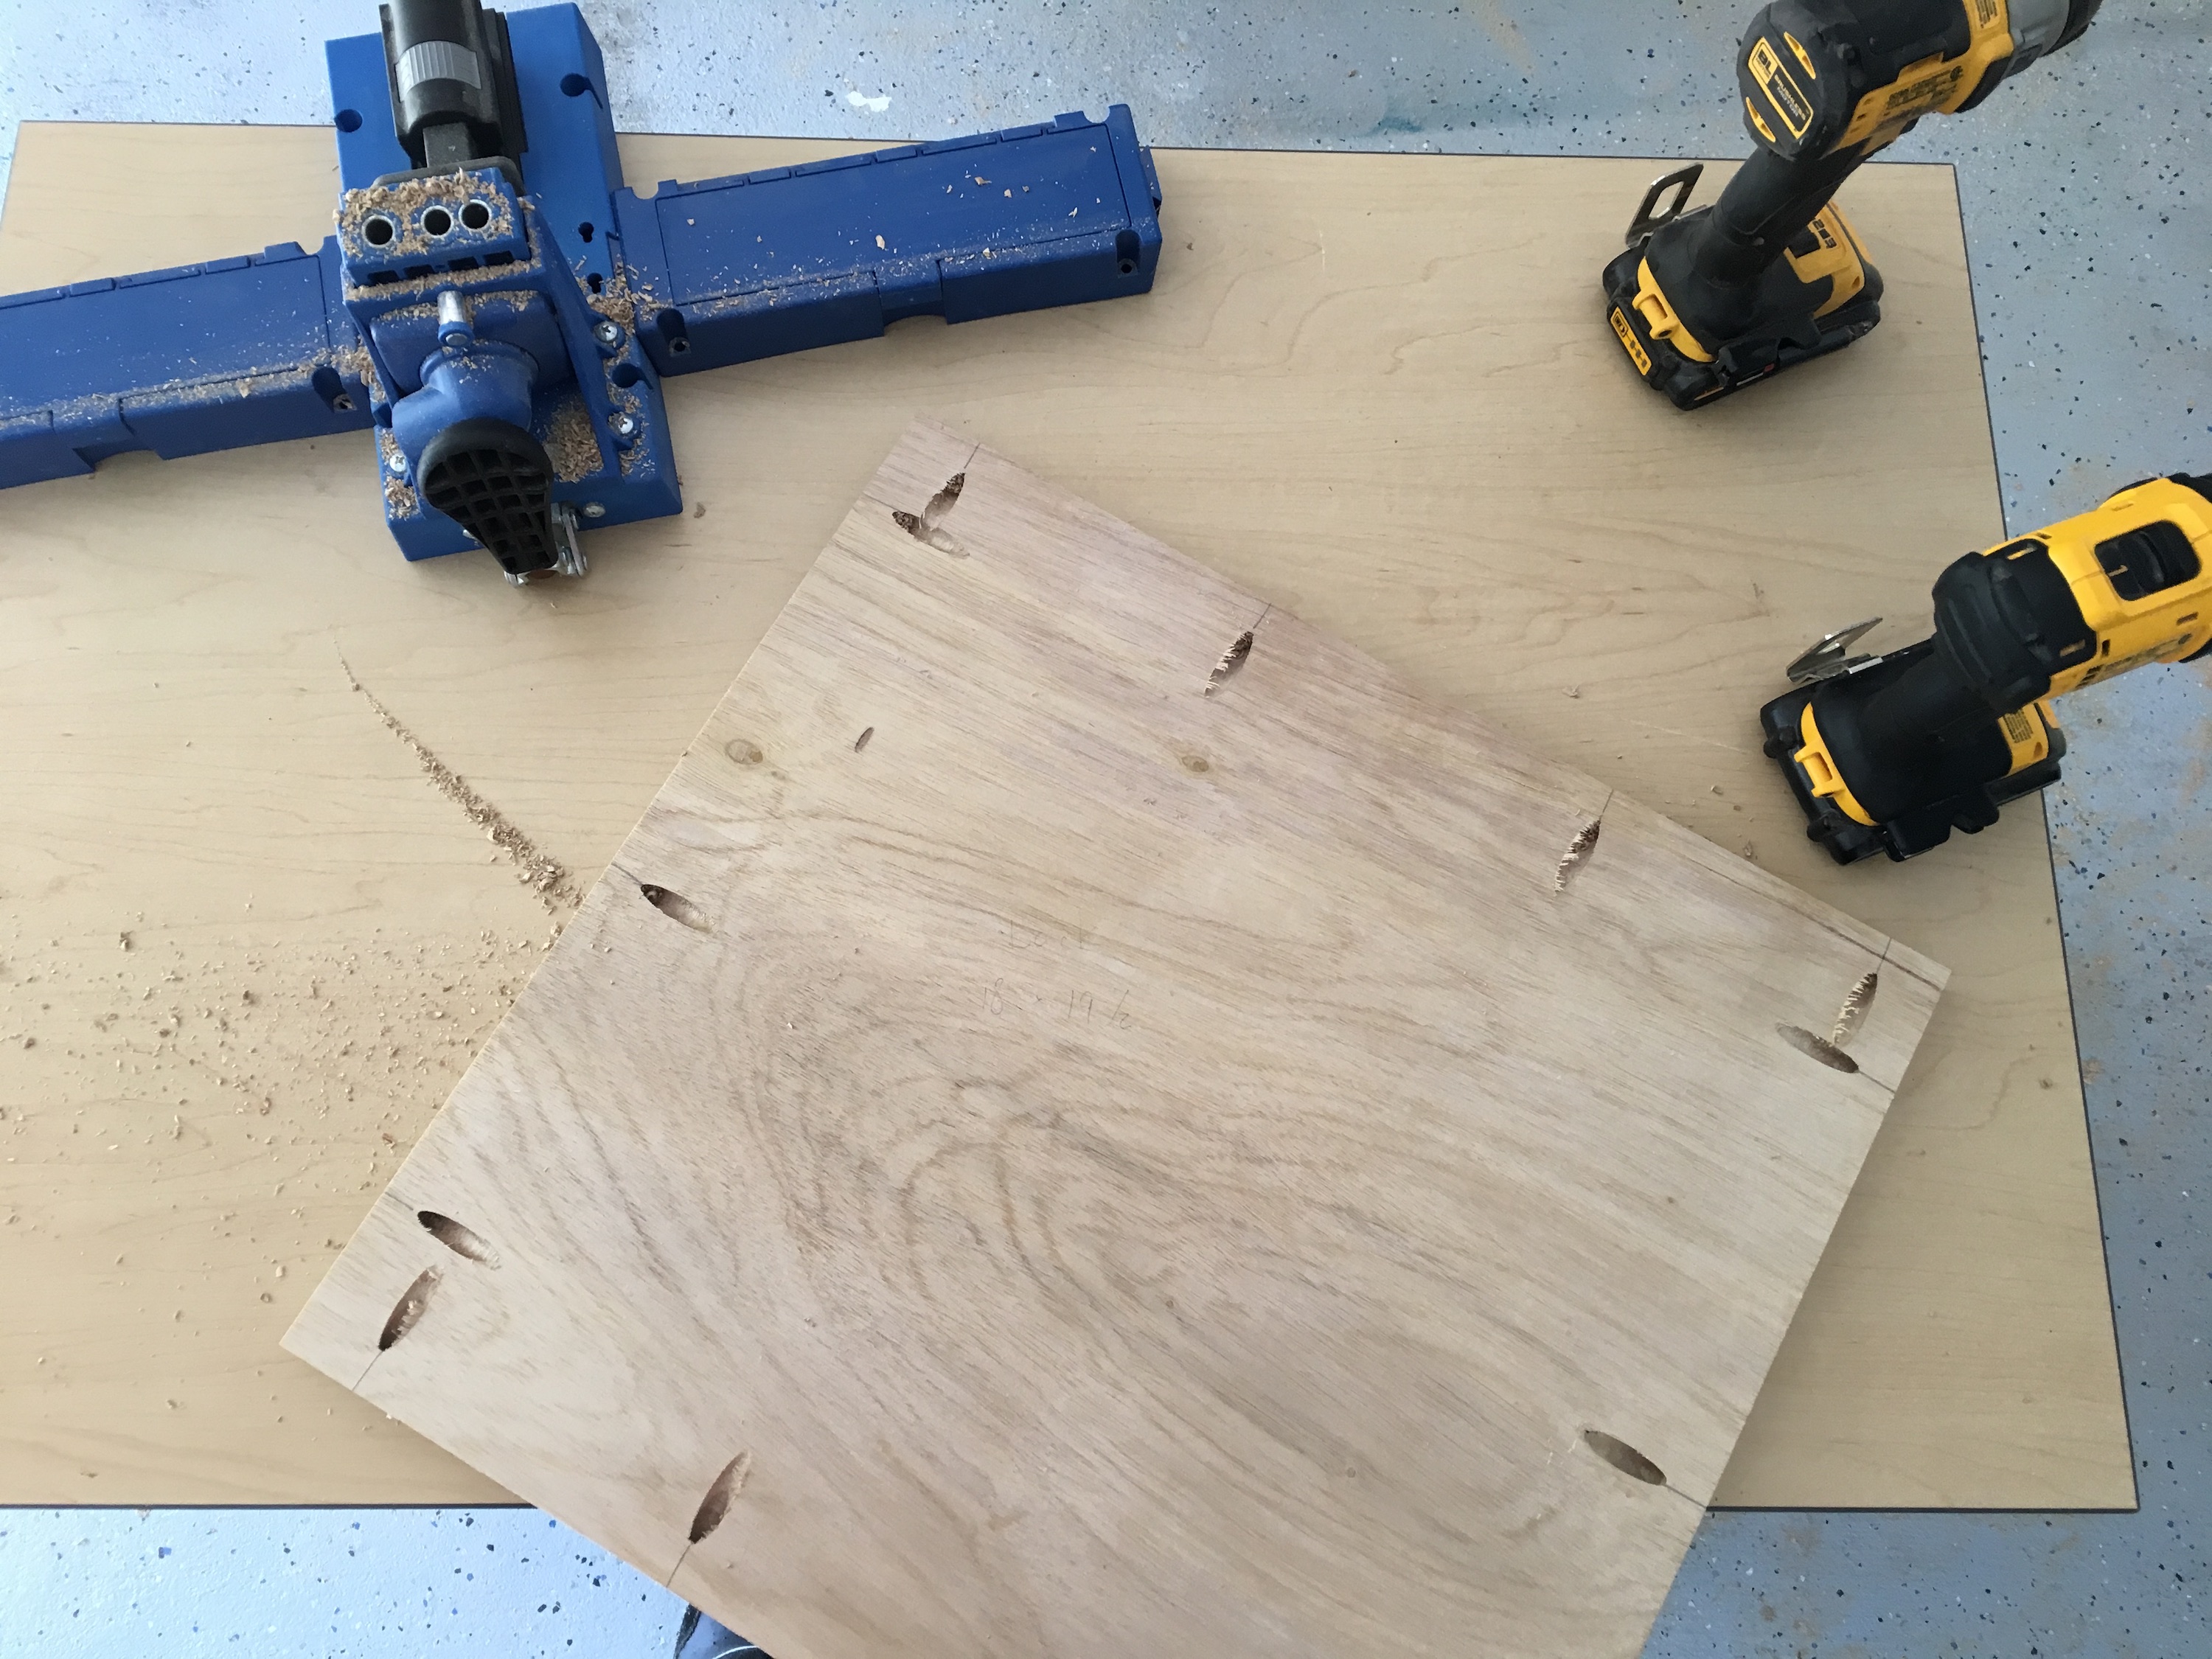
Drill pocket-holes into the side pieces and cross support. I used 5 screws on each of the long sides and 7 on each of the short sides and cross supports (4 going into the adjacent side pieces).
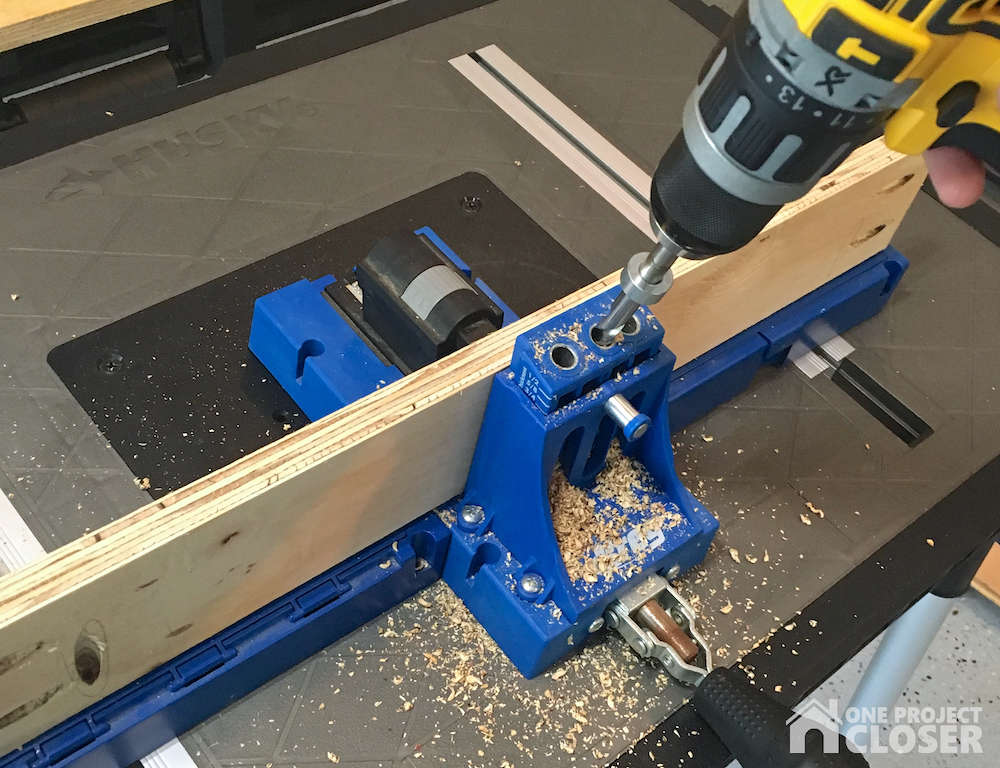
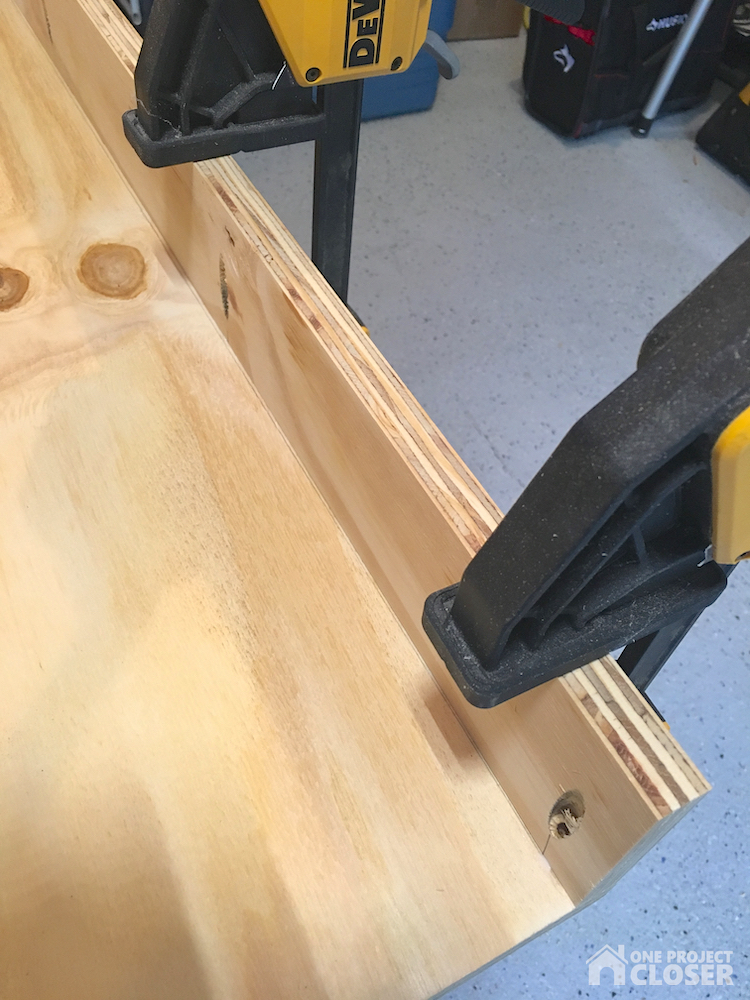
I like to securely clamp all my workpieces before screwing them in place. It helps keep surfaces flush. You can use wood glue if you want but it’s not necessary.
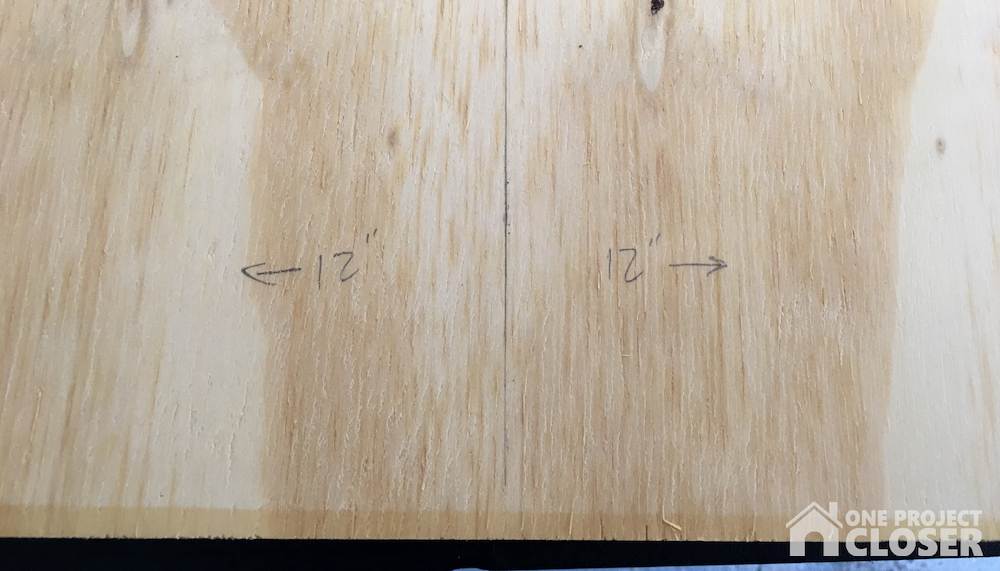
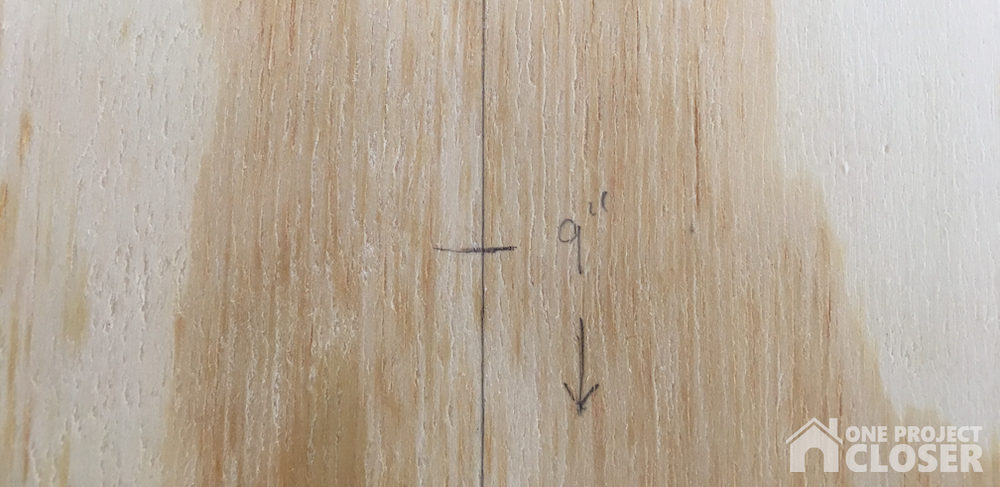
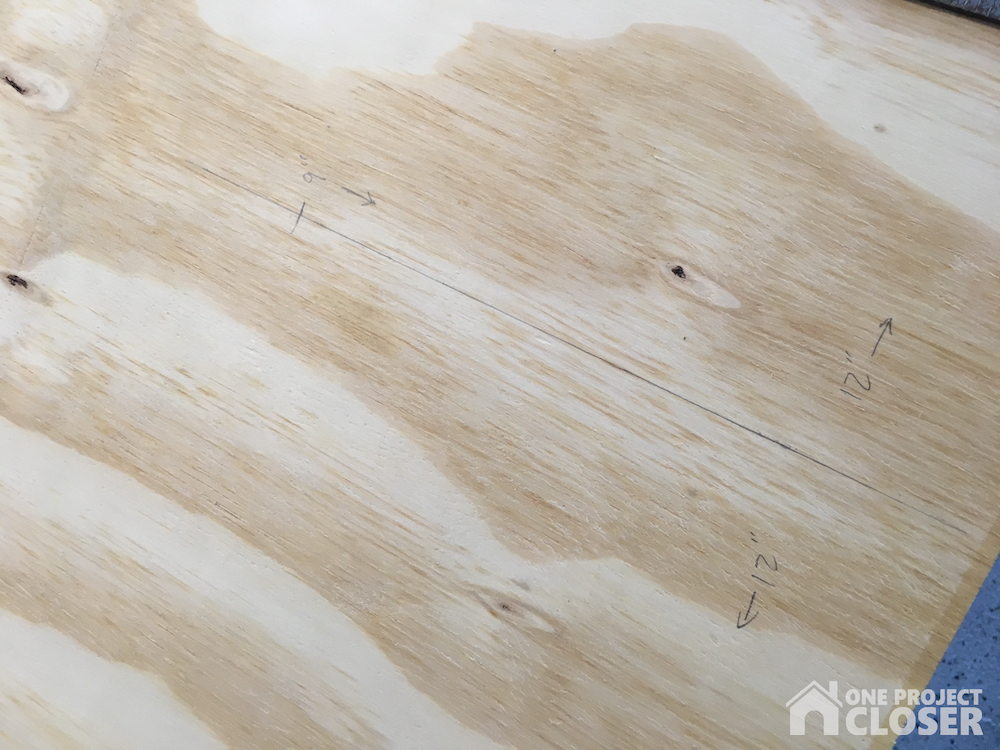
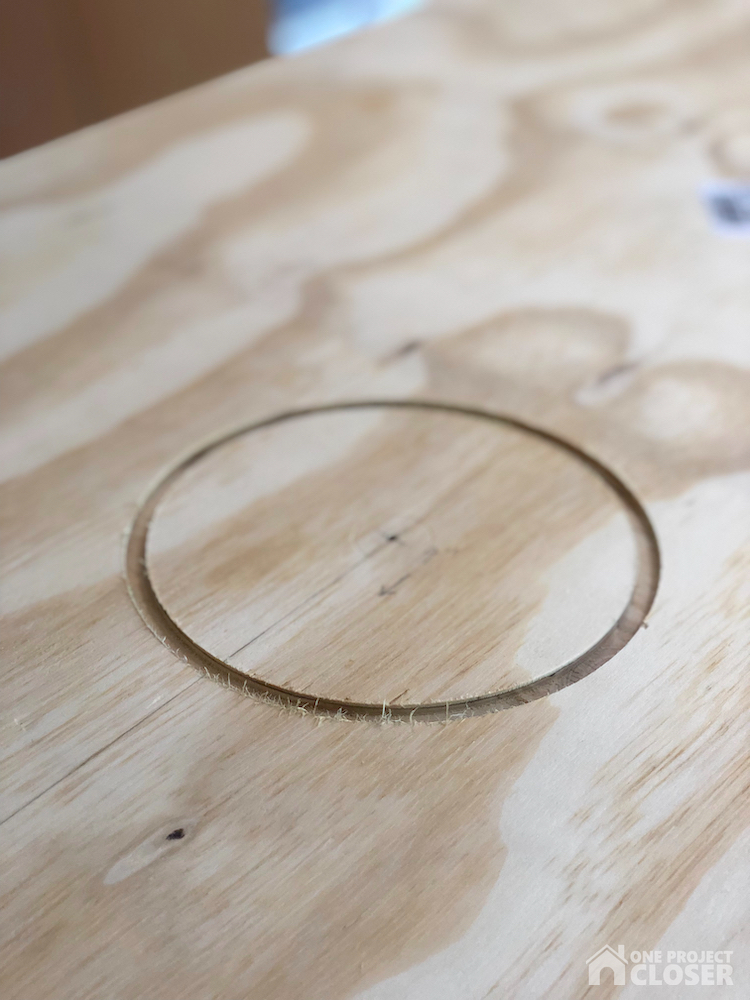
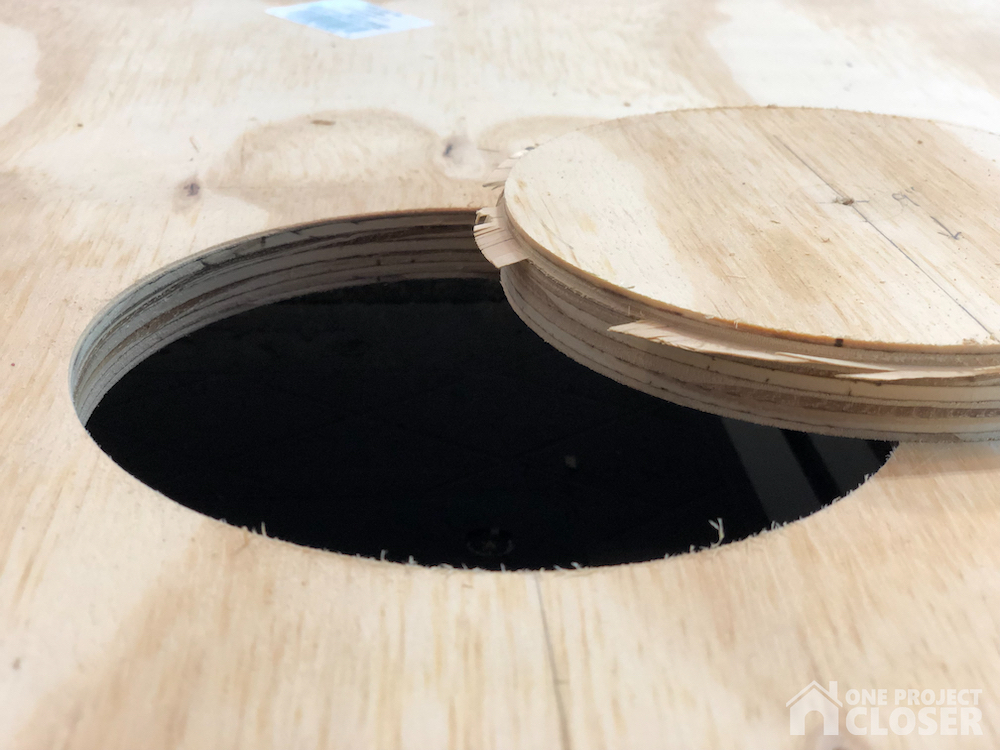
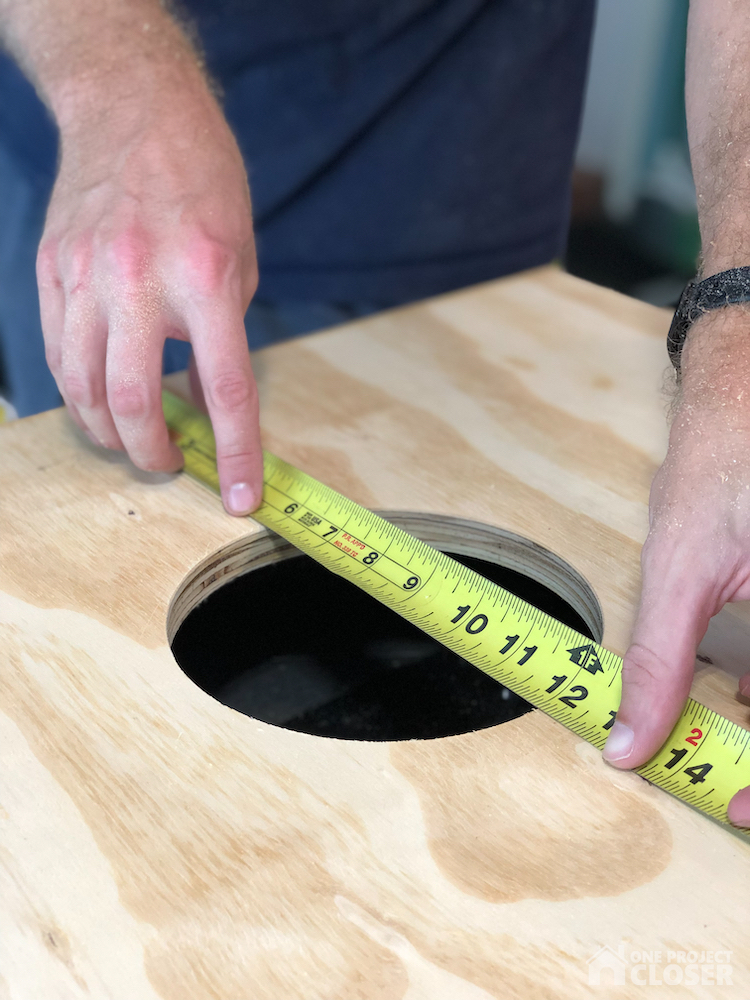
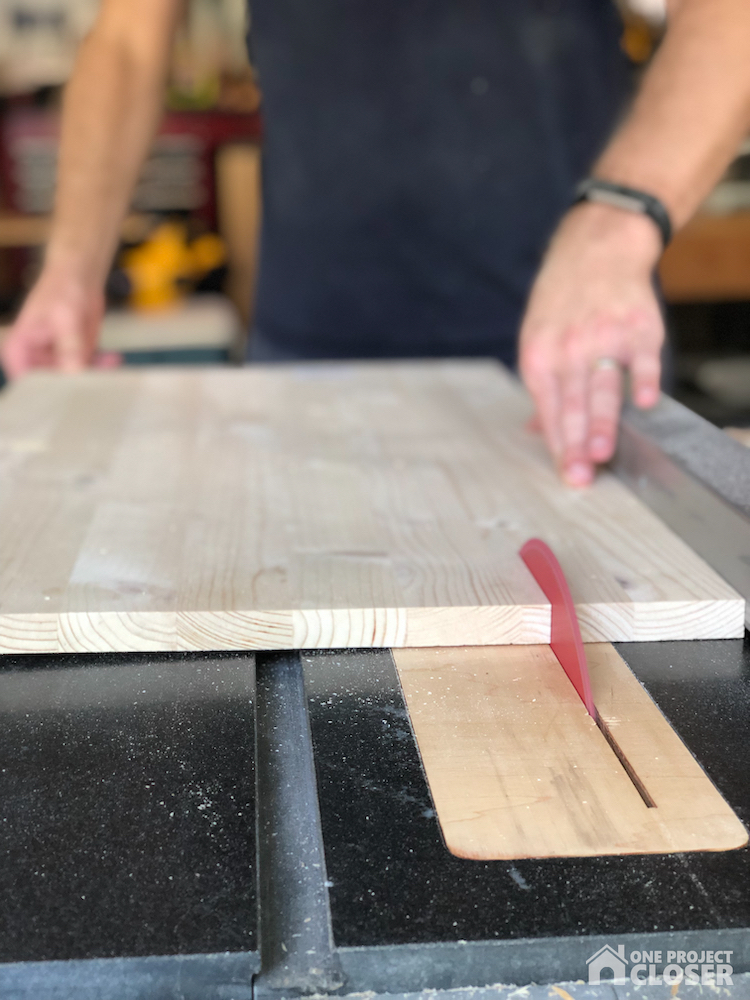
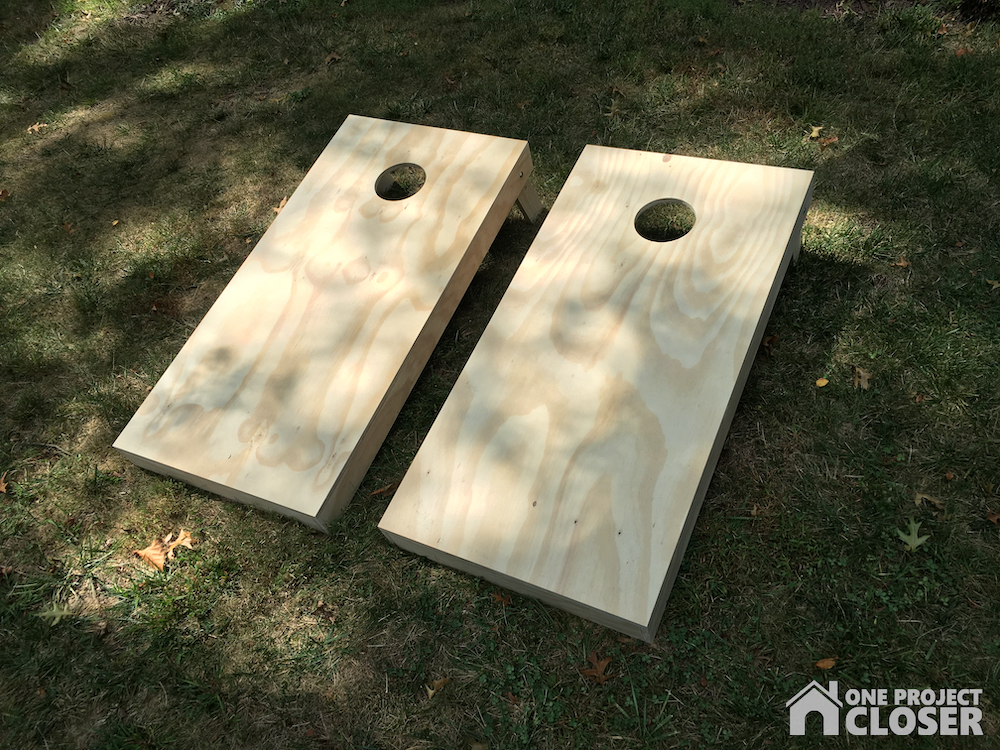
STEP 3: Cut the hole
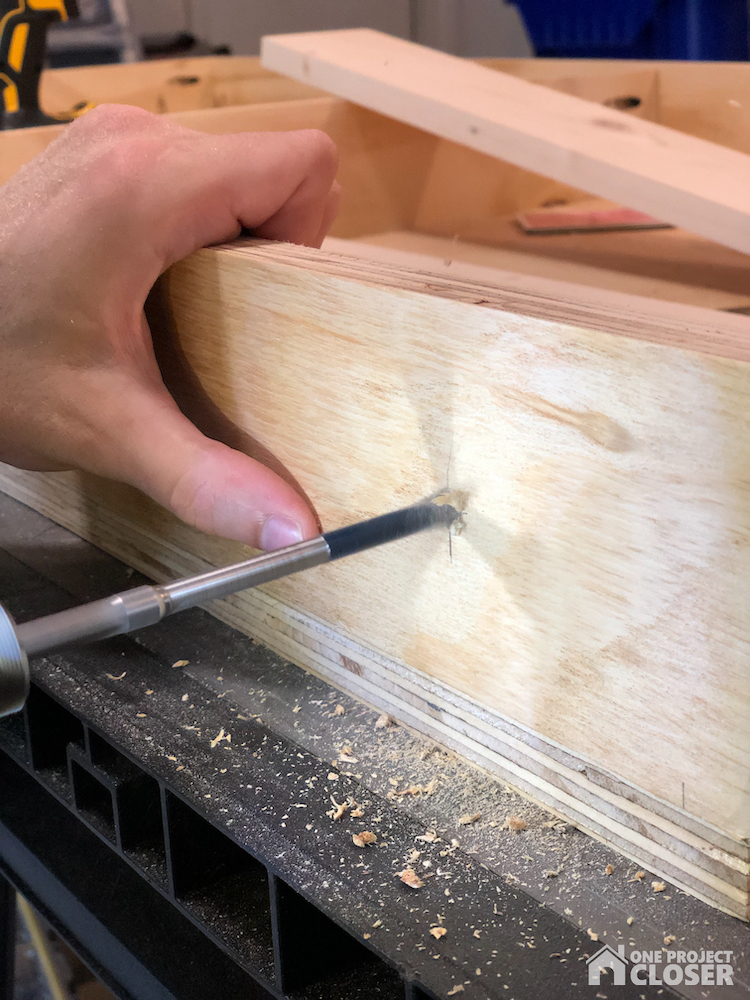
You need to cut a 6″ diameter hole in the boards. This hole will be evenly spaced left-to-right and the center of the hole will be 9″ from the back edge. The easiest way to cut the hole is with a 6″ hole saw. I don’t have one, and none of my friends do either (I checked!). You can cut the hole with a jigsaw, and if you do this, I recommend cutting a little smaller and then sanding.
I built a quick circle jig for my palm router.
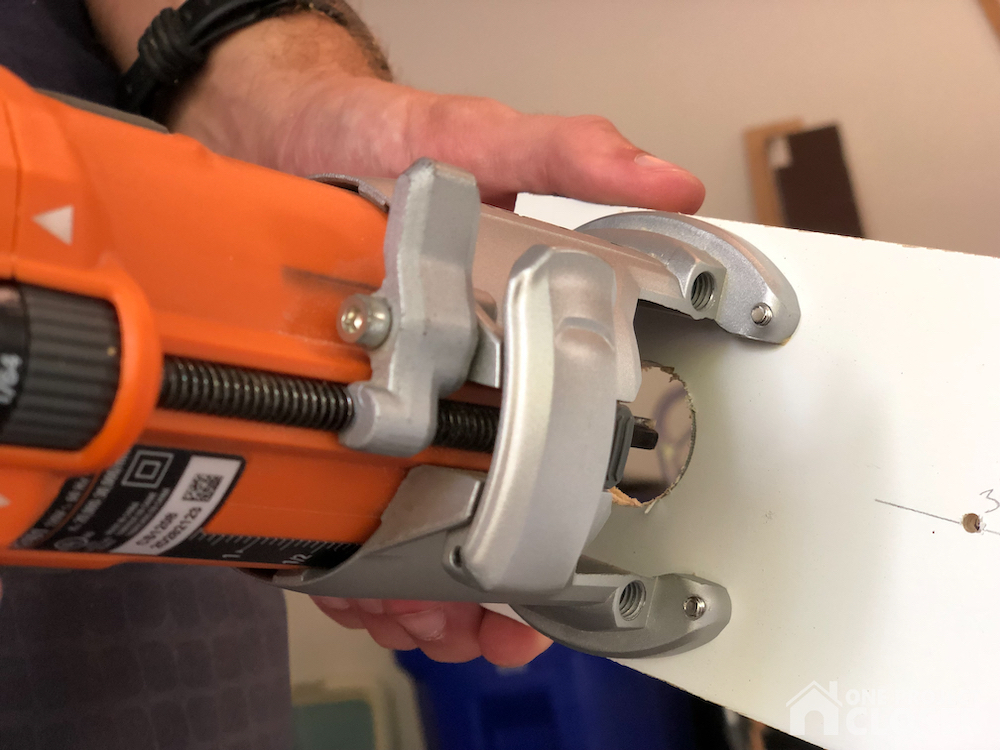
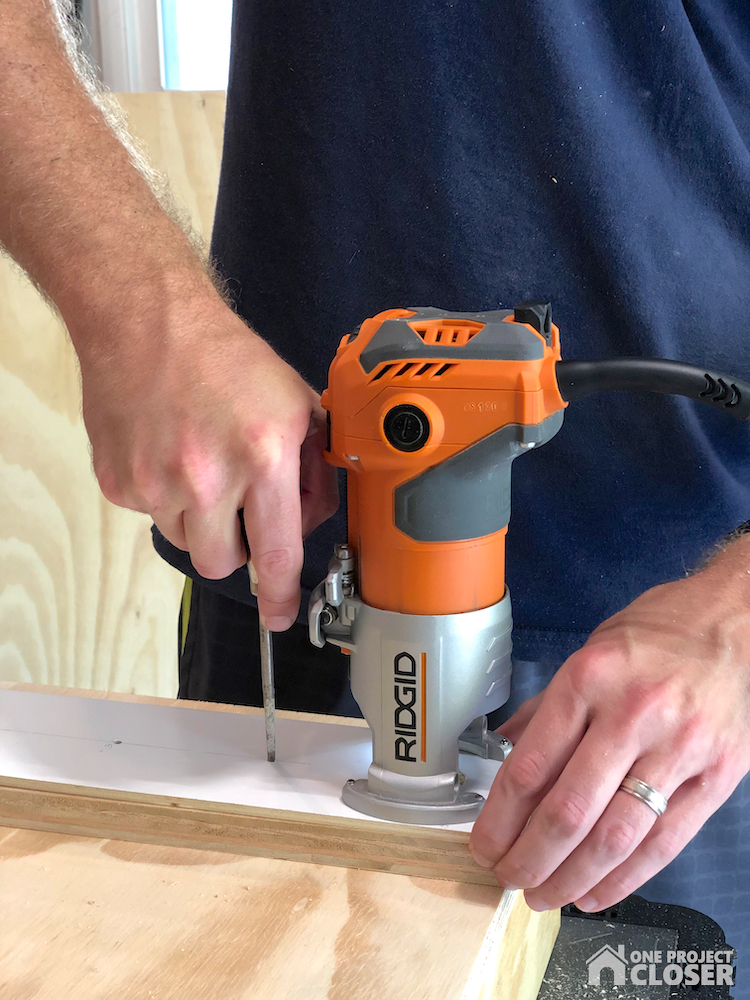
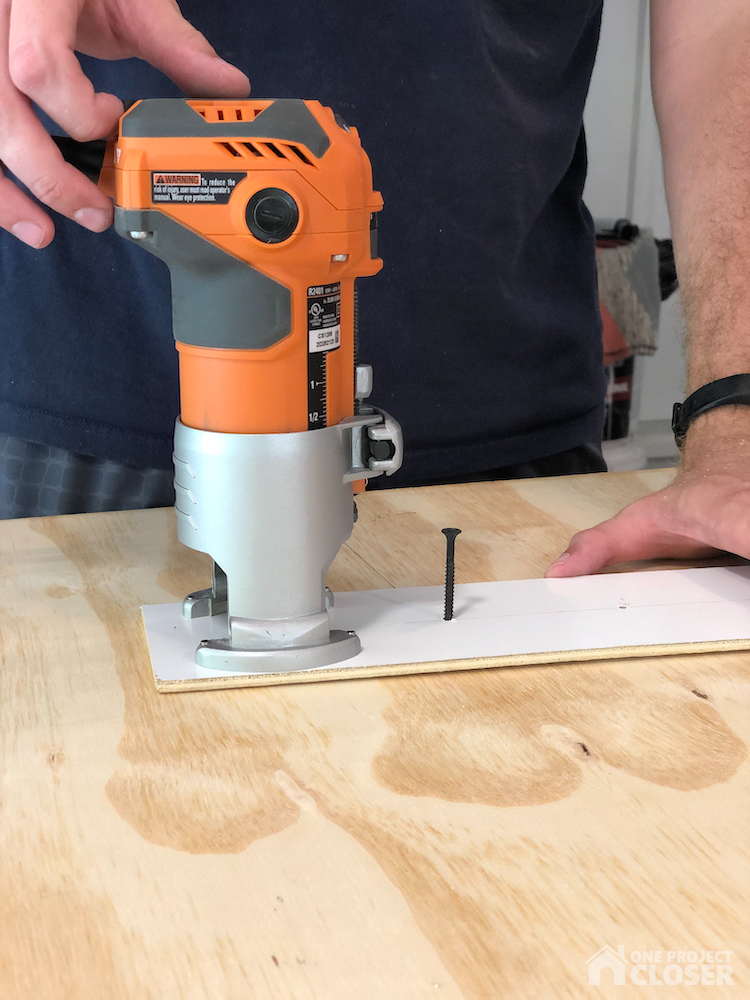
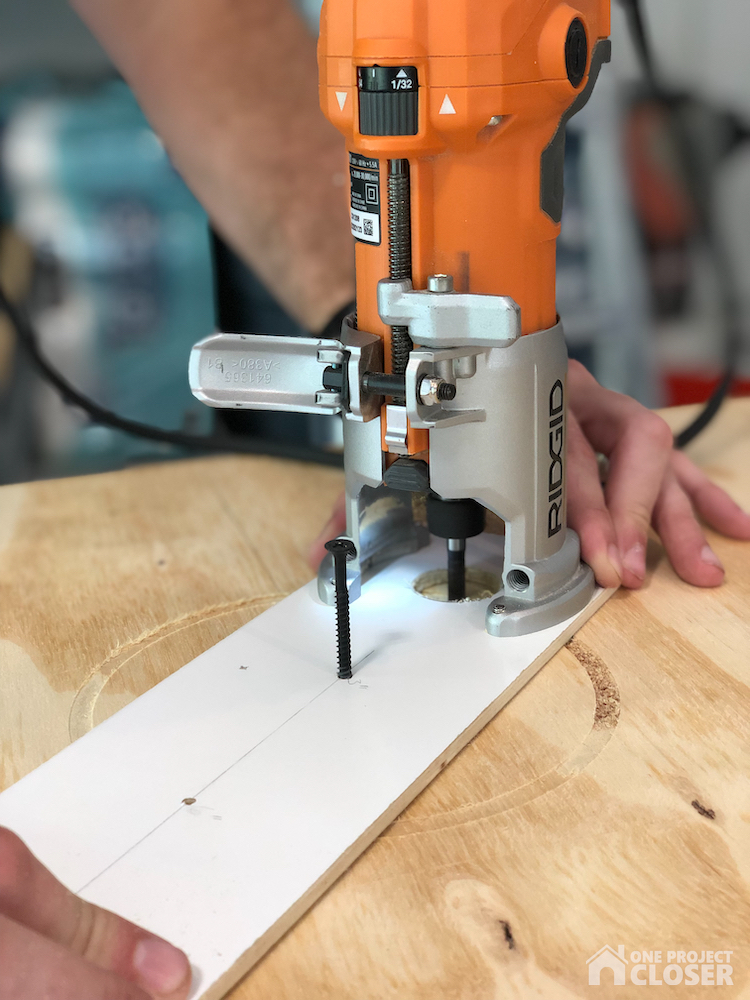
I made a few passes on the face of the cornhole boards and then completed the cut from the backside. Make shallow passes for a nice cut.
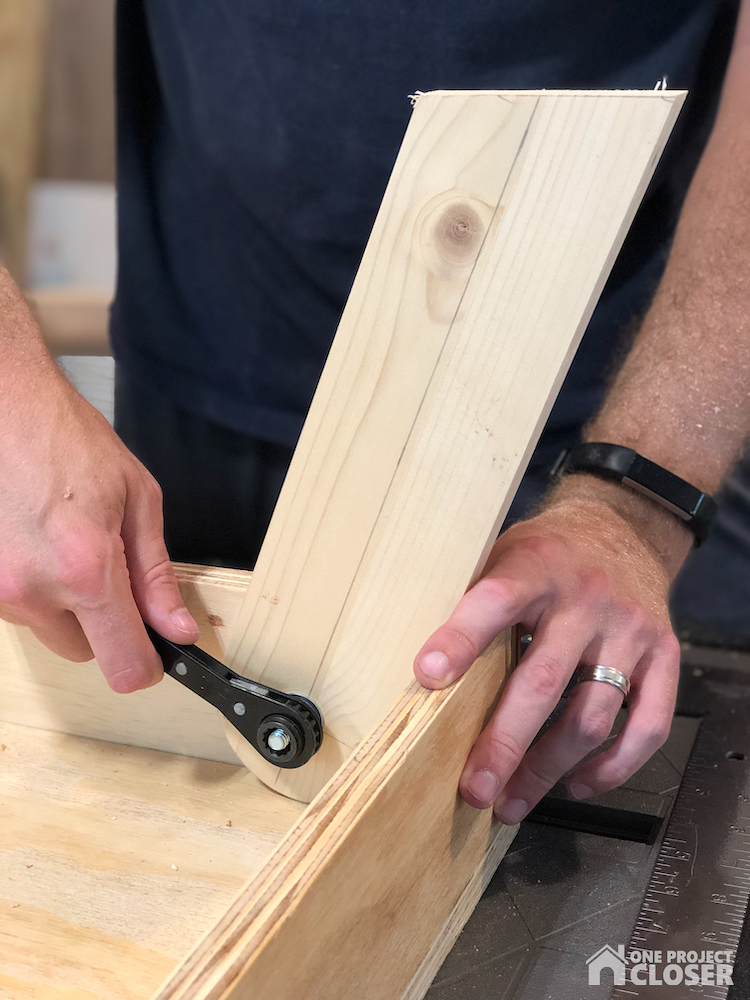
STEP 4: Build the legs
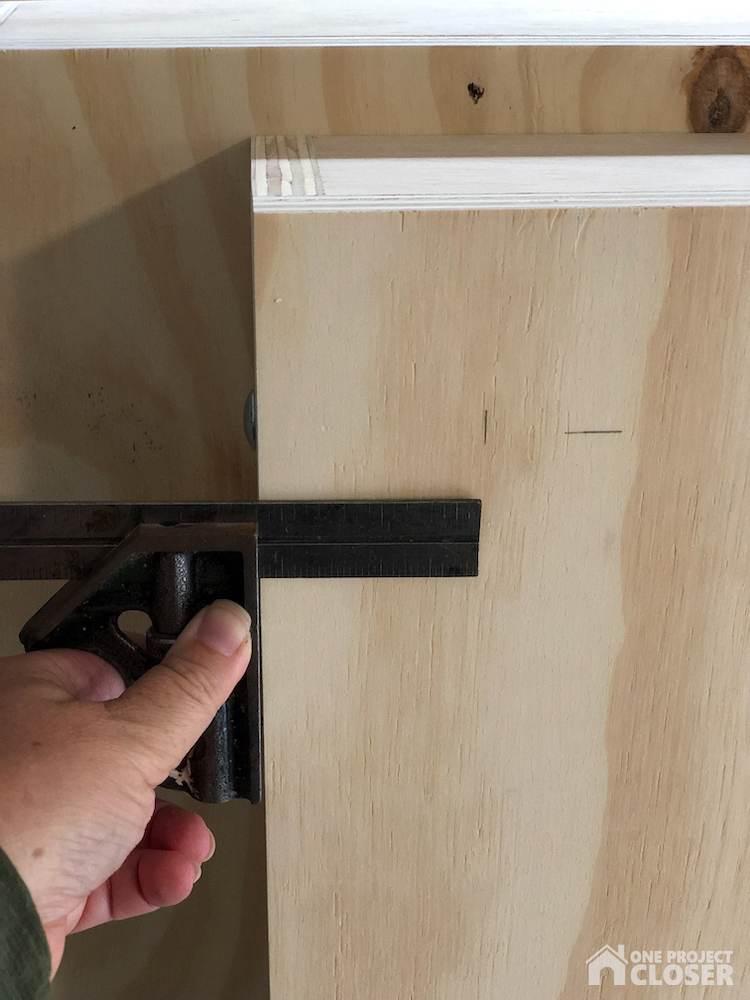
Building the legs may be the trickiest part of the whole process because you want the back edge right at 12″ off the ground. Here’s how I tackle this part.
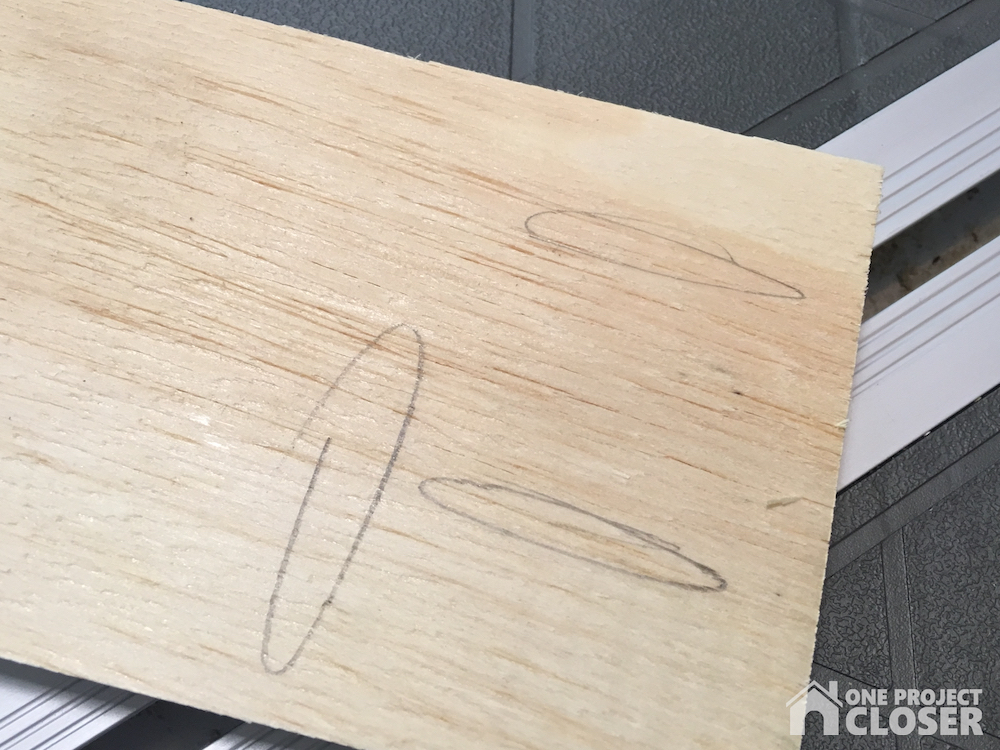
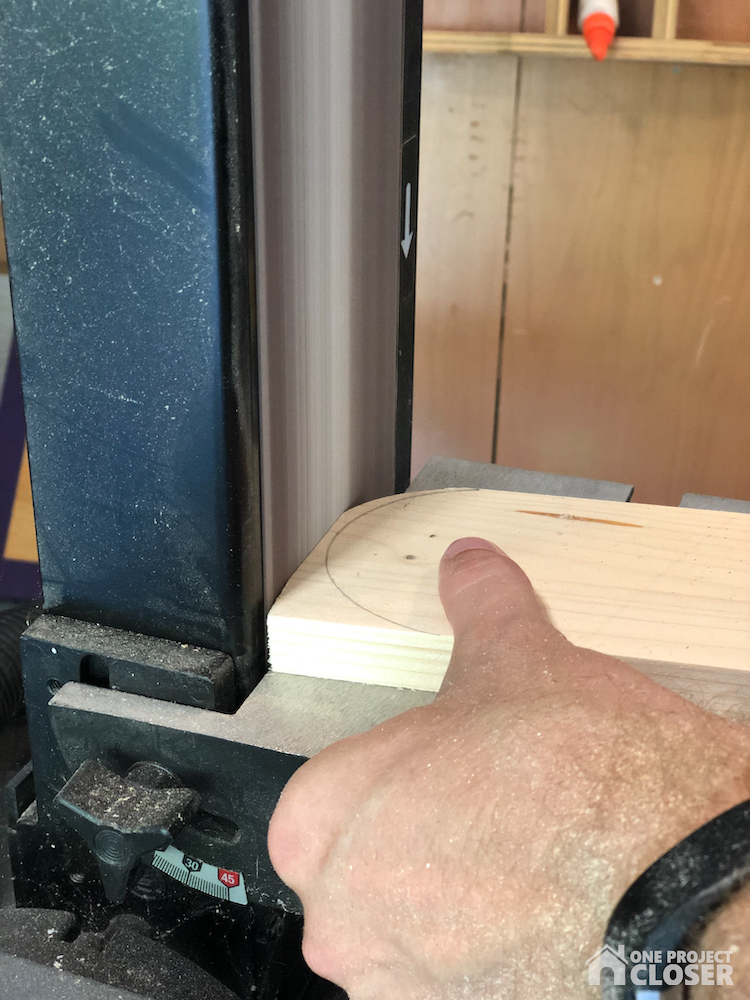
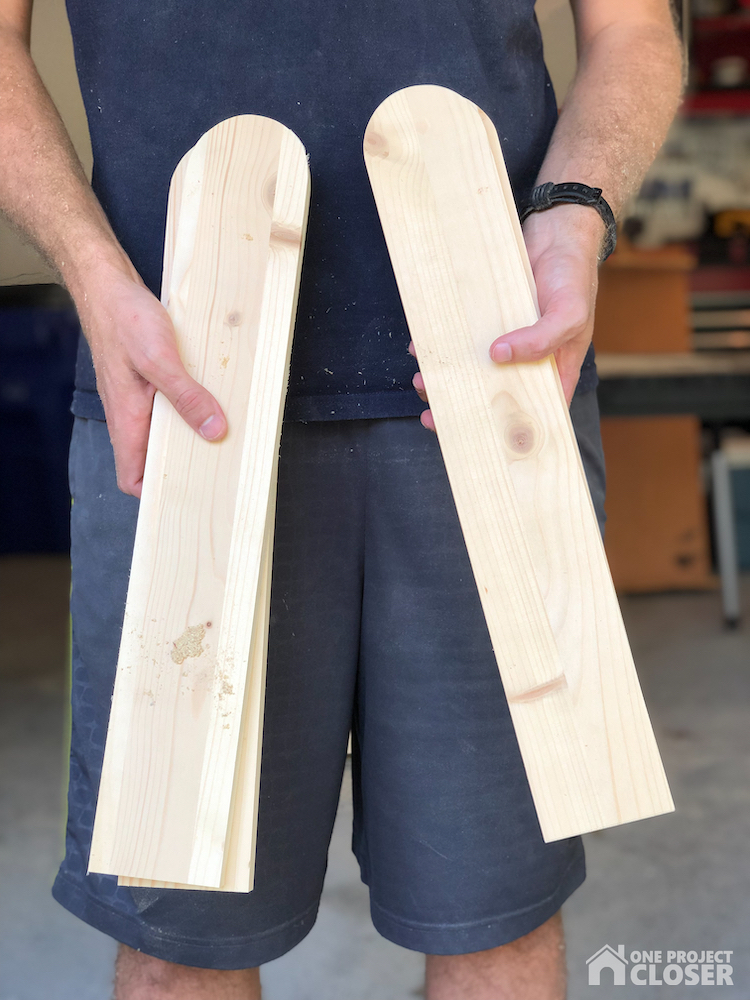
Start by cutting the 4 legs to width so they will fit neatly inside the boards. I had some scrap laminated spruce that was suitable for the job. Leave the length extra long.
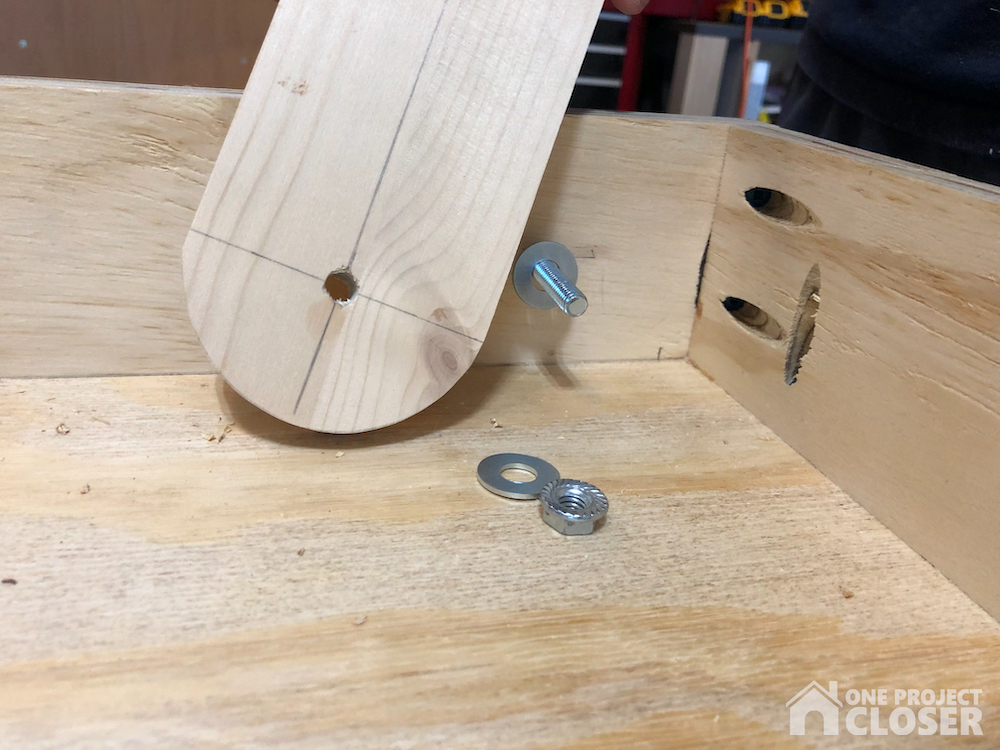
Find the center of the board and cut / sand a nice semi-circle.
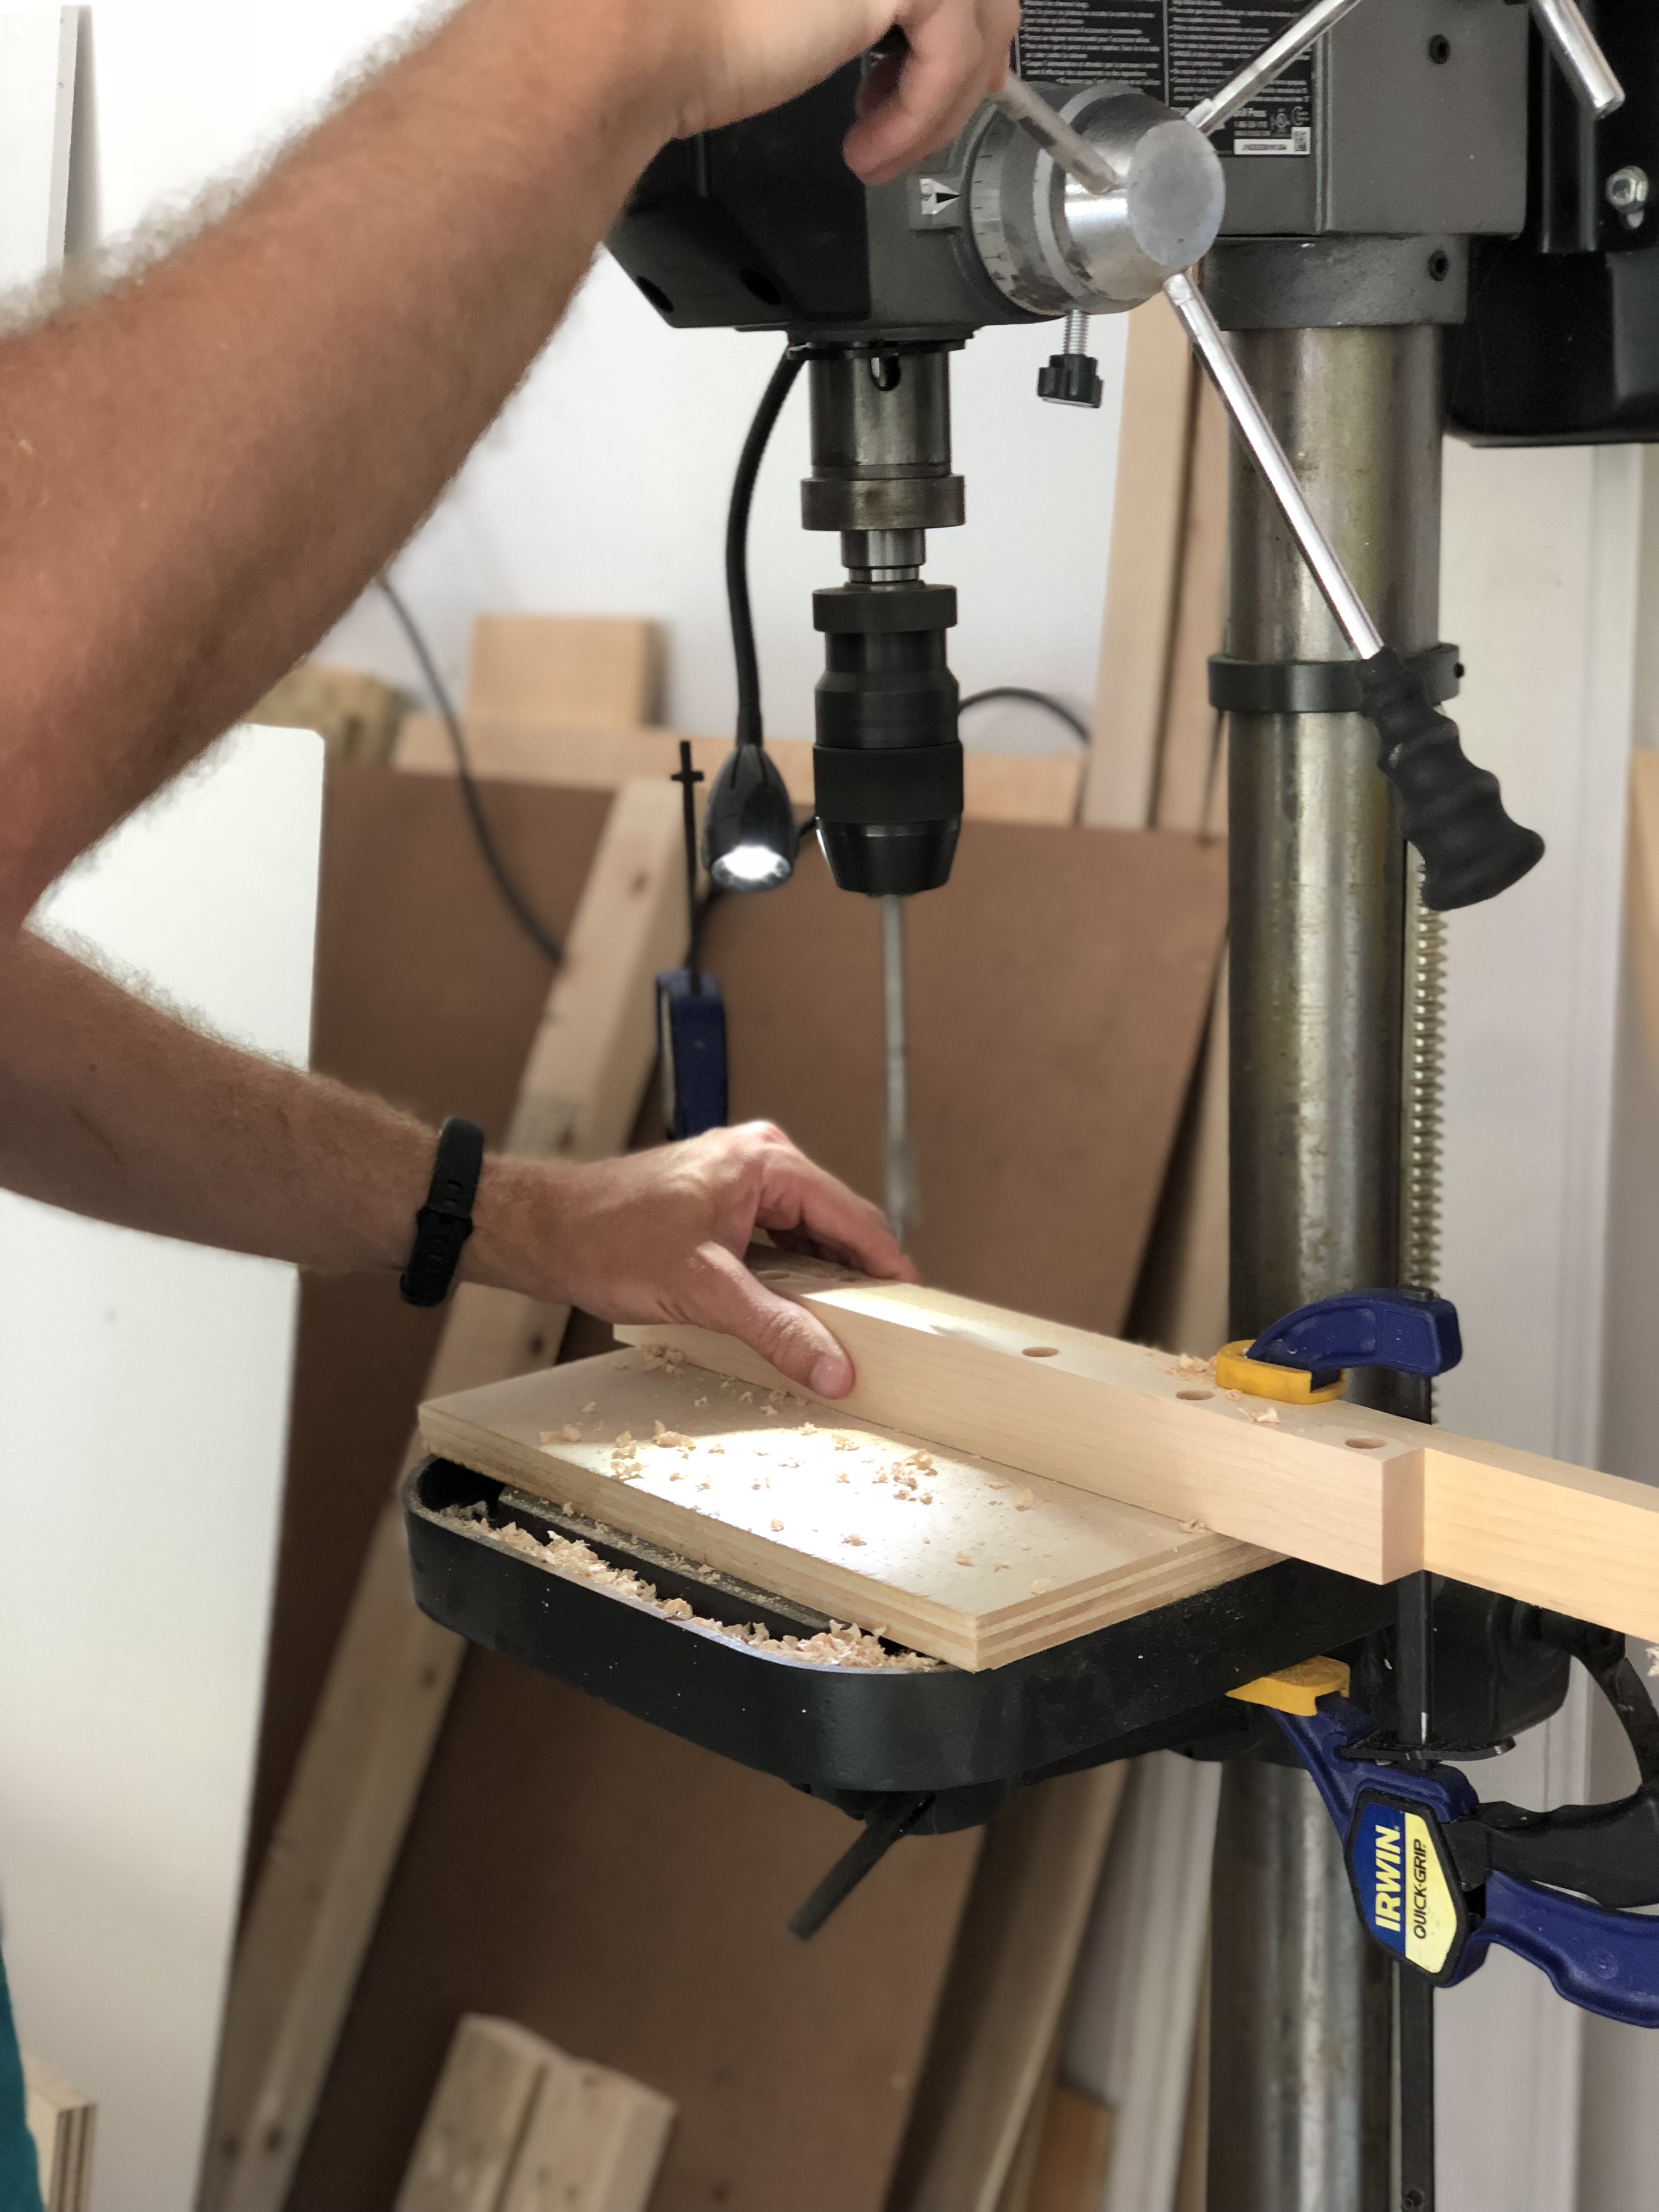
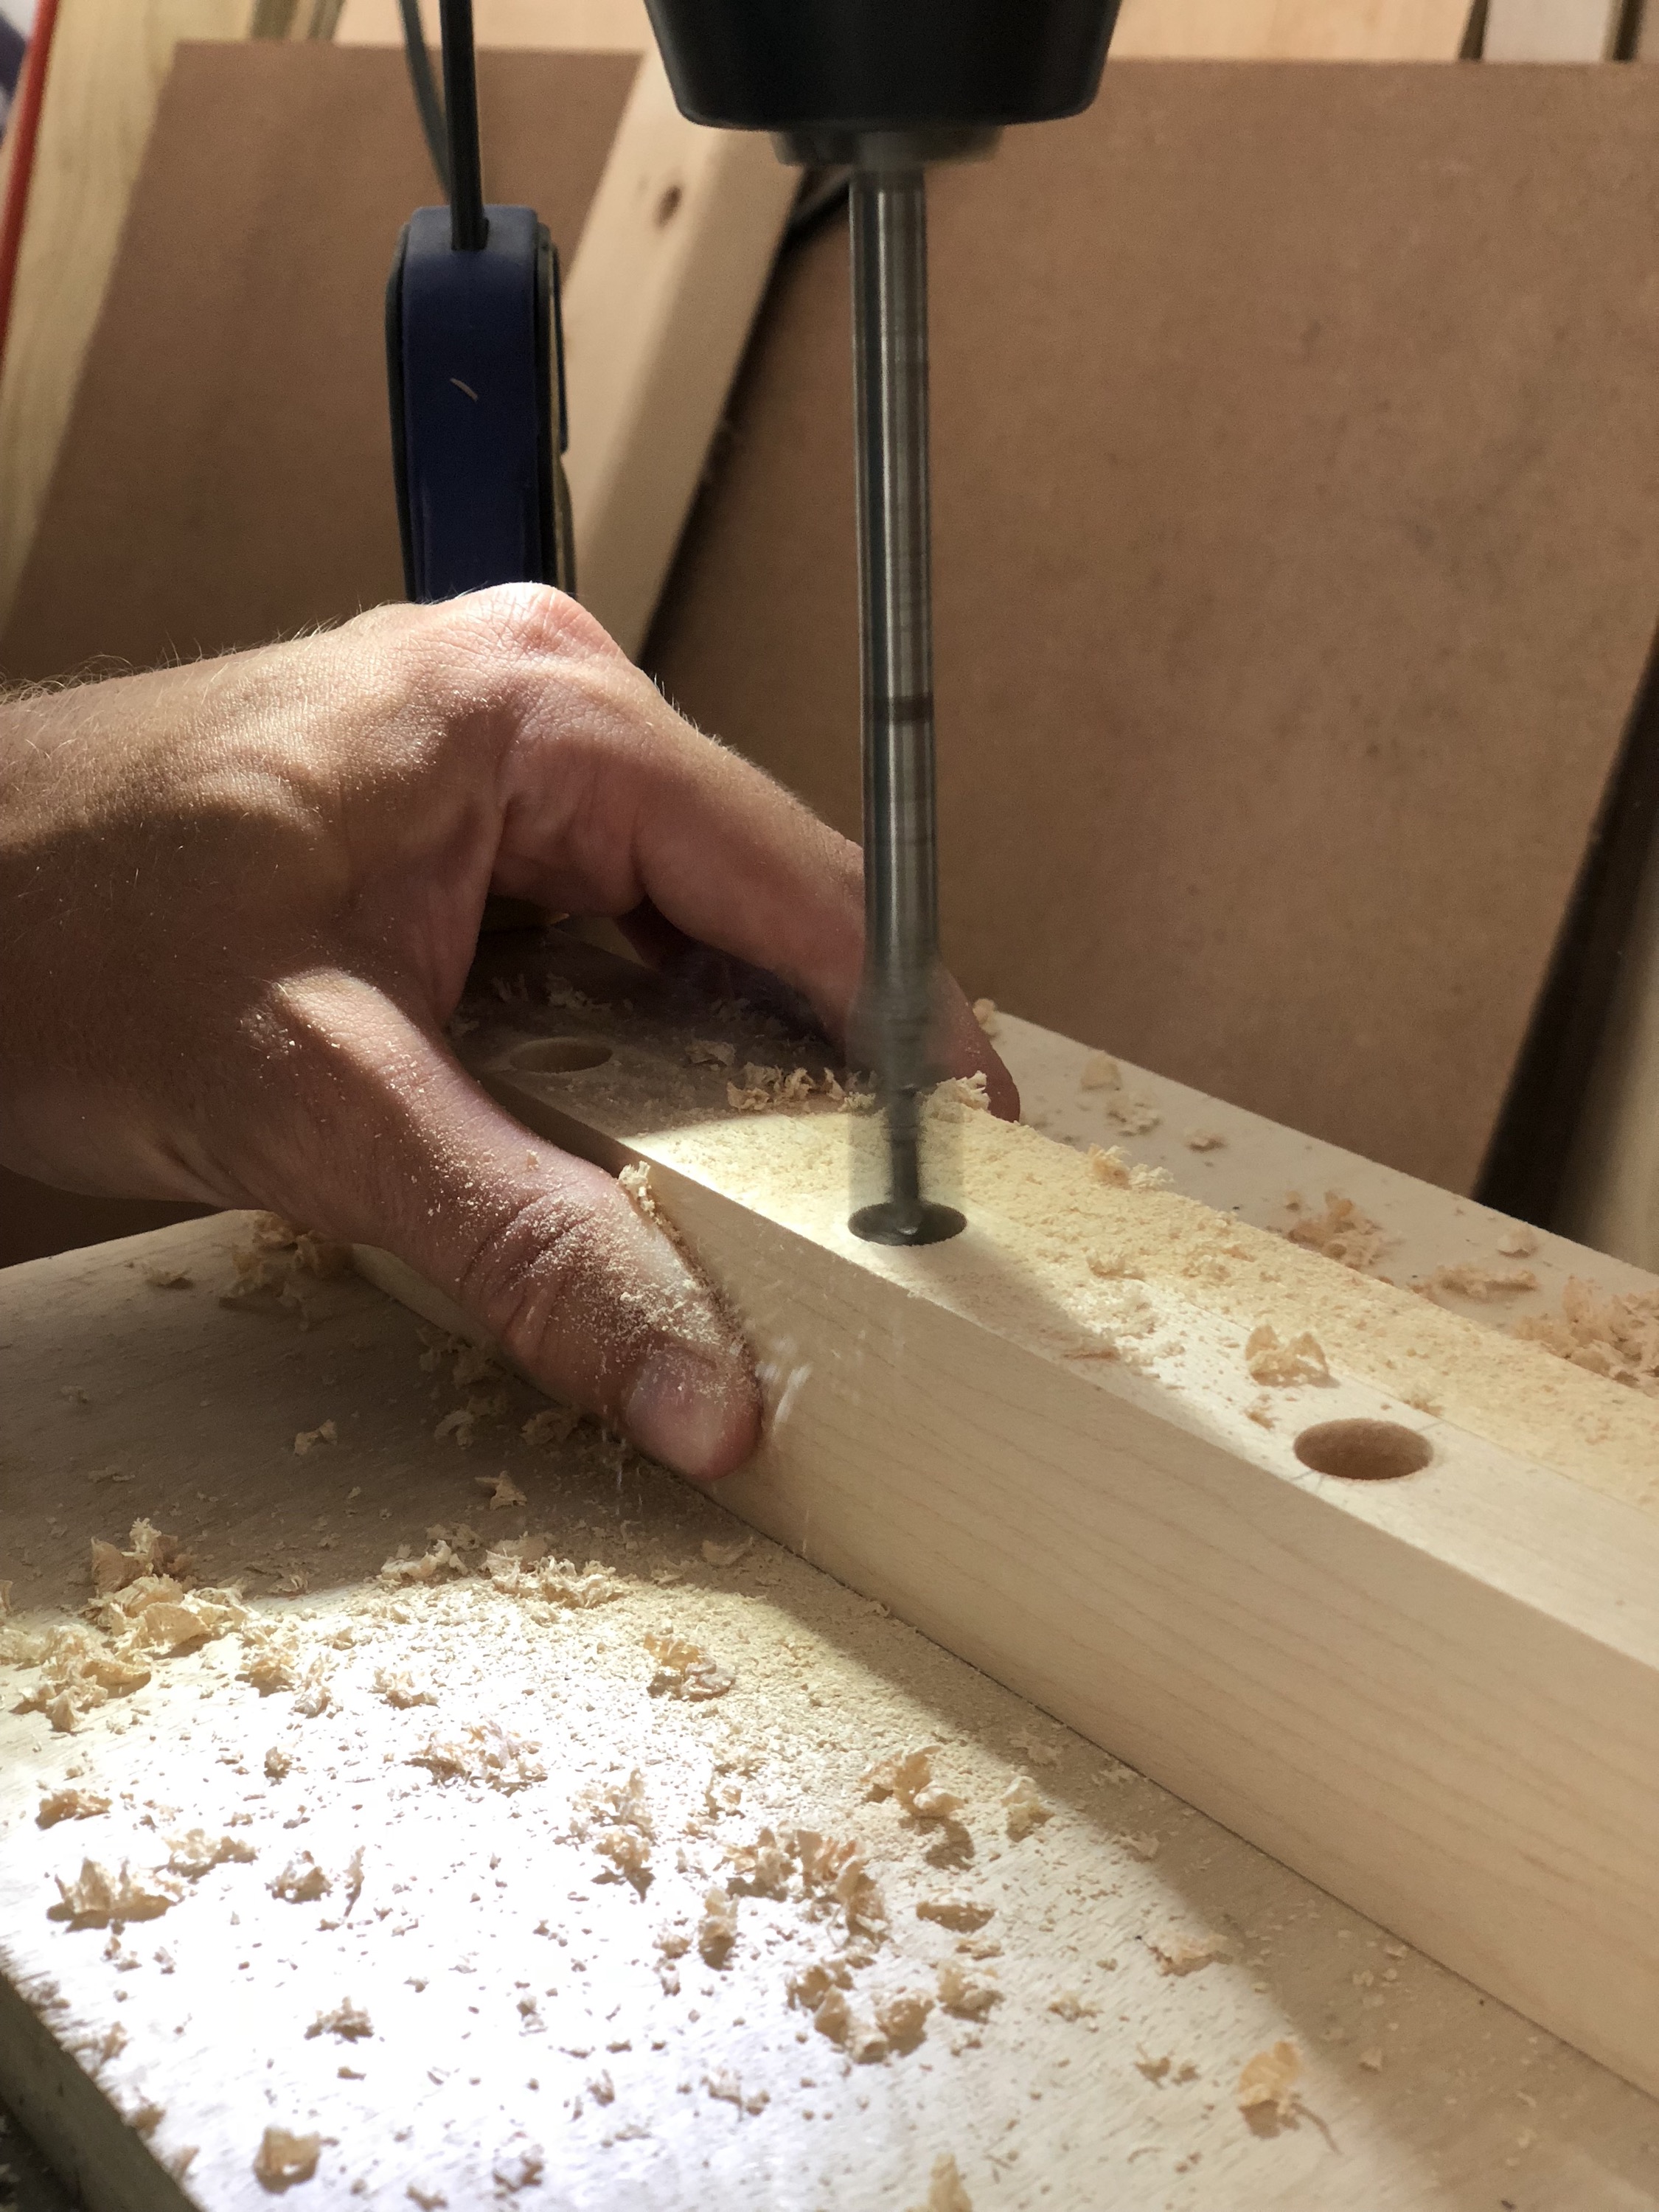
Position the leg a few inches from the back edge and drill a hole through the center mark. I like to start drilling from the inside and then switch to the outside to prevent tear-out.
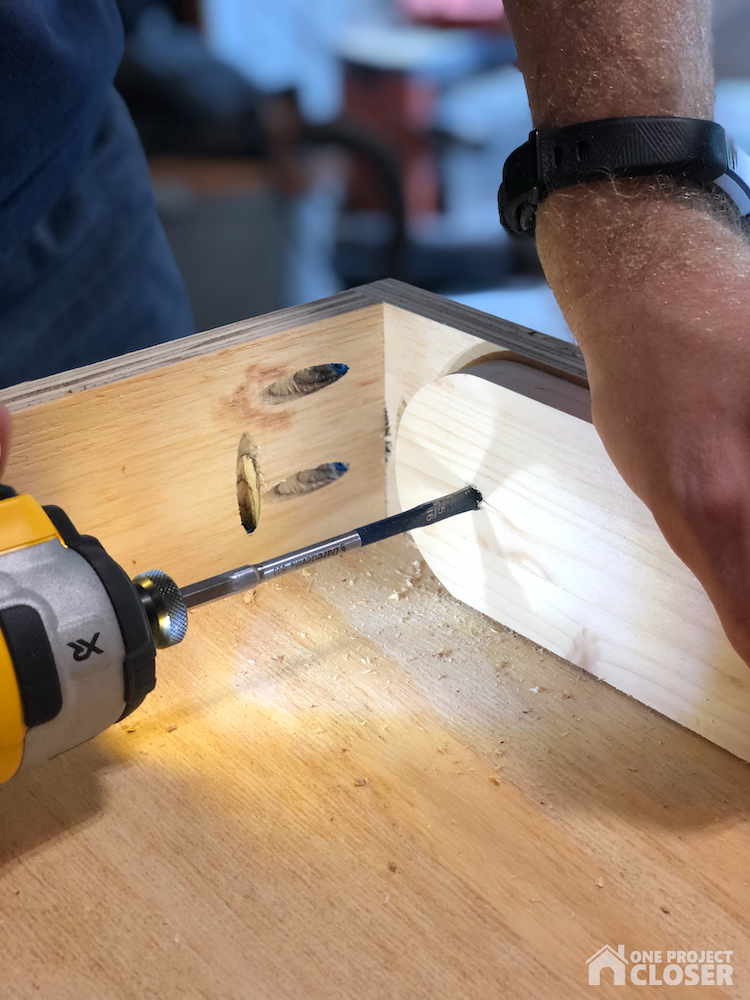
At this point, you can slide a carriage bolt into place and check that the leg can pivot smoothly. If not, take it off and sand anywhere it’s too tight.
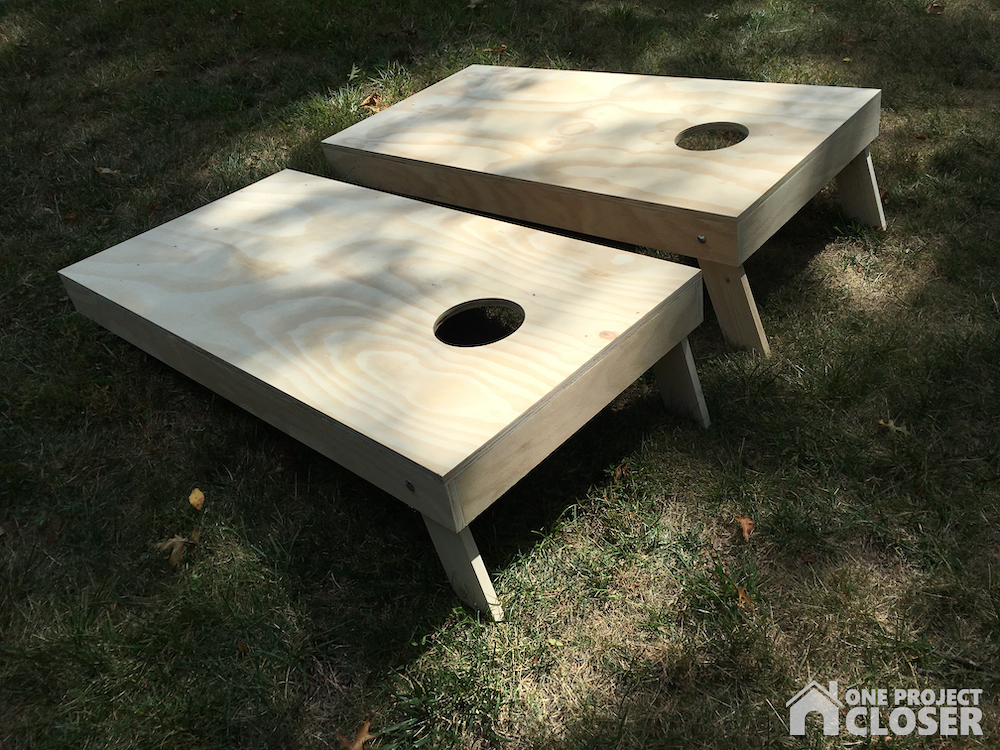
If you’re satisfied with how the legs unfold, flip the boards right-side-up, and use a box or clamp of whatever to prop the back edge at the correct height with the legs extended (but hanging free).
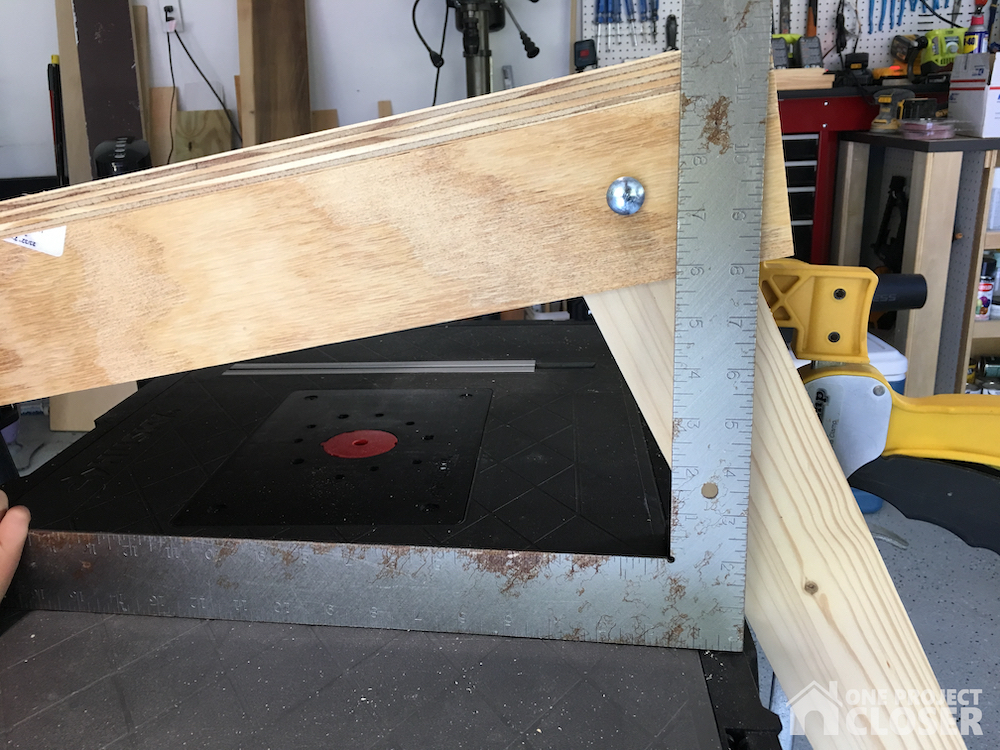
Mark a straight line to cut the leg. This will determine the angle and length you need so the back edge sits at 12″ off the ground. Attach the legs with a washer between the leg and side and another washer before the nut. Lastly, use the second nut to put tension on the first so it won’t loosen over time.
STEP 5: Sand… but not too much
I’ve made the mistake of sanding cornhole boards too much. The result is a super-smooth finish, and it’s really difficult for the bags to land. It makes the game a lot more challenging! Instead, sand the boards with the purpose to flush up any edges, remove tear-out, erase stickers, etc.
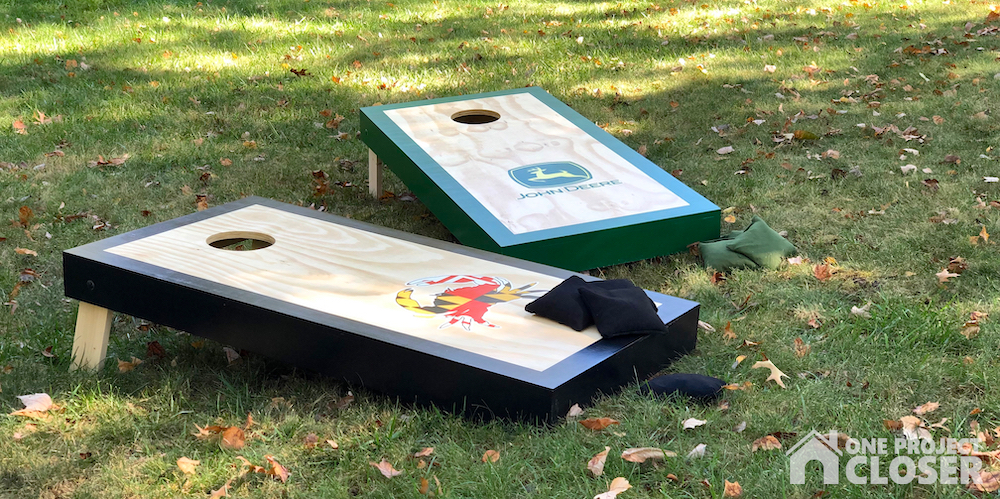
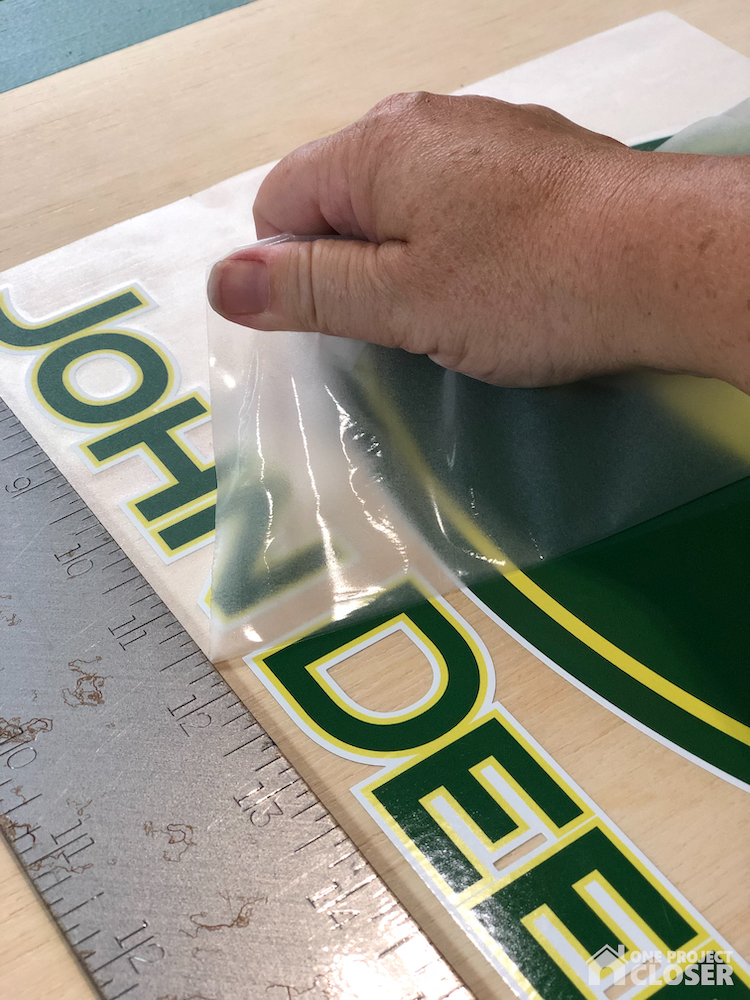
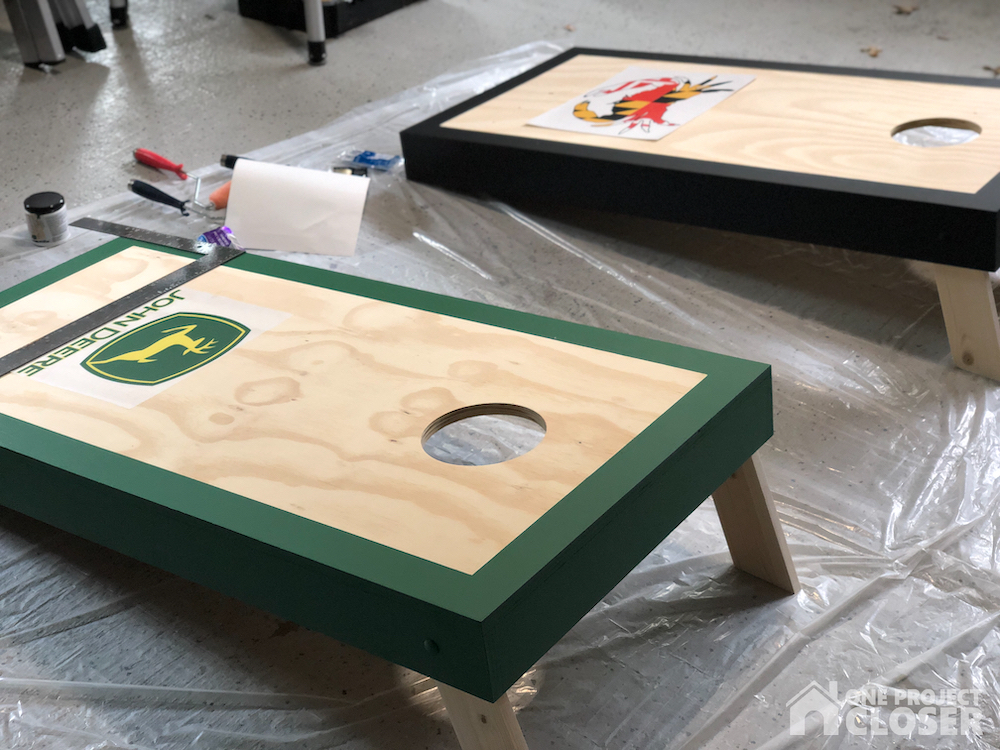
STEP 6: Time for paint
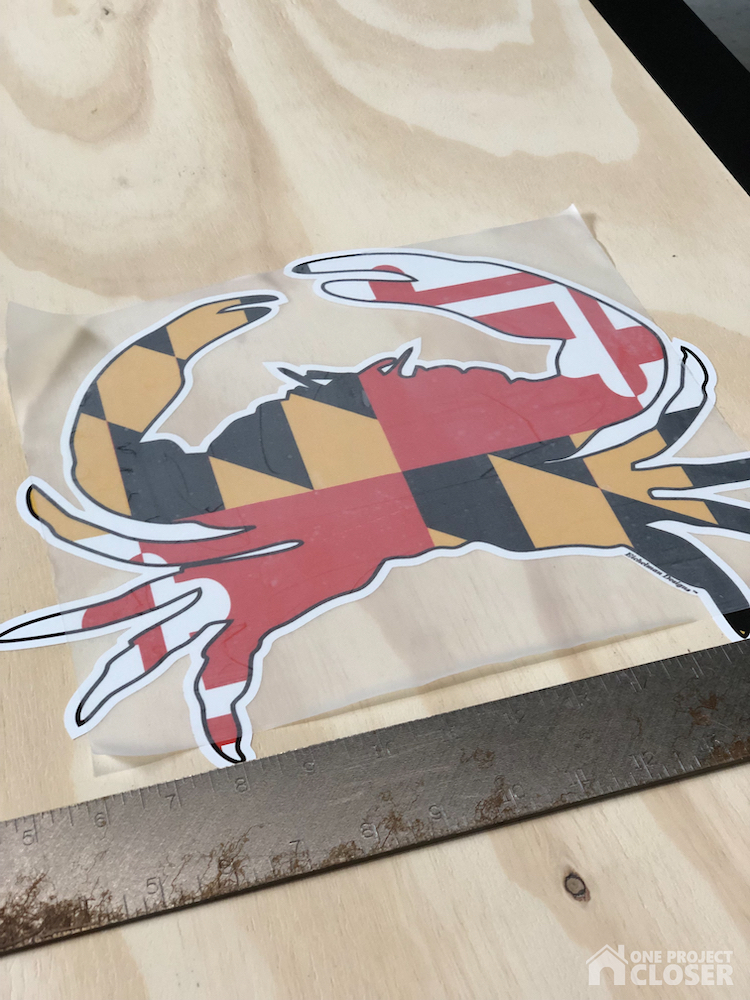
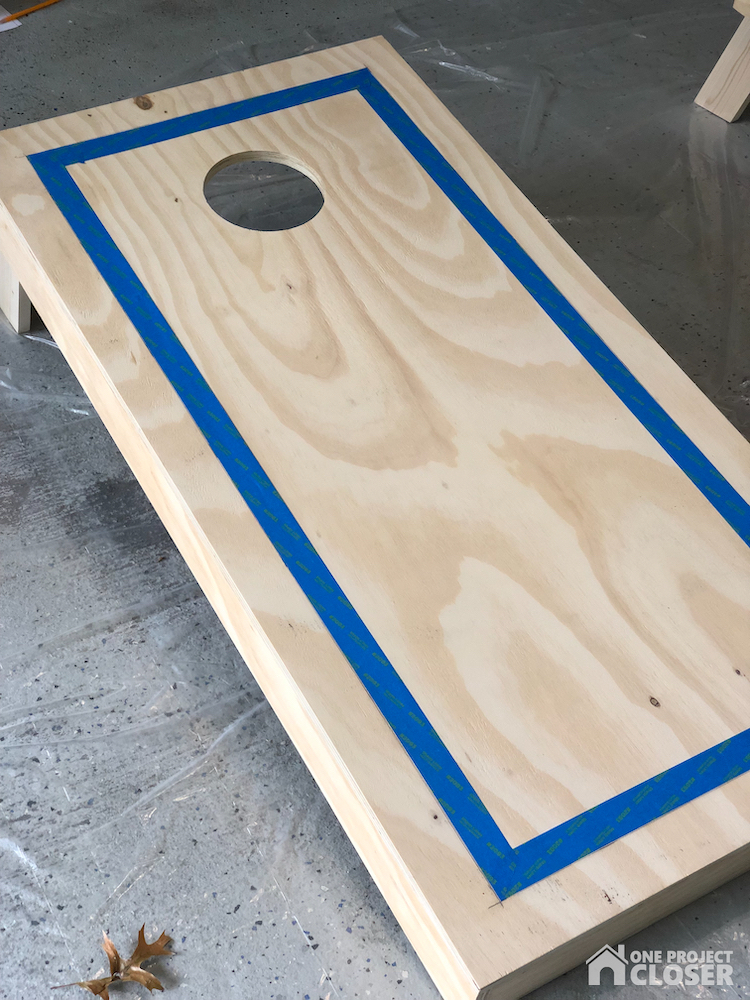
Clean up the boards, eliminating any dust from sanding. If you purchased a decal (we got ours of Amazon), now is the time to add it. Tape off a border with painters tape and roll it on. Be sure to get the underside edge of the plywood sides to better seal them off from moisture.
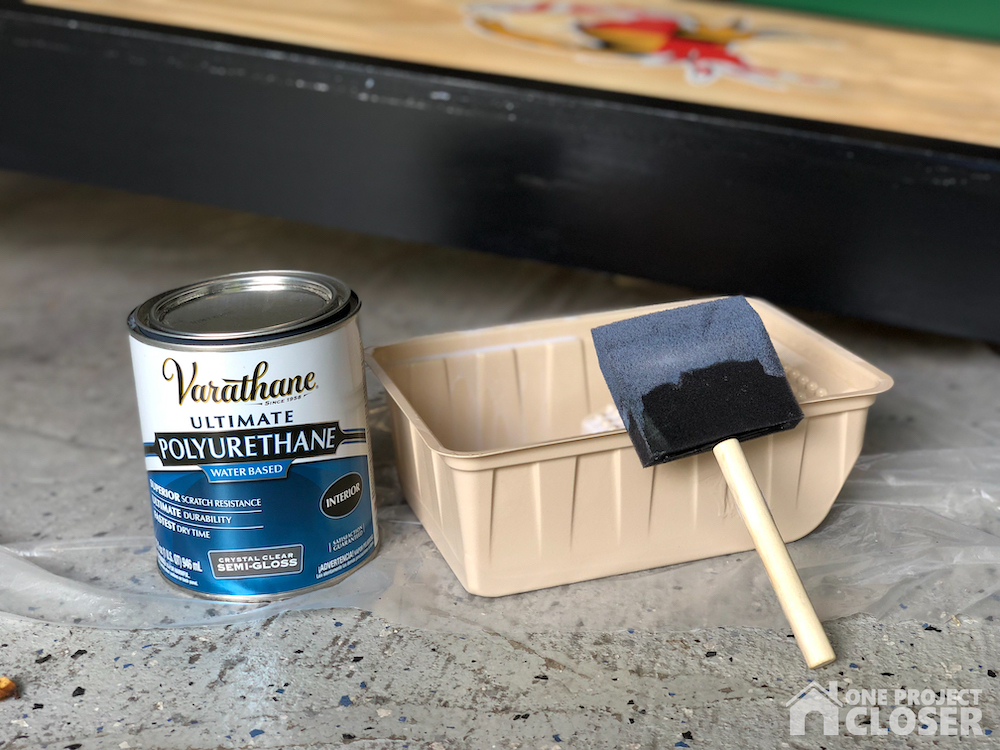
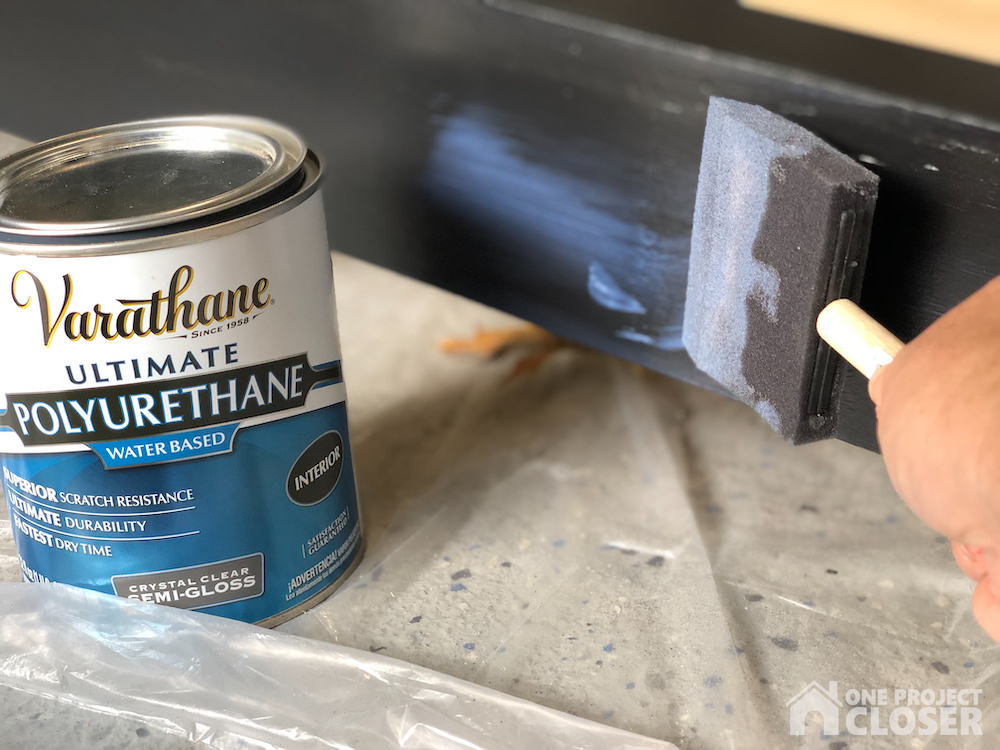
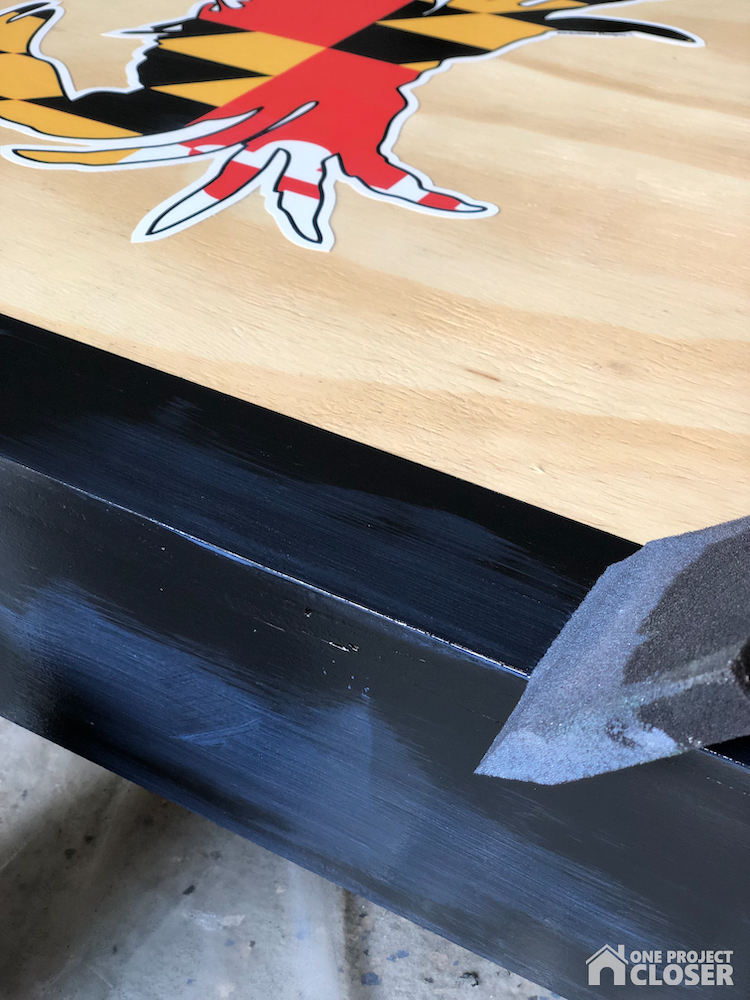
STEP 7: Seal the wood
Finish off with at least three coats of polyeurethane. Be sure to cover the decal to better seal it in, and get the inside edge of the hole. I like to use a bit of steel wool after the last coat to remove any rough spots.
Jocie purchased some bags off Amazon. You can make your own bags, and if you do, use a durable fabric like duck cloth. Usually the local farm supply has cheap corn to fill ’em. Bags are 6″ square and weigh 16 ounces (without being overly filled). We opted for poly pellets and steel bbs for a set that I built for the local pool. Corn doesn’t do well when it gets wet!

Pin for Later
Love this project tutorial on How to Build a Regulation Cornhole Set but don’t have time to build it today? Or love it and want to share it with friends? We’d love for you to pin it!

Thank you so much for joining us at One Project Closer for this DeWalt 60V FlexVolt Brushless Axial Blower Review. This post is sponsored by the Home Depot Prospective Campaign. Post may also contain affiliate links. Opinions are 100% our own, and we appreciate you supporting our site in order to continue to provide free content to our readers.
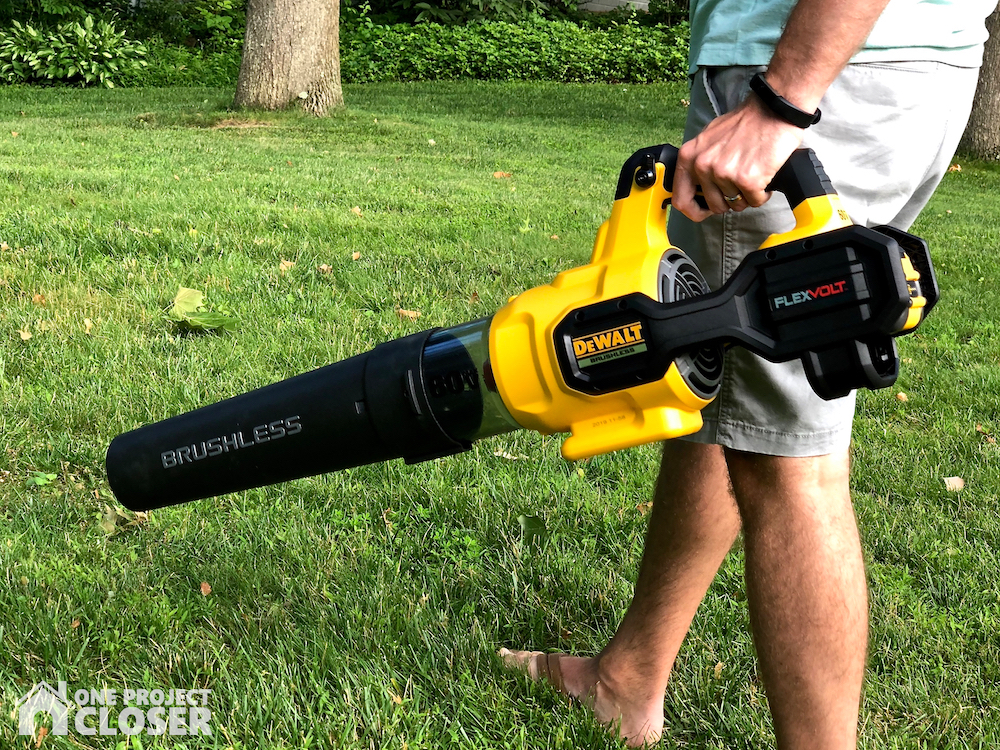
In May of 2019, DeWalt unveiled a new 60V FlexVolt blower kit, DCBL772X1, which includes the blower, 3Ah battery, and charger. This is the next generation of cordless, brushless blowers from DeWalt, and they’ve improved over the previous model DCBL770X1 in just about every way.
DeWalt revamped this blower to an axial design which means the air intake is in-line with the tool. This is, in my humble opinion, a really good improvement. It’s too easy to block a side air intake with your body. Plus, this is a very comfortable and compact design for lefties and righties.
I was really impressed by how much air this blower can move! DeWalt rates this beast at 600 CFM of air volume at 125 MPH. These numbers are an improvement over past generations and about on-par with competitors offerings.

So what are some of the other features? Of course, with battery powered tools, it’s instant-on and instant-off. There’s no priming the engine or yanking a pull cord. DeWalt included a variable speed trigger which is great when you want to move leaves but not the mulch underneath, and there’s a speed-lock lever. With the lever engaged, the blower operates at full power without needing to hold the trigger reducing user fatigue.
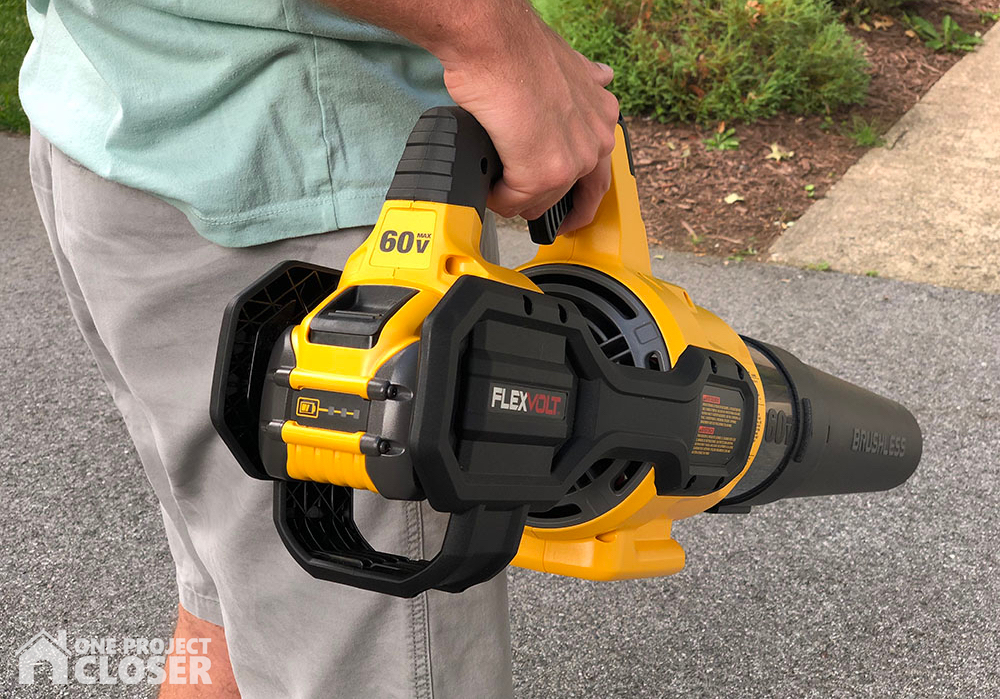
This blower is powered by the 60v FlexVolt battery system, and it comes with a 3Ah battery and charger. The powerful battery combined with a brushless motor provides high power and extended runtime. And if you’ve got a 12Ah or even a 9Ah FlexVolt, that’ll keep you running even longer. However, you’re not going to see landscaping crews abandoning their gas blowers just yet.
Weight comes in at 9.1 lbs, and I can’t find a noise rating.
So let’s talk price! The DCBL772X1 kit is currently available at The Home Depot for $269, and again, that includes the battery and charger. So far I haven’t seen a bare-tool offering. This price is competitive with similar blowers, and, as it happens, the same prices as the previous generation DeWalt blower.
Want more? Check out Ethan and Fred in this DeWalt 60V FlexVolt Brushless Axial Blower Review!
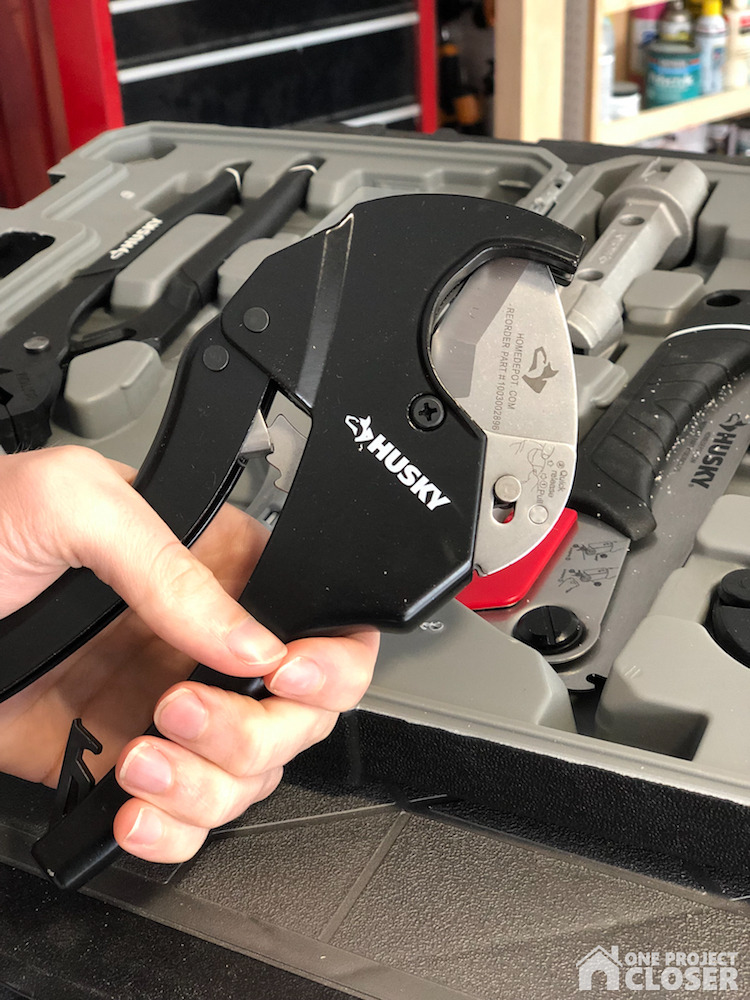
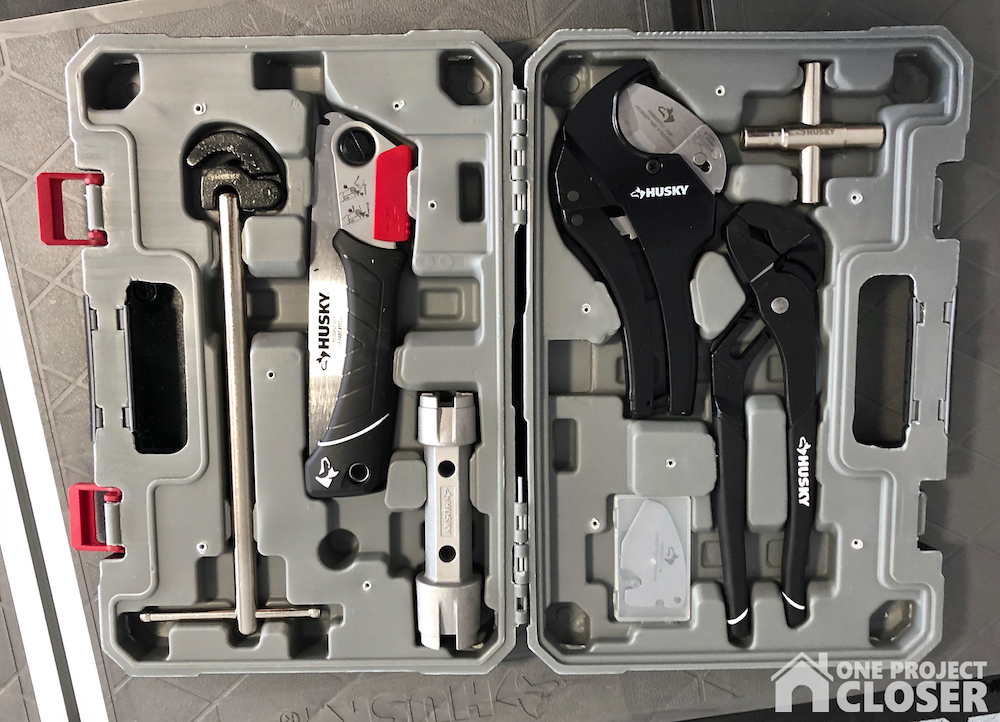
The Husky 7-Piece Plumbers Tool Set is a great set including a variety of tools for plumbing projects. Instead of picking up all these tools individually, Husky bundles them together in a hard case making it easy to grab-and-go. The kit includes a ratcheting PVC cutter and folding PVC saw, soft-jaw pliers, tub drain wrench, basin wrench, sillcock key all in a protective case.
Stuff Lawyers Made Us Say: We’re are continuing our partnership with The Home Depot to provide candid reviews of tools from a wide variety of manufacturers. The Home Depot is both providing the tools for free and compensating us; however, the opinions we express here are our own. Remember, we’ll always be up-front with you when we’re receiving a free product, compensation, or both. And of course, we always strive for objectivity in our reviews.
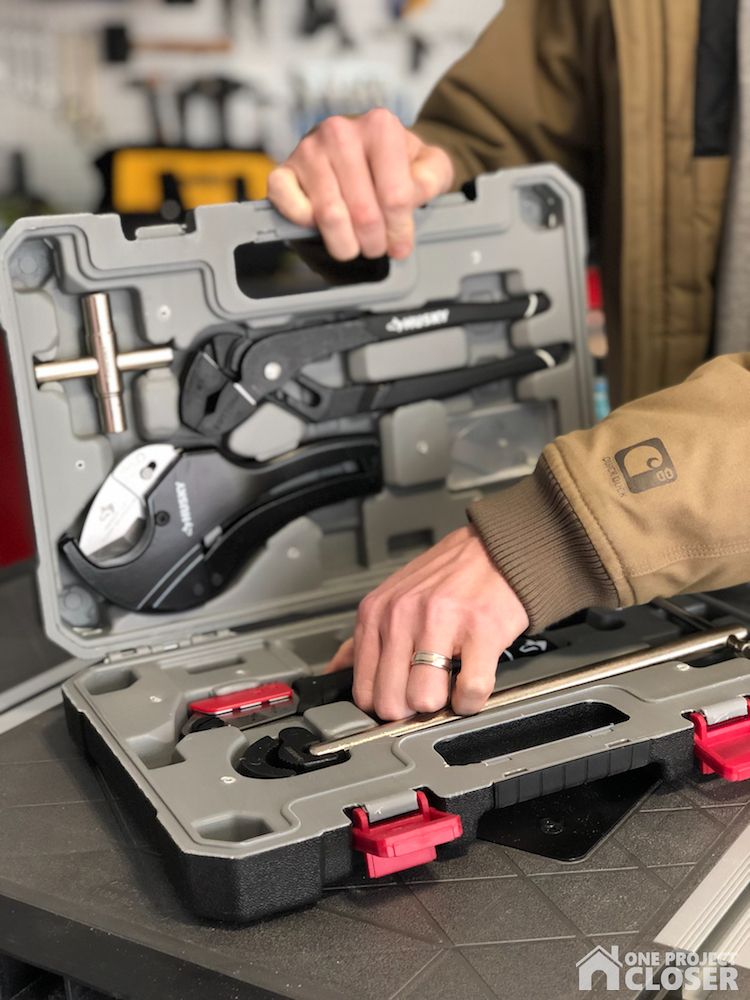
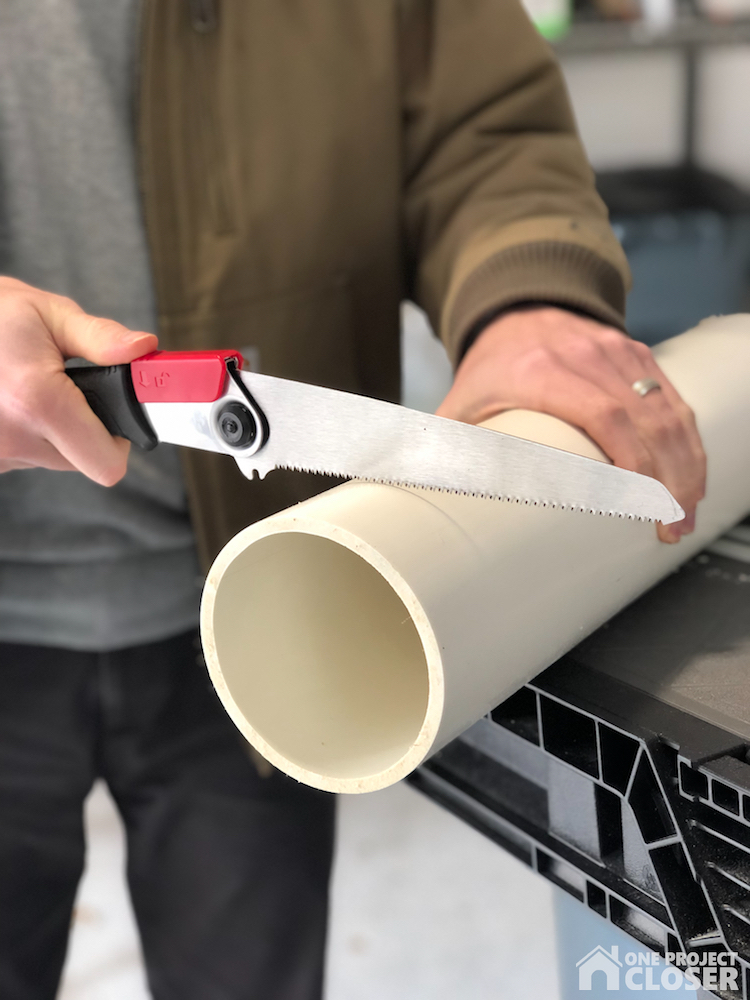
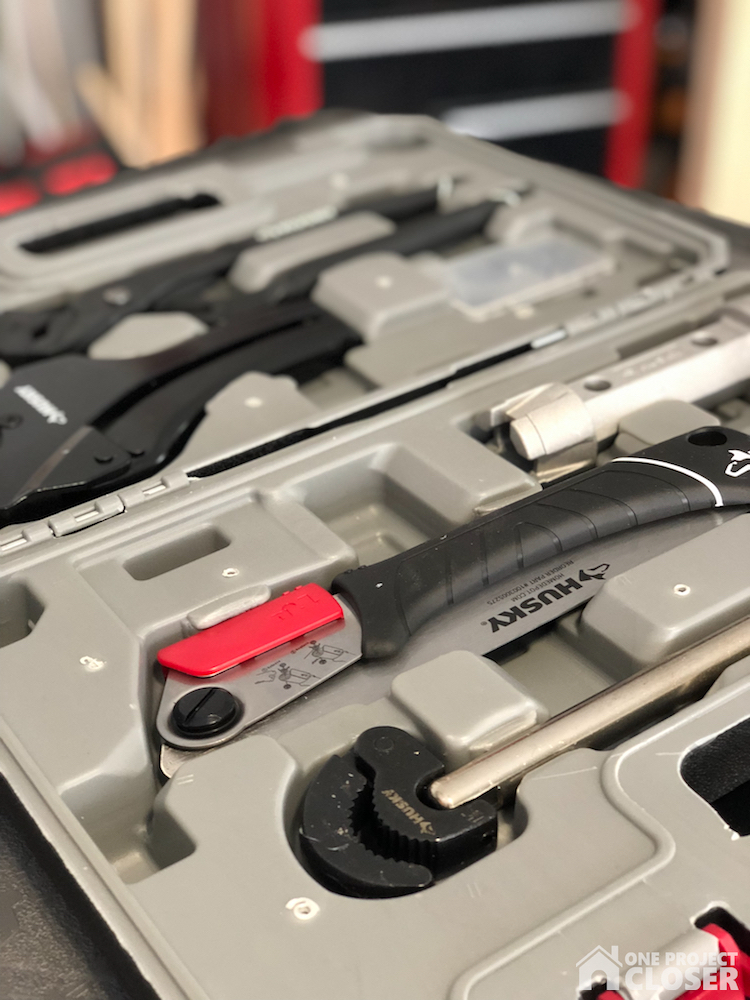
The ratcheting cutter and folding saw are ideal for cutting PVC, CPVC, Pex and more up to 3-1/2″ outside diameter. The ratcheting cutter includes a quick-change for swapping in a fresh blade (and a spare blade is included). There’s something so satisfying hearing that click as you slice through a pipe.
If you’ve ever worked on a shower or tub, you know you need a tub drain wrench to disconnect the drain line. This double-ended wrench fits most tubs, shower drains, and closet spuds.
Husky also includes a pair of slip joint pliers. Folks often just call these Channellocks after the brand that made them popular. These are 10″ soft jaw pliers useful for anything from basin nuts to closet bolts.
The basin wrench (aka sink wrench) works in tight spaces that you would otherwise not be able to reach or maneuver a tool. It’s useful to loosen or tighten fasteners, and the Husky basin wrench has a 1-1/4″ capacity.
The 4-way sillcock key is used for sillcock valves (hose bibbs) and fits the four most common sizes. It also has a tendency to fall out of the case. That one easy improvement Husky can make on this kit.
Husky rounds out the set with a hard plastic case. It’s got a spot for each tool, keeping everything tidy.
Price and Where to Buy
Interested in picking up the Husky 7-Piece Plumbers Tool Set? You can find it at your local Home Depot or online. Right now it’s priced at $49.98. Here’s the link: Husky Plumbers Set
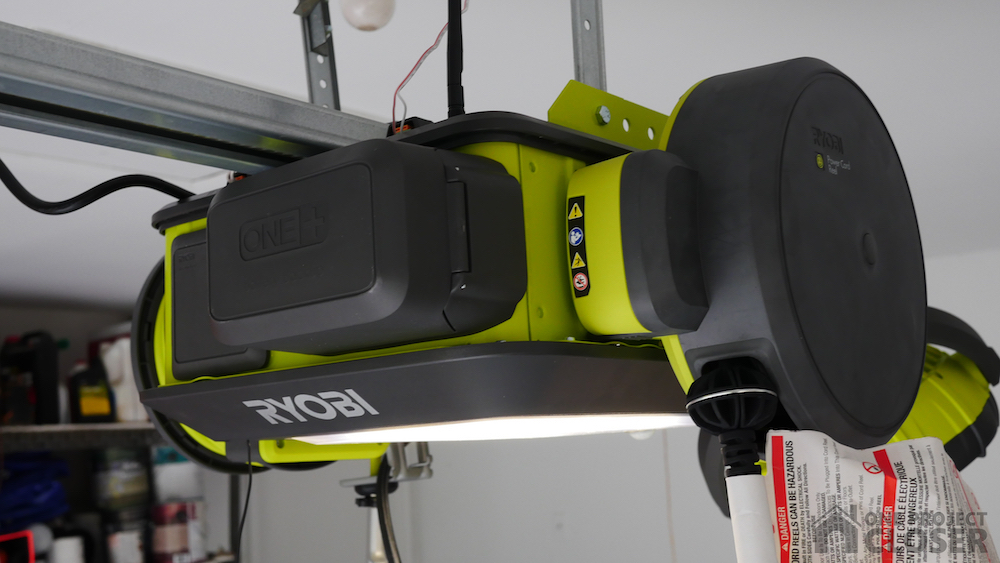
There was a time that all I expected from my garage door opener (GDO) was to raise and lower my garage door. That time is gone. Ryboi has made the garage door opener so much more with innovative features and mix-and-match accessories. If you’re in the market for a new GDO, consider the Ryobi 2 HP Belt Drive Garage Door Opener. It has the features you’d expect – LED light, wireless keypads, safety sensors, and car remotes. But wait there’s more! This GDO also includes wifi capabilities and corresponding app, battery backup and up to seven accessories. The accessories are what really sets the Ryobi GDO apart. You can choose from a retractable power cord, shop fan, air inflator, bluetooth speaker, and more. Ryobi sent us a test unit to try out. Keep reading for the full review.

Installation
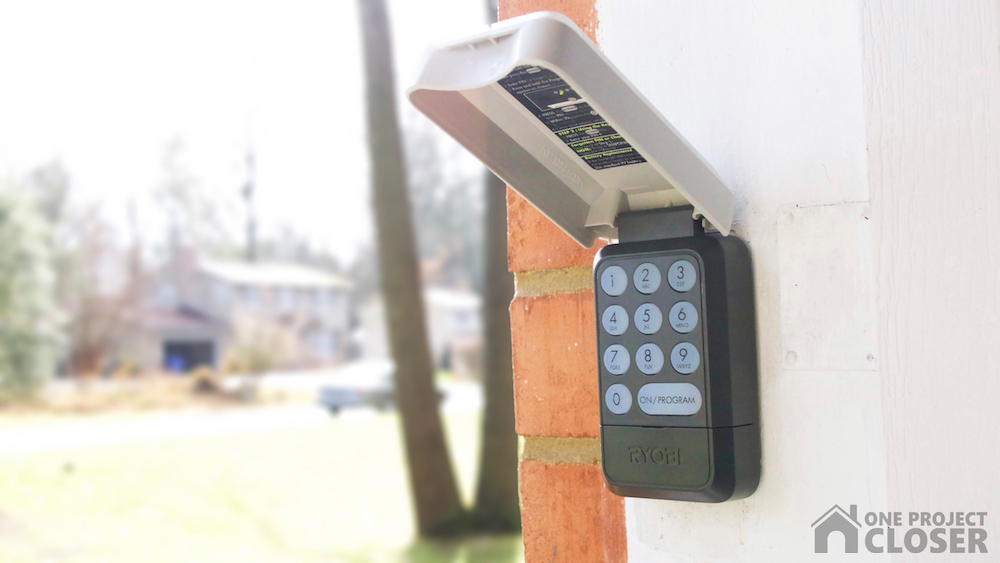
The Ryobi garage door opener installs much like any other GDO, and I highly recommend checking out Ryobi’s installation video. It walks you through the process, and it’s easier to see someone installing the unit rather than reading about it (at least for me). After you remove the old GDO, you assemble the rail and attach to the power head. Next, you secure the rail to the wall above your garage door and the power head to the mounting straps. The safety sensors are hardwired as usual. The indoor keypad uses an IR receiver which requires a line of sight. The outdoor keypad uses RF so just test it out before installing. Programming the travel limits and connecting car remotes was easy. All the accessories are plug-n-play which means you install them and they are ready to go. I had no issues getting the Ryobi GDO connected to wifi. The app takes you through each step. Altogether it took me most of a day to install. I took my time, ensuring everything was dialed-in before continuing to the next step.
Quality
I mentioned earlier that this GDO features a 2 HP motor which is actually quite good. The idea is that a more powerful motor doesn’t have to work as hard and will last longer. If you check out the competition, you’ll often see motors with 1-1/4 HP or less. I can’t speak to the longevity as I’ve only just installed the opener. All the parts and materials seemed good quality. The Ryobi GDO also includes a steel-reinforced belt instead of a direct drive or screw drive. On top of it all, the warranty is very good. Ryobi covers the power head, gearbox, rails, door arms, sensors, remotes, and keypads for three years. The belt and motor have a lifetime warranty.
Operating
This GDO works much as you’d expect with a few additional bells and whistles. The outdoor keypad is wireless and will open or close the door after you punch in a four-digit keycode. You can also set a temporary pin that will remain in effect until the next time you use your regular code. This is nice to give someone access while you’re away. The indoor keypad has a button to raise or lower the door, and it has numbers for operating accessories.
This GDO is HomeLink compatible. For us, that means we can use the built-in remote in our Ford (unlike our last opener).
Ryobi opted for a belt-drive instead of a direct-drive or screw-drive, and the belt drive is much quieter.
Even if the power is out, the Ryobi opener can operate off 18-volt battery backup for about 100 openings!
The one and only thing I would have Ryobi change is that when the door is closing, the unit beeps and the light flashes a few times. This is probably some arcane legal requirement. However, it’s just annoying for the end user.
Built-In Features
You already know about the 2HP motor. I also wanted to point out the LED light. This is a nice bright light, and no more replacing light bulbs. There’s even a motion sensor to automatically turn it on. No more fumbling around for the recycling can in the dark! The duration can be adjusted anywhere between 3 and 10 minutes (in 1 minute increments).
The battery backup also acts as a charger to keep the battery ready in case you lose power.
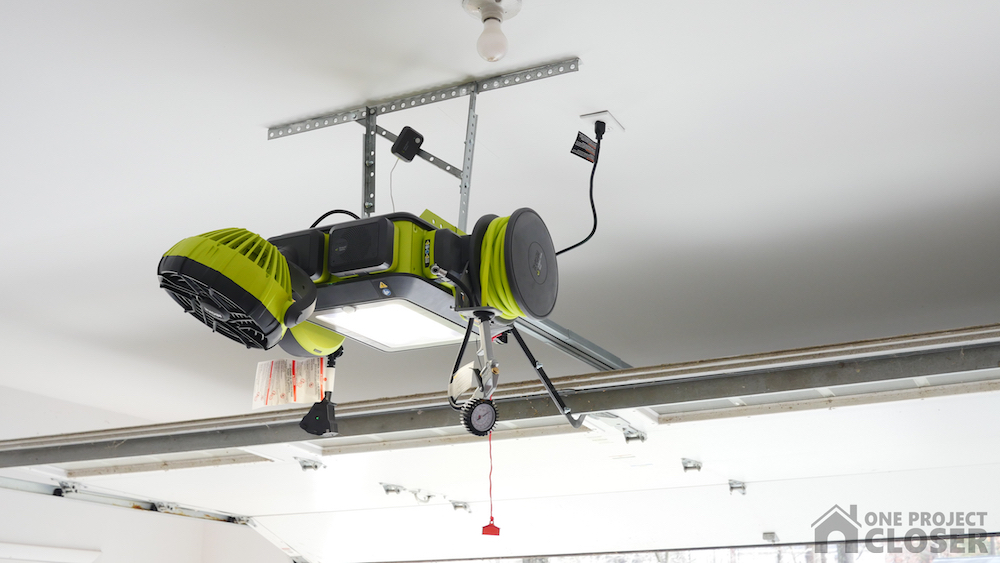
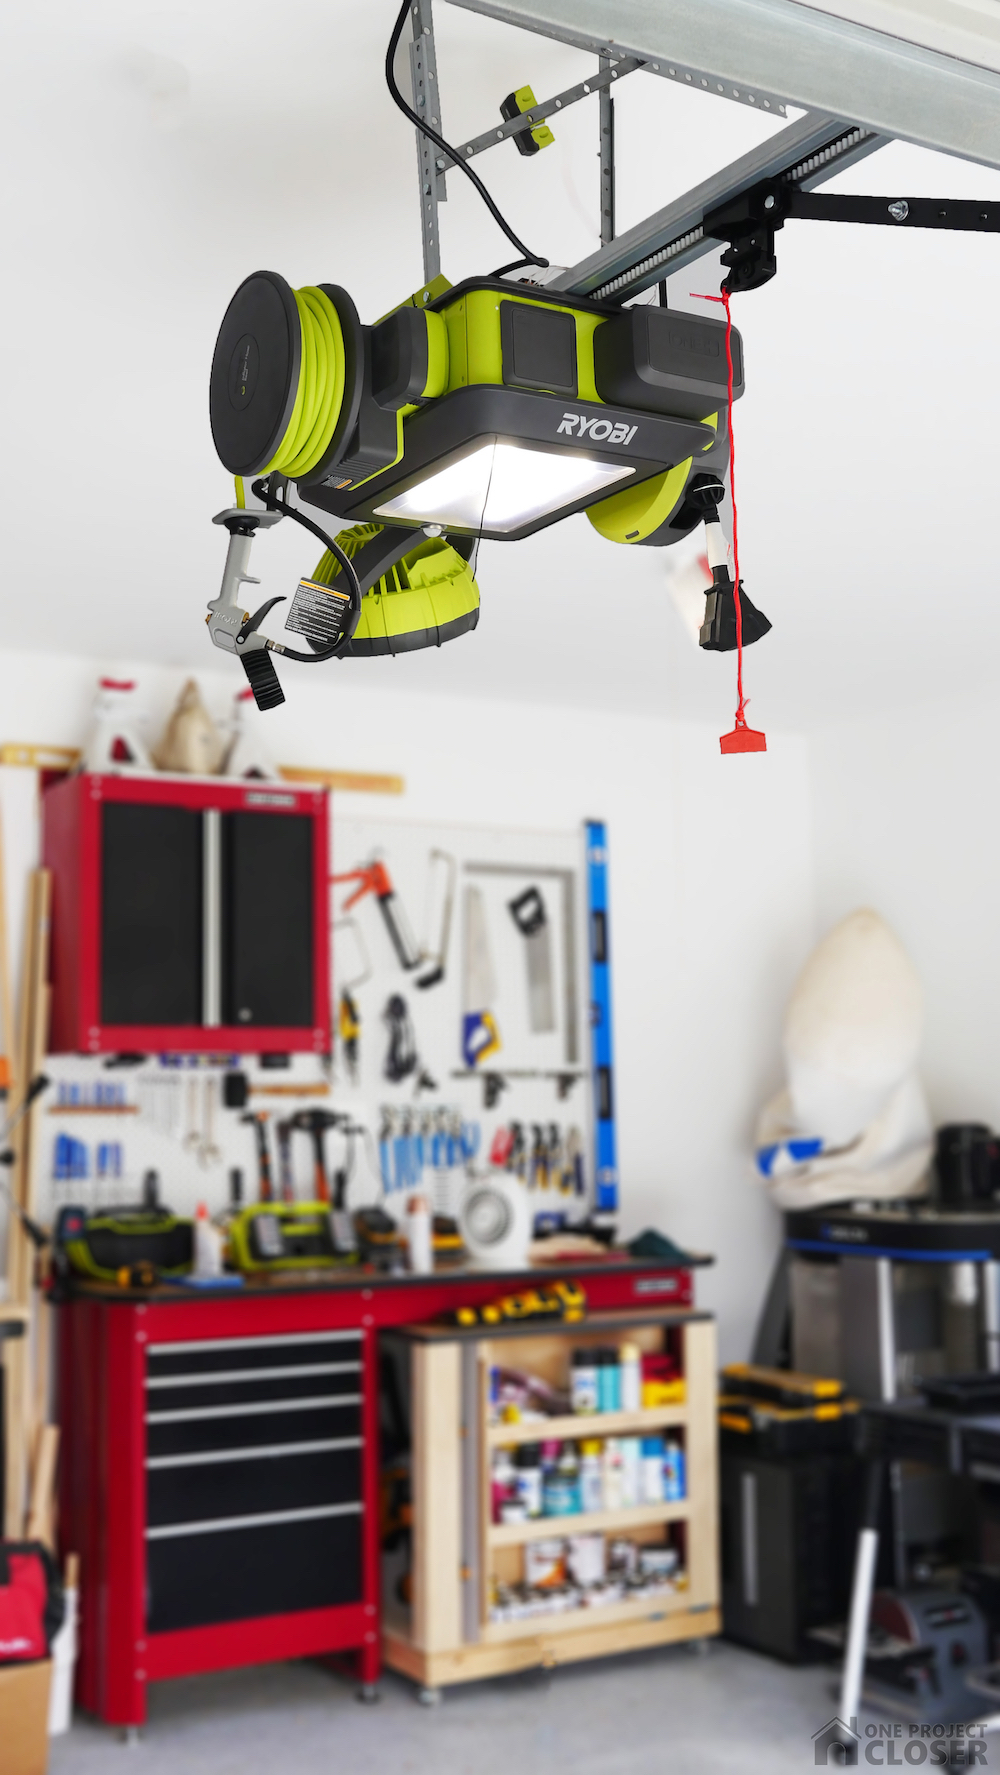
Accessories
OK. This is the really exciting part of the Ryobi GDO. You can use the 7 accessory ports for specialized, plug-n-play modules like a shop fan, bluetooth speaker, retractable power cord, inflator, laser parking assist, security camera, and CO detector (coming soon). How cool is that?! Just note that some accessories require two ports.
I opted for the speaker, power cord, fan and inflator, and so far I’m very pleased with each. The accessories can be controlled from the indoor keypad or from the Ryobi GDO app (App Store, Google Play).
The speaker is great for listening to music while I work, and it includes a microphone for hands-free calling. The 30′, retractable power cord may sound basic, but I love it. It gives me three power connections in the middle of the garage and keeps cords off the ground. Ryobi claims the high-power inflator can handle car tires. I haven’t tested that yet. However, I like it for bike tires, balls, and other toys. This accessory saves me the trouble of setting up my compressor when the kids tires get low. Lastly, I have the shop fan. You can pivot the head in any direction and control the speed with the app or indoor keypad.
Where to Buy
The Ryobi garage door opener and all the Ryobi GDO accessories are available at the Home Depot. The opener will set you back $250 and each accessory ranges from $44 to $100. However, there are some sweet bundles available. For example, you can get the cord reel, speaker, fan and laser parking assist bundle for $175 or the GDO and the speaker for $292. Here are a few links. Be sure to check out all the options!
- Ryobi 2HP Garage Door Opener – $248
- Ryobi Shop Fan – $44
- Ryobi Retractable Cord Reel – $44
- Ryobi Bluetooth Speaker – $44
- Ryobi High Pressure Inflator – $89
I’m really impressed with the new DeWalt 20v Random Orbital Sander. Cord-free sanding is awesome, and this sander delivers great power and runtime. If you’re in the market for a new sander and already bought into the DeWalt 20v MAX battery platform, consider the DCW210B.

Stuff Lawyers Made Us Say: We’re continuing our partnership with The Home Depot to provide candid reviews of tools from a wide variety of manufacturers. The Home Depot is both providing the tools for free and compensating us; however, the opinions we express here are our own. Remember, we’ll always be up-front with you when we’re receiving a free product, compensation, or both. And of course, we always strive for objectivity in our reviews.
What’s in the Box?
DeWalt sells the bare tool along with a dust bag. There’s no case or bag. However, if you step up to the kit, DeWalt includes a battery, charger, and bag along with the sander. DeWalt offers two kit options for this sander- one with a 5Ah battery and the other with a 2Ah battery.

How Does this Cordless Sander Perform?
Whenever we talk about battery-powered tools, it invariably leads to a discussion on runtime. Nobody is going to switch to a cordless tool if you only get a few minutes of runtime. DeWalt knows this and a major perk of the brushless motor is improved runtime. With a 5Ah battery, DeWalt boasts almost an hour of runtime. A lot of my projects, like building drawer-fronts, don’t require an hours worth of sanding so I opt for a smaller, 2Ah battery. This keeps the sander more balanced and easier to maneuver one-handed.
Something I immediately noticed and really like with this sander is the instant off. As soon as you flip the switch, the sander stops. There’s no waiting for it to wind down and stop spinning. I’ve been using a corded, Milwaukee sander for some time and either I have to wait until it stops spinning or I have to stop it myself (usually with my hand). The instant off is a small perk but one I really like.

The dust bag can be swapped out for use with either DeWalt DWV010 or DWV012 dust collectors. Like a lot of you, I’d rather just use my shop vac and that requires an adapter (not included). The dust bag attaches easily and collects about as well as any other.
The power switch is protected by a rubber boot to keep out dust. This is a must-have for any sander these days. Otherwise, you’ll find the switch fails before too long. In fact, this sander features a dual sealed switch for longer switch life. Right next to the power is a variable speed dial ranging from 8,000 – 12,000 OPM for a variety of projects.
Another concern with sanders is the amount of vibrations transmitted to the user. Too much vibration quickly leads to hand fatigue, and manufacturers are working to reduce that. This is something tough to measure in a shop. However, I felt that the DCW210B was very good in this regard.

Features
- Compact design
- Brushless motor
- Dust collection bag
- Rubber overmold
- AirLock connection – for use with DeWalt dust collector models DWV010 and DWV012
- Dual sealed switch
- Variable speed control
- Weight- 1.9 pounds without battery and dust bag, 2.1 pounds with dust bag attached
- For use with 8-hole hook-and-loop sanding pads (not included)
Price and Where to Buy
The DeWalt DCS210B is an excellent sander, and if you’re already on the battery line, you should absolutely pick one up. The price is a bit higher, but you’re paying for a high-quality tool. The bare tool is available at The Home Depot. For the kits, check other retailers. Here’s the breakdown:
- 20V MAX 5in. random orbital sander (bare tool) – $119
- 20V MAX 5in. random orbital sander with 2.0Ah battery kit – $199
- 20V MAX 5in. random orbital sander with 5.0Ah battery kit – $249
How to Build a Dog Crate That Doubles as an End-Table (Picture Tutorial)
September 12, 2018 | by Ethan (email) |Thank you so much for visiting us at One Project Closer for this Mid-Century Modern Dog Crate and End-Table Tutorial.
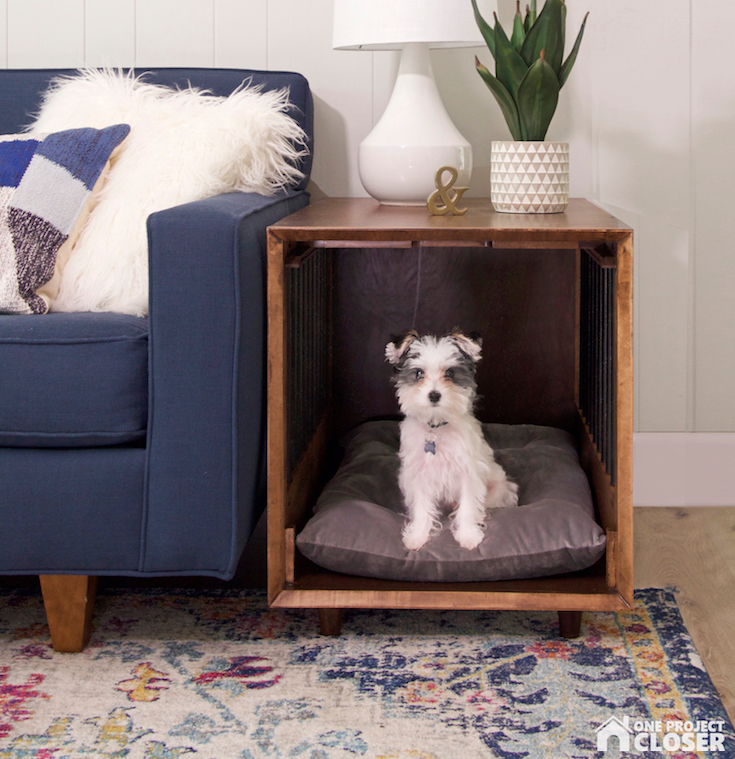
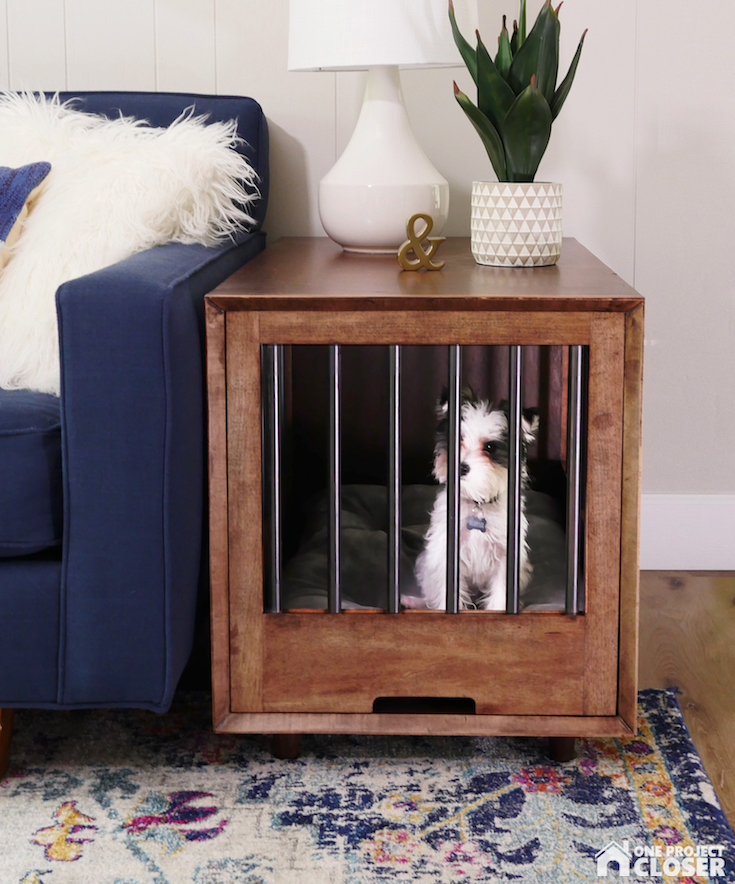
I’m sure you’ve heard by now that we have a new addition to the family – Chief Hopper. Hopper is a Morkie (Maltese + Yorkie mix), and he is a ton of fun. The girls love playing with him, and I’ll admit that so do I. Getting ready for Hopper, we purchased all the usual stuff – bed, toys, food, bowls, etc. When it came to buying a dog crate, Jocie and I couldn’t find anything that we really liked. Jocie is big on the mid-century modern style, and we wanted something that would serve as an end-table too. You can probably see where this is going. In the end, I decided to build the dog crate.

Materials
For this project, I picked up some Maple 1x and a sheet of sanded plywood at the local Home Depot. One thing to remember (because initially I did not) is that Maple is a hardwood and will soak up stain much slower than a softwood. I’m pleased with the ‘two-tone’ look of our dog crate. If you want something more uniform, try to buy all the same species of wood.
Here are the other materials I used to build this crate:
- Kreg pocket hole screws (fine and course thread)
- 1/2″ wood dowel
- Wood glue
- Tapered legs (purchased off Etsy)
- Round metal stair balusters
- Plywood edge banding
- 12″ piano hinge
- Wood stain
Building the Dog Crate
I started by cutting the bottom and back pieces to size from the sheet of plywood. I like to use painters tape especially for cuts across the grain to better prevent tear-out. If you know of other tips, share them in the comments! I sized this to fit the dog bed which is 18 x 30″.
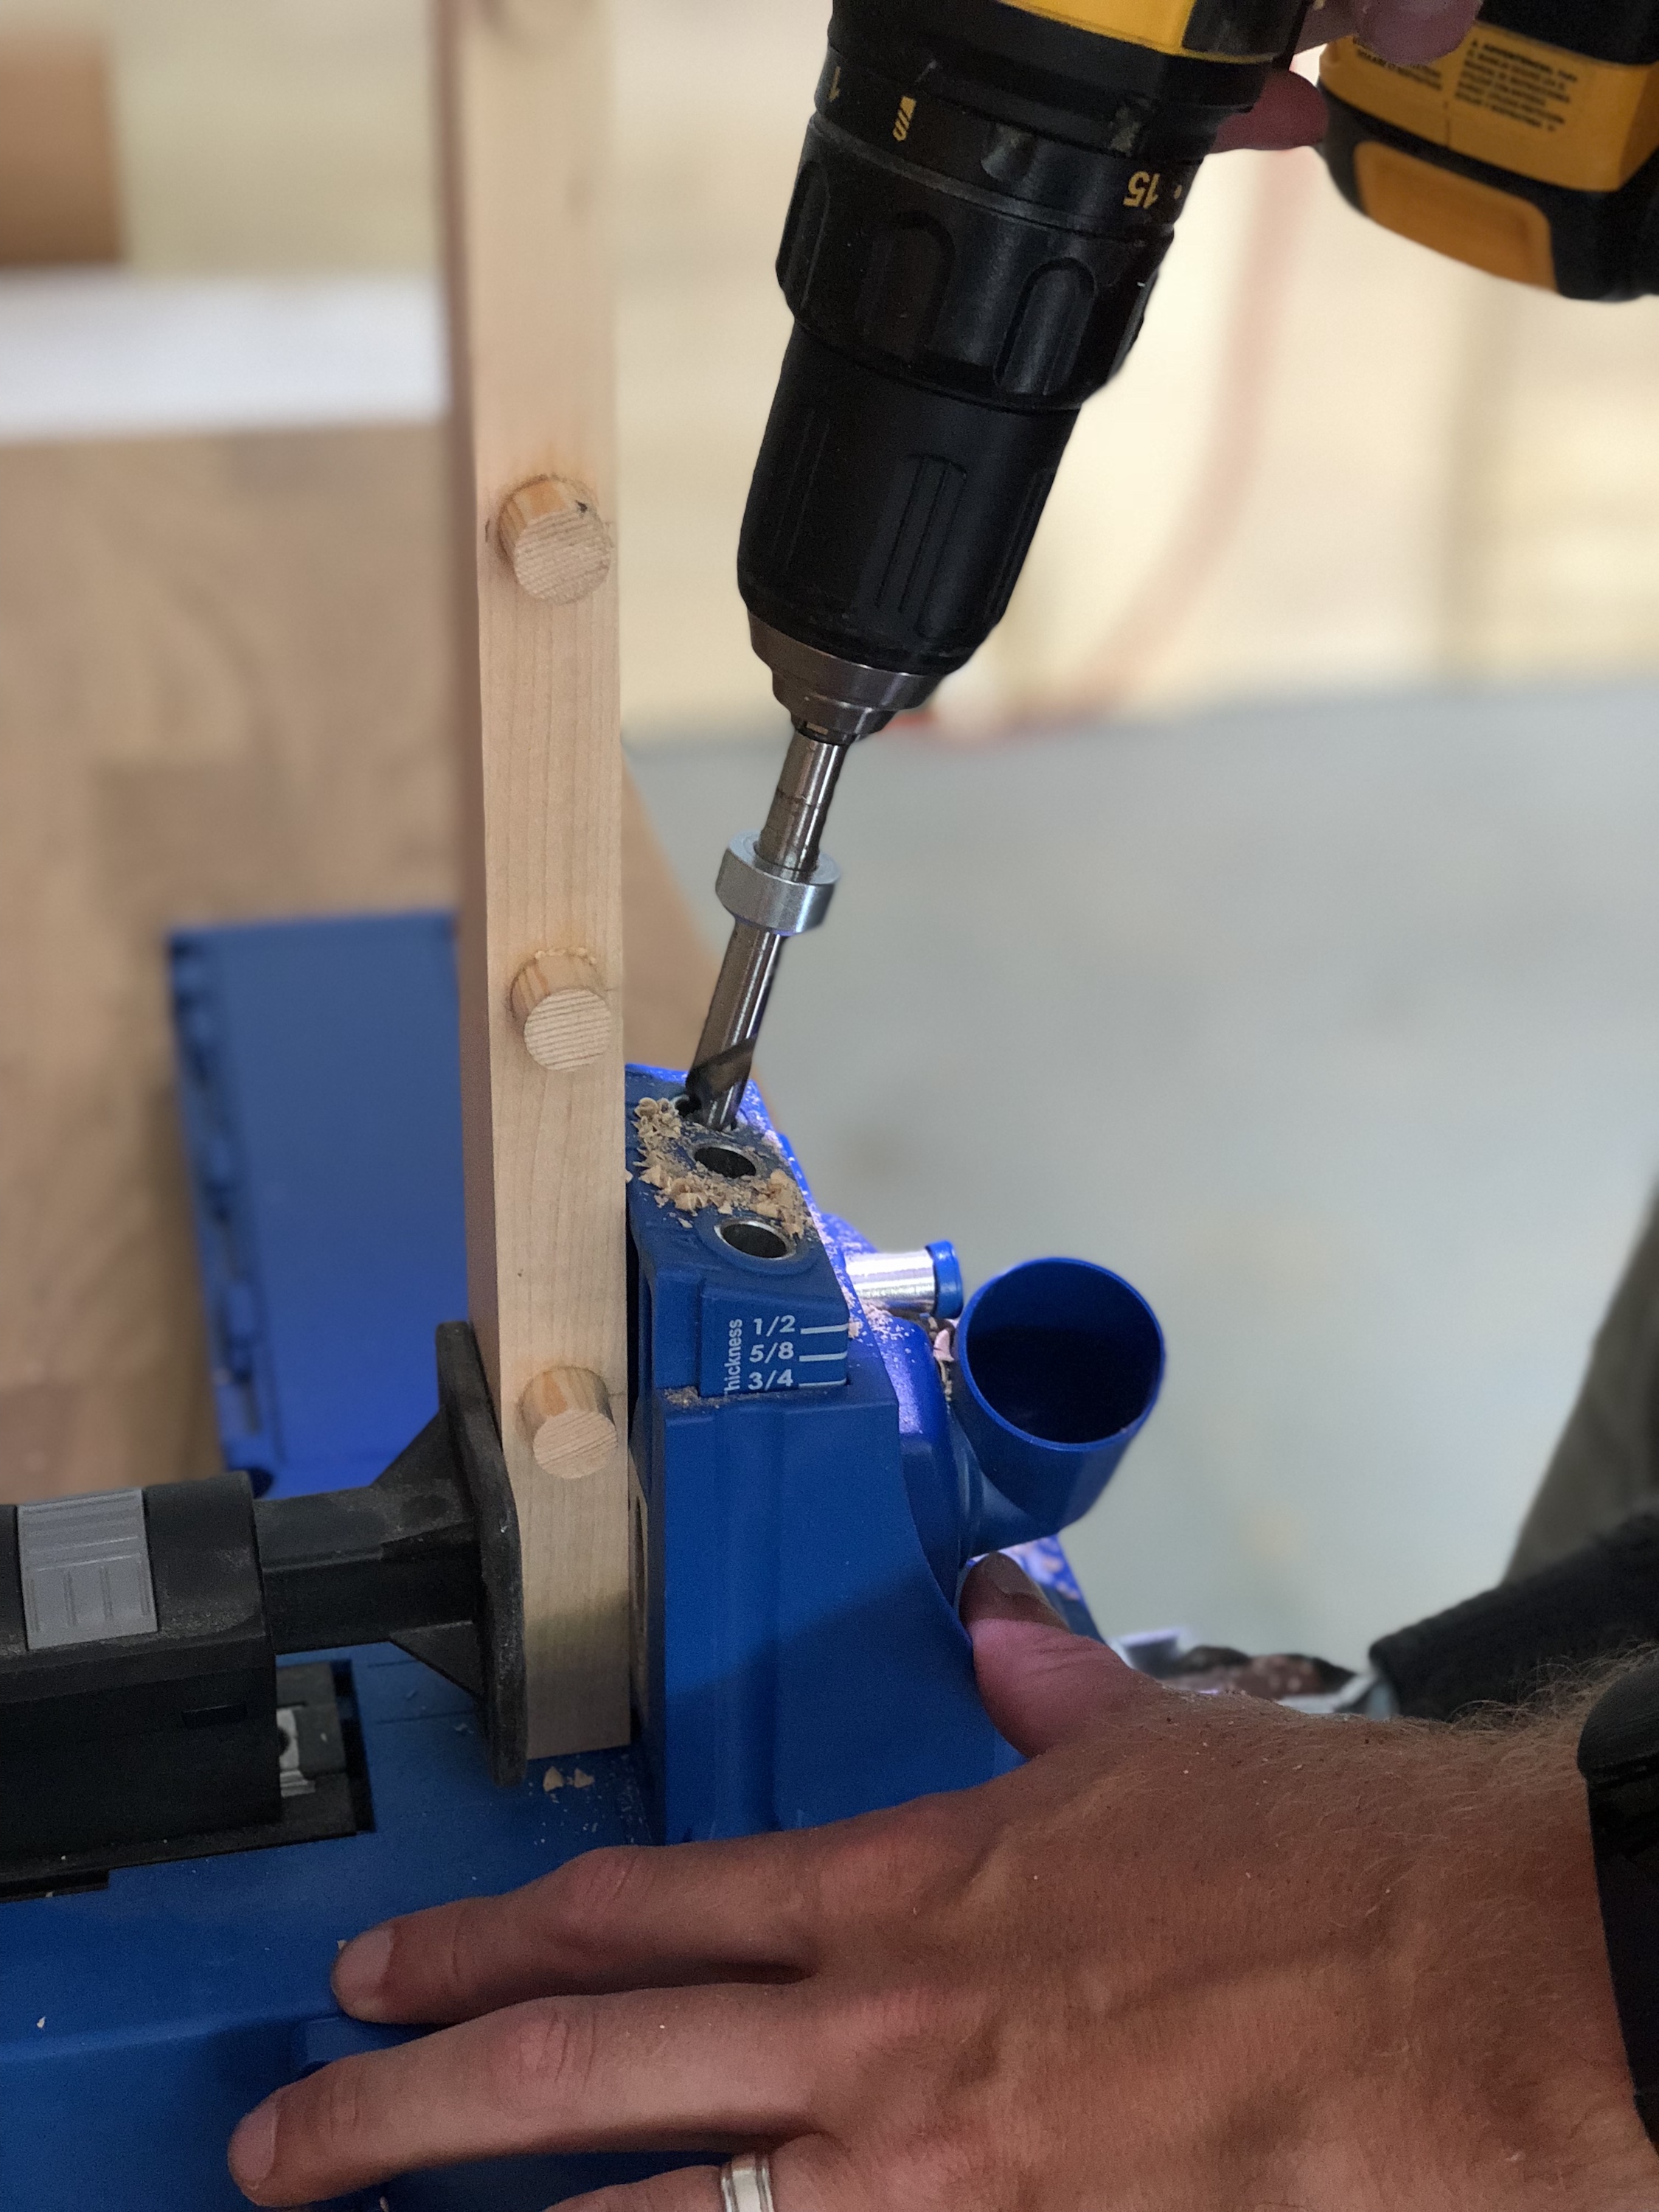
Next, I drilled pocket holes that would allow me to attach the bottom, top and sides.

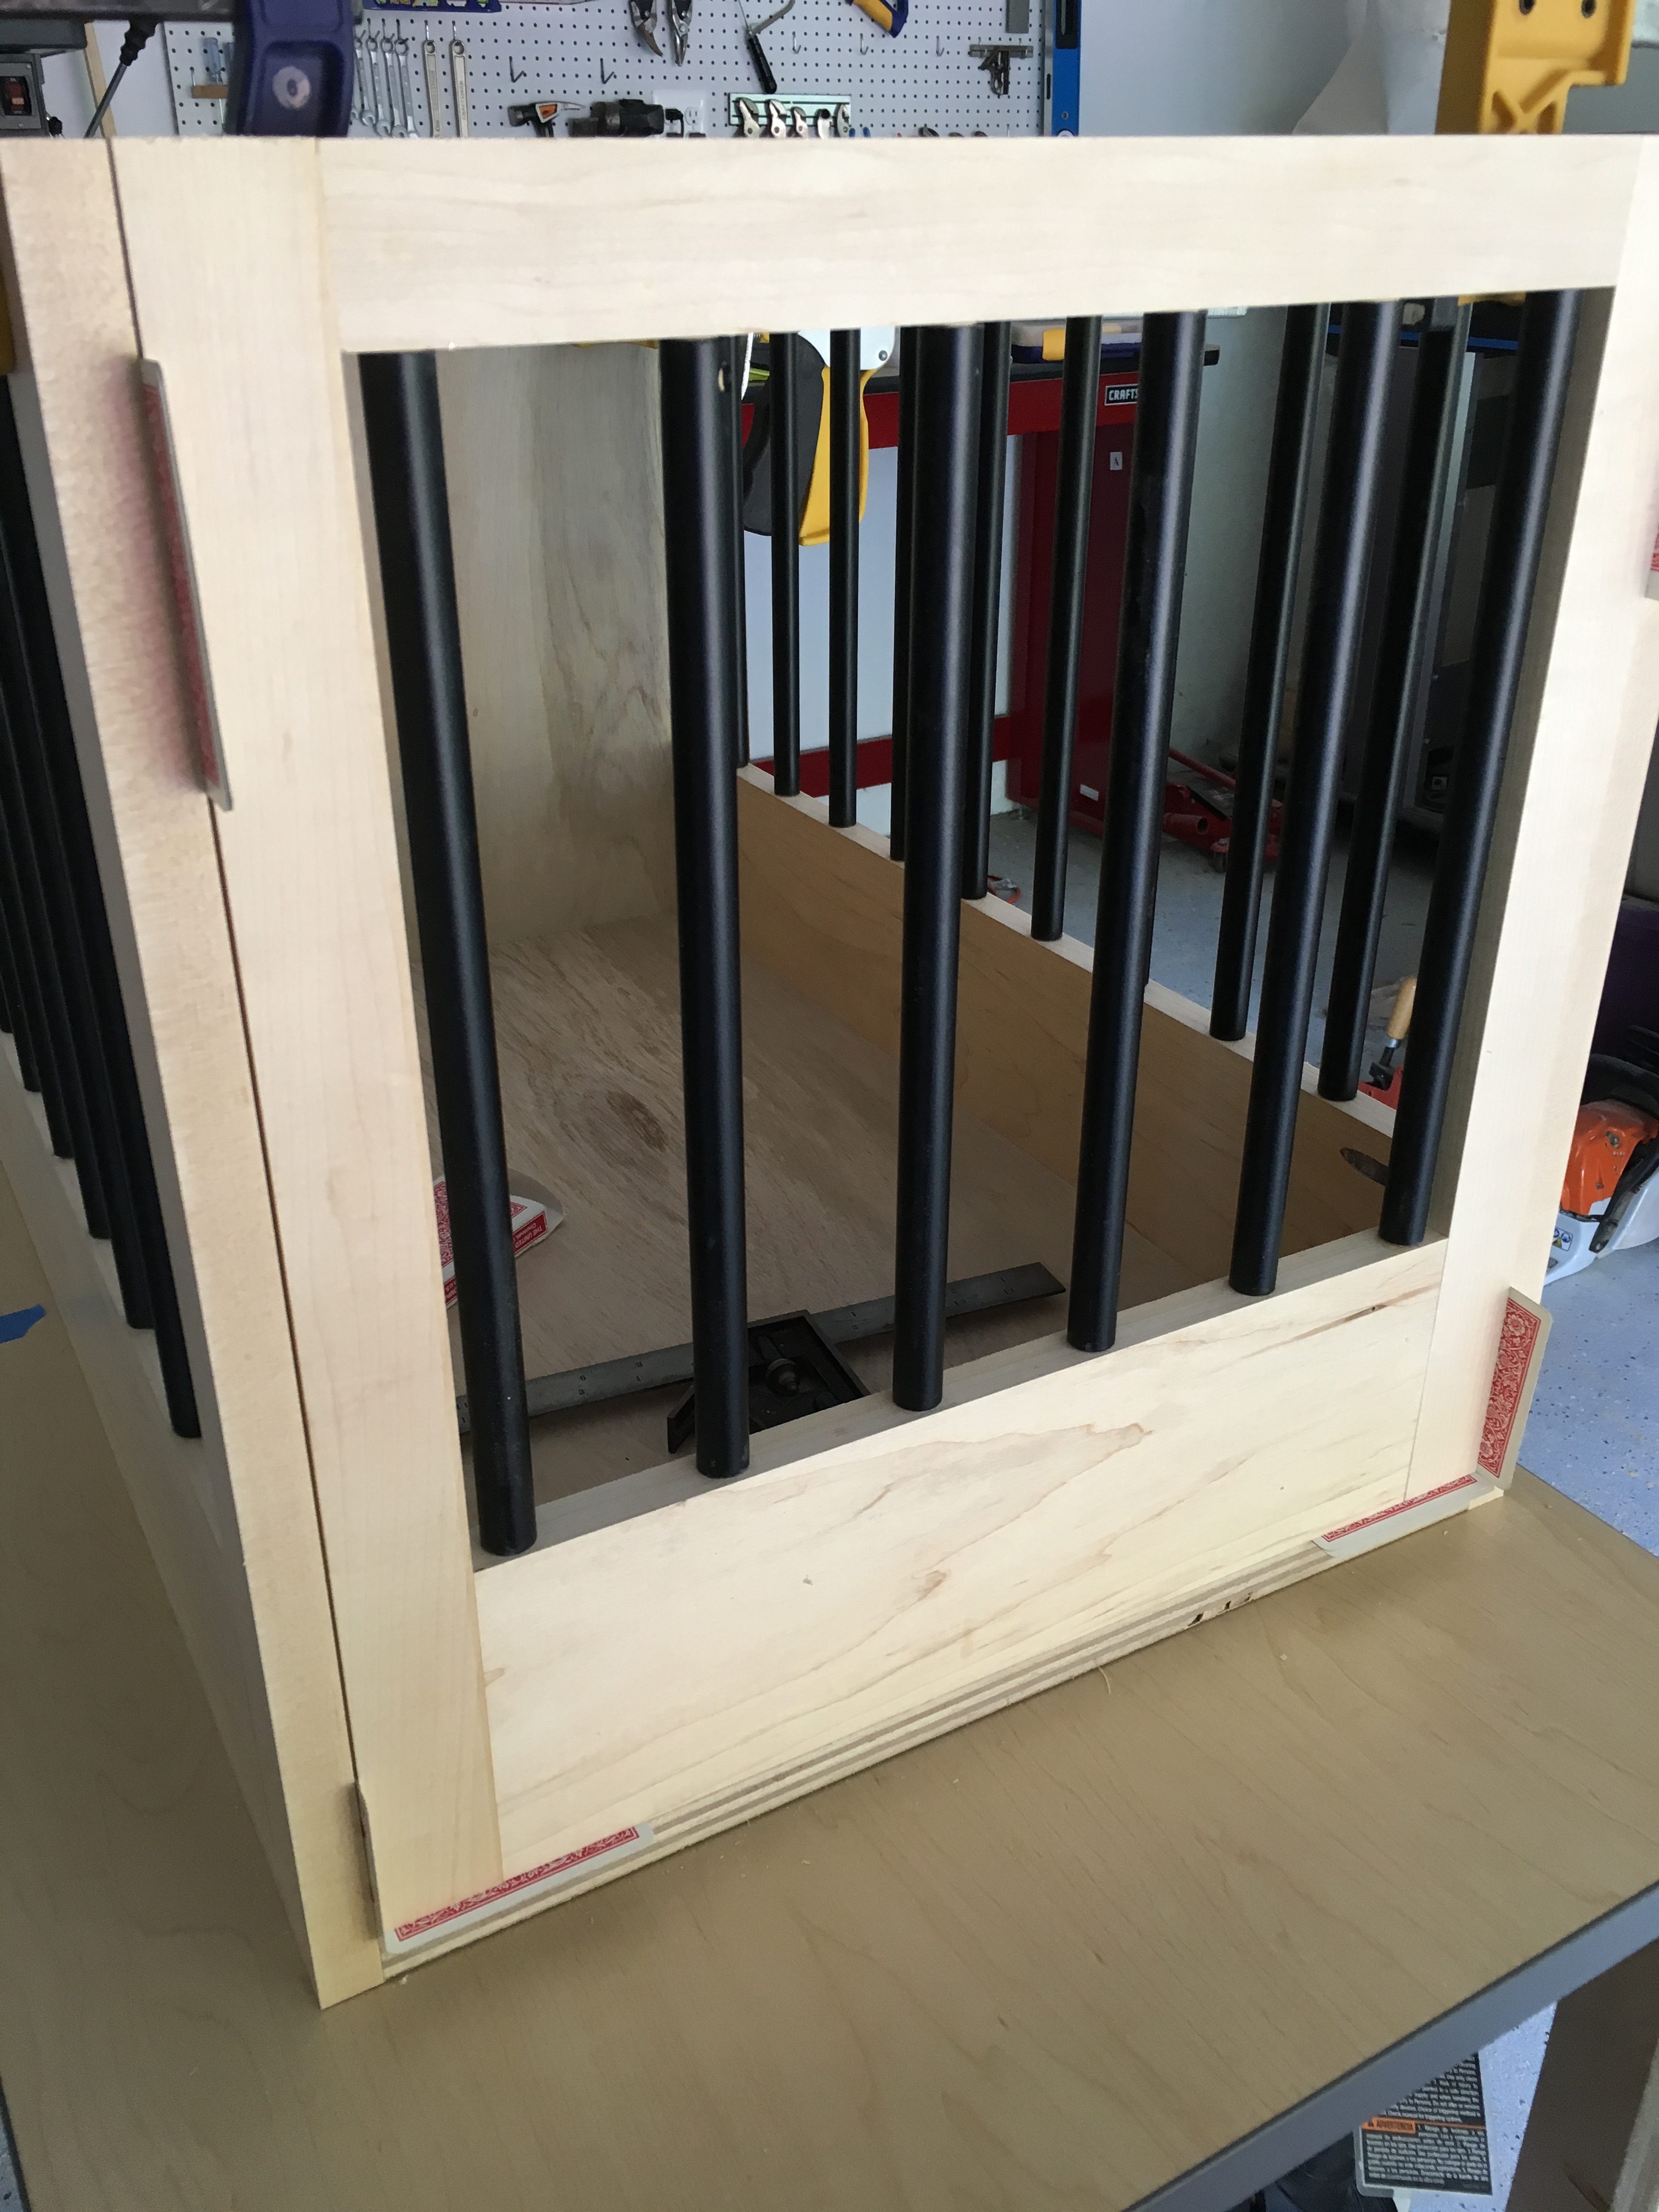
The sides are made from Maple and the round metal stair balusters. I began building the sides by cutting the rails and stiles to length. Here’s where I could have really benefited from a metal chop saw and dowel jig. Instead I made due with my grinder and drill press.
The stair balusters will be the metal bars for the crate, and I needed to cut three equal lengths from each baluster. With some help from Jocie and a lot of tedious adjustments, we cut the bars and sanded any rough edges.


Next, I measured and drilled 1/2″ holes for the dowel plugs.
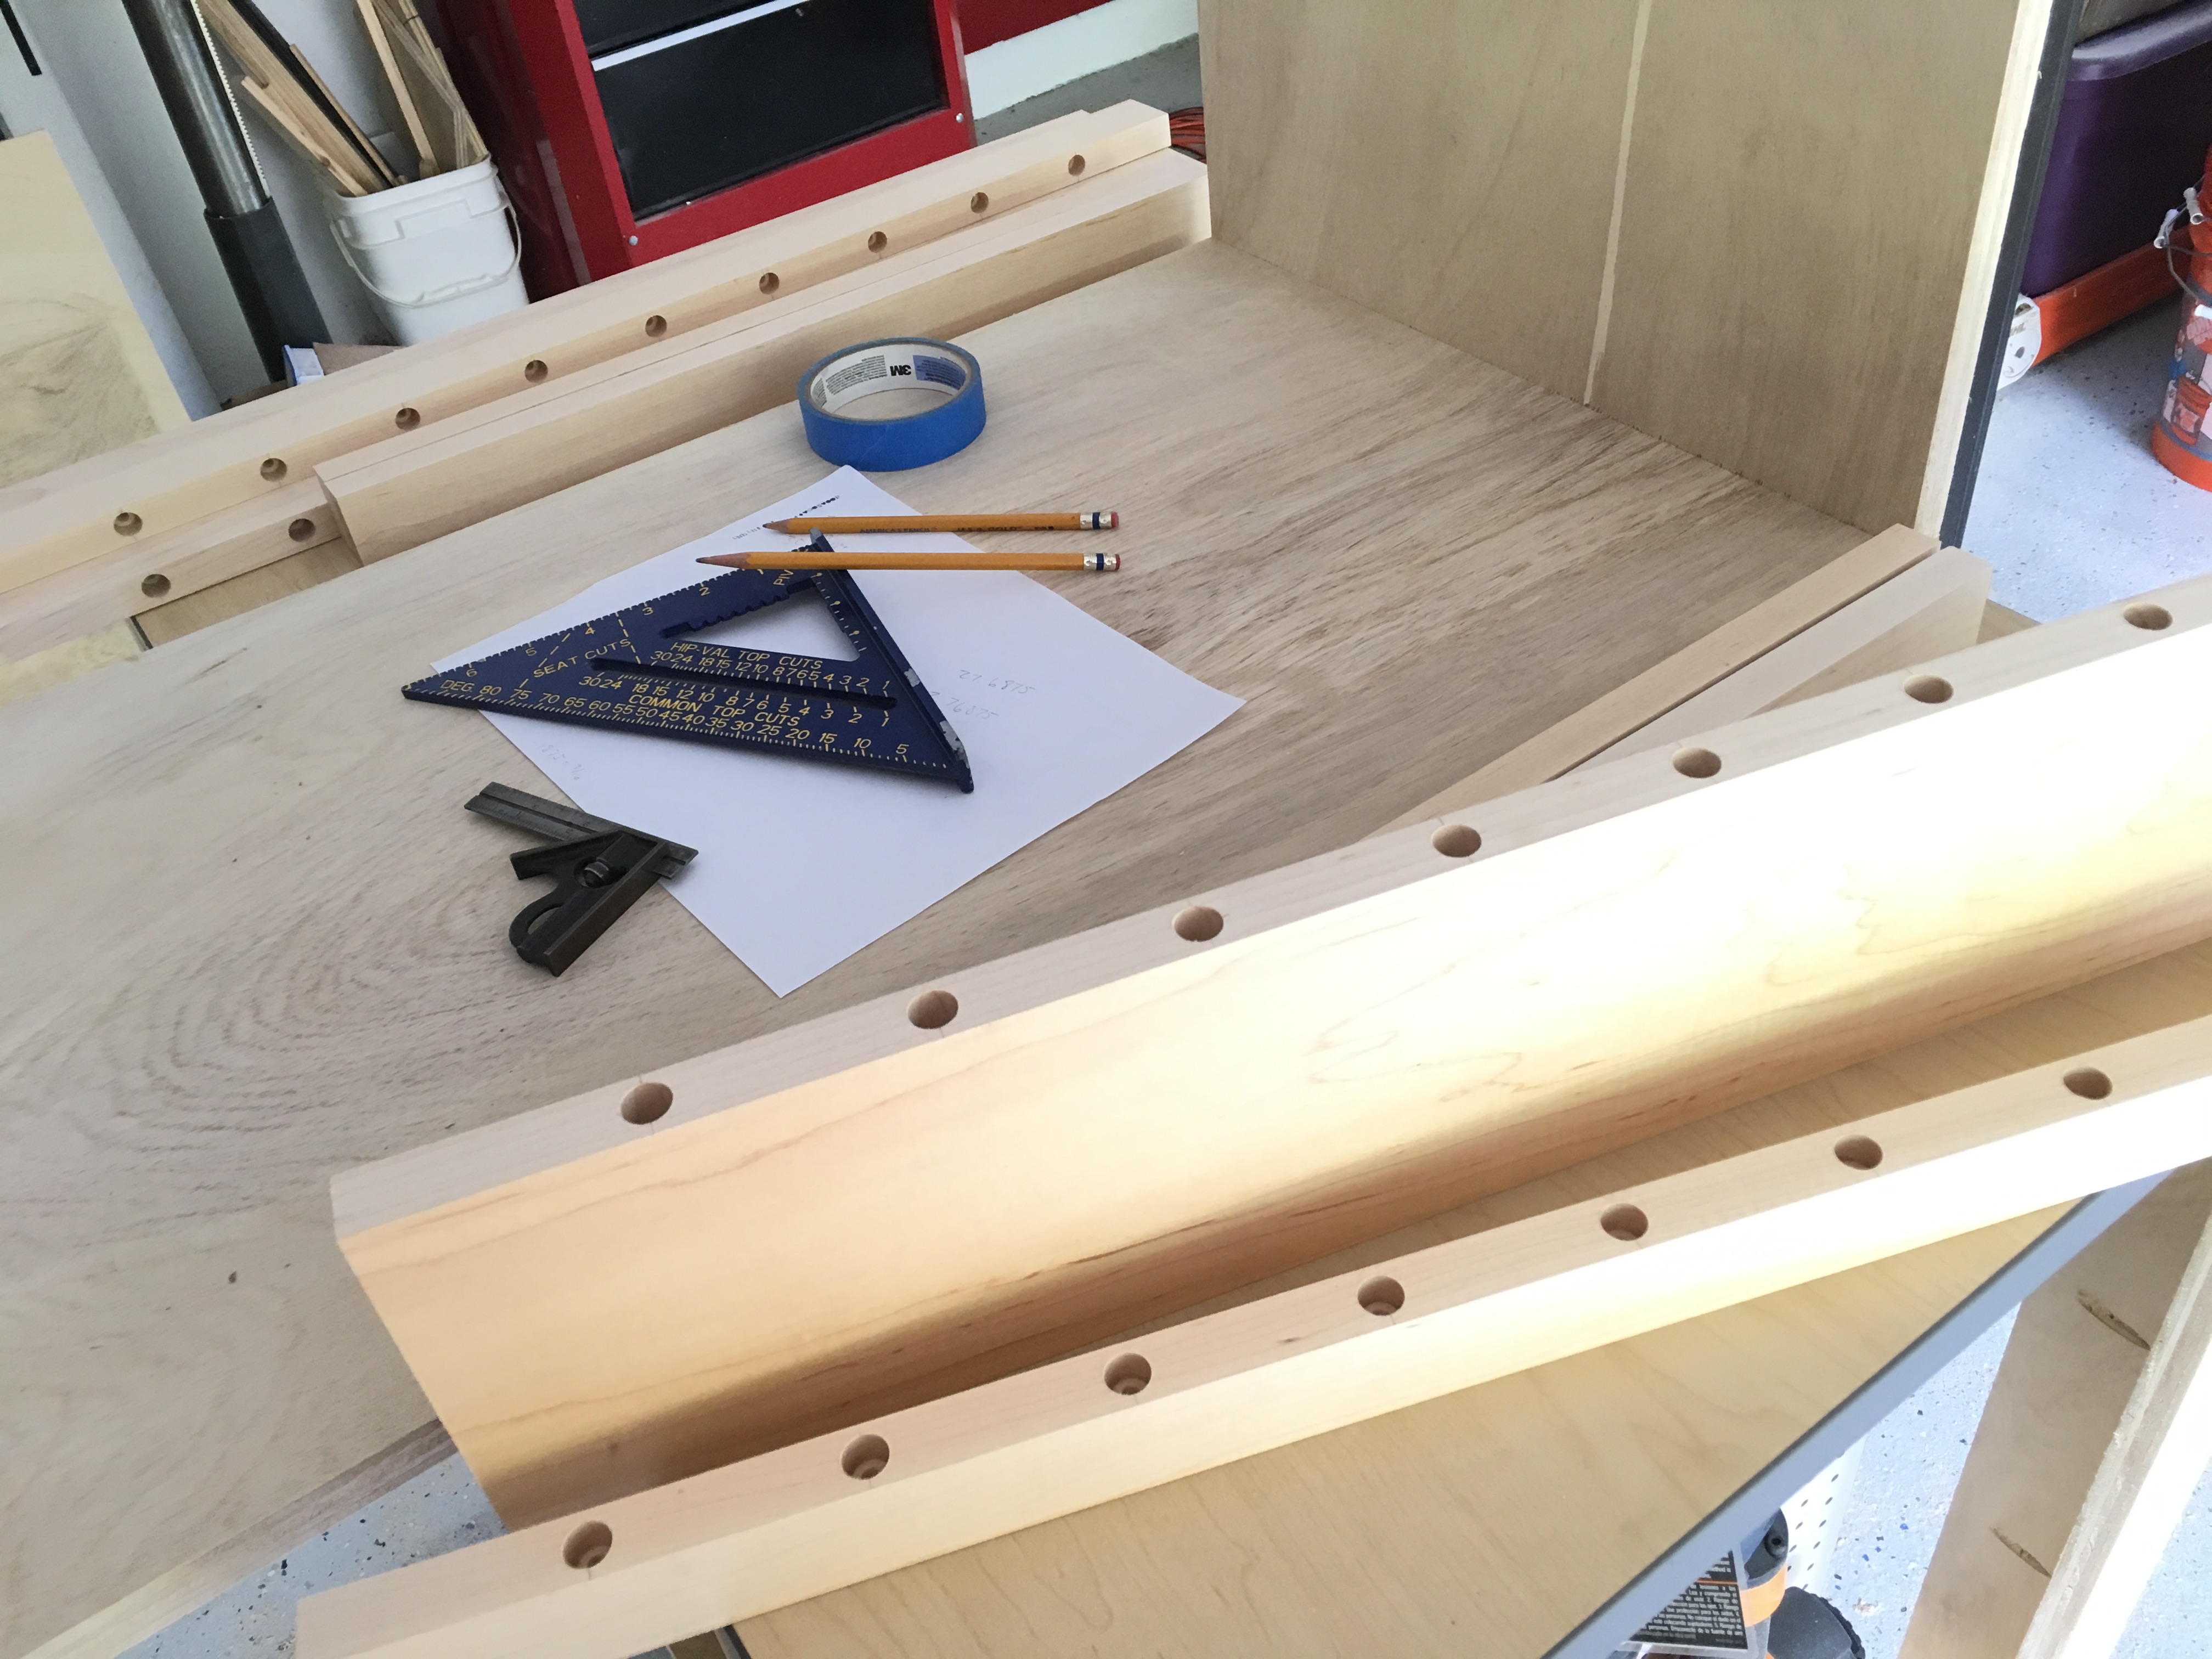
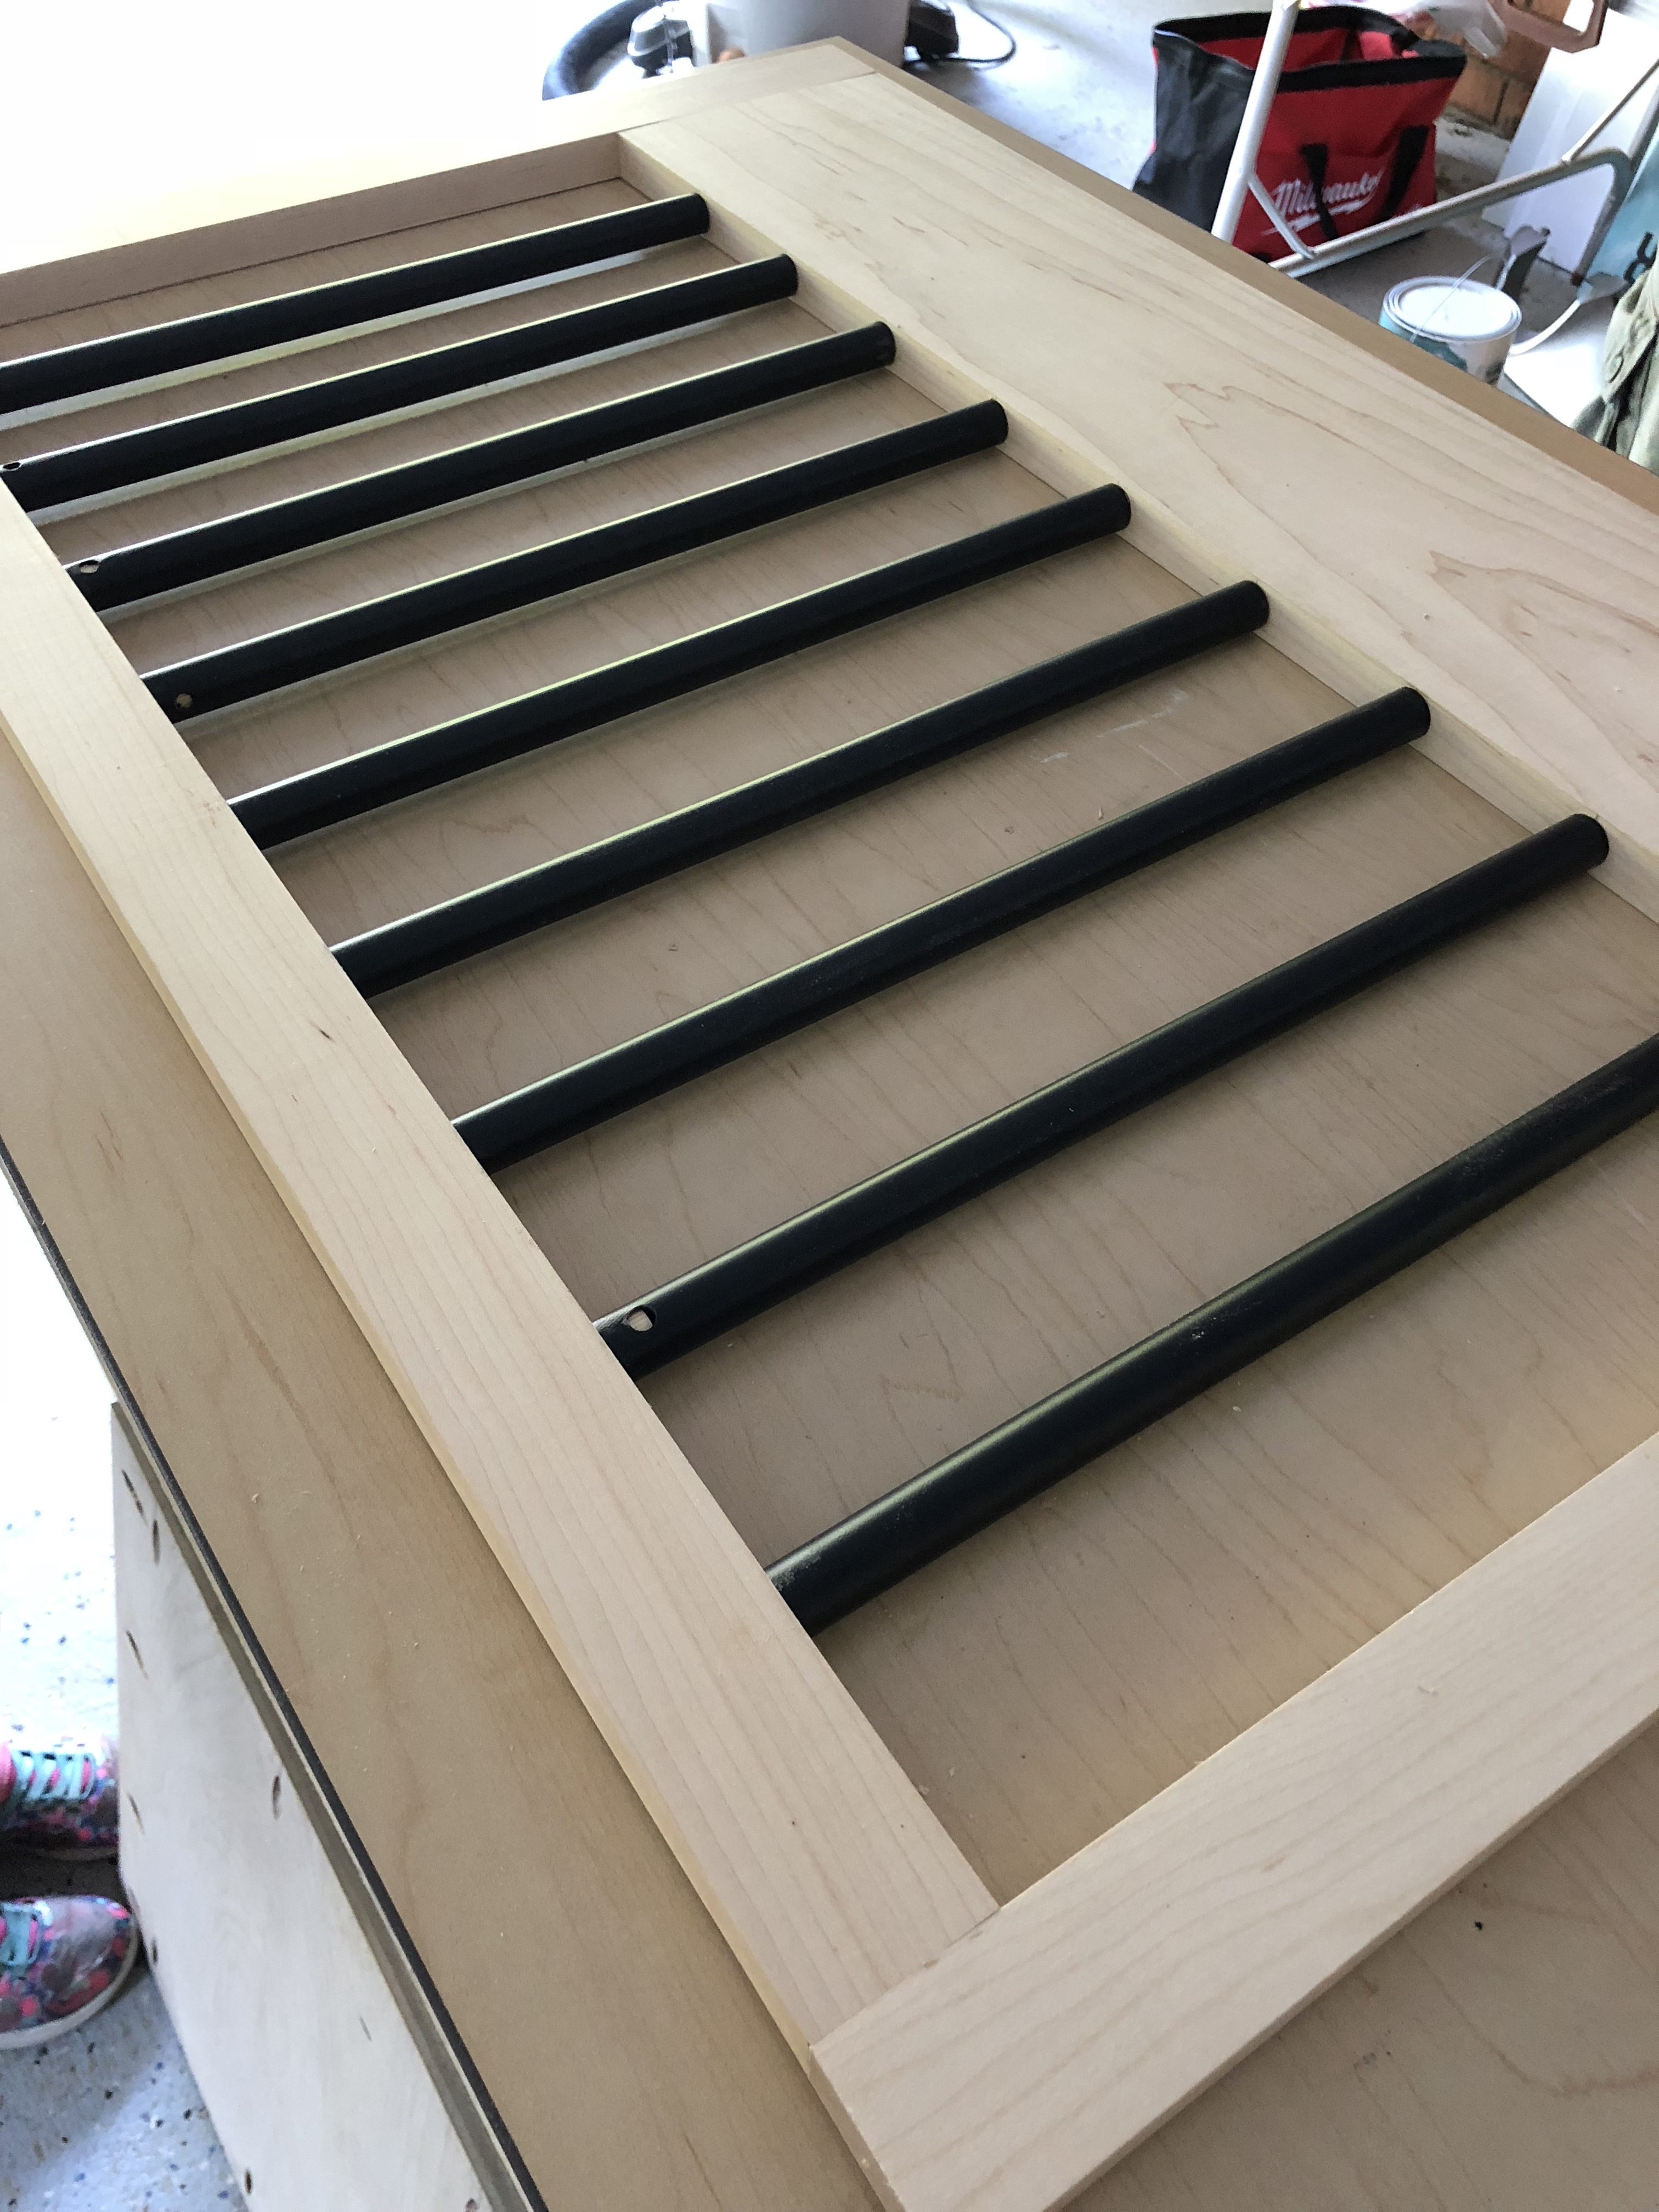
Full disclosure – Hopper’s head is smaller than I expected and he can slip through the bars. I spaced the bars at 2-3/4″ intervals. If you’re intending to build this dog crate, consider putting the bars a little closer together for dogs under 6 lbs. I’m hopeful that he will grow big enough that he can’t ninja his way out of the dog crate soon.
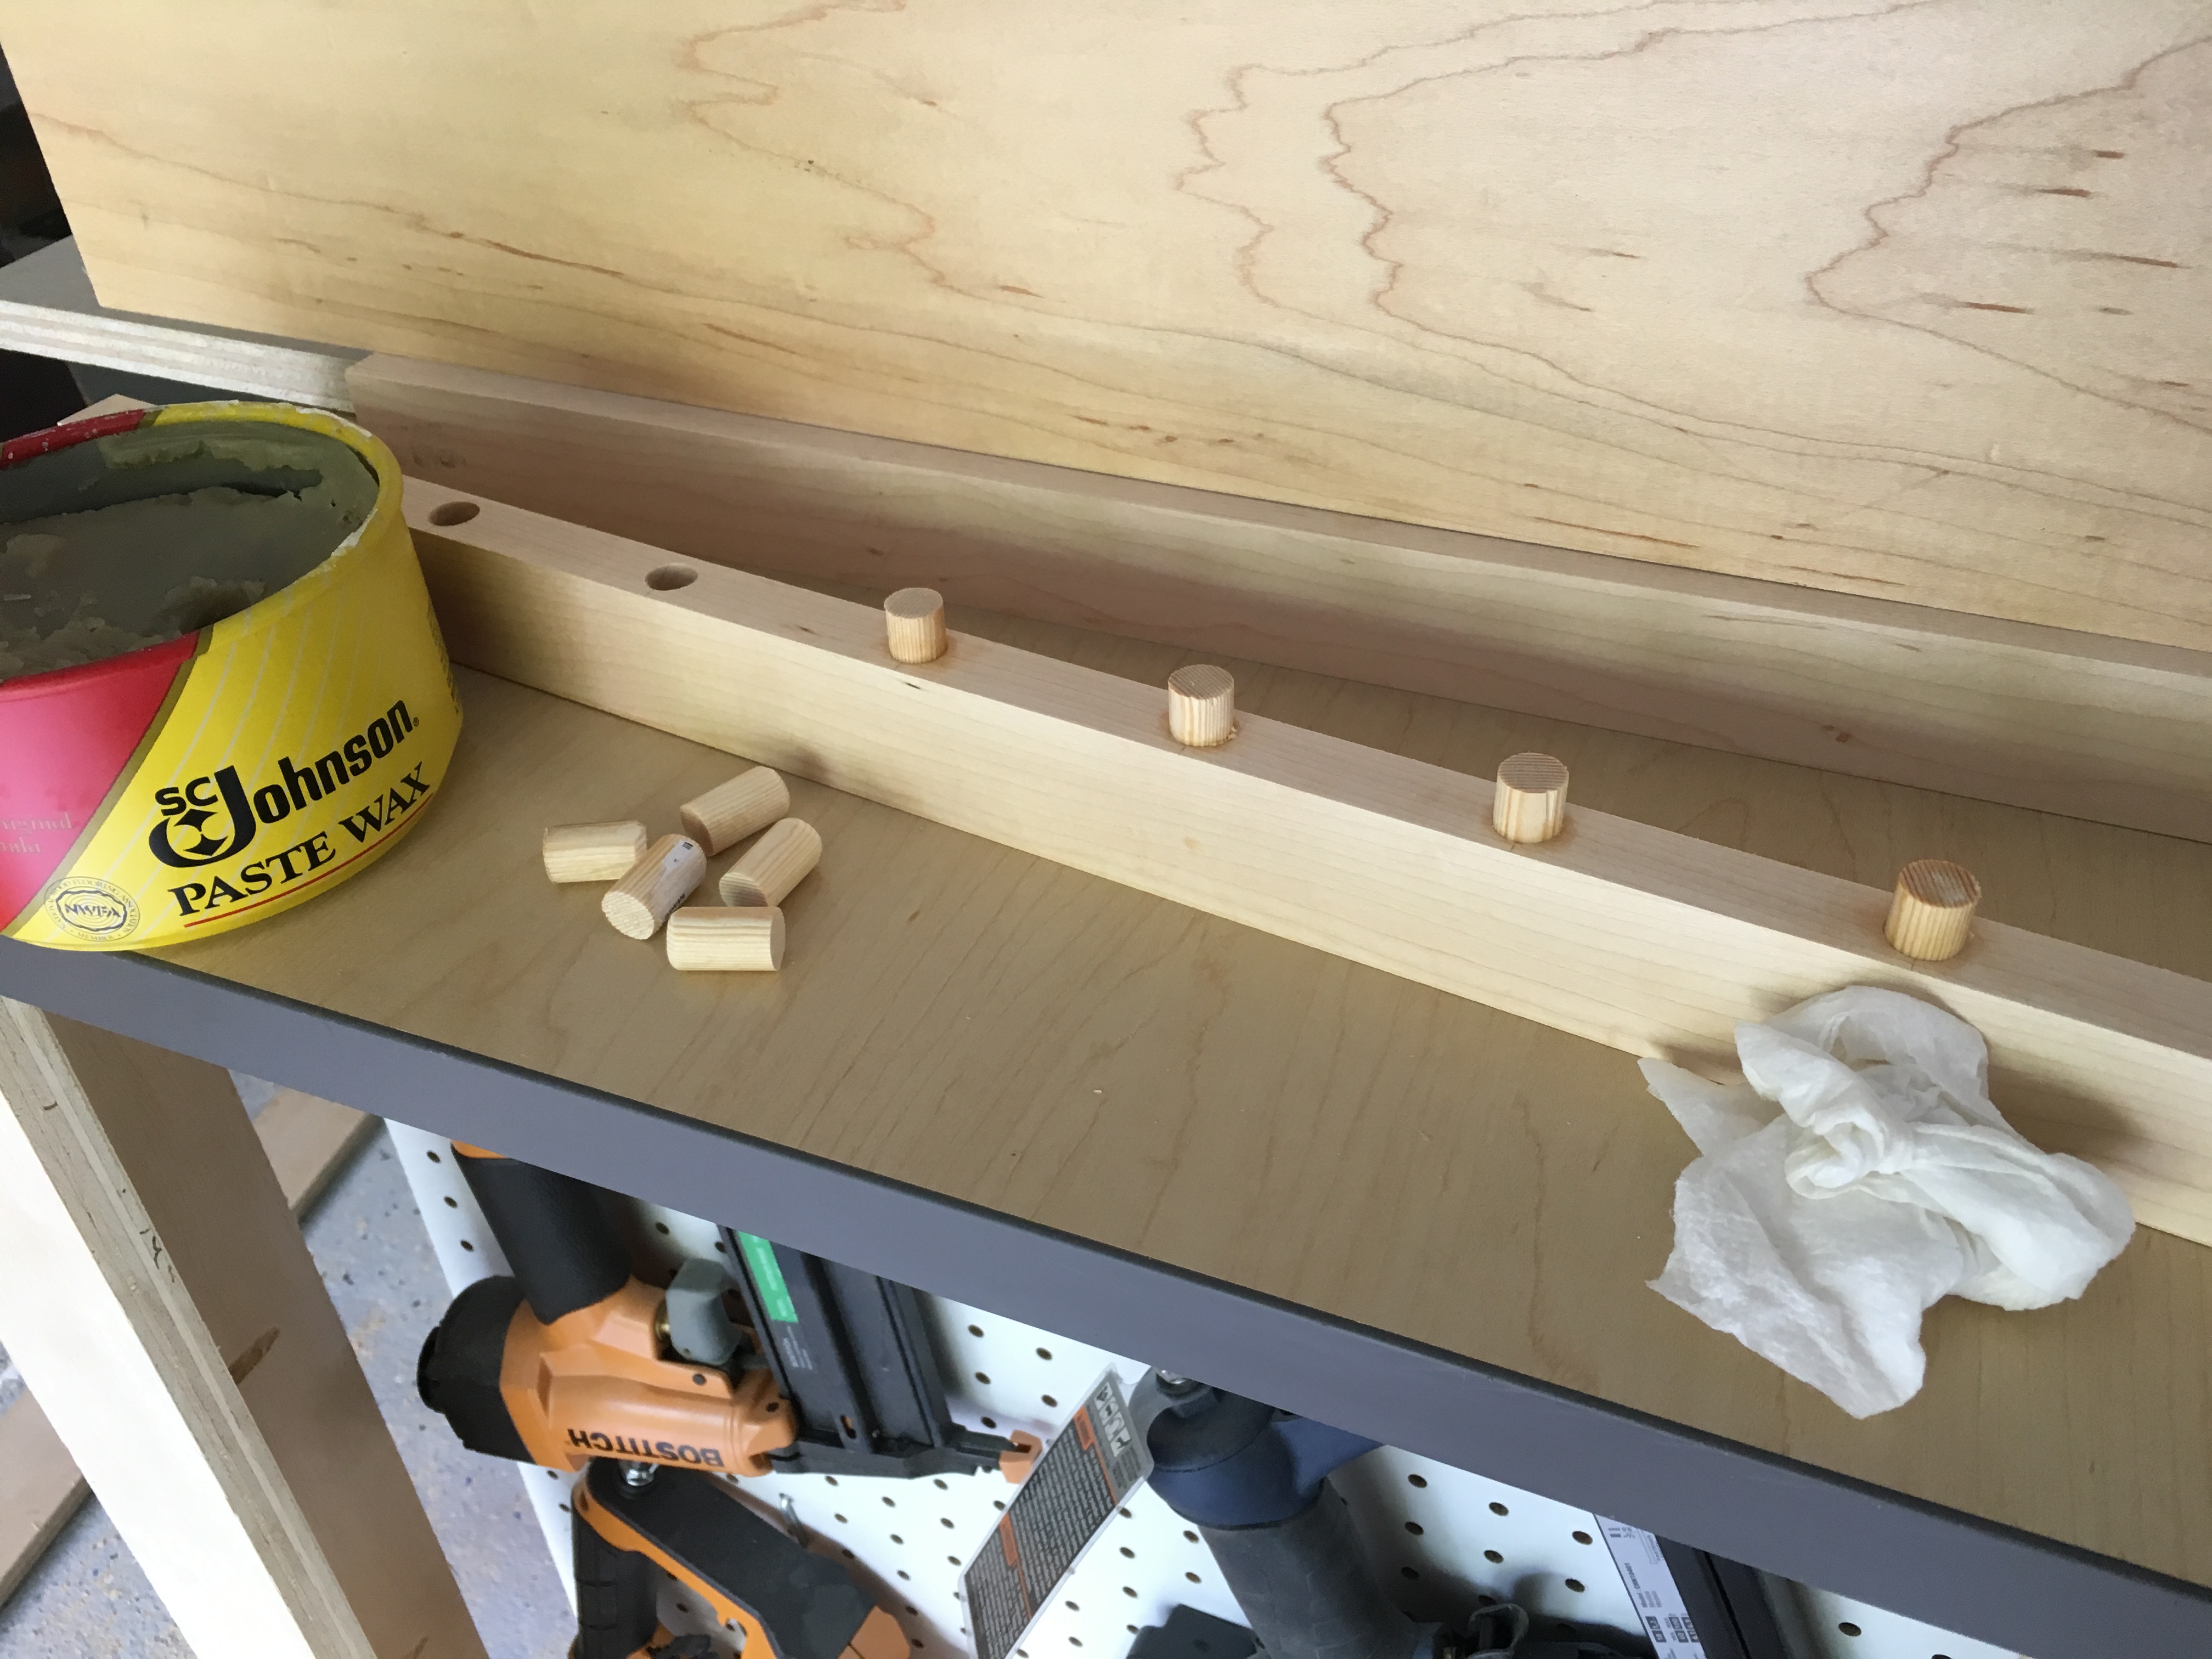
The 1/2″ dowel plugs are a very tight fit in the 1/2″ holes so I rounded one edge of the plug and smeared a tiny bit of paste wax before pounding them into place.
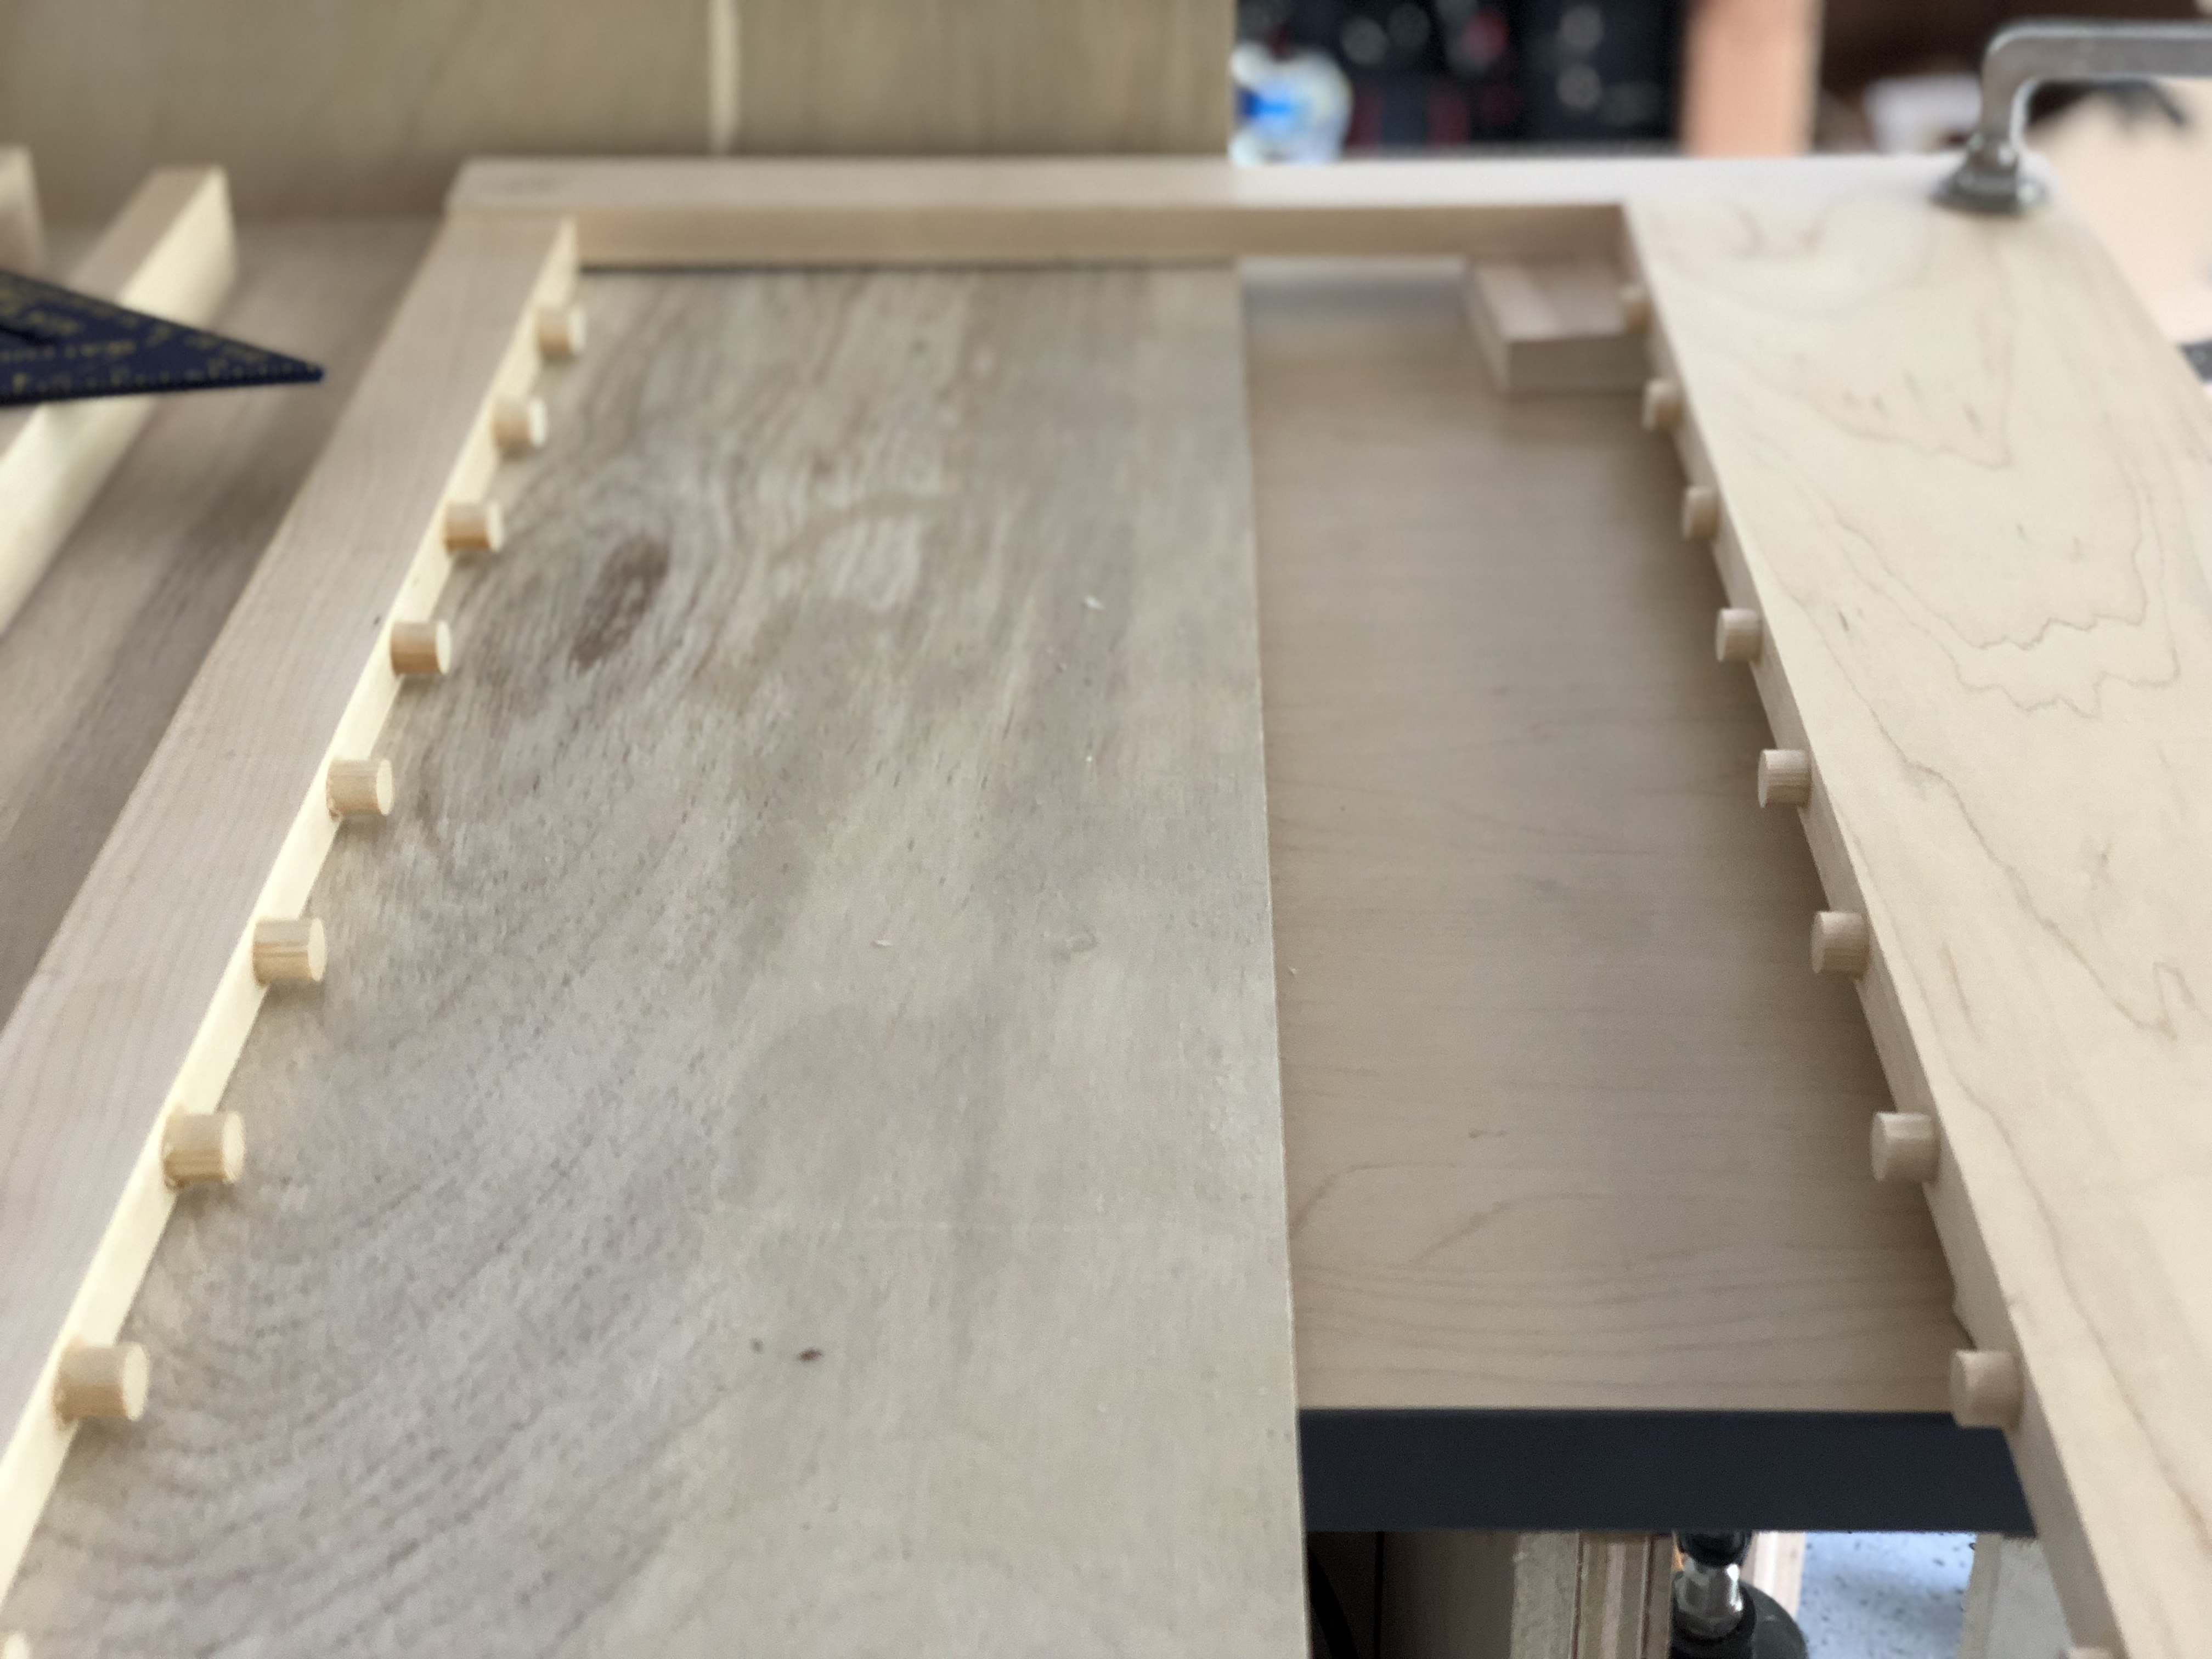
After a quick dry-fit, I assembled the two sides with more pocket holes.

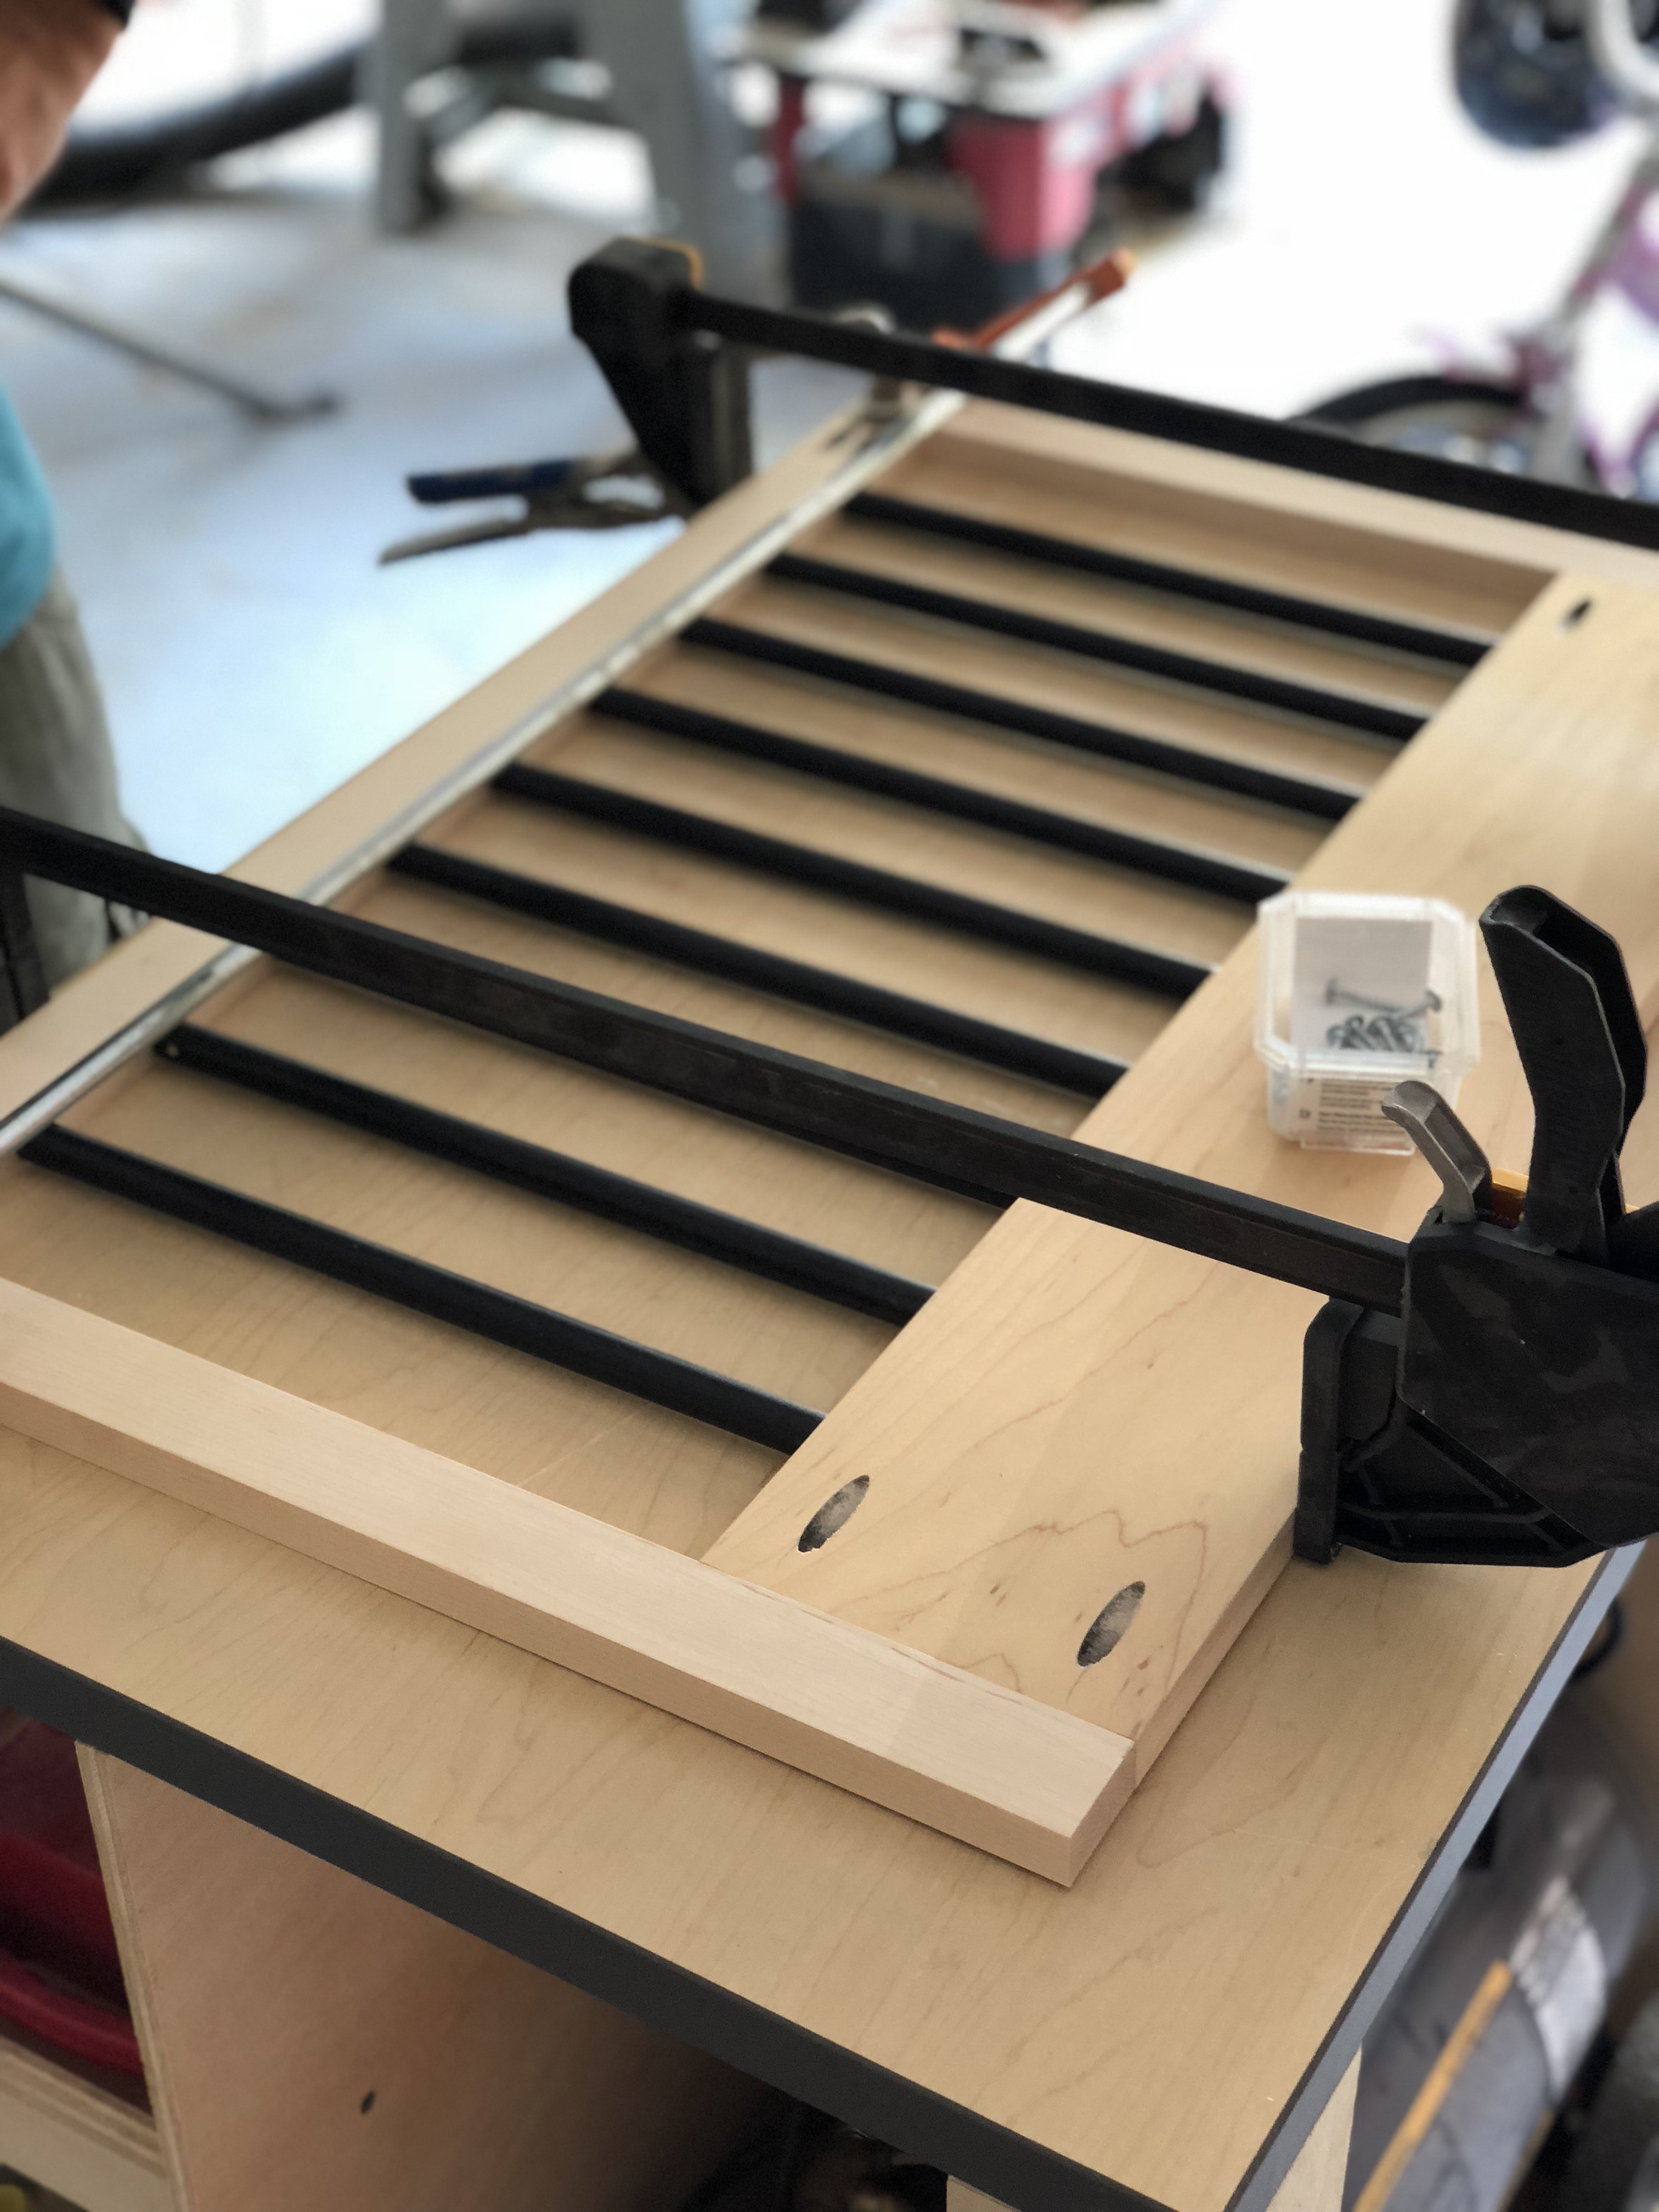
LuLu was my occasional helper. She’s so stinkin cute.

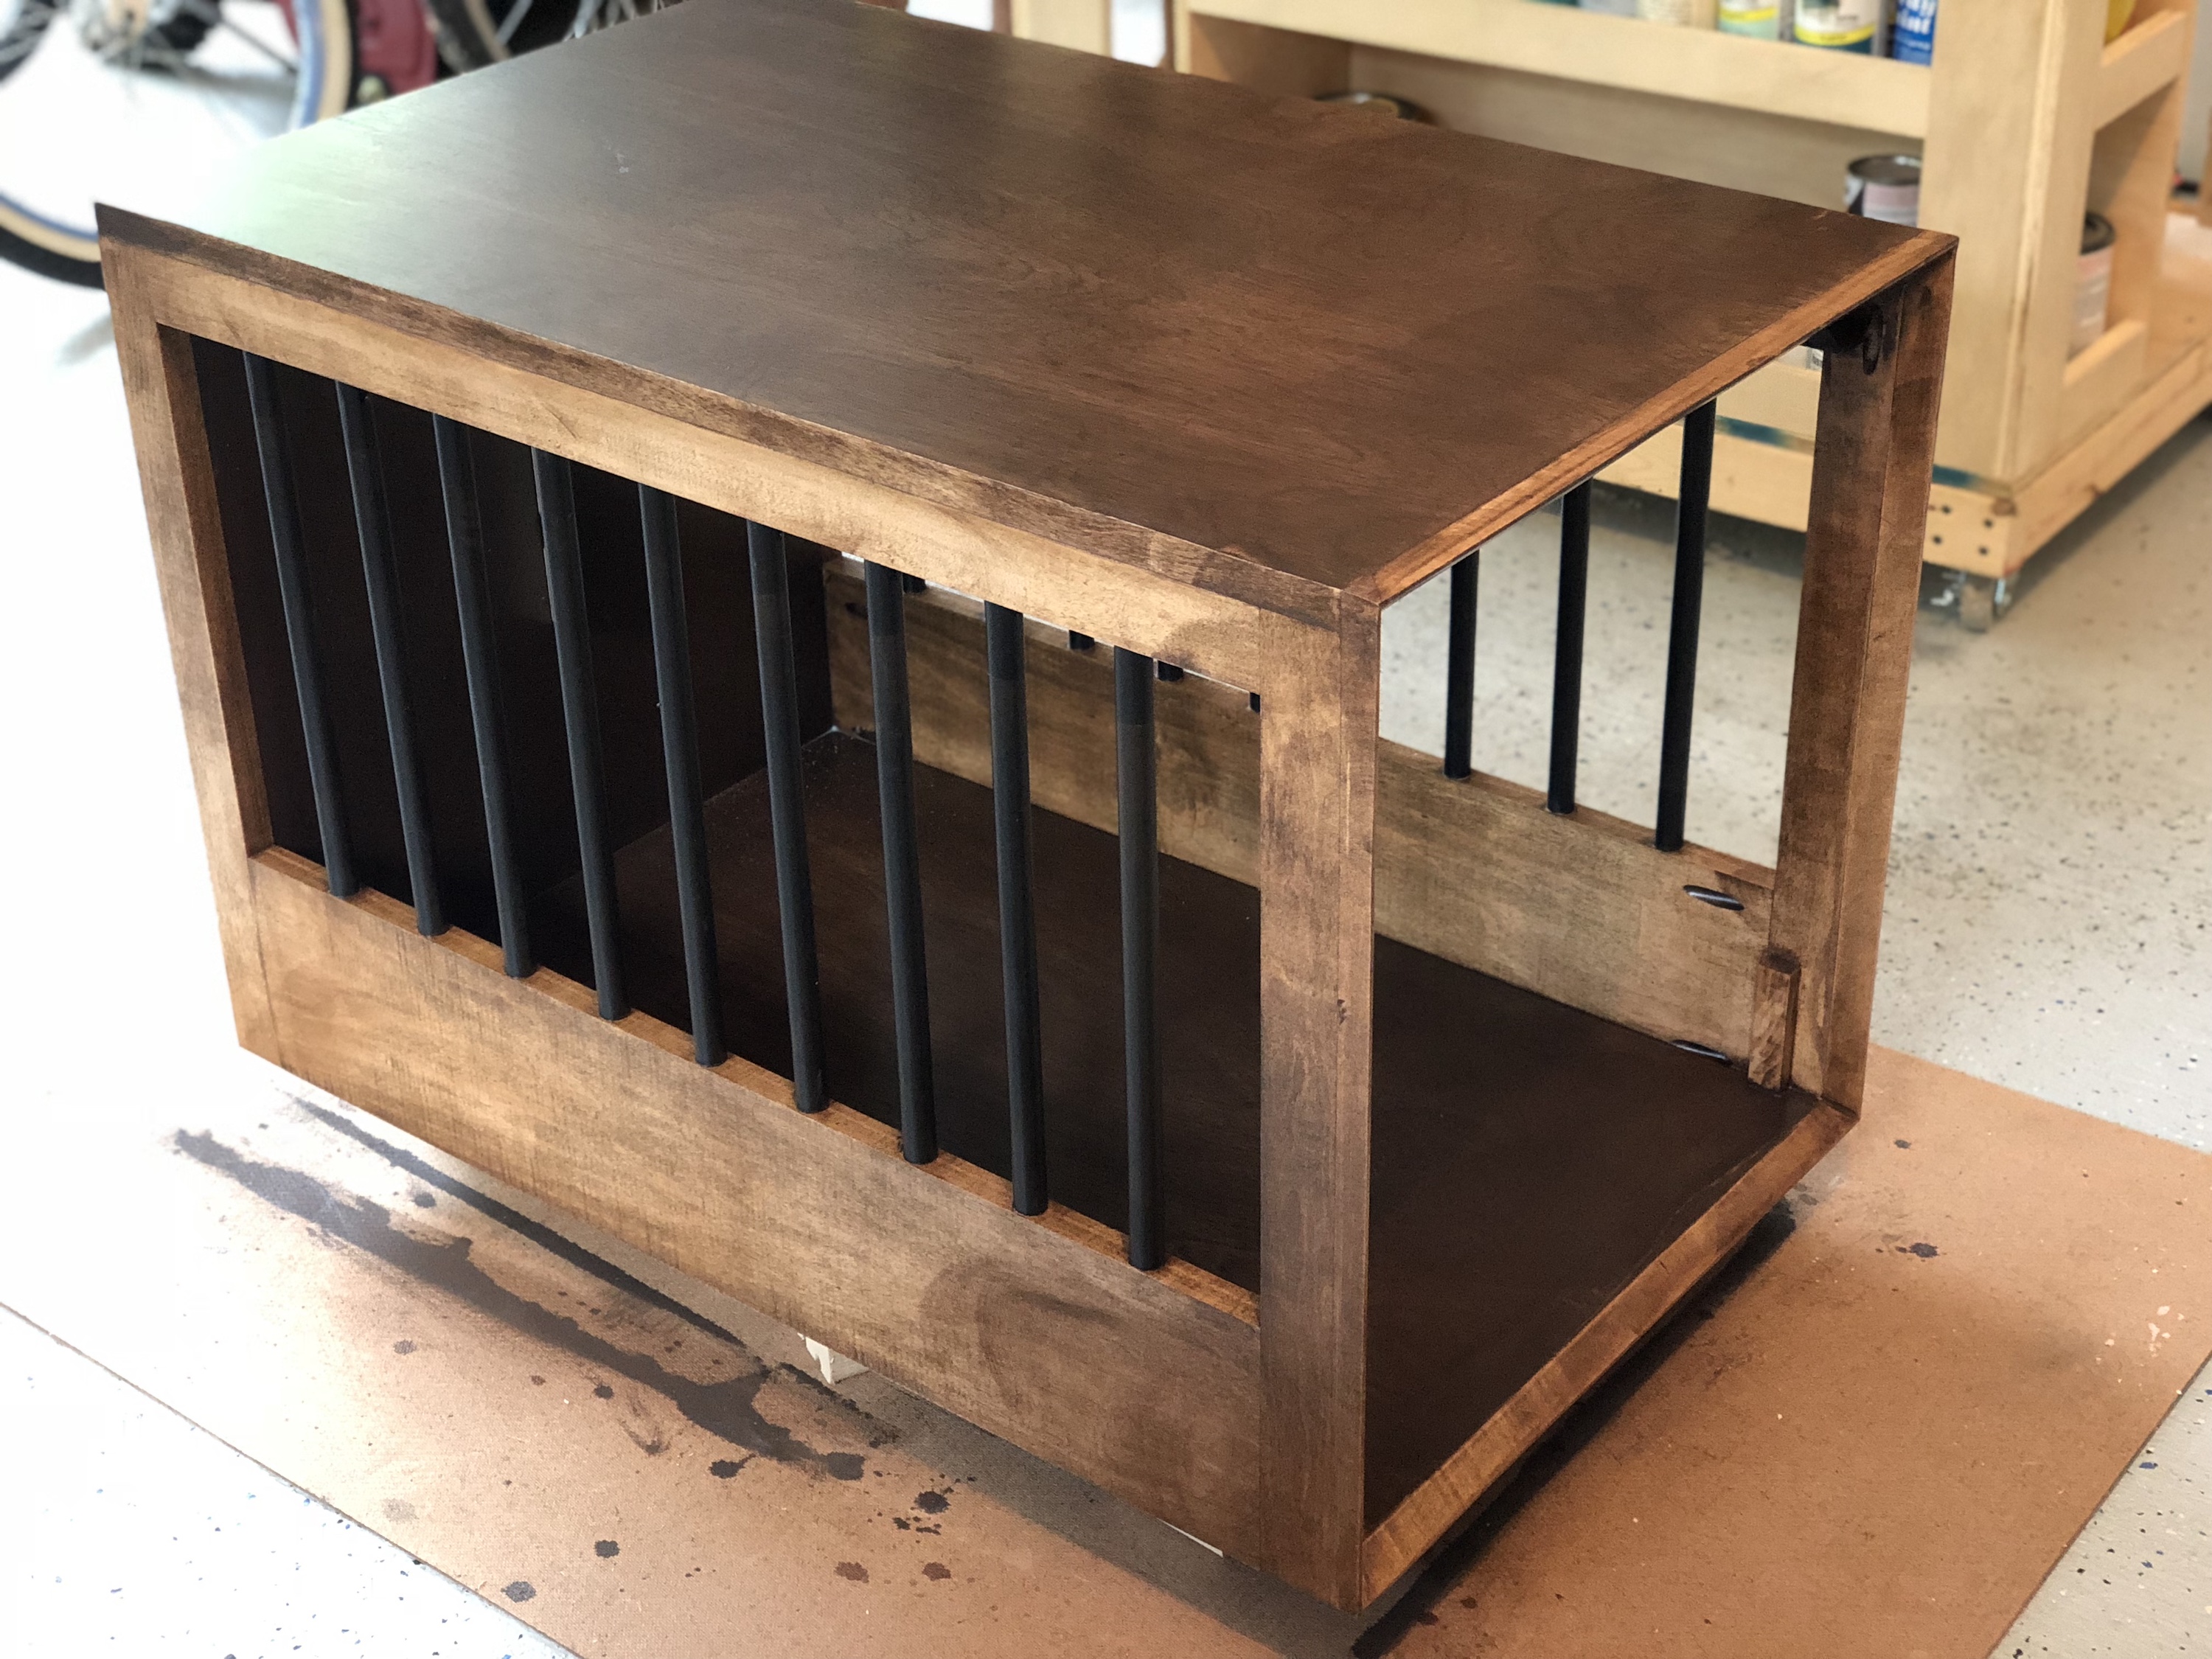
After the sides were assembled, I attached them to the plywood bottom and sides.

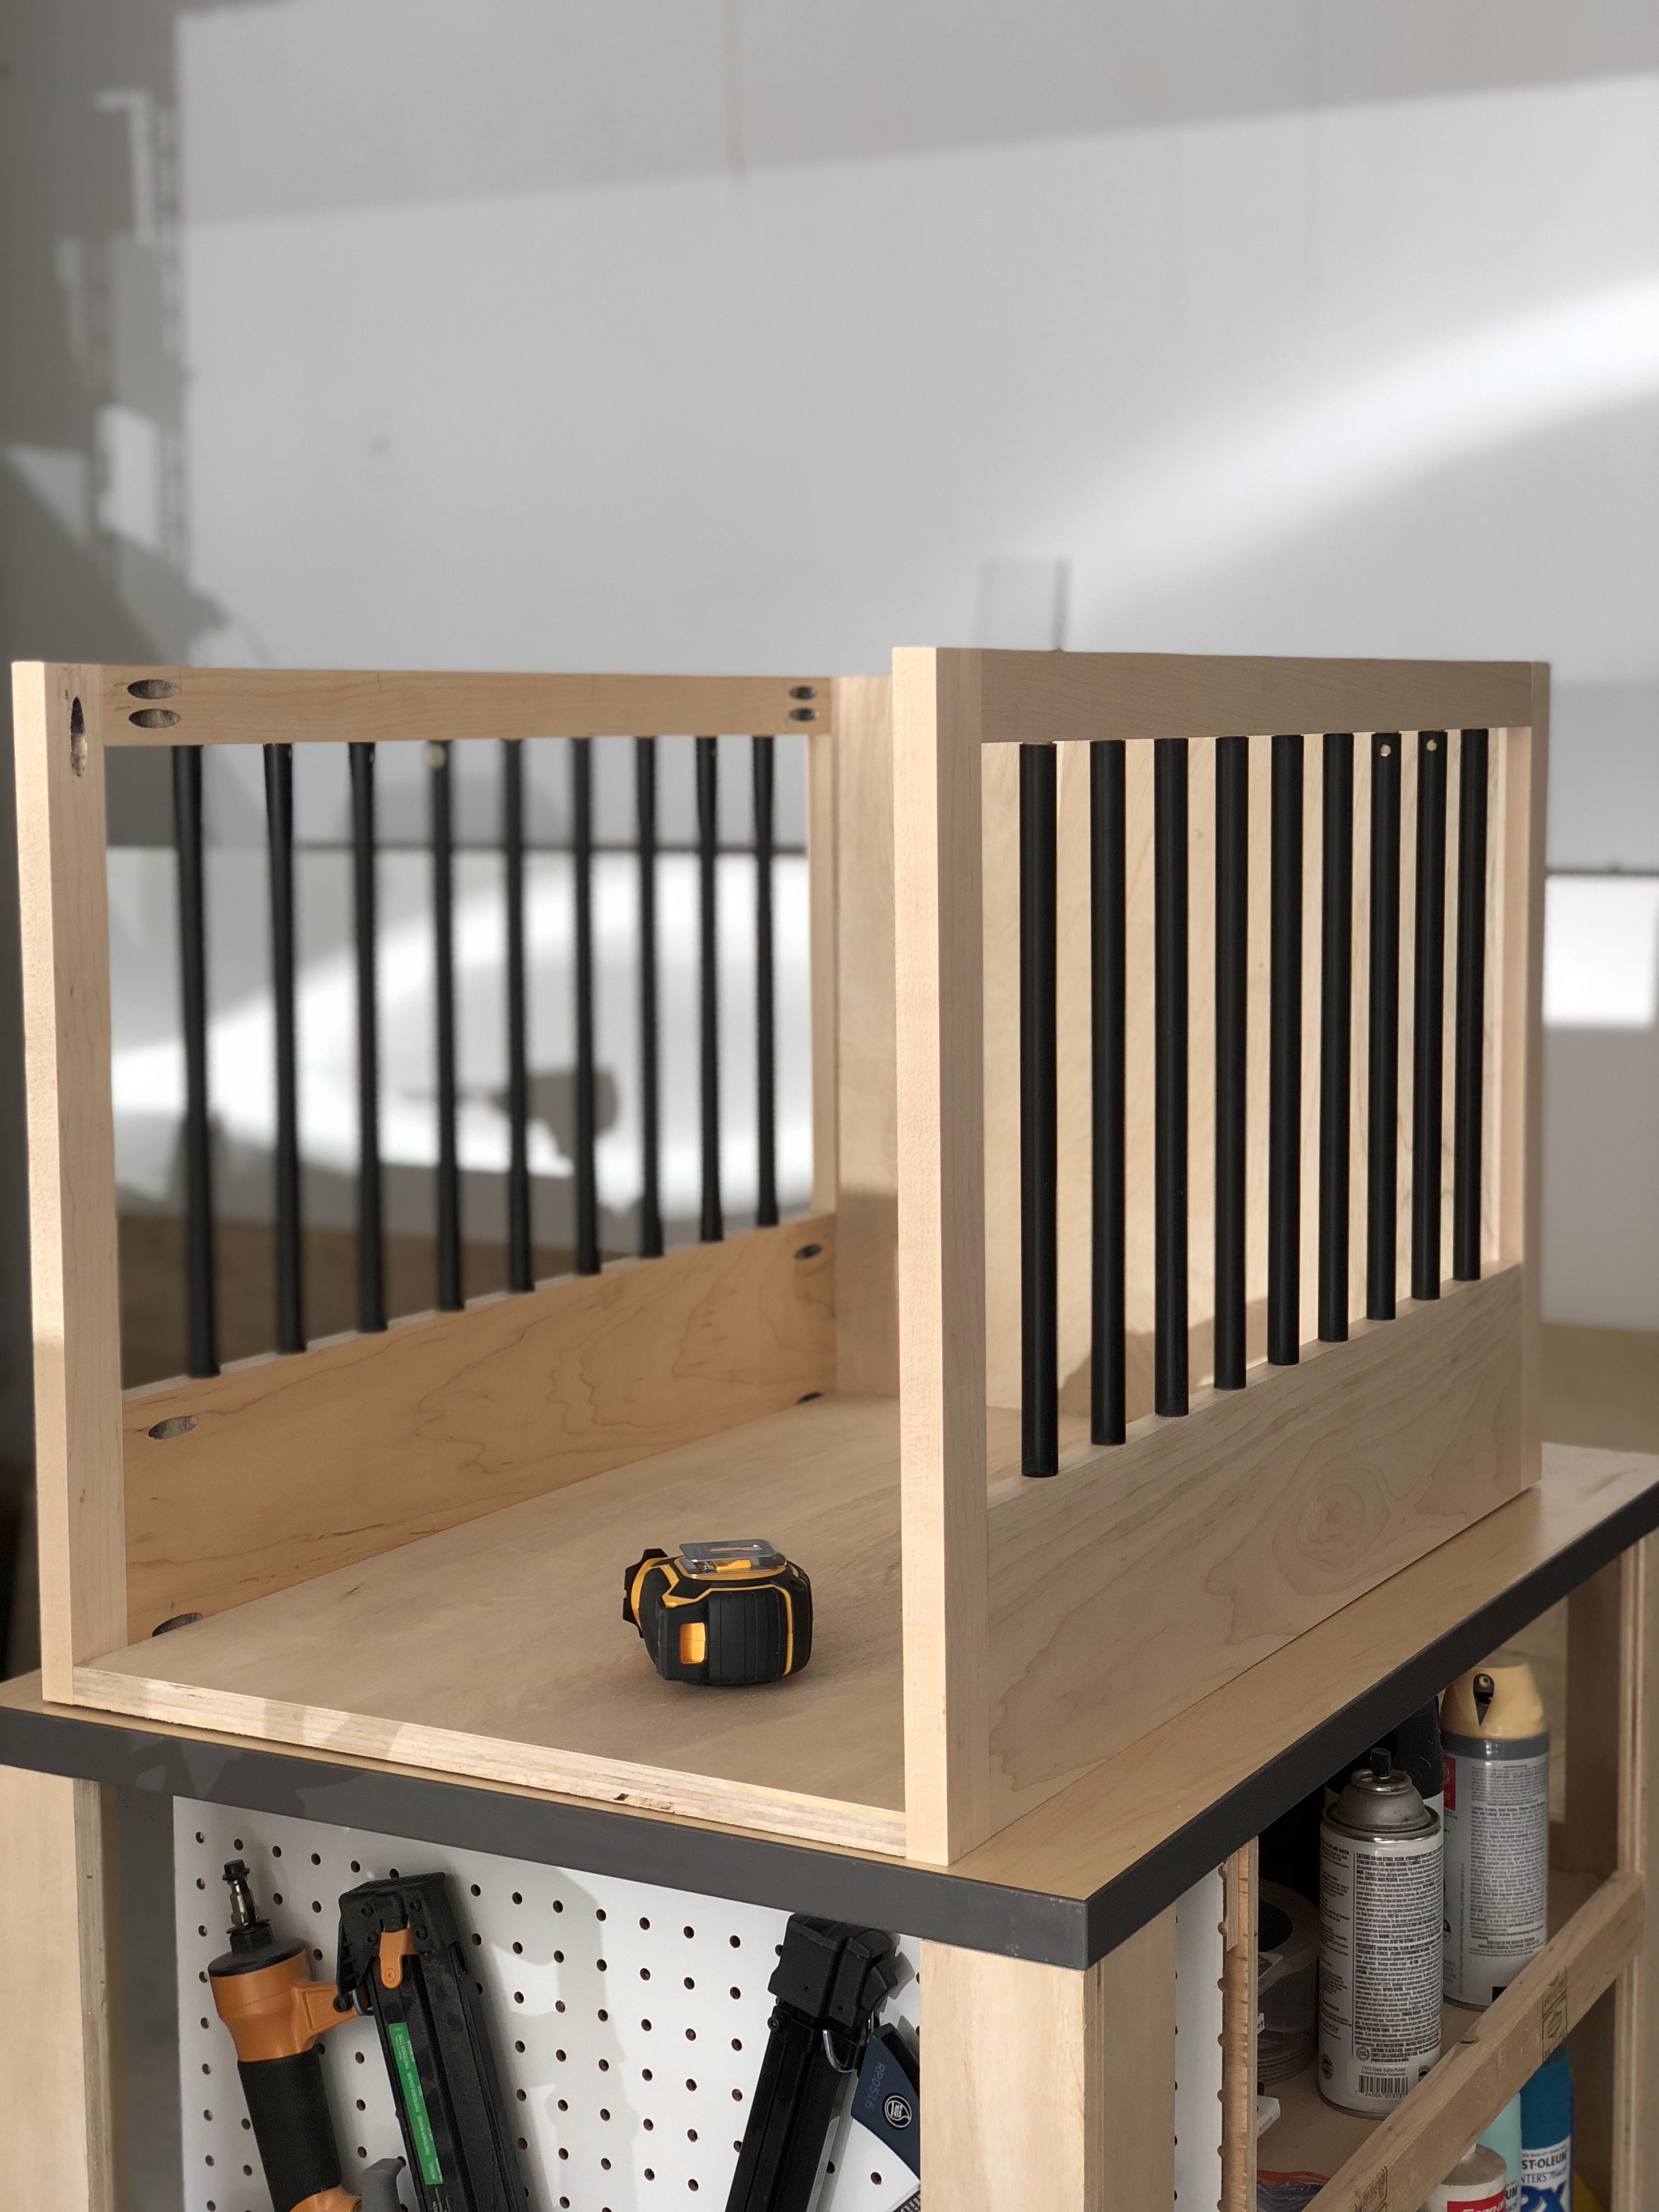
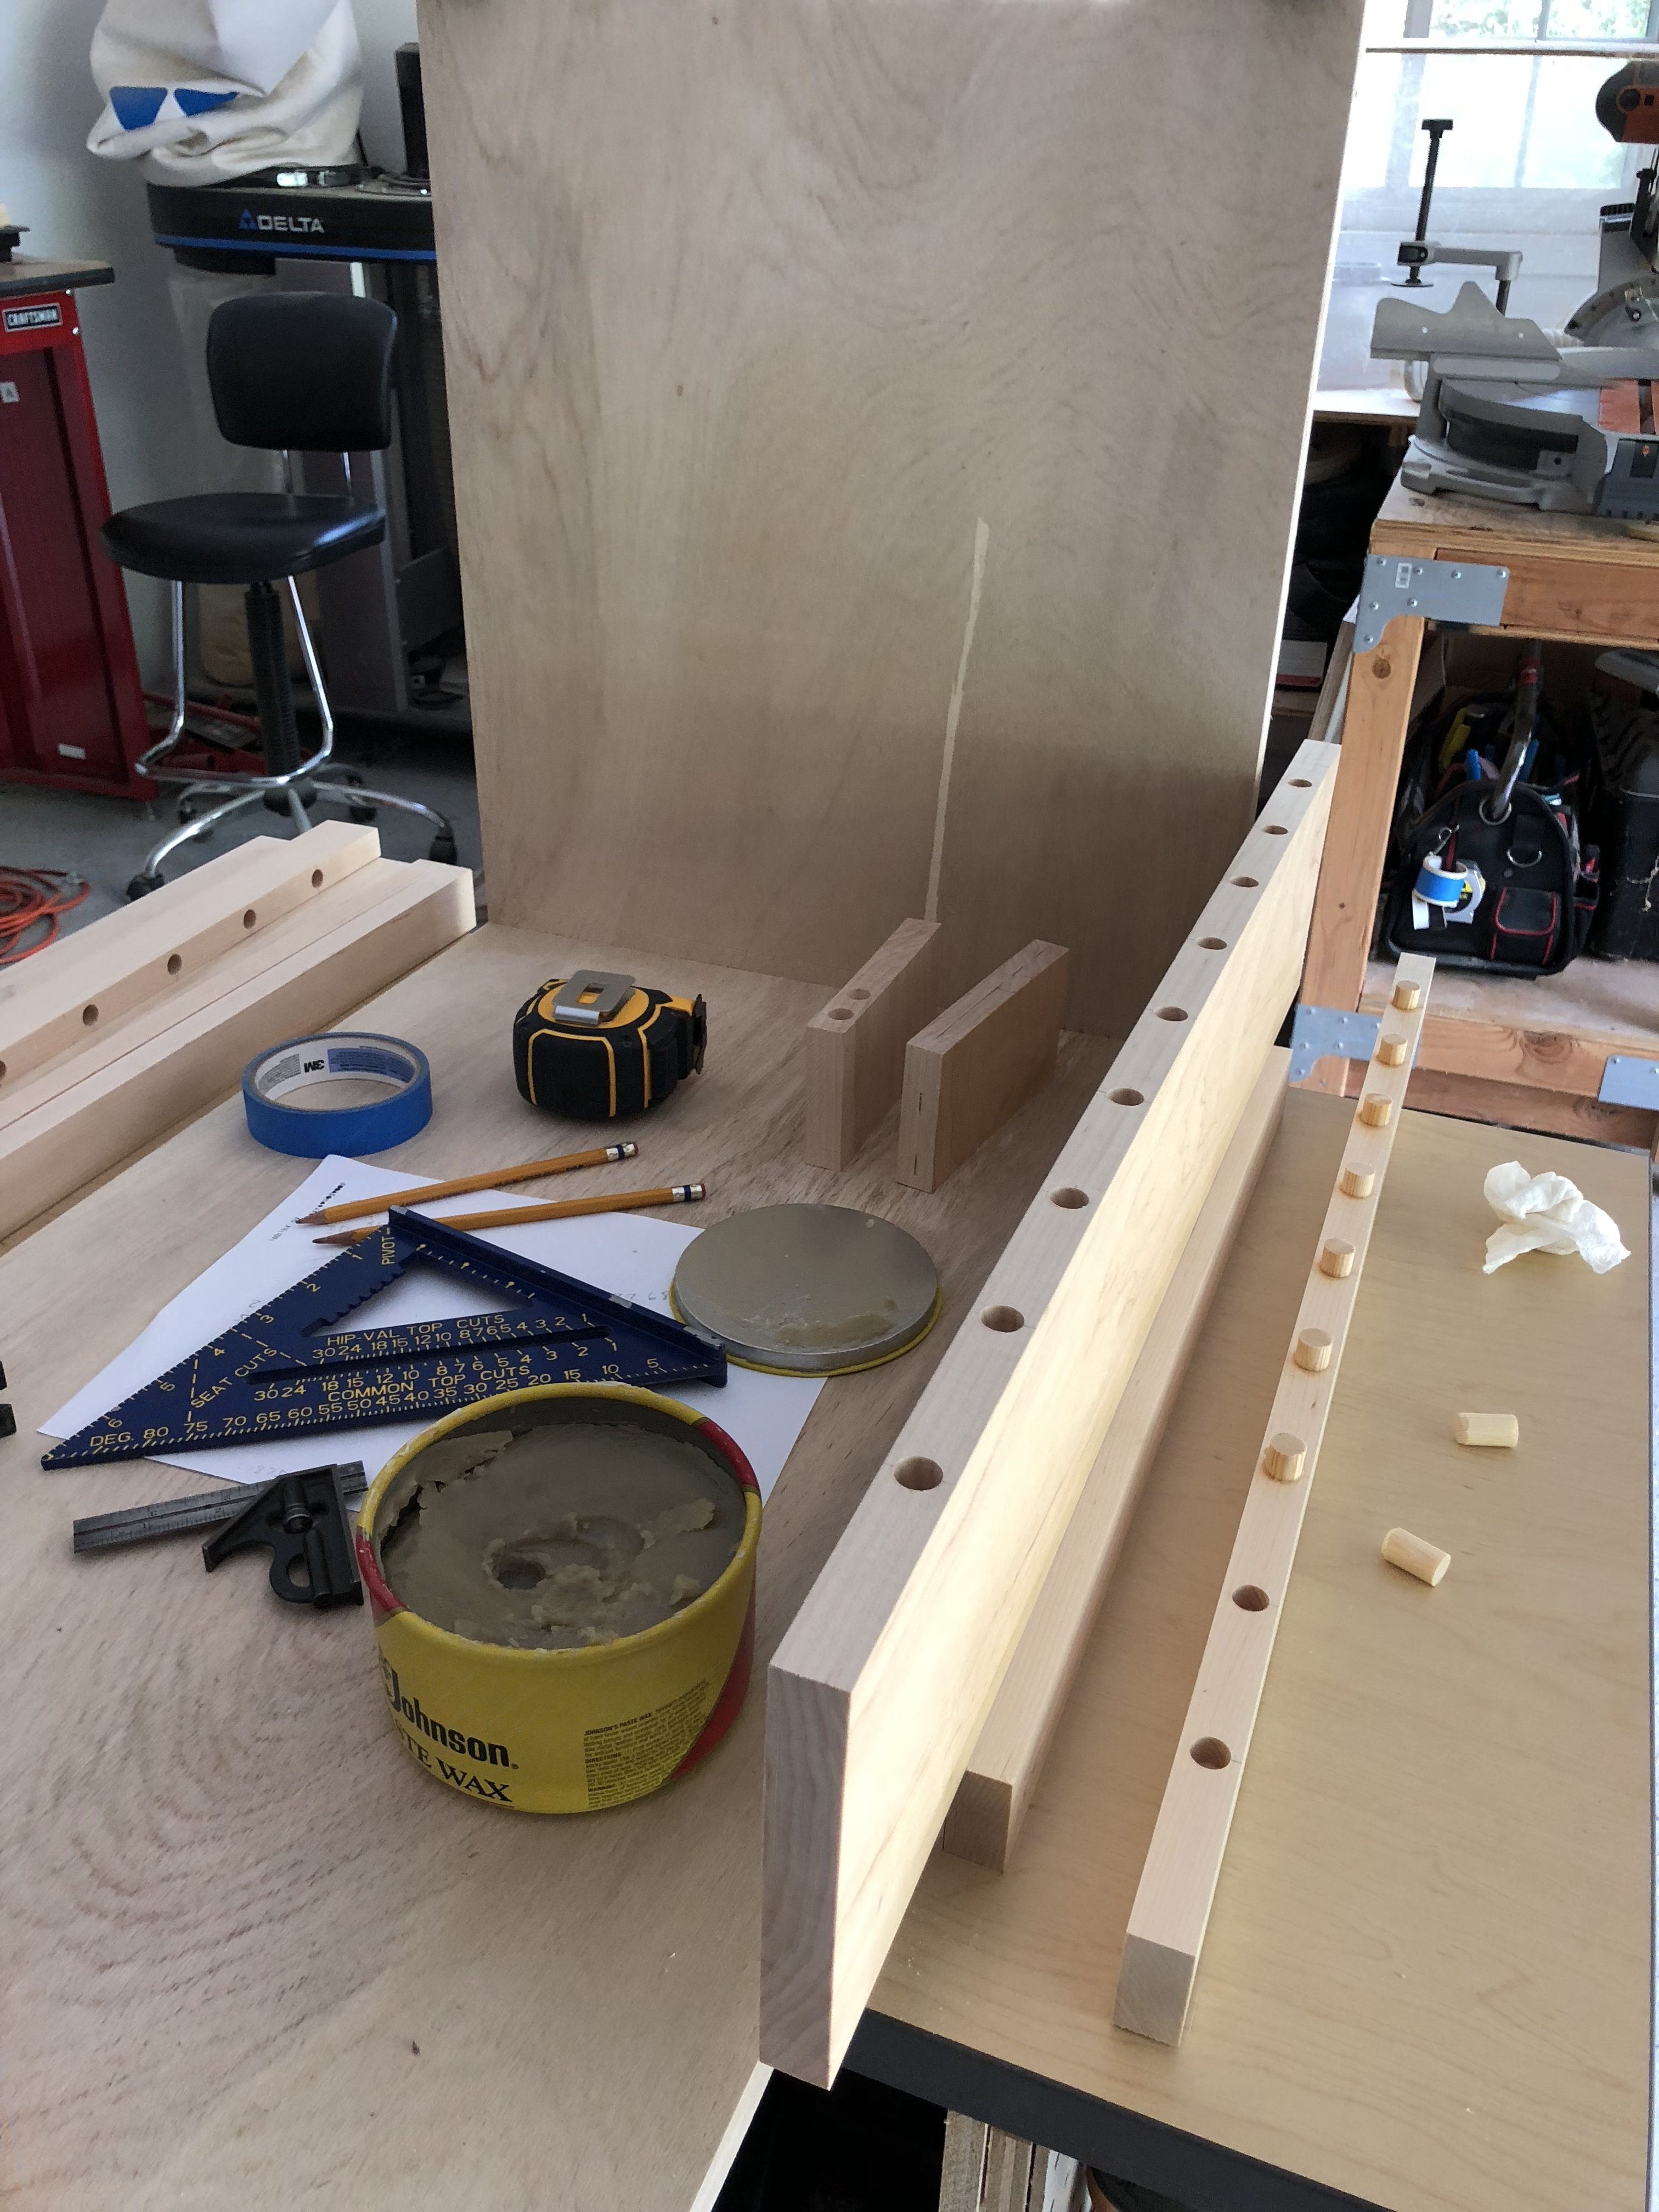
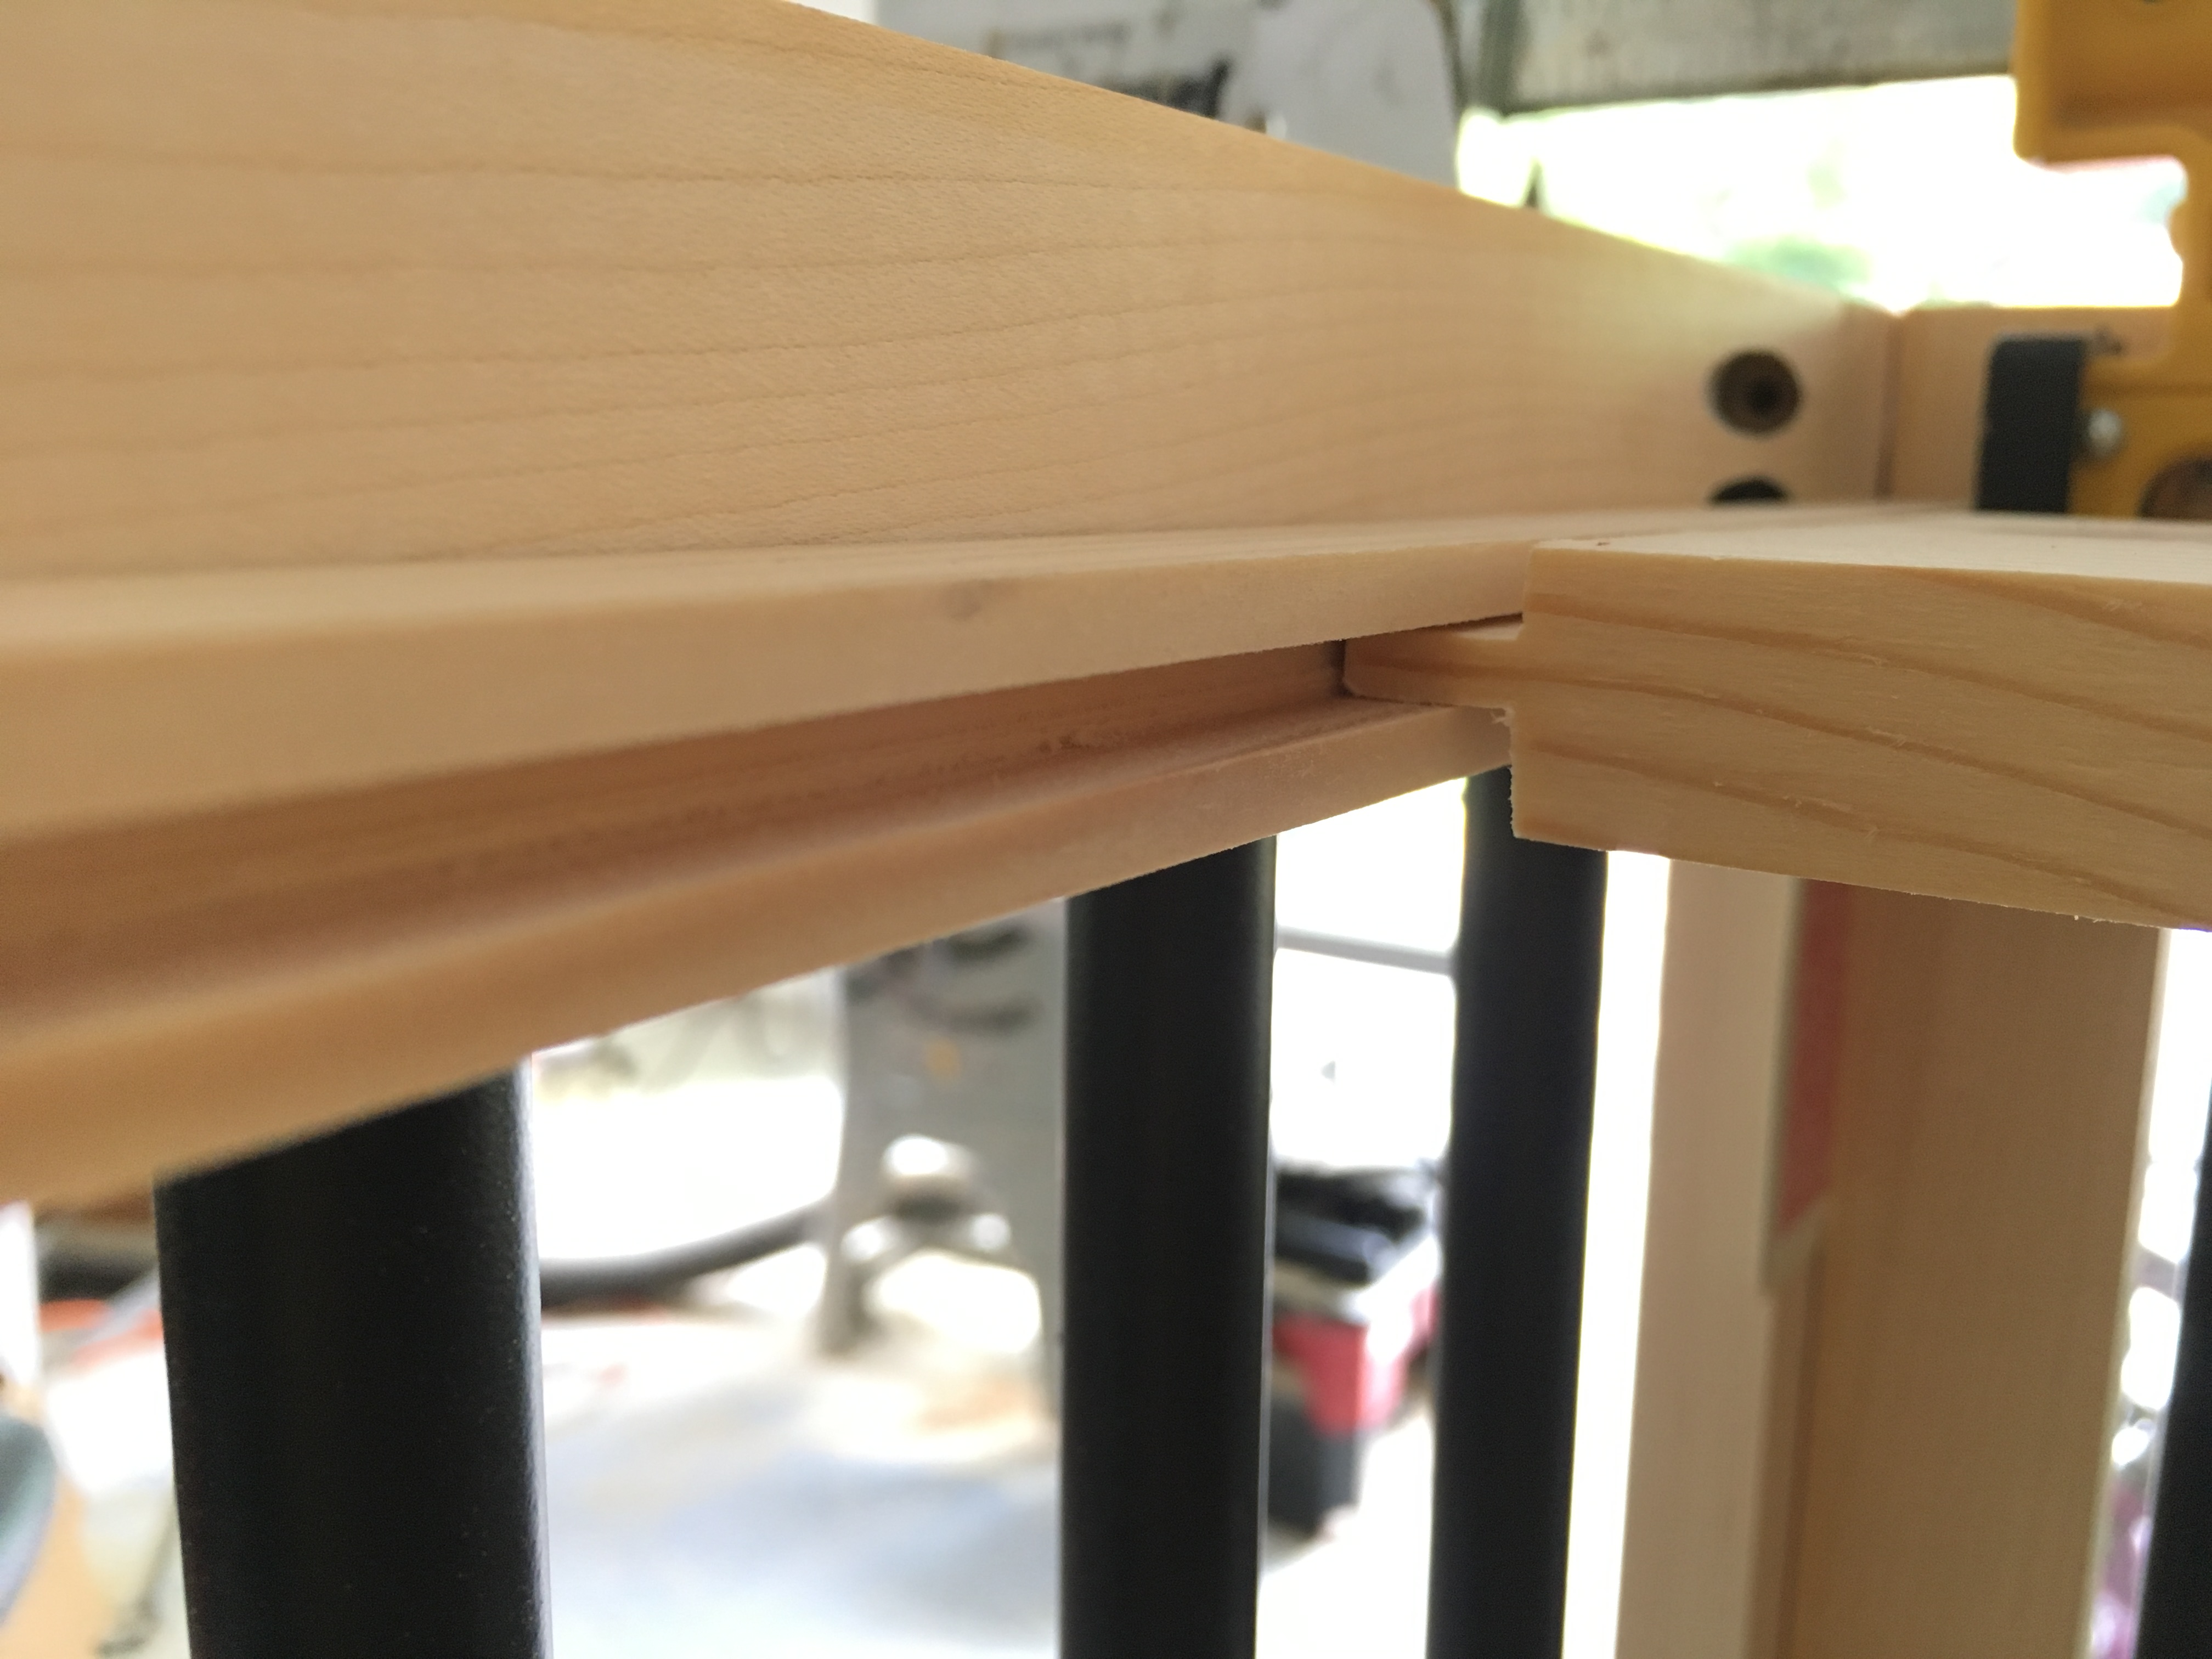
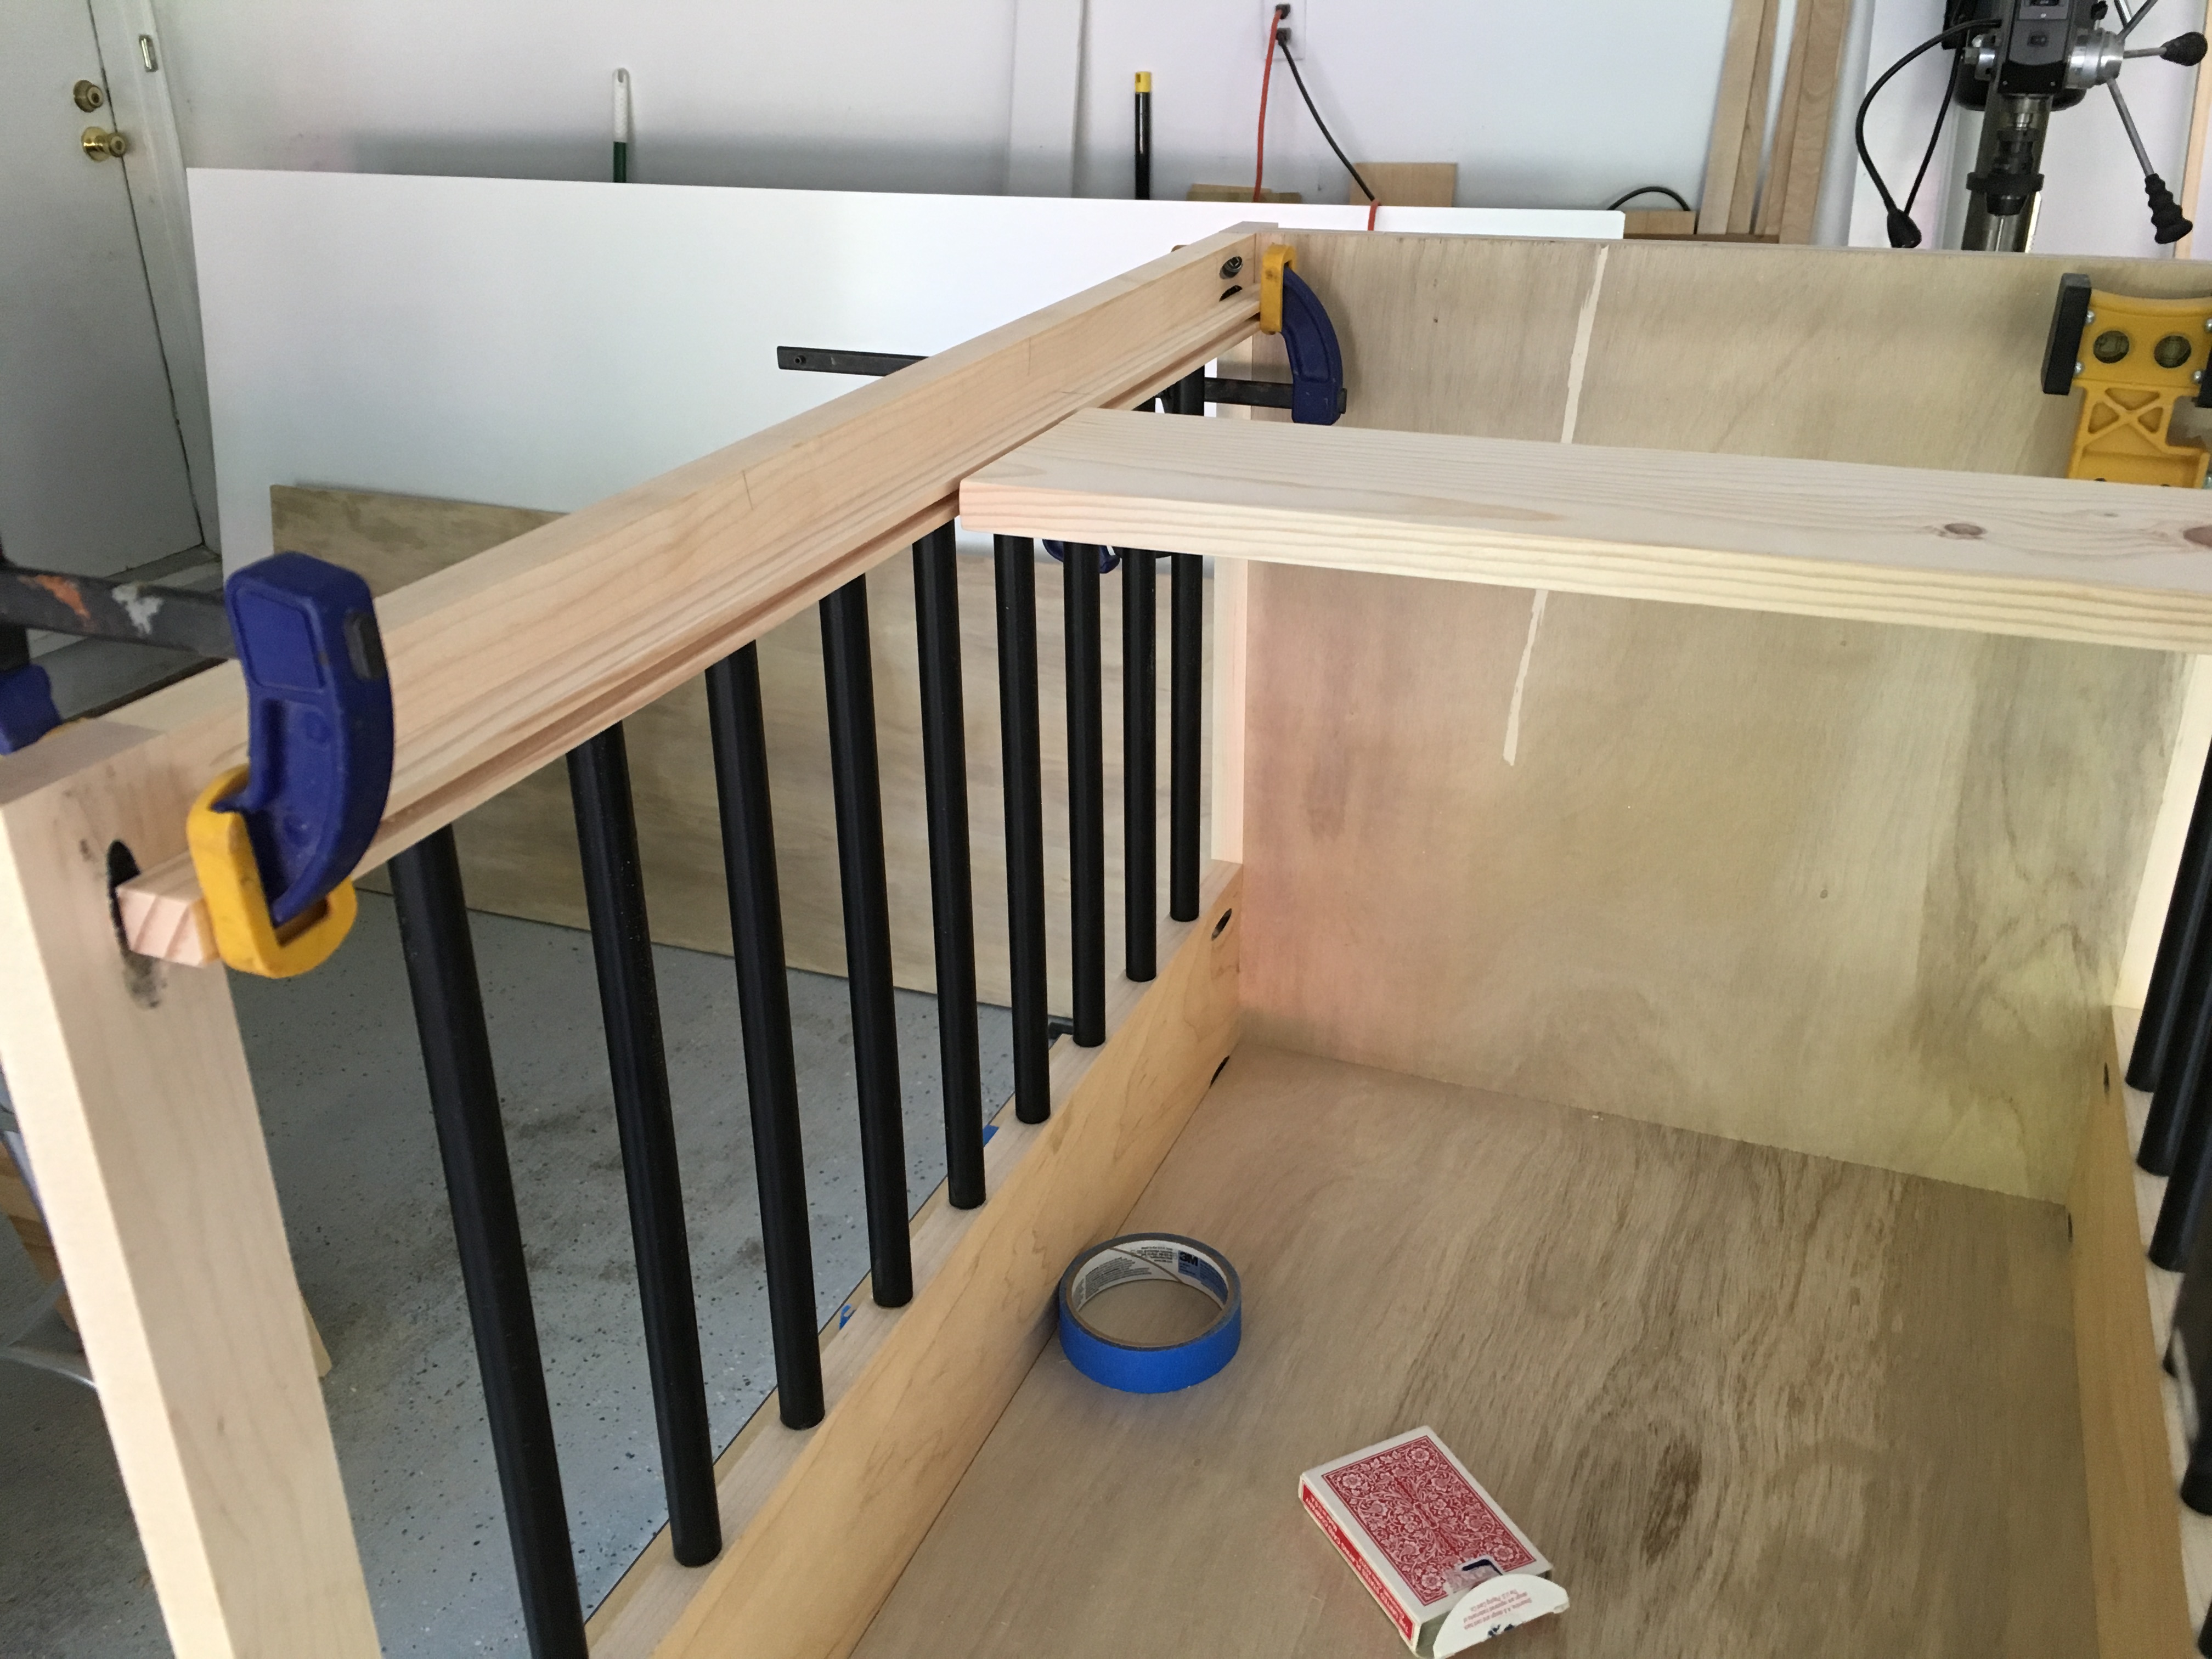
One feature on this dog crate is that I wanted a sliding pocket door. This enables us to leave the crate open for Hopper without having a crate door swing out into the room. To achieve this I cut a piece of scrap with tenons on both ends. Next, I cut a corresponding slot for the two slides. The crate door swings upward on the piano hinge and then slides back into the crate, resting on the side pieces.
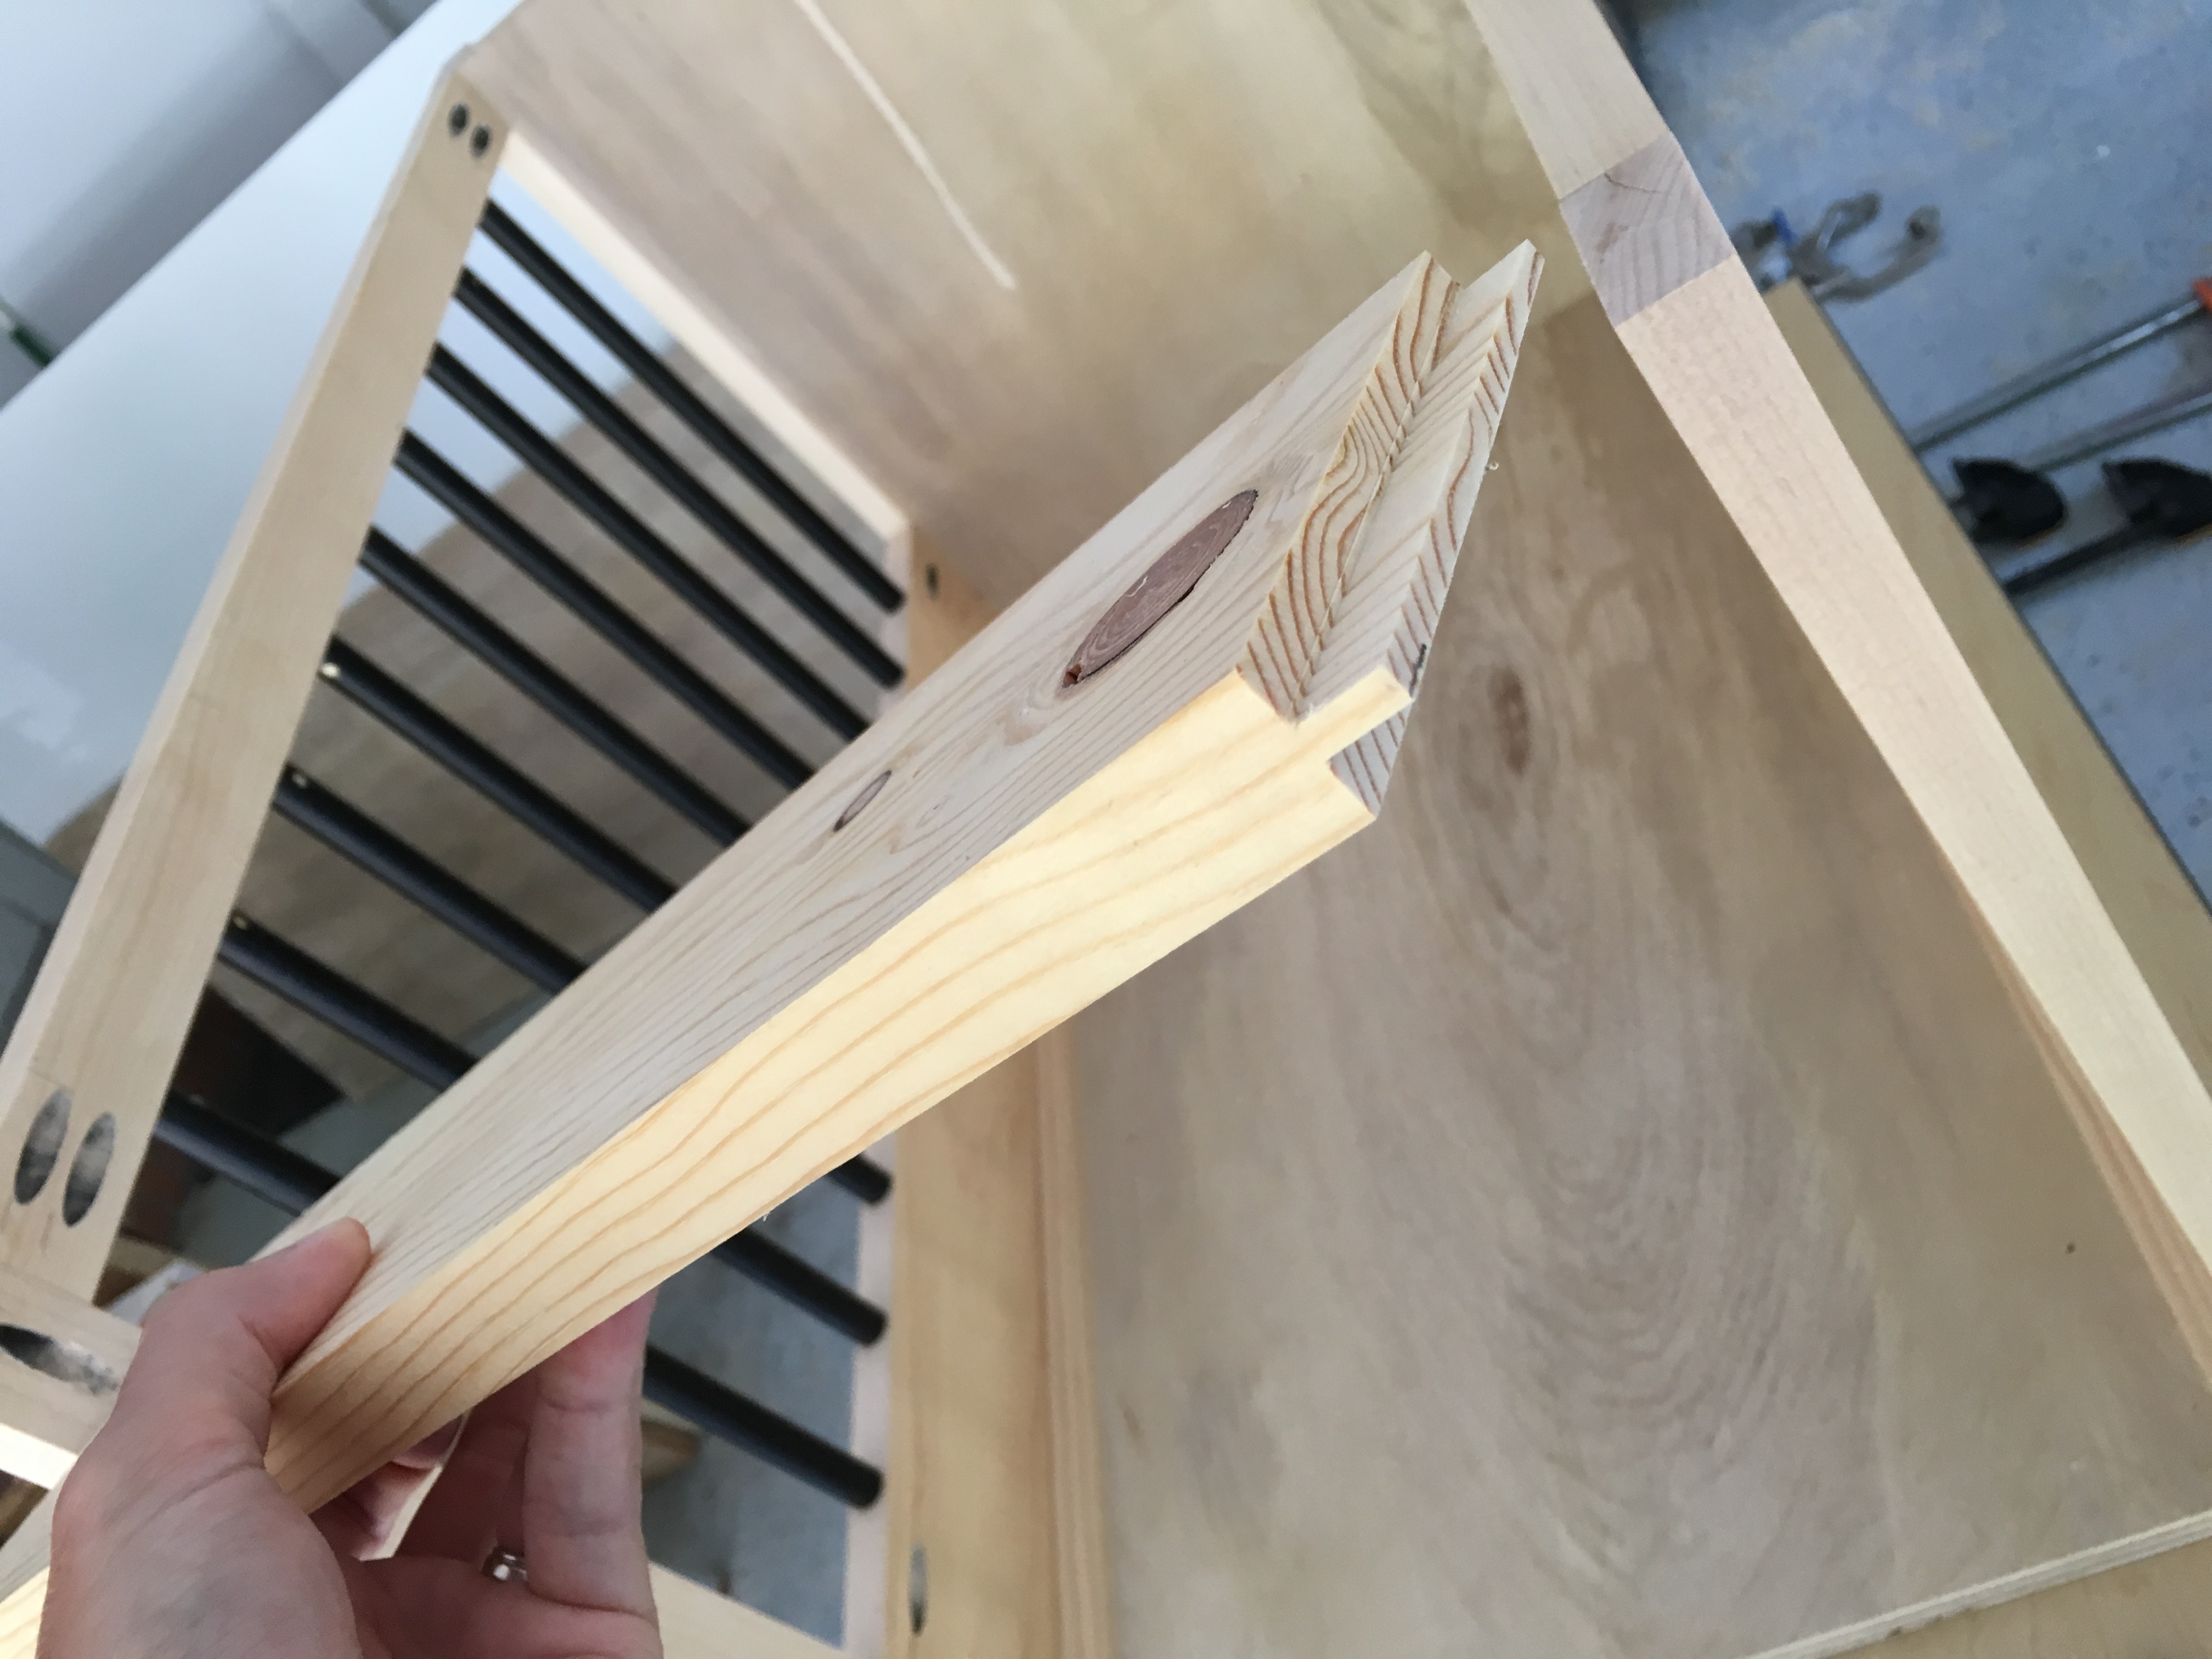
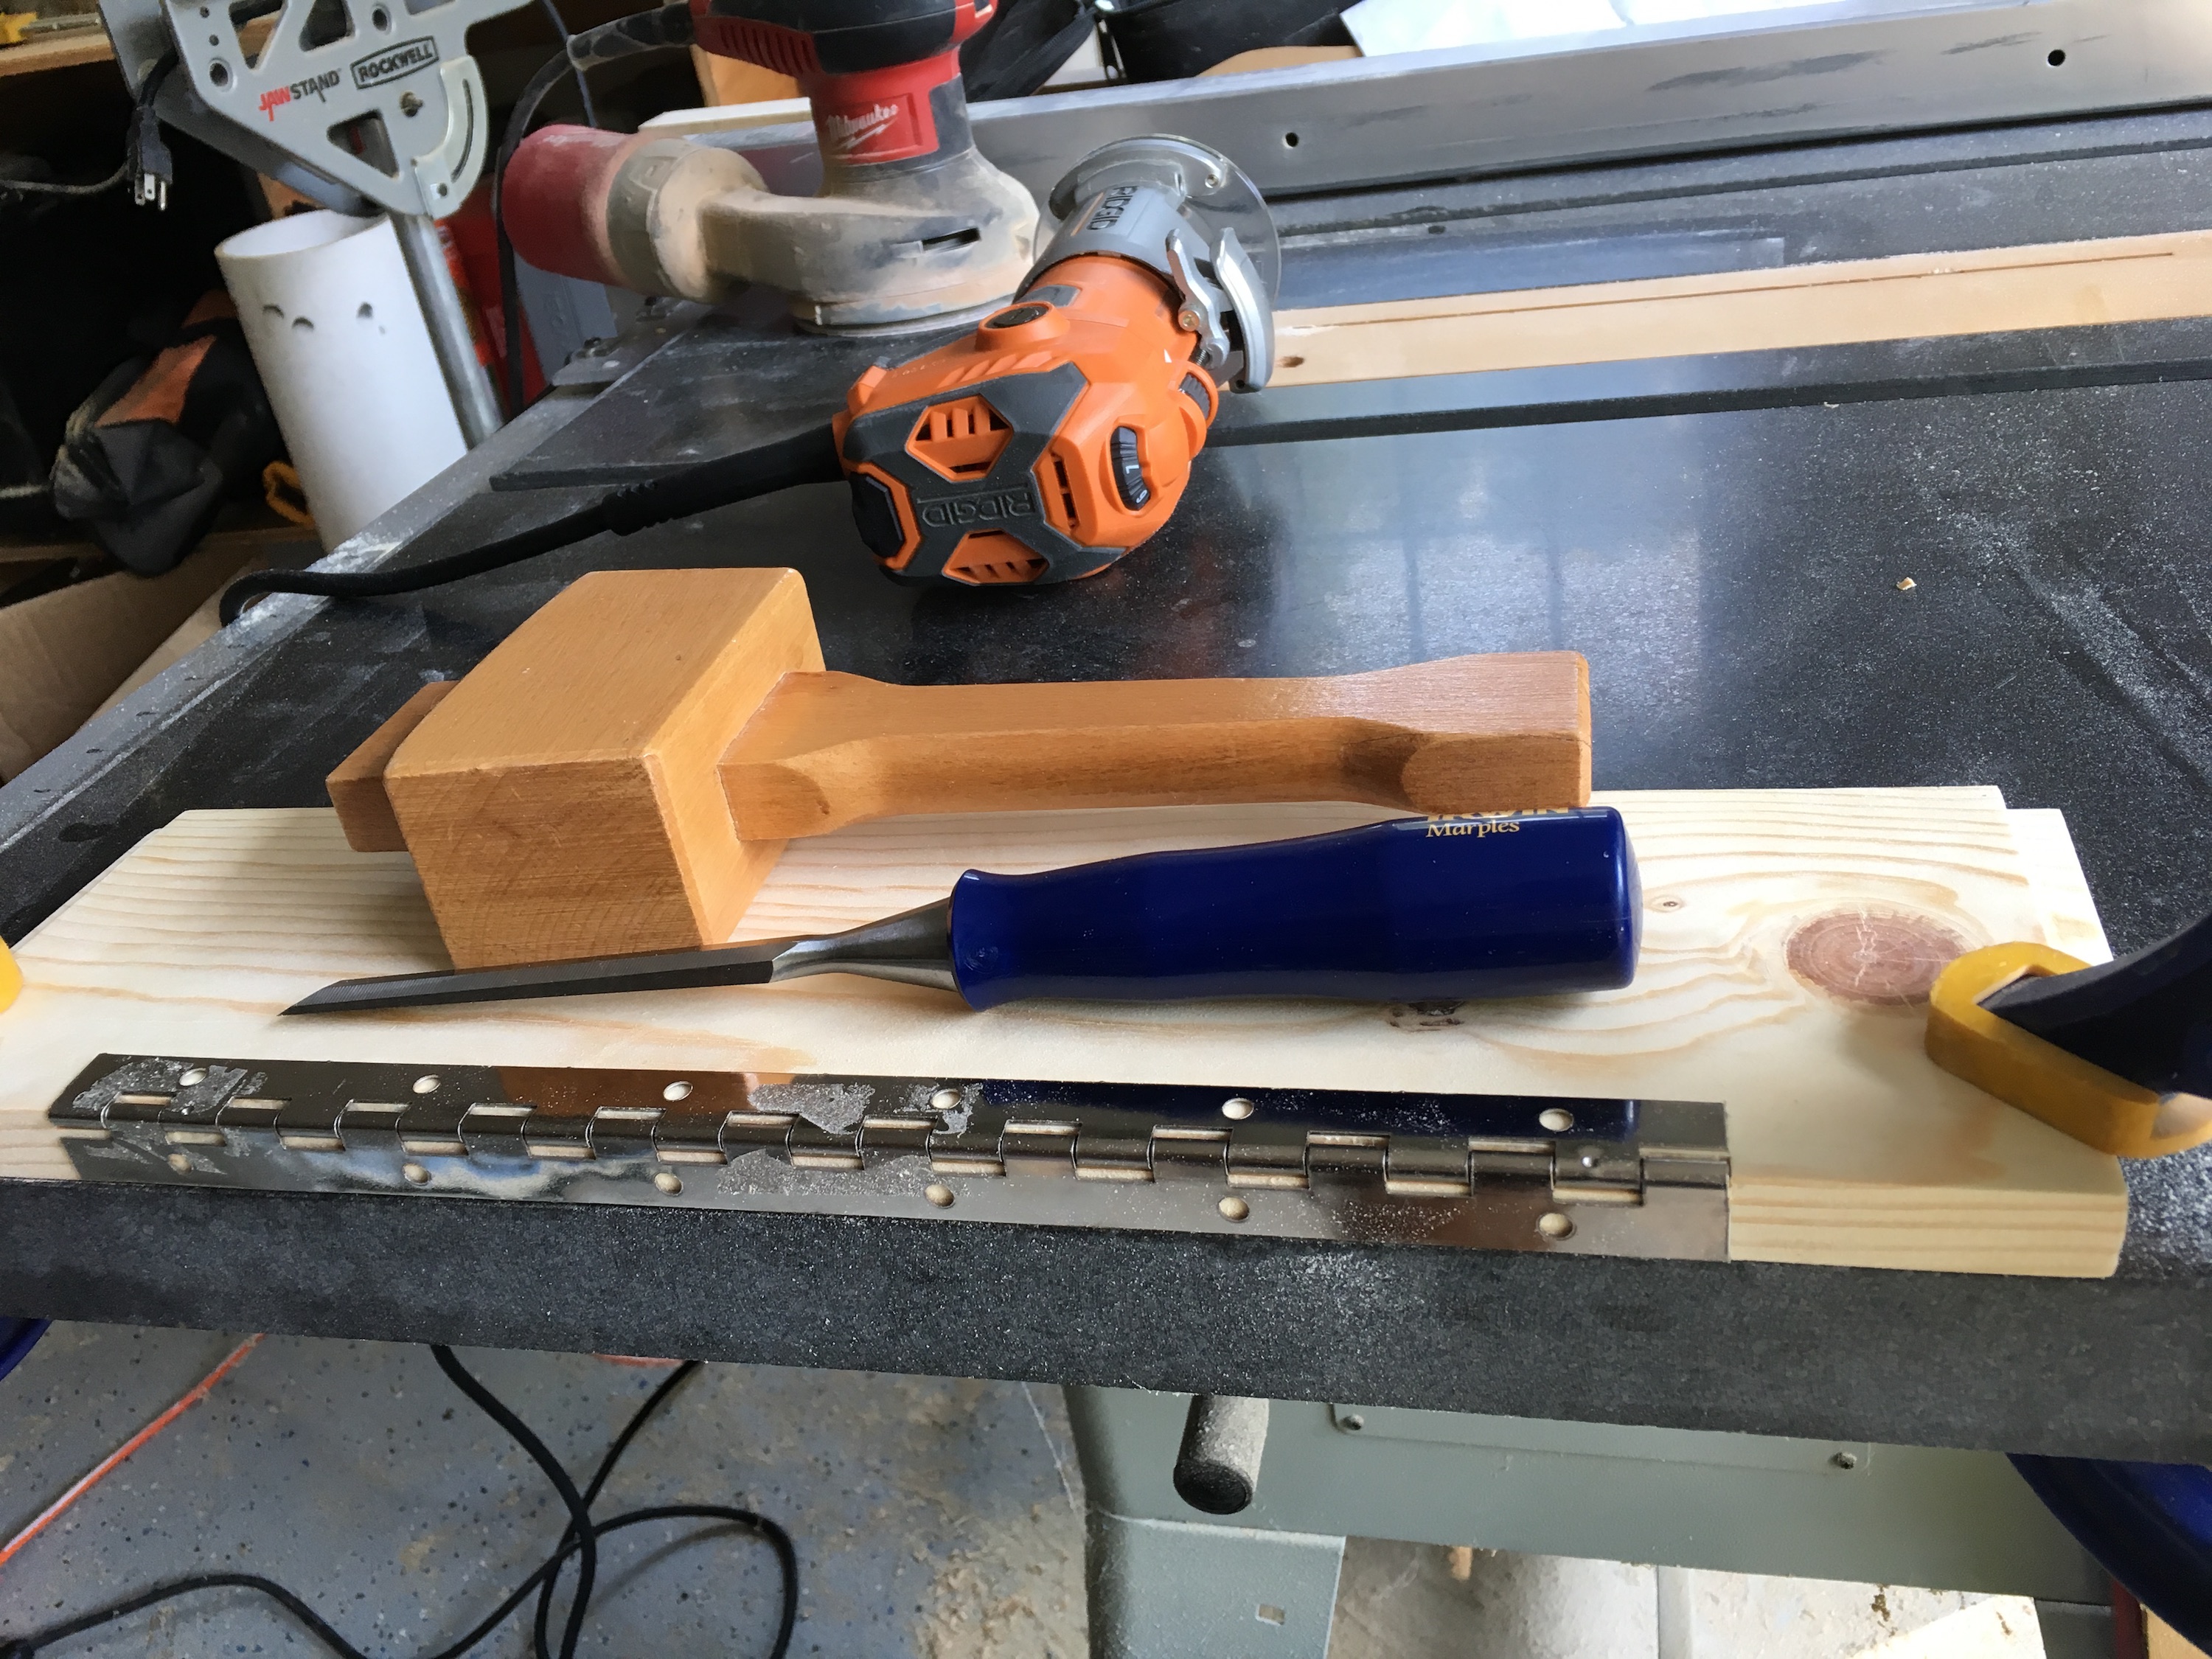
I used a router and chisel to cut a space into the slide for the hinge.
Once I was satisfied with the slides, I built the crate door much just like the sides. I used playing cards to create just the slightest space for the door to move.
I also cut a rounded slot for a handhold.

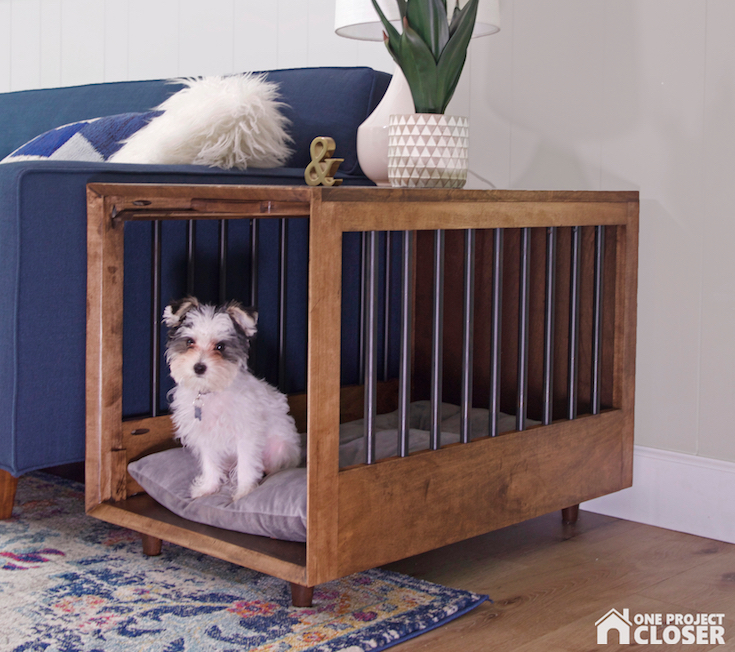
Next, I cut the plywood top to size. There was a bit of back-and-forth because I needed to account for the thickness of the edge banding on three sides, and I needed to cut some clearance for the top of the door to pivot. At this point I also attached the tapered legs. These I simply routed a shallow circle and glued into place.
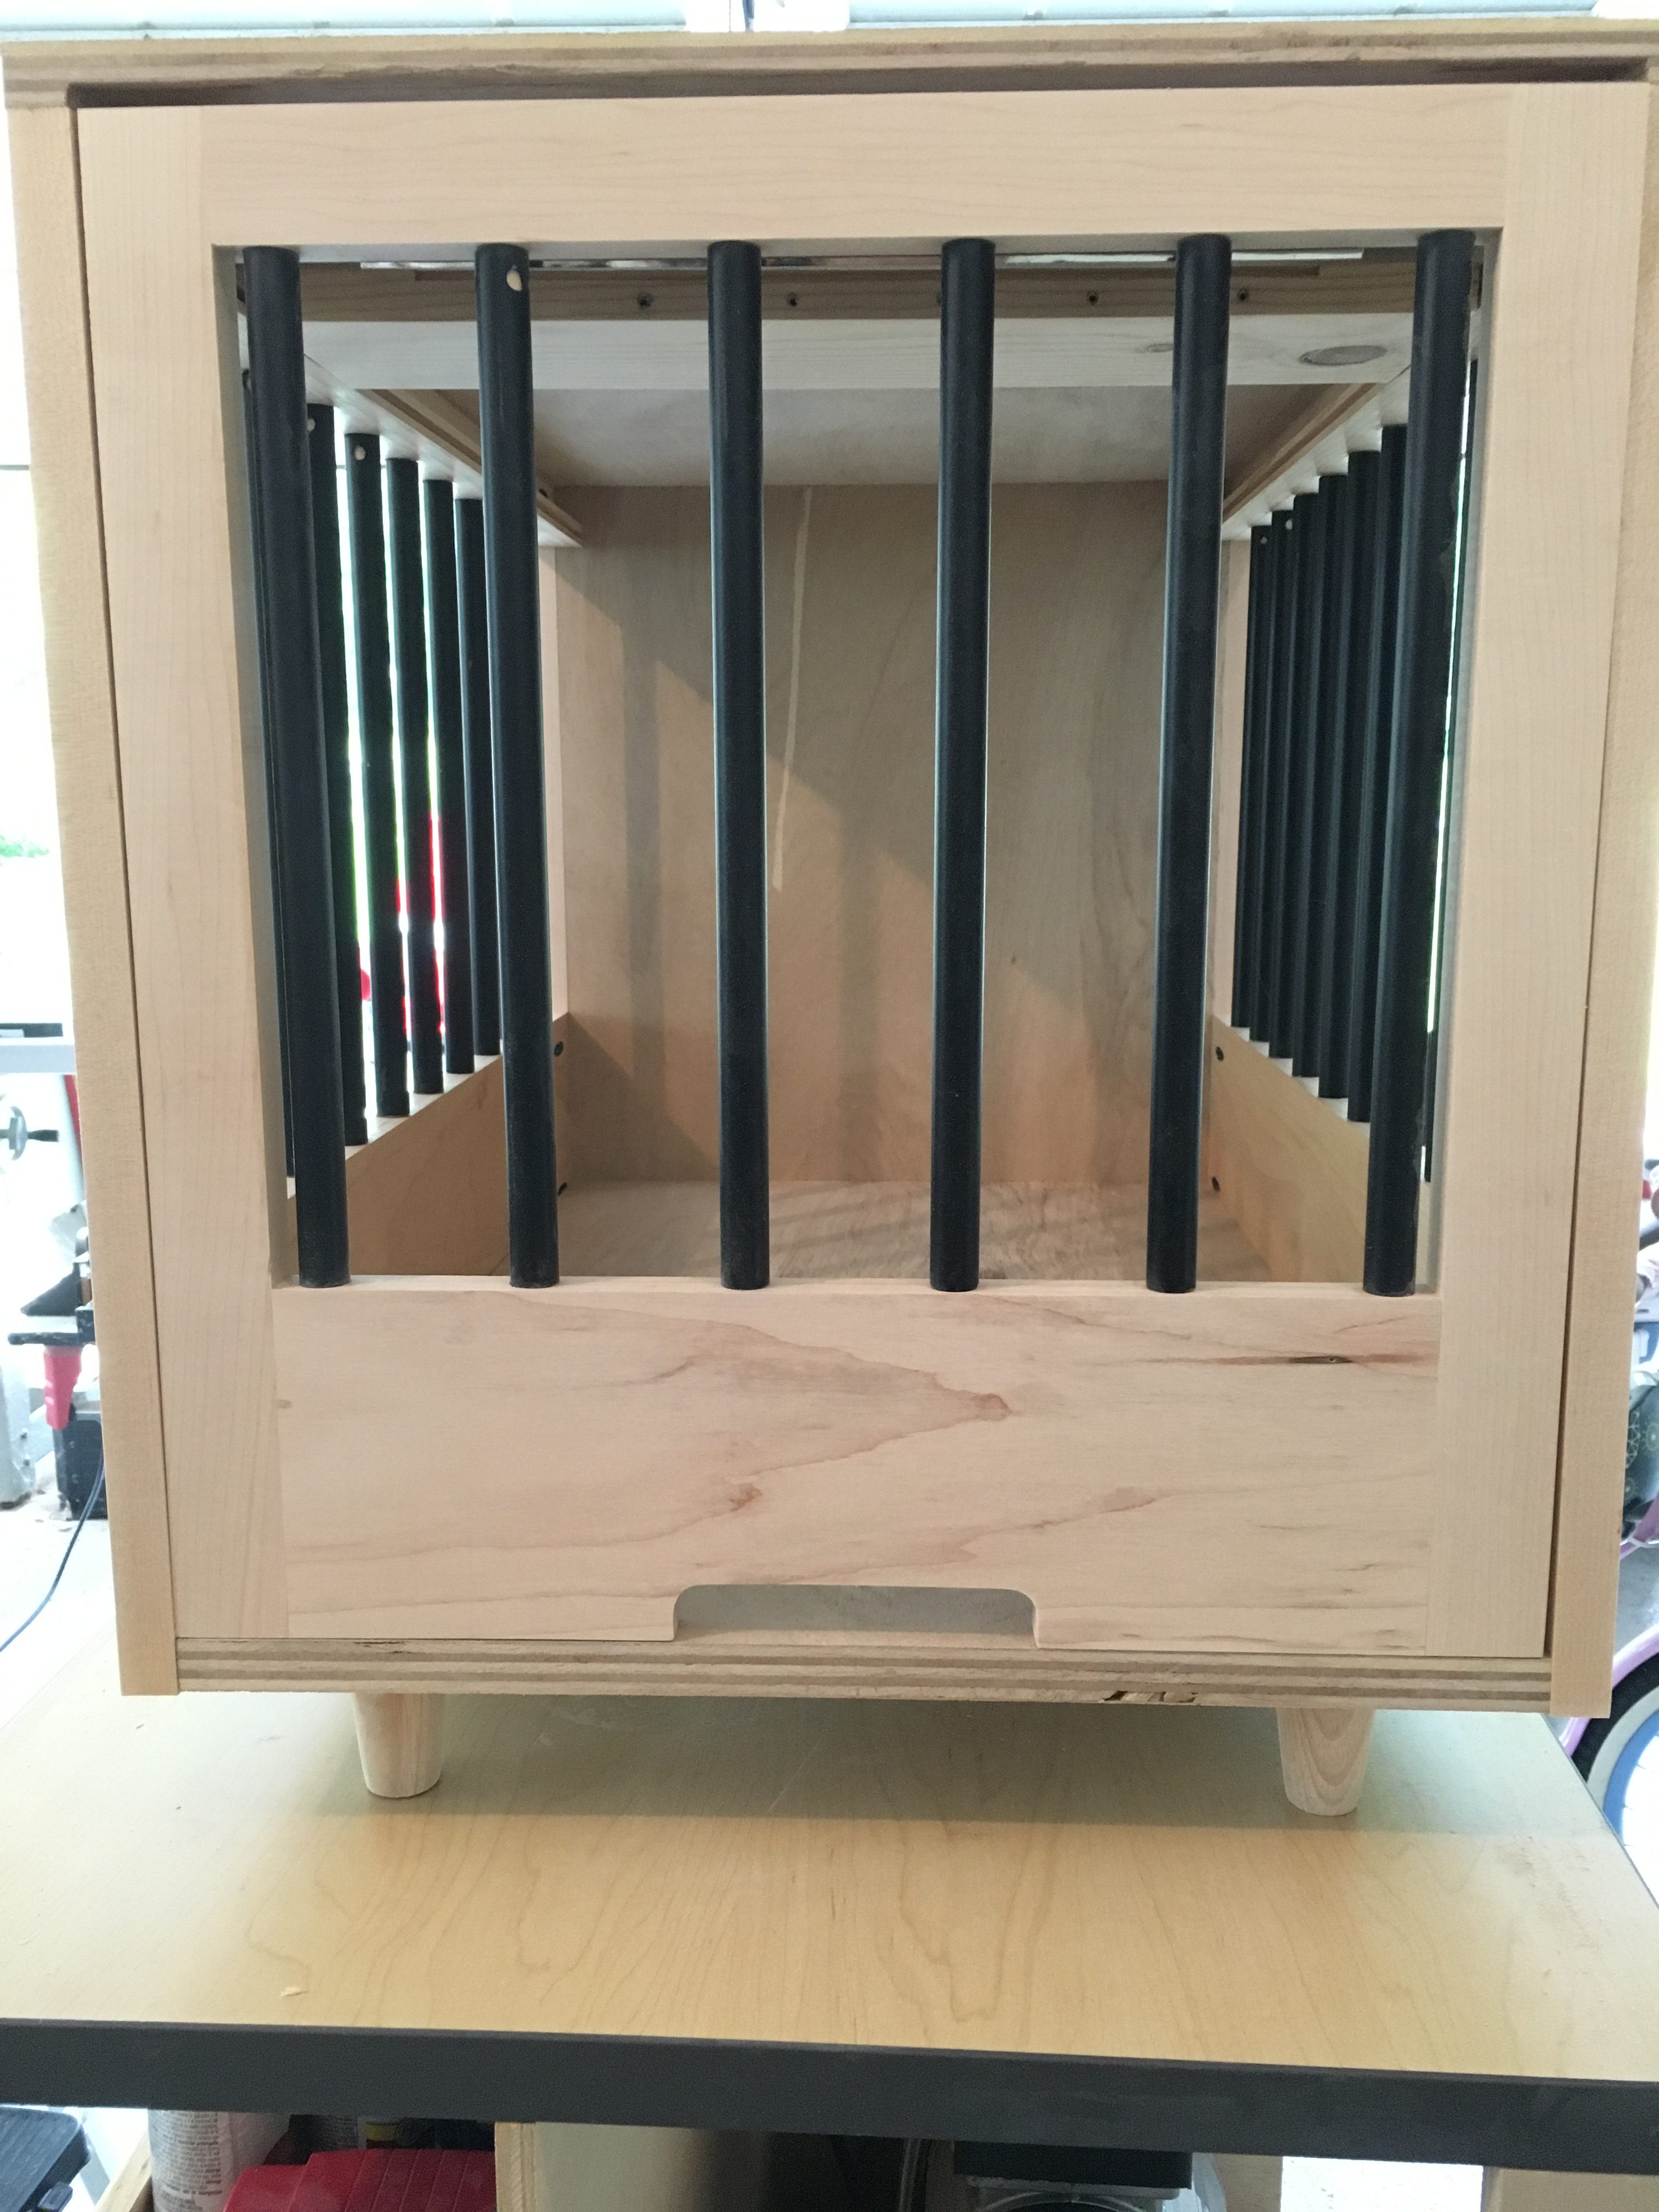
Once I had the top in place and the door able to slide as expected, I ripped some more Maple to create a flair trim piece. This was glued into place around the entire front face. You can see I cut some scrap wood to be able to better clamp everything in place.

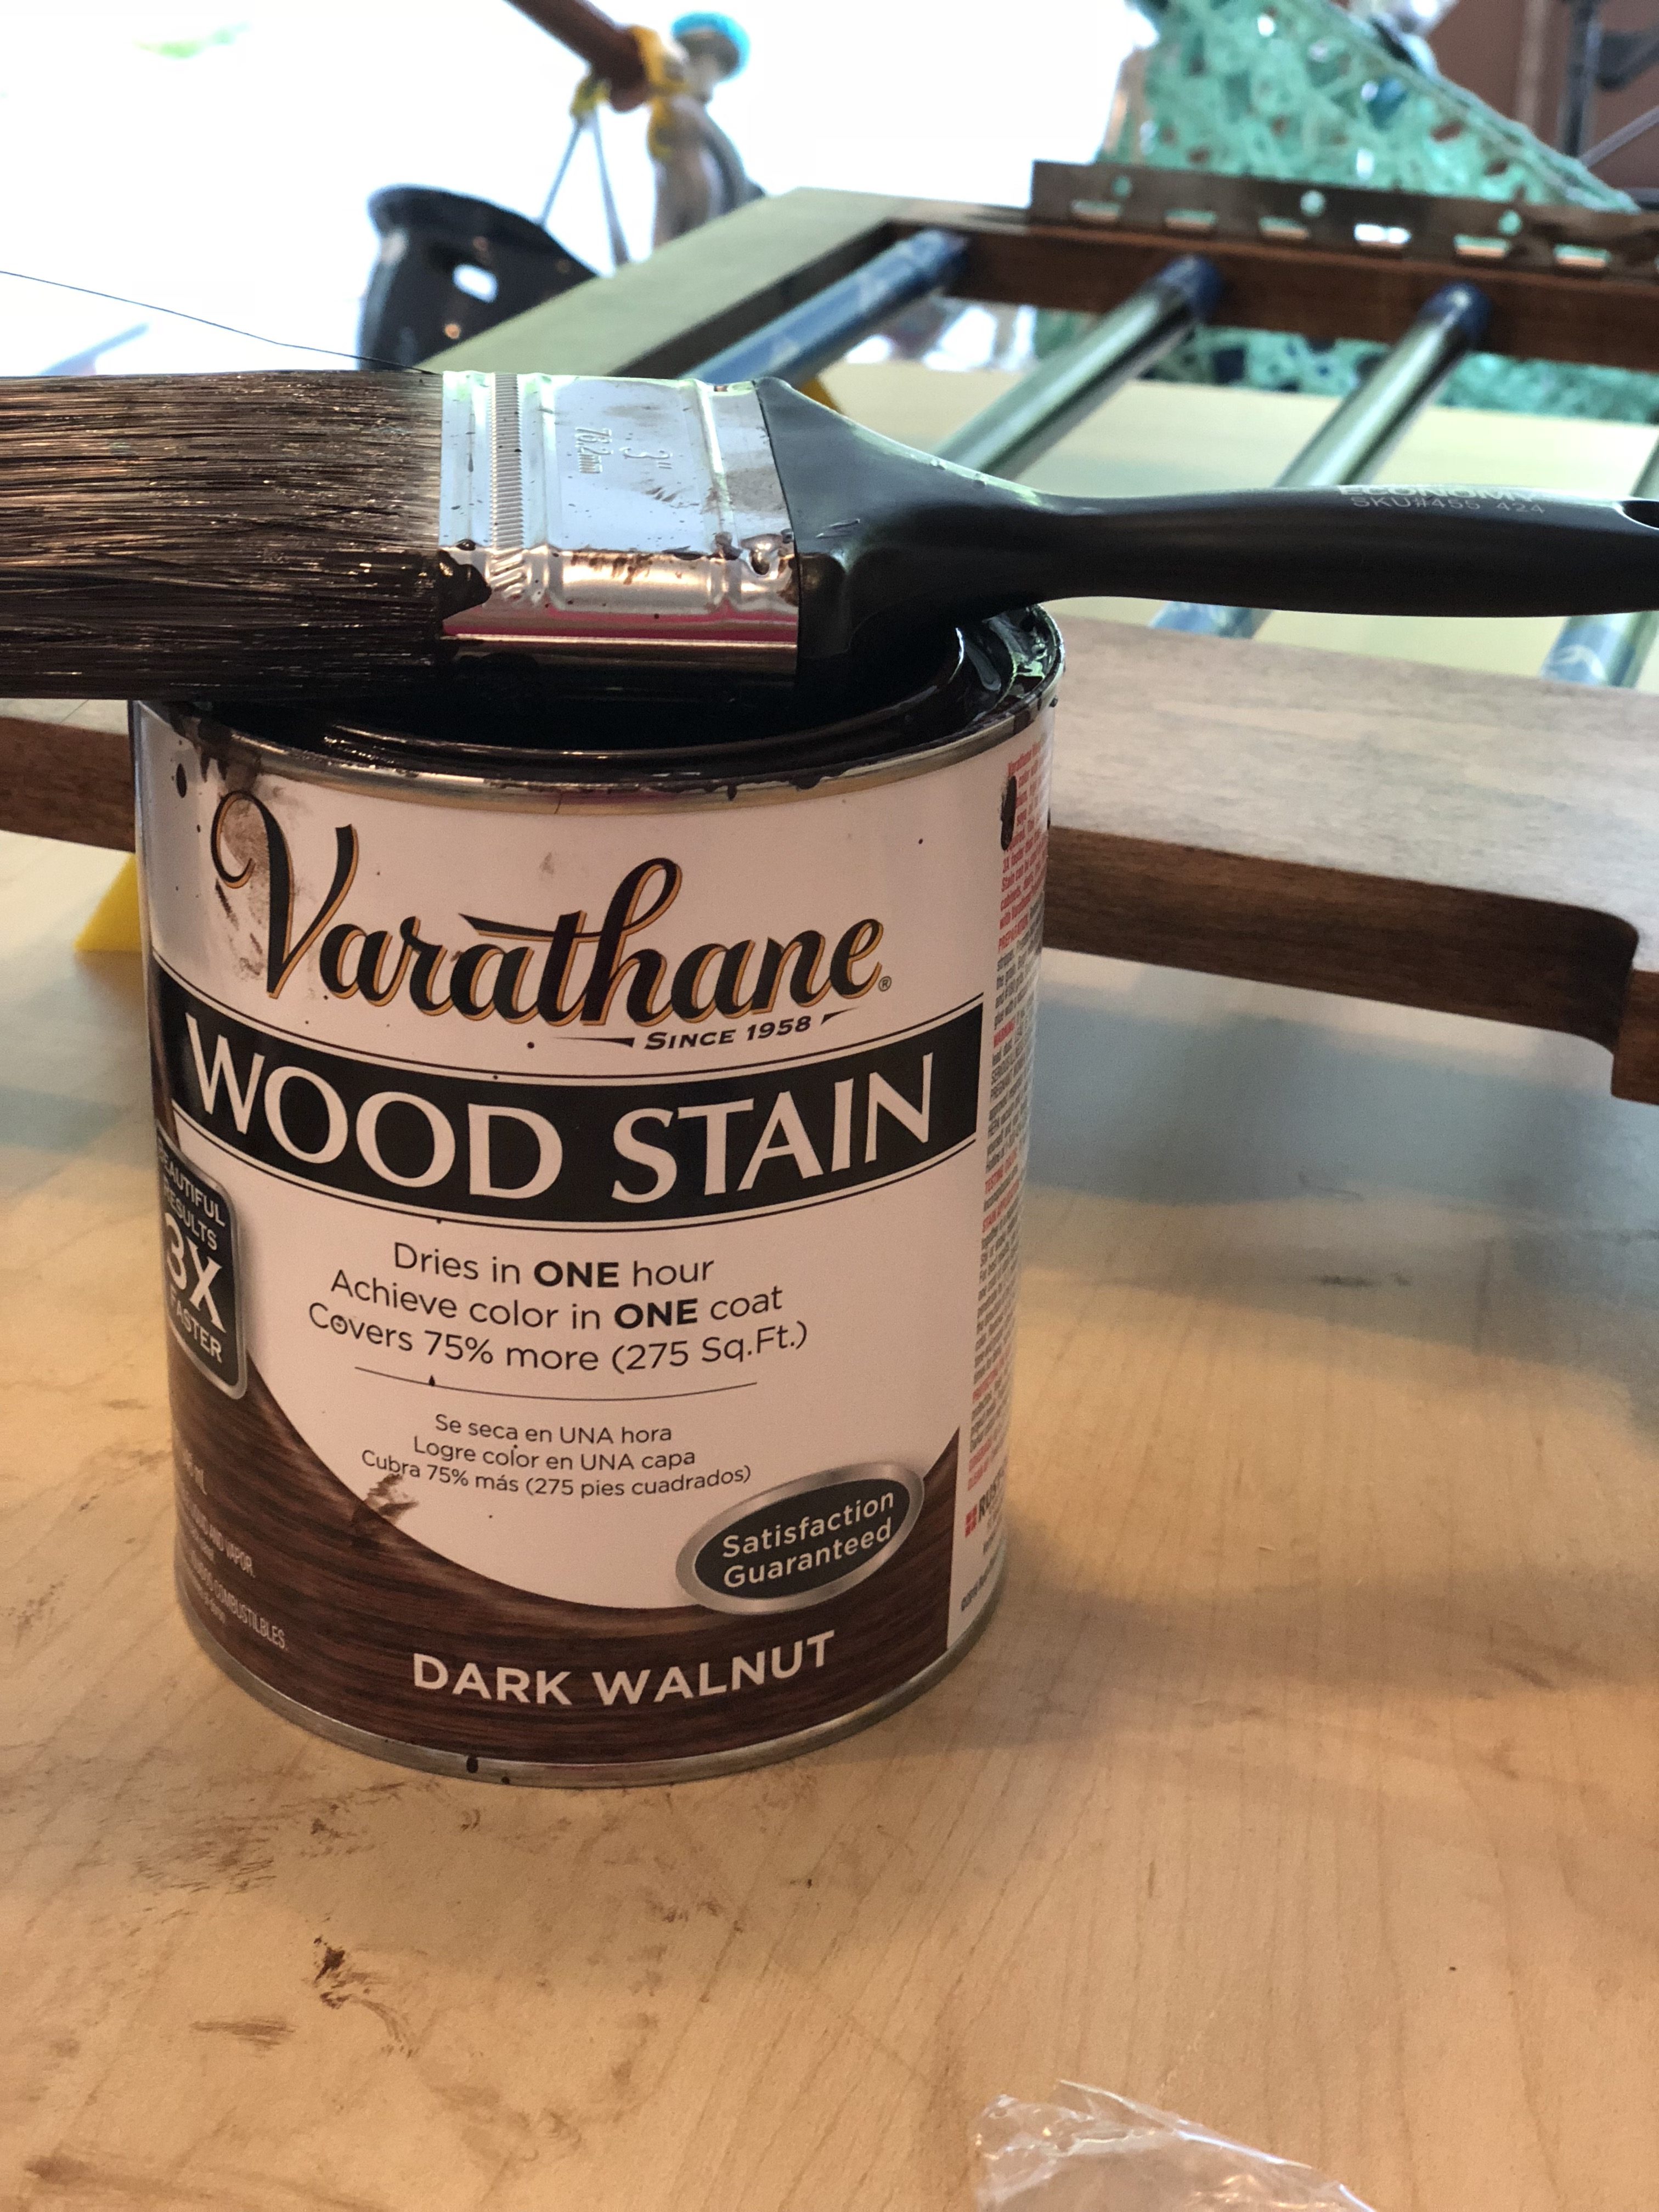
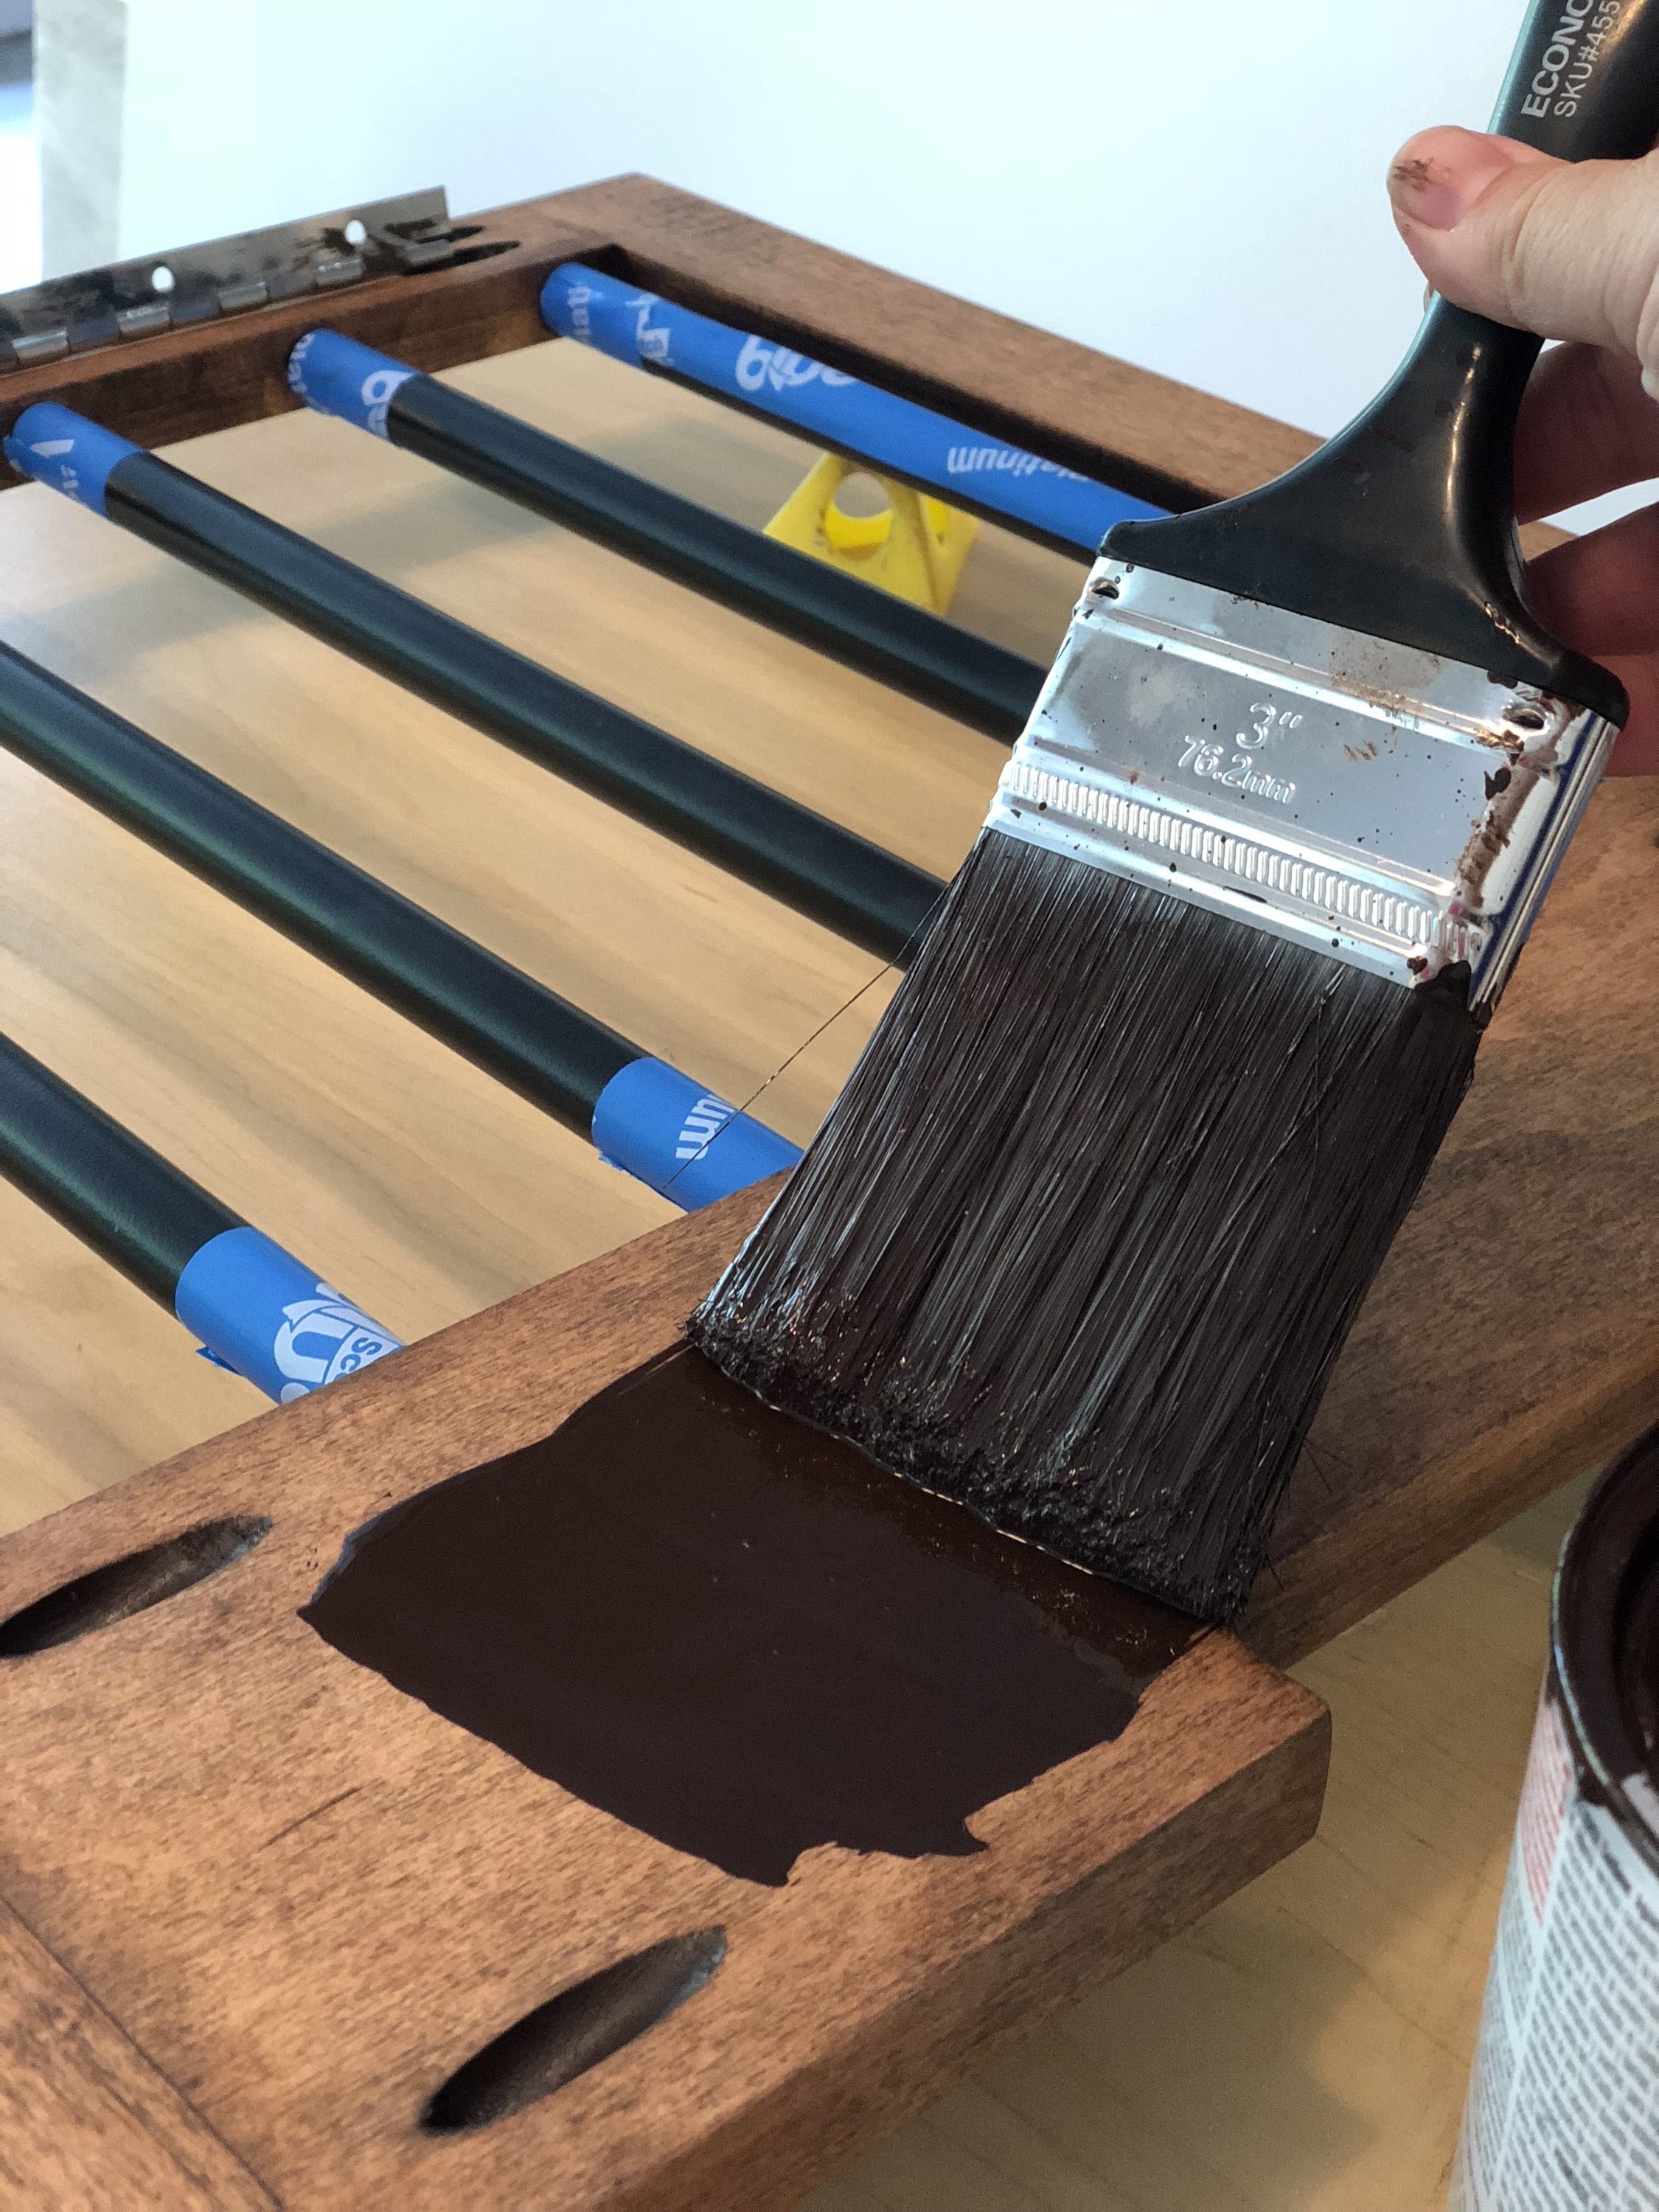
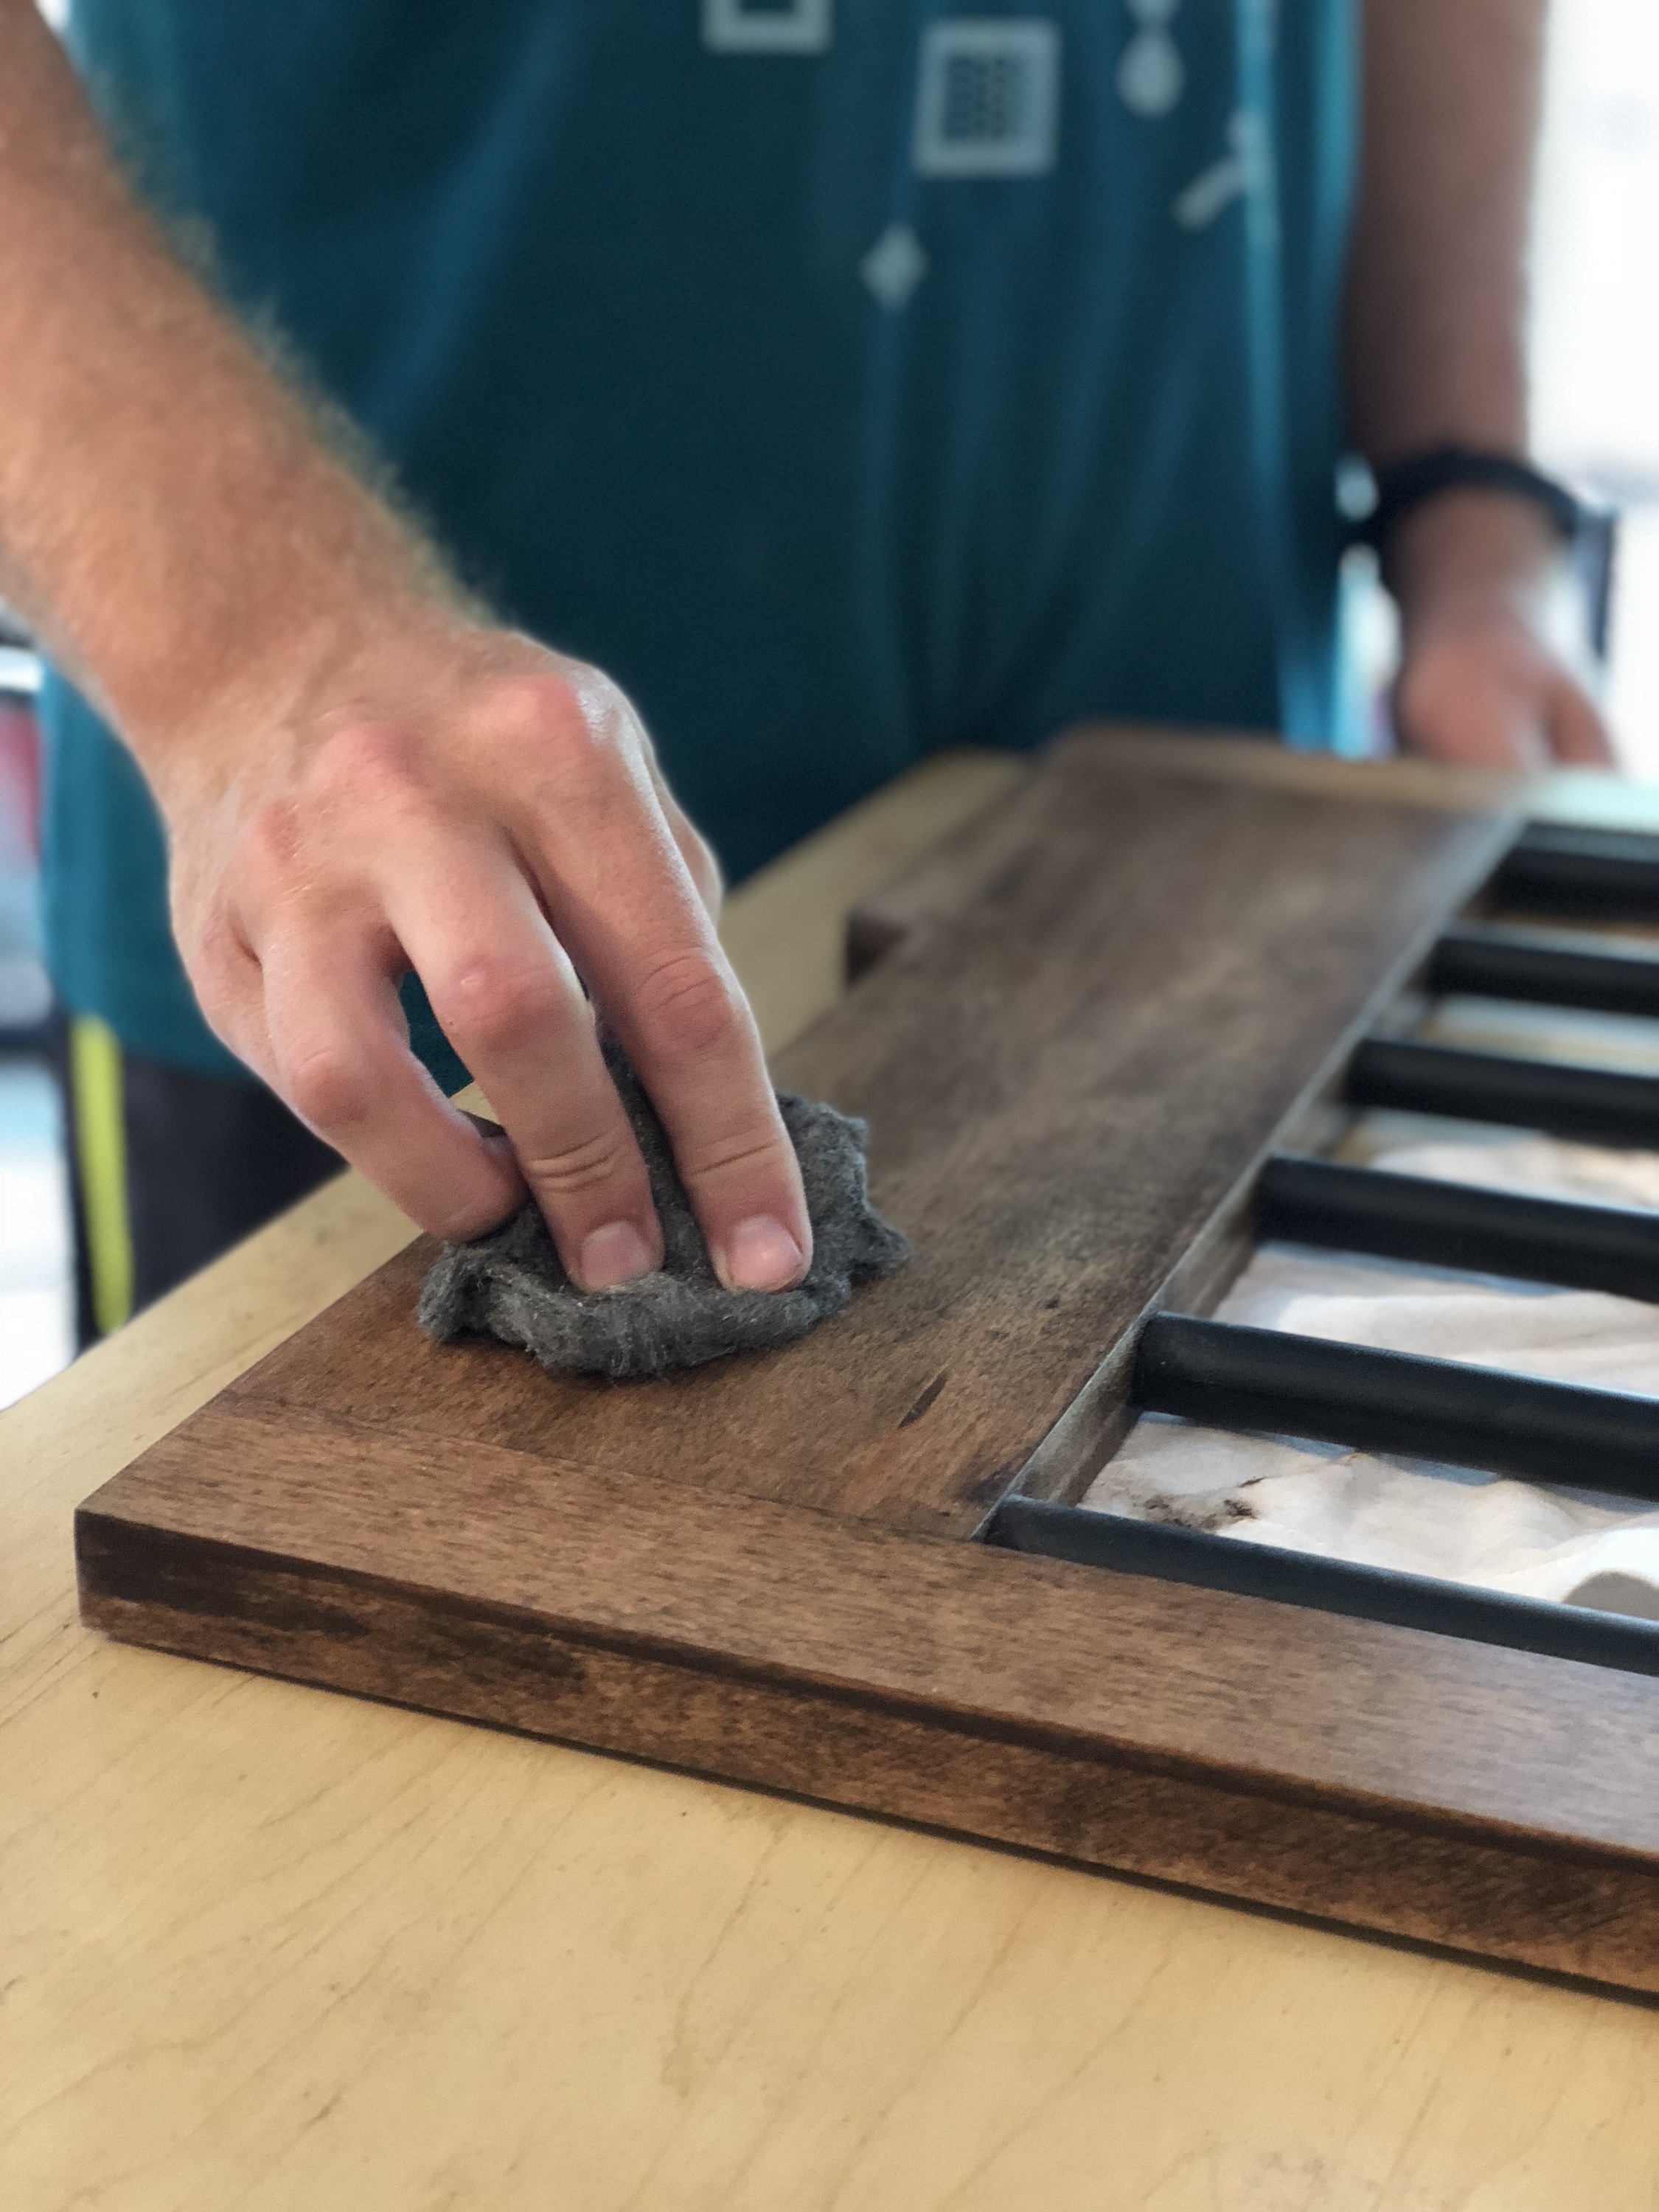
After going through progressively finer sandpaper, the dog crate was ready for stain. Jocie picked a dark walnut, and we applied two coats. Lastly, I sealed the crate with three coats of polyurethane.
A few days later the poly was dry and the smell had gone. We moved the crate into the house, and I was rewarded when Hopper very quickly crawled into his crate and lay down.
Here’s a quick video showing how the door slides open and closed. I love that there isn’t a door hanging open for me to bang on legs on as I walk by. You know what I’m talking about!
This post originally appeared on our tool site, Toolbox One.
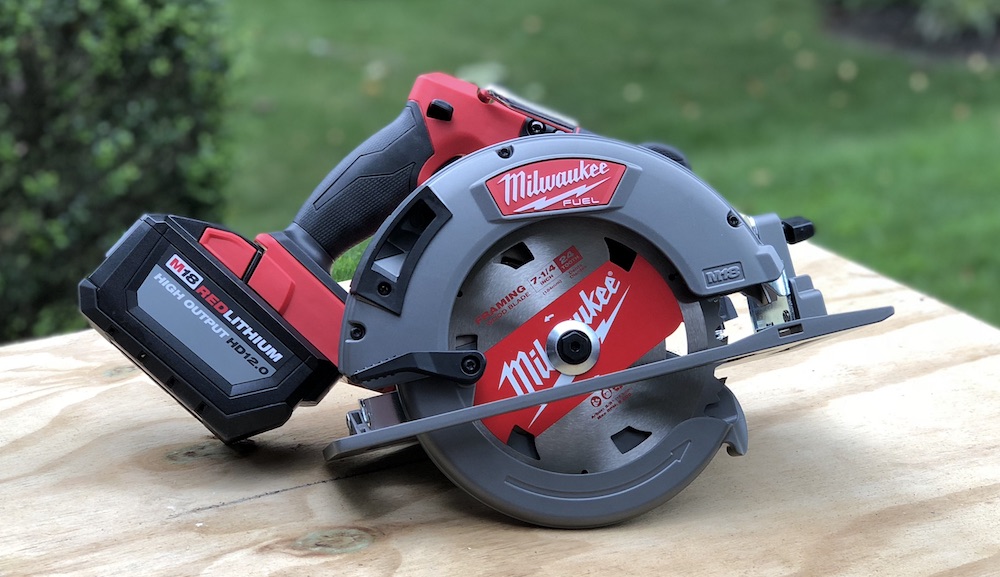
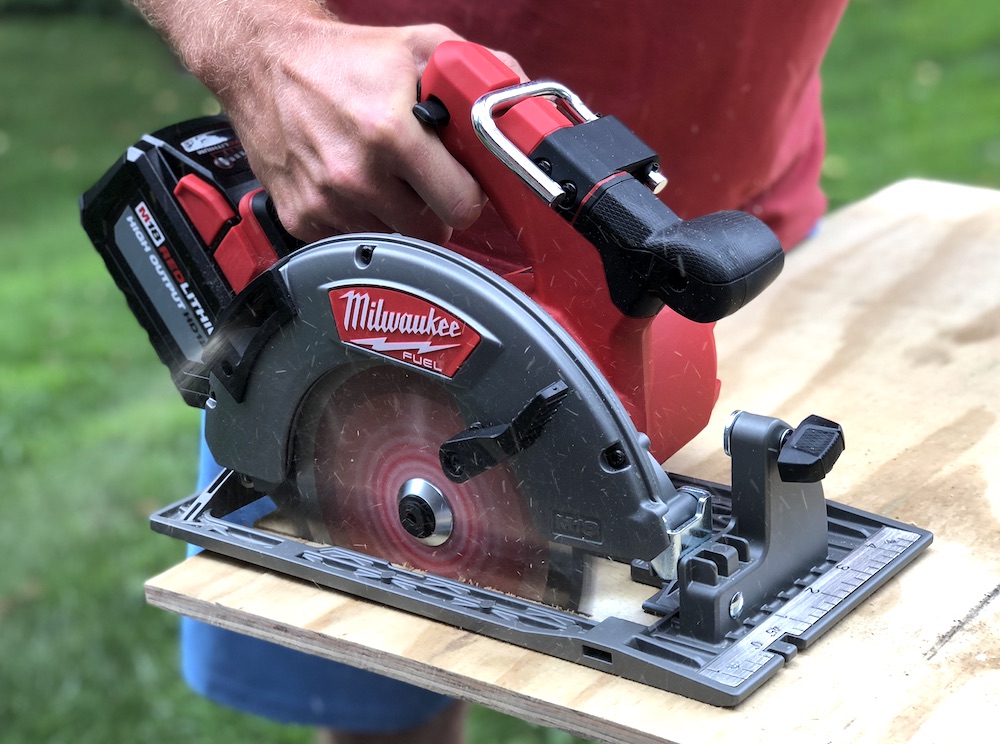
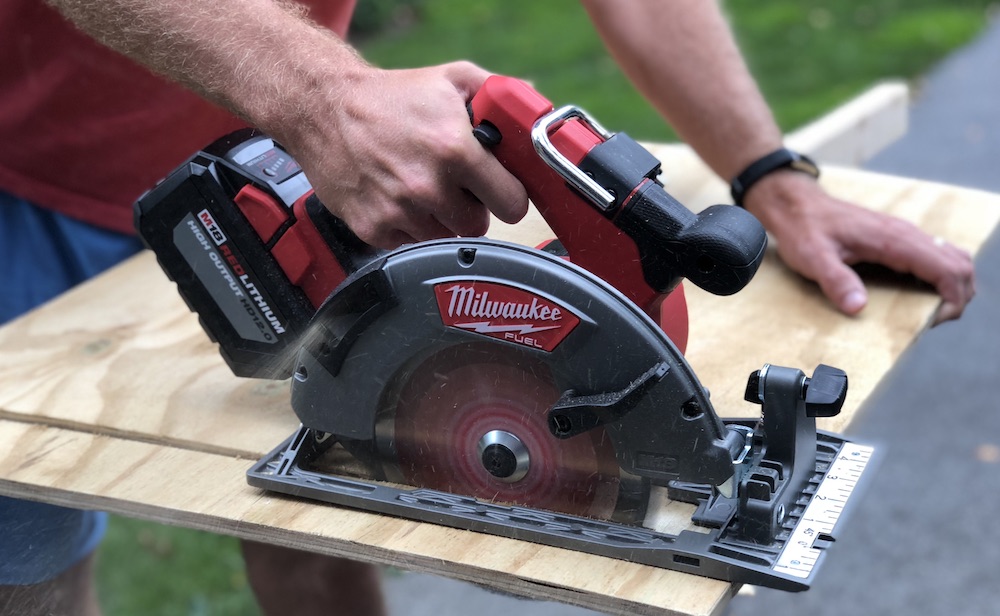
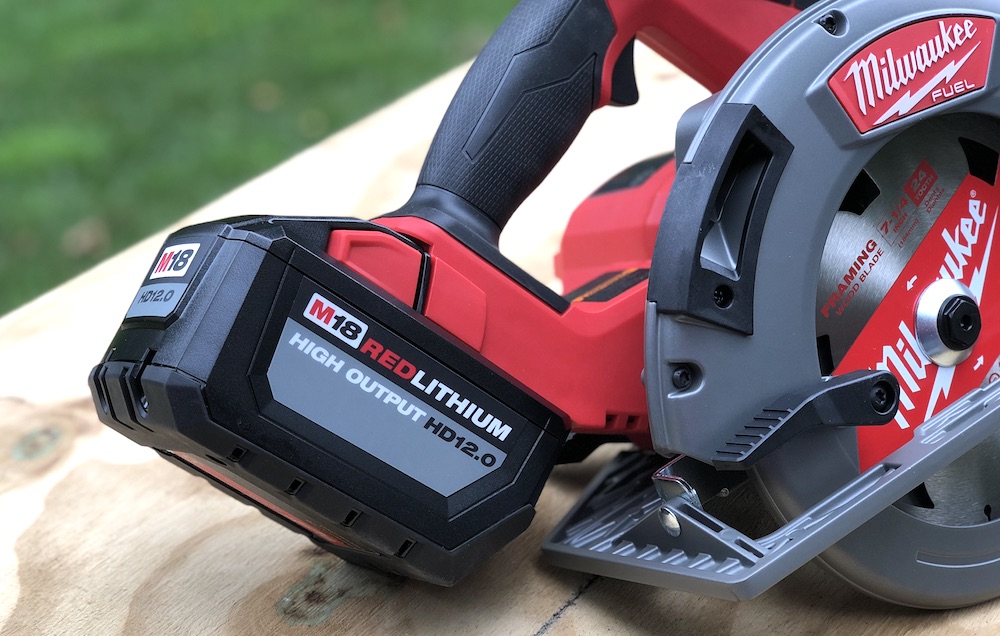
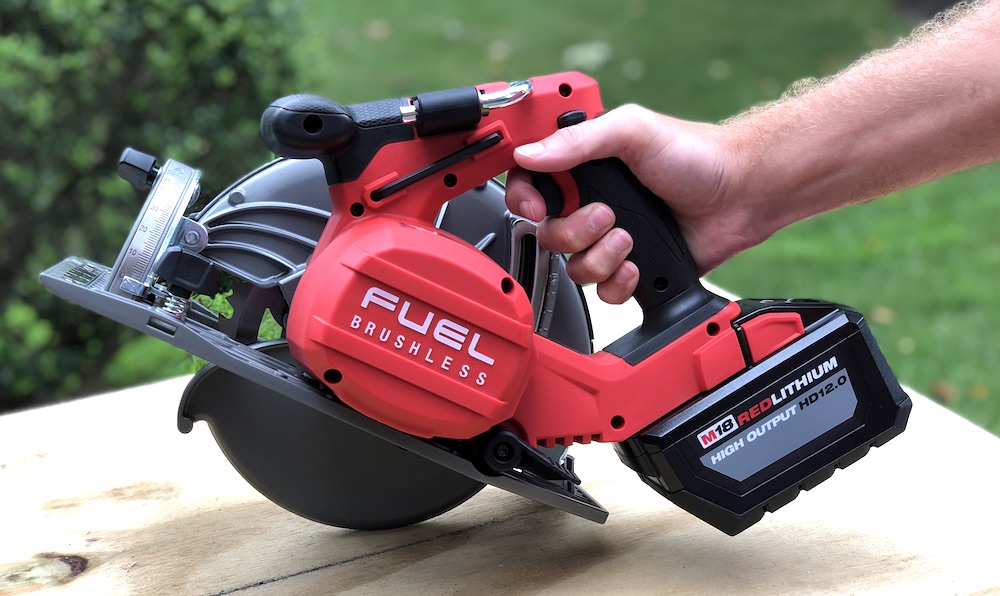
In May of this year, Milwaukee announced their latest M18 FUEL 7-1/4″ circular saw. You may be thinking this looks a lot like the previous model – brushless motor, 7-1/4″ blade, rafter hook, LED light. It has all those features you’d expect. The big difference and why this is an exciting release is because Milwaukee re-engineered this saw for the new M18 High Output HD12.0 battery. With the high output battery, this new circ saw delivers the power of a 15amp corded saw.
Stuff Lawyers Made Us Say: We’re are continuing our partnership with The Home Depot to provide candid reviews of tools from a wide variety of manufacturers. The Home Depot is both providing the tools for free and compensating us; however, the opinions we express here are our own. Remember, we’ll always be up-front with you when we’re receiving a free product, compensation, or both. And of course, we always strive for objectivity in our reviews.
Better Than the Previous Model
Again, at first glance, this saw looks a lot like the previous iteration. So let’s take a deeper dive to see what Milwaukee has improved.
Brushless Motor
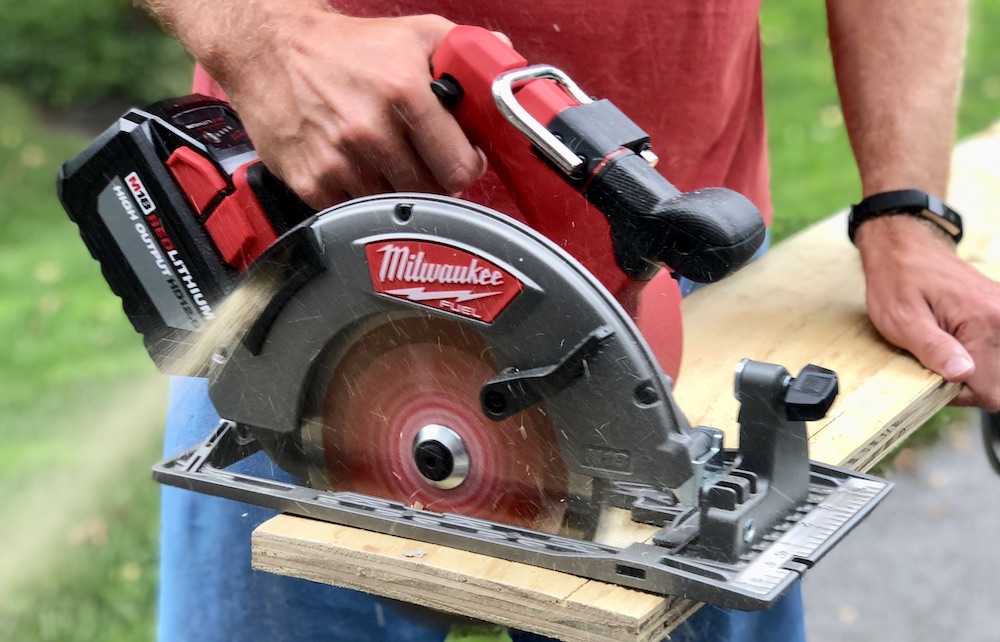
Milwaukee created a brand-new POWERSTATE Brushless Motor for this circular saw, which delivers 5,800 RPM to rip through tough applications without bogging down. That’s a nice bump compared to 5,000 RPM on the previous generation.
Electronics
Milwaukee also redesigned the REDLINK PLUS™ Intelligence, utilizing electronics never used before in power tools. The redesign ensures maximum performance of the tool under load and prevents against overload and overheat.
Battery
With the M18 High Output HD12.0 battery, this circ saw can power through up to 750 cuts on just one charge. The new battery provides 50% more power, runs 50% cooler, and delivers 33% more run-time than the M18 HD9.0 battery. You can read more about the battery here.
Other Thoughts
I like the cast magnesium shoe and guards. Milwaukee also included an electric brake to stop the blade after releasing the trigger. There is an optional dust port / vac adapter for connecting to a shop vac. Weighing in at 12.0 lbs (8.75 lbs bare tool), it’s a bit heavier than comparable, cordless options.
Specifications
M18 FUEL 7-1/4″ Circular Saw Kit (2732-21HD)
- Speed: 5,800 RPM
- Arbor Size: 5/8″
- Bevel Capacity: 1-7/8″
- Capacity: 2-1/2″
- Weight: 12.0 lbs (8.75 lbs bare tool)
- 5-year warranty
Where to Buy
The latest Milwaukee circ saw became available in June 2018. You can purchase the saw kit (2732-21HD) which includes the M18 FUEL 7-1/4” Circular Saw, M18 HIGH OUTPUT HD12.0 Battery, M12/M18 Multi-Voltage Charger, general purpose framing blade and contractor bag. Milwaukee will also offer a bare tool (2732-20) option as well. We haven’t heard when that will become available.
- 2732-21HD Circular Saw Kit – $399
- 2732-20 Circular Saw (bare tool) – not yet available
This post originally appeared on our tool site, Toolbox One.
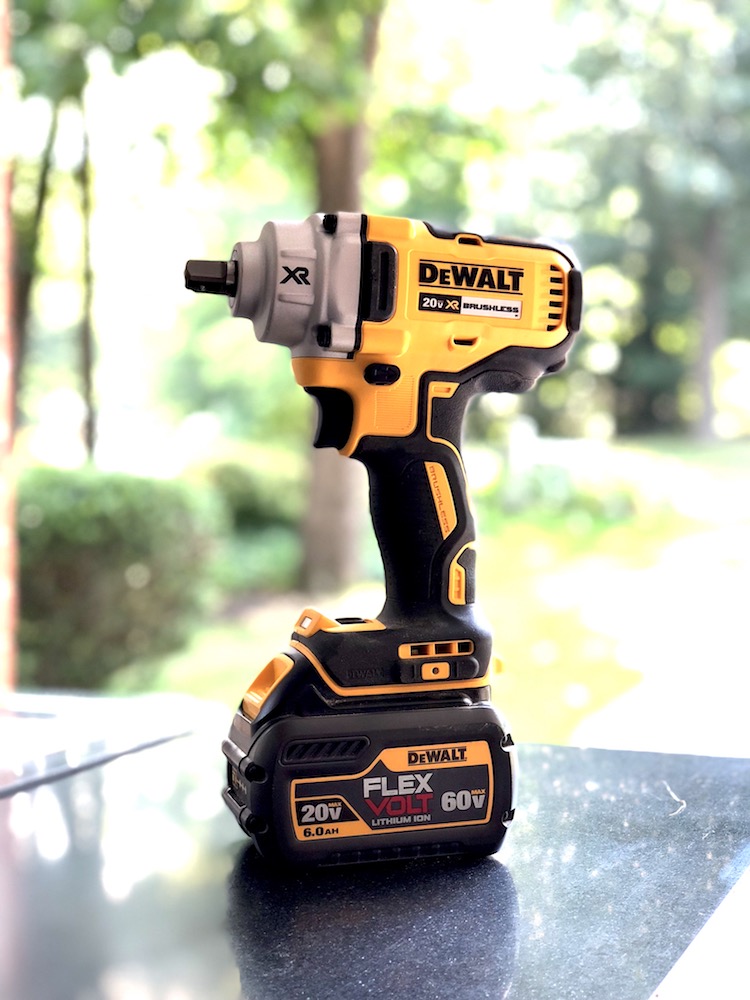
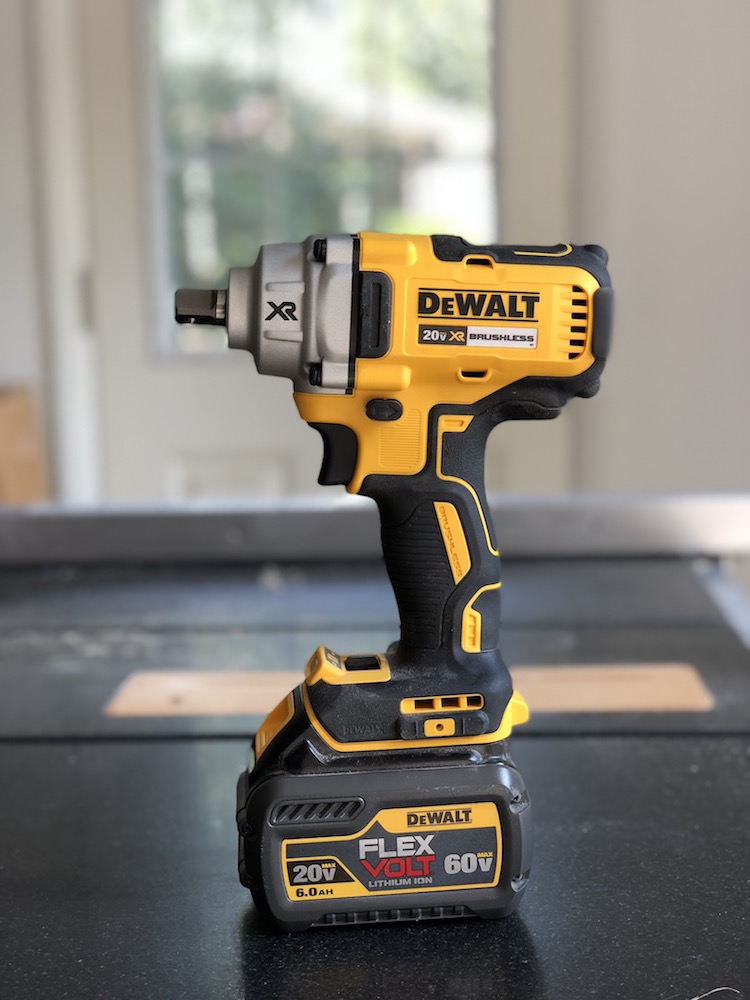
Next up we’re taking a look at the DeWalt DCF894B4 1/2 in. cordless impact wrench with detent pin anvil. This impact boasts up to 330 ft-lbs of torque with three different modes for various applications. Weighing in under 3.5 lbs, this impact wrench is compact and lightweight. DeWalt also included Precision Wrench Control, which helps to prevent overtightening in forward and fastener run-off in reverse.
Stuff Lawyers Made Us Say: We’re are continuing our partnership with The Home Depot to provide candid reviews of tools from a wide variety of manufacturers. The Home Depot is both providing the tools for free and compensating us; however, the opinions we express here are our own. Remember, we’ll always be up-front with you when we’re receiving a free product, compensation, or both. And of course, we always strive for objectivity in our reviews.
The DeWalt DCF894B4 is a mid-range impact wrench. It’s not designed to put out 700+ foot-pounds of torque so if that’s what you’re after, consider another model like the DeWalt DCF899P2. Even so, this wrench is great for wheel lugs, concrete anchors, pipe flange and driving fasteners in wood, metal and concrete.

Important Features
The DCF894B4 impact wrench is part of the DeWalt XR Brushless tool lineup. Brushless motors outperform their brushed counterparts in efficiency which translates into longer runtime.
This model features a detent pin anvil. If you prefer the hog ring design, that is available too on the DCF894HB model.

Since this tool is designed for working in tight or awkward spaces, it’s great that DeWalt included an LED light near the base. This light activates when you pull the trigger.
There are three mode settings allowing the user to select the best speed based on their application.

The new precision wrench control feature improves control. When using this wrench in forward, the tool will pause before impacting to help prevent overtightening. In reverse, the tool lowers the speed when a fastener is loose to help prevent run-off.
Specifications
- Anvil Size: 1/2″
- Impacts/min: 0-3100 IPM
- Max Torque: 330 ft-lbs
- Weight: 3.48 lbs

Price and Where to Buy
You can find the DeWalt DCF894B at the Home Depot for $199 (bare tool only). This is a great pickup especially if you’ve already bought into the 20v MAX battery line, and it includes the DeWalt 3-year limited warranty.
