
This week’s Before and After is a really great transformation. I love it because of how amazing everything turned out and because it’s a great project for do-it-yourselfers. Today, we showcase a concrete patio makeover from Traci @ Beneath My Heart. Traci and husband took a plain looking concrete patio and really turned it into a great space to entertain or just kick back and relax. Read on for this great story, our Habitat Quick Fact and to learn how to enter your own Before & After project.
For winning this week’s Before and After contest, Traci gets a $50 gift card to the home improvement store of her choice, and we’re making a $100 donation to Habitat for Humanity in her honor. She’s also entered into our end-of-summer contest for a $150 gift card where the community will vote for the best.
Staining Concrete, Patio Makeover by Traci
Well, we finally finished staining our concrete patio to look like tile!
This was is what our concrete patio looked like before.
Dull and dirty.
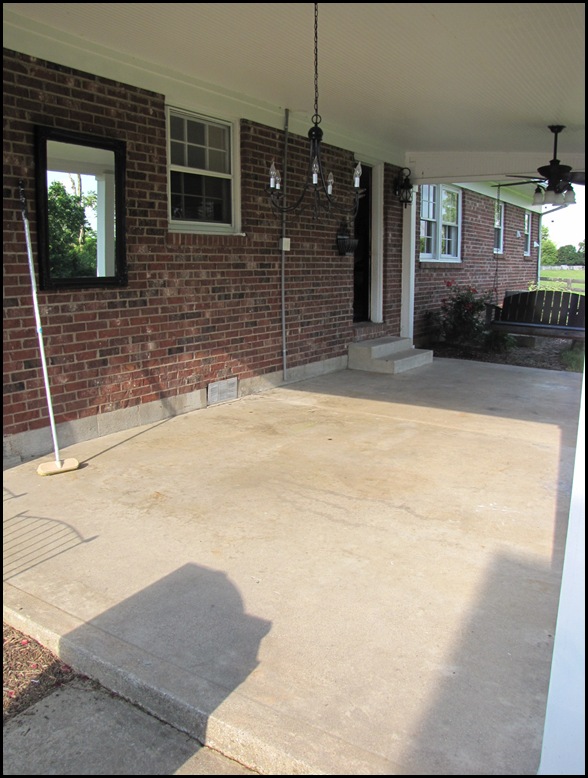
It doesn’t look as bad in these pictures as it did in person, but believe me…it didn’t look good.

As I was trying to decorate the patio with furniture, I just couldn’t get pass how ugly the floor looked.
So I wanted to tile it, but we couldn’t afford it.
My friend, Richella, suggested that we stain the concrete to look like tile. This seemed like an option that we could afford, so we went for it.
Here are the main steps to staining concrete.
- Clean the concrete.
- Stain the concrete.
- Seal the concrete.
Not bad, huh?
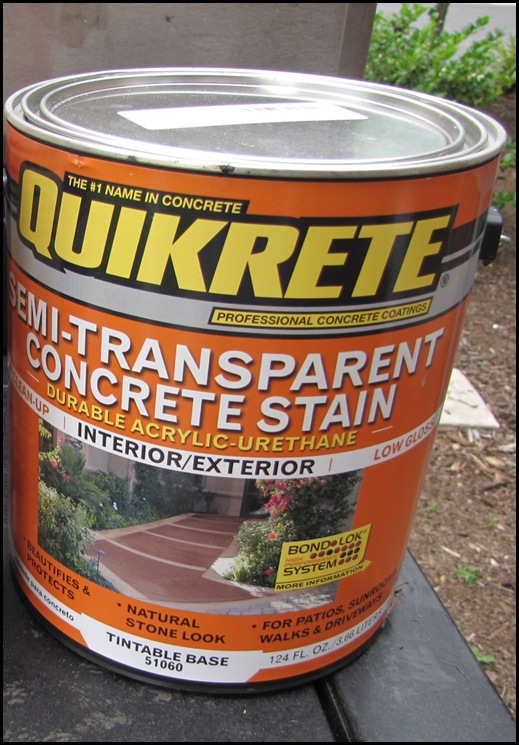
We used Quikrete products from Lowe’s for this project.

The pamphlet suggests to prep the concrete with Quikrete BondLok.
However, my hubby insisted that Muriatic Acid would do the same thing. It would clean the concrete and open up the pores for staining. Since we already had some of it, we used it instead.
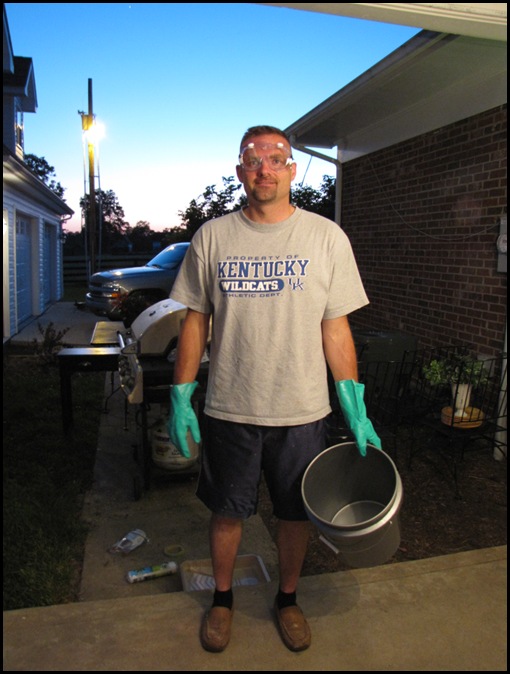
WARNING: Muriatic Acid is extremely dangerous!!! You do not want to get this on your skin!
You want to be sure to wear protective goggles and gloves. You may even want to wear a mask to cover your mouth and nose so you don’t breathe in too many fumes. My hubby did not since we were outside. I also thought he should wear some pants since the acid can burn through your skin! But luckily, he didn’t get anything on him. 🙂
If you use Quikcrete BondLok to clean the concrete, just be sure to read the directions carefully.
Here’s my man…ready for the job…
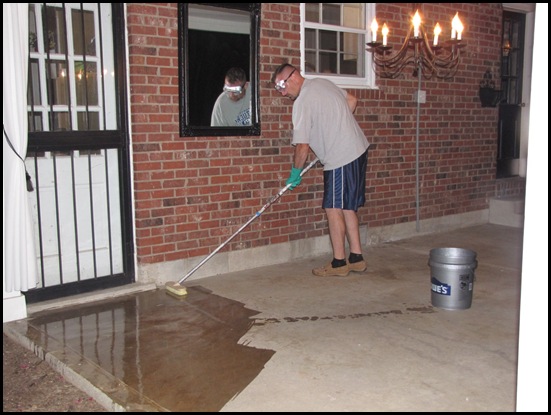
He carefully poured the acid into a large bucket. Then applied it with a large stiff broom.
You can’t see it in the picture, but the acid would actually bubble up on the concrete as it was applied.
We let it dry overnight before we began to tape the concrete.
Now you can skip this step if you don’t want your concrete to look like tile. But since we were going for the “tile look”, we used 1/2 inch tape to make our design.
It is not easy to find 1/2 inch tape. They don’t have it at Lowe’s or Walmart. We had to go to CarQuest and KOI Motors to get our tape. It is used a lot in painting cars.
My husband measured and made our starting point in the corner by the steps…
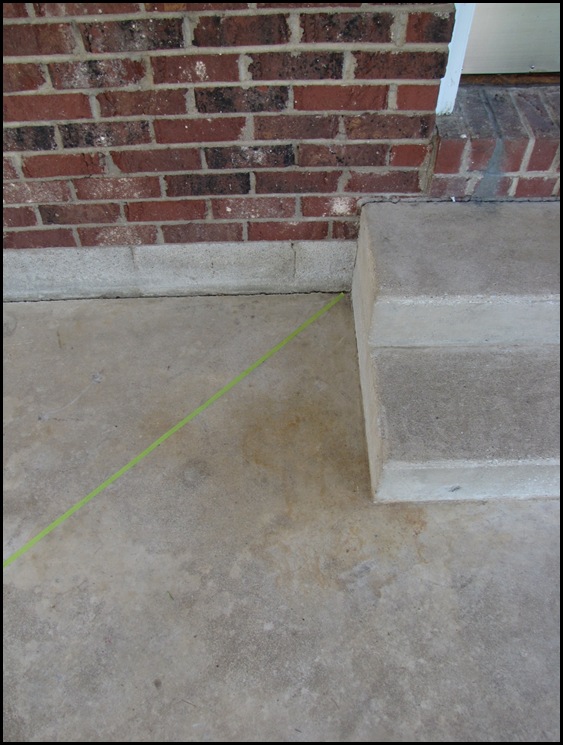
We wanted our tiles to measure 18 x 18 inches.
My husband also suggested we make the tiles on a diagonal. I am so glad he did! It looks so much better on a diagonal!
We used a large piece of trim molding that we had left over from another project, a tape measure, and pencil to draw our lines every 18 inches.
I did most of the taping by myself while my husband was at work. Many of you ask how I get so many things done around the house with four boys.
Well, one thing I do is to keep them busy doing something else…like a “slip and slide”.
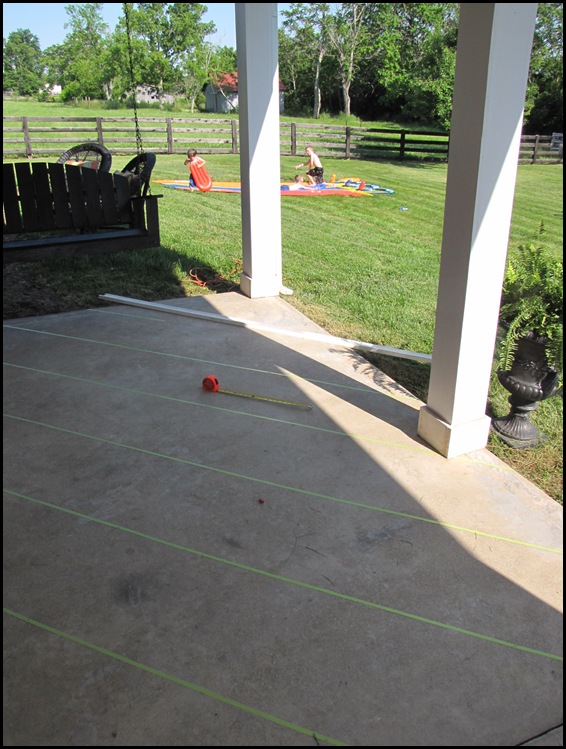
They played on that slide for 3 hours straight! And Mama got a lot of work done. 🙂
And then I filled up their bellies! They loved that the table was in the grass under the shade tree. (I loved that I was able to get more done on the patio!)
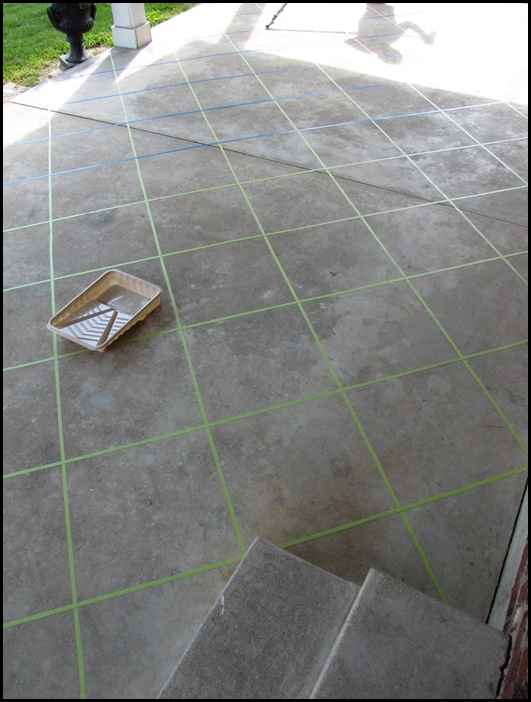
After I finished taping in one direction, I started in the other.
This step was not hard AT ALL! It just took a little time.
I would suggest knee pads though. I didn’t have any, and now I have blisters on both of my knees!
Oh well, it was worth it.
Now the concrete was ready to apply the stain.
Picking out the color of the stain was the most stressful part to me!
There is a color guide in the pamphlet which includes solid stains and translucent stains.
We liked the look of the translucent stains because they more closely resembled the look of tile.
However, they do tell you that each stain can look very different when applied to the concrete since each concrete surface is different.
We went with the color Vaquero Brown. You have to take the can of stain to the paint desk for them to mix the color for you.I was expecting it to look lighter on our concrete than in the picture, but I was wrong. It actually looked darker.
The pamphlet suggests to wet the concrete before applying the stain, but we did not. This may have made the stain a little lighter. Don’t really know.
We applied the stain with a roll brush.
Don’t cha love my hubbies black socks? Too cute.
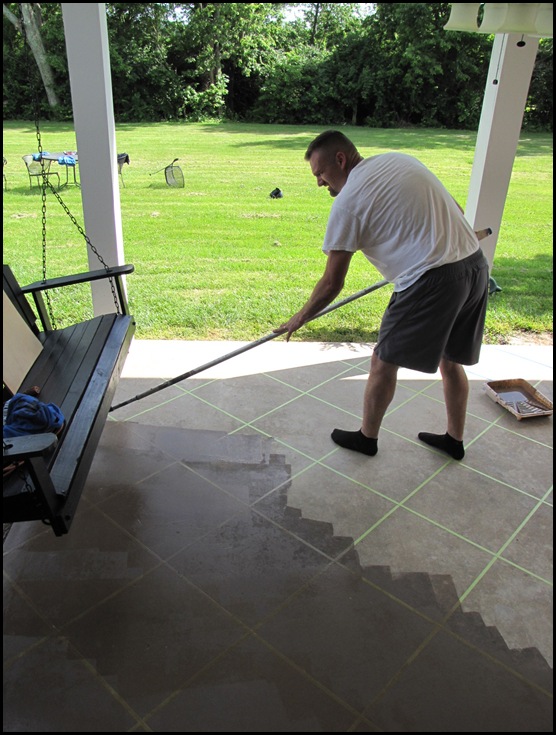
We let it dry overnight, and we weren’t real happy with the results the next morning because you could see where all of the brush strokes were. Some were very dark and very noticeable.
So I got on my sore knees again, and applied a second coat of stain by hand with a rag to try and cover up the brush strokes.
We let that dry, and it definitely looked much better. Now with two coats of stain, it is definitely darker than what I had wanted, but I still think it looks so much better than our dull old gray concrete.
I peeled off the tape and here is what we have now…
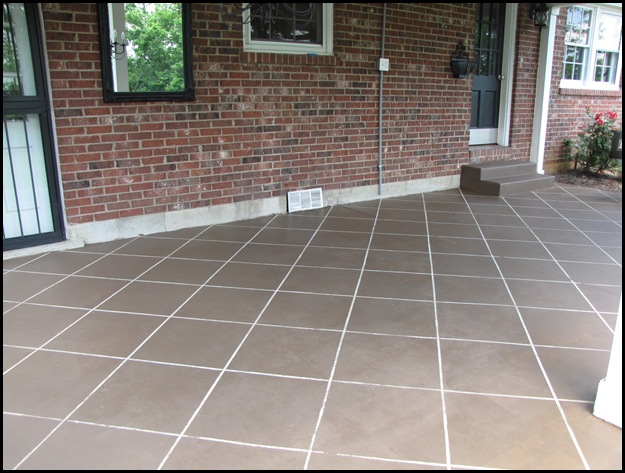
It really looks like tile! Some of the stain bled through the sides of the tape, but it really just makes it look more like real tile to me.
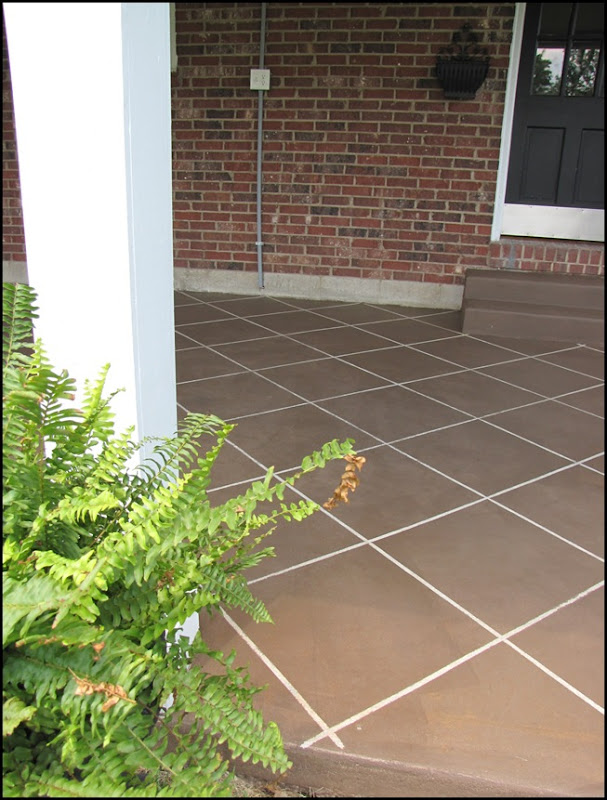
The last step is to applied the sealer. We went with the High Gloss Wet Look Sealer.

It looks exactly like milk and leaves a white film on the concrete when you apply it with a roll brush.
But it dries to a clean shiny finish…

Can you see the difference in the picture above? The top half of the pictures has the sealer on it and the bottom half does not.
The sealer helps protect and seal the stain.
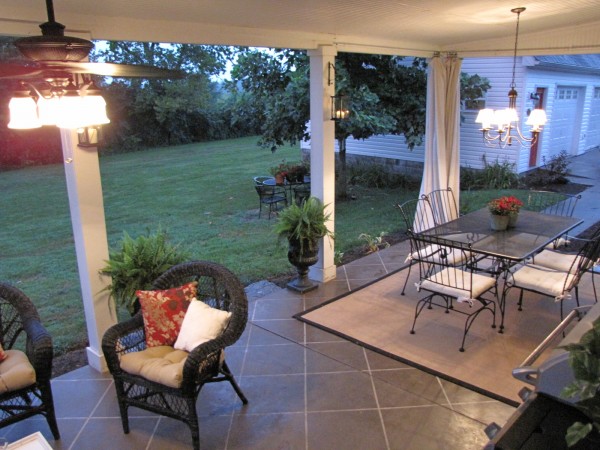
We have let that dry overnight. I was wanting to get a picture of the patio with our furniture back on there this morning, but I decided to wait a little longer. I want to make sure that it is completely dry and that the furniture does not mess up all of our hard work.
Overall, I am VERY pleased with how this turned out. It gives our patio a very finished look.
Here is the breakdown of the costs:
- Muriatic Acid – free (we already had it)
- Stain-$24.00
- Sealer- $24.00
- 2 rollers – $6.00
- Rubber gloves -$3.00
We already had the roll brush, the glasses, and bucket, so this whole project cost us less than $60.00!!!
Much better than the $300.00 it would have cost my husband to tile it himself! Plus, it was a lot easier!
One more time, the BEFORE…

Here is what my patio looks like now…

Thanks from One Project Closer
Traci, this is such a great Before & After! Thanks sos much for sharing your story with us!
Habitat Quick Fact
From the Habitat site:
Social media is a great way to connect with friends and family on the Web, and it’s also a great way to connect with Habitat! Visit the links below to stay up-to-date on Habitat happenings and help us spread the word.
- Become a fan on Facebook
- Check out the Habitat Youtube channel
- Join in their LinkedIn network
- Choose the Habitat theme to personalize your Google homepage
- Follow Habitat updates on Twitter
How to Submit your Own Entry
You can submit your Before and After entry to beforeandafter@oneprojectcloser.com. Time is running out so get your story in soon!

Wow! I love the finished look! The fabric panels! The rug! The seating! They all look so good with the faux tile! Awesome job!
This is beautiful!
I love your creativity and ingenuity in keeping your little guys busy while working. 🙂
Traci –
I continue to be amazed at what you and Cy can do with your home. Truly an inspiration to all of us.
Great DIY job! Alot of times the acrylic Quickcrete stain leaves roller marks in the floors when applied and after the floor is sealed then they become even more noticeable. We like to used acid stains to etch color into the concrete. If a tile pattern is desired we either cut the design into the concrete before or after we stain it depending on the look you want. We use a small hand grinder with a diamond blade to cut in the pattern. Many different designs can be made with this!
You two did a real nice job looks great. We were going to tile our patio.
now we are going to try this thanks for the step by step .
Omg, this is fantastic!! I hate our concrete patio, but my husband said for us to cover it with tile we would have to install a french drain because of the water line is so low which means more time and money. We are so going to try this!
I hate our ugly concrete patio, but I know my husband wasn’t wanting to put much money into improving it like I would have, but this is PERFECT!!!
Thanks,
Brandi
This is absolutely gorgeous and right in my project limits!!! i’m going to do this, thank you so much for posting I cannot wait to get started!!!!!!!!!!!!!!!!!!!!!!!!!!!!!!!!!!!!!!!!!!!!!!!!!!!!!!!!
amazing! I am so gonna copycat this as well! It is EXACTLY what I have invisioned for my own patio!!!!!!! yaaaaa Thanks:))))))))
Sylvia
I haven’t started my project yet (due to insane weather conditions) but hoping to soon and was wondering how did the stain not run under the tape? Does the tape adhere real well to the concrete so nothing runs?
I love it! I am literally broke and cant afford tiles right now, my question is does the tape leave the white marks? or how did you achieve that? please reply
Hi!
I love this! You did a fantastic job! We are getting ready to do some home improvements to the outside of our home as soon as Spring sets in real good 😀
I should this to my husband & he really liked the look of the finished patio & the ease of the application process.
Could you tell us please the size of your patio area? Ours is about 12 ft x 28 ft . We’d like to compare your cost to what it might cost us.
Thank you so much! 😀
WOW! I LOVE IT!!! The scariest part about starting a project like this is not knowing exactly how it will look. In your mind you imagine something and hope it turns out. I love it, great job!
Do you have knowledge of contractors in Tulsa, ok
that can work with these concrete products?