
Before & After: Stair Project by Rhoda @ Southern Hospitality
September 4, 2010 | by Ethan (email) |This week’s Before and After winner comes from a well know style and design resource on the web: Rhoda @ Southern Hospitality. Rhoda’s been an annual supporter of our Before and After series and always has an amazing DIY project to share.
We chose Rhoda’s submission because it’s such a dramatic difference and she really walks you through doing it yourself.
For winning this week’s contest, Rhoda gets a $50 gift card to Home Depot, Lowes, or Amazon. And, we’ll make a $100 donation to Habitat for Humanity in her honor. The end-of-year contest is coming up soon and Rhoda is now entered for a $150 gift card to the home improvement store of her choice. Read on for Rhoda’s story and for this week’s Habitat quick fact.
Stair Project Renovation by Rhoda
Here’s how it all started. Ripping that carpet off, one step at a time. Unearthing all the ugliness that was hiding beneath. Our builder certainly never meant for these stairs to be shown, that’s for sure. And like I mentioned, if I had any delusions of something nice lurking beneath this mess of carpet, that was quickly put to rest after the first couple of stairs.

In fact, it just got worse, as I went down the stairs ripping that carpet and padding off.
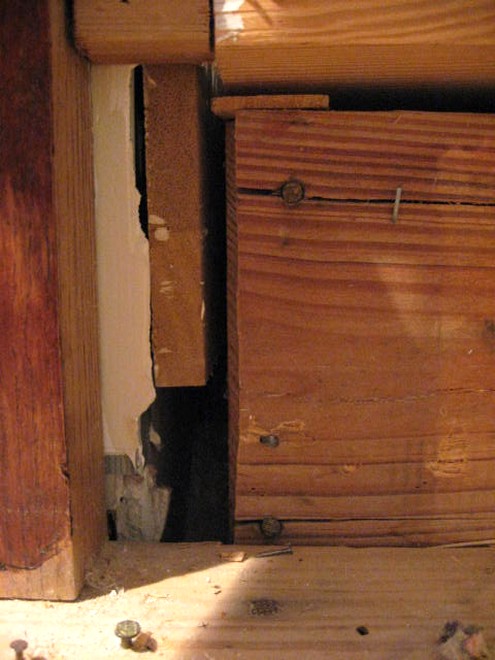
Like this gaping hole! I know, it’s really bad. So bad that I started to question my sanity. But, one thing I’ve learned in the DIY world is this fact. Most anything can be improved upon by hiding it with molding or caulking with caulk and that was my motto here. Hide it, cover it up, or make it look better.
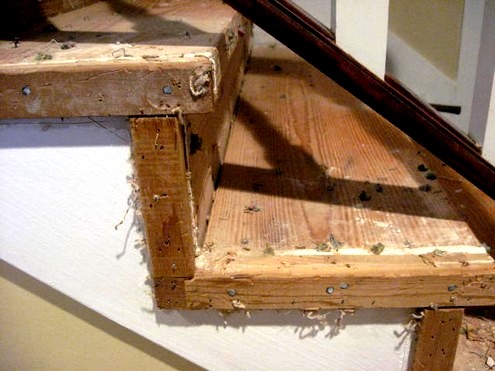
Look at the ends of the stairs. Pretty darn bad, with all the carpet fuzz and the milllllllions of staples that were in here. That itself took awhile, just to get the staples pulled out. This wood was not meant to be seen either, so I had to cover it all up with molding. Evil, evil carpet tack strips. I pulled and tugged and finally got them all out of there.
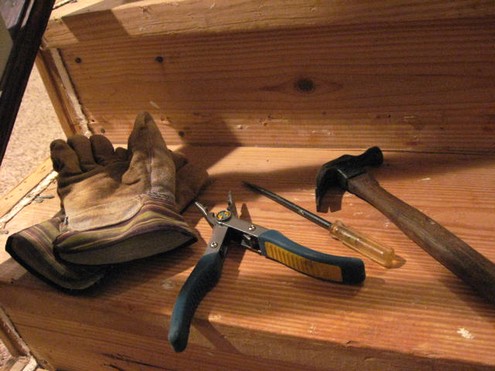
Using these tools. Don’t even try this without safety glasses and leather gloves. I didn’t have a crowbar or I would have used it.
How about these lovely edges with drywall trapped inside. Is there any hope to beautify THIS?? Well, yes there is. You see, I had a vision. Or maybe it was a nightmare after I saw what I was working with.
First, I bought a nice hand sander and began sanding as much roughness as I could off all the stair treads and risers. I went through several pieces of heavy duty sandpaper and sanded them as good as I could. And no, they were not even smooth at this point either, but then came the wood filler putty. That works pretty good too for smoothing out holes and gaps in wood. There’s only so much you can do with rough raw wood like this, but paint works wonders too. I went back and resanded after I added the wood putty to all the holes and uneven gaps.

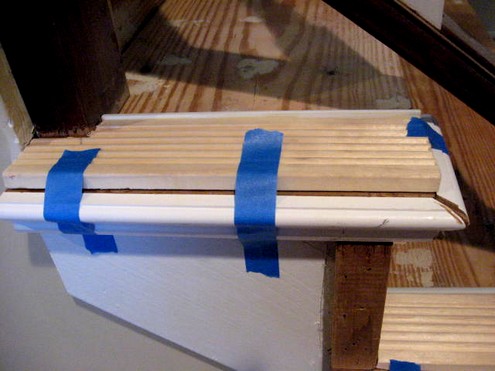
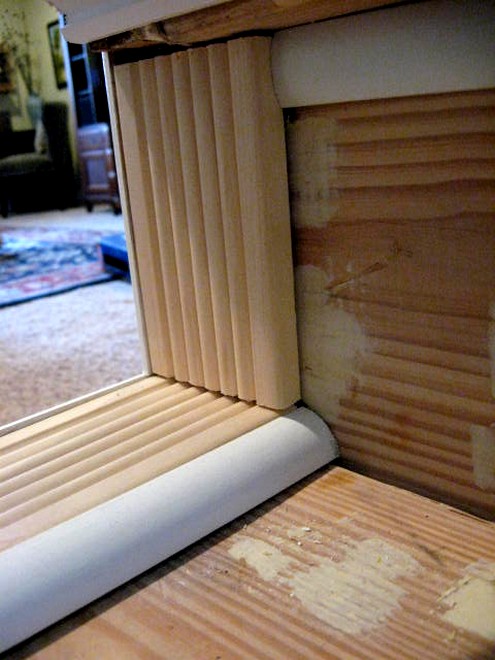
So then began the process of covering all the ugly gaping holes with molding. I went to the store and bought about 3 or 4 kinds of molding, going back a couple of times when I fine-tuned things a little more and figured out what all I needed. I started at the top, cutting those pieces to fit and used wood glue to hold them in place. Cause they are nothing but foam and could be cut with scissors. You gotta love molding you can cut with scissors.
See, here it is. It will splinter a little, but I made it work just fine. It was all I needed to cover underneath the stairs and on the sides to cover up the ugly holes and it was cheap. Cheap, I like for something like this. Held in place with blue tape til dry.
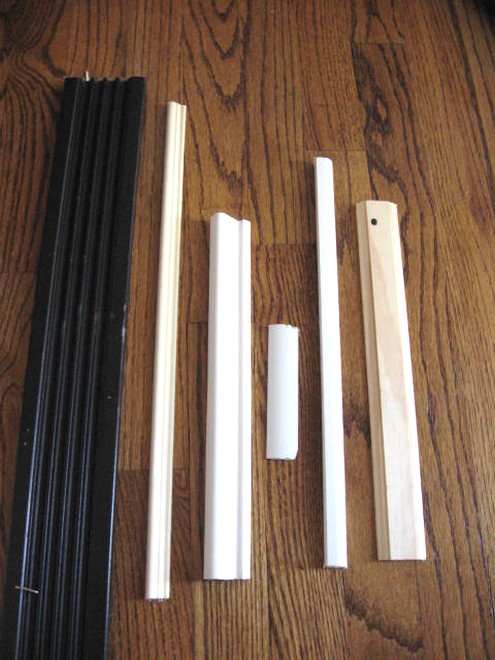
Here’s all the different size moldings I used, so you can be on the lookout for it as I explain it all. Some of this was leftover from other projects and some I bought.
Left to Right:
- 3″ Reeded molding
- 1/2″ fluted trim (bottom of stairs)
- 1 1/4″ small chairrail type
- 1″ MDF (this is the one I cut with scissors)
- 1/2″ shoe molding
- 1 1/2″ to trim out the stair nose
All of this was real wood molding, except that one piece. Someone asked if I have an an electric miter saw. NO! I wish I did and one of these days, I may have to break down and get one. I used a less than $10 yellow miter box that you can buy at the home stores. It works fine, of course takes much longer than an electric one would.
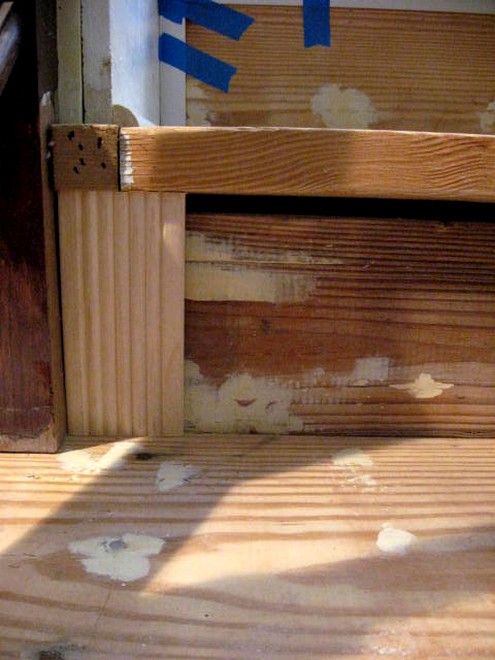
And I knew I would need some wider molding to cover the really BIG gaps, like this one that you see above. One nice piece of 3″ reeded molding covered it right up. I had some of this leftover from another project, so I raided my extras for this and used up all my left over pieces.
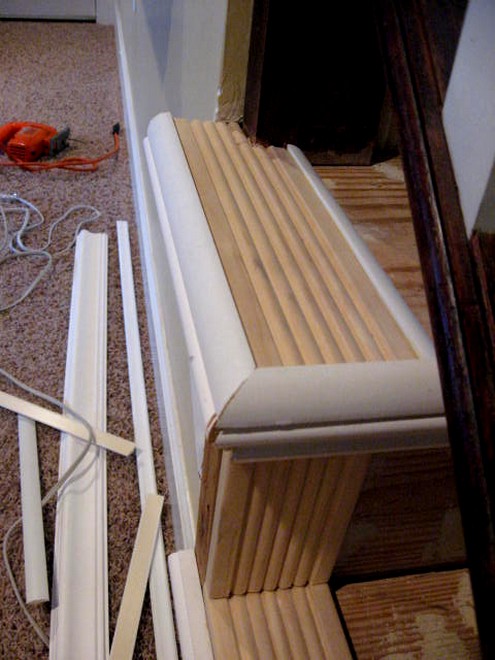
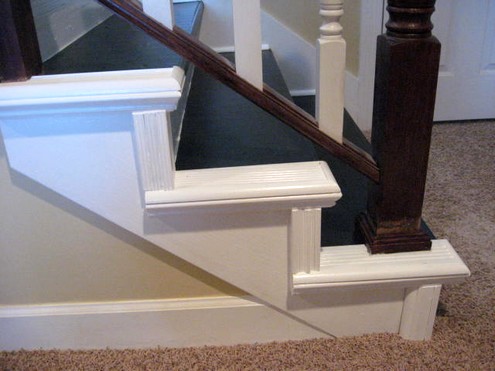
Used quarter round on the edges of the stair treads to cover more gaps. And you can see the big gap on either side of the stair nose. I knew I would have to cover that up, so that’s what drove me to use a nice molding piece on each stair nose. It looked better AND it covered up that gap too. You’ll see more of those down below.
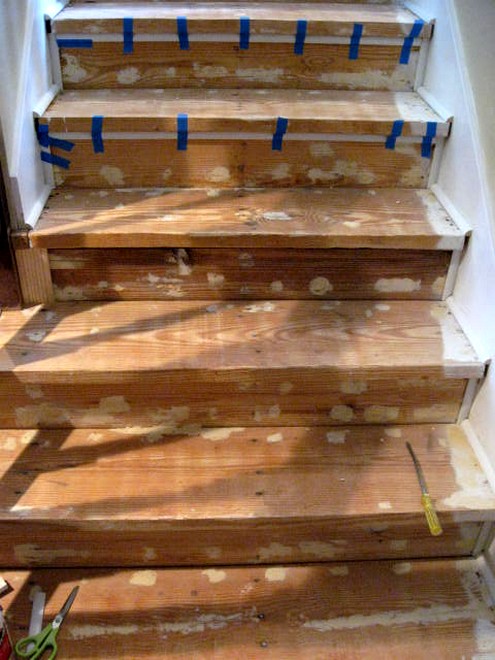
Making progress all down the stairs, one at a time. Aren’t they starting to look beautiful now. Ha! Not yet, but we’re getting there.
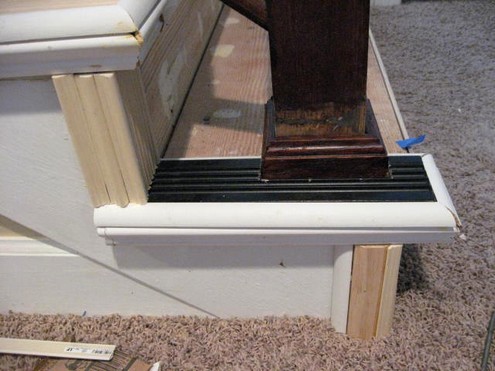
Now, this bottom part down on the edges of the stairs was the most challenging part. I knew I’d have to cover the ugly down here and be creative about it too. Again, left over fluted molding was used as well as some of the quarter round I had bought. I figured it out as I went along and started with a small base piece of molding at the bottom.
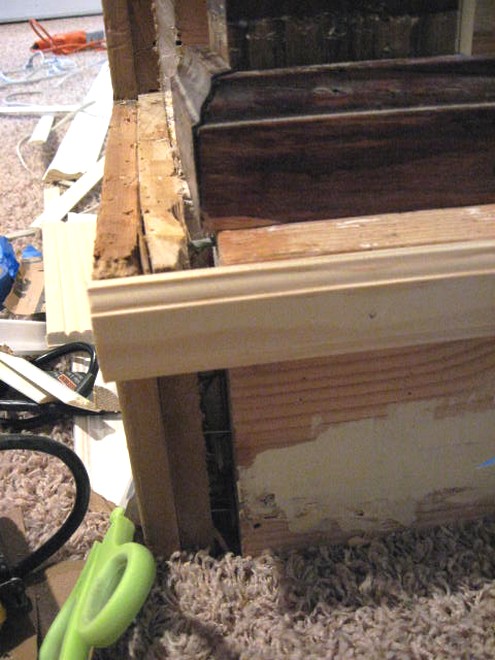
One good thing about the stair treads were that they were nice and thick. I figured out that I need to put some molding on the front of them to help hide gaps on either side of the stairs, so I found this flat piece that fit on there perfectly to make the stair treads look better AND hide the gaps on the sides. This is about 1 1/2″ wide. I used wood glue AND finishing nails on these.
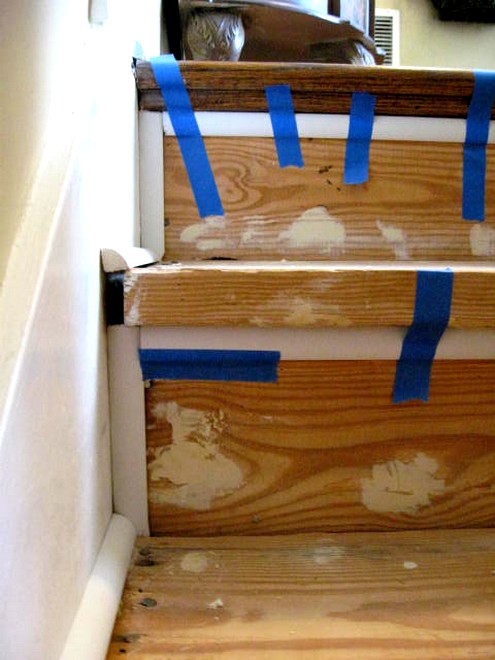
Working on the bottom 3 steps that had more molding to deal with. I just kept going, again figuring it out as I went along. I started with one layer and that wasn’t looking so great, so I just added another layer on top and they started to look decent.
Cut, glue and wait. All the way down. Getting there.
Cut more, glue more, keep on going. Getting to the final part here, this was the last thing I did was figure out this corner.
You can see I used all the leftover pieces I could find in the garage to make it all work. And it did! Once it’s all painted out with my white trim paint, it looks beautiful.

When all the molding was in, it was time to caulk. Again, caulk hides a multitude of flaws. It’s a DIYer’s best friend! I used an entire large tube of caulk in my caulk gun on these stairs.
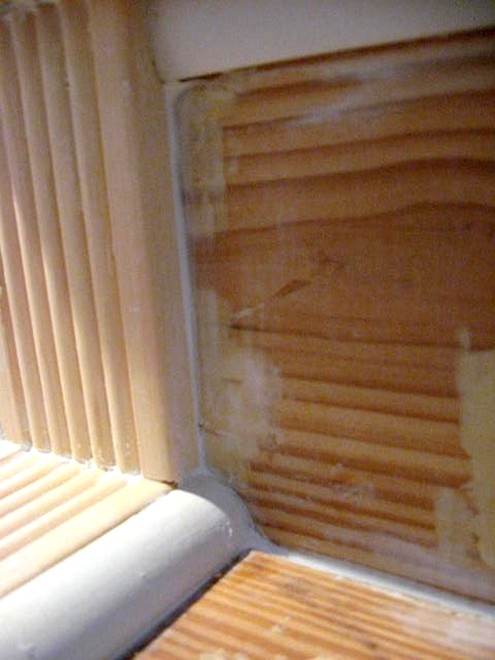
Caulk, caulk and more caulk hides all those seams and gaps. Another sanding and it was time to prime. Even the primer looks pretty good! I then painted all the white trim with my interior white trim semi-gloss paint, letting it all dry overnight between coats. I figured it would be easier to do that first and then go back and do the stair treads black.
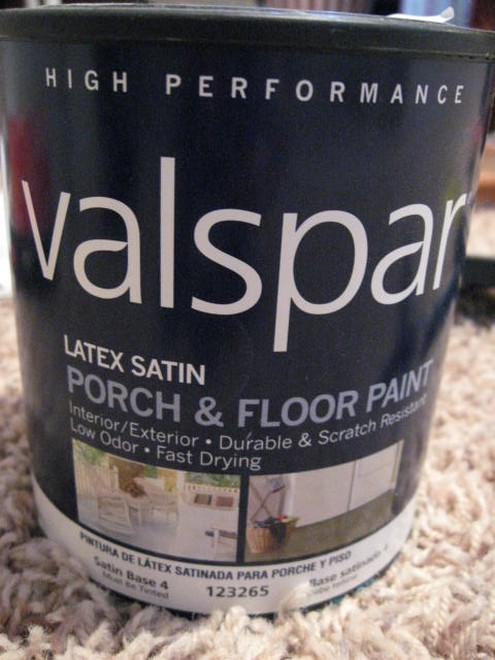
One quart of black porch and floor paint was plenty for this project. I didn’t even use 1/2 of this can.
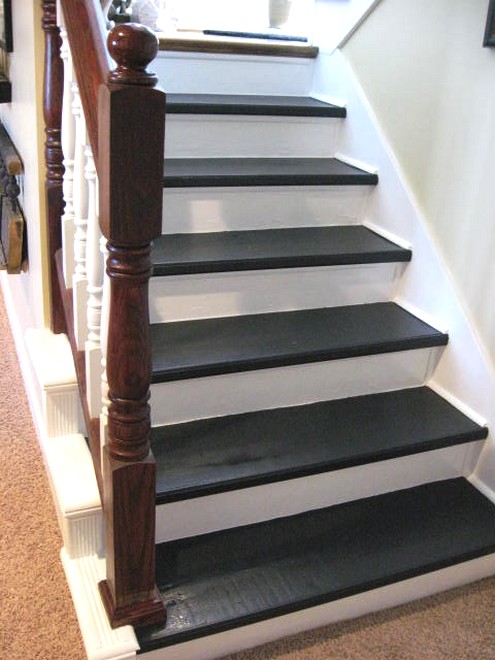
And I put on 3 coats, letting it all dry at least overnight in between. I used a small foam roller and a tiny craft brush to get around the edges by the white trim.
Just a quick visual here…BEFORE
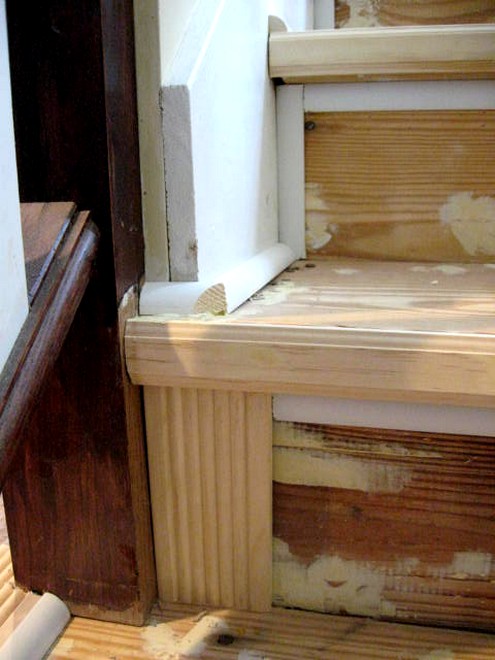
And AFTER….here are the ends all trimmed out and painted. Lots of difference between Before and After on this for sure! These are SO not perfect, but unless your nose is right down here, it all looks great.
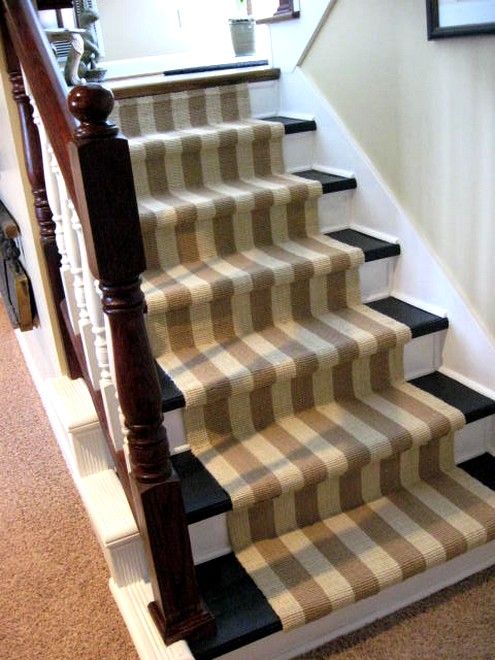
After 3 coats, the black painted stairs are done. You can see nails in the stairs. There’s just no way to completely cover them, since they are on each end and in the middle. So, that was one reason I decided to add a runner. That and the fact that I really love natural runners. But, really if you have steps that are in pretty good condition, I think the 2-3 coats of black porch paint look pretty fabulous too and I would not have had a problem leaving them like this. But, I like that extra touch that the runner added.

And one final addition of molding here at the back of the stair treads. It was impossible to keep a straight line back here. So I just added an additional small shoe molding on top and that hid all the wavy lines.
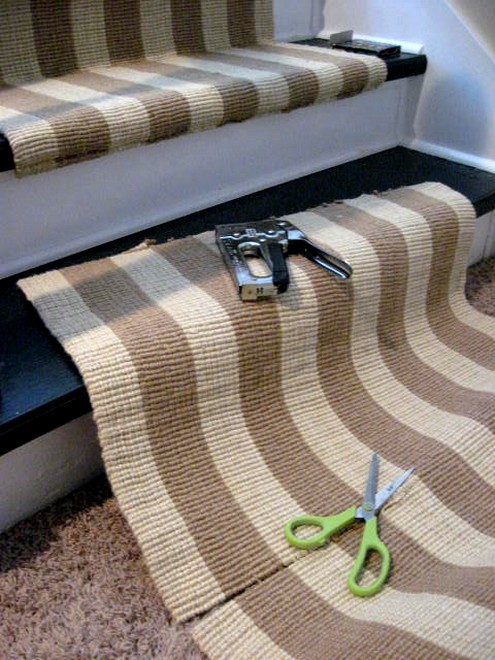
Next, stapling on the jute runner which I got from Overstock. I had to order 2 of them, since one wasn’t quite long enough. I needed to cut an extra foot or so off the 2nd one to fit that last step and it was easy enough to cut with scissors. And I have a whole section from the 2nd runner in case I need to replace one stair tread later on (like if something gets spilled, etc.). Nice to have a backup piece.
I did go back and add a little jute twine at the back of the stair treads to sort of hide the staples, since I had 6 of them that came with my rug. I simply wrapped them around the rug on either side and they are laying in place just fine. But really, those staples don’t bother me a bit. I had the twine so I used it.
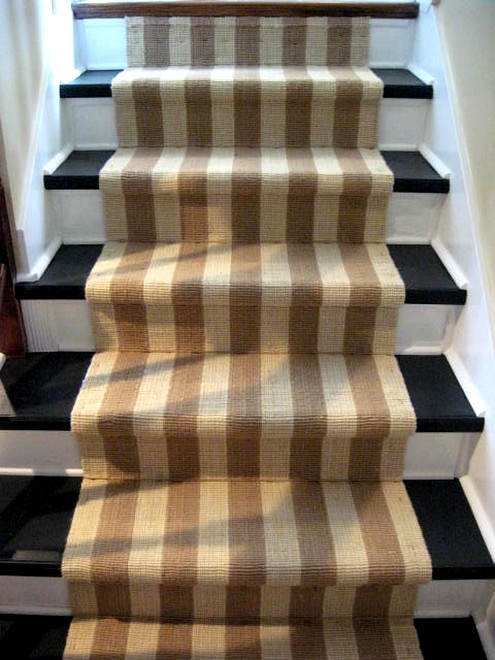
Dramatic AND beautiful, a great combo! We will definitely be enjoying these stairs for a long time to come. When the runner wears out or gets too dirty, I can pull it up for something else.
This whole project cost around $200:
1/2 for the molding, paint and supplies and 1/2 for the runner.
It was very cost effective and SO totally worth every penny. Keep in mind, I only had 6 stairs here, so if you have a whole staircase, it will be even more work. But, it is TOTALLY worth every minute of pain.
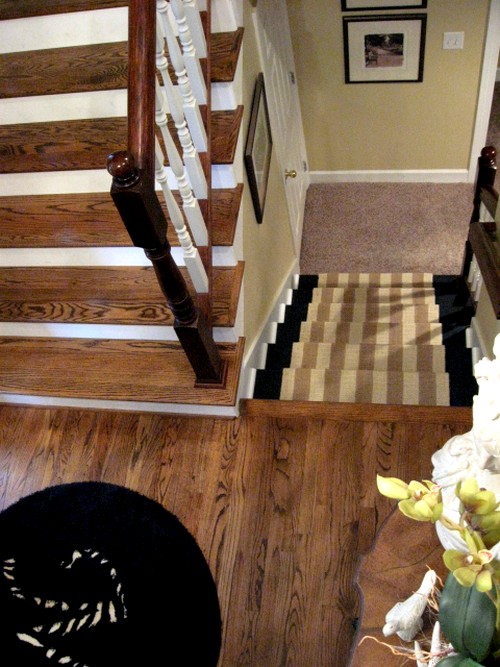
Here’s a visual from the top of our upper stairs looking down towards the foyer landing, and down to the newly painted stairs, so you can see how it all ties together.
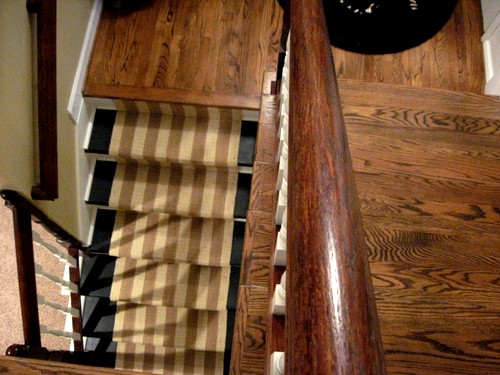
As you can see from the pics, our foyer landing already has beautiful finished hardwoods, as do the flight of stairs going up to our main living area. I simply wanted to tie these down stairs into what we already have and get rid of that ugly carpet! Mission accomplished!
Thanks from One Project Closer!
Rhoda, the stairs look great! Thanks so much for sharing your renovation story with us.
Habitat Quick Fact
From the World Habitat Day Photo Wall:
For the second year, Habitat for Humanity is collecting photos to send to leaders in Washington, D.C., to persuade them that adequate housing for all should be a priority. Take a stand this World Habitat Day and add your photo to the World Habitat Day Photo Wall.

Will you add your photo to the wall?
Submit Your Own Entry!
There’s only two weeks left! Submit your own entry to beforeandafter@oneprojectcloser.com. Include your Before and After pictures as JPEG attachments and tell us a story about your remodel in the body of the e-mail!

Thanks so much guys! I’m excited to be the winner this week & I’m so happy that project is done. I’ve seen so many stairs that were not in 1/2 as bad a shape as mine, so those should be a piece of cake. That porch paint is great stuff!
I like it Rhoda except I think they look better without the striped rug. Great job!
I am amazed! That girls needs to get herself a power miter saw! Lisa~
Thanks for the reminder of Rhoda’s fabulous transformation.
I have started work on our basement stairs and this is the inspiration I need to complete the project.
One question, would the jute runner hold up to water and dirt being tracked in? I don’t want anything on my basement stairs that can’t handle some dirt and traffic.
Having some flood damage repaired and our stairs look very much like these! Hoping to have a decent estimate and if Not I will be doing them myself. This article is getting saved to my home renovations link so I can look back and take charge of my own stairs! Thanks for sharing.
Where did you buy the foam molding?