
Today’s guest post comes to us from Tanya over at Dans le Townhouse. Tanya and her husband blog about DIY, decor, and before/after projects as they work to renovate and fix-up their “formerly ugly 1976” townhouse. I think Tanya and I must have a lot in common since we also have a formerly ugly townhouse. lol! Thanks Tanya for guest posting! If you are interested in guest posting for us, check out our guidelines and send me an email. We would love to have you!
I think brooches might be the hardest accessory for women to wear. Yet, so many of us seem to have a collection of brooches (if you don’t, peek into any vintage shop or estate sale and you’ll find hoards of them). I found a solution for those too gorgeous to part with, too fussy to wear brooches: frame them and call them art!
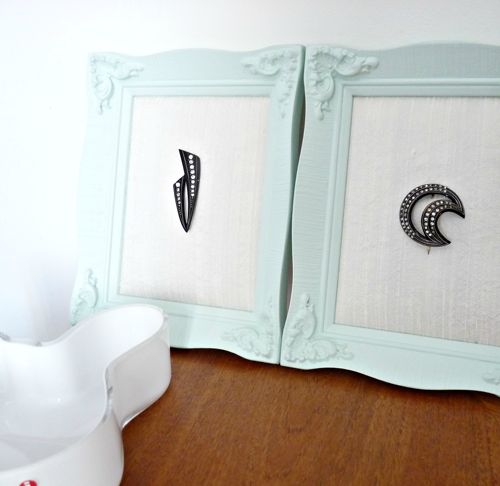
The best part is if I have a change of heart I can quickly access these jewelry pieces to wear (a bigger version of this might be a nice way to store jewelry). Plus, this project used a lot remnants from other DIY projects (which I’m sure you have too) so it cost very little.
Supplies:
- 2 (vintage) frames
- Cotton batting (2 rectangles, slightly larger than the opening of the frame)
- Fabric (2 pieces, slightly larger than the cotton batting)
- 2 Vintage brooches
- Primer
- Paint
- Small paint brush
- Aleene’s Glue (or similar)
- Sandpaper
- Tape
Step 1: Gather Supplies, including Brooches and Frames
I had two vintage Bakelite brooches that hadn’t seen the light of day in seven years. I started searching for frames to display them in, and found a pair vintage frames at an estate sale for only $5.00 (thrift stores also have a bevy of good frames).
Step 2: Prep and Paint
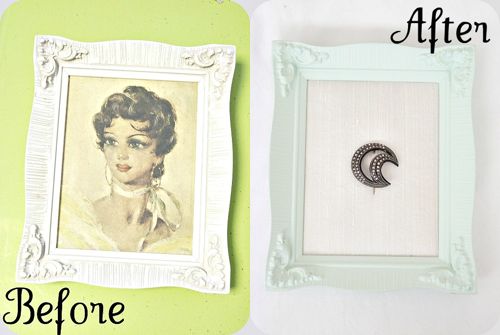
I lightly sanded the frames to remove any sheen (to help the paint grip better), then wiped them with a dry cloth. A thinly applied coat of primer, plus a few thin coats of minty-turquoise paint made the frames look new again. I used leftover latex paint, applied with a small brush, because I had leftovers from another project, but spray paint (especially a paint + primer) would work even better. I followed the manufacturer’s instruction regarding drying time in between coats for a perfect finish.
Step 3: Upholster the Frame Insert
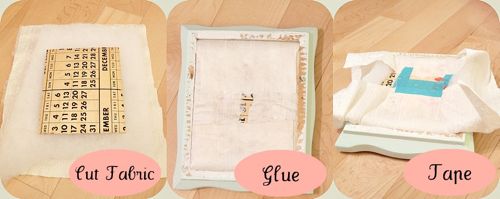
Using leftover batting from an upholstery project, coupled with fabric remnants, I “upholstered” the original image that was in the frames, using glue in lieu of staples. If your frame is empty, a piece of cardboard or super thin plywood, cut to size, could work too. Just as I would upholster a kitchen chair, I covered the surface with batting and then the fabric. I pulled tightly on one side and glued in place (I used tape to keep everything together while the glue dried), then glued the opposite side and so on, working my way around.
Step 4: Staple in the Upholstered Board
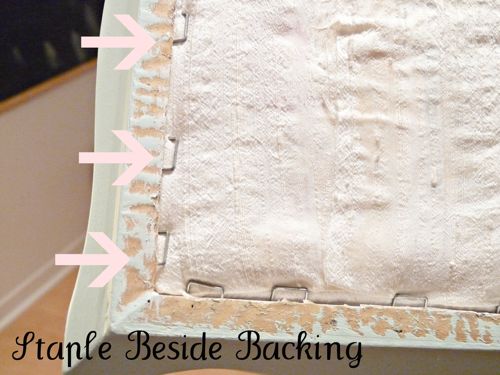
Once the glue had dried, I popped the newly-upholstered boards back into the painted frames and stapled sideways into the frames so that the staples hold the padded surface in place without actually going through the padded surface.
Step 5: Pin it!
Then I simply pinned my brooches on!
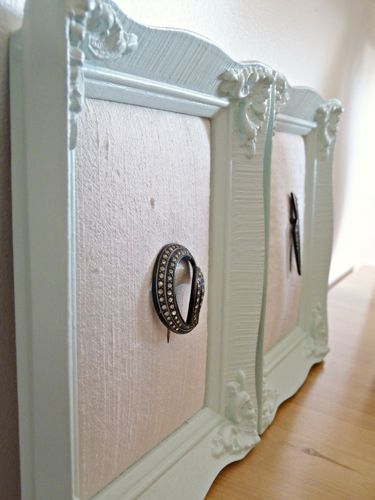
What do you think? Where will you hang your vintage framed brooch?
As Always, thanks for reading!

Don’t forget to check out our weekly Link-up Parties on Fridays, where you can submit your own DIY projects and crafts!


What a lovely idea. I have some beautiful vintage brooches (that I do wear) that belonged to my Mom and Grammy along with a few others I’ve collected over the years. I’ve often thought of doing just this, but have yet to do so for one reason only. I had no place to hang them. I’m glad you posted this because it brought the idea back to life and I now have a place for them.
Thanks Jocie and Tanya!
One of the things I found to strip the shine of wood is a Mr. Clean Magic Eraser. It quickly cleans the dirt and some of the paint to prep for painting. And the softness of the sponge seems to work really well in intricate details like the frame you show.
That is such a great idea!! i am going to try this the next time i refinish! THANKS!
Such a fun project! These would make a great gift for my mother with her mother’s old brooches. 🙂
I may have to do the same thing for my grandmother! 🙂
Pretty and if you want to wear one (if u wear broaches) u can easily take it down.
Have you considered old doors as bed headboards