

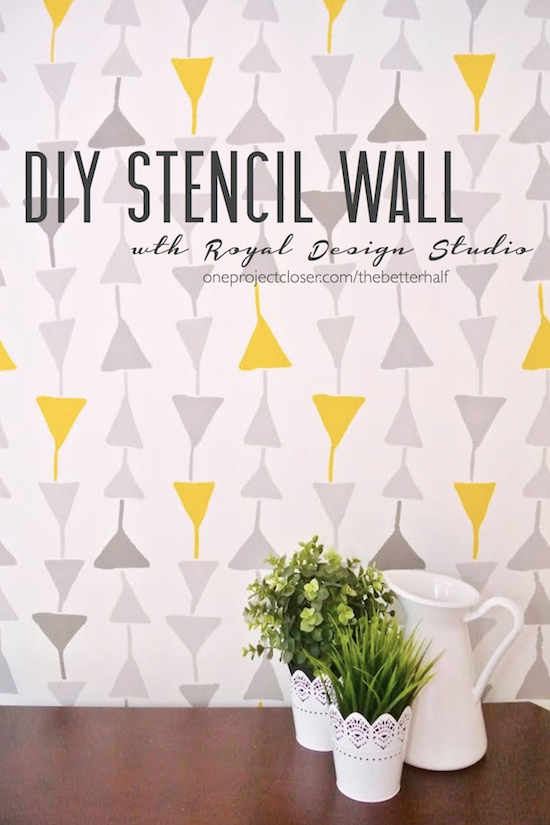
Who has two thumbs and loves a DIY stencil wall? This girl!
We’ve now been in our new home for about 2 weeks. I tell ya, we had the easy life before. The town home we lived in for the last 9 years was completely updated, decorated the way I like, and our honey-do list was pretty short. Well, now the list is a mile long and no end in sight. But on the upside, its been a lot of fun taking the house from drab to fab.
No joke, the Builder Beige walls are killing me. Before we even moved, this was the first painting project I planned because I knew it would be a quick way to add a little bit of fun and color to an otherwise white (and builder beige) kitchen. Here is the before(…before we even moved in):
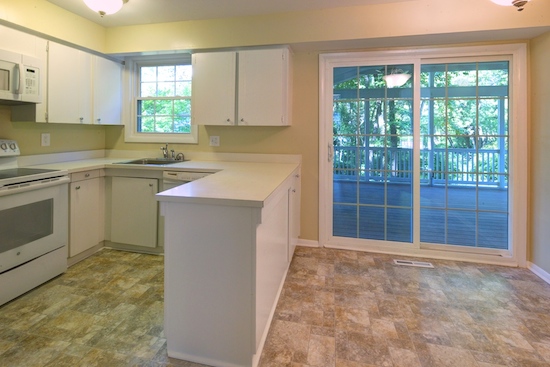 Photo Cred: Chris Paulis Photography
As you can see, we have a beautiful deck/screened in porch overlooking our yard. And its a peaceful place to sit with my cup of tea in the morning while I avoid those dishes that are staring at me from across the room.
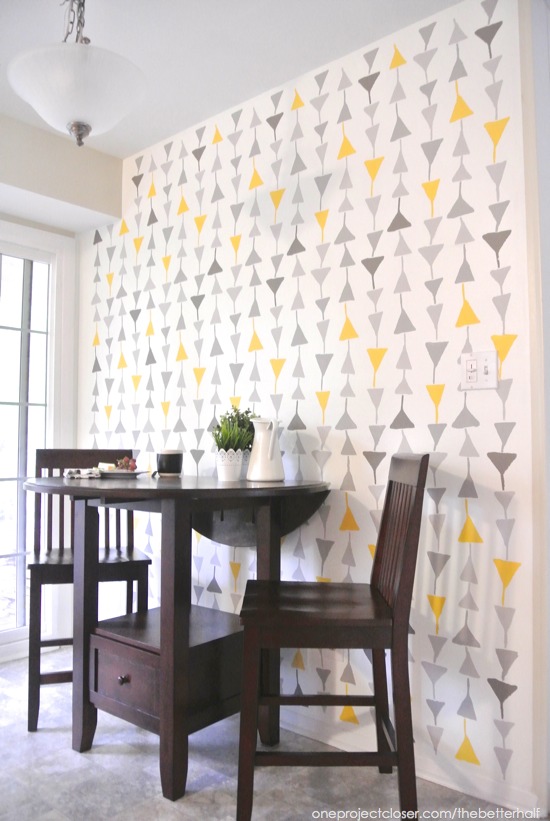
Back to the stenciling…I looked around online at removable wallpaper and stencils and came across this Triangulations All Over Wall Stencil from Royal Design Studios and really liked it. Its a bit funkier than my usual style but I like the switch up. I contacted RDS and they agreed to send me the stencil since I loved it so much!
A Few Stencil Tips:
- Read the directions and tips RDS sends you. They are really great and helpful!
- I used small sponge rollers (one for each color) to give a clean, smooth finish
- Plan to do it all in one day. It took about 4 hours, but if you do it over several days, you will need to clean the rollers. What a pain!
- Start in the middle of the wall, at the top. This way you can work in both directions as it dries and the ceiling will give you a straight start.

Side note: We tried to avoid buying a lot of new furniture, or really anything expensive since there are so many small expenses, like curtains! But, we both thought a small table was necessary for the kitchen since the girls still spill frequently and the dining room has carpet (for now). I found this super cute pub table at Target on sale, using my Target RedCard, spending only about $160 for the table and two chairs! What a steal.
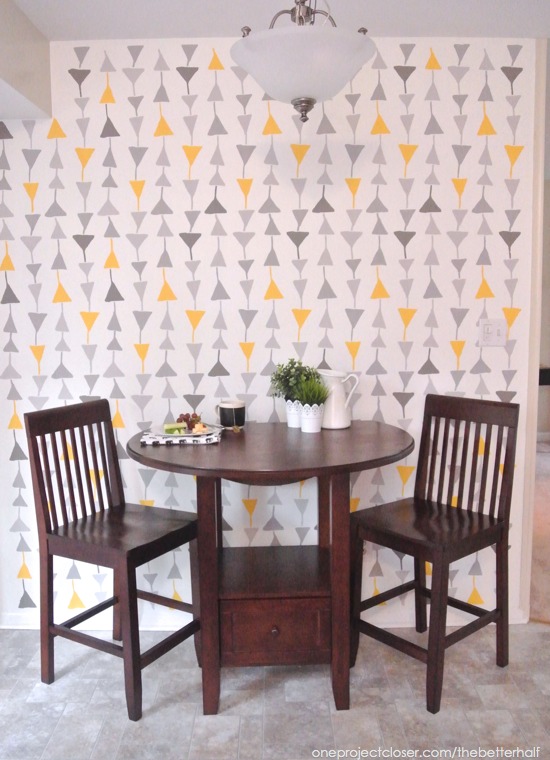
Oh and before you get judgy on me, that light fixture will be hitting the curb asap. Seriously, those boob lights are my nemesis.
What do you think? Is the stencil too “out there”? Do you have any DIY Stencil Wall tips to add?
As Always, thanks for reading!


Haha. Boob lights. We have them too and I hate them too. I said they look like boobs and billy thought I was nuts!
I would think most men would see the resemblance faster than us…lol but ethan thinks i’m crazy that all i see are boobs when i look at those lights. haha
Ps. Love the wall! Can’t wait to see the rest of the house!
Ummm…seriously the cutest wall I’ve ever seen! I might have to borrow that stencil from you!! Boob lights…haha i think that every time I look at the light section at Home Depot!
WOW this looks absolutely beautiful.
THAT WALL!! Jocie, I could not love it more!
If you put the rollers in a grocery store plastic bag (with paint still on them) and pop them in the freezer then you just need to take them out an hour before painting and you are good to go. Cuts down on all that washing until you are finished!