
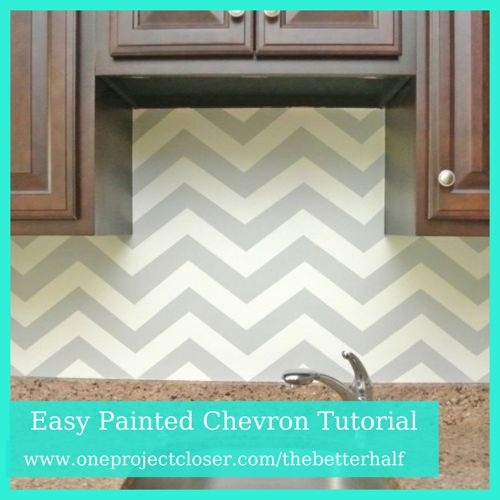
While searching on Pinterest for some inspiration for my kitchen re-design, I saw this chevron tile backsplash from Hooked on Houses. It was actually from Kelsey Grammar’s kitchen. While I’m not a huge fan of Kelsey Grammar, I do love that backsplash.
We currently have a standard 4″ granite backsplash, matching the countertop, so Ethan and I thought it might look weird to add tile backsplash above that. Plus, it would be a big financial investment for a unnecessary design element that will likely go out of style before we are prepared to remove and replace it.
All that threw tiling out the window, but I still loved the idea of chevrons in the backsplash. I considered wall paper, since it would be cheaper that tile and less work than painting chevrons. But the big downside of wall paper is that there is so much heat, steam, and water in a kitchen, wall paper doesn’t fare well in the backsplash.
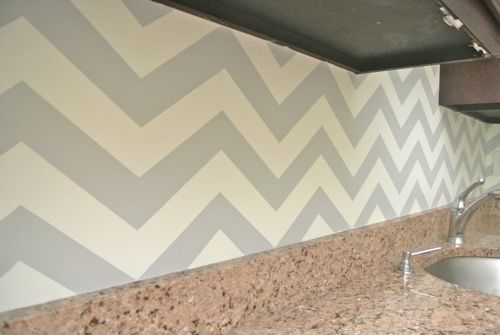
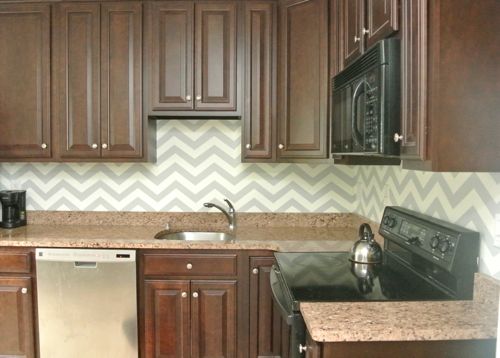
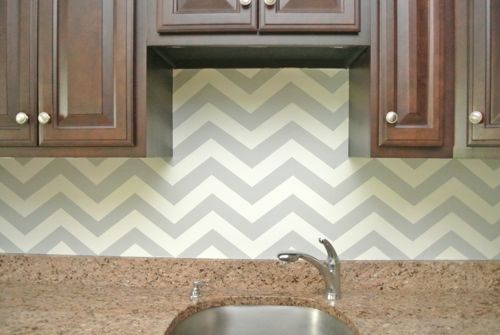
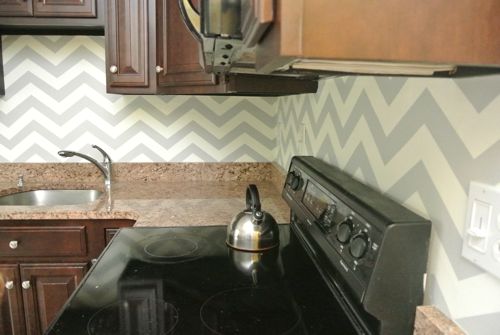
So instead I decided to paint the chevrons myself. I figured, how hard could it really be?! Turns out, it wasn’t too hard but very time consuming. I am super glad I didn’t do a larger area! Now that it is done, I really love it, and the kitchen is quickly turning into my favorite room in the house.
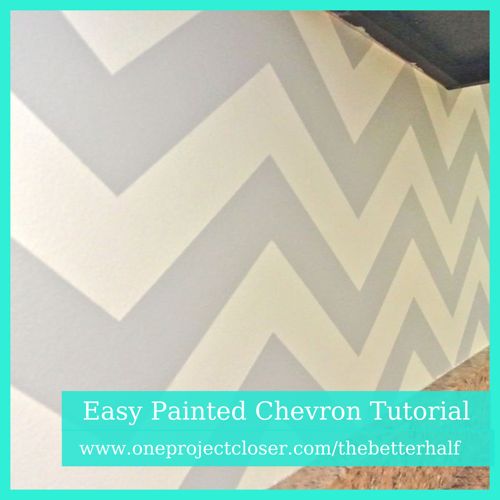
I didn’t get any help in designing the chevrons (or zig zags, which ever you prefer)- I sorta just made up my own method. There my be better methods out there, but this worked really well for me and was fairly simple! Don’t be scared by the tutorial – it looks complicated, but once you get the initial concept, it is easy!
Materials:
2 ” Blue Painter’s Tape
Wall paint, wall color and chevron color
Measuring tape
Measuring mat (optional)
Laser level, or level and chalk line
Step 1: Determine Your Chevron Size
I will give you the measurements for my chevron pattern, but you can really do it as big, little, wide, or tight as you want. The basics will be the same, just use your own size tape, height, and width of chevron.
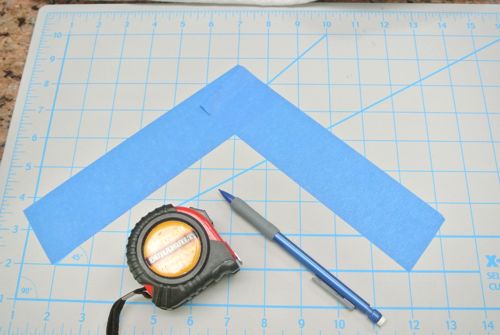
I practiced with some blue tape in the backsplash until I came up with an approximate pattern that I liked. From there, you will come up with several measurements –
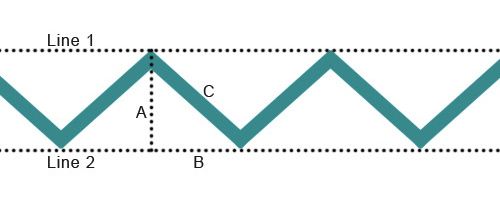
- the height of the chevron (side A) = 7 inches
- the width of the chevron (two times the length of side B) = 5 inches x 2 = 10 inches
- the length of the tape (side C) – 8.5 inches
This is not as simple as measuring the length of side C, or the hypotenuse since your chevron is not a line of single points, but rather a thick band of tape. Therefore, the angle of side C is actually made up starting at the top of one chevron to the bottom of the next chevron. The point off the top chevron is made using the right hand side of the blue tape and the point of the bottom chevron is made using the left hand side of the same piece of tape. Once you practice this, measure your tape exactly, but it WILL NOT equal the same as the length from point to point.
Step 2: Measure and mark your first chevron
Using a laser level or level and chalk line, mark where you want the top of your first line of chevrons. Be sure this is VERY straight and exact!!! The first chevron needs to be perfect because you will use it as a guide for the rest of the chevrons. I measured 7 inches up from the top of the backsplash, so the bottom of the first chevron was flush with the backsplash. This is the height of your chevron.
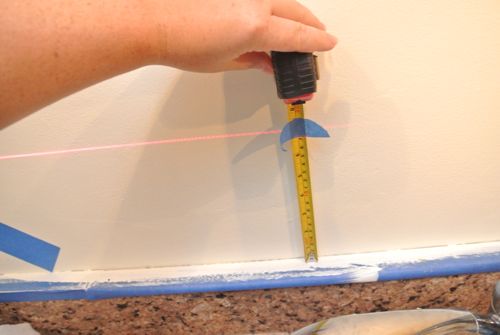
On this first line, using a pencil, mark a small point every 10 inches (or however wide you have determined you want your chevrons).
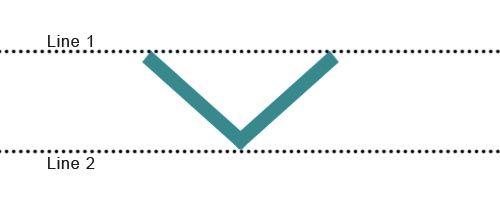
Once you have done this for the entire length of the first chevron, using your laser level, mark another line perfectly parallel to your first line. Line 2 will be 7 inches below line 1 – this is the height of your chevron.
Instead of marking a new line (line 2), I used the line of my granite backsplash. From your very first point on line 1, measure 5 inches over and place a mark on line 2 – this is the bottom point of the chevron. From this point on line 2, measure and mark every 10 inches for the entire length of the first chevron.
You now have the the top and bottom points marked for the first line of chevrons.
Step 3: Tape!
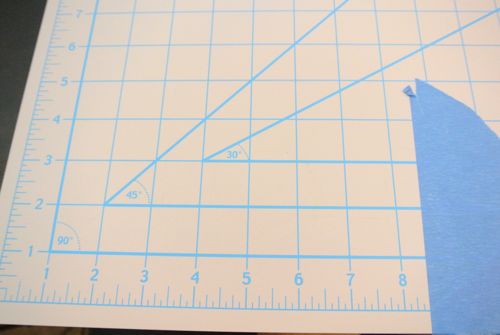
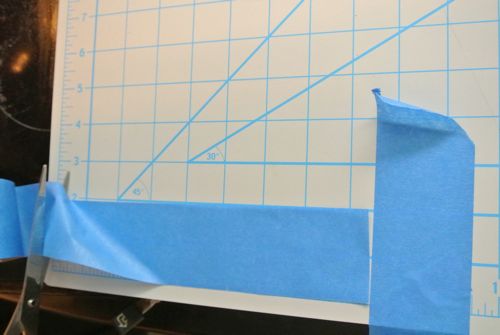
Cut lots of lots of blue painter’s tape exactly 8.5 inches long. Since the measurement is not a whole number, and to make sure I was cutting the same length every time, I placed a piece of blue tape on my measuring mat, and measured to the tape rather than a number. It worked great and I didn’t have to keep lots of numbers in my head.
Place the right side of one piece of tape on the top point of the first chevron. Moving right, place the right end of the same piece of tape on the bottom of the chevron.
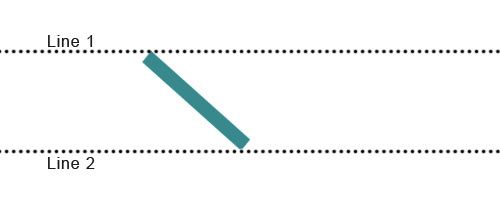
Taking a second piece of tape, place the left side of the tape on the bottom of the same chevron. Moving right, place the left side of the tape on the top point of the next chevron.
In other words, if holding the tape horizontal, you will always place the top edge of the tape at the top of the chevron, and the bottom edge of the tape at the bottom of the chevron.
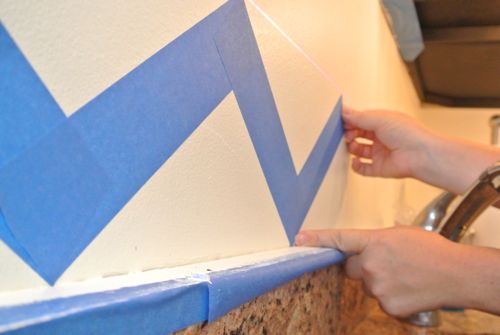
Keep repeating this for the entire length of the chevron.
Step 4: Measure and Tape
Starting your second chevron is a little tricky, but once you get it started, no need to keep measuring!
If you are using a different width of chevrons other than 2″, here is how I got the distance from the top point of one chevron to the top point of the chevron above it:
- I used my measuring mat to create two sample chevrons. I wanted them spaced so that all the chevrons were equal in width (2″). But, this does not mean that the points are 2″ apart, so this was the calculation that was a little difficult. I played with the spacing until sides of both chevrons were exactly two inches apart.
- Once in place, measure the distance between the top point of once chevron to the top point of the other chevron.
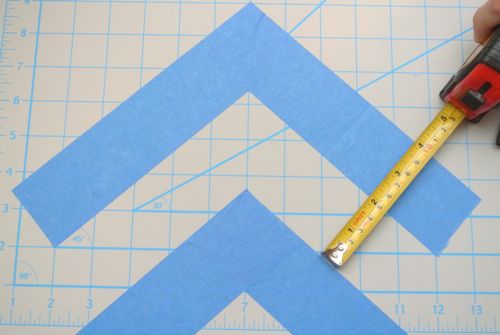
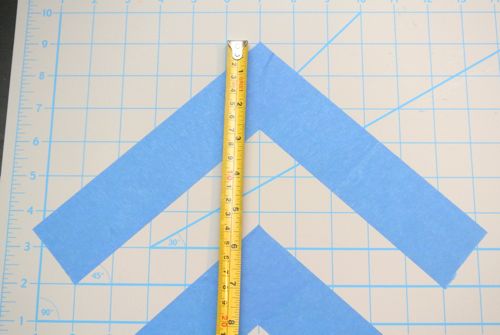
If making 2″ thick chevrons, you will measure 5-3/8 inches from the top of the first line of chevrons and mark using your laser level.
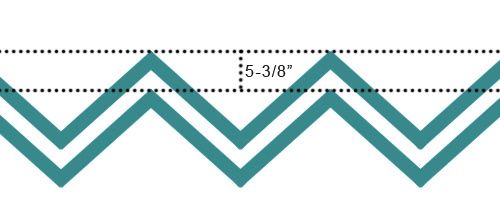
Then mark a point 5 3/8 inches above each BOTTOM point of the chevron. Again, I marked my measuring tape to make sure I always marked the same distance.
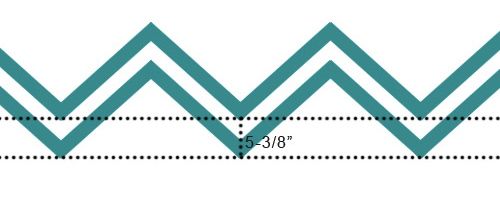
*Do not measure using the method for the first chevron, marking every 10 inches along the horizontal line. That measurement does not matter as much as making sure the chevrons line up with each other.
I short-cutted things and did not mark the top points of the chevrons, instead I followed the slope of the chevron above (or below) it. Since the tape is measured to be all the same length it always ends where the point should be on the laser level line. If you are not as confident eye-balling it, you can also measure up from the top of the point of each chevron (5-3/8 inches).
Once you have the bottom points of the second line of chevrons, cut lots more tape 5-3/8 inches long, repeating step 3.
You will keep on repeating this process for the entire area until all your chevrons have been taped.
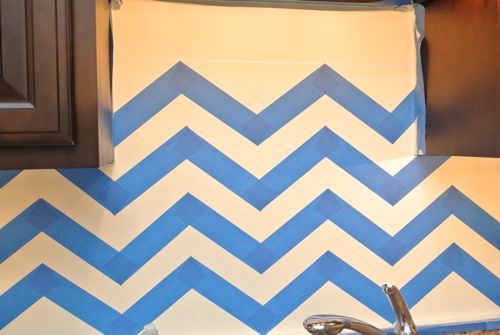
Tips:
- For the top and bottom edges of the backsplash or wall, you will only be able to measure and mark one point of the chevron. Therefore, you will have to eye-ball the angle.
- When taping a corner or the top and bottom edges, make sure the tape in completely flush with the wall. I used my finger nail, or you can use a hard, flat edge to ensure the tape is covering the wall and not pulled away from it.
- Run your hand along all the taped chevrons to make sure they are pressed firmly to the wall.
- Use short-cuts. All the numbers will get confusing. Use card stock to mark the measurements and label each card so you can re-use it. I used blue tape on my measuring tape.
- Don’t stress. If you mess up a chevron, pull off the tape and start again! But if you see you have made a mistake, fix it now, because the mistake will multiply and be difficult to fix later.
Step 5: Paint the tape the wall color
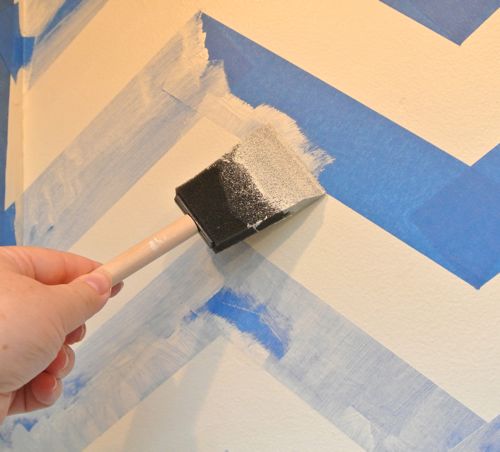
In the past, when I have taped walls when painting, I am so frustrated because the paint often bleeds. I wonder why I even bothered taping to begin with. With the chevrons, bleeding paint would have been a serious problem. To combat this, I painted a very thin coat of the wall color paint, working the paint against the tape line.
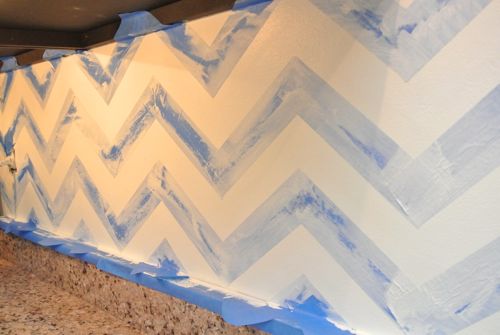
Step 6: Paint the chevrons
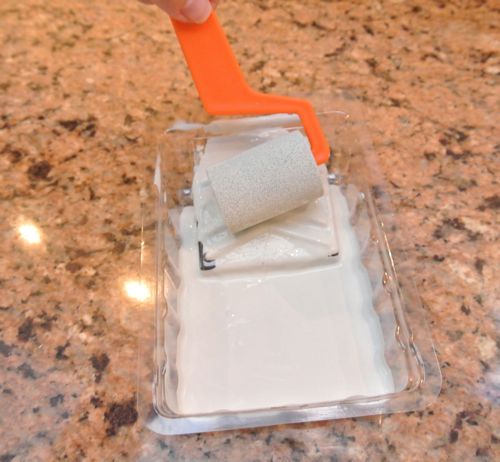
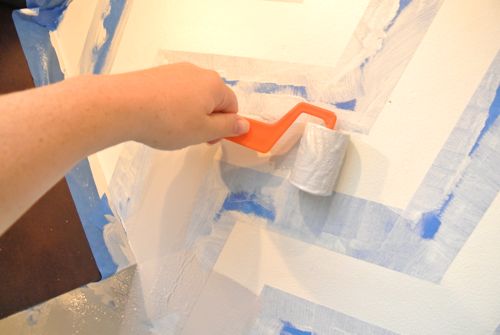
Using a different color or sheen than your wall color, paint the chevrons. Work quickly but thoroughly. I used a small sponge roller and a small sponge brush for the edges.
Step 7: Remove the tape
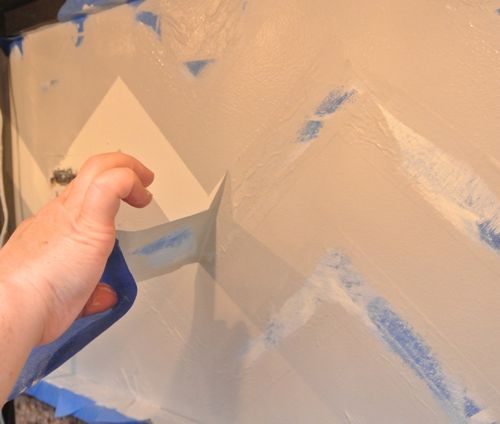
While the paint is still tacky (not dripping wet but NOT dry), carefully and slowly remove the tape. If you wait until the paint is completely dry, some paint will tear, especially latex paints. If you remove the tape when the paint is too wet, the paint may splatter some.
Step 8: Touch -Up
Even though I was super careful in priming the tape and removing the tape when the paint was tacky, there were small places where paint had splattered or the tape removed paint. Using a small brush, I went back and fixed any problems spots, this included points of chevrons that were not perfect.
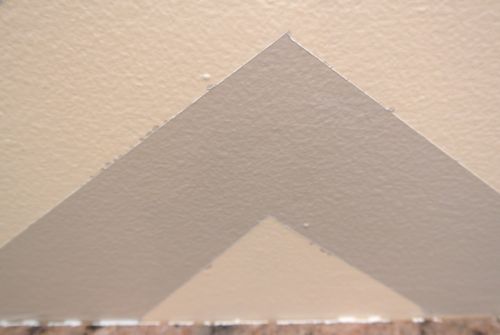
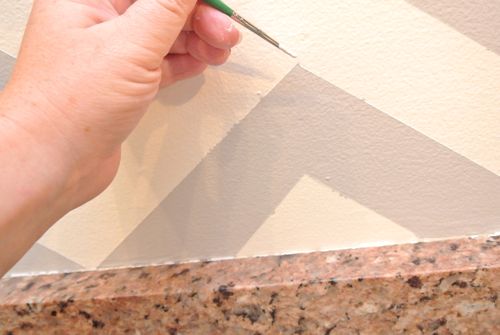
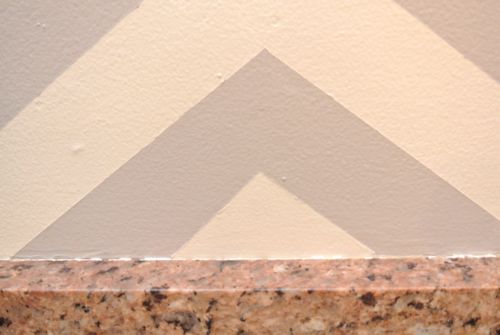
Step 9: Show it off!
After all that work, have a party and show it off because it looks amazing! Seriously, I love it and it looks so professional!
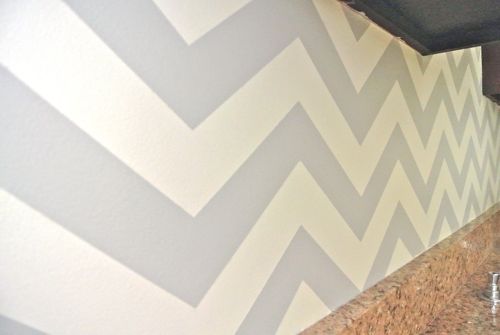
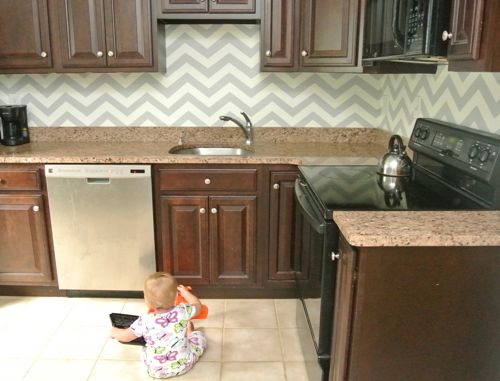 Lucy likes to help, too! 🙂
Where will you paint your chevrons? Any good painting tips?
As Always, thanks for reading!

Don’t forget to check us out on Facebook and Pinterest!



That looks fantastic!!
Thanks Megan!
Wow! That looks incredible! I love it!
Thanks, Ashley!
That looks awesome Jocie, but isn’t there a stencil that would make this job less time consuming?
I looked for stencils, and i couldn’t find one I liked and they were expensive. 🙁 it may have been less time consuming, although stencils are slow also.
They can get very expensive. I would imagine they can be time consuming too since you probably have to clean the back every time you use it so as not to transfer paint when you move it.
Wow, I think that took more tape than when my husband and I painted and argyle pattern on our son’s nursery walls! :0D
Hey Bev, Ethan showed me your argyle! That was amazing!!!
I want to see it! Do you have a blog?
I don’t use scotch blue any more. Too many bleed issues. I just use frog instead. My hand isn’t steady enough to come back and touch up, I’d just make it worse. Looks fantastic.
Jeff, what is Frog?!?!?!?!?
Jeff, what you do then is go over the edges with the base color before you use the second color. That way anything that bleeds through will be the base color.
Jocie, Frog tape is a brand. It’s green and you can find it at the big box stores.
I’ve also used a clear acrylic to seal the tape…before I got smart and thought to just use the base color. I wonder if a spray sealer would work?
I have not seen a significant difference with the frog tape. It didn’t seem worth the price jump with the performance that I got out it.
Jocie, this is absolutely amazing!
Thanks, Naomi!
Thanks for writing such a thorough explanation of the taping process! I always wondered how people got it so clean. Looks great!!
Thanks so much Erin!
That looks great first glance I thought it was wallpaper.
Did you ever try the Scotch Blue Painters tape with Edge Lock. I have yet to but maybe it works better as it claims to prevent bleeding and give you great lines.
http://www.scotchblue.com/wps/portal/3M/en_US/Scotch-BlueBrand/Scotch-Blue/Products/Catalog/~/ScotchBlue-Painter-s-Tape-Advanced-Multi-Surface-with-Edge-Lock-2093EL?N=5941829&rt=rud
I haven’t used Scotch Blue with Edge Lock, but priming the tape worked really well!
I love this idea. I don’t know if I’d do it on a backsplash in my home, but I love the finished look.
Thanks, Reuben!
Looks great! I have also switched to Frog rather than Scotch Blue. I’m not sure if there’s a price difference, but even if there is it is well worth it.
I can’t believe I’ve never heard of Frog! I need to get to home Depot and try some out!
Looks great! Very nice choice of colors, too.
How long did it take for that size area?
Hi trebor! Its hard to say how long it took, b/c I had two little girls running around while I was working, so I wasn’t working constantly. I would say maybe 2 hours to tape and an hour to prime the tape, paint, and touch up. it would have gone a lot quicker taping if there were two of us, one cutting the tape and one placing the tape. 🙂
Wow, that’s actually much faster than I would have guessed for taping. I was thinking closer to double that!
Again…very nice!
i love this look… i am not sure I have this much patience to complete though! (2 hours taping is not bad though)
you have the patience of a saint! I’m not sure I have the patience for this one 🙂
Erin, I think YOU have the patience of a saint with 4 kids! 🙂
That LOOKS amazing!!!
I have a question! I’m thinking of doing something very similar (except that I want to do an uneven chevron). But, I’m worried about the cleanup and durability of paint as a backsplash. I already have Sherwin Williams emerald paint in a semi-gloss that is supposed to be durable and cleanable after a 30 day curing period. But, I feel like I might be throwing good money after bad and just end up tiling everything anyways. How has your painted backsplash held up? How does it clean? Do you find the area behind the range and/or behind the sink to be difficult?
It would be so wonderful if you could let us know!!! Thanks for sharing your project. Your kitchen looks absolutely lovely.
Hey Sisi, I used Behr paint (because it was convenient although not as good as Sherwin-Willaims) and it had held up great to scrubbing. Not wearing spots yet. I had the same concerns and figure I can touch up with a small paint brush in the future, if need be.
Let me know how it goes and what you decide! 🙂
Your chevron is awesome! I just had my entry way painted with gray on the bottom half & yellow on the top. Right now the colors are just meeting at the line, but I would like to maybe put a gray chevron on the top & then a yellow on the bottom…maybe a white in the middle, maybe not…any thoughts or suggestions? I have 2 smaller walls & then 2 walls that have a door in them so there is a very small space on either side of the door. How did you decide how wide to make each chevron?
thanks for the great tutorial!