
This past Christmas, Kim gave Fred an Official Red Ryder Carbine-Action Two-Hundred-Shot Range Model Air Rifle. (Yep, it’s just like this one, except it has no compass in the stock, and it doesn’t have a “thing which tells time”…) I pulled this picture from Christmas morning off Facebook; check out that big ol’ grin.

Fred and I were shooting it in the workshop at a makeshift target the other night when a BB came flying back at us on a ricochet. Neither of us shot an eye out that night, but we still decided it was a good idea to build a safer backstop for our BB shooting escapades. Plus, it gave me an excuse for another beginner’s woodworking project to share with you.
This backstop design uses tongue-and-groove construction to join the sides and back. These types of joints are extremely strong. This is an easy first project to practice tongue-and-groove construction.
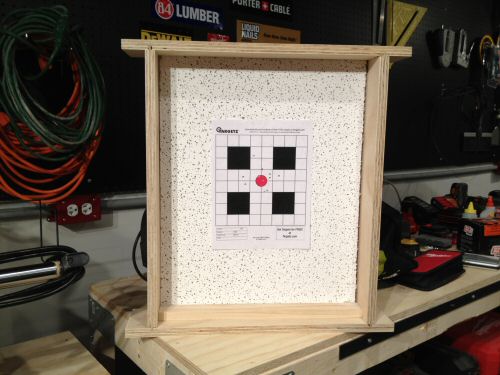
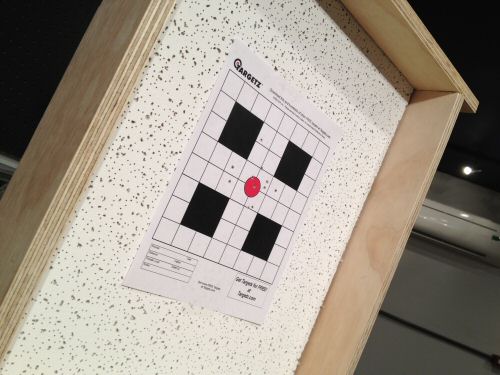
Tools & Materials
I used scrap material from our wall-mounted lumber storage project for most of the materials. The general idea was to build a frame with a plywood back and find some sort of material that would hold onto a BB, preventing it from rebounding back out. After wandering around Home Depot, I realized that a drop ceiling tile would be the perfect backing, and it would be easy to replace.
Materials
- 3/4″ plywood – for walls – scraps will probably work if you have them, or a 2×2 sheet.
- 1/4″ plywood – for backing – 2×2 sheet
- 1×2″ pine – or 3/4″ plywood could be substituted
- (1) 2×2 drop ceiling tile
Tools
- Router (or table saw with dado blade)
- Jigsaw
- Rubber mallet
- Wood glue
- Pin nailer
How to Build A BB Gun Backstop
I wanted to attempt (for the first time) tongue and groove wood joints. T&G joints are very strong, and becoming proficient in making this style of joint will be a useful skill for future woodworking projects. You can purchase a set of router bits specifically designed for this task or use a straight flute bit (like I did). If you’re not interested in something as involved, you can build a similar BB gun backstop using alternate wood joints like lap joints or even butt joints.
Step 1: Cut Plywood to Size
Like I mentioned, most of the materials for this project were leftovers from building my lumber storage rack. That means I already had pieces cut to acceptable dimensions. If you’re not so lucky, cut four pieces of 3/4″ plywood into 4″ x 22″ strips. Cut the 1/4″ backing to 17-1/4″ x 21-5/8″.
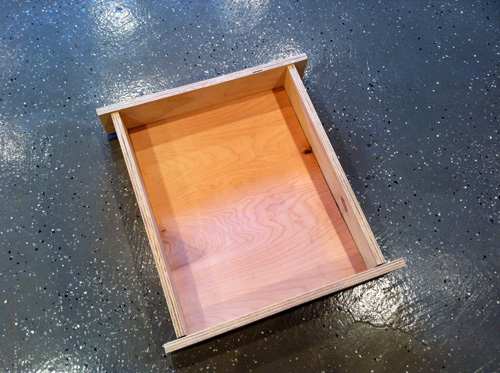
Step 2: Route the Tongues
Cut a 1/4″ tongue (deep and wide) on both ends of each side of the 3/4″ plywood vertical rails. Using a 1/4″ straight router bit, I fine-tuned the position of the router with a piece of scrap. After it was setup, routing the tongues went very quickly, a quick slide by the flute on each side.
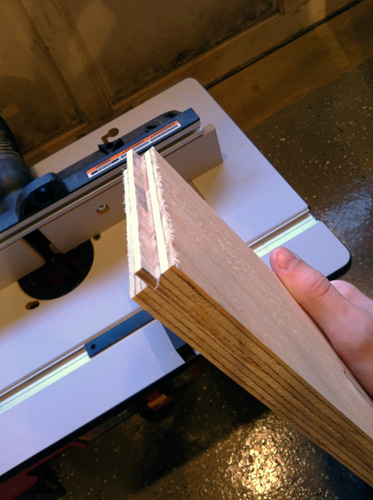
Step 3: Route the Grooves
Side Grooves
I decided to cut the side grooves 2-1/2″ away from each end on the top and bottom boards. That made things a little simpler because I didn’t need to worry about lining up the outside edges. Plus, I could easily cut the ceiling tile to size. The position of the groove is flexible. Just be sure to keep everything consistent and modify the dimensions of your plywood backing as necessary.
I used an 1/8″ straight flute router bit and made multiple passes. After each pass I would dry fit the joint, working to keep everything snug.
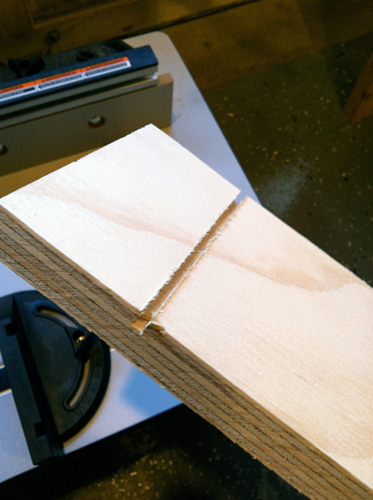
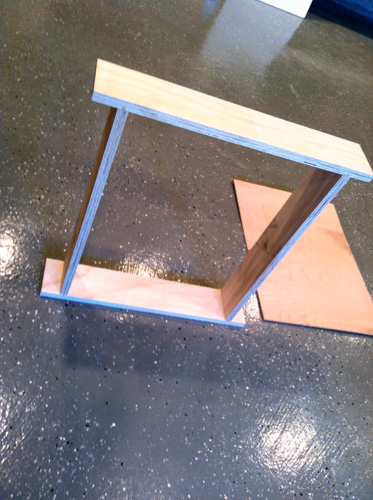
Back Groove
I cut a similar groove about 1/2″ away from the backside to accommodate the 1/4″ plywood backing. Again, I used the 1/8″ straight flute bit and made multiple passes. It’s important to note that I only cut this back groove on the bottom and side boards. You’ll see why I omitted the top board in the next step.
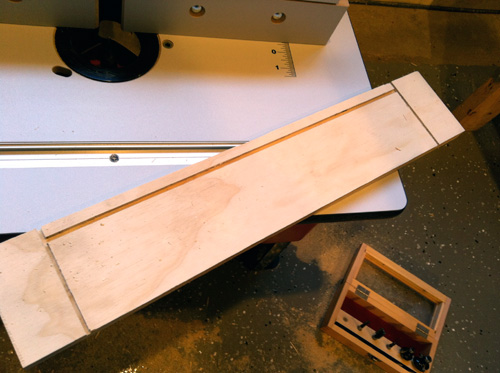
Step 4: Cut a Slot in the Top
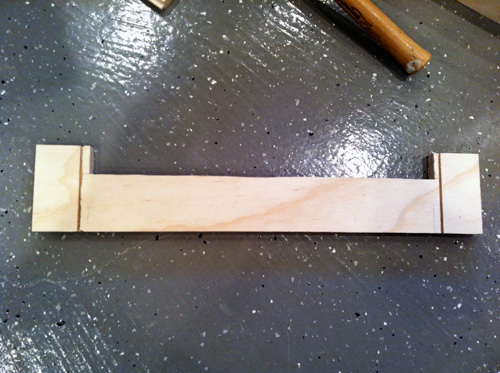
I figure a ceiling tile will only last so long against a barrage of BB’s, and so I cut a slot at the top to make it easy to swap in a new tile. For the dimensions, I use the ceiling tile to determine the thickness and my jigsaw to cut it out.
This picture shows the hole I drilled to start the cut.
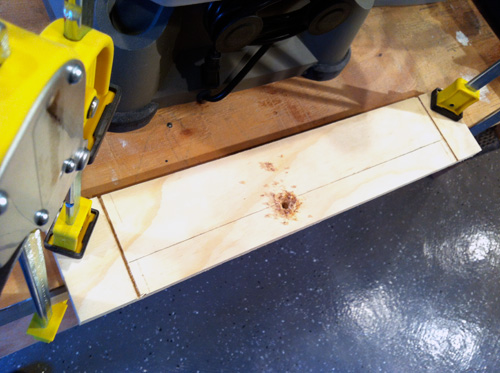
Step 5: Glue it Together
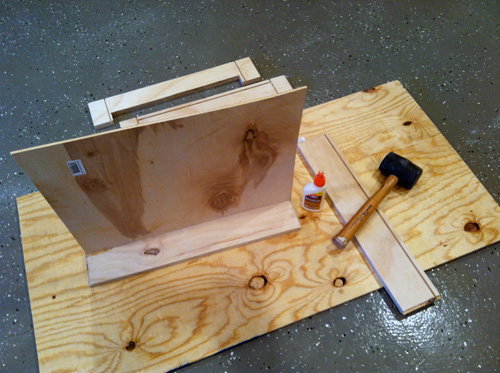
I used the rubber mallet to help put all the pieces together. Unfortunately, I made a few grooves too tight and needed to make additional cuts before it all fit. I glued all the joints and let it dry overnight.
Step 6: Add a Bottom Guide
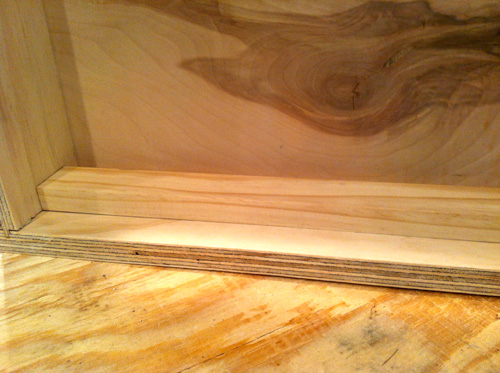
The top slot was necessary because I wanted to add at least one guide to prevent the ceiling tile from falling out. To achieve this, I pin-nailed a piece of 1×2 to the bottom of the frame.
Step 7: Cut the Ceiling Tile
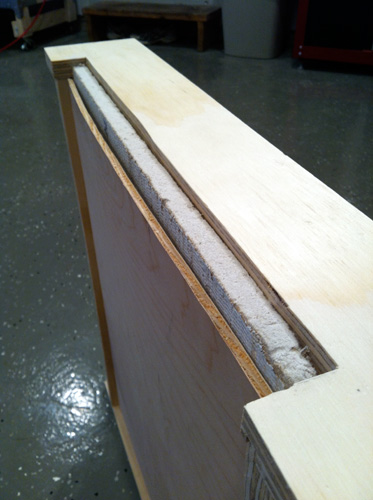
I used a utility knife to cut the ceiling tile to fit and slide it in place. It is held at the top by the opening in the plywood, and at the bottom by the guide installed in Step 6.

Target Practice
Of course I wanted to try out my new creation, so I printed off a target and set everything up across the shop (about 17′ away). You can see how deadly I am with a BB gun.
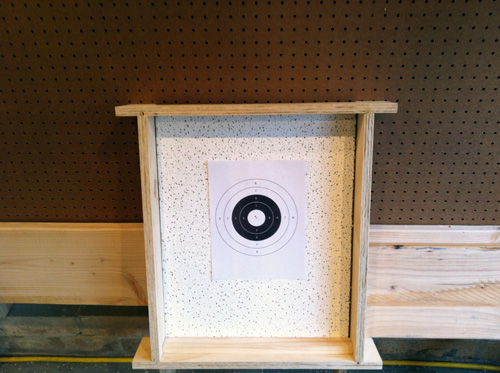
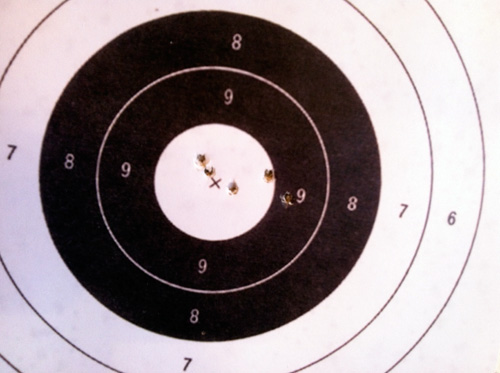
The backstop caught all the BB’s. None of them came out, and I wasn’t afraid of shooting my eye out!
Where to Get Targets
After building the BB backstop, I was hoping to find free online targets. After a few Google searches, we came across Targetz, which offers PDF shooting targets that are 100% free. Unlike many other “free” sites out there, this one was easy to navigate and actually download and print a target.


Great post.Thanks for sharing such a useful information with us.
Clearly Black Bart and his gang don’t stand a chance with you and old blue protecting the joint.
For some crazy reason, Jocie has never seen A Christmas Story! I’m glad everyone else made the connection 🙂
So if you would happen to get a “major award” in the mail she probably wouldn’t let you display it in the front window?
@ Ethan – Jocie’s not the only one – I haven’t ever seen it either!
@ Jeff – “major award?” Gonna have to Google that part ’cause what springs to MY mind is Arrested Development instead. 🙂
Did the BBs make it through the tile into the wood? or did the tile stop them?
I triple dog dare you to lick the flagpole 🙂
None of the BB’s show through on the backside of the tile, but without the plywood, I think they’d make it through.
Great idea guys! I will pass this one on to a friend whose son got a BB gun for Christmas also! Any ideas how it would work for airsoft?
Erin, I think airsoft pellets would likely bounce off the tile. We’re going to be re-thinking it at some point in the future. William and Robin left some good tips below for a better design that might include an angled backstop, BB catch, and/or carpet.
I’ve never seen the movie either. But since it’s so iconic, I caught the reference.
You can also use carpet scraps as backstop material. Instead of mounting the target directly to the backstop material, you would create a similar box with a back, but put carpet on the back. You could affix it any way you wanted- staple it to the back; staple it to the top, so it hangs freely like a mudflap and more readily absorbs the impact, or whatever you come up with. The important part is that the target isn’t ON the backstop material, or you’ll eventually find that the BB’s will bounce back into the target.
With your current setup, as you continue to fill the tile up with BB’s, you will have a hard surface in the center of your target (either the plywood back or the collection of imbedded BB’s) that will cause BB’s to ricochet back at least into the target, and maybe beyond.
If you use carpet, then staple or otherwise affix cardboard to the front of the box, you can attach the targets to the cardboard. The BB’s will penetrate the target and the cardboard, hit the carpet, and collect inside the box. In this manner, you can reuse the BB’s, too. Don’t reuse lead pellets fired into this backstop. Cardboard is cheaper than ceiling tiles, and I’m sure you’ve got tons of it from all the things you guys get shipped to you. You could even make a slot to slide it through like your ceiling tile slot.
And I got my 2 year old son the same Red Ryder this Christmas. He’ll get it when he’s older, but I had to get it while they’re still made with real wood.
William, Great tips! We’ll likely be revisiting this basic backstop and improving it!
Thanks for sharing such a great beginner’s woodworking project with us. A Christmas Story is one of those movies that I’ve seen so many bits and pieces of throughout the years that I cannot recall if I’ve actually ever seen the entire movie from start to finish in one sitting.
No! No! I want an Official Red Ryder Carbine-Action Two-Hundred-Shot Range Model Air Rifle!
Santa :You’ll shoot your eye out kid
Love A Christmas Story 🙂
It is a great movie! I just learned that Kim has never seen it, but also knew the reference (it is so iconic). Even though we’re past the season, we’ll have to get it on Netflix.
Clearly you guys need a OPC movie night. Maybe setup a projector in the shop and hang a sheet on the garage door.
You’ll shoot your eye out! Like William said that isn’t going to work for very long. You’ll constantly be replacing the ceiling tiles. And no backstop should have a straight back.
A true indoor range backstop has a target that hangs from clips in the front and a slanted back with a steel plate on it. All of this is above a cavity where the pellets fall. My husband made ours and it’s in the basement next to the dry fire target. He covered the outside of it with some sound absorbing material to reduce noise. We use the same type of thing when we shoot .22 at one of our indoor ranges. There are a few other backstop designs but those are the cheapest and easiest. Plus you never have to replace anything but the target!
Robin, this is really good. Think you could shoot us a picture of yours? You can email ethan (link at the top of the post). We’ll likely revisit this simple design with something more sustainable!
Sure I’ll try to dig it out and take some pictures sometime. I was thinking of writing a blog post about it too possibly. FM wanted to help write it. : )
You should have taken the picture next to your leg lamp! 🙂
LOL on the reference. We have NOT built one of those yet. I’m not sure it would fit in with our industrial-style workshop…. Or in fact, any decorating style whatsoever!
You can buy the leg lamp premade. Official Christmas Story merch. Its only for the diehard fans tho.
Anyone try this with a high- powered pellet gun? I like the carpet backstop idea. I also noticed that you used a ceiling tile with lots of pre-made holes in it- maybe handy for hiding those ” way- off- the- mark” shots? Anyway, sure beats the manufactured stops in price!
Yeah, my carpet idea isn’t exactly an original idea. It’s based on how we made the traps for the rifle team in high school. We shot in classroom trailers that we made into ranges, and shot with nice Anschutz pellet rifles. Carpet was the main backstop material, with the targets stapled to cardboard panels that stretched the height of the trailer, so we could do offhand, kneeling, and prone.
Nice! I never would have thought of ceiling tiles… looks like fun!