
 Sealing your driveway is an excellent way to add curb appeal to your home for a relatively low price–a fraction of the cost of a new asphalt driveway. Over time, asphalt grays and forms pits as the softer tar on the surface wears away and the stones underneath it emerge. Sealing asphalt benefits you cosmetically (there’s nothing quite like new a new blacktop look), and also helps your driveway resist the elements. The primary advantage of sealing is that it creates a less porous surface which serves as a rain barrier. In the winter, this prevents water from seeping down into the asphalt and then freezing, expanding, and causing cracks in the surface.
Sealing your driveway also forces you to address cracks and holes in the driveway that could grow over time. While you could handle these outside of a sealing job, it is a nice motivator with a big payoff in terms of looks.
Our neighbors recently sealed their driveway with two coats of Latex-ite, a gel-like sealer available at your local big box improvement store. We spent some time with them reviewing their experience. There’s a great ‘just finished’ picture at the end to motivate you to seal your own driveway.
DIY or Hire a Driveway Sealer Contractor?
Most asphalt contractors will also provide a sealing service, especially if they’re the ones who laid your driveway. While this project isn’t too hard, if you’re looking for someone to help with the project, one of our Partner blogs, Calfinder, offers a great service for finding home improvement contractors.
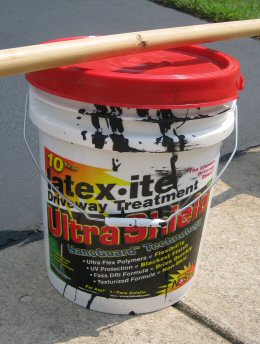
The cost of Latex-ite (shown above) is about $20 per 5 gallon bucket. A 30-foot single car driveway will take about four buckets for two solid coats. Paying a contractor will add about 30% to the materials price, and you can plan on about $250-400 for the labor.
How to Apply Asphalt Sealer
Latex-ite recommends a five step process that is pretty similar to other sealers. You’ll need a period of three days without rain in the forecast, and the recommended outdoor temperature for sealing is in the 50s – 80s. The basic steps are:
Step 1: Remove all debris from the driveway (a leaf blower is good for this). Remove all residue, especially residue from oil stains or other stains on the surface of the driveway. Oil stains will prevent the sealer from forming a good bond with the underlying surface. Our neighbor used and recommends Purple Power cleaning solution, which he used on both the driveway and the floor of his garage with excellent results (it gets the oil to unstick from the driveway so it can be hosed off).
Step 2: Prime the driveway. Priming will prevent remaining oil spots and other spots from bleeding through. It will also create a strong bonding surface for the gel.
Step 3: Fill small cracks (less than 1/4″) in the surface of the driveway with a tube of asphalt filler. You can find these fillers located with the sealers in your home improvement store. Sometimes they are also located with the caulk. You should fix these problems 4 hours before you seal the driveway.
Step 4: Fill low spots and large cracks with an asphalt patch. This will require several hours to set up. If you have a driveway with this type of problem, you should fix it 2 days before you intend to seal.
Step 5: Seal the driveway with Latex-ite Sealer. (Keep reading below).
Spreading Asphalt Sealer
Most asphalt sealers will perform and look their best with at least two coats. While every sealer will come with instructions, here’s some tips for what you can do to maximize your experience:
Tip 1. Spread from high to low. That is, start with the driveway is the highest, and allow gravity to help you spread the sealer to the lowest point.
Tip 2. Use a large paint brush close to the house. Most of your spreading will be done with a squeegee. Even when being careful, it’s easy to splash sealer onto the house. Do the 6 inches closest to the house and around the perimeter with the brush.
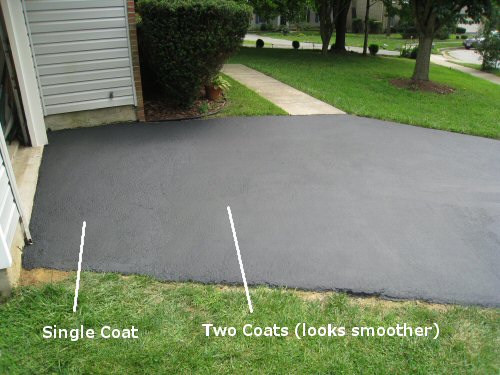
Tip 3. Follow a consistent pattern so you know which areas have been sealed twice. The driveway will look a little different in the spots there’s one coat vs. two. (This is much less noticeable between the second and third coats, should you choose to apply one). Take a look at this picture that shows you the differential:
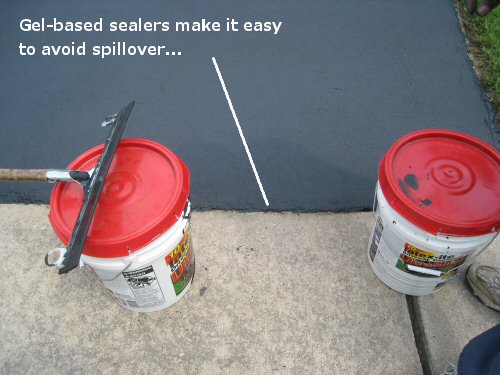
Tip 4. Allow the sealer to curve around the edge of the asphalt. Asphalt has a tendency to crumble on the edges, and allowing the sealer to get to the edges helps prevent this. For areas close to sidewalks, a gel sealer will give you enough control on most grades to avoid excessive spillover.
Tools Needed to Seal a Driveway
The tools for this job are pretty basic and will likely be co-located with the sealer at the store. Pickup a squeegee with a long paint roller stick, and a 5 inch wide paint brush. You may also want a medium-duty broom for the cleaning step as you’ll want to agitate the surface of the driveway when using cleaner.
Asphalt Driveway Pictures
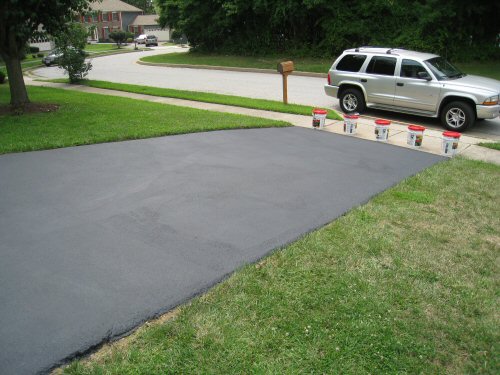
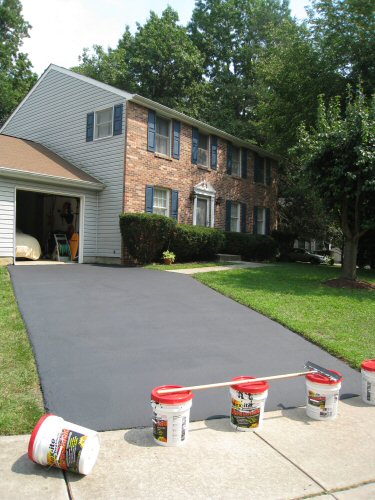
Our neighbor’s freshly sealed driveway looks great. We’re a little envious if its good looks…
Counterpoint: Is Sealing a Driveway Bad?
One final thought… some asphalt contractors recommend against sealing. The argument: sealers prevent moisture from escaping. If water finds its way under the sealer, it is more likely to freeze and crack than if it were allowed to expand up and out, or evaporate. If you seal the driveway, you’ll be forced to reseal every few years or cracks in some parts of the top coat will exacerbate this problem.
Our jury is still out on this, and without a good study across climates, sealers, and compounds, it would be hard to evaluate the claim. For now, we think the cosmetic benefits of sealing are pretty great, and would recommend it to increase resale value.
What do you think? Have you sealed your driveway? What steps did you take? Have you had any problems since application?



Just did our driveway. It looks great. We did only one coat. Should be done every 4 years. Also protects the driveway. It’s a good idea.
I want to seal my daughters asphalt driveway myself but it is very large, about 3200 sf. I have filled all the cracks and patched the larger breaks, is this project too much for a 68 yr old woman who paints fences trims hedges and other outside work?
Pat, 3200 square feet is a lot. I would suggest getting at least one other person (or maybe 2-3 to help)! Spreading the emulsion isn’t difficult, but it is tedious and time-limited. I think you’d want more hands for that much driveway.
” Prime the driveway.” WITH WHAT?????
How long do you have to wait to apply sealer in your driway after been resurface?
Olga, I’d wait at least 6 months, but probably not longer than 12.
I rate your information alomg with doctors. Ask 3 doctors and get four opinions.
I live in New Hampshire and still do not know whether to reseal or not. I did reseal about four years ago and wonder if I should again. I have filled all of the cracks with fillers.
Aam also confused as to what type of sealer to use Latex or other?
John Kelly
John, after four years, you’ll probably want to reseal. Use asphalt emulsion.
Getting ready to seal my driveway with GraniteSeal. This was a very helpful article on how to go about it. thanks.
I live in an townhouse complex and we have a long drive way that meets a parking lot behind the townhouses.
Both the driveway and the parking lot show various signs of cracking, stones showing, and uneven surfaces.
We were given notice that some people would be doing work on it (I thought it was getting repaved). It turns out it was just two guys with long brushes, a few of those 5 gallon buckets, and a small mixer hooked behind a pickup truck (it looked like a small cement mixer).
Turns out it looks like they just sealed the driveway/parking lot. The surfaces are still uneven and driving on it is very bumpy. I took a closer look when it was still drying and it looked like a small layer of latex black paint. I poked it with a stick and it was mostly dried but was I was reminded of typically latex paint jobs.
Overall, it looks like it wont help at all. The driveway/parking lot is just darker now!