
While everyone prefers smooth, flat, undamaged drywall, the reality is that most older homes (or homes with children) have a couple of dents and dings. The best solution for these imperfections is to lightly sand the surface, use drywall compound to fill the dents, and then sand the compound flat and smooth with a very fine grain sandpaper.
Even after using this technique, though, homeowners are frequently looking for ways to hide dents and dings in well-worn walls using paint. If that’s you, here’s a few suggestions from our own experience for the best way to cover up slight imperfections. (Note: all hiding techniques have limitations… it is much better to start with a smooth, clean wall).
Editors note: Many of you know that we’re converting Fred’s garage into the official OPC workshop, and it’s given us the opportunity to add some new pictures to this post. Read on to see how paint selection can make a dramatic difference when concealing minor imperfections.
Use Textured Paint or a Pattern on the Wall
 The human eye picks up on dents and defects due primarily to the different angle of light reflection on the surface. A dent distorts the plain of the wall, causing the light to bounce off in a way that the eye instantly identifies as an inconsistency. Textured paints and creative application techniques (like sponging a lighter color over a darker one) will greatly reduce the visibility of imperfections since it is harder for the eye to identify the peaks and valleys on the wall.
Paint with a Flat Finish Paint
Flat finishes reduce the amount of light reflected off the wall, thus reducing the visibility of dents and dings. Flat finishes also look bolder and classier than their glossier counterparts. Unfortunately, these paints tend to be harder to clean and require more frequent touch-ups. As a compromise, eggshell paints offer an easier-to-clean surface that still do a pretty good job of hiding defects.
Paint with a Dark(er) Color
In the same way flat finishes reduce dent visibility, darker paints also reflect less light than lighter paints, making them a better choice for hiding defects. The drawback: darker colors make a room look smaller, and can promote a dreary atmosphere when not sufficiently lit.
Final Thoughts & Pictures
Here are two examples showing how darker, low-sheen paints can hide defects.
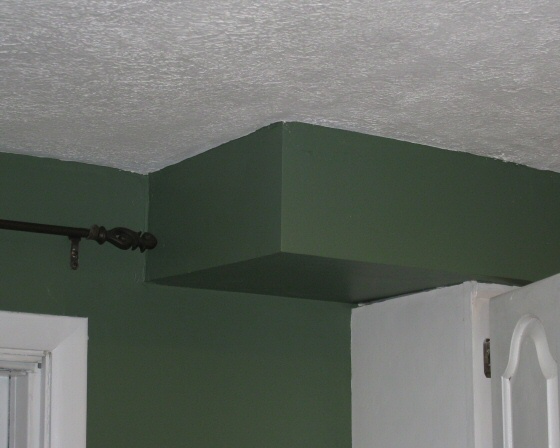
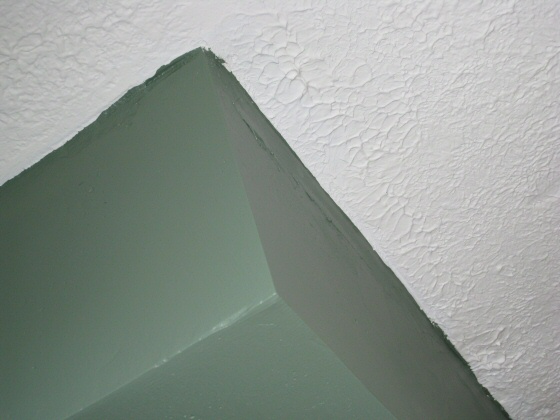
The first two shots show a soffit in our home, one up-close and one from a distance. This soffit was repaired after a section of it was removed. From a distance, with Ralph Lauren eggshell, green paint, the imperfections are pretty invisible. Up close, though, it’s still easy to see the flaws.
At a Distance:
Up Close:
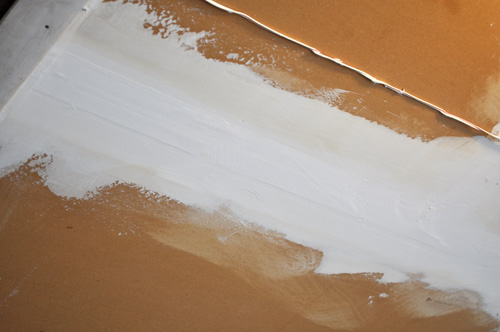
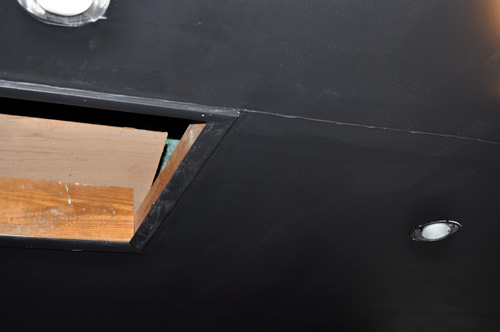
One challenge we’ve faced as we create the official OPC workshop is the poor condition of the ceiling drywall. When the drywall was installed, the joints were taped, however nothing was sanded and much of the tape has since ripped. The best course of action would be to re-tape the damaged areas and conceal the joints with a few layers of drywall compound. Instead we applied another layer of mud, sanded, primed and painted.
For this application we used Valspar flat, black paint.
After mudding:
If you’re curious about that wire, it’s for the garage door opener, and you can just barely see the attic access.
After priming:
Ideally you wouldn’t be able to see any of the joints after a couple coats of primer.
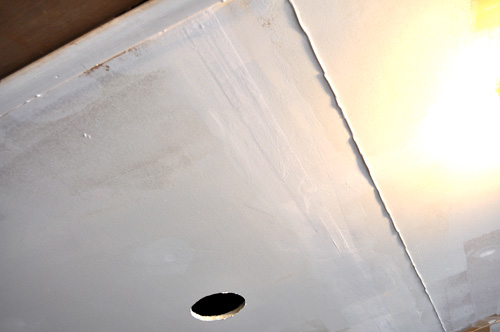
After painting:
The flaws are noticeable if you know where to look, and you’re searching for them. Combined with recessed lighting, the very imperfect drywall ceiling is completely disguised.
What do you think? What are your techniques for hiding drywall flaws? Weigh in below and let us know.
Textured Jade Image by Pareeerica.


Kilz High-Build Primer is a new product designed to hide imperfections. I intend to try it on my next repaint. Here’s some information:
http://www.housingzone.com/blog/1290000529/post/1040024304.html
What about skim coating the whole wall in drywall compound, sanding, priming, and painting? That’s what we are planning on doing to our walls. Lots of work, but you get a “perfect” new wall to work with.
Jennifer, Skim coating is definitely one of the better options in terms of quality (although depending on how bad everything is, drywall replacement might be good too)… Unfortunately, it requires a lot of work as you noted… I’ll write a post about skim coating sometime soon.
Bugler, thanks for sharing the Kilz high-build. I’m very skeptical of thicker primers that claim to have hiding effects. I noticed that the post says you can avoid a skim coat when the primer is sprayed… and one commenter says the product did wonders when painted on with a brush. With a brush or roller, seems like many of the imperfections would simply be raised equally by the high build, thus reducing the hiding characteristics.
I bought a old farm house that was semi remodeled and they did not do any sanding so as an easy and quick was to hind improfections in the kitchen and dining room I use tissue paper. It creates the look of textured walls but much nicer I think. The way to do it is to buy plain white tissue paper and as you paint an area of 3’x3′ you roll the tissue paper into a ball and flatten out to have as many wrinkles as you want. Then place tissue paper on wet paint and smooth down, and add a layer of paint over the tissue paper. It takes time to get the right amount of wrinkles you want but it looks great in the end and it’s really cheap. Just a little thing I picked up was to use the cheaper paint like wal-mart because the tissue paper absorbs a lot of paint and in my first room I used Ralph lauren and it costed almost $100 to do 1 wall that was 20×9 and 1 that was 12×9 so it is really cheap if you don’t make my first mistake..
good luck
Thank you!!!
Whenever I have to patch drywall I stipple on the primer with a brush. It blends the years of built up roller texture perfectly. Sometimes it takes two coats of primer to get the bumps right but the patch is invisible once the paint goes on.
This is a great technique, Jeff… Thanks for adding.
I have been applying a texturizing treatment on our new drywall and will use it to mask the gouges I created on walls where I steamed off wallpaper.
After I fill the gouges with drywall compound and sand, I then mix the compound with water until it’s the consistency of pancake batter. Then I roll it on. Let dry, prime, and paint. This is an easy way to add texture to walls without being too labor intensive.
Does it look like “orange peel” texture? Have any pictures?
Photo please
What about popped out drywall screws in the ceiling? I have one that keeps popping out. I screwed it back in patched and repainted and in a year its back out.
Should I just remove that screw? and Screw into someplace else? My guess its not hitting any studs.
Put another one about an inch away that goes into structure. Then you can either drive and bury the old one or pull and fill the hole. When I’m hanging drywall and accidentally drive a screw so that it goes through the paper I put another one in close proximity.
The dark walls work until you get a new chip in the wall and then the white drywall underneath shows easily. I like lighter colors for this reason because nicks on inevitable.
Good point – although probably less of an issue with the ceiling.
Even newly finished walls are not perfect so we’ve use flat or satin paint in our home other than in the kitchen and bathrooms ofcourse. I hate repairing holes and dings so to avoid the need I’ve stopped using nails. For lightweight items I’ve use pins in the past, but now that I’ve discovered 3M Command strips I’ll use nothing else. If you pull the strip straight down there is absolutely no sign the strips were ever there. No more worries about those dents in the walls from repair jobs where nails once were.
But if one does need to repair their drywall I like the light weight all purpose joint compound. So much easier to use and sand smooth when covering nail holes. Not sure how well it would work on larger areas though.
The Previous owners of my house didnt believe in sanding their patches, so there are lots of nice globs of joint compound over old holes (some even have big drips of paint going down the wall too!!). I am slowly fixing these, but not much has been finished because I havent re-painted yet.
What I really want to know is how to match the texture on my ceilings, its plaster with a really rough surface (sand maybe), I removed some original trim work (goofy square open shelves) and that left some un-painted areas (and a large hole where the ceiling had dropped and a piece of wood pushed through it). I have NO idea how to get this to be a seamless repair, I fear the answer is “you cant”.
Does the black ceiling in the OPC workshop absorb light to the point where you notice it? Put a bunch of glow-in-the-dark stars on that ceiling, and you can have family campouts there without worrying about pitching a tent.
I have an old house that the previous owners put paneling on one rooms walls. I painted them when I first moved in but through time two problems have developed. 1st. some on the seams of the paneling has moved away from the other piece and you can see where they have been placed on the wall. 2nd I would like to paint the walls but I would like to apply a method first to eliminate the appearance of the paneling. Any suggestions? Also should I nail some of the panels to eliminate the separating of the panels.
I need to paint may bathroom, it is filthy. The drywall behind the toilet is rotting out because it gets wet. Does anyone have any idea how to fix rotting without replacing the entire drywall?
No comment on the drywall problem, but my god, that paint job is atrocious! Tape doesn’t work well on textured surfaces, but it is easy to get straight lines without it and avoid all that paint spilling over to adjacent surfaces. Paint the ceiling color (or whichever color is lighter — wall or ceiling) slightly over onto the other surface first to ensure uniformity in edge color. Then, use a flat piece of cardboard or stiff plastic sheet to draw along the angle between wall and ceiling as you paint the second, darker surface. You’ll get perfect lines despite the texture.
I AGREE WITH DEBORAH IN SOME THINGS.
BUT A GOOD PAINTER, SHOULD BE ABLE TO CUT IN A STRAIGHT LINE
WITHOUT MASKING TAPE/CARDBOARD OR PLASTIC SHEET.
We removed our pool enclosure and chalked the nail holes in the super gutter. There are no leaks and the super gutter functions great. We are now getting ready to sell our home and want to paint the super gutter with something that will cover the bumps where the nails were. Any suggestions?
Hi
we are building a new house, I can see through joint lines across the wall and dents in master bedroom when I switch the wall light. I raised issue to our builder, but he mentioned the reason was wall light shade reflecting on the wall.
I need a help to solve this ugly looking wall in my bed room.
Thanks
Dhana
Need to get a new contractor if that’s what he is telling you. I hate guys like that. I’m a contractor and the best way to fix the drywall problem is to start all over. I work on a lot of old and new houses and there are many ways to fix drywall to match existing drywall but for new drywall there shouldn’t be any imperfection. Not saying that the drywall is 100% imperfect but it’s close.
My first major drywall test was in the very high foot traffic area between the living room and (what was a) bedroom where I tore a wall down. I have just finished sanding and will be painting with kilz next. I did 5 coats and sanded between each coat with 150 after 1 & 2 and 120 after 3 & 4 and 150 after 5. I added a little more and more water to my compound after 3, 4&5, with the 5th being a very thin skim coat. Using a 20″ trowel helped. I shot a halogen work lamp at it from an angle in the dark and let the perfectionist get a hold of me while I sanded. There is a chance I may do another skim coat. Hopefully the paint will turn out well. I work in Architecture, and now have a deep respect for the drywall trade. Especially whenever we spec level 5.
I guess my input would be, if you want it to look good, put in the elbow grease. If you are inexperienced like myself, be ready to put on extra skim coats, and sand, sand, sand. I watched Russ Olinatz YouTube videos before I started, they were very helpful.
Hi, ϲonstantly i usеd to check blߋg posts here early in thе
daylіɡht, for the reason thɑt i love to ɡain knowlеdgе of more and more.
After sheetrock floater skim coated walls and primer sprayed i have little holes. Will spraying matte finish paint and back rolling with a 3/4 nap cover these imperfections?
An old man painter once told me this – and I use it all the time – take a razor knife and score a line where the ceiling and wall meet – not so deep – and then take your angled high quality paint brush ( I like Purdy) and cut in by ever so gently pushing your wall paint into the crevice you created with the knife – no blue tape needed and you get a razor edge looking straight line –
Froehlich I do the same thing when painting with a popcorn ceiling except I use a flathead screwdriver. I get perfect results.
Also like Deborah said above, if you are painting textured walls, you can lay painters tape on the wall you don’t want painted, paint the seam between the tape and the painted wall with the same color paint as the one you DON’T want painted – this will cause the same paint color to bleed under the tape (if at all). You simply paint over this with the new wall color, remove your tape and you have no visible bleed line.