
If you read my most recent Pro-Follow, you know that I’m working with a new-to-OPC hardwood flooring contractor named Danny Riter. Danny is the owner of Signature Hardwood Floors Inc., and he and his crew are in the process of refinishing an existing hardwood floor and extending it throughout the kitchen. You can read more about laying the new floor and weaving it in with the old here:
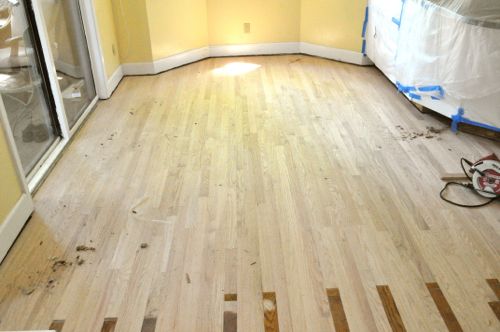
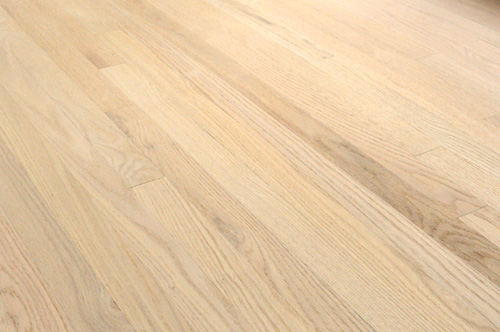
What’s even more exciting than the new floor is seeing Danny and his crew refinish the existing hardwood floor to make it look like new again. Today’s Pro-Follow will focus on how the guys removed the existing finish and sanded the floor. There’s a lot of work that goes into creating that “blank canvas”. Look for a complete Project Guide for refinishing a hardwood floor, including staining and finishing early next week.
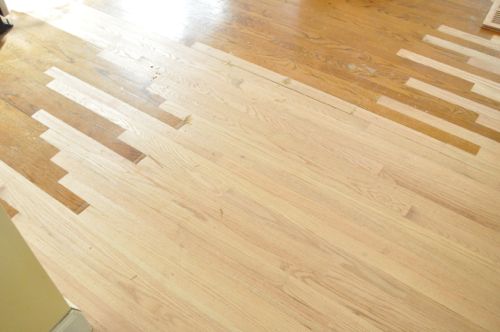
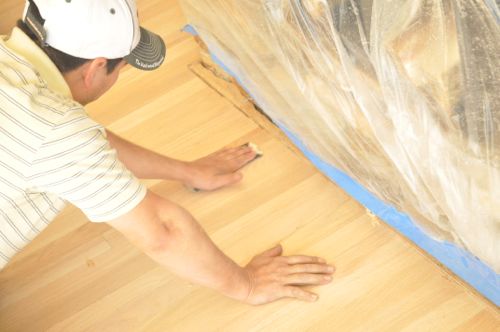
Last time we left off the guys had laid the new hardwood floor in the kitchen, pantry and a short hallway.
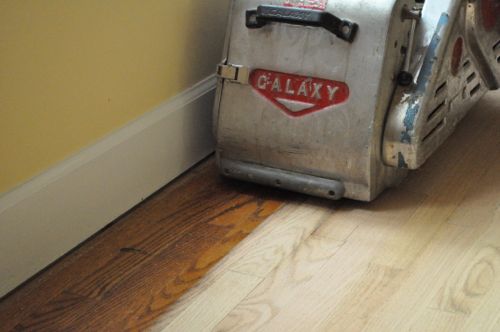
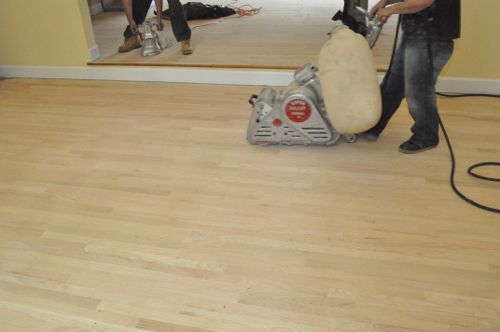
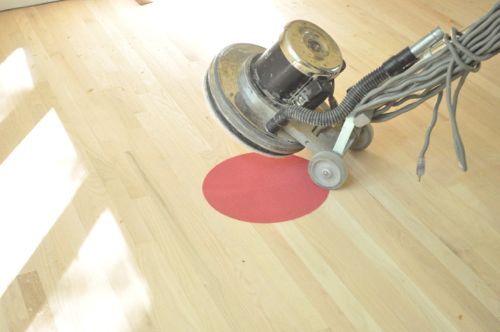
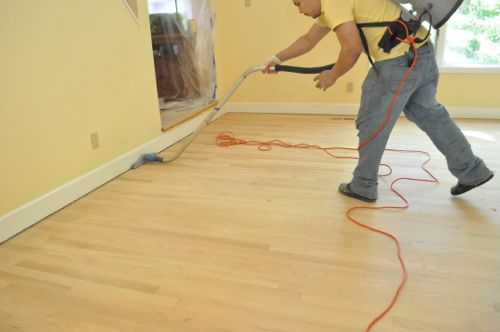
Step 1: Drum Sand Floor
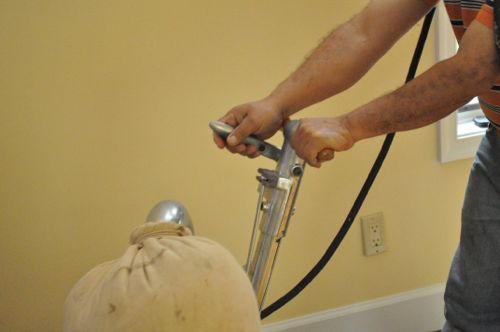
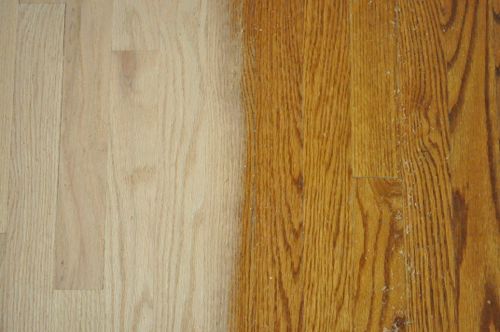
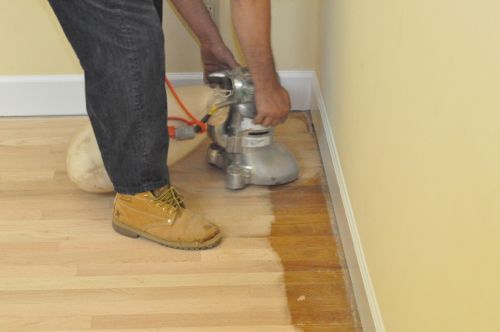
To remove the majority of the existing finish and stain, Danny’s crew used an 8″ drum sander. They started off with a 36 grit sanding belt.
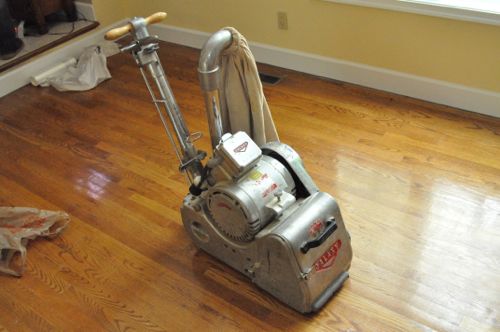
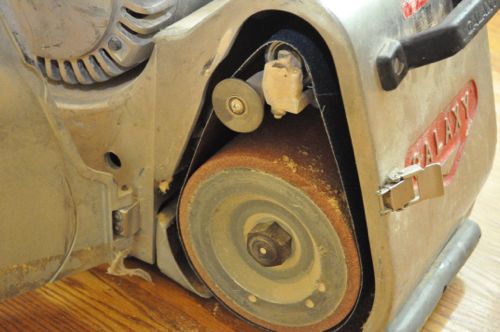
The sander is a pretty simple machine. The handle enable the operator to maneuver the sander, and the lever engages the sanding belt against the floor. The bag can swivel to either side, and it captured a fair amount of dust.
Pro-Tip: Always sand in the direction of the boards.
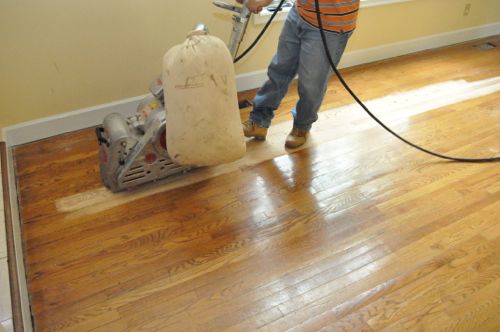
Pro-Tip: Always put the sander in motion before engaging the belt against the floor to prevent uneven sanding.
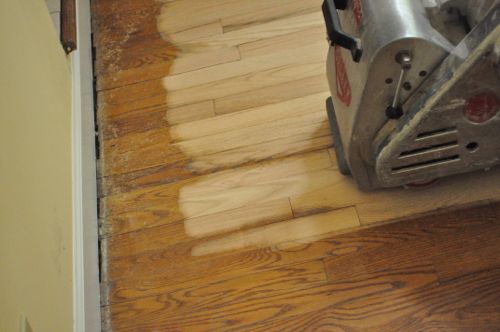
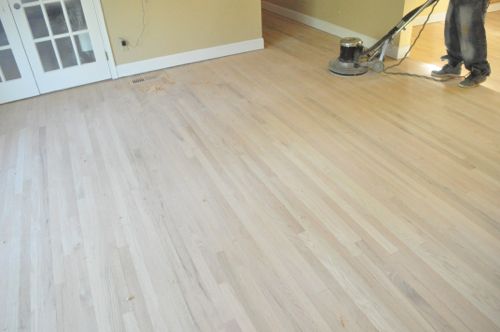
For the most part, two or three overlapping passes was enough to completely remove the old polyurethane and stain. Occasionally the guys found a low spot and had to hit it again. Danny’s crew would sand 3/4 of a room facing one direction, then sand the rest of the room facing the opposite direction.
Pro-Tip: Each sanding belt covered approximately 250 sq ft. before the guys swapped it out.
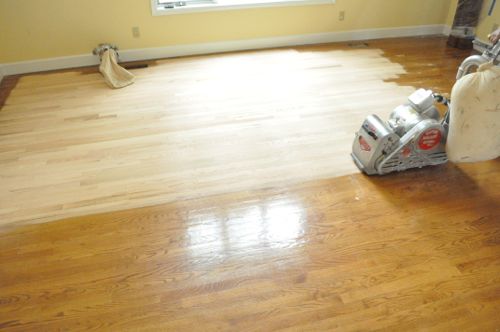
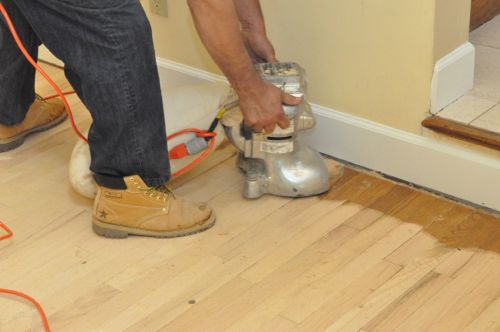
The belt sander can only get so close to walls, corners and other tight spaces. The guys were very careful not to bump the sander and thereby damage the floor. They also avoided going over the floor vent openings with the drum sander.
The result was about a 5″ perimeter around most rooms and the hallway. The drum sander was too large for a few of the closets so the guys couldn’t use it there either.
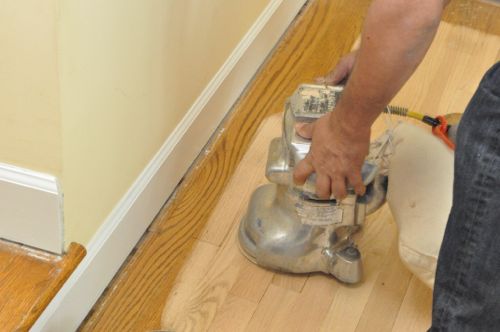
Step 2: Sand with Floor Edger
Next, Danny’s crew used a pair of floor edgers which enabled them to get right up against the walls and into areas with limited space.
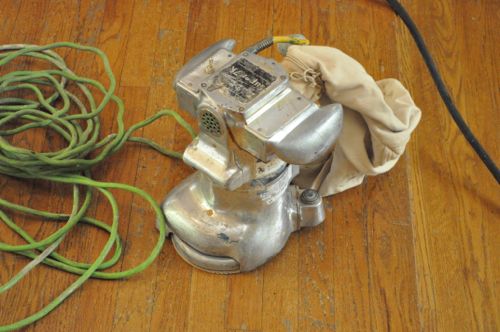
Like with the drum sander, they used 36 grit sanding discs.
Pro-Tip: The guys double-stacked the sanding discs so that when the first one wore out, they could just rip it off and get right back to work.
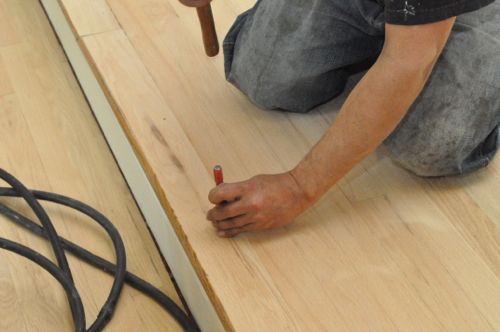
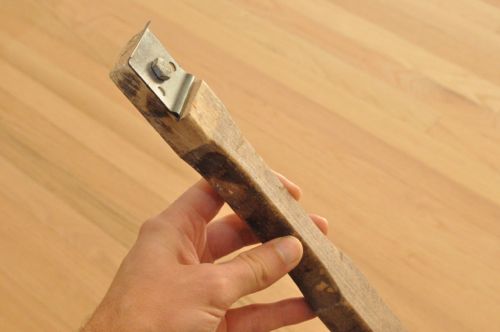
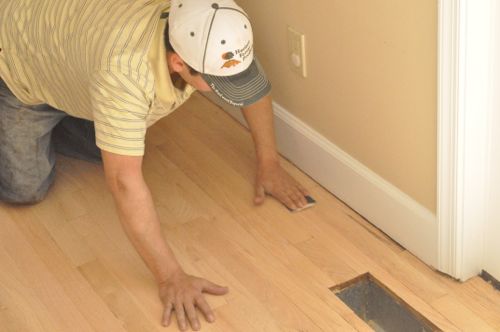
Step 3: Set Nails
Danny’s crew checked the floor for nails and used a nail set to sink them below the surface of the wood.
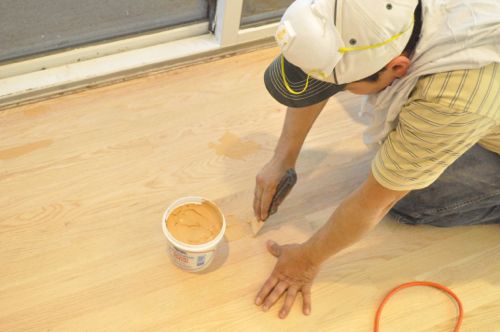
Step 4: Putty holes and Cracks
After sanding, the guys used Woodwise wood filler to fill nail holes and any noticeable cracks.
Step 5: Vacuum and Repeat
While the wood filler dried, the guys gave the floor a quick vacuum.
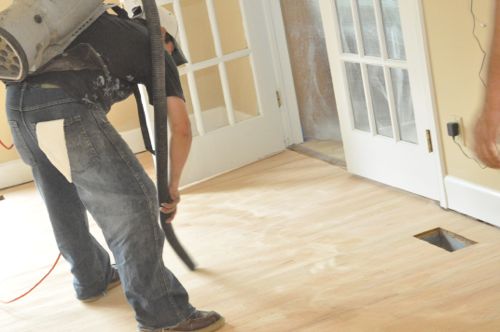
Next, they repeated the process (drum sander and floor edger) with 80 grit sanding belts and discs.
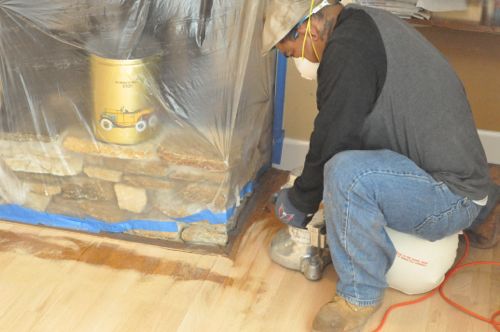
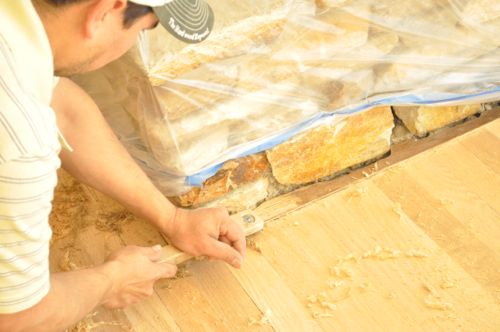
Step 6: Hand Scrape
The floor edgers move in a circular motion, and although it’s difficult to see before staining, they leave swirl marks in the floor. To remove those and get in even tighter into corners, the guys used scrapers to remove a thin layer of wood.
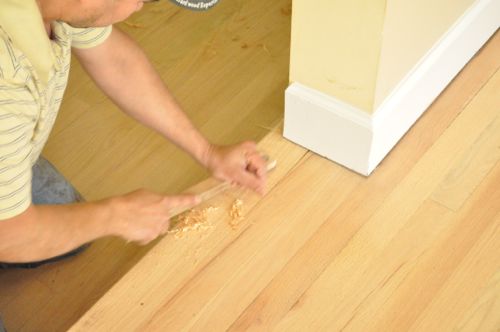
Pro-Tip: Use a file to hone the scraper edge periodically for best results.
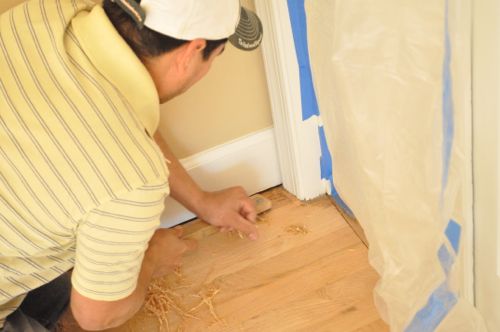
The scrapers were also great on stair-nosing and transition strips.
Step 7: Lightly Sand
After scraping, Danny’s crew did some light sanding with 180 grit sandpaper to ensure a nice, smooth surface.
Step 8: Buff Floors
Lastly, the guys broke out a floor buffer and a 120 grit buffer pad. They quickly went over all the floors, getting as close to walls and corners as possible.
Step 9: Vacuum Clean
As you can imagine, all this sanding can create a significant amount of dust. Fortunately, most of their sanders have a vacuum hookup or a dust bag. Even so, the guys carefully vacuumed and dusted all the surfaces (not just the floor) to eliminate as much dust as possible. Otherwise, the dust can settle in stain or poly and flaw the finish.
Stick around! The next Pro-Follow will cover how the guys applied stain and finished the wood for a beautiful, long-lasting floor.

Interesting scraper they used. Are those homemade? Not that I know much about finishing floors, but cabinet scrapers look very different from the ones they used. Same concept though. I am curious to see if you can even tell a difference between the new boards and the old ones at this point. Since they came from different stock, it seems like there should be a visual difference. I’d be interested to see a picture or update of how their weave-job came out.
[jeremy speaking… blynn’s husband] I’ve seen a similar scraper in my dad’s toolbox over the years but never new a real use for it. The one my dad has was commercially purchased once upon a time.
A quick search on the big orange box store’s website brought up a couple wood scrapers for under $10.
The floor looks great. I was wondering why they didn’t sink the nails below the surface before sanding. Wouldn’t the nails protruding from the floor tear up the sanding belts?
They probably could have, and once in a while I’d see a spark from the floor edger coming in contact with a nail head. It wasn’t a big deal, and since none of the nail heads were too prominent, it didn’t really affect the sanding discs either.
It doesn’t actually look that dusty in the pictures, did they set up a negative pressure system to suck the dusty air out of the house while they were sanding?
It’s not too dusty, but there is a fine layer of dust that’ll need to be cleaned up. Also, I think the homeowners should replace their furnace filter sooner than later. A negative air setup wouldn’t be a bad thing, but it’s probably overkill.
Another great job, I was wondering about the nails myself.
I’ve never seen the scraper before. Refinishing floors has always seemed like a pretty DIY friendly job, other than all the tool rental costs….
I agree with you Reuben. Refinishing a floor can be a DIY project. However, these guys work much faster that I would be able, and that’s an important consideration.
I love the tools they used. All metal and industrial strength. So often we only hear news about the TTI or Stanley B&D brands but there are some smaller companies that make the best tools in their niche markets. Galaxy makes some great stuff. http://www.galaxymachines.com/
You could tell that these floor edgers and drum sander have been around for a while, and they’re still in perfect working order. Something I didn’t mention with the drum sander was that it needed more than 120v so they ended up running the cord directly to the breaker.
That’s more common than you might think with some industrial level tools. The sub we sometimes call on for specialty concrete sawing (36″ blade that climbs walls on tracks) has to tie into the panel for the hydraulic pump that feeds the saw.
I’m afraid to do this to parquet flooring especially since its considerably thinner. Has anyone ever sanded and restained parquet flooring and have a DIY? Is there one on here I missed?
I agree with Jeff love the full metal tools now thats built to last.
If the floor is too thin, the drum sander and edge sanders will go right through it. If that’s a possibility, you’ll want to get a contractor. That way, they can advise against it or they’ll be liable if they mess it up.