My toilet was leaking a tiny amount of water from the tank into the bowl. No water was escaping the “toilet system” but I’d hear the tank quickly refill every 30 minutes or so. It was wasteful and the noise really started bothering me so I bumped this project to the top of my list.
What is a Toilet Flapper?
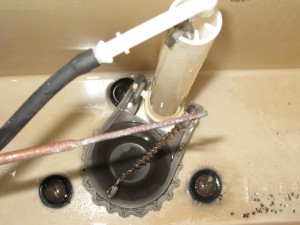
A toilet flapper is located on the bottom of the toilet tank. When you flush, the handle pulls a chain, which in turn pulls the flapper open. Water pours into the bowl, flushing everything away. The tank empties and the flapper closes. The tank refills and it’s ready for another go. The flapper on my toilet wasn’t creating a water-tight seal causing a small leak.
Purchasing Replacement Toilet Parts
Toilets don’t have very much to them. There’s a mechanism to fill the tank, the handle, the flushing mechanism and some nuts and bolts holding everything together. Whenever I have a problem, I swap out the defective part and pickup a new set of nuts / bolts. Here’s my thinking:
- Parts are cheap and available at most DIY stores. I’d rather replace a flushing mechanism than try and figure out why the flapper is not fully closing.
- Toilets require some work to take apart and reassemble. I feel that replacing parts means I’ll be doing it less often.
- Getting a new set of nuts and bolts means that I won’t have to work with the disgusting, older set and I can be more confident that they won’t leak.
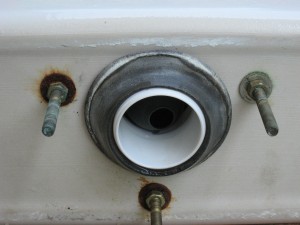
Check how many bolts secure your tank in place. Some toilets have two, others have three. Many times you can purchase packages that include all the necessary washers, nuts, rubber washers, and bolts.
How to replace the Entire Flushing Mechanism
Step 1: I always start by cleaning the toilet. If I’m going to have my face that close to a toilet, it’s got to be clean. I also clean as I work. It helps ensure good connections and water-tight seals.


Step 2: Turn off the water. Remember, righty-tighty, lefty-loosey. Flush the toilet to remove the majority of the water in the tank. Scoop out the remaining with a plastic cup or use a sponge.
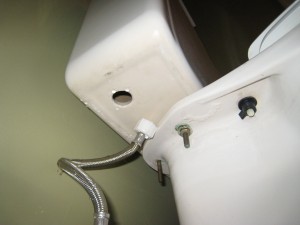
Step 3: Disconnect the water supply hose. Remove the nuts holding the tank to the rest of the toilet. Now you can lift the tank.
Step 4: You’ll see another set of washers and nuts on the underside of the tank. Also remove these along with the bolts inside the tank.
Step 5: Remove the black gasket from the underside of the tank. This will reveal a large plastic nut. Undo the nut and remove the flushing mechanism. Be sure to disconnect the refill tube. Now it’s time to start assembling the new parts in the opposite order.


Step 6: Start with the flushing mechanism. Make sure that the new plastic nut is tight. Add the new gasket after it’s in place.
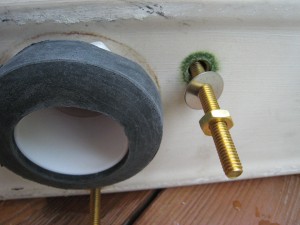
Step 7: Insert the new bolts with the rubber washers threaded onto the bolts inside the tank. These prevent water from leaking out.
Step 8: Slide on the metal washers outside the tank and begin tightening the nuts. DON’T OVER-TIGHTEN the nuts, or you’ll end up with a cracked tank and a lot more work.
Step 9: Place the tank back onto the rest of the toilet and secure with another set of washers and nuts. Again, don’t over-tighten.
Step 10: Attach the flapper chain to the handle. Reattach the fill tube and the supply line.
What do you think? Any toilet tips to pass along?


