My brother and his wife are remodeling their kitchen, and they’ve taken the time to carefully investigate all the different options including flooring. I was really curious when they began talking about DuraCeramic for the kitchen floor. It’s a relatively new product, and I wanted to know how it compared to a more “traditional” choice like ceramic tile.
Editors note: We’re updating another old post from June 2008. Since that time, more information regarding the benefits and disadvantages of DuraCeramic have come out, and we’ve had a lot of readers share they’re experience. We hope you find this comparison helpful.

What is DuraCeramic?
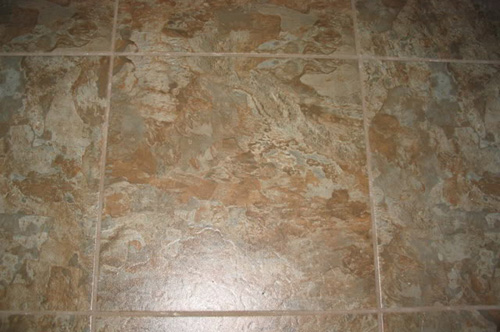
DuraCeramic is a Congoleum product designed to look like ceramic with the warmth and comfort of resilient flooring. In short, it’s a cross between vinyl and ceramic tile. DuraCeramic is made with a limestone composite base and fortified with a polymeric resin. For that reason, it’s tough yet flexible and will resist breaking from subfloor deflection, expansion and contraction. Since DuraCeramic is “more forgiving,” installation is faster and easier because the subfloor requires less attention when compared to ceramic and stone tile preparation.
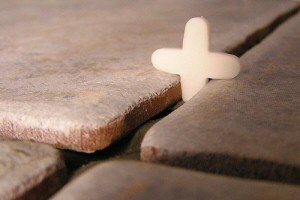
Tiles are available in 16″ squares and can be scored along the embossed lines into 8″ pieces. Installations can be grouted to look even more like a ceramic tile floor or un-grouted with no space at the joint. You can expect to see DuraCeramic installed on walls, floors, backsplashes, and more. It’s intended for residential and light commercial use in dry, interior, heated areas. It is not recommended for wet areas like shower walls and shower floors.
The price of DuraCeramic has dropped since it was first introduced. Consumer Reports estimates retail price at $5.00 per square foot which is comparable to high-end ceramic tile.
DuraCeramic Benefits
I’ve already mentioned that DuraCeramic requires less subfloor preparation. In fact, DuraCeramic can be installed directly over concrete, suspended wood, some old resilient floors, ceramic tile and terrazzo. Like most flooring installations, make sure everything is clean, dry and free of dust, dirt, grease, etc. DuraCeramic is flexible but the subfloor must be flat. Deviations should not exceed 1/16” in 1’ or 3/16” in 10’. If your floor doesn’t meet those requirements, you can fill low areas with a portland cement patching compound. It’s also worth noting that you don’t need a wet saw. DuraCeramic can be cut by scoring and flexing the tile much like drywall. These are great benefits for the installer, but what about the end user?
Homeowners enjoy DuraCeramic because it’s warmer and easier to stand on that ceramic tile. I’ve even seen mention of it for people who suffer from arthritic ankles. With 12 different patterns and the option to grout joints, homeowners can creative a very unique space. Congoleum claims virtually no maintenance outside of normal floor cleaning, however that may be no simple task. Keep reading, and you’ll see what I mean.
Since the floor is composed of separate tiles, it’s easier to repair defects and damaged pieces than patching a sheet flooring product like linoleum.
DuraCeramic Disadvantages
DuraCeramic does have some inherent disadvantages. For instance, if you prefer the 8″ x 8″ size, these tiles must be grouted at the joints, and the only approved grout is DuraCeramic Premix Grout (designed for high flexural strength and adhesion to the edge of the tile). Grout and un-grouted joints still need to be sealed
The biggest draw for DuraCeramic is also the biggest complaint. Homeowners want something softer than ceramic but are disappointed because DuraCeramic can dent, chip and cut from things like scissors, stiletto heals and pets. Heavy furniture and appliances should have floor protector pads to prevent scratches, and Congoleum suggests door mats to prevent dirt and grit from being tracked onto the floor.
DuraCeramic Clean Up
Many readers want to know the best way to clean DuraCeramic floors. If you read through the comments you’ll see a lot of suggestions like a the Shark Steam Mop. Some readers say steam mops dull the surface while others have no problems. Congoleum states on their Floor Care page not to use a steam cleaner and recommends their “Bright ’N Easy No- Rinse Cleaner or other suitable floor cleaner.” It’s unclear if a steam mop is considered a steam cleaner or not.
Other commenters have shared how a simple water / vinegar solution works great. If you decide to go with DuraCeramic, consider how a textured surface may be more difficult to clean.
Duraceramic Vote
We’ve had a lot of response about Duraceramic, and we thought it beneficial to add a poll. We hope you’ll take a moment to vote to give everyone a snap-shot of the popular consensus. Be sure to check all that apply, and them read through to comments to find other helpful opinions.
For additional information, check out the Congoleum DuraCeramic installation and technical guide. Image courtesy of Garden Web Forum.
What do you think? Know anyone with DuraCeramic floors? Will the floor last?

 Ceramic tile is a very popular upgrade for kitchens, bathrooms, patios, and foyers. It is resistant to water and scratches, making it more durable than hardwoods or vinyl tile for these areas.
We’ve installed a number of ceramic and stone floors. The job isn’t difficult when it’s done right… But done wrong, it can leave a homeowner with a feeling of defeat. A poor ceramic installation will delaminate from the subfloor, split at the grout lines, or worse–crack directly across the tile.
One question that folks new to ceramic tile frequently ask is whether they can lay the ceramic directly on top of a plywood or OSB subfloor, using a thinset cement or liquid nails to glue down the tile to the wood.
Problems with Ceramic Directly on Plywood or OSB
The basic answer to whether you should lay ceramic directly over plywood or OSB is simple: you shouldn’t do it. Here’s why:
Plywood and OSB expand and contract with humidity and temperature much more than ceramic tile. Regular seasonal humidity shifts are significant enough to make the average 10′ x 10′ wood subfloor floor expand or contract as much as 1/2″. Ceramic tile doesn’t expand/contract nearly as much. As the plywood or OSB expands, the ceramic won’t. You’ll begin to see hairline cracks in the grout, then the grout will crumble a bit. Eventually, after several seasonal cycles, tiles will begin to come loose or crack.
Plywood and OSB have surface imperfections. This concern is significantly less important than the first; but it is nonetheless still a concern. Plywood and OSB frequently have imperfect joints and surface textures. While these could be smoothed over with thinset, they are much harder to manage than the correct solution.
Proper Way to Lay Ceramic on Plywood or OSB
There are two materials commonly used for laying ceramic on plywood or OSB that are applied before the tile:
Concrete Board – Concrete board, also called Backer Board comes in 1/4″ and 1/2″ thicknesses and is usually sold in 4′ x 6′ sheets. It should be fastened to the subfloor using thinset, and then screwed down every 10″ square. Screws should be kept at least 2.5″ from the edge of the board, since it is prone to split. You should use a 1/4″ slotted trowel to apply the thinset. Leave 1/4″ gaps between each board.
Concrete board has similar expansion properties to ceramic tile (it doesn’t expand/contract much at all). The combination of thinset and screws prevents the plywood or OSB from expanding beneath the concrete board, thus creating a strong bonding surface for the tile that doesn’t shift with thermal or humidity changes.
Once the concrete board is down, you fill in the 1/4″ gap with thinset and a special mesh tape available anywhere ceramic products are sold.
There are a number of concrete board manufacturers including the popular hardiebacker. Check your local home improvement store or ceramic tile shop.
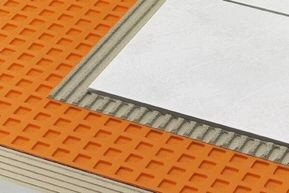
 Ditra – This is a special plastic material made by Schulter (official site). The unique geometric design decouples the subfloor from the surface of the Ditra, effectively serving the same function as concrete board. Ditra should be set with thinset using a 1/8″ trowel.
Once laid, the surface of the Ditra is suitable for ceramic installation. You can either use a 1/4″ trowel and apply enough thinset to fill in the gaps, or you can skim coat the Ditra first using the flat side of the trowel and then use a 1/4″ trowel to lay ceramic in a two step process.
Good Results From Proper Tiling
Using backerboard or Ditra to mediate the expansion and contraction of the subfloor will lead to a much longer lasting and professional-looking tile job that is much less likely to cause trouble in the future.


