
Compact soil is a huge obstacle for creating a lush, green lawn. It creates a physical barrier, preventing deep root formation. All plant life needs nutrients, water and oxygen, but compact soil limits these resources, stifling growth. Fertilizers and pesticides have minimal effect because they cannot penetrate the soil, and ultimately wash away. Aerating your lawn is a technique to improve permeability. It counteracts compacted soil by removing small plugs from the topmost layer of earth. Aeration should be considered for all high-traffic areas, lawns with excess thatch, and clay soil.

Hardwood Flooring Installation Tools (Nailers, Compressors, Saws, etc…)
February 1, 2011 | by Fred (email) |Updated 5/10/11 with more details and information:
Hardwood flooring is one of the most popular upgrades for today’s homes, and for good reason.  The hardwood flooring association of America reports that 90% of real estate agents say homes with wood floors sell faster and for higher prices.
Over the last decade, do-it-yourself wood floor installs have rocketed as hardwood companies cut out the retailer and sell directly to consumers. Basic wood floor installation is the perfect candidate for a DIY weekend (or multiple weekend) project. The hardwoods at the right are a great example of an easy project to carry out with the proper tools.
Below, we’ve featured the tools we like most for this job and highlighted the links at Amazon and Toolking (our two favorite online tool joints). There’s a short list at the conclusion of this post where all the tools are grouped into one place for reference. We like Amazon for their favorable shipping policies (often free) and no sales tax in most places, and Toolking for the wide selection and no sales taxes (although in our experience Amazon often has lower prices).
The remainder of this post assumes you have a basic understanding of installing hardwood floors and what you’ll need to complete the job. If you don’t have any idea where to start, we suggest getting a good reference.  You can start online with our Hardwood Flooring Installation Guide.  It gives a basic overview of the installation process.  We also recommend picking up a flooring guide like Stanley’s Complete Flooring.
Stanley’s Complete Flooring covers hardwood installation and includes a wide range of floor types (not just hardwood installation).  It’s a useful reference even beyond your first installation project. If you’ve settled on installing hardwoods, you can pick up Stanley’s guide along with the tools you don’t already own that are highlighted below.
Recommended Hardwood Floor Install Tools
#1) Toe Nailer for Fastening Hardwood Floors
 The most important tool for hardwood flooring installation is the hardwood flooring nailer, also called a toe nailer because it drives cleats through the edge of a hardwood flooring into the subfloor or joist below.
Hardwood flooring nailers fall into two overall categories: manual and air-powered (pneumatic) nailers. We highly recommend a pneumatic nailer. While manual nailers are cheaper, they are hard on the installer, tend to under-drive nails and split boards, and may produce a looser installation (for example, leaving small gaps between the planks). Pneumatic floor nailers are a bit more spendy, but well worth the added cost to protect your flooring investment.
Unfortunately, most pneumatic hardwood flooring nailers are expensive ($399+ for a realiable, brand name nailer).  For DIYers, Amazon also sells a much less expensive Hardcore Tools Pneumatic Hardwood Flooring Nailer (usually around $240 shipped).  If you’re planning on doing a single home’s worth of hardwood floors, we think this air nailer is your best bet for the job.
#2)Â Mitre Saw to Cut Flooring Boards
 If you don’t already own a decent mitre saw, installing floors is the perfect time to purchase one. Mitre saws range in capabilities and price. For hardwood flooring, you need only a basic saw capable of making 90 degree cuts and the occasional 25-45 degree cut to work around an obstacle (for instance, stairs or support posts).
If your goal is only to complete this one project, we recommend an inexpensive saw like this Kobalt Miter Saw. Of course, if you can borrow a mitre saw, that’s even better for a single project.
#3)Â Finish Nailer & Compressor Combo Kit for Trim
 The beginning and end boards in a wood flooring job cannot be installed with the toe nailer because the nailer cannot fit close to either the start or the end wall in a room. In these cases, a finish nailer should be used to secure the boards in place by performing a toe nail function (for the 2-4 board from the end) or by top nailing the boards (for the last 1-2 boards). A finish nailer will also be required for the installation of the baseboard and the installation of quarter round or shoe molding trim.  Follow those links for our instructions on doing this for your own floors.
We are huge fans of reconditioned finish nailer and compressor combo kits available on Amazon. This Bostitch kit includes a compressor (which you will need to power the hardwood flooring nailer and the finish nailer), a finish nailer, a brad nailer, and a crown stapler. We’ve heard good things about this kit from our fellow bloggers, even though we own the Porter Cable version. Even better, the Bostitch combo is slightly cheaper.
#4) Table Saw For Ripping Boards Length-wise.
 It is possible, although not probable, that you can perform a complete hardwood installation without a table saw. A table saw is only required if the last board in a room cannot be laid at full width. For example, if you are laying 4 inch wide planks, and only a 2 inch space remains at the end of the room, you will need to rip a board (rip means to cut it length-wise) to complete the installation.
During installs where we haven’t had a table saw available to us, we simply lay the entire floor and then run to a friends’ house or local shop to get the final board cut.  If you’re doing multiple rooms or foresee a need for a table saw in the future, we recommend the DeWALT DW745 Heavy Duty 10-inch Table Saw. The saw boasts plenty of horsepower for a variety of woodworking tasks and is a great addition to a DIYers tool kit.
#5) Jamb Saw for Cutting Door Jambs
 There will be places in a hardwood flooring installation where the trim pieces around doors needs to be cut a little higher than the existing floor so that hardwood can fit underneath. There is no need to remove the molding from the doors; you can simply cut the molding in place using a jamb saw.
Jamb saws come in manual and power models. We prefer the hand tool because it is about 10% of the price of the power tool and the amount of cutting required in the typical installation does not warrant the fully automatic version. We’ve used and really like the Irwin Pro Touch Flush Cut Reversible Jamb Saw. At under $10, it makes the job easy at a price tag that doesn’t break the bank.
#6) Miscellaneous Tools for Everything Else…
In addition to the tools above, it’s also very good to have the following tools on hand:
- a 35-foot tape measure to provide accurate measurements,
- a chalk line for setting a mark for the first board and ensuring you stay straight,
- a nail set in case you need to sink a few nails below the wood surface by hand, and
- an additional rubber mallet for tapping boards into place (in addition to the mallet you need).
Our favorite part about a hardwood flooring installation is the variety of tools you can purchase that are reused on later DIY jobs. With the exception of the hardwood flooring nailer, every tool in this list is used on dozens of other DIY projects that you’ll likely tackle in the future.
Best of luck with your installation!
What to you think? Would you make any changes to our list? Â Weigh in below and let us know.
First image courtesy of Juhansonin.
Have you ever check out the Pro Desk at your local THD or clicked on the “FOR PROS” tab on The Home Depot website? If you’re not a contractor, you probably skip right over it but that’s a mistake. On the website, the Pro tab takes you to a page that details all sorts of resources that can save you money. They have programs for cabinets, water heaters, paint and more. The best part is you don’t need to be a pro to qualify!
Pro pricing is really a misnomer. Something more accurate (but less catchy) would be bulk purchasing because that’s really what matters to qualify for a discount. If you’re buying in volume, these programs can help you out. I spoke with the pro supervisor at my local Home Depot and she gave me details for the two most popular programs. Here’s what I learned.

Home Depot Pro Pricing Programs
Volume Pricing Program
The Volume Pricing Program is the most popular option available. Regardless of what you’re buying, this program applies a discount to all purchases of $2500 or more (excluding Dallas/Ft Worth TX and Northern CA stores). The discount varies greatly from product to product but on average you save 13%! For 7 days following your purchase, you can add anything, no matter what the price, to your order. To meet the minimum dollar amount you can group projects together or even buy ahead for the next phase.
A nice aspect of this program is that you can come in with a list of materials or have the Pro desk pull the materials ahead of time. You pick up your order or have it shipped to the job site.
Home Depot Pro Direct Paint Program
The second most popular option is the pro paint program. Again, you need to be purchasing a large amount of paint, but unlike the volume pricing, the paint program is based on annual usage. For that reason, this is the only program that requires a sign up. Discounts apply to Behr, Glidden and Kilz brand paints and offer factory tinting, order history tracking and job site delivery.
The paint program features three tiers:
- Tier 1 = 10% discount after 150 gallons
- Tier 2 = 15% after 300 gallons
- Tier 3 = 20% after 500 gallons

Other Programs
There are several other programs. Check with your local Home Depot to learn more about the Cabinet, Appliance and Water Heater programs.
Home Depot Coupons
We’re always happy to share different ways to save money on your next home improvement project and often times, the best solution is to grab a coupon. We keep a list of up-to-date Home Depot Coupons so be sure to take a look before you make your next purchase. Using a coupon can amount to as much as $300 or more in savings off tools, appliances, housewares, and more!
What do you think? Have you ever taken advantage of Pro Pricing?
Images courtesy of Incase and Jesse Wagstaff
An air compressor is a necessary part of any good workshop whether you’re a do-it-yourselfer or professional. Compressors power the toe-nailer for laying hardwood flooring, framing and finish nail guns, and allow you put air in your tires! That’s right. I just got back inside from checking and inflating (as necessary) the tires on my car and Jocie’s car. Along with any good compressor, you need to have the right accessories.
Recommended Compressor and Nailers
If you’re in the market for a compressor and nailer combo kit, read about this refurbished Bostitch combo kit for more details. It has all the elements you’d need to tackle most jobs- 6 gal compressor, finish nailer, brad nailer and stapler. Purchasing refurbished tools can save you a significant amount of money and most tools include a manufacturers warranty.
Rob from A Concord Carpenter has a great site filled with solutions for home improvement. He had a recent article about air compressor maintenance that you should read to keep your compressor in tip-top shape.

Simple Air Compressor Accessory Kit
I’d argue that everyone who owns a compressor should, at a minimum, have a basic air tool accessory kit. Simple accessory kits can be found online or at big box stores for about $20. It’s a small but worthwhile investment. One of the most popular compressor accessory kits is made by Campbell Hausfeld- a company known for their air tools. They put together a nice 25-piece accessory kit to get you started.

Air Compressor Hose
Most compressors ship with a sub-standard hose. Even though the pressure gauge reads 90psi, small diameter hoses restrict air flow. Pick up a heavy-duty hose with a 3/8″ diameter.
Air Compressor Tool Kit
If you’re really looking to take full advantage of your compressor, pick up a pneumatic tool kit (in addition to all the nail guns). Pneumatic kits often include impact drivers, impact wrenches, cut-off tools, air hammers and blow guns. Some of these kits require a larger, high-powered compressor so double check the specifications before you buy.
What do you think? Any other must-have compressor add-ons?
Yesterday, Fred mentioned our work with Habitat for Humanity in Sandtown. I had a lot of fun working this remodel and would urge everyone to find an opportunity to volunteer. We began the day by completing the installation of about 8 floor joists for the second floor. This post focuses on wood I-beam floor joists and how we installed them. You can read Fred’s original post on installing a plywood subfloor from yesterday, which actually occurred after these floor joists were installed.
More Info on TJI’s
Wood I-beam joists, also called TJI’s (for Trus Joist I-Joist), resemble steel I-beams. They are composed of a top and bottom flange with a piece of plywood or OSB fixed perpendicular in between the two. Flanges range in size from 1½” – 2½” wide and depths vary depending on application (residential or commercial) and spanning distance. For more information on TJIs and other floor joists, check out my article comparing floor joists.

Benefits of Wood I-Beam Joists
Engineered beams have become the preferred choice for new structures because of all the benefits they provide. Here’s a short list of the benefits of wood I joists, by characteristic.
- Rigidness
Maybe the biggest benefit of using wood TJI joists is their rigidity. TJI’s are very stiff and have limited deflection compared to traditional solid wood joists. This is an important characteristic when you consider the stringent deflection requirements for natural stone and ceramic tile. - Span
These joists can also span larger distances than traditional wood joists. A joist 16 inches deep and spaced 16 inches apart can span about 26 feet. - Warping & Twisting, Uniformity
Engineered beams are manufactured to be very consistent. With TJI’s, you’ll find they are very straight and have minimal twisting and warping. They also have very little dimensional shrinkage, which means easier installation and more uniform surface flooring. - Flange
I consider the flange width to be another advantage. It provides a wide surface for nailing, screwing and gluing the subfloor. This can be particularly helpful if the room is slightly out of square or if a single joist is slightly mispositioned. - Green
The eco-friendliness of TJI’s is a little clouded. On the one hand, solid wood joists are typically made from old growth trees that are tough to replace. I-joists use less wood and are made from several different pieces. However, there is some off-gassing that takes place in the manufacturing process, but ultimately I think they are a smart choice considering the benefits and ability to use new growth trees.

Install TJI Wood I beam Floor Joists
Framing a floor with I-joists is very similar to using dimensional lumber. In the first picture you can see that we are mounting the joist flush up against another to work around a staircase. This flush-framed method calls for galvanized hangers to support the TJI joist. We took special care to place them 16″ OC and used 1 ½” nails to secure them in place. Only nail one side of the hanger, then set the I-beam in place and nail the other side.
On the opposite side, the I-joist rests on top of of a beam. This is the drop-framed method and we nailed these joists to a rim board. Take special care walking on I-joists before the plywood sheathing is installed as they are not as stable.

What do you think? Do you have I-joists in your home?
 It’s the time of year that you want to pull out your snowblower and perform annual maintenance- before the cold weather and snow starts falling. Many snowblowers feature a two-stroke engine because of their simple design and great power output. The annual maintenance is similar to that of a lawn mower but with some important differences.
Purchasing a Snowblower
If you find your snowblower is beyond repair or are just in the market for a new snowblower, Sears has a great selection to choose from. They are even running a promotion through October 30th with $140 savings. Take the time to consider purchasing a snowblower now. Here’s the link:
Be sure to check out our Sears Coupons as they feature regular deals on outdoor equipment.
Snowblower Maintenance, Toro CCR 3650 GTS Example
Last week, Fred and I performed the suggested annual maintenance on a Toro 3650. Here’s what we did.

Blades / Paddles
Toro snowblowers feature wide rubber paddles that clear the snow and propel the snowblower forward. These paddles wear away each year so it’s important to check them on a regular basis. Toro included a nice wear indicator. When the paddle is worn down to the hole, it’s time to replace. Install new paddles with the thicker layer facing down.

Control Cable
The control cable is located on the left-hand side. Inside a tubular cover is a spring that applies tension to the cable and it’s important that this tension is consistent each year.

Engage the control bar and check the gap between the control bar and handle. It should be 2-3 mm. To adjust the tension, unhook the control cable and sliding the spring cover off. Moving the Z-fitting (metal part that fits into the hole) higher decreases the gap and lower increases the gap.
If your snowblower makes a squealing noise, odds are the drive belt is loose. Increasing the tension on the drive belt is very similar to adjusting the control cable. Unhook the control cable and move it to the top hole of the control bar.

Spark Plug
The manual indicates that an authorized service deal should replace the spark plug, I think it’s mostly because it’s very limited access. The spark plug is located under the black cover where the key, primer and starter are located. There are four hex screws to remove and the spark plug is on the left-hand side. You’ll need the right sized socket and an extension to swap it out. Be careful not to damage the spark plug wire.

What do you think? Are you ready for snow?
 Paslode took a hard look at the roofing market before announcing their new cordless roofing nailer. Their research indicated that more and more, homeowners want to repair their roof rather than replace it. This comes as no surprise as homeowners look to save every penny in today’s economy, but there comes a time when replacing the roof is the better choice to avoid repeated roof leaks.
I’ve spoken with roofing contractors that walked away from repair jobs because the roof is in such bad condition. If they perform a repair, a new leak will inevitably appear and their name is on the line. It’s important for homeowners to be realistic and replace their roof when the time comes. Read on to learn the signs that you need to replace your roof.
Finding a Roofing Contractor
Jocie and I had a new roof installed in the summer of 2007. We obtained several bids, compared contracts and checked references. I firmly believe that following these steps enabled us to select a great contractor, saving time and money. If you’re looking to get in touch with a roofing contractor, follow the link below for free estimates.
Signs it’s Time to Replace your Roof
Age
The age of your roof is a good indicator of when you can expect to start seeing problems. Depending on the materials used, some roofs can last over 50 years. Here are typical roof life-spans in order of longevity:
- Real wood / Shakes have poor long-term performance, only lasting about 15 years.
- Three-tab asphalt shingles are a very common choice with warranties ranging from 20 – 40 years. It’s important that homeowners understand that these warranties protect against manufacturers defects and not poor installation. Average three-tab roofs last about 17 – 20 years.
- Architectural asphalt shingles have additional asphalt making them more durable than three-tab. Warranties range from 20 – 50 years with an actual life expectancy of 30 – 50 years.
- Metal roofs are extremely durable, often lasting up to 50 years.
- Synthetic roofs are becoming a popular choice for homeowners. They can last up to 50 years and require minimal maintenance.
- Slate shingles have a great look and superb lifespan. Some slate roofs last up to 100 years!
Brittle Shingles
Near the end of their life cycles, asphalt and real wood shingles become more brittle. On an asphalt roof you should be able to gently lift a shingle and verify that it is well adhered to the top of the shingle underneath. Brittle shingles will break and crumble.

Ventilation
Another important factor to examine is roof ventilation. Poor ventilation can trap heat and moisture, opening you up to lots of potential problems.
- Prolonged exposure to moisture results in deck deflection and warped plywood.
- Insulation can trap moisture creating a breeding ground for mold and mildew.
- Ice dams form as a result of repeated freeze-thaw cycles. This can result in leaks and damaged shingles.
- Water vapor will cause metal to rust.
- Roofs can actually rot from the inside out.
- Poor ventilation can accelerate shingles becoming brittle.
Heat Cracking
Heat cracking, also called thermal splitting, is another sign that your roof needs attention. Thermal splitting occurs because of temperature changes that cause asphalt shingles to expand and contract. Dramatic temperature swings occur so quickly that the shingle tears apart.
Additional Resources
For leaks around a chimney, Rob over at A Concord Carpenter provides information on building a roof cricket.
What do you think? What are other signs a roof needs replacing?
Images courtesy of striactic and John-Morgan, respectively.
Editor’s note: we subsequently reviewed Kichler’s Design Pro LED Lighting as this article suggests. You can find the full review at that link, but the product overview information is still covered here.
—-
We told you last week that coming up soon on our list of articles would be a tutorial for installing under cabinet lighting, a project we’ll be tackling next in our ongoing kitchen remodel. Coincidentally, as we were planning the project, Kichler Lighting reached out to us and asked if we’d like to try their new Design Pro LED Under Cabinet Lighting solution in the space.
We like the idea of installing an LED-based under cabinet system for two reasons: (1) it uses less energy than incandescent or halogen alternatives; and, (2) the LED light bulbs last for 40,000 hours (or in practical terms, forever).
Kichler gave us access to Jeff Dross, their senior product manager for the Design Pro series and a veteran of the lighting industry. Jeff told us to treat him like we would any sales person, and helped us select the components that would work best with our kitchen. I asked Jeff some tough questions: would the Kichler Design Pro system add sufficient brightness to our under cabinet area? He assured me it would, and that the only brighter solution would be a florescent fixture. I asked if the system would be easy to install and reliable. He said without question it would. This system is designed for ease of use.
We intend to put Kichler’s claims to the test in our upcoming installation. You canBut first, we wanted to show you what things look like right out of the box in their raw form.  After all, you aren’t supposed to see under cabinet lighting components, just their effects. So consider this a look under the hood of Kichler’s latest LED product. Our initial impression: we are impressed with just how simple the system actually appears to be.
Here’s a picture of all the components we’ll be using. Below we describe each one with some close-up shots.
Kichler Design Pro LED Lighting Components

Power Supply & Leads: The black box on the upper right is the power supply for the system. The power supply takes in 120 Volts AC (standard household wiring) and outputs 24Volts DC. Kichler sells power supplies in several sizes depending on the load of the panels you need. This one serves up 100 watts. The two rather thick coils of wire on the left are 25′ leads that will connect the power supply to the first panels under the cabinets. We will be installing the power supply in the basement, connected to 120VAC off a switch in the kitchen, with the leads going up the wall and through the back of the cabinets to the panels.
LED Lighting Panels: The five bronze panels in the middle are the LED lights themselves. While somewhat deep (all are about 3.25″), they are only 3/8″ thick, and will be easily concealed on the underside of our cabinets. Each panel has two connectors–one on each end–so they can be daisy chained together. Â These panels are available in a variety of colors including black, white, brushed nickel, and bronze. Kichler recommends selecting panels that closely match your cabinet color. Since we’re installing mid-tone wood cabinets, bronze is the right choice for us.
Kichler makes the Design Pro LED panels in three sizes: 6″, 12″, and 18″ (all three are shown in the picture above). Below you can see a shot of the panel up close. Â From the looks of it, installation will be a snap, with just two screws to tighten to the underside of the cabinet and interconnect wires connecting both ends.

Connector Wires: Each panel can be either directly connected to the panel next to it (they will flush mount against one another–a cool feature) or they are connected with wires. You select wire lengths based on how far you will be traveling from one lighting unit to the next (9″, 14″ and 21″ wires are available). Kichler designed the panels so that the power supply wire can be connected to either side of the units for maximum flexibility. This allows you to bring power up on the right side or left side of the first cabinet depending on which side of the kitchen you start on. If you are making an extremely long run, the 8″ and 25″ lead wires can also double as an interconnect.

Dimmer Switches: The two small black boxes sitting above the panels in the first picture are small dimmer switches that can be installed anywhere in the circuit. Â They feature a single button that lets you set the lighting to one of three levels (low, medium, high) or off. Â These are good if you don’t already have a switch on your 120VAC line going to the transformer, or if you have a switch on the AC line but want to have the lights set to a lower level. The dimmer will remember the lighting level even when the AC switch is cycled. Â Unfortunately, with LED lighting you cannot use a dimmer on the AC side.

Selecting Kichler Under Cabinet Lighting Components
Kichler has designed the system to make it easy to select the right modular components for your installation. Essentially, you want to fit the largest possible panels under each cabinet without leaving any cabinet blank. Note that the space available under a cabinet is always shorter than the cabinet’s nominal length. For example, our 24″ cabinets actually have about 22.5 inches of available under cabinet space, making the 18″ panel an ideal choice, especially after you consider the space required for the interconnect wires.
Each component in the system uses a set amount of under cabinet space that is generally measured in whole numbers. For example, the 12″ LED panel takes up 12 inches + 0.25″ for a male connector. Unless the panel is the last one in the series, you can ignore the space taken by the male connector because it will be accounted for in the adjacent component or wire. Â The 6″ and 18″ LED panels work the same for their respective lengths. Â The dimmer switches are 2″ wide + the male connector length if they are the last unit in the chain.
Interconnect wire ends consumes about 1.5″ Â of under cabinet space adjacent to the panel. Assuming you are exiting the underside of the cabinet through a cutout, you can ignore any additional length that might be needed to bend the wire. If not, you’ll need to reserve about 1/2 to 3/4 inch to make the bend.
You can see all of the Kichler Modular LED products using the search feature on their site. (That link takes you to the right results page).
Stay Tuned for Installation and a Final Review
We’ll be installing and reviewing the Kichler system in the next few weeks, so stay tuned for the full articles.

This article is part 3 of a three part series covering removing a load-bearing wall.
- Part 1 -Â Preparing for Load-Bearing Wall Removal
- Part 2 - Removing Part of a Load-Bearing Wall – Demolition
- Part 3 -Â Before Closing Up a Load-Bearing Wall
Before Closing Up a Load Bearing Wall (Part 3)
Here’s what had to be done before they could close up our load bearing wall project.
Electric
We mentioned that we decided at the end of Day 2 to add recessed lighting in the Family Room ceiling while the walls were opened up.  We had that done, added a junction box for our chandelier in the Dining Room, and the electrician even mounted our thermostat in its new location. (The latter had been sitting on the floor ever since we removed the wall on which it had been hanging in December.)


Support Stud Strapping
To keep our tripled-up support studs on the right side of the new opening from twisting in the future, our carpenter fastened a strap between them and the header. Had there been a longer “king” stud there, as there is on the left, strapping would not be necessary.


Drywall Hanging
Most of the new drywall is up now, just not finished.

Finished Pictures
After our wall was finished, it took several more projects to get this room into it’s finished shape. But it was all worth it, because in the end, it looks like this.
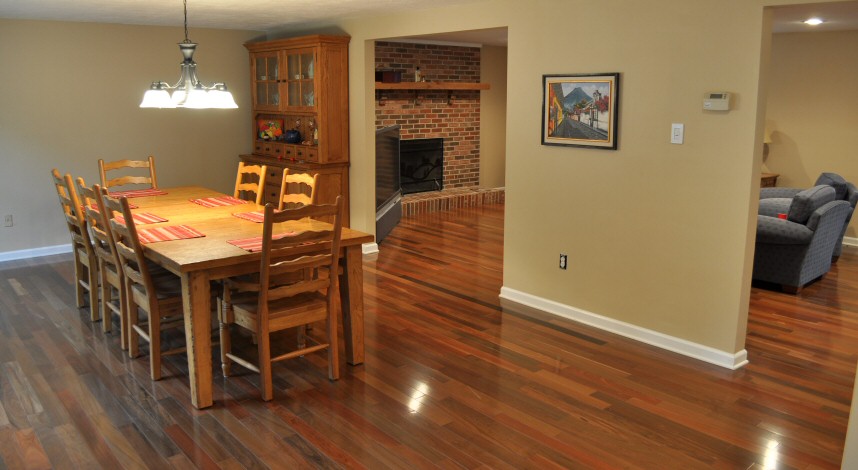
Here’s a link to more pictures of this space after we finished the hardwood flooring.
—
This article is part 3 of a three part series covering removing a load-bearing wall.
- Part 1 -Â Preparing for Load-Bearing Wall Removal
- Part 2 - Removing Part of a Load-Bearing Wall – Demolition
- Part 3 -Â Before Closing Up a Load-Bearing Wall
This article is part 2 of a three part series covering removing a load-bearing wall.
- Part 1 – Preparing for Load-Bearing Wall Removal
- Part 2 - Removing Part of a Load-Bearing Wall – Demolition
- Part 3 -Â Before Closing Up a Load-Bearing Wall
Removing Part of a Load Bearing Wall (Part 2)
We return to our load-bearing wall removal project here at Fred’s and my house.  In a single day, our contractors removed the drywall section, framed out the doorway, and also partially removed our pantry. It was all going along so well until we hit that last item, but that’s for another post.
Here’s the step-by-step on the load bearing wall removal.
1. Drywall/Molding Removal: The contractor removed the baseboard on both sides of the wall, the sections of paneling in the family room that overlapped the opening, and the remainder of the drywall on the Dining Room side (where they’d cut the exploratory hole the other day.


2. Construct Temporary Walls – on both sides of the area to be opened, in order to support the joists holding up the the second floor of the house. As I mentioned in my Days 1 & 2 post, we needed two temporary walls because we have 14′ joists. Had we had 16′ joists, we would have only needed one temporary wall on one side of the opening.


3. Remove Original Studs and Frame and Replace with LVL (Laminated Veneer Lumber) Beam at Top and Supporting Studs at Sides of the New Opening. One of the guys mentioned that their 3-stud-width support structure is actually more than required, but we support over-engineering when it’s this inexpensive! The studs are sitting on blocks which are sitting on the beam down in the basement (a steel one).


4. Remove Remaining Drywall, Nail Supporting Studs Together


5. Remove Temporary Walls. We left off on this project here, Friday. The drywall guys will come later, since we also have lighting we decided to install at the last minute in the Family Room (decided to let them handle it for us, for expediency’s sake) and the pantry removal.


—-
This article is part 2 of a three-part series covering removing a load-bearing wall.
- Part 1 -Â Preparing for Load-Bearing Wall Removal
- Part 2 - Removing Part of a Load-Bearing Wall – Demolition
- Part 3 -Â Before Closing Up a Load-Bearing Wall
