
This article is part 3 of a three part series covering removing a load-bearing wall.
- Part 1 – Preparing for Load-Bearing Wall Removal
- Part 2 – Removing Part of a Load-Bearing Wall – Demolition
- Part 3 – Before Closing Up a Load-Bearing Wall
Before Closing Up a Load Bearing Wall (Part 3)
Here’s what had to be done before they could close up our load bearing wall project.
Electric
We mentioned that we decided at the end of Day 2 to add recessed lighting in the Family Room ceiling while the walls were opened up. We had that done, added a junction box for our chandelier in the Dining Room, and the electrician even mounted our thermostat in its new location. (The latter had been sitting on the floor ever since we removed the wall on which it had been hanging in December.)


Support Stud Strapping
To keep our tripled-up support studs on the right side of the new opening from twisting in the future, our carpenter fastened a strap between them and the header. Had there been a longer “king” stud there, as there is on the left, strapping would not be necessary.


Drywall Hanging
Most of the new drywall is up now, just not finished.

Finished Pictures
After our wall was finished, it took several more projects to get this room into it’s finished shape. But it was all worth it, because in the end, it looks like this.
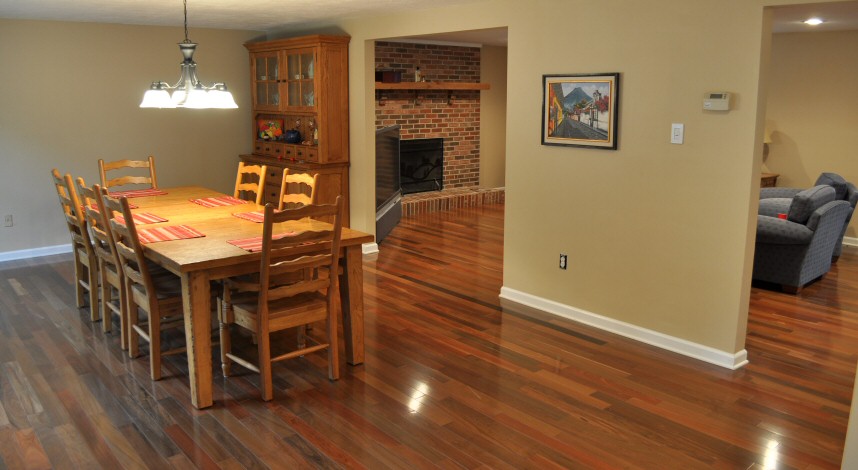
Here’s a link to more pictures of this space after we finished the hardwood flooring.
—
This article is part 3 of a three part series covering removing a load-bearing wall.
- Part 1 – Preparing for Load-Bearing Wall Removal
- Part 2 – Removing Part of a Load-Bearing Wall – Demolition
- Part 3 – Before Closing Up a Load-Bearing Wall

How did the inspection process go for a project like this? Do they have particular concerns when doing work on a load bearing structure?
Thanks for sharing your wall experience. We are still pursuing a very similar project which will enlarge a doorway from our kitchen to dining room from a standard door to about 6 ft. We would make it larger if it weren’t for the duct work in the way 🙁 Like you, we are also removing the casing that leads into our old walk in pantry. Fingers crossed we don’t find any pipes or electric! That would severely affect our kitchen configuration. I look forward to seeing your hardwood installation too. What are you using? Engineered or solid? We are leaning towards having solid finished in place. We shall see…
@ck – we had to have a structural engineer’s stamp of approval on the design and materials, but that was the only “special” item.
@Marjorie – we’re using solid and we’re installing it ourselves… so you KNOW we’ll be posting pix then, too! (Probably 2nd week of June).