This is our very first reader guest post, and it comes to you from Marc, a.k.a. haus356. If you’d like to submit your own, send me an email.
Trim such as baseboards, crown molding, and chair rail has been used seemingly forever to add visual appeal to a room and cover seams or joints where different materials come together. As discussed in this article, coping inside corners yields tighter fitting and better looking corners and is often easier to do than trying to make matching bevel cuts because corners are rarely exactly 90°. However, cutting copes by hand can be tedious and difficult, particularly for trim with complex profiles such as crown molding or chair rail. This article discusses how a Dremel rotary tool can simplify the process and yield perfect looking corners.
There are a large number of attachments available for Dremel rotary tools to perform a myriad of tasks from cutting to polishing, and wood shaping is no exception. One such attachment is number 801, the carbide shaping wheel. The 801 is carbide coated on its entire face and can quickly remove material including wood, laminate, and plastic. It is not perfectly flat, though, as it has a small mushroom top shape which can sometimes make it tricky to remove material in small detail areas.

The 801 wheel attaches using Dremel’s standard 1/8” collet.
Another handy attachment is the EZ544 carbide cutting wheel, which cuts along the outer edge of the wheel and makes it easier to follow small, detailed changes in the trim profile.

This wheel uses the Dremel EZ lock system, which makes accessory changes easy by replacing the small set screw with a quick release mechanism that greatly simplifies the process of changing accessories. However, it does require the use of the EZ402 EZ lock mandrel, an additional accessory.
To cope your trim using a Dremel, take the following steps:
Step 1: Cut your first piece to length with a straight (0°) cut to butt against the wall.

Step 2: Cut the adjoining piece of trim with a 45° angle – this is the piece you will cope (In the picture below we are cutting crown molding laying flat on our miter saw using a 31.6° miter angle and 33.9° bevel angle. It is easiest to refer to crown molding angle charts available at numerous places online to ensure you use the correct miter and bevel settings on your compound miter saw for the type of crown molding you are using).

Step 3: Use a pencil to mark the profile line, which makes it easier to see the edge as you are coping.

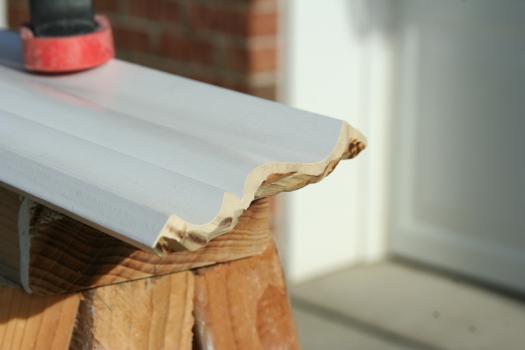
Step 4: Although when coping you generally follow the edge profile, you usually need to nick one corner to make the two pieces meet properly in the corner. For our crown molding, that was the bottom edge as shown below. This is necessary because by installing one piece of trim flush against the wall, the piece you are coping no longer goes all the way into the corner against the wall – you need to remove enough material from the piece you are coping to sit flush against the adjoining piece you butted against the wall.

Step 5: With your trim piece clamped down, begin removing the excess material with your Dremel. Use a faster speed ranging from 25,000-30,000 rpms when removing large chunks of wood away from the profile edge.

Step 6: Slow the speed of your tool down to 10,000-15,000 rpms when working close to the profile edge to allow you to work with more finesse and minimize the risk of compromising the profile.

Step 7: The desired end result is to leave the profile cut from the miter saw intact but remove enough backing material to allow the profile to sit flush with the adjoining piece of trim. For baseboard and chair rail this generally requires that you remove enough material so that the edge is effectively slightly more than a 90° cut. Due to the compound angles involved with crown molding you must back cut the material even more. It is easiest to have a scrap piece of matching material handy in order to check your progress as you work. In the picture below the two arrows point out high spots that need to have additional material removed to allow the pieces to meet properly.

Remove any excess material and check again.

Step 8: Once you have a tight fit you are ready to install all the pieces. Putty all your nail holes, finish as desired, and sit back and enjoy the results!


Great post Marc. Love the built-in. Did you do that all yourself or did you use some stock boxes?
Thanks Jeff. The whole thing was done by hand using 3/4″ plywood for the main box, 1/2″ plywood for the back, and 3/4″ oak for the adjustable shelves. The best part about it is the unit on the right is hinged and opens into a storage room.
Seriously? You’ve got to send us a picture of the hinge opening? That is really neat! I love this project. Thanks so much for sharing! We’re looking forward to seeing more submissions from you, Marc!
Wow! That is beautiful. I appreciate all the photos. Helps those of us who are “cutting challenged”.
By hand impressive! It looks amazing and I can only imagine how much you saved doing it yourself.
I should clarify that “by hand” meant that I started with blank sheets of wood and not any pre-assembled or stock pieces. There was plenty of power tools employed, including the Dremel obviously.
Wow, what an amazing accomplishment. My hubby and I are working on building more bookcases in our home library but we’ve yet to try our hand at coping. This will help us out immensely. Thank you!