

Thank you so much for visiting us at One Project Closer for this tutorial on how to make DIY Galaxy Painted Rocks – our latest Craft Lightning Project. This project is meant to be done in 15 minutes or less, not including dry times – for the busy woman who ain’t got time for long, drawn out projects. I got you, friend!
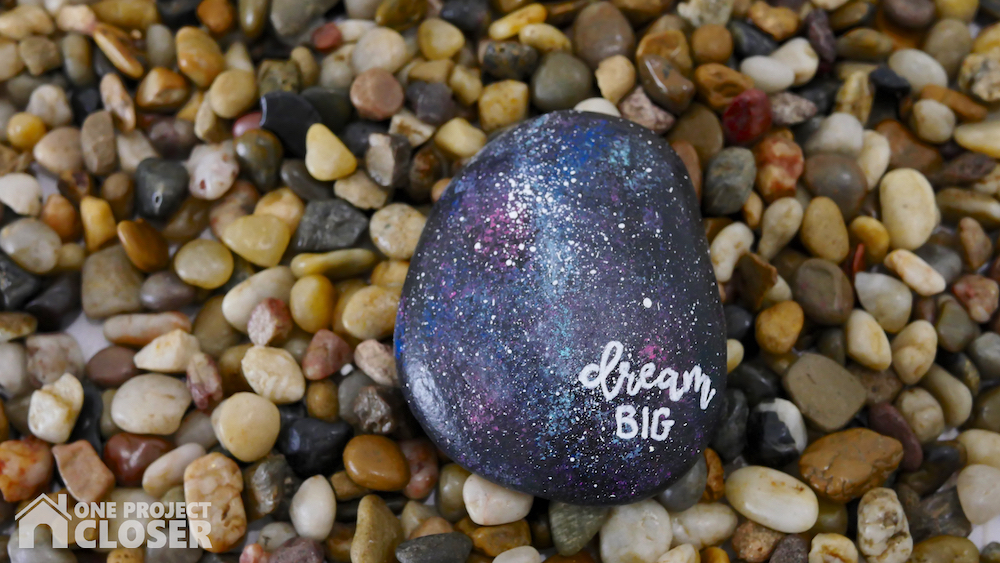
Star + Galaxy Painted Rocks With Hand Lettering
Make Time: 10 minutes + dry time
Cost: $2-15 (depending on what you have on hand)
Difficulty Level: Easy
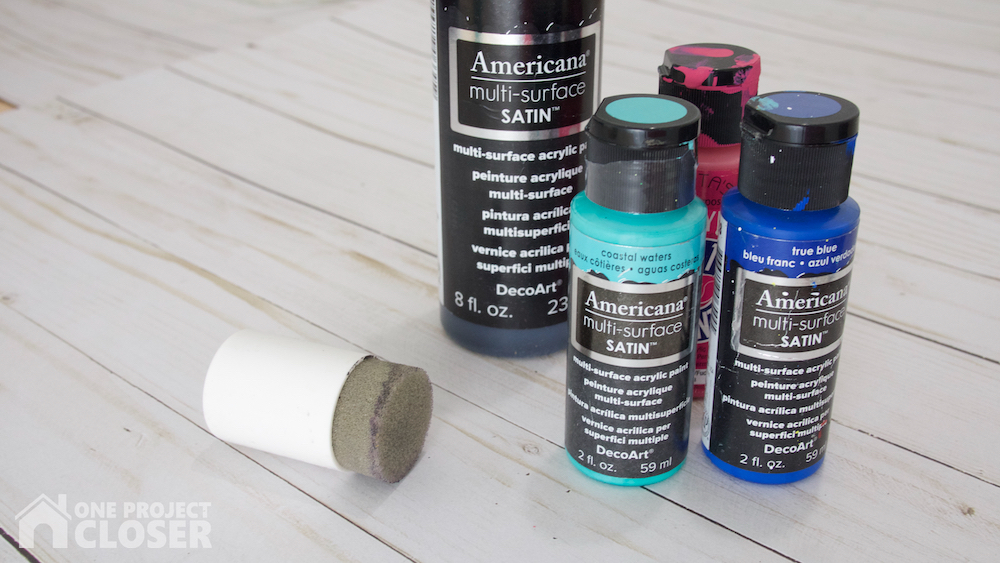
Materials Needed:
- Medium size, smooth rock
- Foam Pouncer
- Acrylic paint – black, hot pink, turquoise, cobalt blue, white
- Black Spray Paint (optional)
- Extra-fine paint marker, white
- Paint brush
- Acrylic Sealer (optional)
STEP ONE (optional)
First spray paint your rocks black. This is optional, but I think it helps the acrylic paint better adhere to the rock without chipping.
STEP TWO
Once dry, using a foam pouncer, cover one side of the rock with black acrylic paint. Yes, I know your rock is already black, but you need a wet, black painted surface to start.
*please ignore my chipping 4th of July nails! I used cheap polish as I painted my nails to match my kids. #bloggerfail
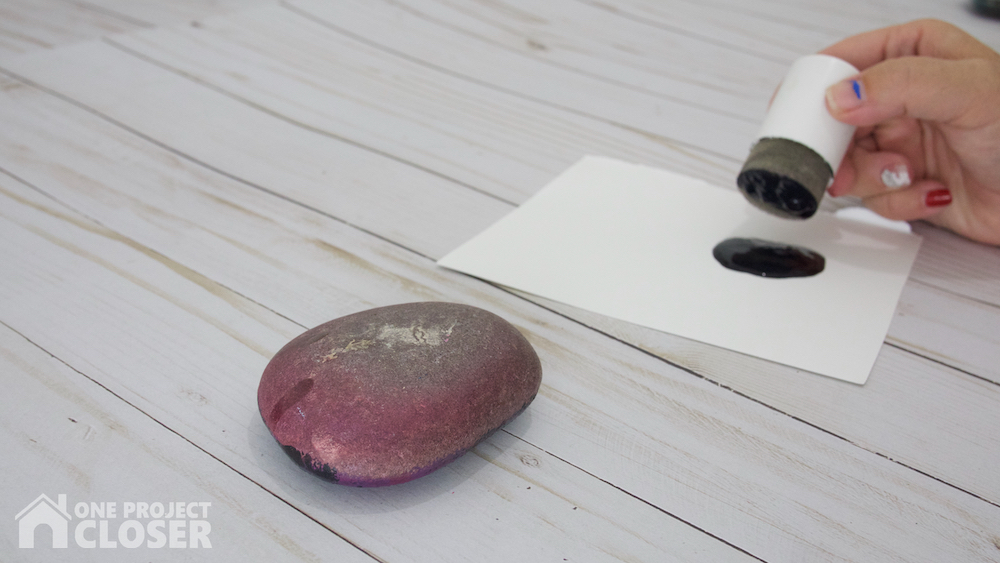
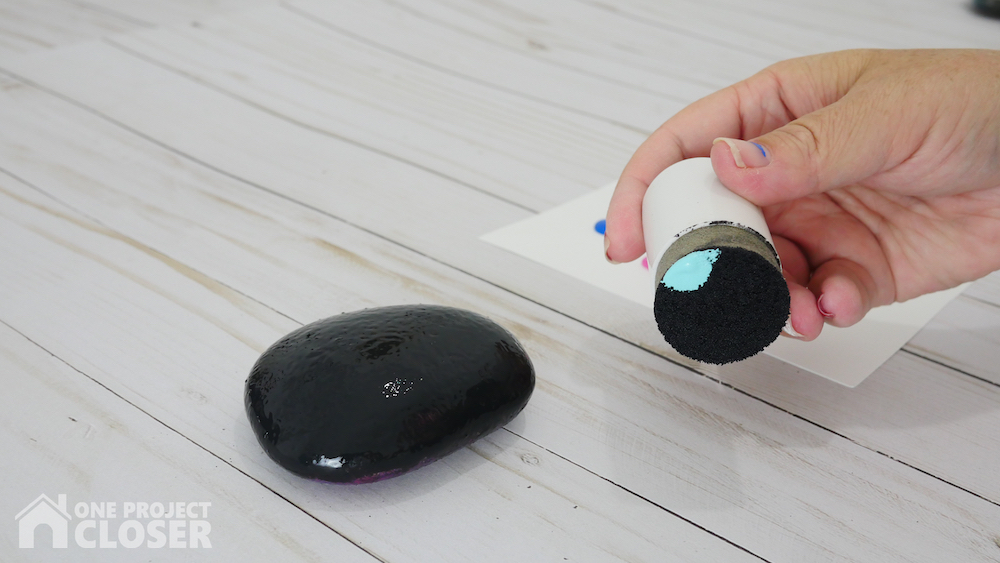
STEP THREE
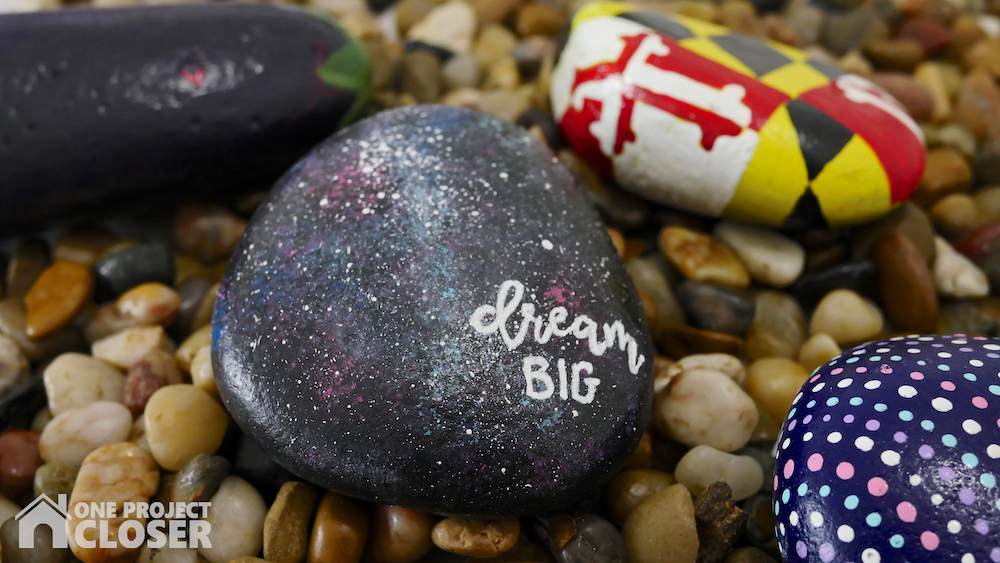
Using the same pouncer, without cleaning, dab a small amount of turquoise paint and dab it down the center of the rock. Add in small amounts of pink and cobalt blue around that.
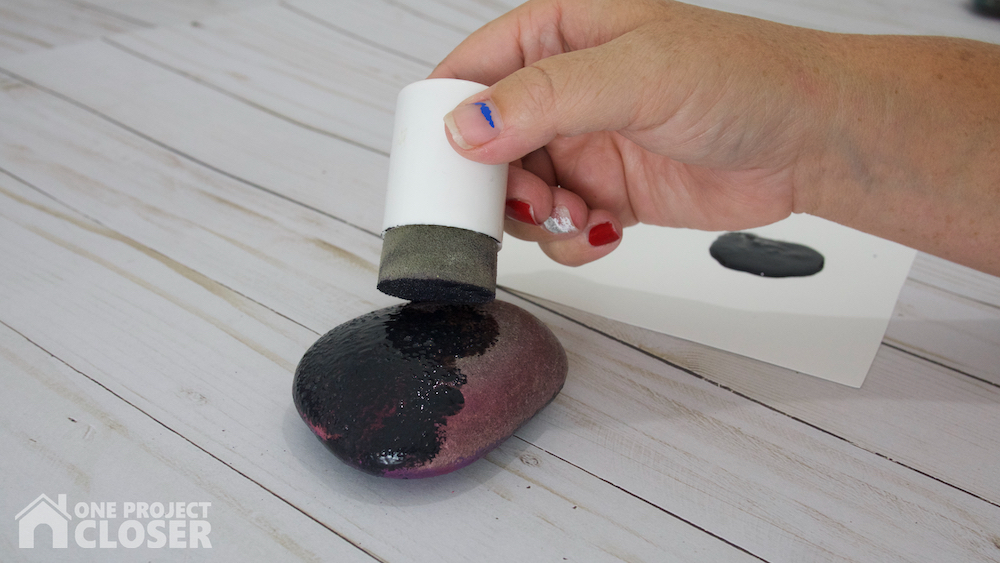
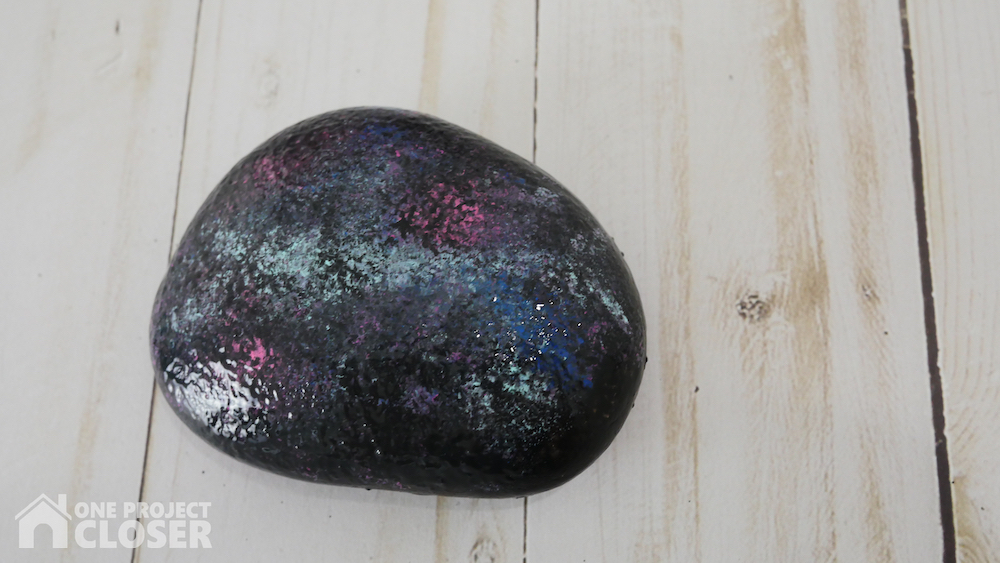
STEP FOUR
With the same dirty pouncer, put some more black paint on your pouncer and dab small amounts over the rock. You may want to dab your pouncer on a scrap piece of paper first to make sure you don’t have too much paint.
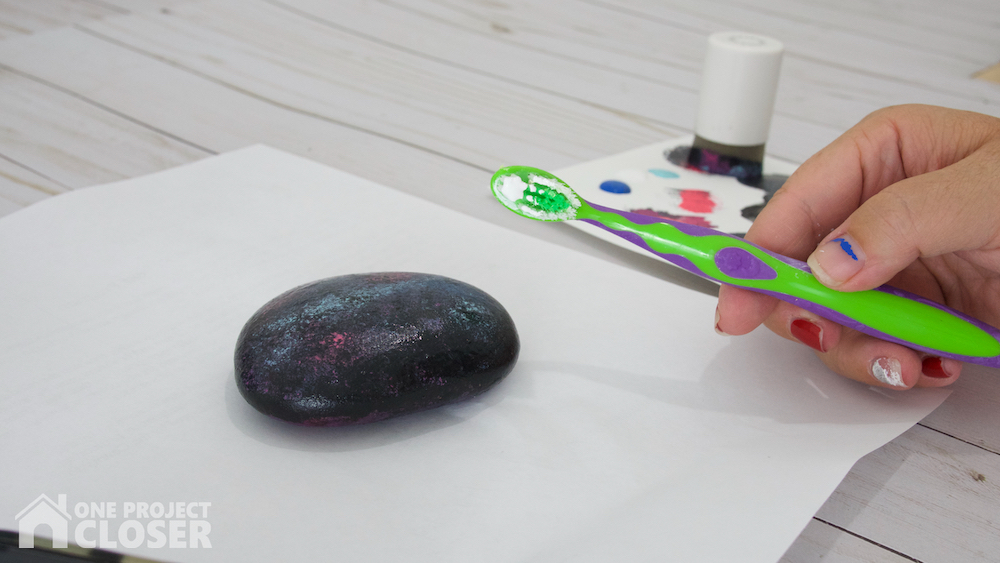
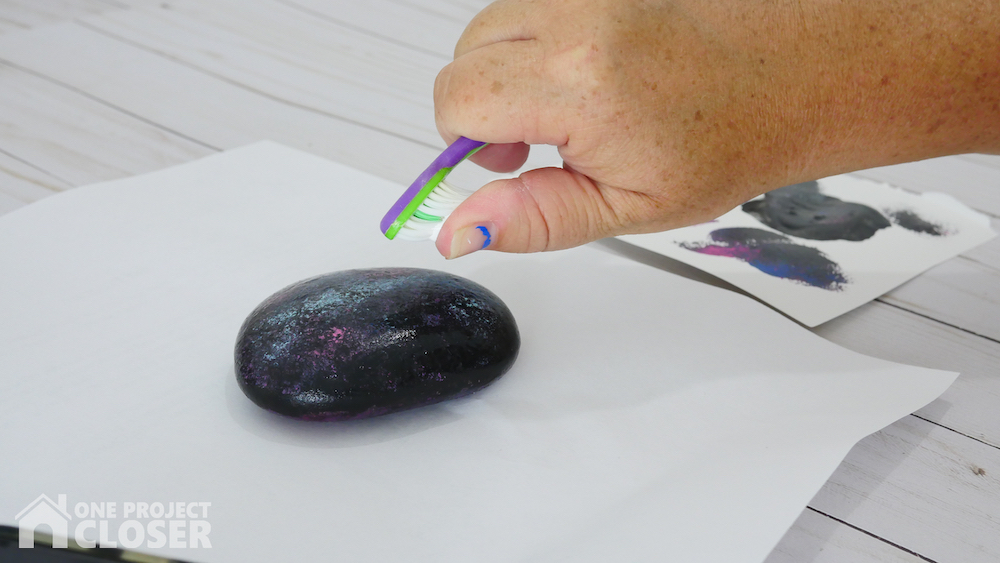
STEP FIVE
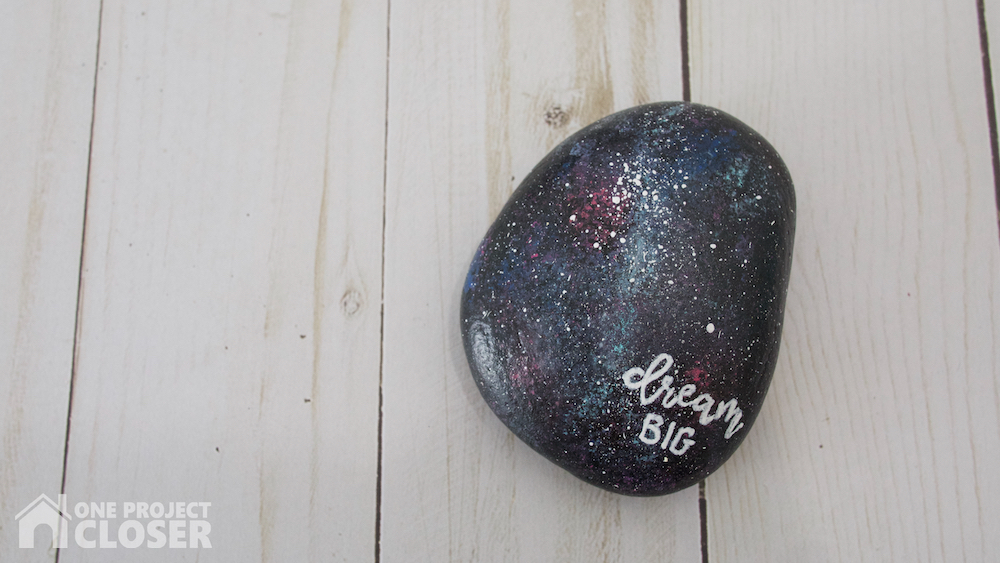
Let dry for 5 – 10 minutes. Then dab a stiff bristled toothbrush into white paint and run your finger across the brush so the paint splatters onto the rock. Splatter more paint along the center turquoise line.
STEP SIX
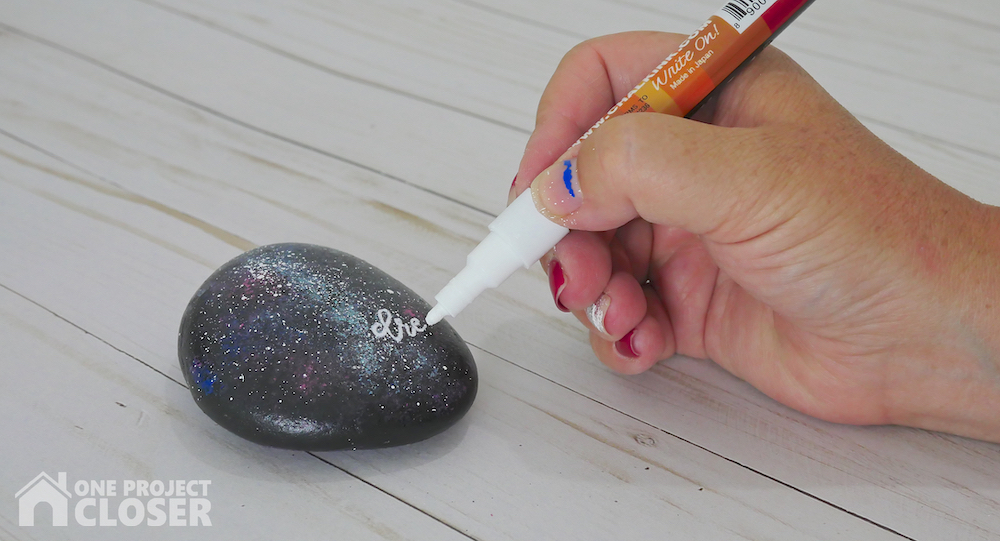
Using a chalk pencil, letter “Dream BIG” just below and to the right of center. Have a hi-polymer eraser on hand to erase and try any mistakes. Once happy with the placement and lettering, trace with a very fine paint pen (Posca is my favorite). I used a chalk pen because I couldn’t find my Posca, but because I’m sealing it later, it won’t go anywhere.
STEP SEVEN (optional)
Finally, once everything is dry, spray rock with polycrylic, non-yellowing sealer.
Other Painted Rocks
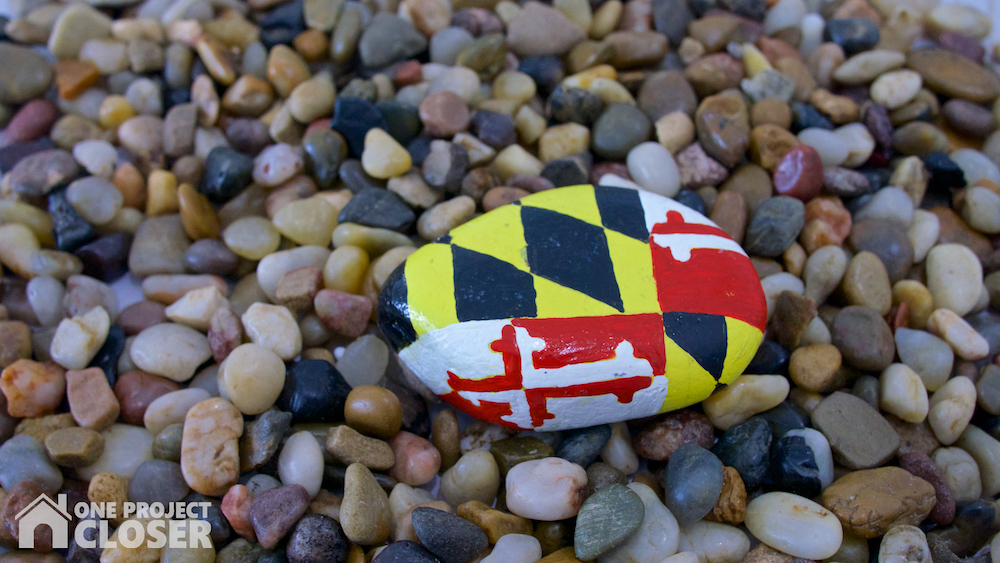
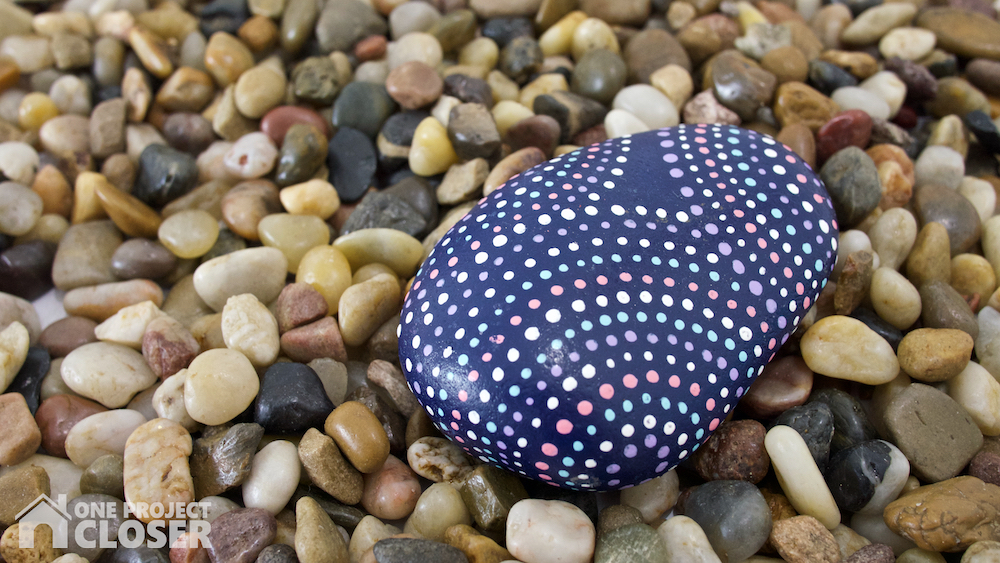
The whole family got in on the fun! I painted a Maryland Flag, my hubs painted an eggplant (he was super proud of this, and later I found out its the emoji for something ENTIRELY DIFFERENT! lolol Please don’t tell him – he’ll be so sad). And I also painted a dotted rock, which was the easiest but also took the longest.

PIN FOR LATER
Love it and want to share it with your friends? Or maybe come back later? Pin it!

Jocie Hagan
One Project Closer
Come say hi on Facebook, Instagram, & Pinterest!
Want to learn to hand letter and make amazing, personal decor for your home?
Learn now with Busy Girl’s Guide to Hand Lettering!
**Use the code HAPPY5OFF to get $5 off the course price**

Love the look of these galaxy rocks and I like how detailed your instructions are!
Thanks so much Cyna!!
[…] Galaxy Painted Rocks | One Project Closer […]