
It’s time for another Pro-Follow update as we follow along with contractor Steve Wartman and his crew. If you remember, Steve brought in Victor and his team from Luciano Cristofaro Contractors to build the foundation, and today’s article shares how they built the block wall foundation. If you missed it, read up on how Victor’s team dug the footers, laid rebar and poured the footers at those links.
Here’s how everything looked after the concrete cured and a little bit of rain.

Step 1: Mix Mortar
The guys used a gas-powered mixer to mix sand, water and type-S masonry cement. Then they would shovel the cement in to large tubs for the block layers.

Pro-Tip: Wet the tubs before adding the mortar to help prevent it from drying out.

Step 2: Measure Length
From the blueprints, Victor and his crew determined the location of the foundation walls. Next, they would mark out each section and calculate the number of blocks per section.
Pro-Tip: Concrete blocks measure 8″ x 16″ including the joint.
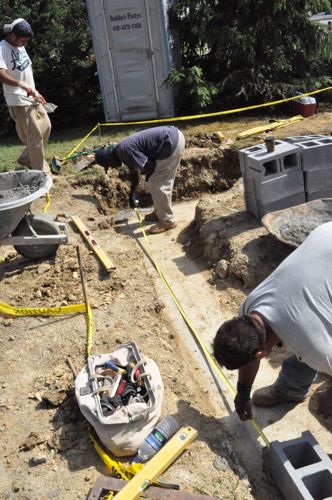

Step 3: Clean Footer & Strike a Line
After the guys cleaned the footer with a foxtail brush, they would strike a chalk line.
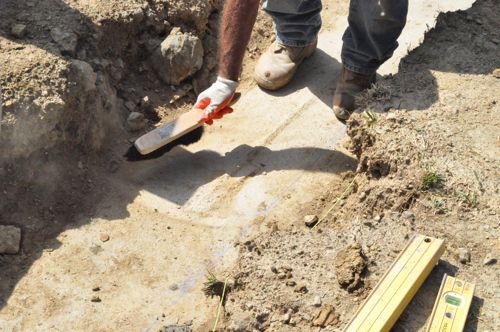
Step 4: Set Corners
For each section, Victor’s crew would start at the corners and work their way into the middle. For that reason it was really important that the corners be perfect because they act as a reference for the rest of that section of wall.
If you look closely, you’ll notice the corner blocks are slightly different with a finished outside corner.
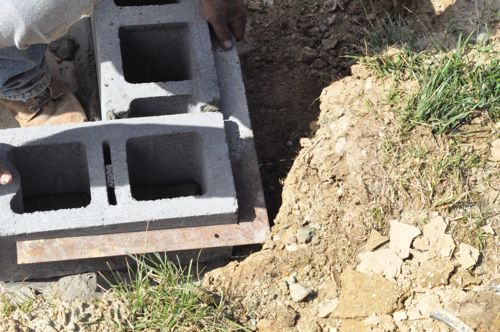
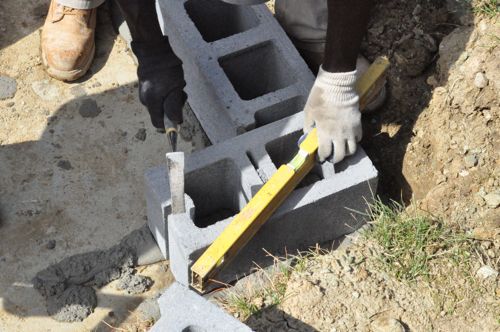
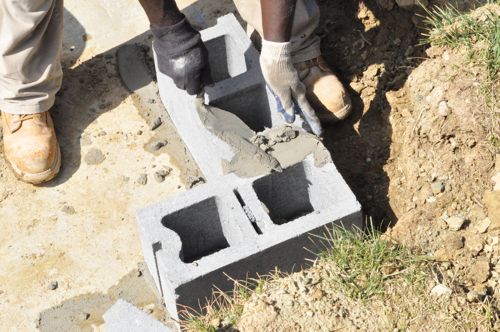
Often, the guys would run a long metal beam with a level on top (not pictured) to check that the corners were in line with each other.
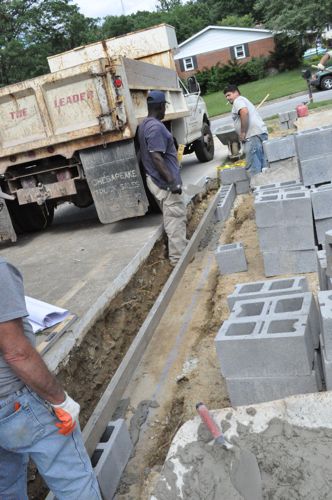
Step 5: Run String Guide
Once the corners were in place, Victor’s crew would run a string along the top corner of the block and use that as a guide for the rest of that section.
Pro-Talk: The bracket for securing a string is called a dogbone or line-stretcher.

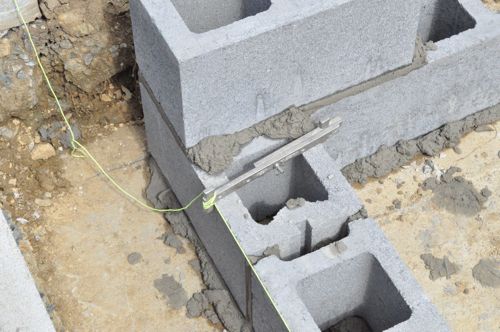
At times they also used a wooden corner block.


Step 6: Lay First Course
Using the chalk line as a reference, the guys laid a bed of mortar and began laying block.
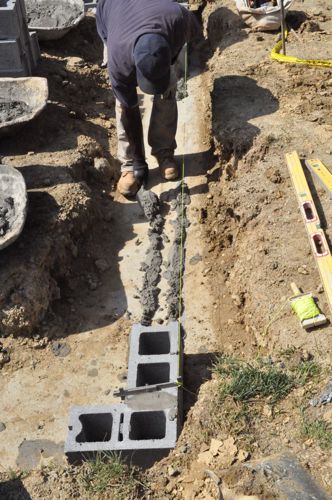
Each block was checked for level and that it followed the string.
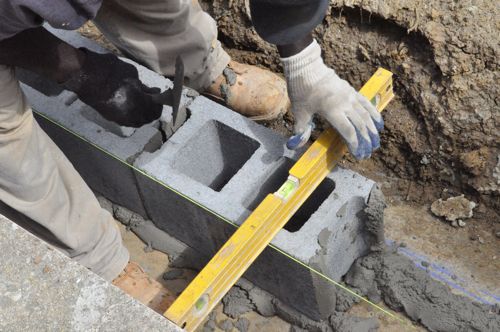
Pro-Tip: Joints should measure 1/2″ and the width of a finger is a good approximation.
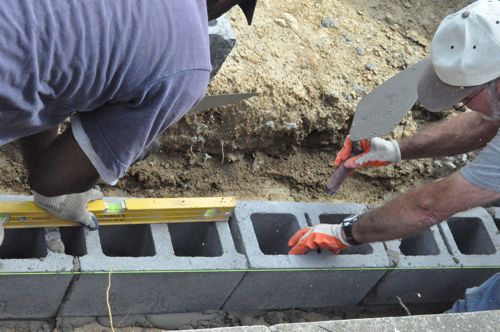
After each section, excess mortar and broken pieces of block were used to fill the corners for additional reinforcement.

Here’s a look at how the concrete footer steps down and the guys laid the block.

Step 7: Turn the Corner
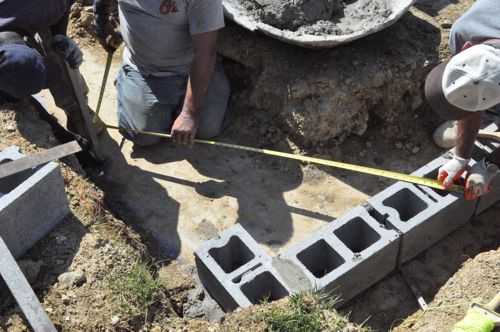
Keeping the corners square is very important, and the guys employed a little trigonometry (3-4-5 Pythagorean triple) to double-check their measurements.
Step 8: Wall Ties
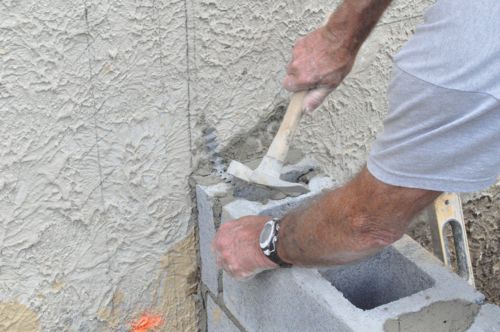
Every 2-3 courses, the guys used wall ties and nails to anchor the block wall to the existing foundation.

They would bend a wall tie in place, nail it to the foundation and embed the rest of the tie in the joint between blocks.

Step 9: Cutting Block
It was often necessary to cut the last block of a section or in order to stagger the joints on the next course of block, and they used two different methods. The first method was to use a brick hammer along the cut line, and after a few well-place whacks it would break.


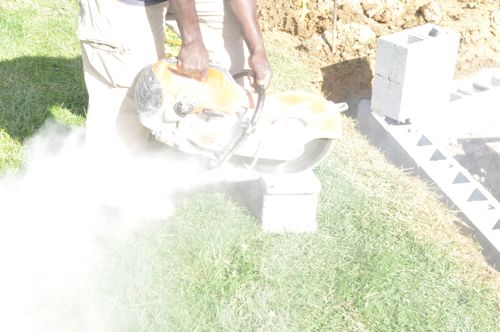
When precision was necessary, the guys used a concrete saw to cut the block.
Step 10: Site Guides
After the first course of block was laid, Victor’s crew used a transit to site a level line at all the corners. To do this, they first setup the transit in view of all the corners.


Next, the guys hammered stakes at all the corners.

Setting the laser detector onto the stake allowed the guys to mark a consistent, level line. Measuring off that line enabled them to make sure each course of the foundation was level with the rest.


Step 11: Lay Additional Courses
After the first course was completed, Victor’s team was able to work much faster. They continued laying block in a similar fashion, starting at the corners and working inward.


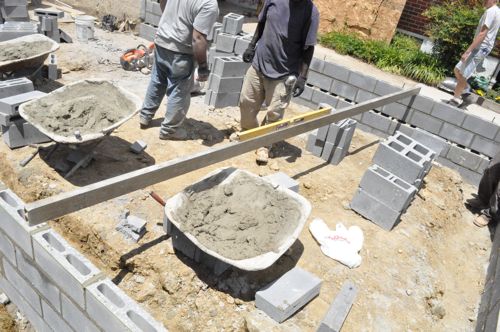
Here’s a picture of one of the guys checking the height to make sure it was in line with the rest of the foundation.

Most of the foundation consisted of two courses of 8″ block and two courses of 4″ block. The only exception was were the footer stepped down, and this area required an additional course of 8″ block.
When the guys pour the concrete floor, the concrete will actually conceal all the 8″ block and sit on the lip between the 8″ and 4″ block. That way, if the ground shifts or settles, the concrete floor will still be supported.
Pro-Tip: The final height of the foundation should be at least 4″ above grade.


At one point, the guys were about 1/2″ too high even if they “cheated” a little with thinner joints. To correct the height, they needed to trim about 15 blocks to the right height.

That brought them back level with the rest of the foundation.
Step 12: Fill Block
Victor’s crew filled the top two courses with mortar to reinforce them.

Step 13: Insert J-Bolts
At the same time, they placed J-bolts approximately every 4′ for anchoring the sill plate.


Step 14: Tool Joints
It’s important to tool over all the joints with a striking tool to press mortar into the joint, and it makes the joints look nicer too.


Step 15: Brush Clean
After the joints had set for while, they guys brushed the block clean. They only did this for the inside of the top two courses because that’s all that will be visible, and the outside will be parged.
Pro-Talk: Parging is a technique used to finish the surface of a masonry wall with a thin layer of mortar.


Finish
If you’re looking closely, you’ll notice that not all the blocks are filled at this point. The guys use left over mortar to eliminate waste, and even though I’m calling this finished, they still have some filling left to do.
The next step is to call in an inspection before backfilling around the foundation and let the plumbers complete their rough-in.


The long metal bar is an aluminum screed board used in concrete flat work. Great additional use for it!
Good clarification Jeff. They had an assortment of those, and it makes sense that they are screed boards.
Are these also known as Split Face Blocks? If so, here’s an interesting read on them http://www.deckerhomeservices.com/Split_faced_block.htm
I’m really shocked that the local code doesn’t require rebar between the footing and foundation wall. Unreinforced masonry isn’t a very “structural” application for a foundation. I’m also curious what depth of frost protection is required down there, those footings only look to be about 1 foot below grade. I have to imagine you get frost deeper than that. Any idea?
I was curious about the missing rebar as well. I’ve always seen vertical “L”s dropped in the footing.
In a previous article I think Ethan mentioned frost depth of 32”.
Hey Todd! Haven’t seen you around the site recently, and it’s always good to have your feedback. First, the inspector would have never passed the footers if they were only 1′ deep. Jeff is right that they dug down 32″. I’ll touch base with Victor and get his take on the rebar. I’ll let you guys know what I find.
I talked with Victor and he said that sometimes (like for basements) they dowel into the concrete to tie-in the walls. This foundation isn’t very deep, and (as I understand it) requires less reinforcement. Not only is this approved by local code, but the architect that drew up the plans didn’t find it necessary either. Thanks for the question.
That’s crazyzyyyyy
As for the rebar (I am a structural engineer, but nice intro article) it is not necessary. this short of a wall is not handling only lateral loads, therefore the CMU and grout/mortar will never experience any tensile loading. However there maybe uplift in which case we have an issue. The J-bolts are holding down the sill, the studs attach to the sill with toe nails and when there is an uplift, a hold-down is utilized. Since these anchor bolts are only being embed into grout, in a 4 inch block (!!!!) there are not substantial wind loads i am guessing by this fact you do not have any windows or doors within 48″ of a corner.
So in summary, rebar is only needed to carry tension loads, type-S mortar alone can handle 40psi of tension before it fractures (allowable by structural codes, but consult an engineer before you think it is ok for you to design with). This is why it is needed for a basement wall that is retaining any substantial amount of soil.
the plain 4″ block is adequate, but as someone who has seen too many failures i am glad they are fully grouted.
Again thanks for the progress photos!
Hey Eric,
I appreciate the thorough comment and the expert opinion. Thanks for adding the extra information! I hope to see you around OPC again.
Hey Eric,
My wife and I recently purchased a home we are fixing up. Built 1910. Foundation was terrible, it was set on regular red brick, not double, one width of brick. It was bowing out from weight of house and when we jacked up, it fell down. We have our footer approved by inspector, but we used 8×8 cinder block and on the sides of home used 4×8, and sat joists of 8×8 lip under the 4×8. All blocks (8×8 and 4×8) were filled with cement and rebar. Inspector says the 4×8 isn’t stable enough for house. What do you think?
What are the benefit of a block foundation vs a poured one?
Looks like it will match the rest of the house.
Actually the addition won’t really match the rest of the house, and it’s mostly to keep costs down. The stucco finish won’t extend as high, and the guys are planning on siding instead of brick. It’ll still look good though.
I gotta double-check on this one, but I imagine a poured foundation can support more weight. I’d guess it’s significantly more expensive too.
Self-admitedly not having a great point of reference, I wonder what the cost benefit analysis of filling all the blocks with some grade of concrete would run. Even if they were not staked with rebar as mentioned before. I appreciate the follow and now just need to find some need to build an outdoor shed to practice on.
Thanks.
the grout being used will give the overall wall capacity of 1900 psi (cmu + type s). the type-s has a compressive strength by design around 2200 psi. concrete can vary but typical structural is 4000psi, but can be as low as 2500 (or lower). Concrete typically has larger aggregates which would like to fit within the 4″ blocks, so you would not get good compaction; as compared to what one gets with mortar.
As a summary, using concrete in lieu of mortar and grout can give better results but most likely will be worse. and concrete is more expensive (typically)
Hello,
Apples for apples, I’ve always heard that block foundations will support more bearing weight, although there are many variables when deciding which foundation option is best, such as things like the location of the closest concrete plant (long distance=$$$=block best), how much time you have to spend on building the foundation (little time=concrete best), the area’s local masonry trade skill level (skilled mason available=block) the depth of the foundation (deep frost line=toss up with labor cost=block vs material cost=concrete) the type of soil, the amount of moisture/water within the soil (heavy rain, soil holds water=concrete, block=less dense=absorption) and many other determining factors. No matter which type of foundation you decide to use, both types when designed, built
then sealed correct and has a drainage trench system to to keep rain water away from the foundation will support the structure for a lifetime
cool, I wish I knew how to do this!
Years ago, while working some general construction, block had been taken to a height of around 10 feet, not sure if rebar had been used. A worker was standing on top of the wall as they began to backfill. The wall collapsed, sending the guy tumbling, thankfully without injury. It was also fortunate that no one else was in the area below. Was this due to 1) mortar not dry 2) lack of rebar 3) too heavy of a load of backfill? Maybe all of the above?
Firstly , head joints are made to work out at 3/8ths of an inch not 1/2. If you have a transit on the job there should be no need for a screed to check height and level. That should all be taken care of when you build you leads. If your first course is laid to a line and chalk line they should be plumb and no need to level each block.its ditchwork.Nice work just some unnecessary steps.
Thank you ! nice picture
Your use of the term “footer” is incorrect. That term is not defined, nor found, in the International Residential Code, aka the “Building Code”. A footing is the structural element upon which walls are constructed; a footer is a reference line placed at the bottom of a typewritten page. I suggest you revise the article to use appropriate terminology.
John…Im a CPM in AK. I wondered about the footers referencein the beginning as well…thought is was likely a local term LOL
great build until you mentioned j bolts and sill plate it then turned into a typical American build sadly you stopped building a decent structure and decided on a wooden shed instead
Is the cinder block and brick verneer on the same footing ? I ask because I have these stairway mortar issues on 6 rows of brick verneer however, no Sheetrock cracking on the interior walls
Thanks
Vinny
Hi, i am an engineer. I am wonder how do you design and calculate this blocks? Thank you!