
Thank you so much for joining us at One Project Closer for this tutorial on How To Change Oil In a Car. This post is sponsored by the Home Depot Prospective Campaign. Post may also contain affiliate links. Opinions (and typos) are 100% our own, and we appreciate you supporting our site in order to continue to provide free content to our readers. Professional auto mechanics may have a different way of completing this project – this advice does not replace common sense or the need to consult a professional. DIY at your own risk.

Home Depot sent one of their Husky 100-Position Double Ratcheting Wrench Sets to try out. Being that I’ve been on a bit of a car maintenance tear with my latest blog posts, I thought I’d write about changing oil since we’ve already covered brakes, rotors, and tire rotation. Also be sure to check out a few of my oil change tips and tricks!
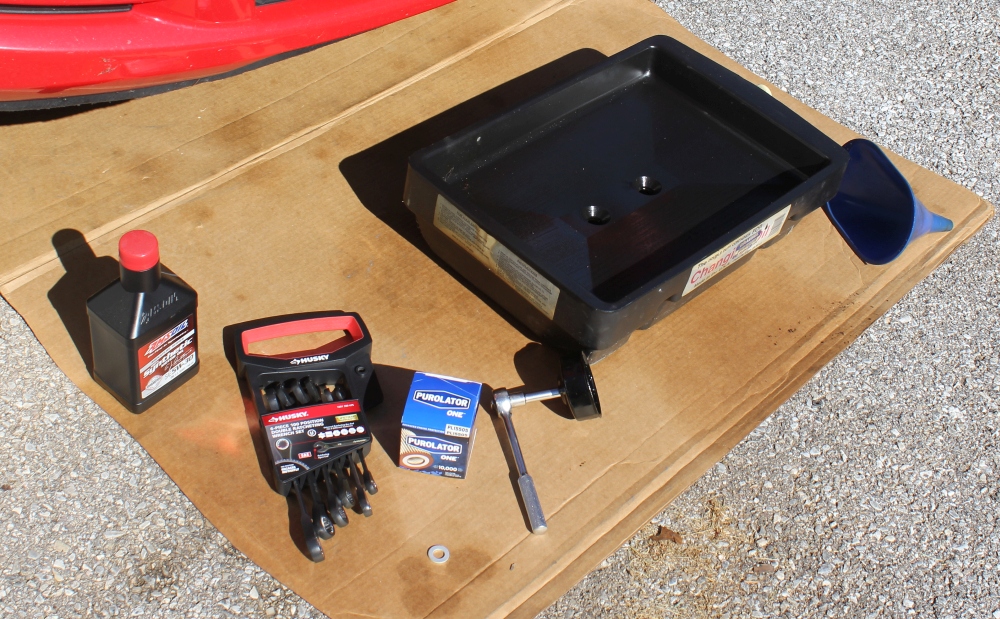
What You’ll Need:
- Oil – your car manual will tell you which weight and how many quarts you’ll need for your particular vehicle. I recommend spending some of that money you are saving doing it yourself, and upgrade to synthetic oil. You can go longer between changes and your engine components will last longer.
- Funnel
- Husky 100 Position Double Ratcheting Wrench Set (make sure to get SAE or metric based on your vehicle)
- Oil Filter
- Oil Plug Washer
- Oil Collection Pan
- Old Cardboard or some other spill protection
- Old Rags or Shop Paper Towels
- Oil Filter Wrench and 3/8″ Drive Ratchet Wrench – oil filter wrenches are specific to different types of car makes.
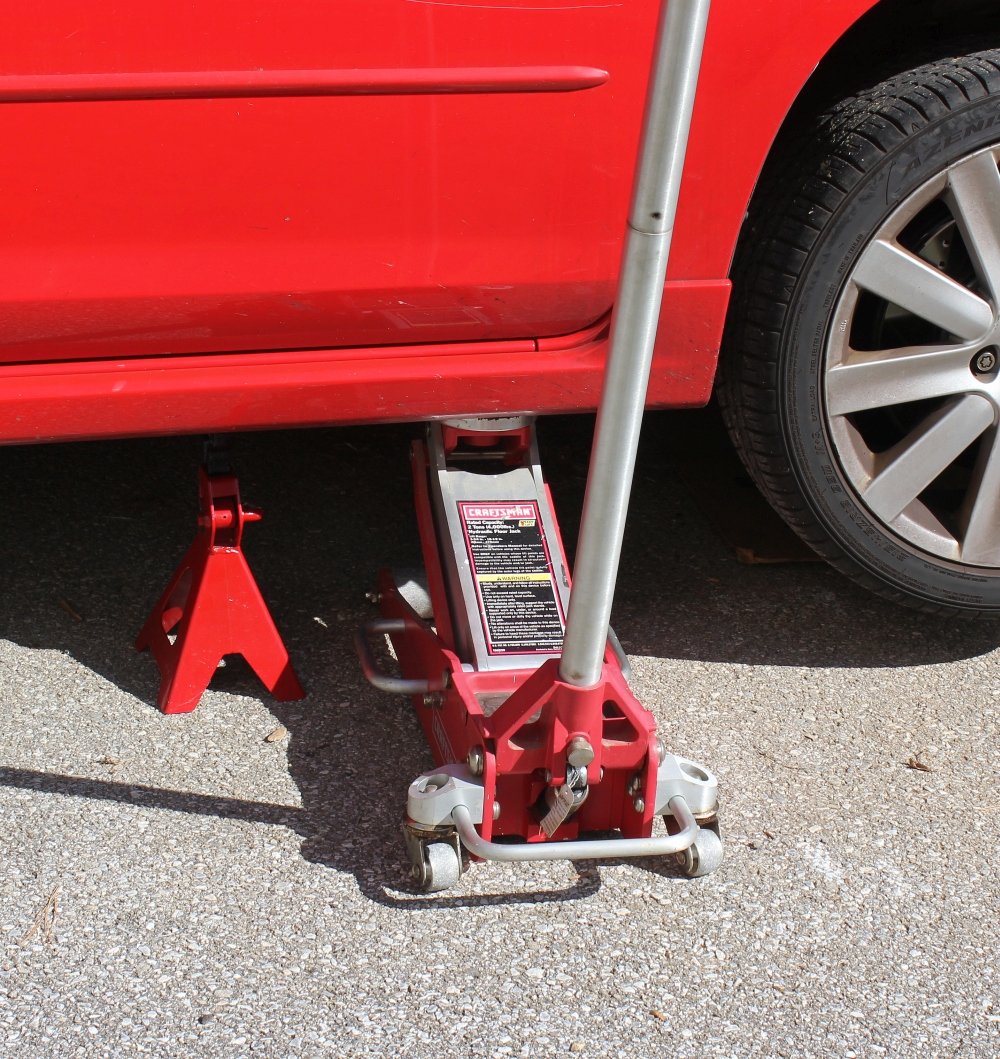
- Jack
- Jack Stand
Don’t forget to get the best Home Depot Coupons and deals before buying your tools for this project!
Let’s Get Started:
If you don’t already know which side your oil pan is on lie down and take a peek under the car. That is the side of the car you’ll want to jack up enough so you can slip in underneath with a wrench. Don’t forget that jack stand for added safety!
Step One
Locate the oil pan plug and position the oil catch pan underneath. The oil will shoot out with some force so be sure to factor that in when placing it. Using the appropriately sized wrench for your oil plug loosen it a 1/2 to 1 turn. Set the wrench aside use your fingers to untighten the bolt until it feels loose.
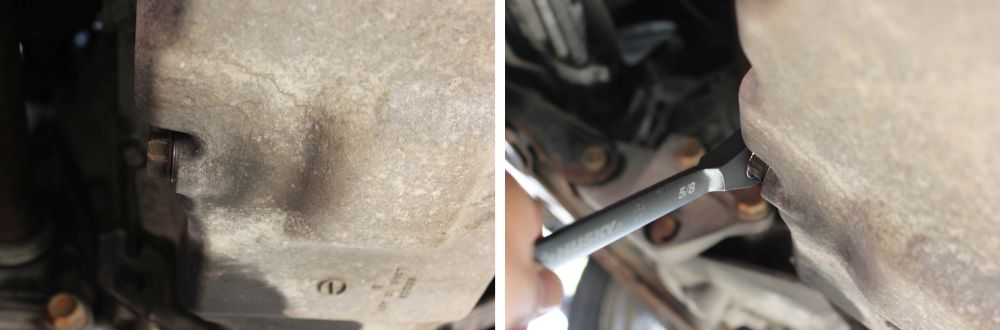
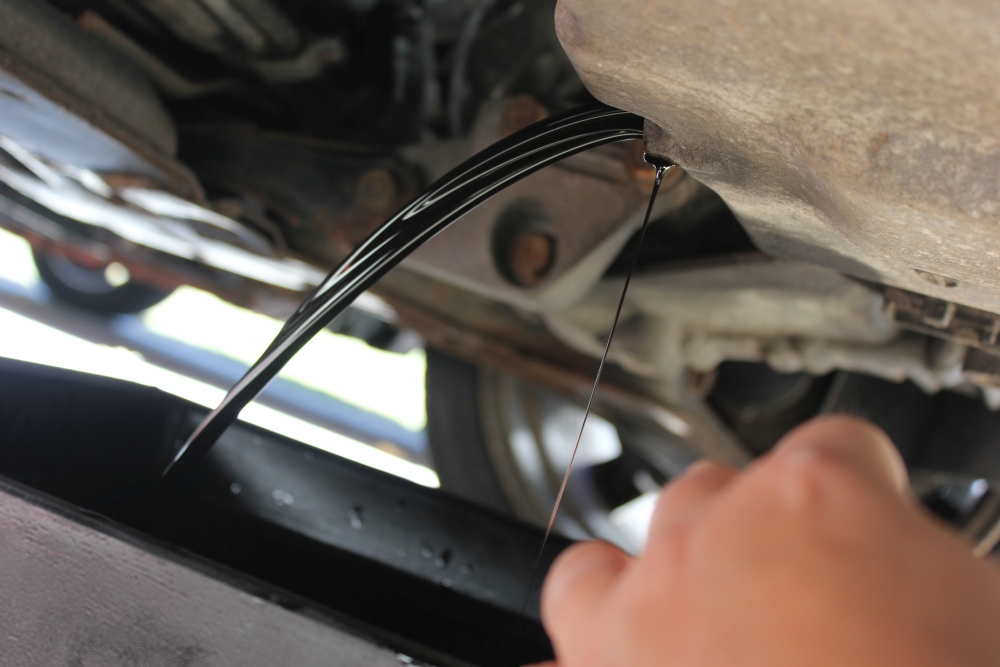
Quickly pull it away from the oil pan, allowing the oil to drain freely into the catch pan. Now remove the jack stand and carefully lower the vehicle back down while the oil is draining to get the best drainage. After 15 minutes or so the drainage should have slowed to a drip. Jack the car back up and replace the oil plug using a new washer and torque it down firmly with your ratcheting wrench. These Husky wrenches are super solid and the fine control ratcheting action makes them super useful for tighter spaces. And even IF, you were to break one, and that’s a big if, simply return it to Home Depot for a replacement no receipt necessary.
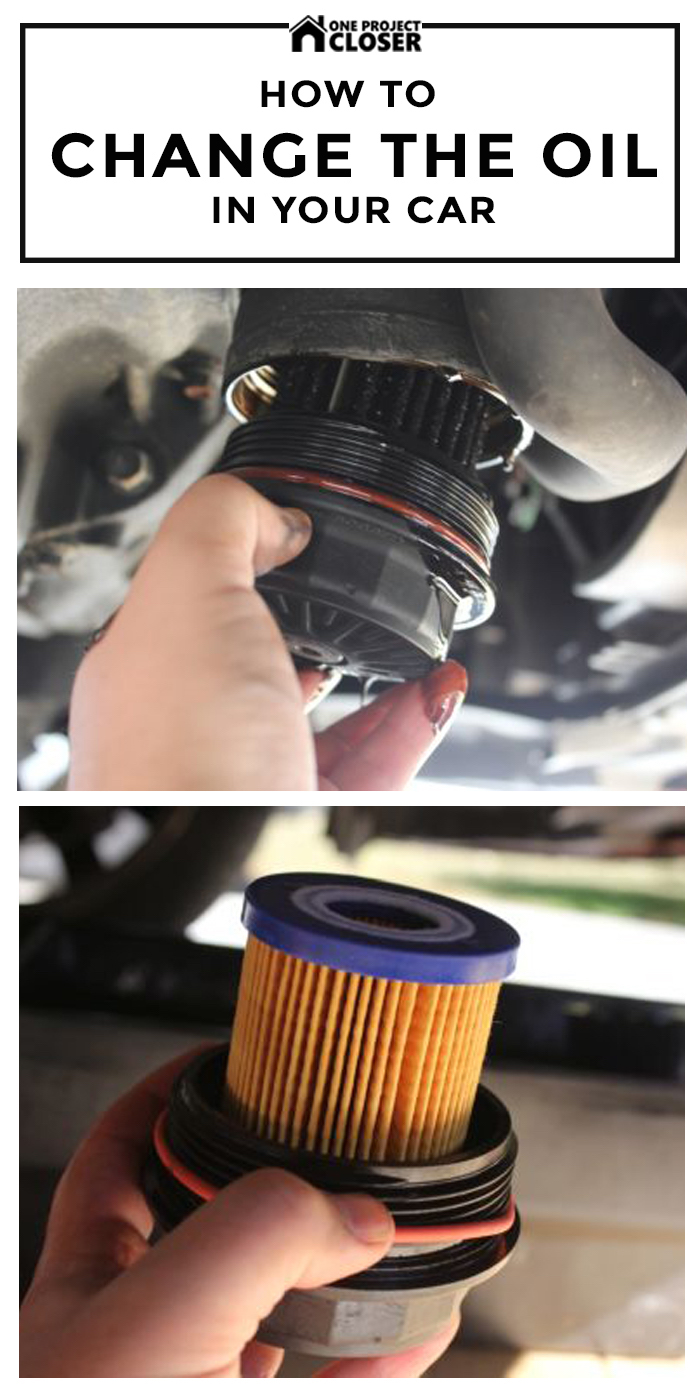
Step Two
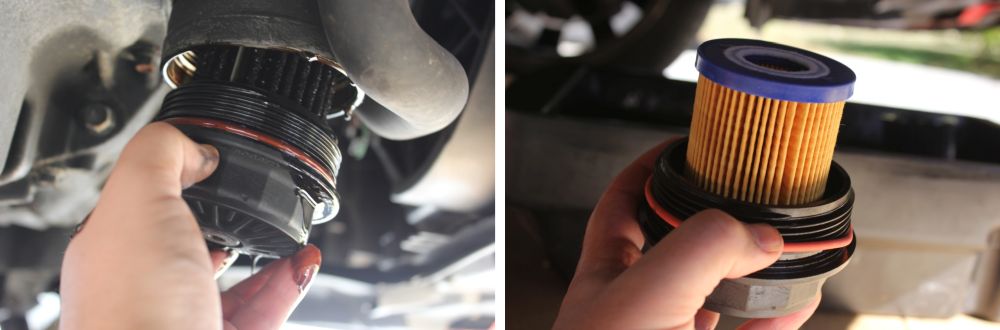
Next, locate the oil filter on your vehicle. Most are located underneath, but some vehicles are more easily accessed from above. Your local auto parts dealer can help you get the right size and type of filter for your car. In my case, this particular car using a pleated cartridge style of filter. Place the oil catch pan underneath of the oil filter and use the oil filter wrench to loosen the filter a turn or two. Again, use your fingers to untighten the rest of the way.
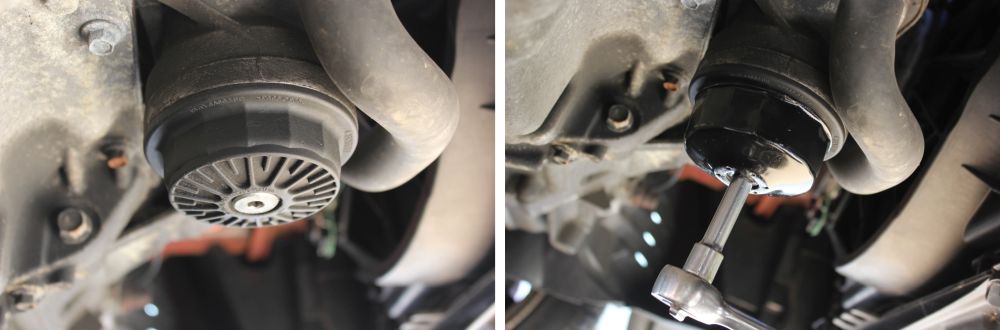
Once you’ve wiped up any mess and disposed of the old filter, replace the o-ring and cartridge, using a little bit of new oil to lube the o-ring. The same is true if replacing an all-in-one style filter. Now simply reverse the process and finger tighten the filter and finish tightening with the ratchet wrench and oil filter wrench.
Step Three
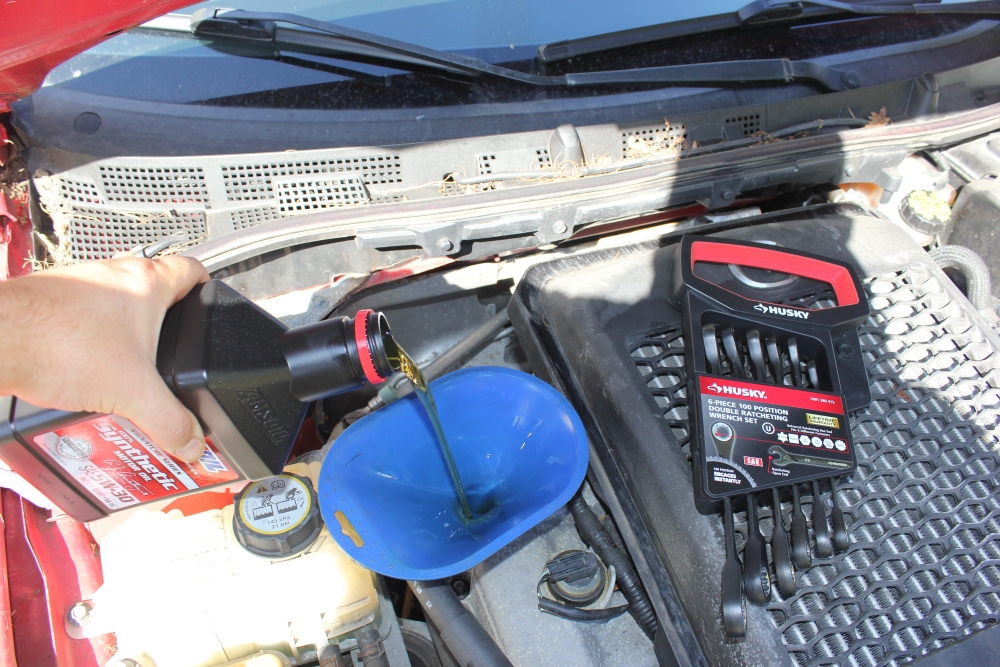
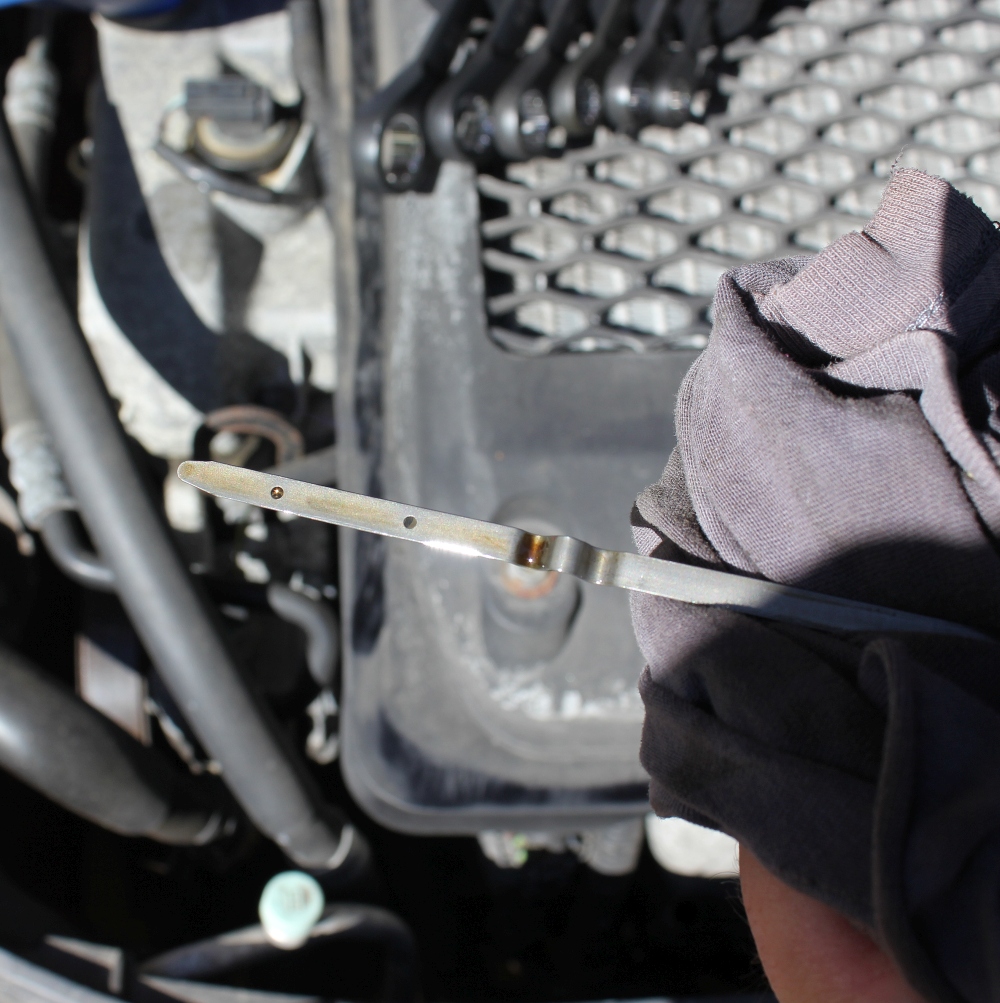
Now it’s time to lower the car off of the jack and fill ‘er back up with oil. Unscrew the oil cap on top of the engine, and using a funnel, add a little bit less oil than the manual calls for. Next check the dip stick to see if the desired oil level has been reached. Slowly add more oil if necessary, and repeat this process until the dipstick reads as it should. Finger tighten the oil cap and you’re good to go.
*Pro Tip #1 – Be sure to save your old oil containers to dispose of your used motor oil properly. Most local landfills will have a place to do this, or you might find a local mechanic willing to help you out.
*Pro Tip #2 – Lay your oily rags and paper towels somewhere safe to dry before disposing of them. Spontaneous combustion is a very real occurrence.
Thank you for following this tutorial on how to change oil in a car. What are your best tips or advice on how YOU change oil in a car?

Nice article. Changing oil is a simple money-saving task you can often do better than a shop. Two comments. First, advising not to cross thread the plug would be helpful – seems to happen too often. Second, on your picture of the dipstick, looks to me you are overfilling – the oil level should b between the two little holes on the stick. Worth checking to be sure. Thank you.