
Today’s Pro-Follow is part of a series shadowing professional contractor Joe Bianco and his crews as they remodel an unfinished basement. A necessary part of this remodel is bringing the basement (and even other areas of the house) up to current code, and that includes installing an emergency egress window. For this project, the guys are expanding an existing window and installing a window well.
If you enjoy learning and interacting with pro contractors and tradesmen, become an email or RSS subscriber. You can also like our Facebook Page and follow us on Twitter.
Egress Requirements
The 2012 International Residential Code (IRC) section R310 requires an emergency escape in all basements, and where basements include a bedroom(s), emergency egress in each sleeping room. This is a change that was implemented in the 2006 IRC; previous editions qualified basements with habitable space. Existing dwellings were “grandfathered in” and allowed to remain unchanged unless new construction, additions, alterations or repairs took place, in which case the new code applies.
Here are the requirements for emergency egress:
- Minimum opening area: 5.7 square feet
- Minimum opening height: 24 inches
- Minimum opening width: 20 inches
- Maximum sill height: not more than 44 inches measured from the finished floor to the bottom of the clear opening.
- Window wells: minimum horizontal area shall be 9 square feet, with a minimum horizontal projection and width of 36 inches. A permanent ladder or steps if the window well depth is more than 44 inches.
- Bars, grilles, covers, or screens are permitted to be placed over emergency escape and rescue openings or window wells, provided such devices are easily releasable or removable from the inside without the use of a key, tool, or special knowledge.
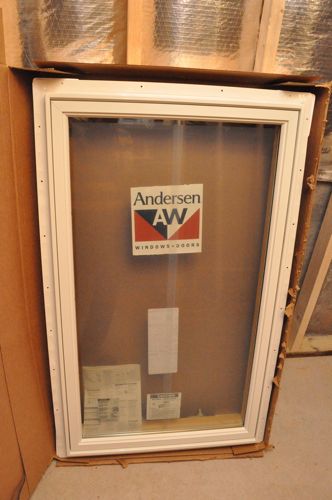
Step 1: Dig Opening
The guys got started by digging out a semi-circle around the existing basement window with a radius of 3′. The plan is to dig down about 6″ below the new sill height which keeps them under 44″ (and would require a step or ladder).


Step 2: Turn Off HVAC and Cover Openings
Inside the basement, Joe’s crew turned off the HVAC and covered all return air ducts and supply ducts. They also sealed around the basement door with tape to prevent any dust from escaping.

Step 3: Plastic Sheeting Barrier
The guys built a plastic barrier to further trap any dust created by the concrete saw.


Step 4: Mark Window Rough-In
The new window will be positioned less than 44″ off the floor and extend up to the existing window height.
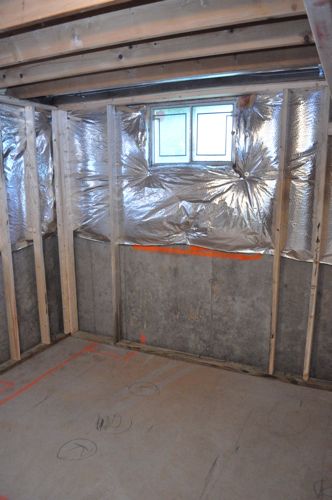


After removing the insulation, Frank used a level to mark horizontal and vertical lines on the inside and outside of the house.


Step 5: Cut with Concrete Saw
The concrete saw has a hose connect to further reduce the amount of dust, and the guys took advantage of it.

They cut along the lines on the inside and outside of the house, and they made an extra cut down the middle to make it easier to remove that section of wall.


The crew used sledge hammers and a pick-axe to demo the opening.


Step 6: Frame Window
Frank removed the rest of the old window frame and cleaned up the concrete.

He used pressure-treated 2 x 8″ to rough-frame the opening. As it turned out, the new window fit the rough opening really well.

Frank put down a generous amount of sealant to create a waterproof barrier under each board.

Pro-Tip: Frank chamfered some of the boards because it’s tough to cut perfectly clean corners.

As Frank placed each board, he checked it with a level and shimmed accordingly.

The sealant is what really secures the rough framing in place. Frank drove cut nails for a temporary hold.


Step 7: Hang Window
Frank put another bead of sealant on the face of the framing and positioned the window in the opening. After leveling the window, he put screws through all the pre-drilled holes.


Step 8: Foam
The guys used a low-expansion, window and door foam to seal and insulate around the window. The foam was great for sealing any gaps or cracks.
Step 9: Trim with PVC Board
Frank trimmed the window with PVC board since it won’t rot or become a target for pests.
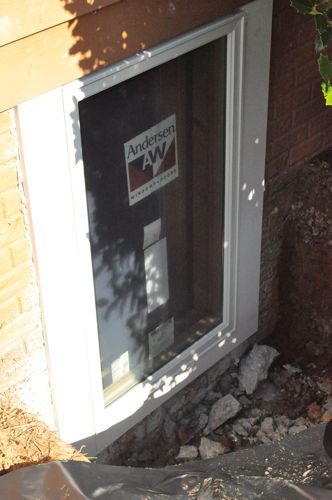
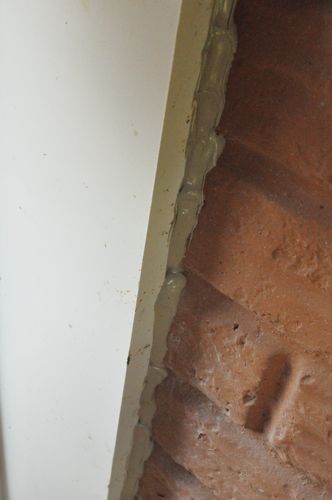
He also put a bead of sealant around the edge to prevent water from finding a way through.
Step 10: Install Window Well
Joe and Frank picked up this window well from a local lumber yard.
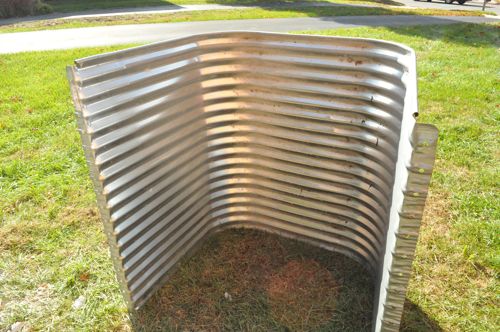
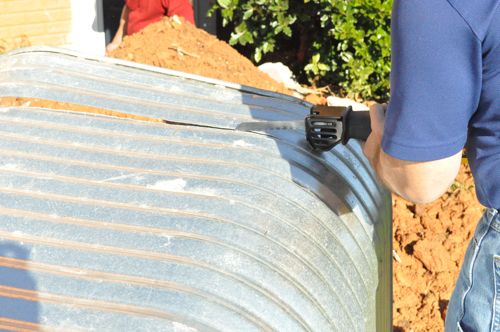
They cut it down to the necessary height and fit it in place.
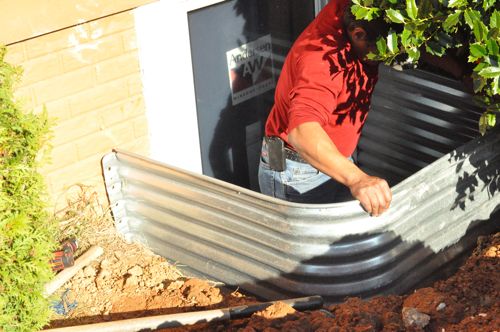
The guys used concrete anchors to attach the window well to the foundation.
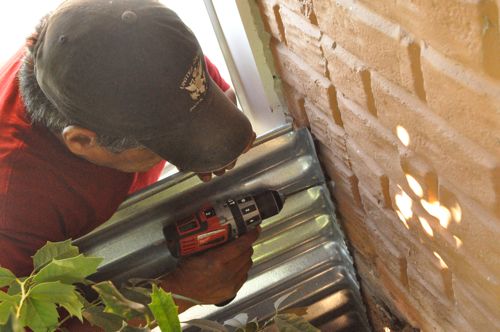
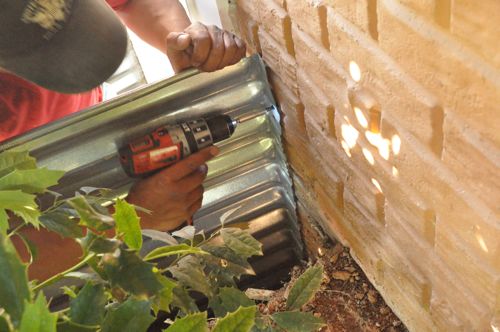
They also sealed the edge to prevent water infiltration.

Lastly, the guys backfilled around the window well. They piled the dirt higher because it’ll sink as it compacts more.
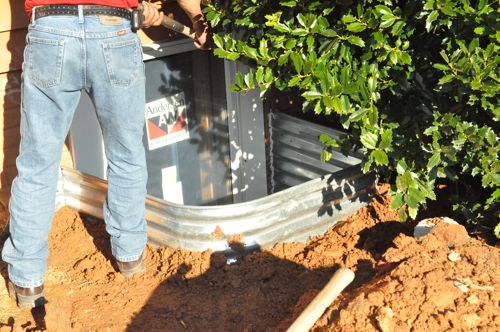
Finished
Technically the guys weren’t quite finished. They still needed to add about 6″ of gravel to the bottom of the window well and install a window well cover to divert rainfall. Although it’s not required by code for the height of this window well, Joe and Frank plan on hanging a simple ladder to make it easier to climb in and out.
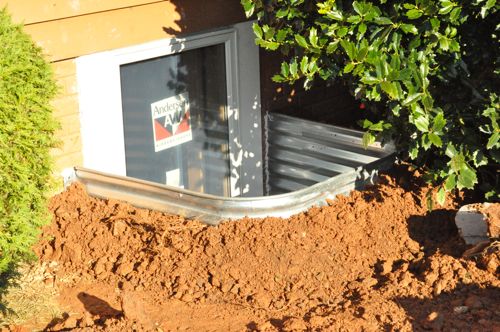


Wow…basement egress. At least there’s one thing you don’t have to worry about when you live below sea-level!
if a reader is planning on handling a job like this (or similar such as cutting out part of a concrete floor). You can rent saws that have a shroud and vac attachment to keep dust to almost zero. I use a Hilti setup and it works great.
Great tip Jeff. I haven’t seen that shroud yet. Capturing dust seems like a hot topic with manufacturers right now (like the rotary hammer attachments) so it doesn’t surprise me.
They make it look easy!
Was anything done to cover the framing (2×8’s) on the interior? PVC board, etc?
The interior of the basement will be drywalled after the utilities are done and inspected. I’m not sure what sort of window casing they’ll be doing though.
Does having on of those installed promote break and entry. To me it looks like the perfect spot to break in u know well hidden easy access.
Very true. To that end, did they use a reinforced window or something?
I do know the window was designed to meet egress requirements. I’m not sure if that includes some sort of reinforcement. I’ll try to find more info.
Odd question…but how does the IRC relate to those who would to a project like this by themselves? Where professionals need inspections, it seems like sometime could do a project like this and not be up to code. Could they get in trouble for it later?
I’m not doing any project like this but I’d like to know in case I would do some other project in the future and later find out I didn’t do it to IRC standards.
Fred and I talked, and here is our opinion. The IRC applies to all projects. If you do something, and it’s not up to code it may come back to bite you when you sell your home. Otherwise, you’ll probably never *get caught*.
Something that is not altering the life & Safety of a structure, modifying the intended function, or altering accessibility/egress really don’t have too many specific codes to follow. And if ever unsure just call and ask your local building official if you’d need a permit or inspection for “Job-Type”.
And if you are still unsure, just do it to code! All codes can be found at:
http://publicecodes.cyberregs.com/icod/index.htm
That has all IRC, 2000-2012 (currently most localities are on 2009, minus CA, FL, and misc.)
Ethan, do you have any problem with website links? I don’t want to upset a great blog maker (Really, you guys do an amazing job! i always enjoy the articles!)
Thanks for the replies, both of you
Thanks for chiming in Eric! We have no problem with good quality website links. They may get held up in moderation, but I’m usually on top of approving those. Thanks for the kind words. I hope to see your comments around the site!
Nice Pro-Follow. Slightly off topic, but why was there only insulation on the top half of the walls?
That was the requirement at the time the house was built. The thinking is that below grade walls are insulated by the surrounding dirt so it’s only important to insulate up high and in the band boards. Code has since changes and the guys will be adding insulation.
Great article. One question: does the larger opening create any problems for the header above the window? It’s a bigger open space and it seems like this could impact how the load transfers to the foundation.
It is a bigger window, but it’s not wider. The header was already supporting the weight above so not much has changed even though it’s a different window.
so… you can get out of the basement, but then youre stuck in a chest height hole?
shouldnt there be stairs out of that? wouldnt that let more light in as well?
Hi Joe,
At the end of the article I mentioned that the guys would be hanging a ladder on the rim of the window well. That’ll make it easy to get out.
Excellent article, discription and pics! My questions are 1.) Doesn’t the window well need some kind of drainage or tie-in to the existing drainage? 2.) How long did it take them to complete this project? 3.)I’d be interested in the general feeling of how myuch additional work/effort is it to enlarge the width of the window, since all the necessary tools (concrete saw are onsite. does it create additional problems other than the obvious (larger header & window, bigger hole more materials)?
Thanks Rasheed,
Here are the answers to your questions, and I hope to see you around OPC.
1) With the grade of the soil, this window is well above the drainage around the foundation so it doesn’t need to tie-in, and the bed of crushed rock will handle any water that makes it in. Also, the well cover will divert 95% of the rain anyway. 2) It took the guys about 8 hours, and that’s with multiple people digging and cutting the concrete. 3) In my opinion, you may want to get a structural engineer involved because you’re modifying a load bearing wall. Other than that, I don’t think it would be too much extra work.
As far as security is concerned, I believe that there are metal grids which can be placed inside the home, over windows, with simple latches that can’t be opened from the outside, but do allow occupants to exit as needed.
Great article! Very descriptive and easy to follow.
I really liked your very through explanation. I’m going to piece meal the job, so I don’t have to use a contractor. I got a bid for $3000! Thank you very. Much 😀