
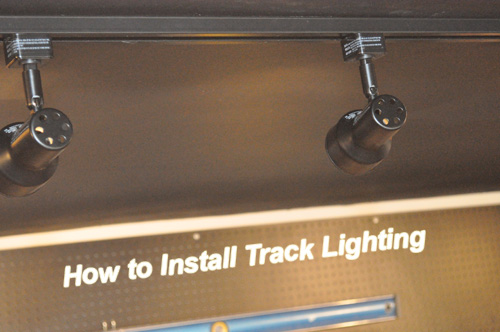
We’ve setup quite a bit of track lighting in our shop, and yesterday I finished installing some additional units. We like track lighting a lot because there are many of styles of lights available, and because we can move or redirect the lights as needed. We use track lighting for taking pictures, recording video, and getting a lot of light on our workbenches. Read on to learn how you can install track lighting too.
Permits: In some areas you are required to obtain a permit for electrical work that includes a new or extended circuit, and sometimes only licensed master electricians can obtain these permits. You can usually find where to file for permits via links on your county government’s or state government’s licensing and permits web page.
Code: Most jurisdictions follow some variation of the National Electric Code. You can get limited free access to the NEC via NFPA’s web site.
Materials
- Ceiling electrical box (see below)
- 14/2 Romex (see below)
- Cable staples
- Light dimmer switch (see below)
- Floating power supply (see below)
- Track light section
- Track spot light(s)

Ceiling box: Ceiling boxes are available as “new work” or “remodel” boxes, and since I have access to the attic above, I selected new work because the profile is thinner. The ceiling box mounts to an adjacent framing member (stud, joist, blocking) with a few screws. Most retrofit track lighting installs won’t have that luxury, and you’ll need to purchase a remodel box. Remodel boxes have fold-out fins that secure the box against the drywall.
14/2 Romex: The wire I selected is 14 gauge, 2-wire which means it has a white, black and ground wire. NM-B stands for non-metallic, and B refers to a temperature rating that the wire can operate at without overheating. 14/2 NM-B is commonly used for indoor, residential electrical applications (like track lighting).
Light dimmer switch: We’ve been installing Lutron 600W dimmer switches in our workshop, and the wattage indicates how many watts of power it can handle. A good rule of thumb is to only load up a switch to 80% of its total wattage otherwise they can get very hot, and for us that means 480 watts.
Floating power supply: There are a couple different power supplies for track lighting (floating, end-feed, linear, etc.), and they are sold separately. We like the floating power supplies because they can be positioned anywhere along the length of the track.
Tools
- Drill / driver
- Screwdriver
- Drywall saw
- Utility knife
- Hammer
- Wire strippers
- Pliers
- Tape measure
These are the tools I used to complete the job, but not all of them are required. For instance, cutting pliers and linemen’s pliers are a little redundant.

Step 1: Mount Box
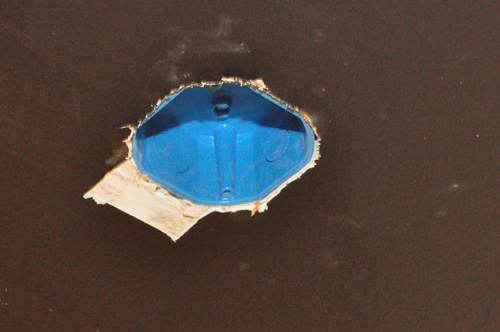
After you determine where you want the track, the next step is to install the ceiling box. Again, I used a new work box which means I needed to mount the box next to a stud. If you’re using a remodel box, you’ll need to mount it away from any studs to provide clearance for the fins. Wherever you position the box is where the power supply will be located so take that into consideration.
I found a suitable spot and used my drywall saw to cut the opening. A little of the drywall tape ripped, and I patched it as I worked. Hopefully that’s problem you can avoid.
Step 2: Run Wires
I ran 14/2 wire from the ceiling box to the switch. Since there was already another switch installed, I was able to piggyback on the existing power supply. If that wasn’t the case, I’d have run another wire from the switch to the circuit breaker panel.
If you’d like to learn more, check out Fred’s post about circuit breaker panels.
I secured the wire with cable staples next to the box and at least every 4′ after.
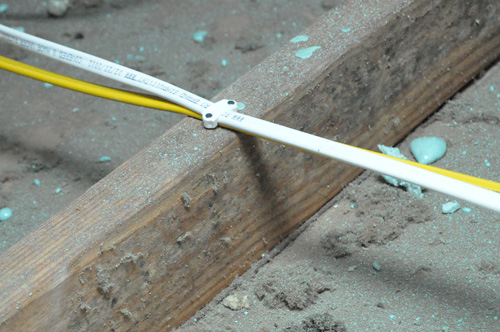
At the ceiling box, I punch out one of the knock-outs and fed the wire through. Be sure to give yourself plenty of wire to connect the power supply. It’s always better to have too much than too little.
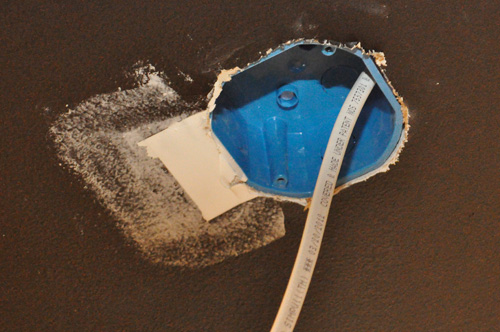
I actually ran two wires back to the switch because I was installing a second piece of track lighting. Afterward, Fred pointed out that I could have used the first track box as a junction over to the second box, which would have created fewer wires in the switch box.
Step 3: Wire Ceiling Box
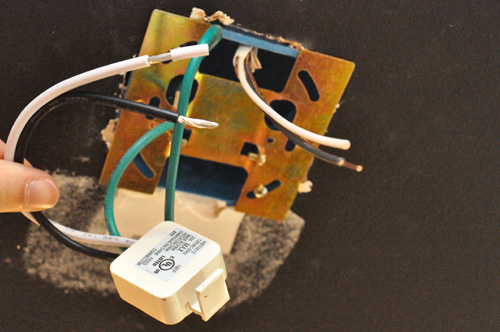
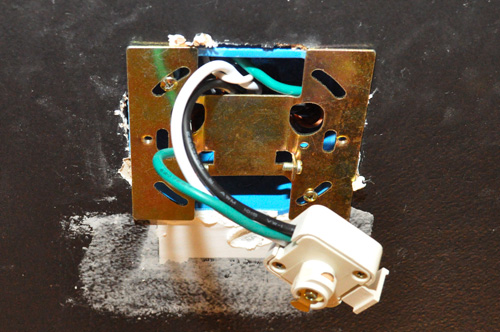
The power supply includes the “H” shaped bracket that mounts to the ceiling box with two screws. In the picture below you can see that I’ve cut the Romex to length and removed the outer sheathing. Next, I stripped the insulation off the black and white wires.
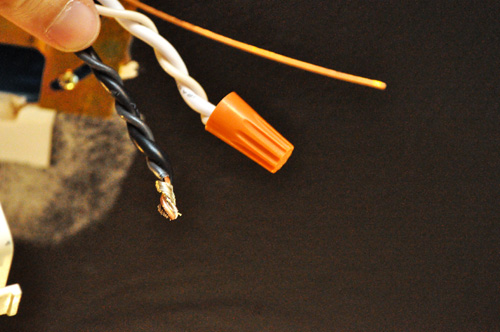
Pairing the black and white wires, I twisted them together and then added the wire nut. This is a little tricky because the power supply has stranded wire instead of solid copper and they tend to break (so be careful).
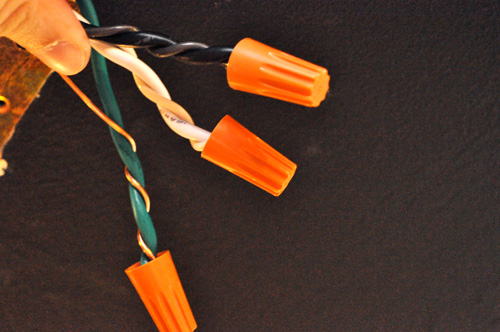
After I finished all the connections, I pushed the excess wire back into the box.
Step 4: Mount Track
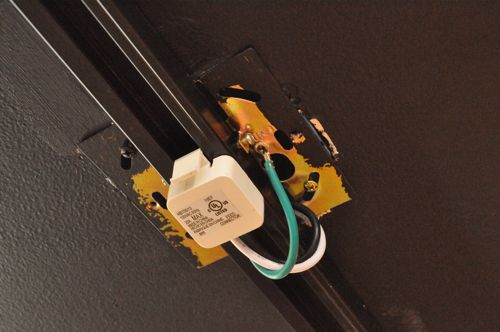
The track comes with hardware for mounting in a couple different scenarios (drywall, masonry, etc.), and I used the drywall anchors and screws. You can use the pre-drilled holes (like I did) or drill new holes as needed.
In the picture you can see how the track runs through the middle of the bracket and is held in place with the two small screws on either side. Once I had the track up, I connected the power supply by inserting the connector and twisting it until it locked in place.
Step 5: Wire Switch
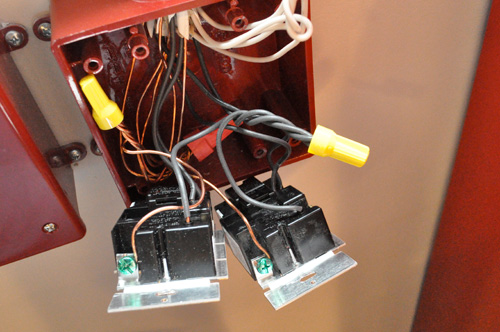
Back at the switch, I wired all the connections together (after turning off the breaker). There’s a lot going on in this box. What you need to know is that I connected the white wires together, the bare copper wires together and to the ground screw, and the black wires to the switch.
There is a limit to the number of wires allowed in a box, and here’s a helpful reference.
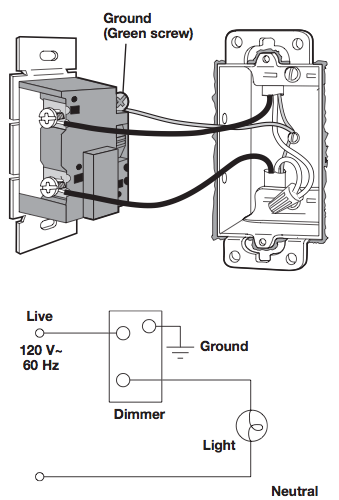
This is a diagram that should make it easier to visualize how the switch should be wired.
Step 6: Install Lights
One of the great things about track lighting are all the lighting choices available. We’ve used small, spot lights around the shop, and I’ve been pleased with how they perform. To install a light, all you have to do is twist the fixture into the track.



Thanks for the post. Any general rule of thumb on where you want to put track lighting in a room?
I’d imagine it all depends on where you want the light. Also, the lights don’t point straight down so if your illuminating something (like a workbench) you wouldn’t put the track right over top. One more thing- Halogen bulbs can get very hot and you shouldn’t put them too close to a flammable material.
What sort of bulbs are those spotlights? I put halogen lights in my kitchen. I love the look, but they sure do eat up a lot of power.
Most of them are 50w halogens, and I can’t imagine they’re very efficient.
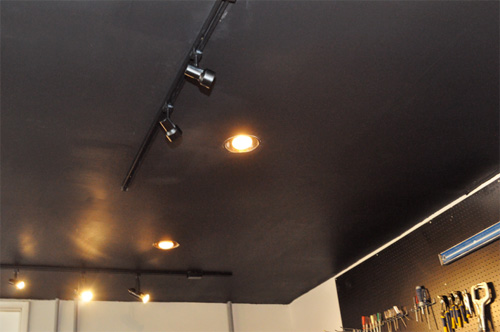
Do u find having a black ceiling actually cuts down on the brightness of the room?
It does. However, I’m still pleased we went with a black ceiling as it hide some of the imperfections in the drywall that we didn’t want to spend time fixing. Also, it gives the shop a sort of studio feel that I like.
Do you have a handy chart on how many wires can be in a conduit? Is it different if it’s metal or plastic? Romex vs THHN?
Why did you guys pick track lighting and can lights for shop lighting instead of the more typical fluorescent shop lights?
I love the track lighting because we can focus the light on a specific workbench, tool, or project. Plus, it’s great for video (like the one we’re running tomorrow). Can lights are convenient because there isn’t anything hanging off the ceiling.
I have a track light that I want to put in sewing room but there is a ceiling fan with light is it possible to change thr wiring so I can just plug it in when needed?
Hey there. Thanks for the article. How can I calculate the max number of fixtures I can add to a section of say 10′ of track?