

Thank you so much for visiting us at One Project Closer for this tutorial on How to Paint a House Exterior! We hope you stick around and check out some of our other great tutorials and projects for the whole family. This post may contain affiliate links. Thank you for your support in helping us to continue to create lots of free content for you!
We are so excited to officially share with you our big Home Exterior Makeover, along with some great tips on how to paint a house exterior. This is for sure a big project but it certainly makes a big impact. When we bought our home 5 years ago, we weren’t loving the red siding with orange brick. In fact, I would have appreciated almost any other color. But I wrote it off as an easy change. But, as you can imagine, it was NOT an easy or inexpensive change and many of our other house projects took precedence, like flooring and master remodels.
This past winter, we decided we wanted to replace our front door and lock – the door was old, leaking a lot of air, the storm door slammed SUUUUPER loud every. damn. time, and the electronic dead bolt has not functioned in months. From there, things sorta went a little out of control and somehow I managed to convince Ethan that it also made sense to paint the house. Did I mention he loves me a whole lot?
We debated replacing the siding all together, but our aluminum siding is good (bordering on great) shape and new siding would easily triple or quadruple the cost of the project.
Without further ado, here is what we learned about painting a house and the big reveal!
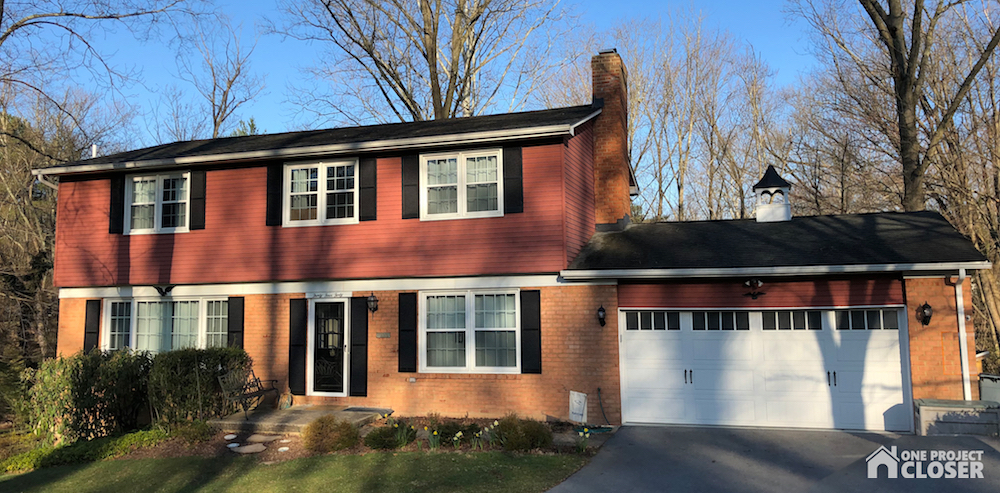
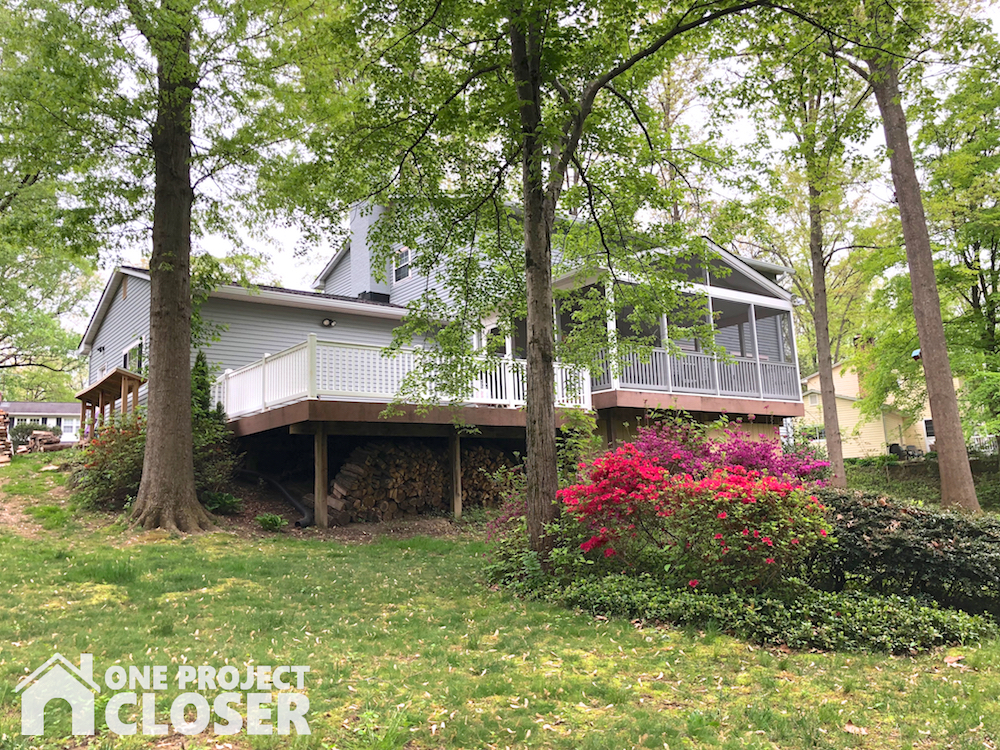
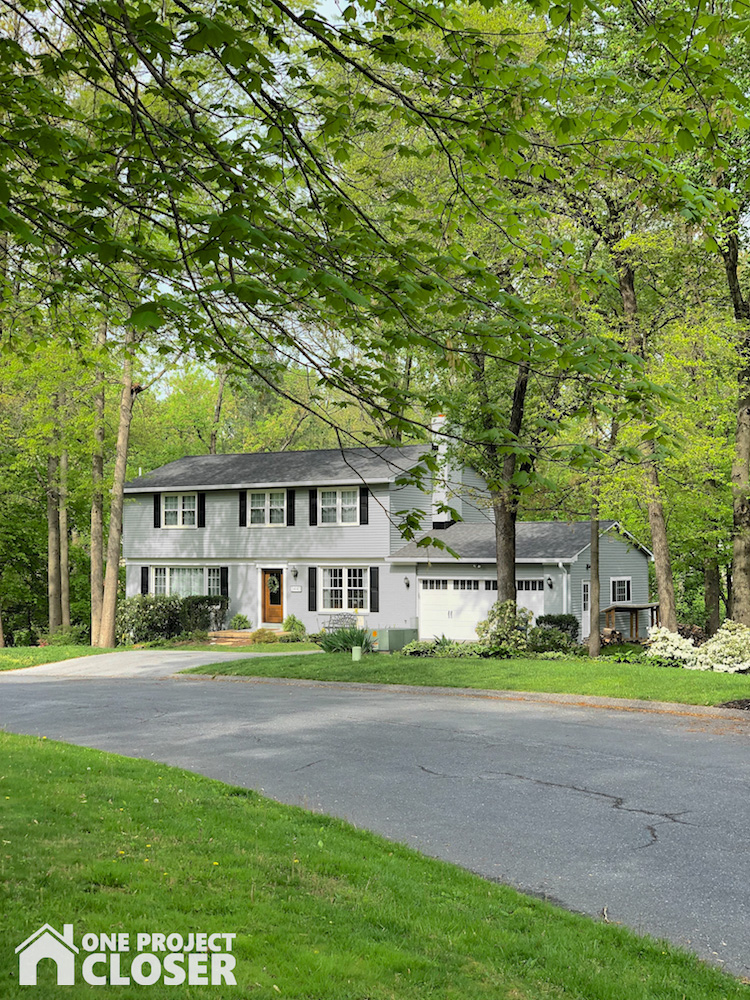
Exterior “Before”
Here’s what we started with!
Pick the Right Time
Once we made the decision to paint, I wanted to do it immediately. By immediately, I mean, yesterday. But the weather wasn’t having it. When painting exterior, the temperature needs to be above 50 (ideally 55) degrees for at least 2 days after painting to allow for best curing. Here in Maryland, that meant waiting until Spring had finally sprung in mid- April. On the flip side of that, heat is not an important factor but humidity is. In MD, our heat often comes with humidity, so Spring was really the ideal time of year.
Also, the surface can’t be wet or get wet, so we had to watch the weather closely to avoid rain (which is also a bit of a challenge from spring in Maryland).
Shop for supplies
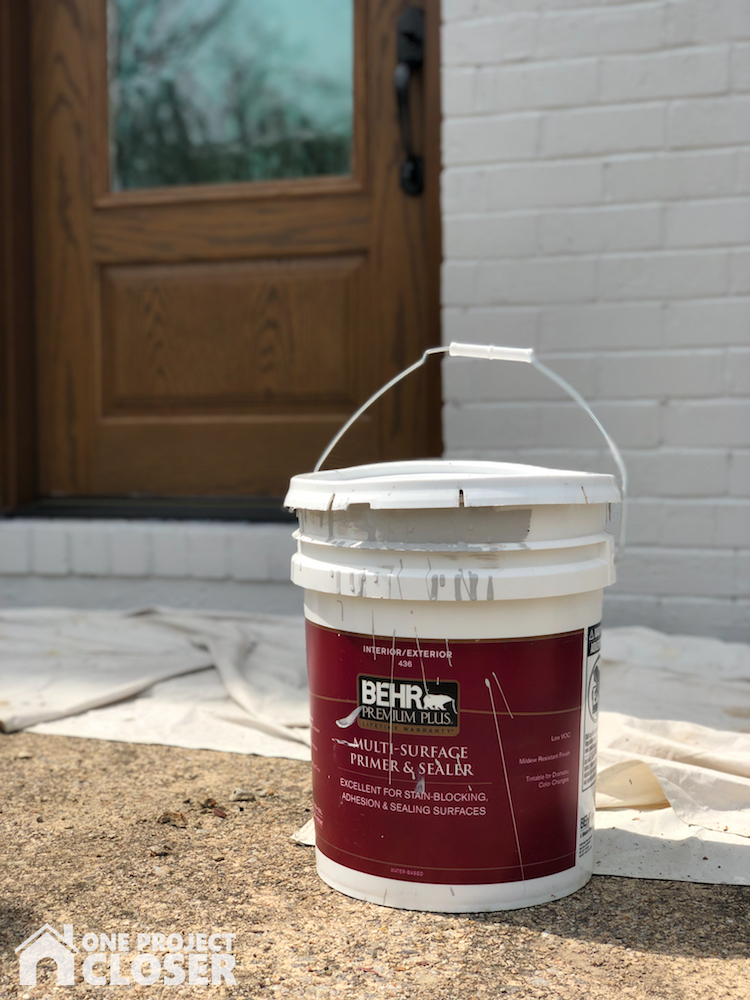
Paint is honestly the most important of supplies when painting your home. Paint Quality Matters. I’m usually the girl who loves saving money and getting a good deal but now is not the time to save money. You will get what you pay for, so get the best paint so your paint will last a long time and look great. We chose Behr Premium Plus Ultra Exterior Flat for the paint and used Behr Premium Plus Multi-surface primer for both the brick and siding. While many paints have a built-in primer, we wanted to be sure the paint adhered well to both surfaces, but especially the brick.
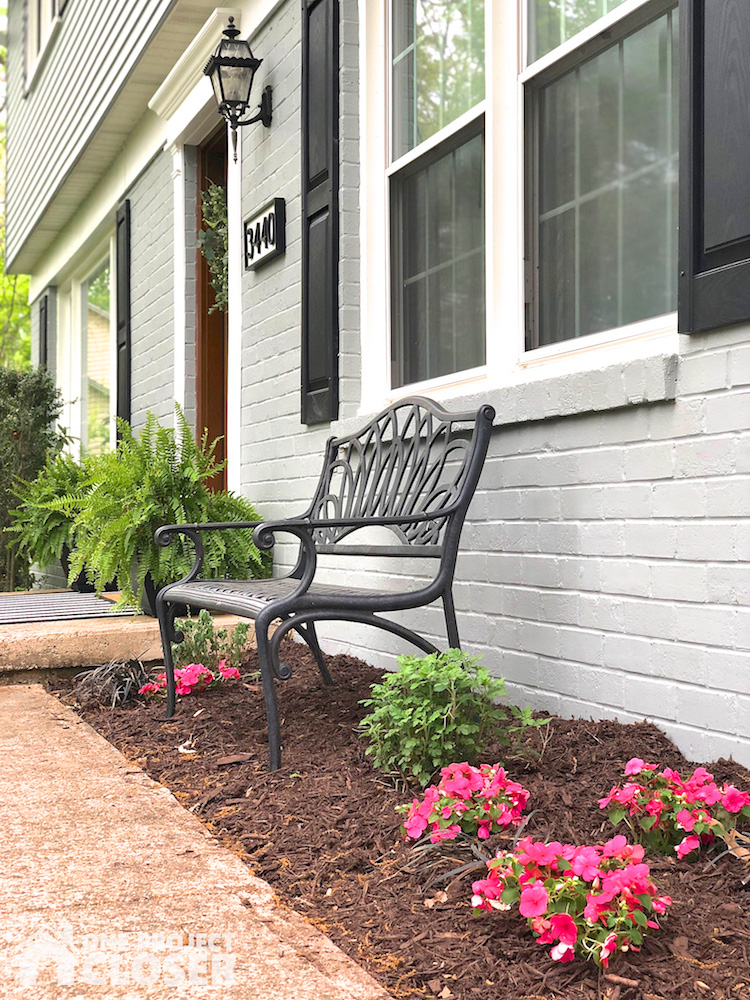
I also decided to mix my own custom color. It’s a medium gray with gray/green undertones, but leans more toward true gray and picks up the colors around it, whether that’s the reflection of the sun against the trees or the sunlight itself. Check out my process on picking the right exterior paint color.
In addition to paint and primer you will need:
- Paint Brush
- Mini Roller
- Paint Sprayer (optional)
- Fabric Drop Cloths
- Scraper + Sandpaper
- Filler/Epoxy
- Caulk
Remove Shutters and Fixtures
Before you do anything else, remove shutters, downspouts, and fixtures to protect them from paint. This is so you can better paint all surfaces without extra cutting in or taping off. We decided to put on new shutters, so we were more than happy to remove the old ones and throw them away! We actually found a bat living behind on of the shutters – we’re hoping he takes up residence somewhere else in our yard to continue to eat all the mosquitos.
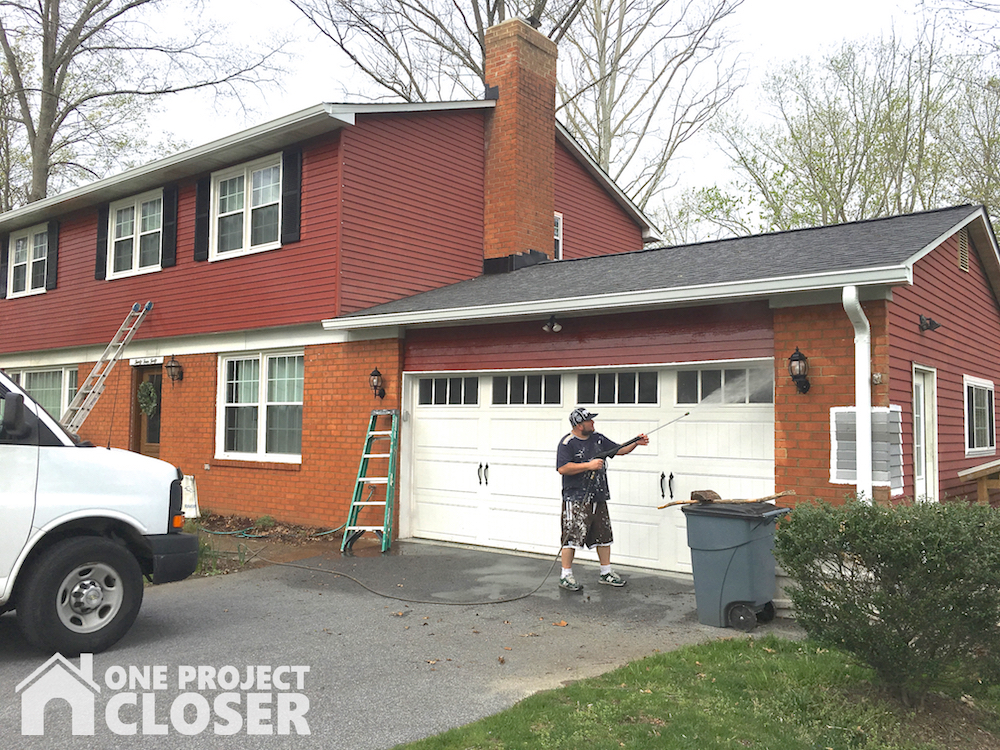
Power wash
Powerwashing is a super important step in order to remove dirt and dust so the paint can better adhere. Work in long, even strokes to clean the surface fully and more evenly. You can also use TSP to help clean the surface, just be sure to rinse it off throughly.
Prep the Siding and Brick for painting
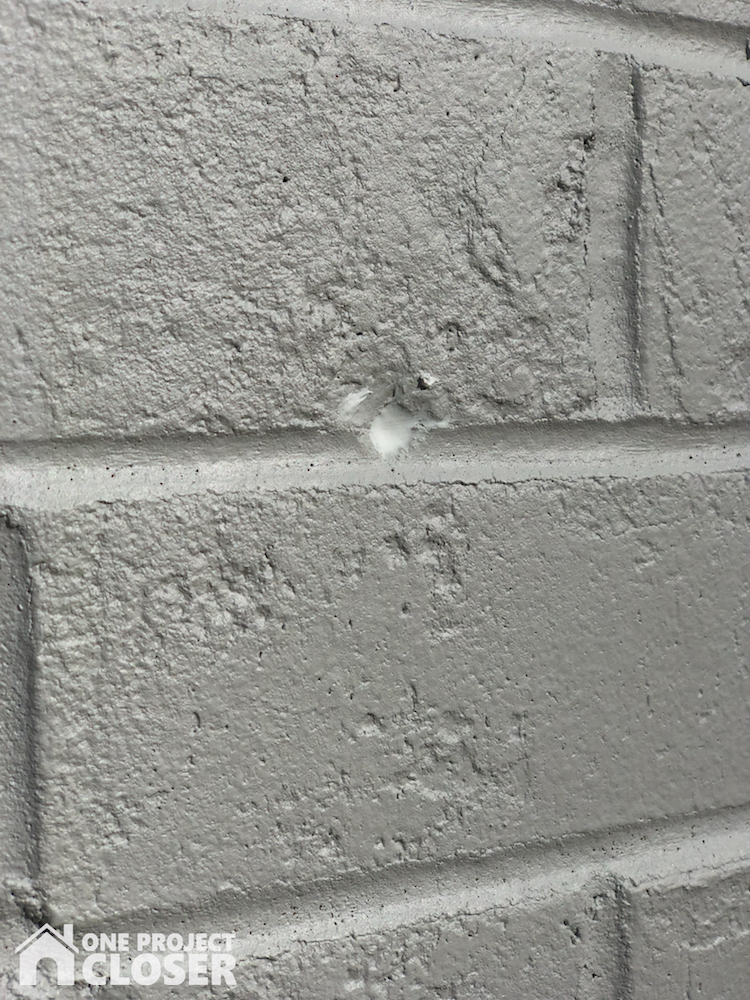
Check the siding and trim carefully, looking for holes and cracks or rotten wood, then make any needed repairs. Use scraper or sandpaper to remove any old, cracked, or peeling paint or caulk. If paint is lead-based, be sure to use proper safety precautions.
Patch and fill any holes with wood filler or epoxy filler, and then sand smooth with medium grit paper.
Prepare the Area
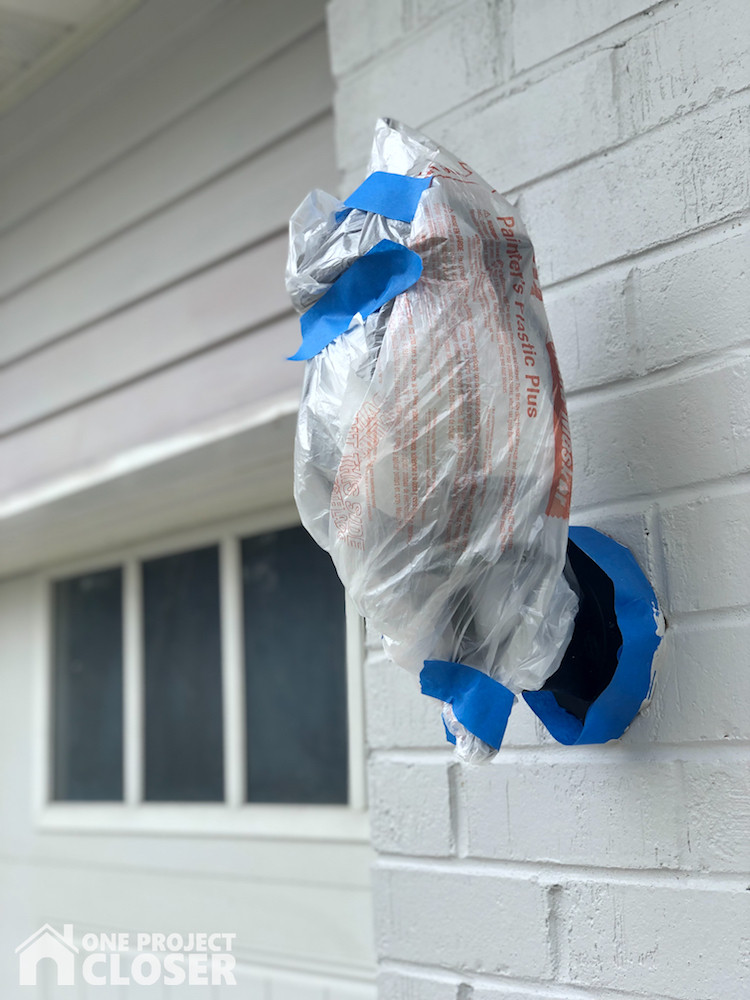
Be sure to protect bushes, deck area, or driveway using drop cloths (use fabric to protect plants and bushes – plastic will cook the plants). Bag/tape fixtures and windows to protect them from paint. Also be sure trim bushes back away from the house so they do not smudge or damage the paint.
Prime the siding and brick
You can see above section on materials for more info, but we chose to use a primer, especially for the purposes of prepping the brick. When priming, tint primer to match the color of the paint. This may prove to be a little tough when explaining this to the people at the paint desk at Home Depot because they essentially need to “trick” the computer. But having the primer the same color as the paint will help you get a more full coverage.
Caulk
After you have primed, use exterior caulk to fill any gaps between house and trim of holes in the brick.
Paint the Siding and Brick
Be sure to choose the right color for your home! Check out our tips on finding the right house color, including our custom paint color.
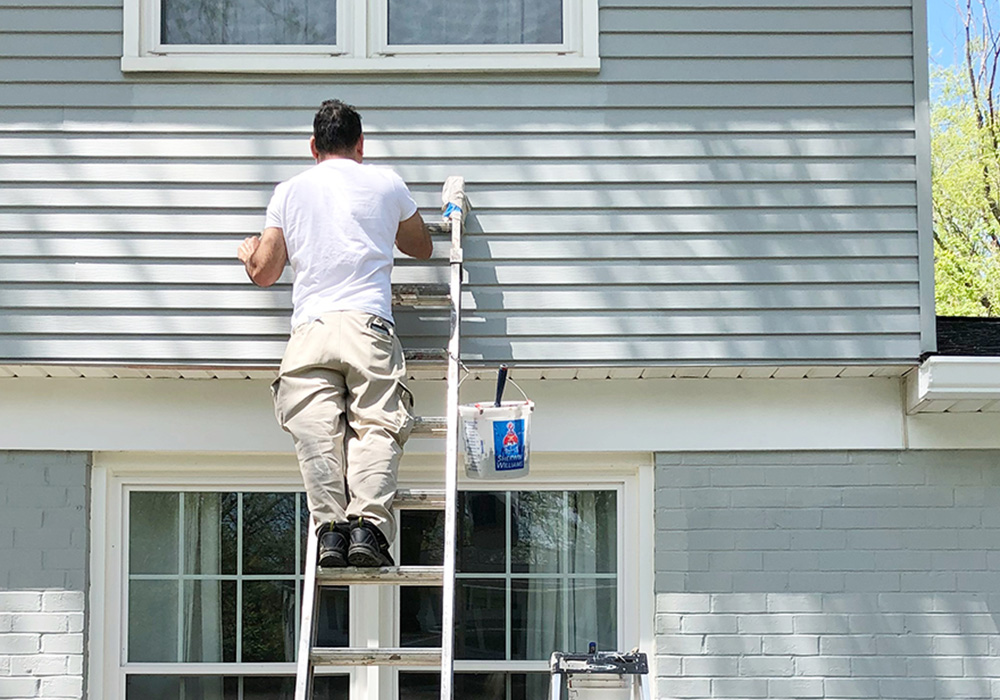
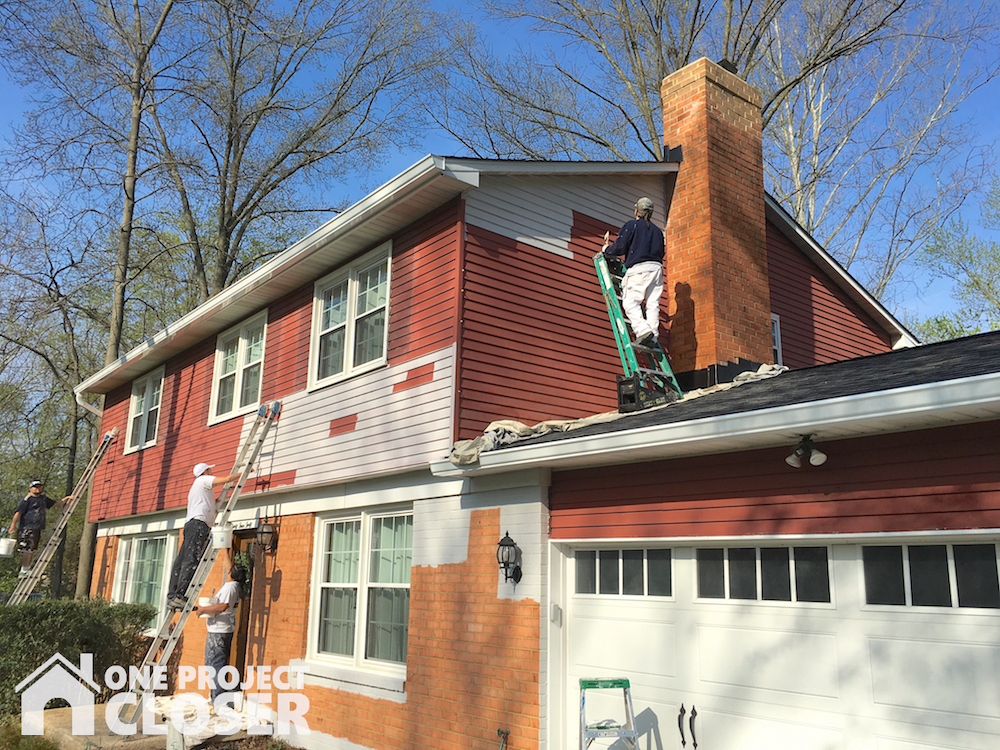
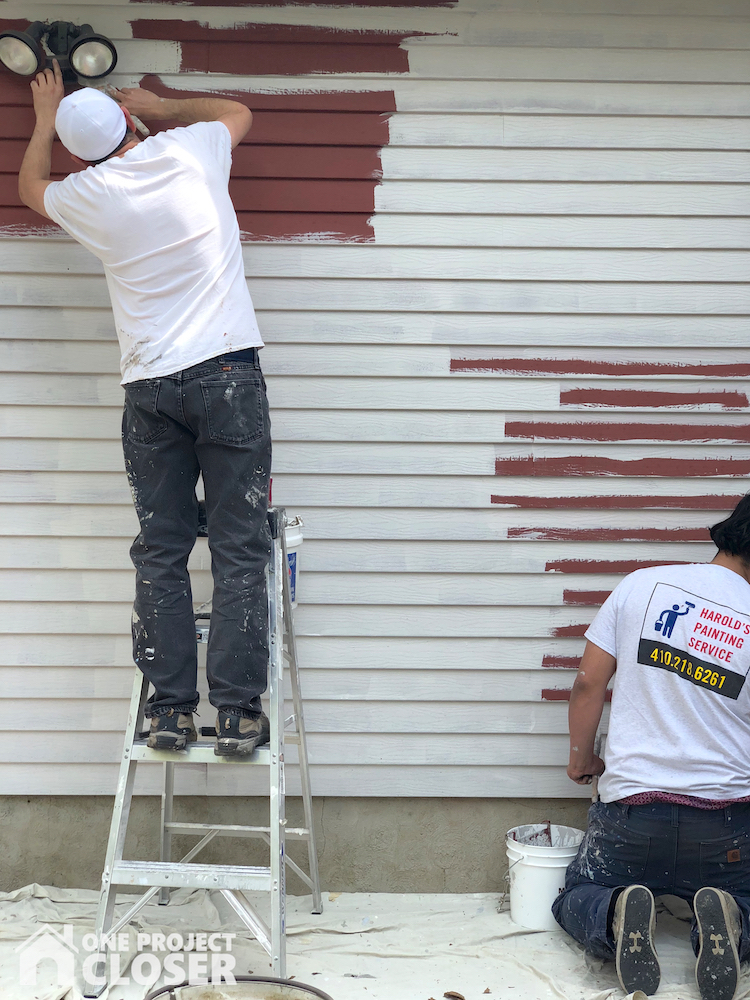
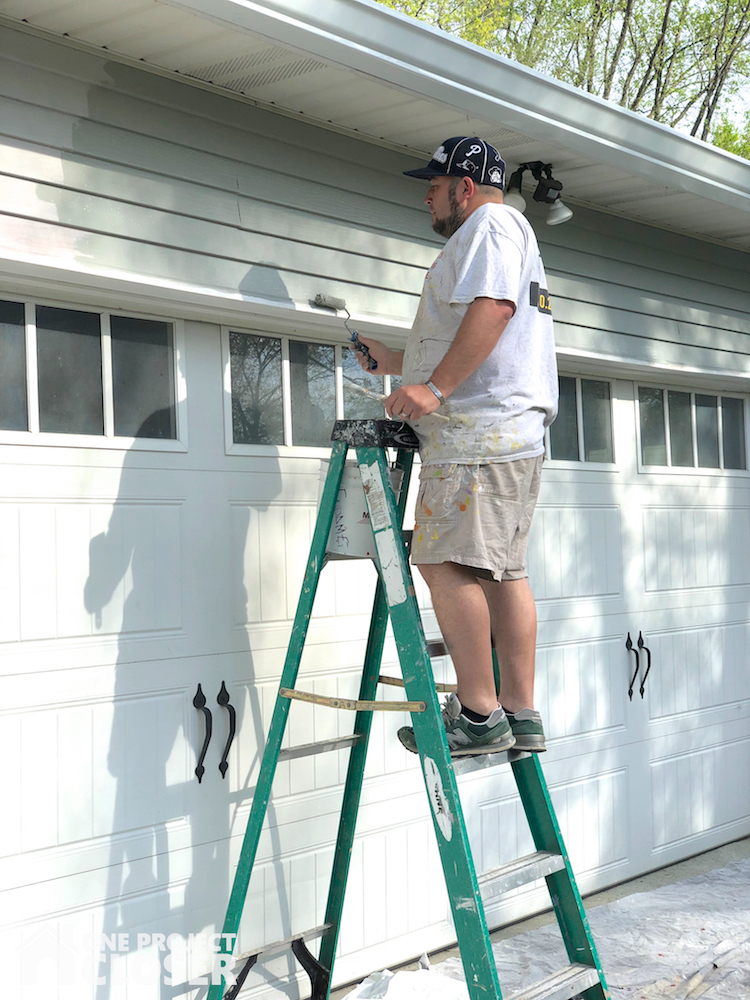
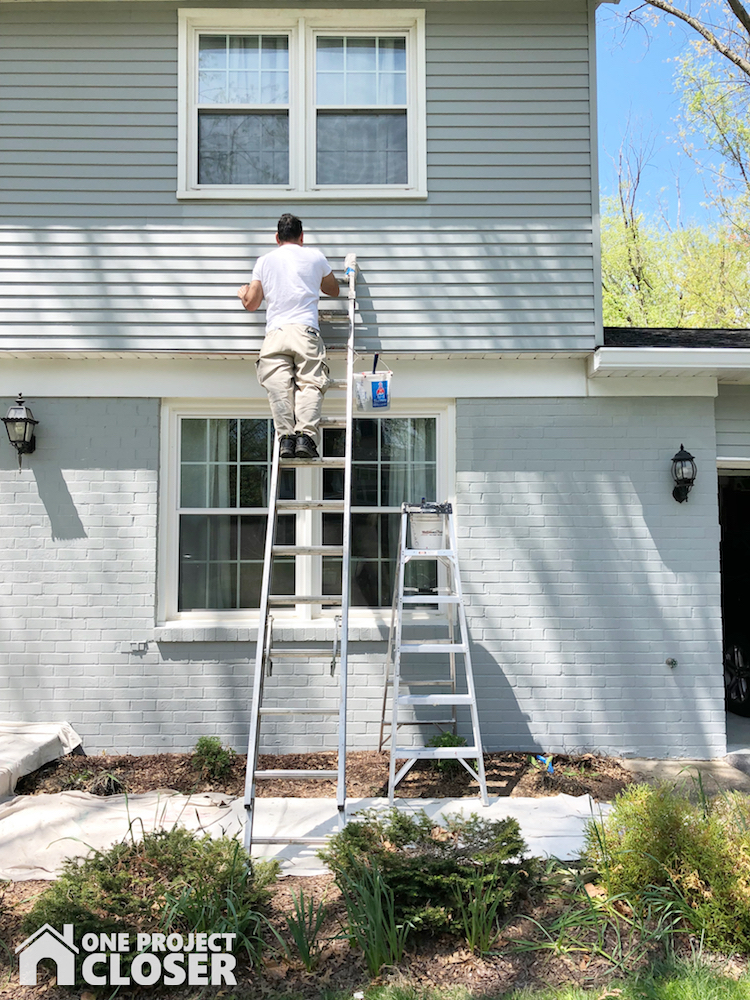
When painting (or priming) your home exterior, start at the top. This will allow you to clean up any drips that will inevitably happen as you work downward. Feather in strokes so you do not have any hard lines. Use a paint brush for edges, around fixtures, under the siding lip, then you can follow-up with a mini roller to speed up the general application. It is also good to work in the shade of the house and move as the sun moves.
Combine small buckets of paint for less color variation. Ideally, 5 gallon buckets of paint are much easier and more cost-effective, but I had a VERY difficult time finding 5 gallon buckets of medium base in the store. I bought one gallon buckets instead and the store gave me the 5 gallon price! YAY! Did you also know if you buy a sample and then buy a one or five gallon of that color, they will refund your sample?? How cool is that? In total, we bought 10 gallons of primer, and 15 gallons of paint, with some leftovers.
When painting, having the right ladders (or even scaffolding) really matters! Use a sturdy and safe ladder, padding the ends if leaning against house. Remember, your house color is NOT worth a hospital trip, so call in the professionals if you find yourself in an unsafe position.
Generally, it is considered best practice to paint two coats of paint!
Paint Trim
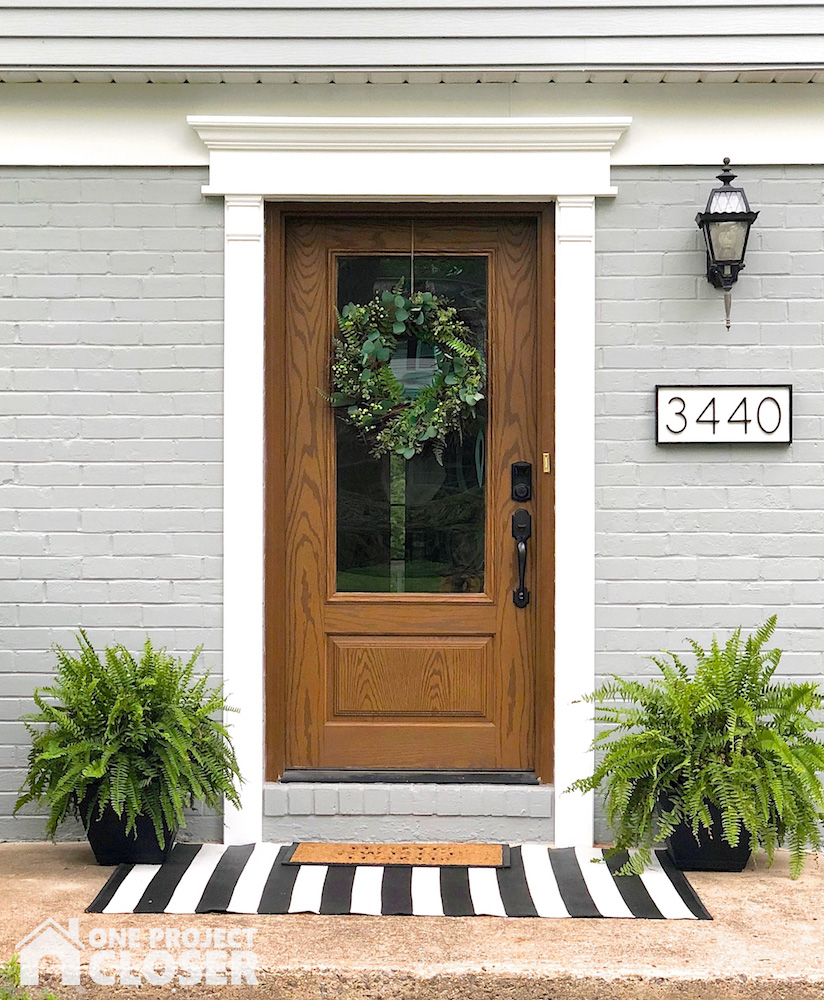
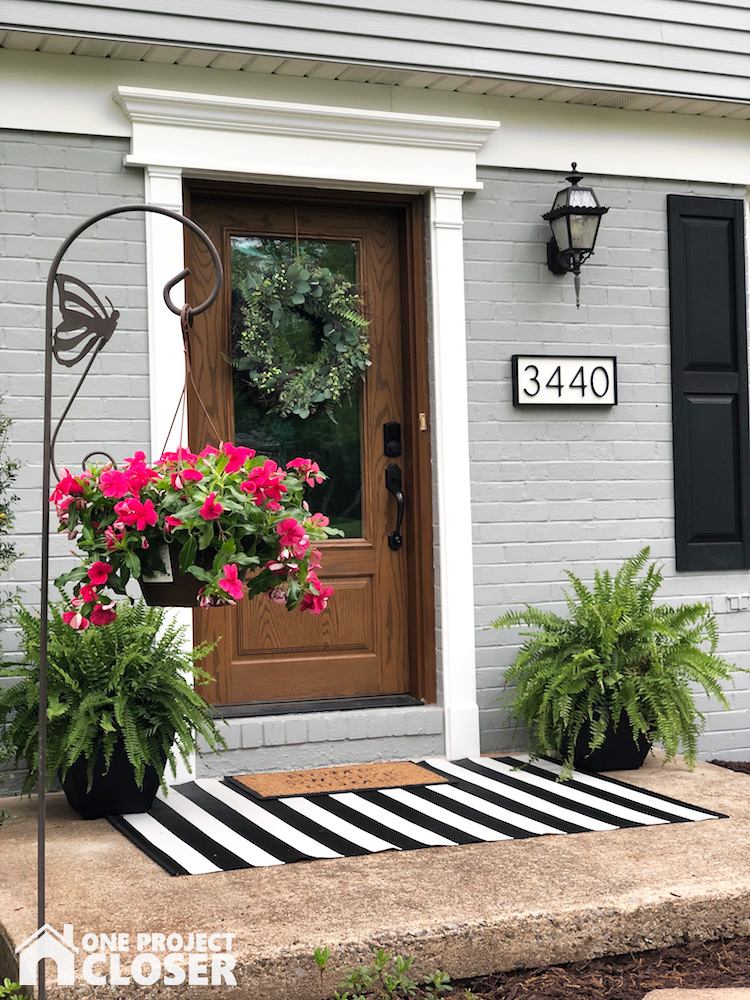
Once the house color is complete, paint the trim. We chose a flat white color for the trim, white I think really helps everything pop.
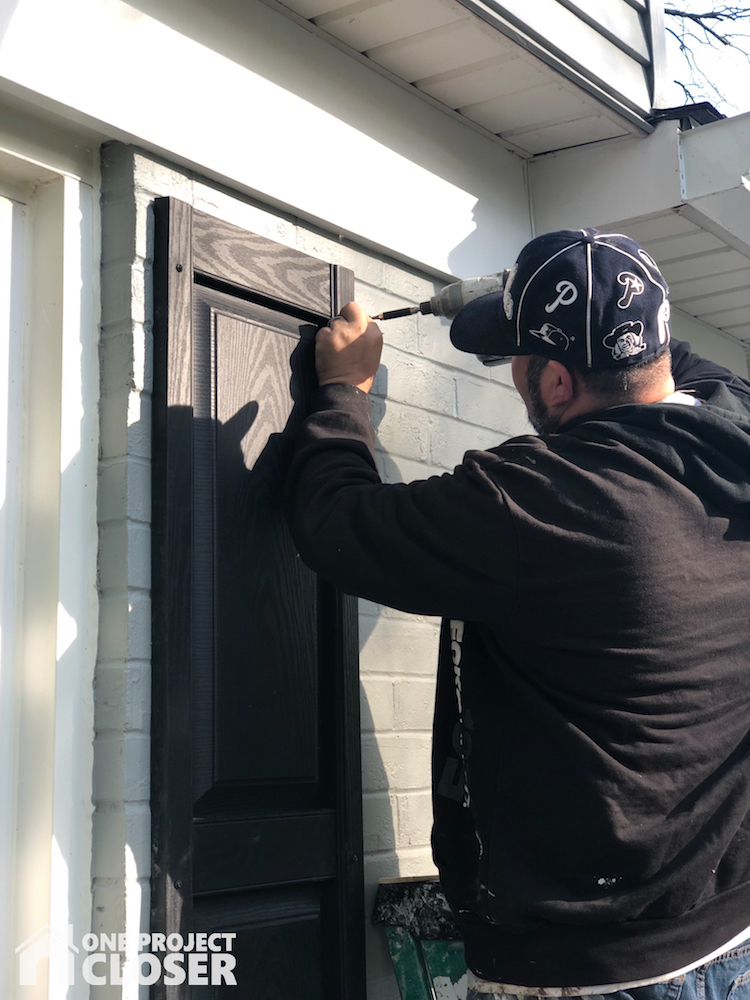
Hang the shutters and fixtures
Now its time to put on the finishing touches by putting back up the shutters and fixtures. We also chose to put up Fypon trim around the door.
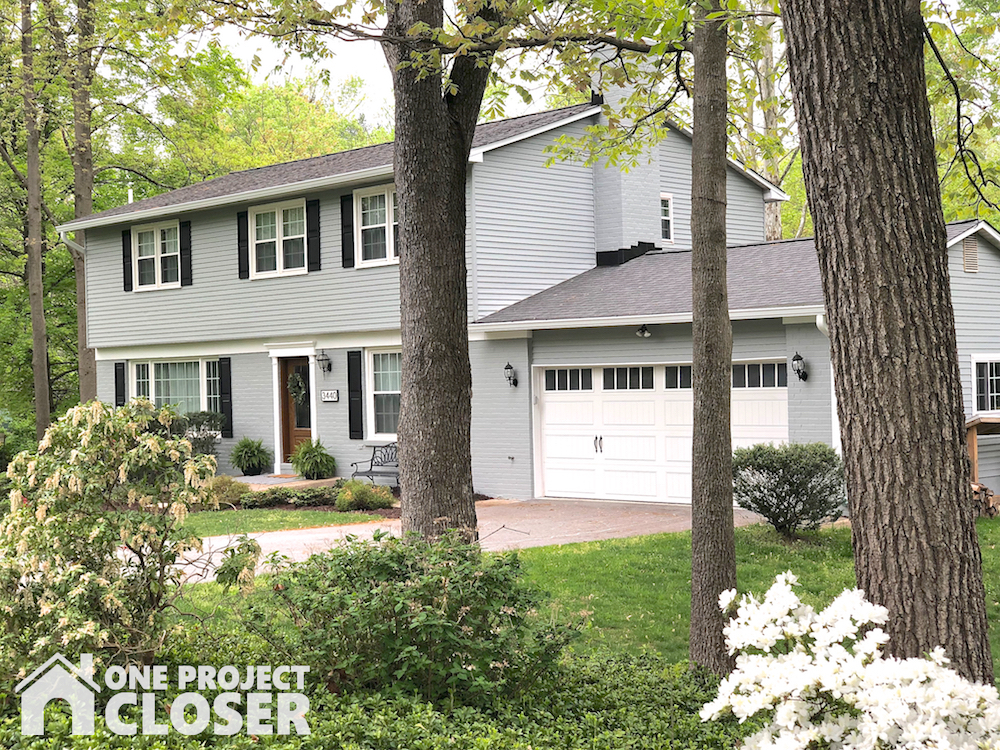
The “After” Home Exterior
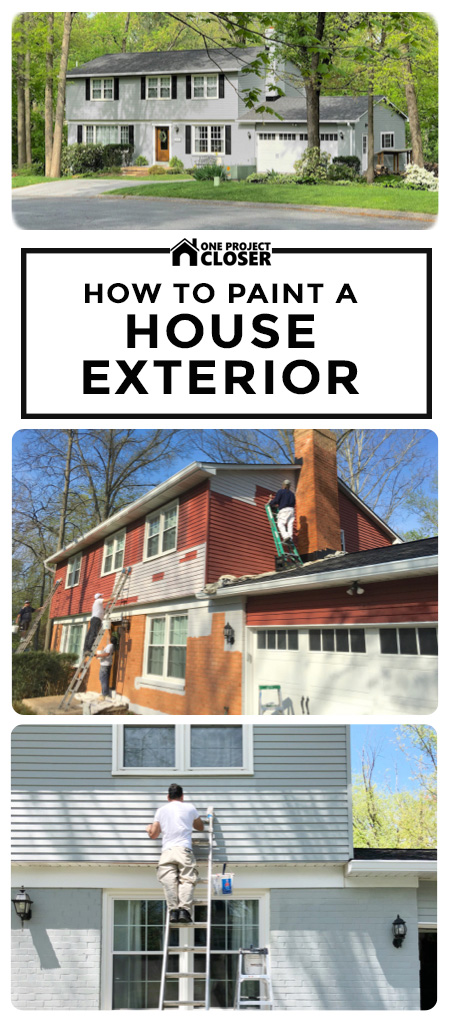
Pin for Later
Love this tutorial on How to Paint a House Exterior and want to save it for later? Or even share with your friends? Pin it!

Jocie Hagan
One Project Closer
Come say hi on Facebook, Instagram, & Pinterest!

Want to learn to hand letter and make amazing, personal decor for your home?
Learn now with Busy Girl’s Guide to Hand Lettering!
**Use the code HAPPY5OFF to get $5 off the course price**

Wow Jocie! This is gorgeous!!!
Jocie,
I can’t get over how amazing this looks. Can that really be the same house? It looks so beautiful!!!
WOWWOWWOW!!!!!! This looks SO great Jocie!! I cannot believe it’s the same house! You did a wonderful job picking colors!
Jocie, this looks FABULOUS! Love the colors you picked! Bet you are loving it!
Turned out so beautifully! Looks like a completely different house. We plan to paint our cinderblock outbuilding this year so I’ll definitely be saving your post for tips.
For 50 yrs we painted our house this yr. We hired a co. My brother helped us put new trim what a difference in our home. Thanks for sharing painting house looks fabulous curve appeal
Such an beautiful transformation!
What can I say? Wow. Simply wow!
Looks great, guys!
It’s beautiful!!! Love the new color and that pretty door.
I seriously love looking at this and am in awe every time I see the transformation. Spectacular makeover. You really knocked this one out of the park! so glad you took the leap!
I love it! Great transformation.
I like the point you made about combining buckets of paint in a larger container to avoid color variation. I imagine that depending on where that happens on the house, that that can be really noticeable. My sister has been planning on painting the exterior of her house, but she will probably get professional help, just because she’s concerned about mistakes and prep work.
I like how you suggest painting the trim of your house white, for a pop look. My wife and I want to paint our home exterior but we never have the time to do it. We are going to look for a professional to help us with this task.
Thank you so much for your tip on protecting bushes, deck areas, and fixtures to make sure nothing is damaged in the painting process. My cousin is thinking of painting the outside of her midcentury home as it is looking kind of worn from years of fun with her 2 kids. I will have to tell her to make sure everything is protected before they start. I think they might need to look for local professionals to help though as the home might be too big of a project for them.