
It’s good to be back on a Pro-Follow, and I’m pleased to introduce you to Larry Smith. Larry is a professional painter, and his company also installs wall coverings (wall paper, fabrics, etc.). Larry brings almost 40 years of experience in the industry, and I’m excited to be on a job site with him. If you live in Maryland and are need in of a painter or someone to install wallpaper or other wall coverings, give Larry a call at 443-250-4899.
Today’s article is all about repainting an existing room, and it’s loaded with helpful Pro-Tips including recommended tools and materials. I hope you enjoy this Pro-Follow, and look for more to come.
Tools & Materials
Larry couldn’t stress enough that using the right tools and materials makes it much easier to paint and achieve good results. He said DIYers and homeowners often skimp on brushes and roller covers to save a few bucks. However, that often results in extra work or a sub-par finished product. Here’s what Larry recommends:
- 2-1/2″ angled brush (see below)
- 3/8″ nap roller cover (see below)
- Painters tool
- Drywall knife
- Sandpaper / sand sponge
- Extension poll
- Drop-cloths
- Screwdriver
- Goof-off wipes
- Microfiber dust cloth
- Spackle
Paint Brush
It’s important that the paint brush bristles are compatible with the paint being used. For instance, a China bristle is appropriate for oil-based products but not latex products. A synthetic bristle brush composed of nylon and/or polyester can be used for all types of paint. Angled brushes are useful because the bristles spread out better when cutting-in and painting trim. Larry recommends Purdy brand paint brushes. He feels they make a quality brush that holds a better edge.
Pro-Tip: Clean brushes with warm water and store them in the original manufacturer keeper to protect the bristles. Larry uses a few brushes almost daily, and by performing simple maintenance, he only needs to replace his brushes about once a year!
Pro-Tip: While synthetic brushes can tackle all types of paint, consider using one set for oil-base paints and another set for water-base paints. This makes it easier to clean the brushes.
Roller Cover
Larry prefers a 3/8″ nap, and he likes Purdy Colossus roller covers. Larry feels they hold a lot of paint, and they don’t create ridges often seen with lower-quality roller covers.
Primer
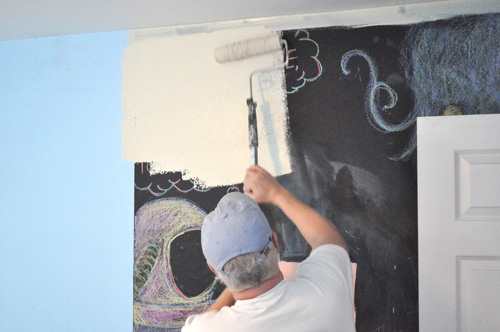
A good primer is important because it hides whatever is underneath (paint, chalk, lipstick, smoke, water-spot, etc.), seals the wall and provides a good surface for the paint to adhere. Larry used Glidden Gripper to prime the chalkboard paint, and Gripper is especially useful for tough-to-bond surfaces. It also ensured that the chalk didn’t “burn through”. Larry chose not to prime the rest of the walls because it wasn’t necessary going from light blue to a sage green color.
Pro-Tip: Tinting primer can reduce the sealing capabilities.

Paint
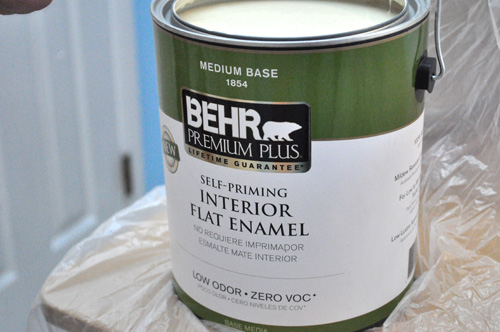
I’ve mentioned before that people often have very strong feelings about paint so I was curious what brand Larry recommends, and his answer surprised me. Larry feels that different brands excel at making different types of paint. For instance, for this project Larry used Behr interior flat enamel. However, Larry would never use Behr semi-gloss. When I pressed Larry for his favorite brand, he said Sherwin Williams is often a top choice and Ben Moore is a close second. He also said he doesn’t believe any manufacturer makes a “one-coat wonder”.
Larry likes Behr Premium Plus because it has good coverage and is a low VOC option. Flat enamel has a slight sheen, provides some wash-ability, and decent hiding. The paint + primer (or self-priming) makes it a better choice on this project for covering over some candle smoke on the walls.
Pro-Tip: Larry usually avoids oil-based paints because of the odor and more difficult cleanup. However, sometimes people request oil-based paint because it creates a more durable finish.
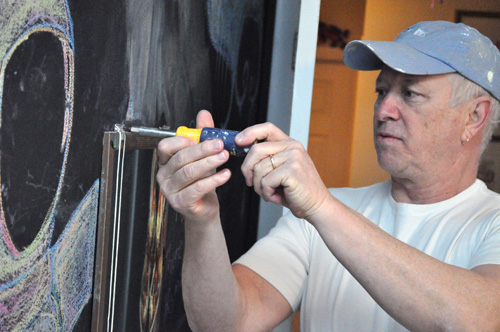
Step 1: Prep the Walls and Ceiling
Larry started work by prepping the walls and ceiling. He removed the light switch and electrical outlet plates, and he removed a mirror mounted to the wall. Larry used Goof-Off rags to clean away sticker residue, and he used a microfiber cloth to eliminate dust.
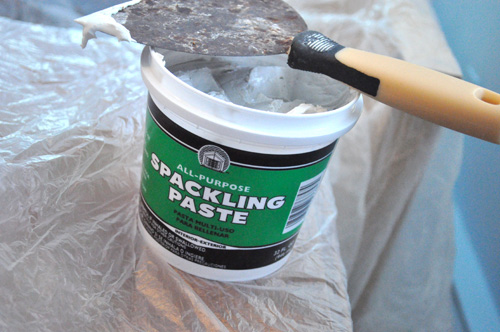
Larry filled nailed holes and gouges with spackle which doesn’t shrink very much as it dries. The trade-off is that it takes longer to dry, and it’s tougher to sand than alternate products (like Durabond).
At some point there was a problem with the HVAC, and the ceiling drywall shows a crack from excess moisture. To fix the crack, Larry scored it with the edge of his drywall knife and scraped away any loose debris.

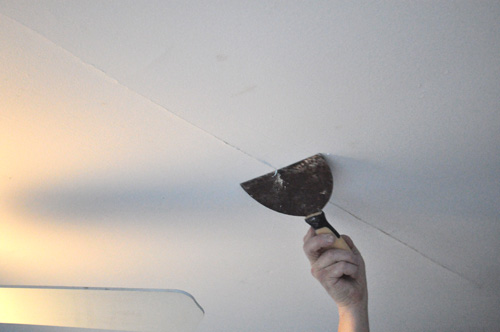
Next, Larry applied a coat of spackle.
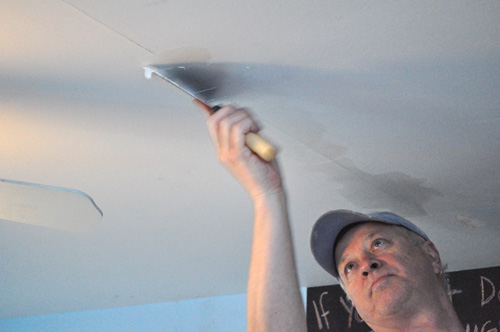
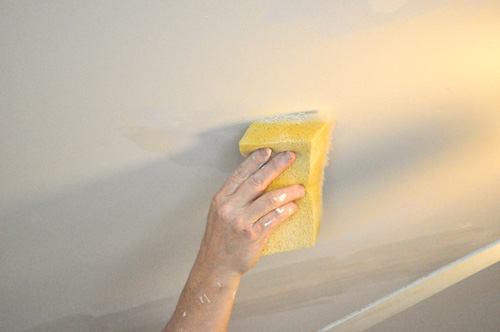
When it was dry, Larry used a sand-sponge to sand it down.
This repair will need more than one coat of spackle so Larry worked around it until the repair was completed and he could prime and paint over it.
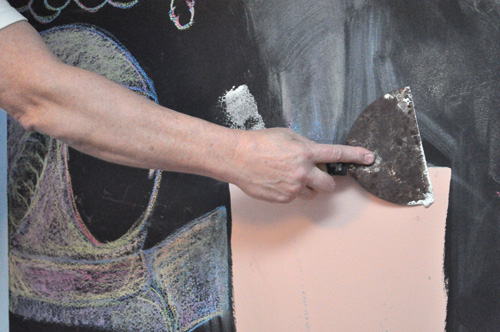
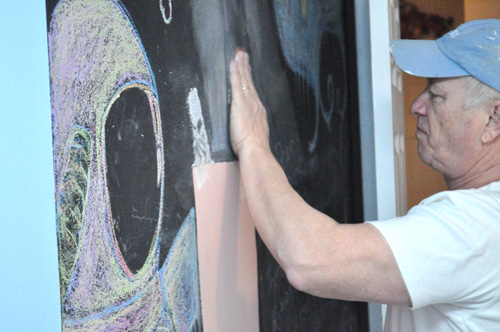
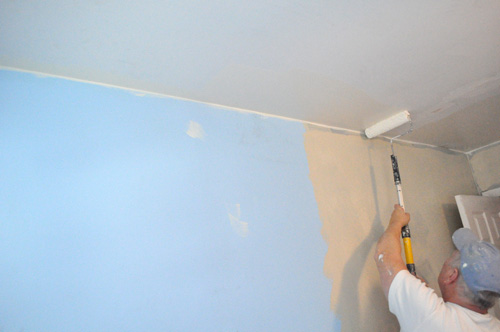
Step 2: Prime
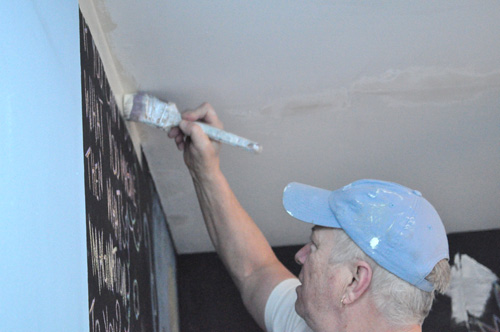
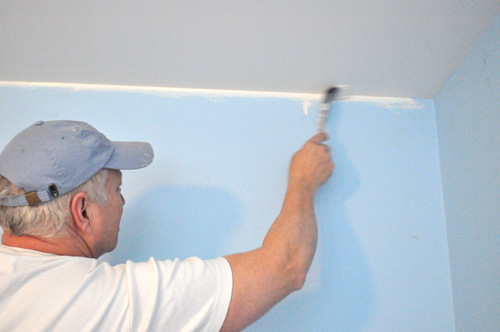
Next, Larry applied a coat of primer to the chalkboard paint. He cut-in around the ceiling with a brush and rolled the walls.
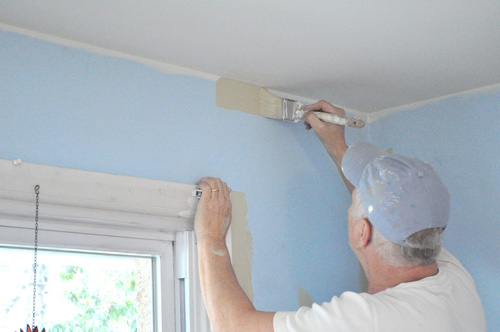
Step 3: Cut-In and Roll Ceiling
While the primer was drying, Larry cut-in around the ceiling with a ceiling paint and paint brush. The ceiling moved quickly because he didn’t need to worry about avoiding the walls.

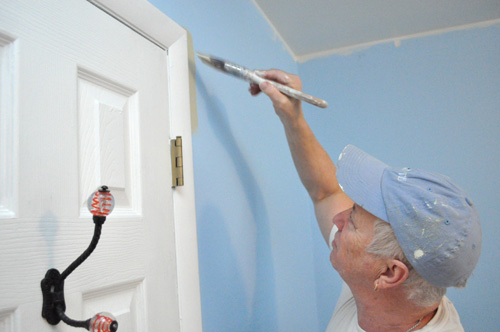
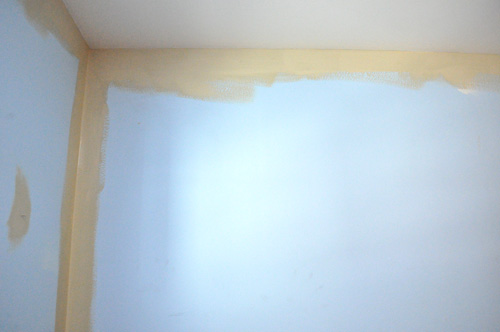
Step 4: Cut-In and Roll Walls
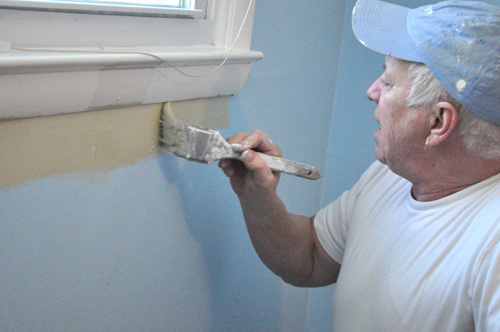
Next, Larry began cutting-in around the doors and window.
Pro-Tip: Paint should always be mixed thoroughly, and deep tone colors should be remixed periodically to ensure uniform color.
Cutting-in has always been difficult for me so I watched Larry closely, and here’s what he did:
- Loaded his brush with paint
- Starting off the trim (or ceiling), he would spread the bristles and define the edge of the brush
- Pushing the brush away from him, Larry would make a short pass coming along side the trim (or ceiling)
- Go back and spread excess paint and eliminate drips
Larry said that one thing that makes cutting-in more difficult is a poorly defined corner. For instance, if the window installers used a lot of caulk, it’s tough to follow the edge of the corner. In those scenarios, Larry said he will sometimes use Frog tape to create a nice, straight edge.
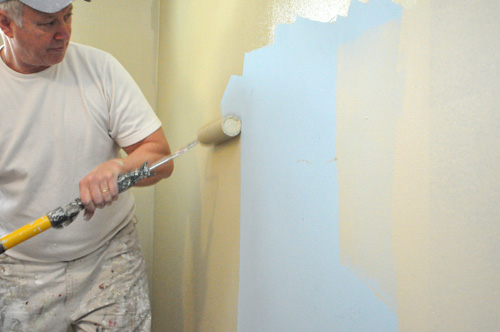
Next, Larry rolled his first coat and the Behr flat enamel covered very well. He almost didn’t need a second coat.
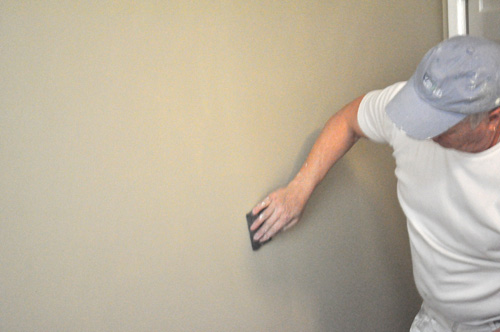
Step 5: Second Coat
It’s important for the first coat of paint to be dry before applying the second coat of paint. Otherwise it can peel away while you’re working. Before painting, Larry sanded down a few areas.
Pro-Tip: Paint with more tint can require longer drying time.
Next, Larry applied a quick second coat to the walls. In addition to ensuring complete coverage, the second coat also increases wipe-ability.

Pro-Tip: Touch-ups don’t require much paint so Larry often advises clients to save only a small amount, and baby food jars work well to preserve paint.
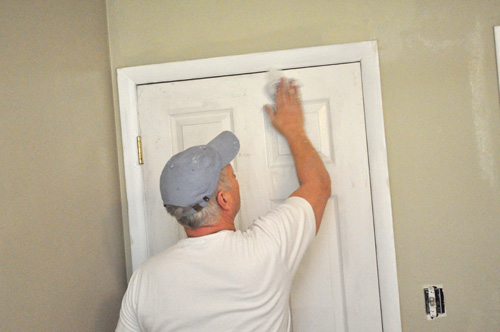
Step 6: Paint Doors and Trim
Larry painted the doors, casing and baseboards last, and he started by cleaning the doors with Goof-Off rags.
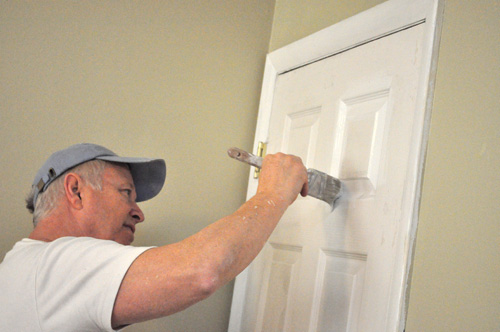
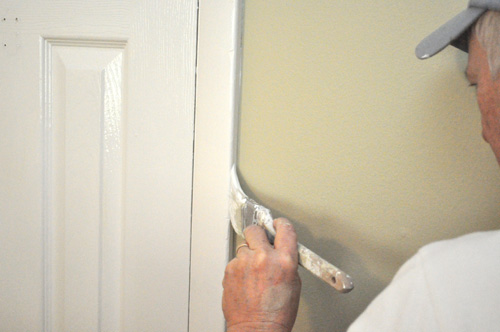
When they were dry, Larry applied an enamel paint that will create a protective surface.
Pro-Tip: When painting doors, always paint with the grain.
It’s more common to find an oil-based paint on trim, and unless it’s sanded off or a bonding primer is applied, latex paint won’t adhere properly. If you’re having problems with trim, Larry advises that can be a likely culprit.
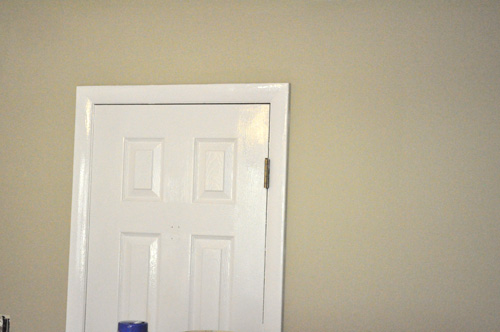
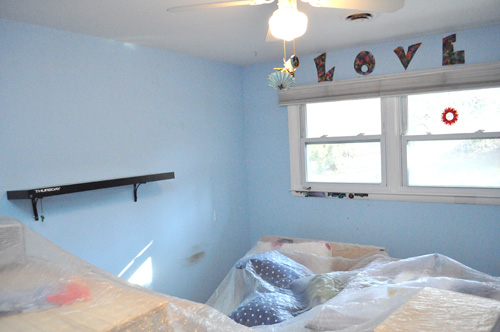
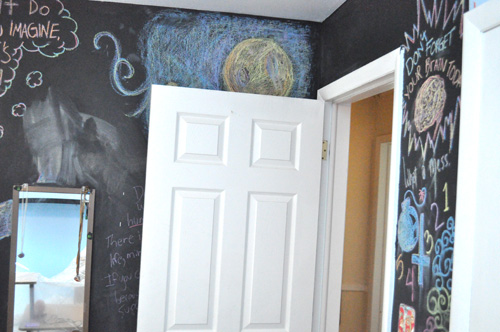
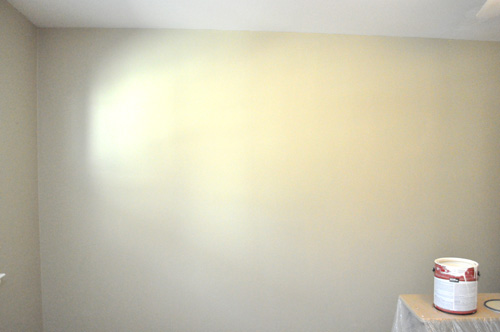
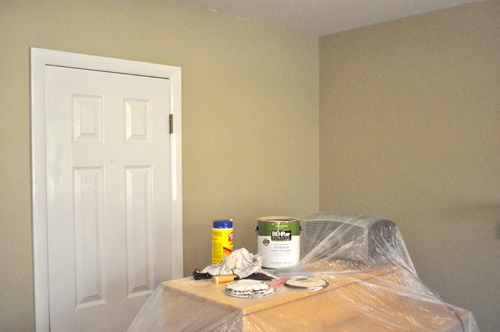
Finished
Here are a couple of shots of the finished room. Look for more pictures in the next few days.

Great article! I especially liked the pro tips.
Thanks Mary Sue!
Wonderful tutorial! Just out of curiosity, how big is the room that was painted and how long did it take the professional. I follow most of the tips above already, but painting even a 10′ x 10′ room (ceiling, trim, walls, etc.. takes me several days. Admittedly, I have several interruptions and need to take breaks to tend to children/family, and am a bit of a perfectionist, but I feel as though I’m missing that ‘one’ special tip that could make it all go quicker.
Typically Larry works with another painter, and he said a room of that size usually takes about 5 hours.
Love the idea of saving extra paint in baby food jars. Over the years I have collected so many gallons of paint. It’s silly to keep it all.
” He removed the light switch and electrical outlet plates” Is this optional? We just had our house painted and the painters did not remove plates. My wife was irritated so we removed them for them and they did paint the “clean” spots but did not put the plates back when they were done.
That just sounds like a lazy painter. I don’t think thats acceptable I would be annoyed just like your wife.
Does Larry have any tips for keeping oil-based brushes clean/useable/long lasting? What does he use for cleaning those brushes and how does he deal with the usually nasty chemicals involved?
Great tips Ethan. Though I’ve never done it, I had no idea that tinting primer could reduce that adhesion capabilities of it. It makes sense though if you take time to think about it.
I was surprised to see Larry painted right over the chalk board wall, chalk and all. That’s good to know too.
I need to learn how to cut in without the annoying taping. Does this pro ever use a paint gun?
The angled Purdy brush is awesome at getting a clean line for cutting in without having to tape. If you haven’t invested in them…do it! I’ve re-painted two houses with the same brush and I have no plans on replacing it anytime soon.
these pro tips are so so so helpful. thank you! i had always assumed paint was the way most things are: the more you pay, the better the quality…
Like I have always heard “The prep is what gets a great job…….I work in a paint shop at Ford and these tips kinda go along with our stragely
Cool job! Do you paint cars at the factory?
I would never have guessed you could prime right over the chalk left on the chalkboard paint. I know this is a heated discussion, but I’m with Larry on Sherwin Williams. They’re expensive, but if you wait for sales (they happen often) it brings the price in line with the big box brands.
This is a great go-to guide. I’m amazed at how good some people are at cutting in (granted, he is a pro). I’m afraid I’ll always be a taper.
The baby jar tip is great
The ceiling crack you patched, was it a taped crack.
Great article! Not much better than learning from the experience of a long term pro.
I’ve read on other painting articles that you should cut in and then roll a wall at a time to reduce the visibility of where you cut in….so you always have a wet edge and the cutting in blends with the rolling. From the pics it looked like Larry cut in the entire room and then rolled. Do you have any experience with this or did you happen to discuss it with Larry?
One of the most important steps can be see on the last photo that being making sure all of the furniture in the room is covered.
Buy canvas drop clothes, they absorb paint if spilled.
Great article – thanks!
I painted the trim & doors in a new room we just added in our basement, using Sherwin WIlliams ProClassic Semi-gloss and no matter what I tried never seemed to be able to get a smooth finish. The surface just dried too quickly for me and I ended up with brush marks where it didn’t flow out. Compared to “old” paint formulations (oil & latex of 20+ years ago) this stuff is extremely difficult to apply. And that’s for horizontal surfaces! Vertical surfaces sag AFTER the top surface has skimmed over. I’ve tried various types of thinners/additives with no significant success.
I assume that there is some application “secret” to get a smooth finish, but I’ve not been able to figure it out, even when asking the “experts” at my local paint stores.
Help, please!
I was also surprised that Larry primed right over the chalk on the chalkboard. I would think removing the chalk and cleaning the board would lead to better adhesion.
How to Paint Like an Amateur.
If you’re worried about grease, chalk, dirt, and general adhesion, wash the walls with TSP. You aren’t getting paid by the job so there’s no reason to rush it.
Alternative to large painters drop cloth, especially in a small room. Use a plastic tablecloth, plastic side up. Keep a damp sponge or paper towel handy to clean drips so you don’t track paint.
When cutting in the baseboard in a carpeted room, the cloth-ish side down will grab on carpet so it won’t creep as you move around. Use a wide putty knife tilted back toward you to get carpet out of the way of your trim brush.
Keep the brush on the roller pan. Lay it across the top of the pan, bristles under the roller handle. Only dip it 1″ deep in the pan, dab the excess off on the roller nap. You paint with the end, there’s no reason to have paint up to your fingers. Unless you aren’t rolling that color, the only time the brush is near the can is to clean the lip when you pour into the pan and end of job when you brush from the pan to can.
If you have trouble going straight when cutting in, choke up on the metal of the brush, probably a 1-1/2″ size, extend your pinky, tilt the brush over and pull the brush left to right and let that finger guide you along the valley. Keeps the shaky hand steady. The pro used a 2-1/2″ brush, but that may not be best for an occasional painter to cut in with. Though it would be the right one for a larger area that can’t be rolled.
You’re not a pro, don’t race. You should never see little paint dots down below on the drop. If you do, roll slower, yes s-l-o-w-e-r. Use a 3′ kitchen step ladder, not a pole. You need control, not reach. Leave the pan on the drop, it’s safer and you probably need the exercise going up and down. Cut in a couple inches along the ceiling for 3′. Do a 3×3 foot area up top. With a loaded (not dripping) roller, make an X, then a light reload and fill vertically, then maybe a light reload and fill horizontally. Not so heavy you get runs or sags, if you do just dry your roller a little on the next 3×3 over and then pick up a little of the excess with it. Cover your brush marks without bumping the ceiling. Then stand on the floor and do the shoulder to hips area 3′ wide. Lie down and cut above the baseboard, then kneel and roll the rest. Then back up on the steps you’d moved over out of the way and repeat. It’s almost like sun salutations in yoga.
And put enough paint on the wall. The second coat shouldn’t be the first time some of the wall feels paint. The second coat should go on easier and take less paint.
Assuming you’re going to let the first coat set, wrap the brush and roller still on the handle in very damp, not dripping, paper towels, put in plastic, i.e. gallon zip locks, so you don’t make a mess, and leave in fridge, even overnight.