

Thank you so much for joining us at One Project Closer for this tutorial on How to Replace Picnic Table Boards. This post is sponsored by the Home Depot Prospective Campaign. Post may also contain affiliate links. Opinions (and typos) are 100% our own, and we appreciate you supporting our site in order to continue to provide free content to our readers.
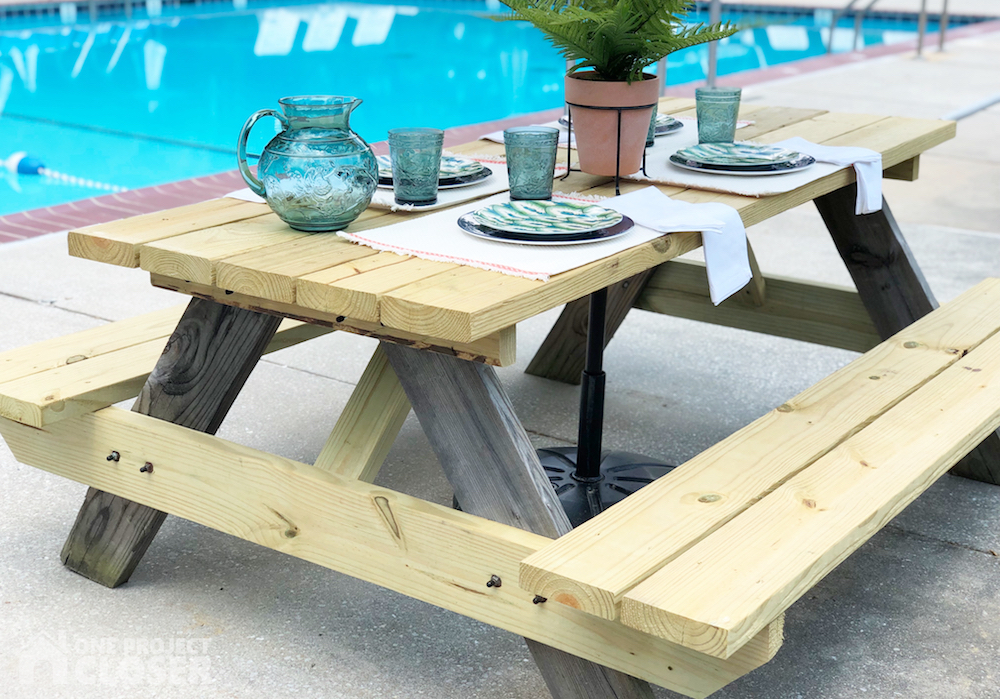
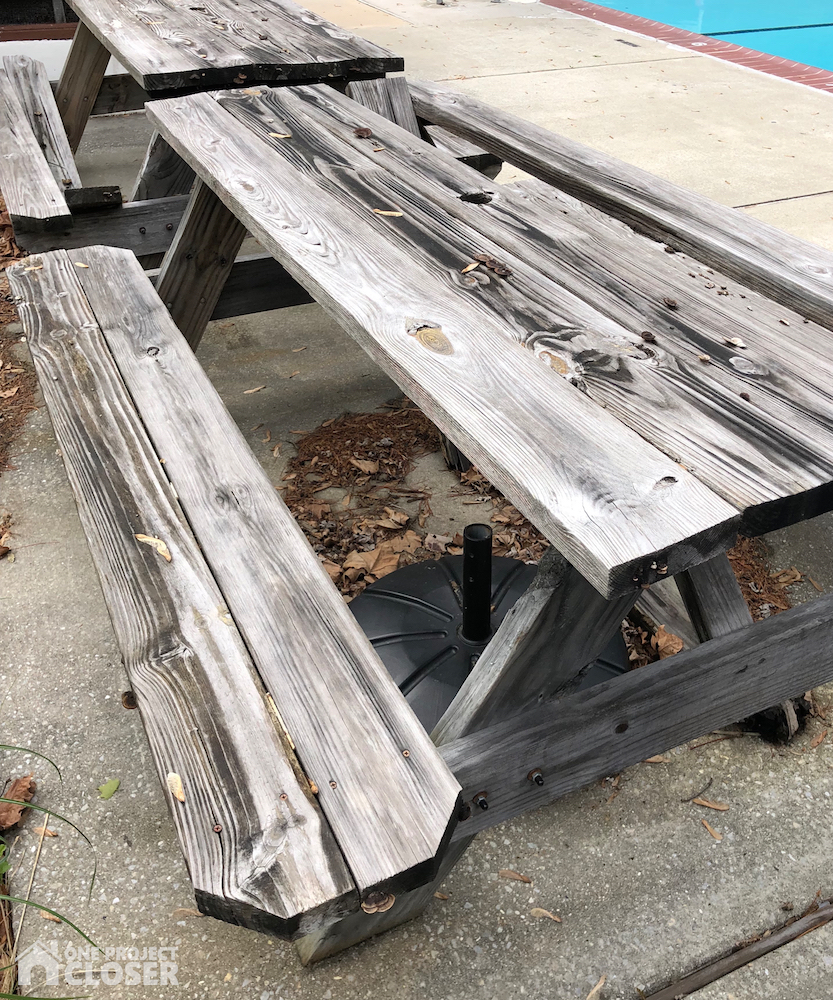
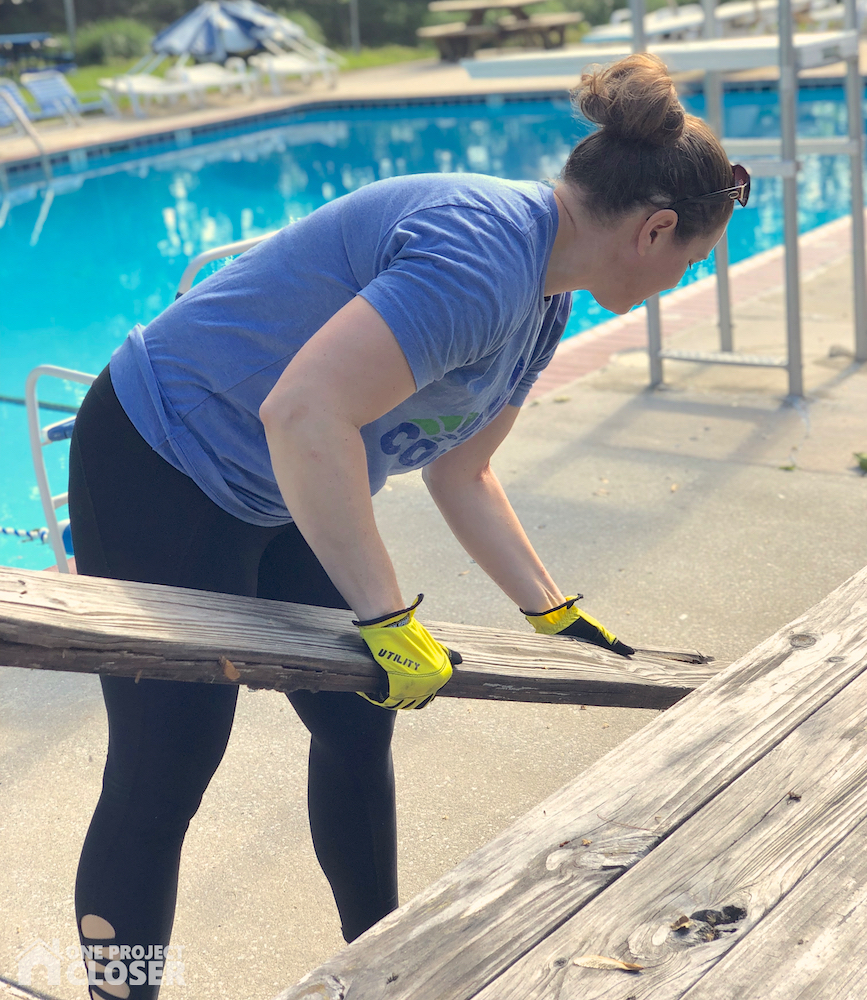
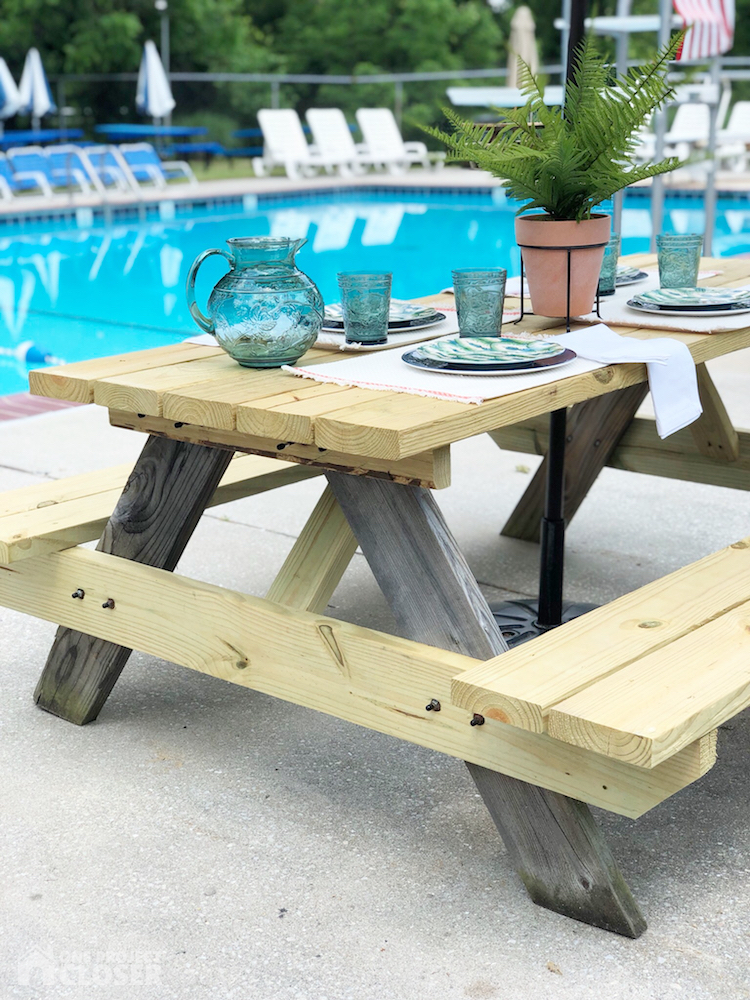
Since most of the sun and water exposure is on the top boards of exterior picnic tables, re-boarding a picnic table is a cost and time efficient solution. We have a bunch of old, rotting picnic tables at our local pool that look awful and are just plain unsafe. My friend Beth, who recently built our DIY outdoor table, agreed to help me replace boards and give our tables a fresh new look. This took a bit longer than we expected since we had to replace some of the support pieces. Generally, this is a simple project that involves minimal planning or skill – you are basically buying and cutting using the old table as a guide.
How to Re-board an Outdoor Picnic Table
Make Time: 30 minutes – 1 hour
Cost: $50
Woodworking Difficulty Level: Easy
Materials Needed:
*Material list is custom to your specific picnic table, but these are typical 8 foot tables and materials and cut list reflect this.
- 6 – 2×6″ @ 12 foot long pressure treated boards
- 1 – 2×6″ @ 8 foot long pressure treated boards
- 1 – 2×4″ @ 8 foot long pressure treated boards
- 3†exterior wood screws (box of 100)
*Pressure treated boards are rot/decay resistant. Non-treated wood is okay but will need to be sealed before being exposed to the elements.
Cut List:
- 9 – 2×6″ @ 6 ft. (Tabletop Boards)
- 2 – 2×6″ @4.5 ft (Apron Ends)
- 2 – 2×4″ @ 2.5 ft (Underneath Tabletop Supports)
Tools Needed:
*Be sure to check out our amazing Home Depot Coupons before you buy to save yourself some money!*
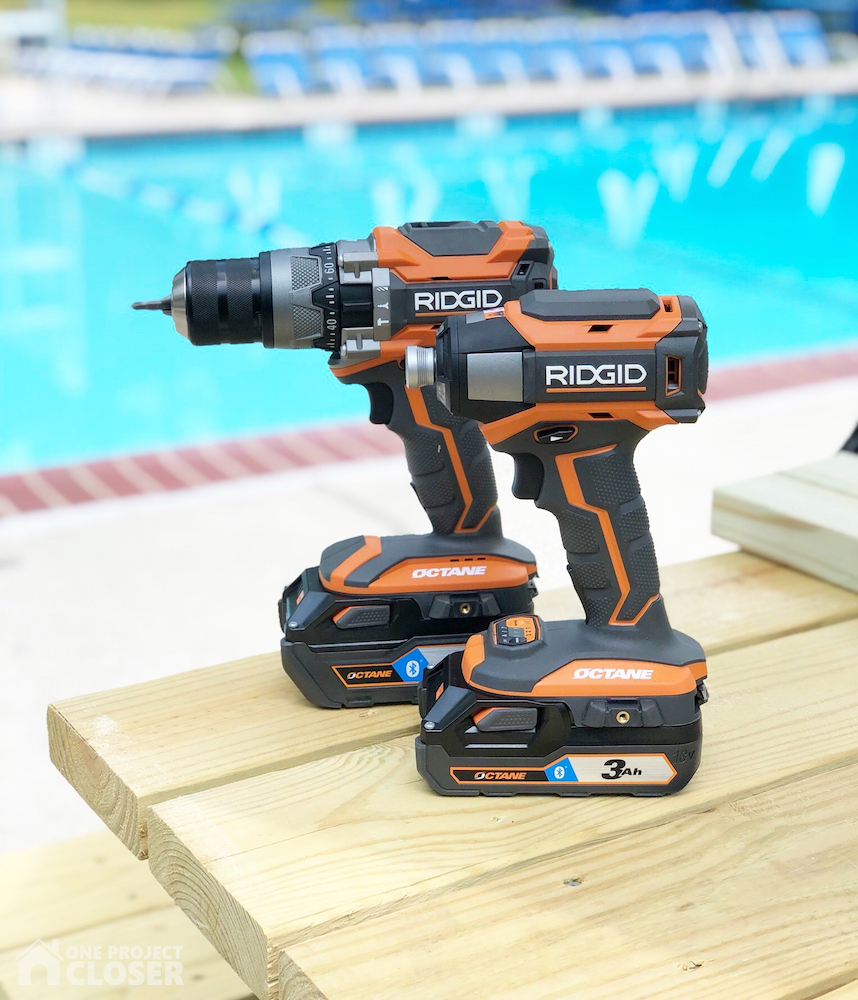
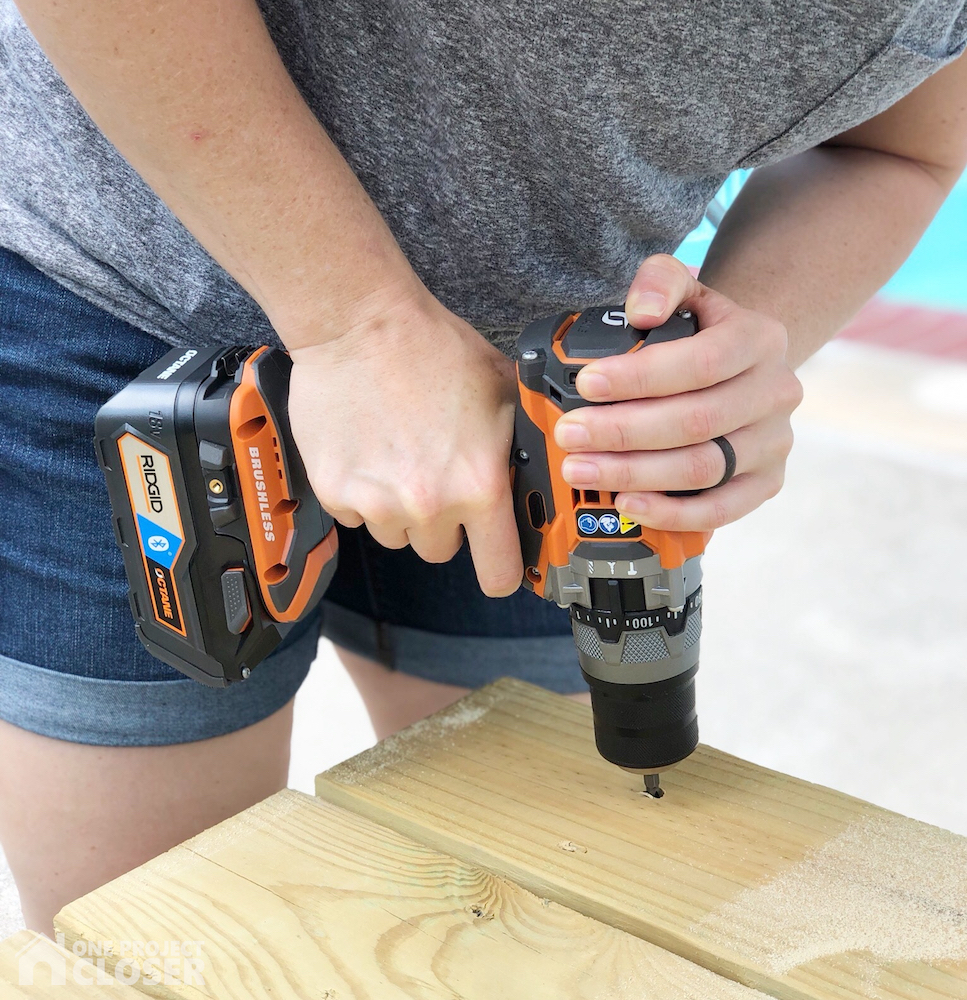
- Ridgid OCTANE 18V Hammer Drill/Driver and 6-Mode Impact Driver Combo Kit
- Ridgid OCTANE 18V 7-1/4 in. Circular Saw
- Hammer
- Tape Measure
- Square
- Pencil
- Sander (optional)
- Safety Glasses
- Wood Clamps
STEP ONE
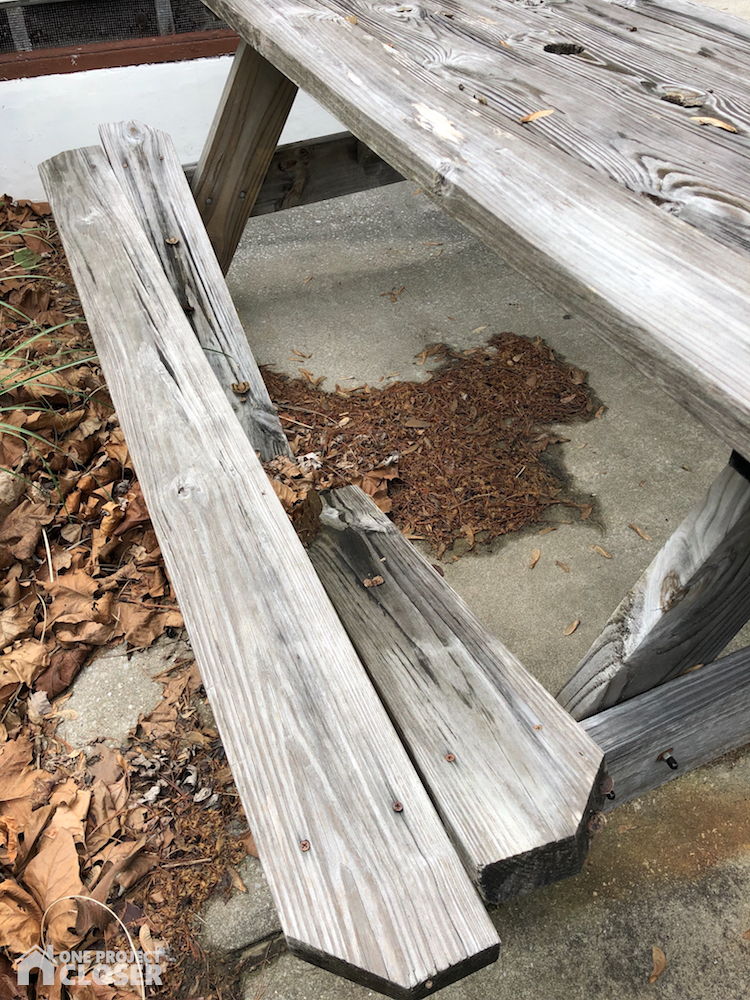
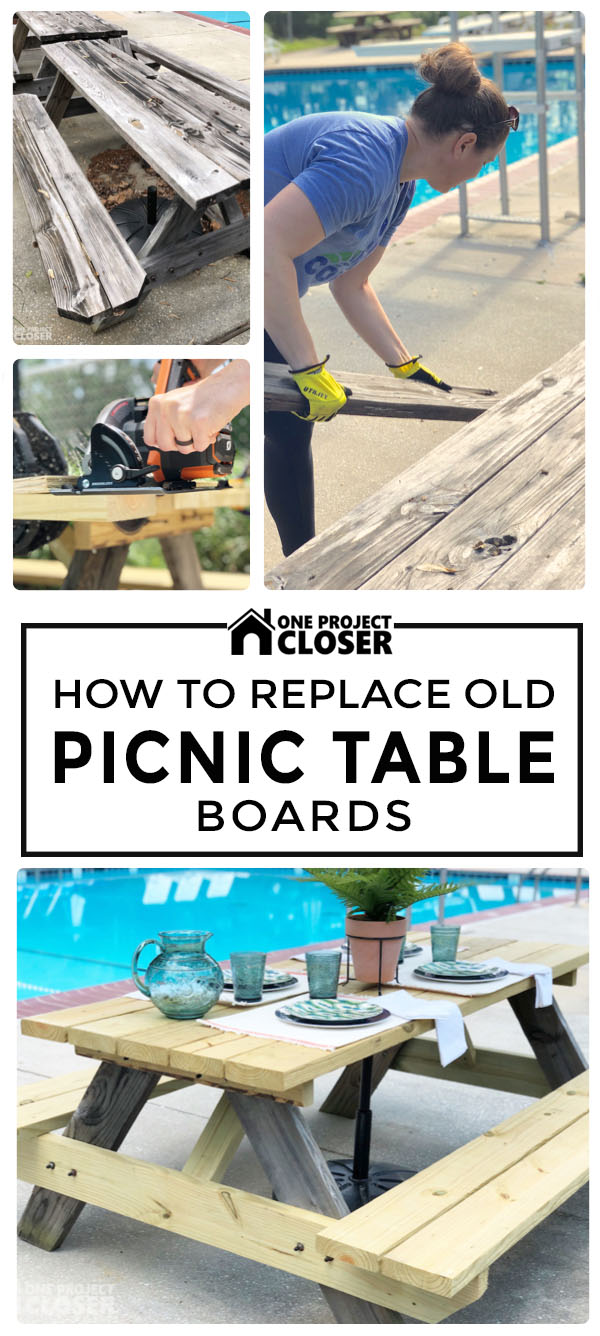
First, hang your head in shame that you let it get this bad. Just me? Okay, so these table needed some work last summer but the winter left them in even worse repair. We were hoping we only needed to replace the top boards and seats, but once we removed those, we realized a few of the support boards had also rotted.
If the supports are still good, you should remove and replace the seats first, then remove the top boards and replace these. This will keep the supports and legs in place without worrying about needing extra hands to hold them in place.
To remove the boards, first remove any bolts (if applicable). These picnic tables had nails holding the boards in place. We used a hammer to knock the boards away from the legs. Since we weren’t worried about preserving the old boards, we went a little crazy! LOL You could also use a pry-bar if nails were used. If screws were used to put the boards into place, you will need to back the screws out with a drill.
STEP TWO (optional)
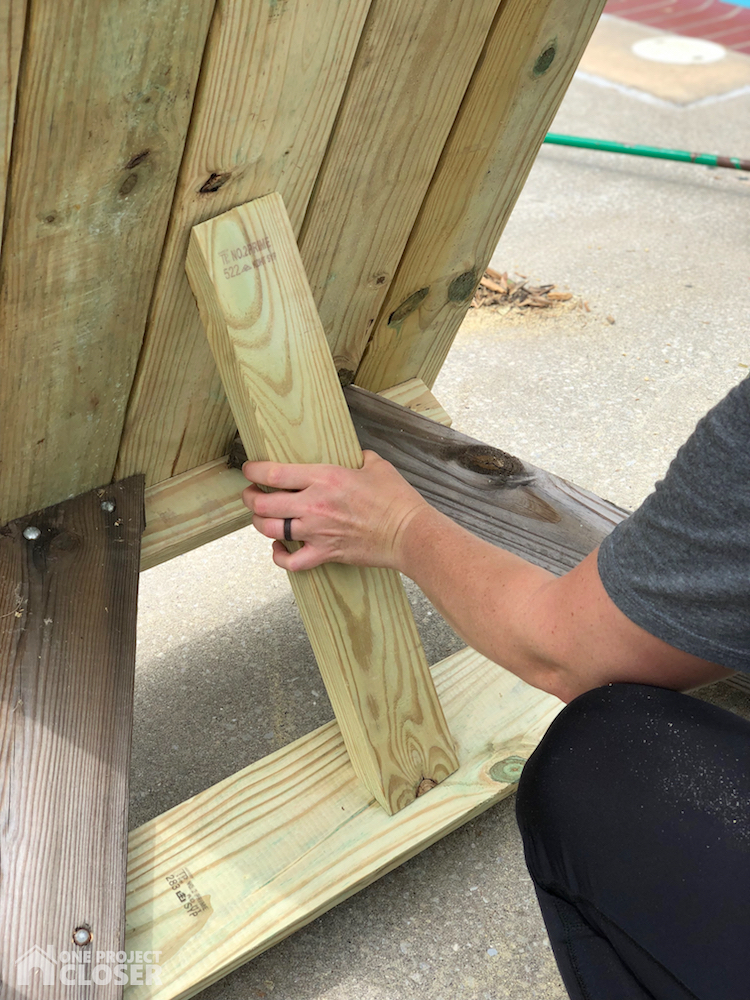
Next replace any support pieces. Our supports were 2×4″ boards, each 2.5′ long. We used our Ridgid OCTANE 18V 7-1/4 in. Circular Saw to cut the boards to the exact size of the old boards. The Octane line is Ridgids larger capacity battery which means more power and longer runtime. On a circ saw, that also means it can muscle through tough cuts without binding.

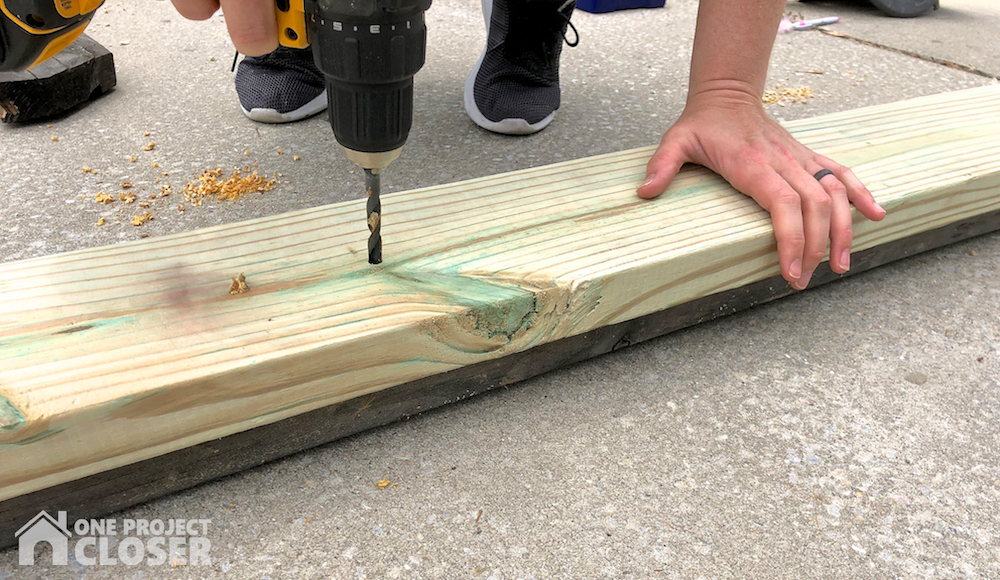
We used the old bolts for the supports and placed the old board on top of the new board and drilled into the old holes so that they match up exactly. Be sure to have another old board under your new board so you don’t drill into the floor/ground.
STEP THREE
Once the supports are replaced (if needed), you can begin replacing the other boards. Again, as stated above, you should remove and replace the seats first, then remove the top boards and replace these. This will keep the supports and legs in place without worrying about needing extra hands to hold them in place.
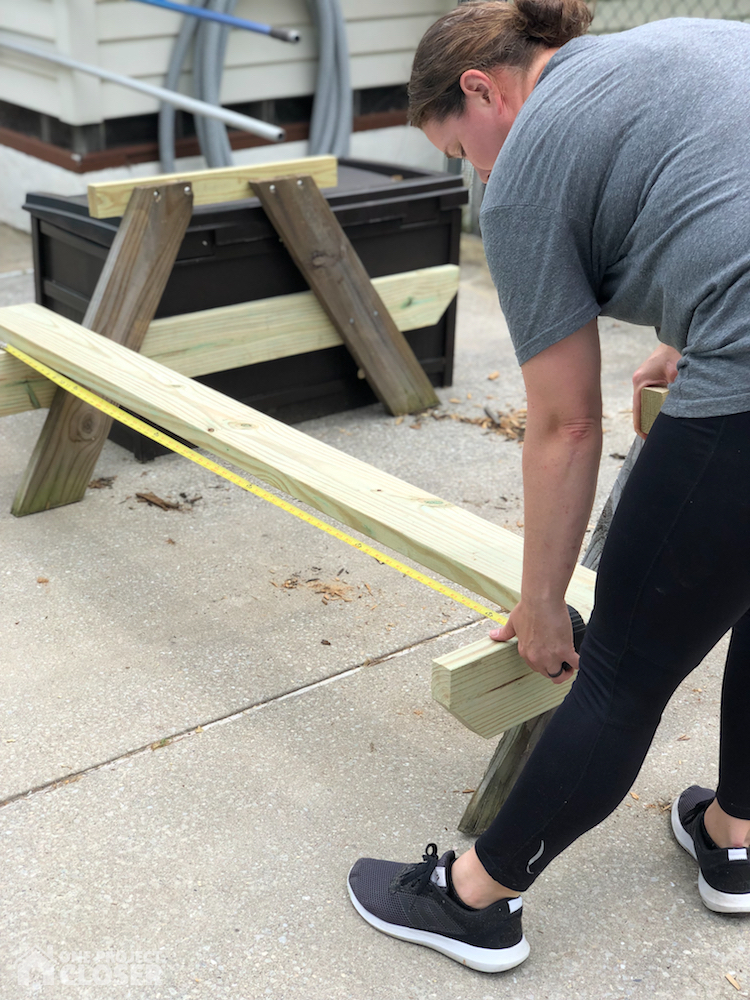
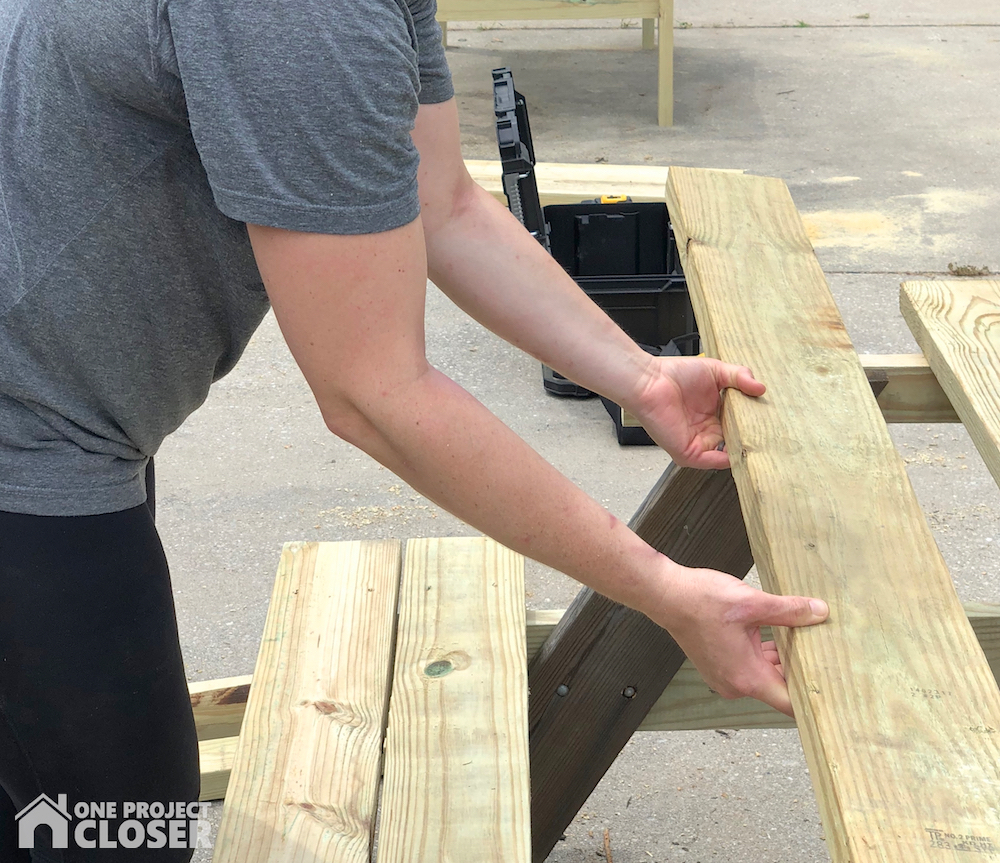
Place the best sides of the boards face up and the best edges on one end lined up straight. Use a square to keep it straight. When lining up the first board, measure the distance on each end from the support and ensure they are similar distances. You can use spacers to make sure the boards are spaced evenly, leaving a small gap for water to escape between boards. We just eye-balled it, since this is a casual, outdoor table.
Once boards are in place, use wood clamps to hold them in place.
STEP FOUR
One your boards are lined up, either on the table top or the benches, pre-drill two holes in each end of the board before setting the screws. Holes should be drilled so the screws fasten into the support below. You can use a chalk line to be exact or you can measure underneath the distance from the support to the edge and add one inch.
Once the pilot holes are drills, insert 3†exterior wood screws, syncing them just past the surface of the wood. Repeat this for all of the planks. We used the Ridgid OCTANE 18V Hammer Drill/Driver and 6-Mode Impact Driver Combo Kit for this project and loved it! This driver packs in 1,300 in./lbs. of torque, a brushless motor, and the super-comfortable over-mold grip on all Ridgid tools.
STEP FIVE
Once the seats are done, remove the table top boards and repeat the process using 2×6″ boards (or whatever was previously in place).
STEP SIX
Once the top and seats are replaced, cut a two 2×4″ boards for the braces underneath. We tilted the table up on its end to get a good angle. This step is far easier with an extra pair of hands to make sure the table doesn’t fall on you.
STEP SEVEN
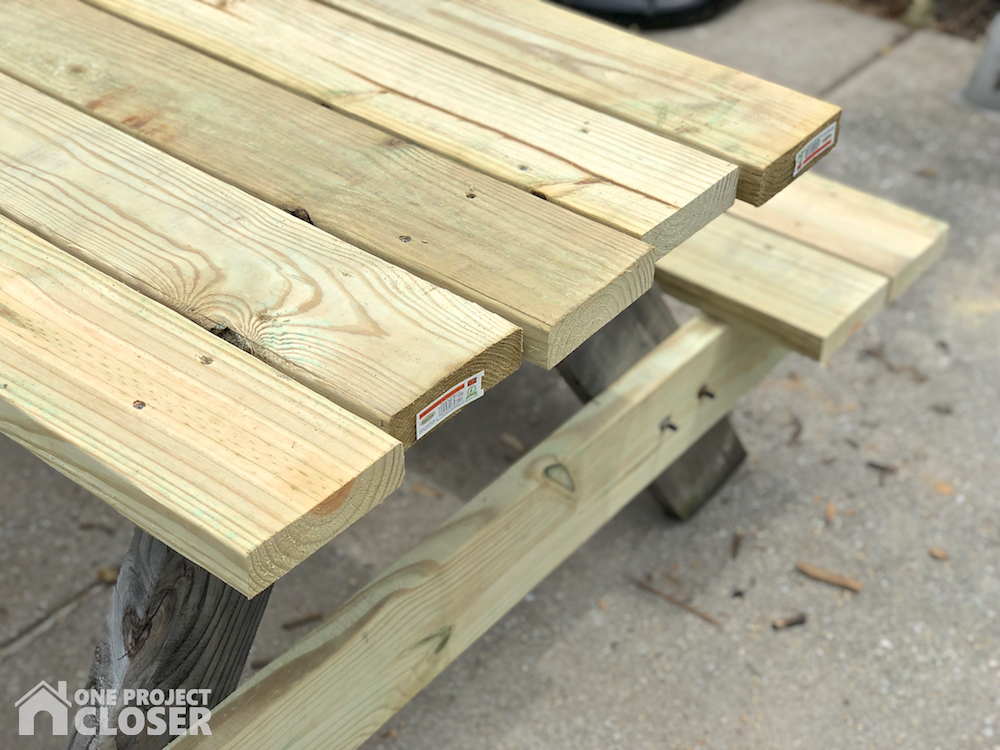
Next, even up all those edges on one side. If needed, use an extra board or long level as a guide for the circular saw, and rip the side of the tabletop and benches that was uneven.

We used this amazing new Ridgid OCTANETM 18V 7-1/4 in. Circular Saw and loved it! Totally worth the purchase for great power, not too heavy of a tool, lots of cut time, and easy to change the blades in and out.
STEP EIGHT
Finish by sanding the tabletop and any other areas that need to be sanded.
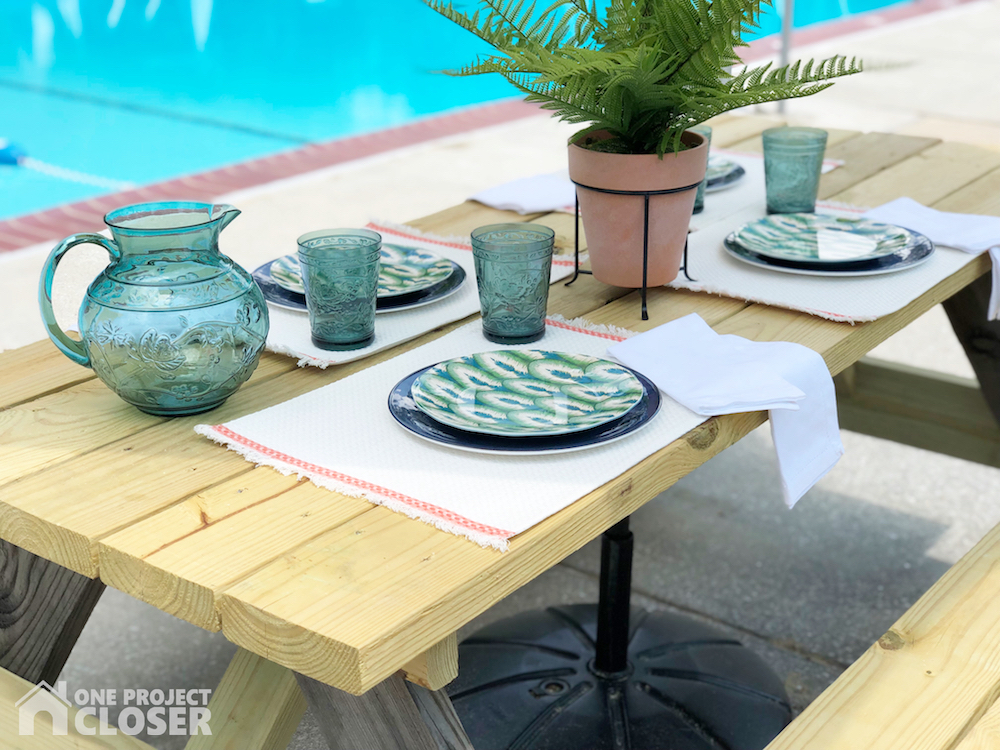
Most pressure treated wood needs to dry out before any stain or paint is added to it. So for now, enjoy your table, and then next summer be sure to apply an exterior grade stain or sealer to the table to make sure it will continue to look beautiful for years to come.
ENJOY!
Pin For Later
Enjoyed this tutorial and want to save it for later? Or share it with your friends? PIN IT!

Jocie Hagan
One Project Closer
Come say hi on Facebook, Instagram, & Pinterest!
Want to learn to hand letter and make amazing, personal decor for your home?
Learn now with Busy Girl’s Guide to Hand Lettering!
**Use the code HAPPY5OFF to get $5 off the course price**
