
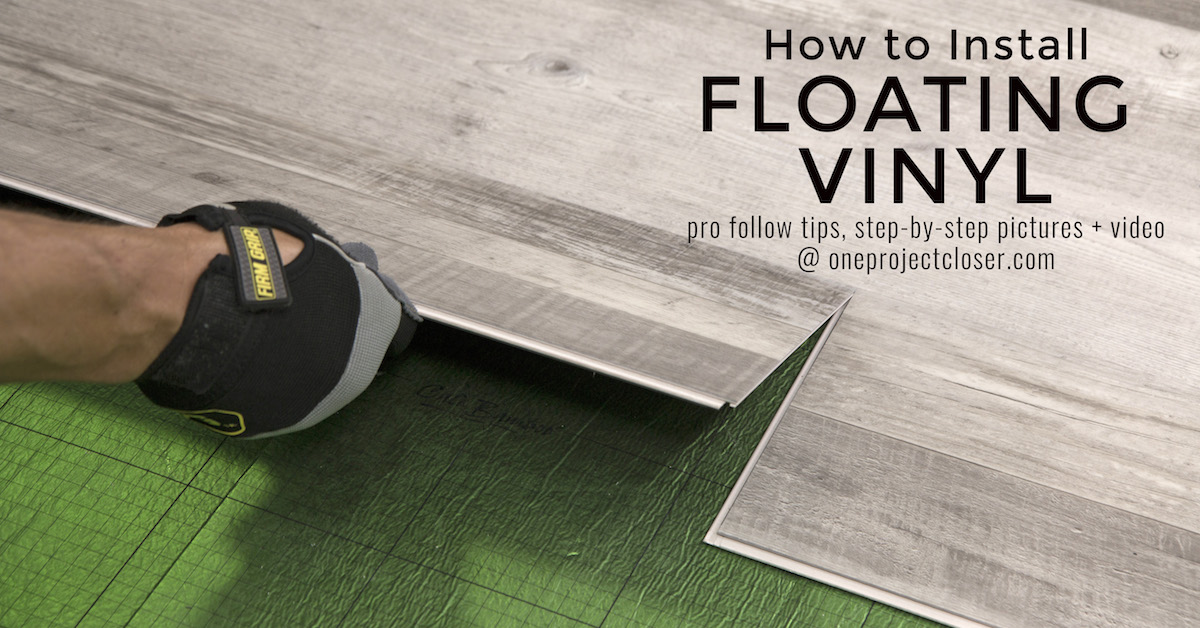
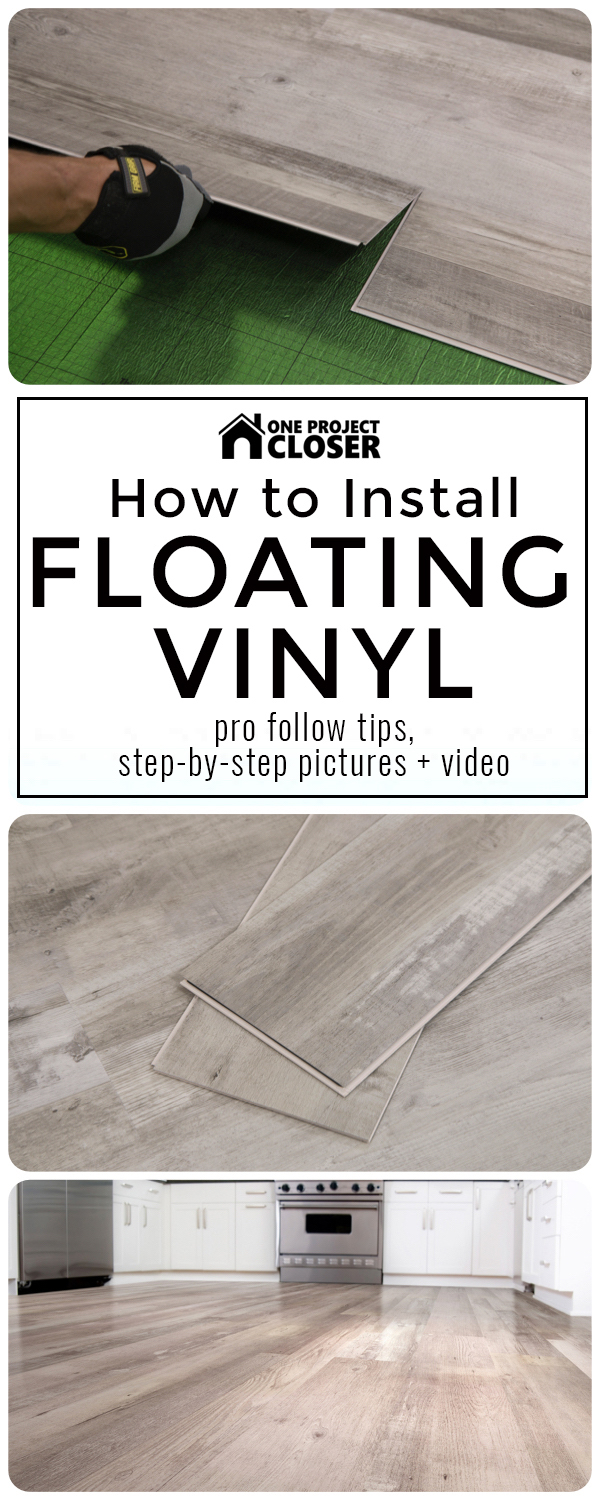
Thank you so much for following us at One Project Closer for our most recent pro follow – how to install floating vinyl flooring. Cali Bamboo is providing the materials for this Pro-Follow for free; however, the opinions we express here are our own. Remember, we’ll always be up-front with you when we’re receiving a free product, compensation, or both. And of course, we always strive for objectivity in our articles. Post may contain affiliate links. Thank you for supporting our site to continue providing you with the best free content!
We’re back with another Pro-Follow, and today’s topic is on installing a floating vinyl floor. For this project guide, we’ve partnered with Dave Swann and team. Dave is a general contractor with over 35 years of experience in new construction, remodeling, historic restoration, and design. Check out Dave’s Facebook page to learn more and to contact him.
Dave and his team are installing about 1000 sq. ft. of Aged Hickory Cali Bamboo vinyl flooring. I’m really excited about this product for a number of reasons:
- DIY install – the click-lock system makes for an easy installation for even a beginner DIYer
- Waterproof – the joints between planks are completely waterproof
- Continuous floor – vinyl planks don’t need expansion joints between different rooms
- Durable – Cali Bamboo vinyl has a 20mil wear layer
If you’re interested in learning more, check out Jocie’s full review of Cali Bamboo Vinyl Flooring.
Here’s a quick overview video of installing Cali Bamboo floating vinyl flooring. Read on for detailed instructions, pictures, and installation tips.
Acclimate the Flooring
The Cali Bamboo vinyl flooring was shipped directly to the job site about a week prior to installation. It’s important to allow the vinyl planks 24 – 48 hours to acclimate to room temperature and relative humidity before installing. Don’t stack cartons more than 8 high, and open both ends of the carton.
Subfloor Prep
As with all flooring installations, subfloor preparation is crucial. Vinyl planks are flexible enough that you will notice if the subfloor does not meet the requirements.
The general rule is that Cali Bamboo vinyl can be installed over most hard surfaces including:
- Concrete
- Plywood
- OSB
- Ceramic tile
- Sheet vinyl
- Radiant heat systems
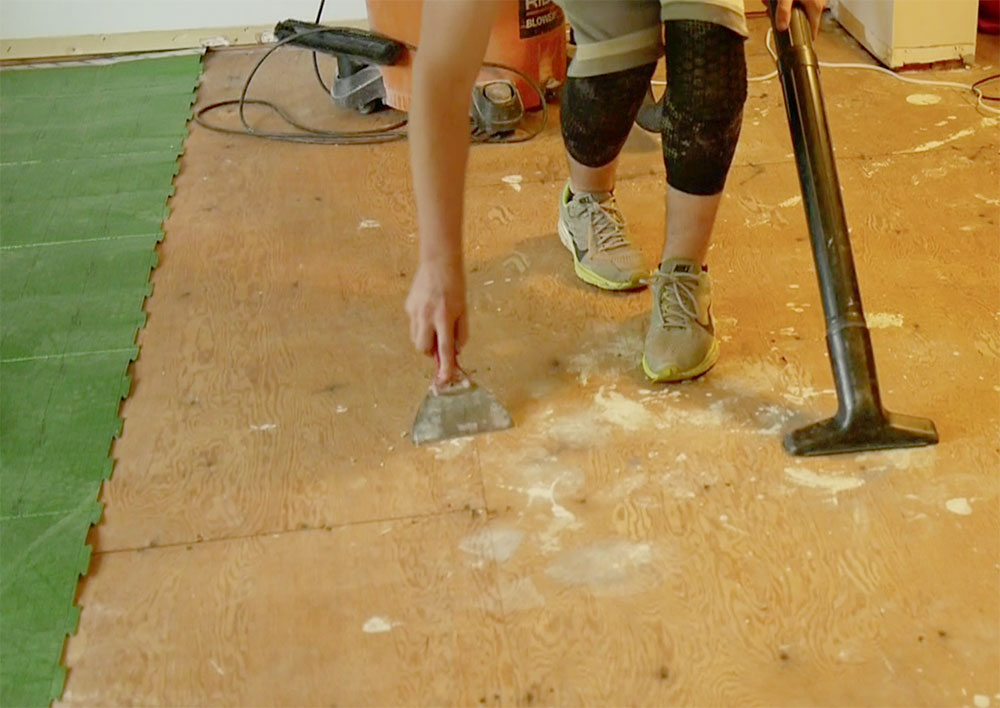
The subfloor must be flat to 3/16″ per 10′ radius and completely clean. You need to knock down high spots and/or fill in low spots. Depending on your application, you may even consider pouring a self-leveling compound to achieve a nice, even subfloor.
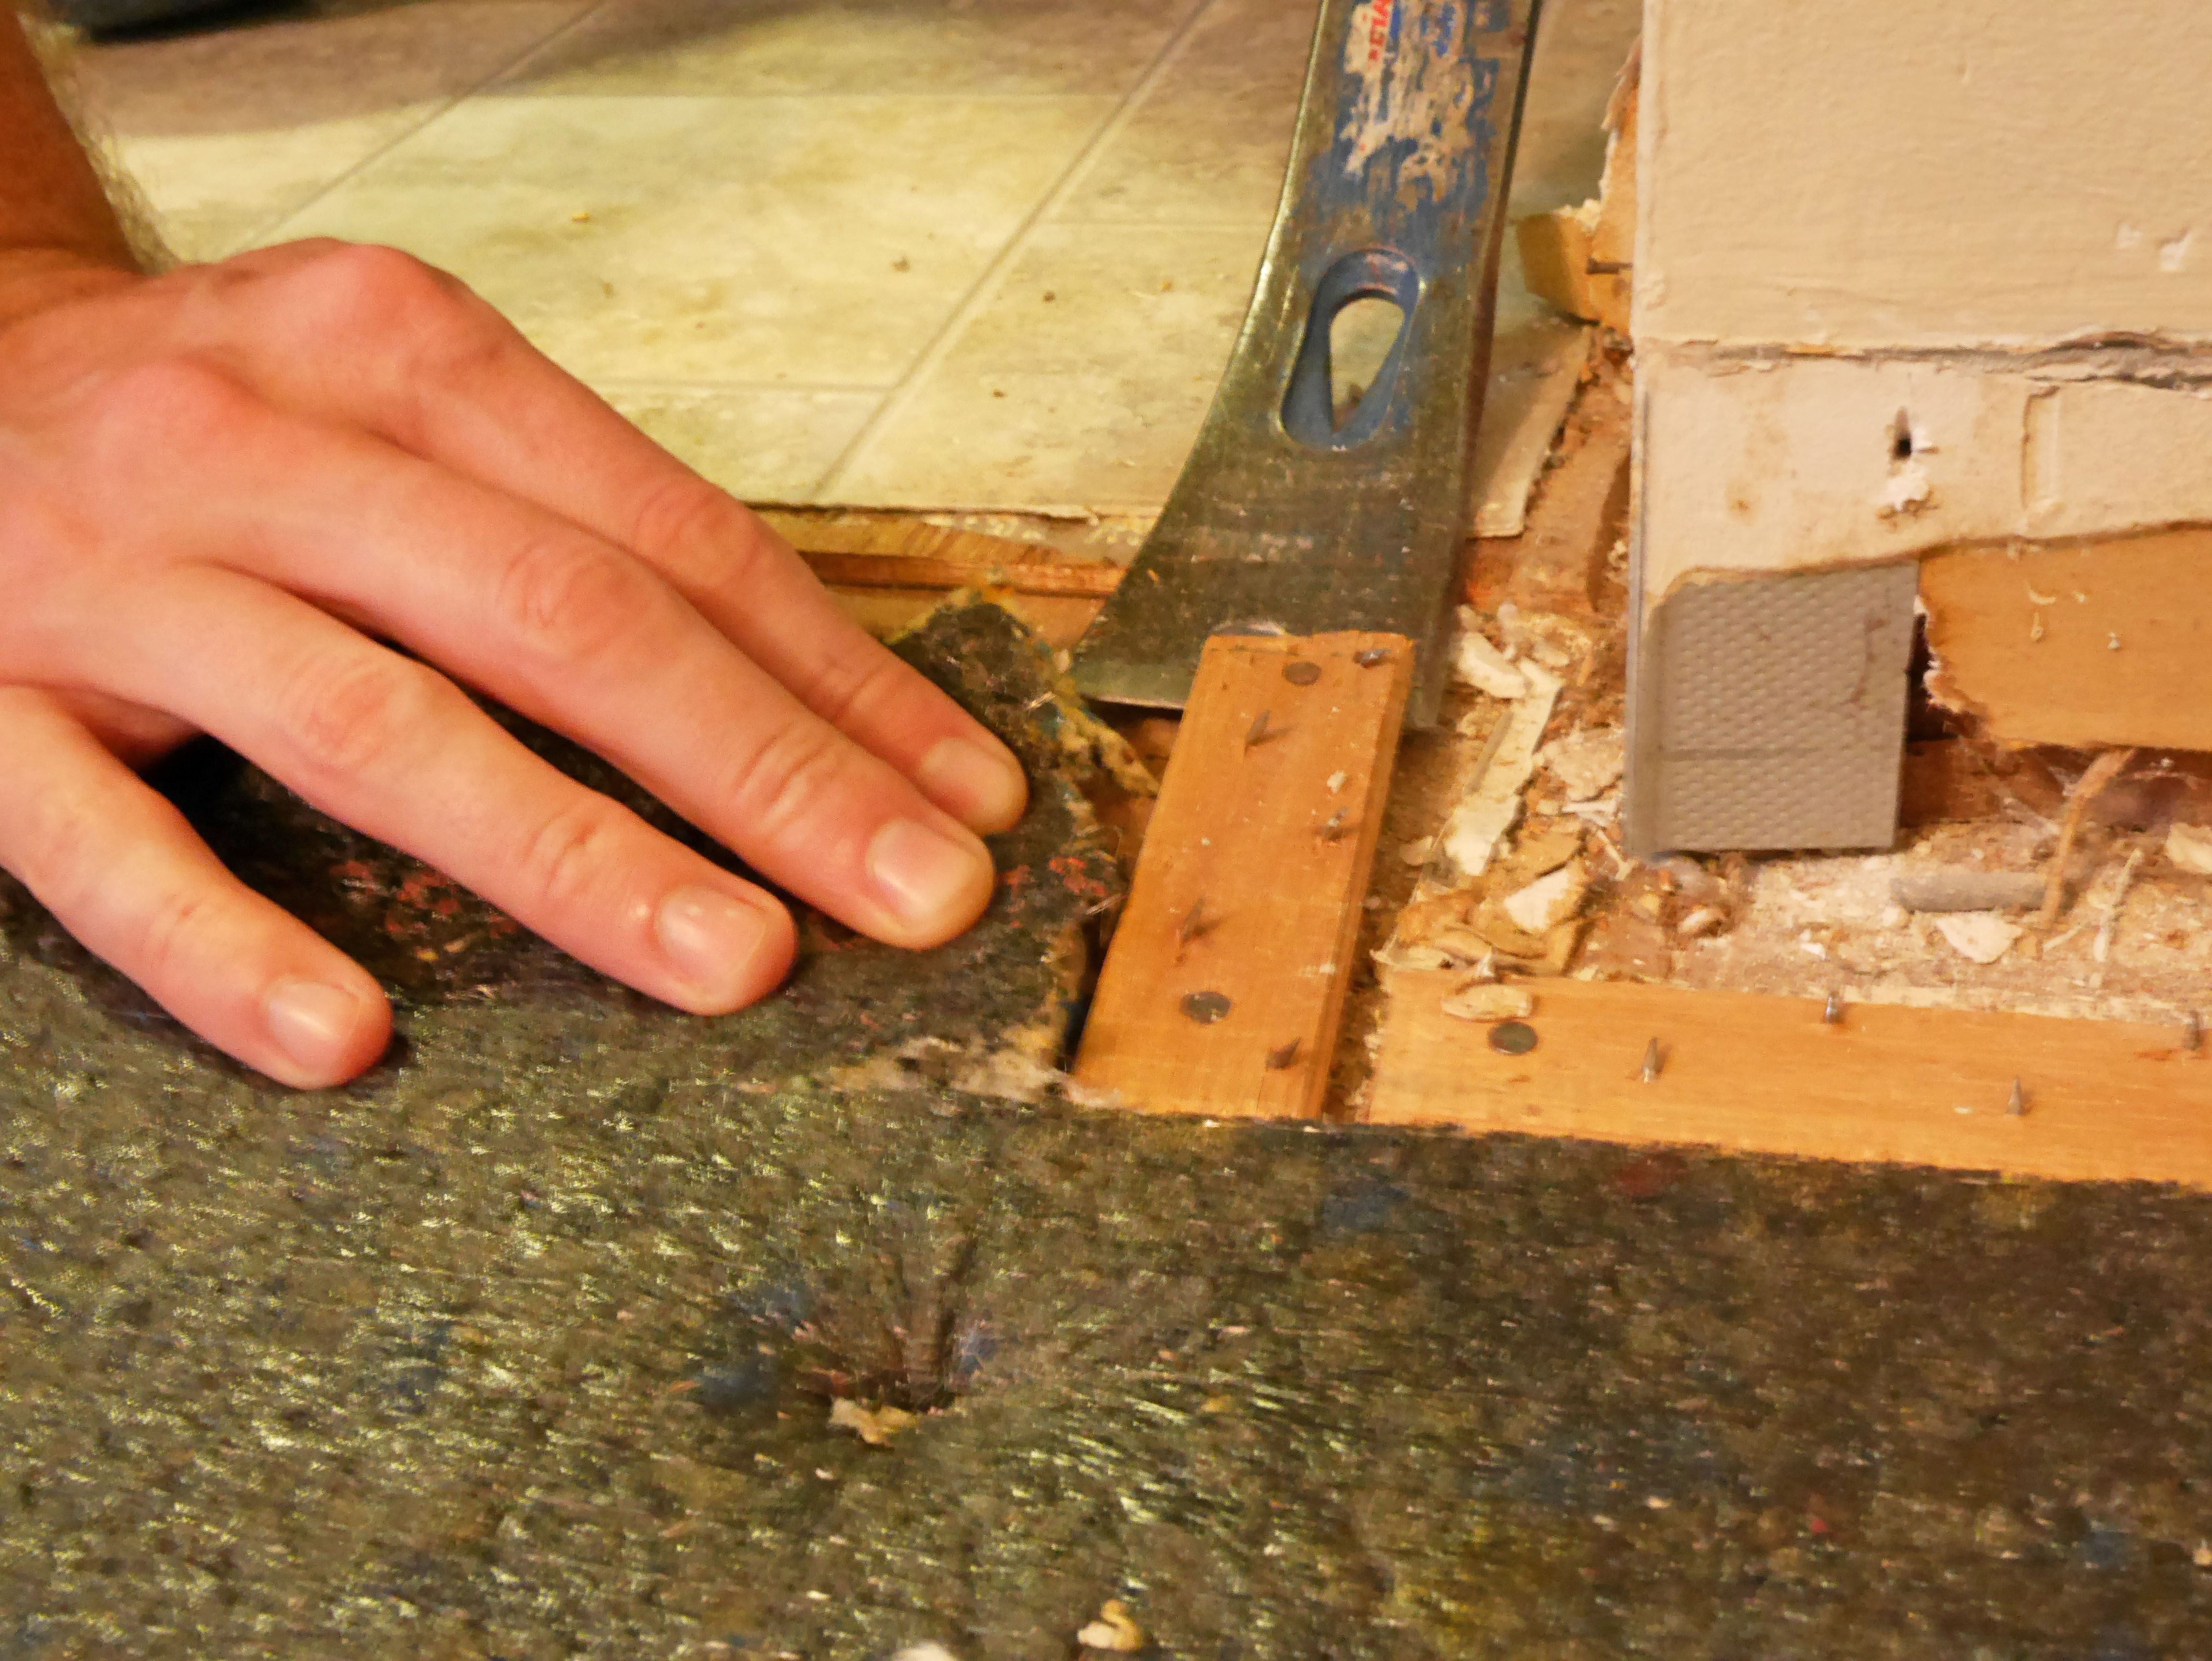
For this project, the baseboards, carpet, slate tile, and sheet vinyl were completely removed. Dave and his team scoured the subfloor for staples, nails, and screws either removing them or driving them below the surface. They gave special attention to remove any leftover mortar after the tile was gone.
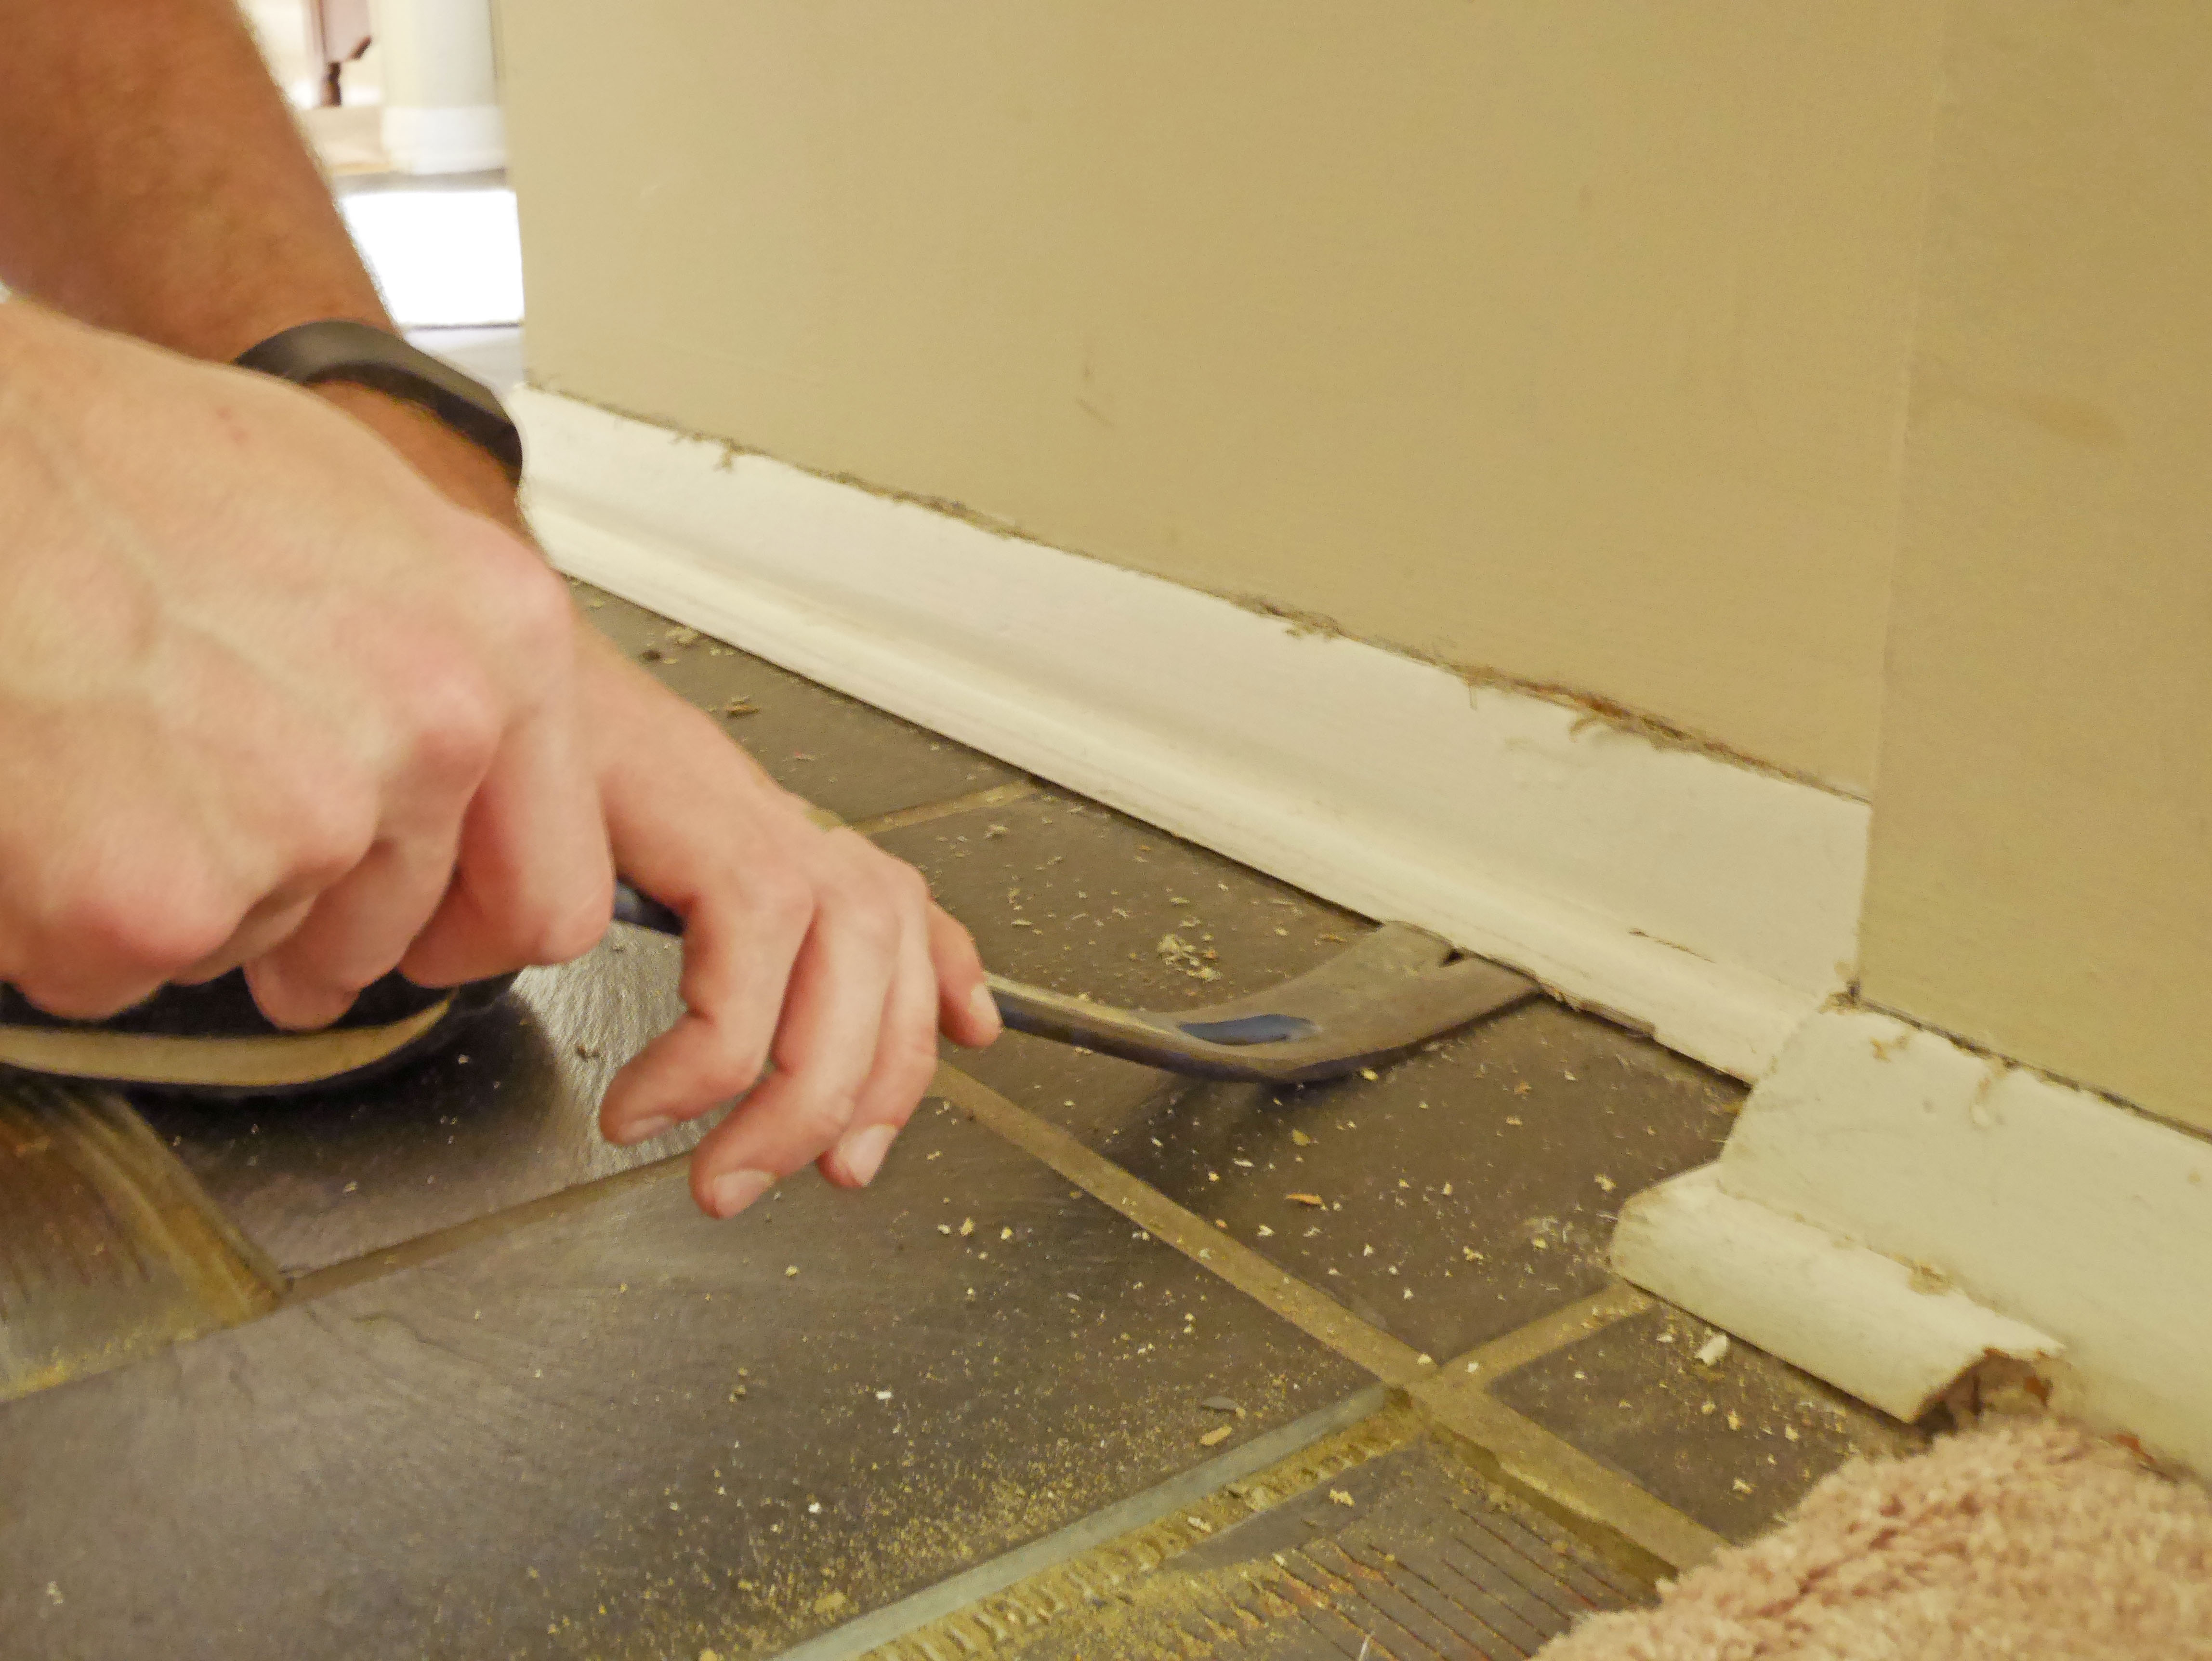
Tip: Slide an old drywall knife across the subfloor to find proud nails, screws, and staples you didn’t notice before.
Wood subfloors must be securing fastened, and this is a good opportunity to eliminate squeaks. Drive screws every 6″ along a joist.
Concrete must be fully cured and at least 60 days old. You can grind down high spots or fill in low spots with a Portland-based leveling compound.
Underlayment
Cali Bamboo vinyl is waterproof; however, moisture intrusions can affect the floor over time. Moisture can also be trapped below the flooring and create mold or mildew. Vinyl planks installed over concrete or a crawlspace must have a moisture barrier, and a vapor barrier is required for plywood subfloors.
For this project, Dave installed Cali Complete. This all-in-one is a moisture and vapor barrier suitable for all subfloor types. Additionally, Cali Complete reduces noise and acts as insulation making floors feel warmer.
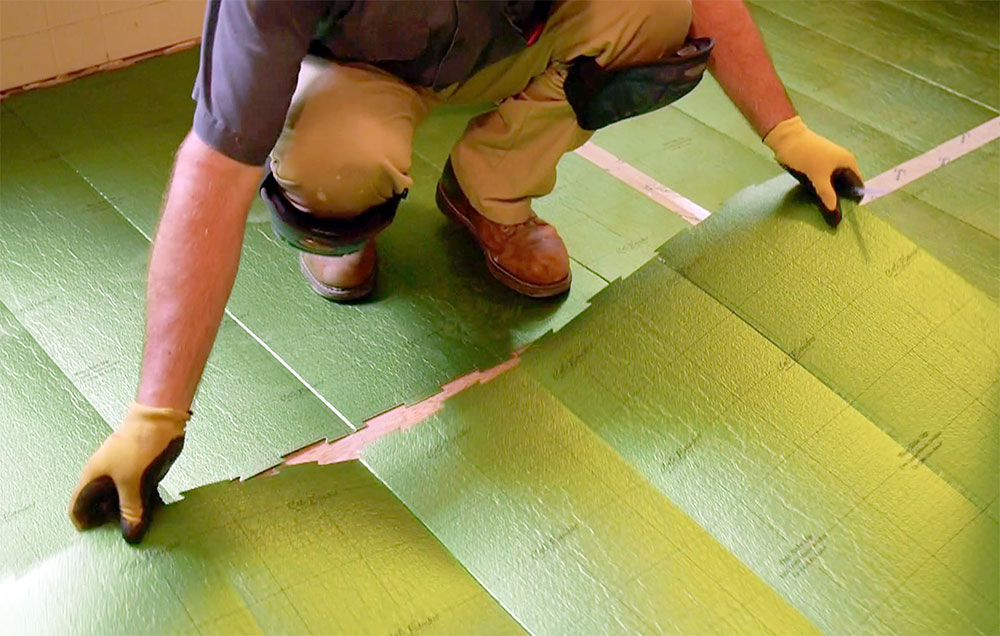
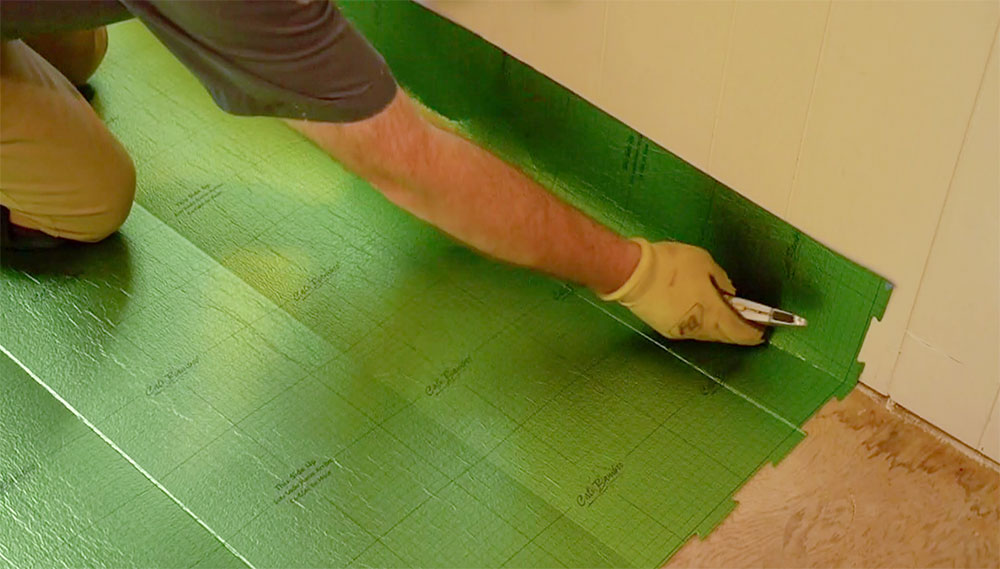
Installing the Cali Complete is very simple. Dave unfolded the sheets and connected adjacent sheets with the interlocking, ‘puzzle-piece’ edges. The underlayment cuts easily with a utility knife, and Dave tapped all the seams with a seal tape.
Before Installing
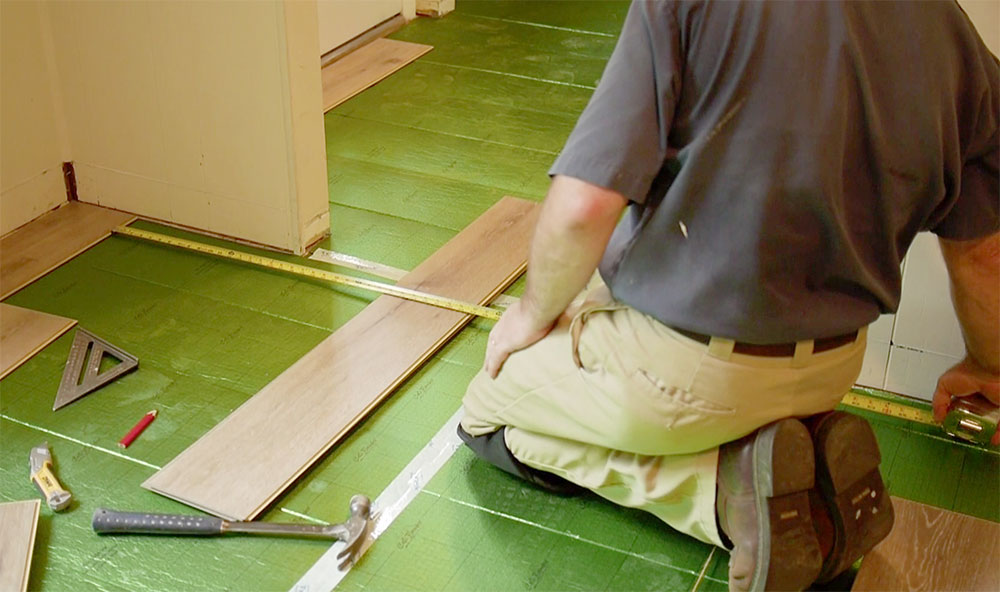
Before you begin, plan out the install. Decide which direction to run the planks, and measure the space at a right angle. You want to avoid the last course of planks being too thin (less than 1/3 of a plank width). If that’s the case, rip the first course of planks to adjust.
Dave measured off the wall and snapped a series of chalk lines. These guides will help ensure the planks are straight throughout the install.
Dave also cut some 1/4″ spacers to leave room for expansion around the walls and immovable objects like fixed cabinetry and the fireplace.
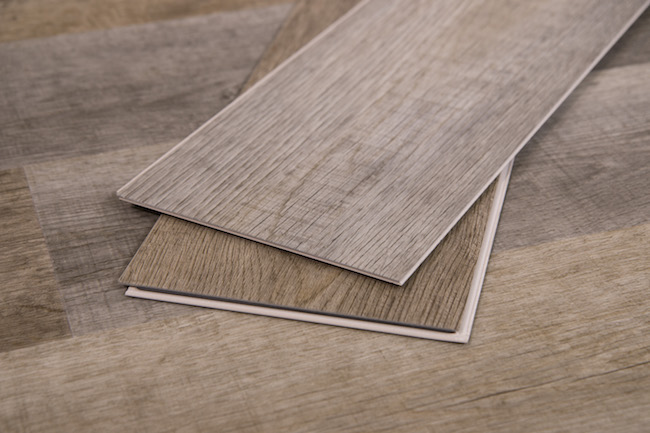
Cali Bamboo vinyl flooring includes 11 different patterns, and it’s important to mix them all together. Best practice is to pull pieces from several different cartons to ensure good color, shade, and appearance.
Installing the First Row
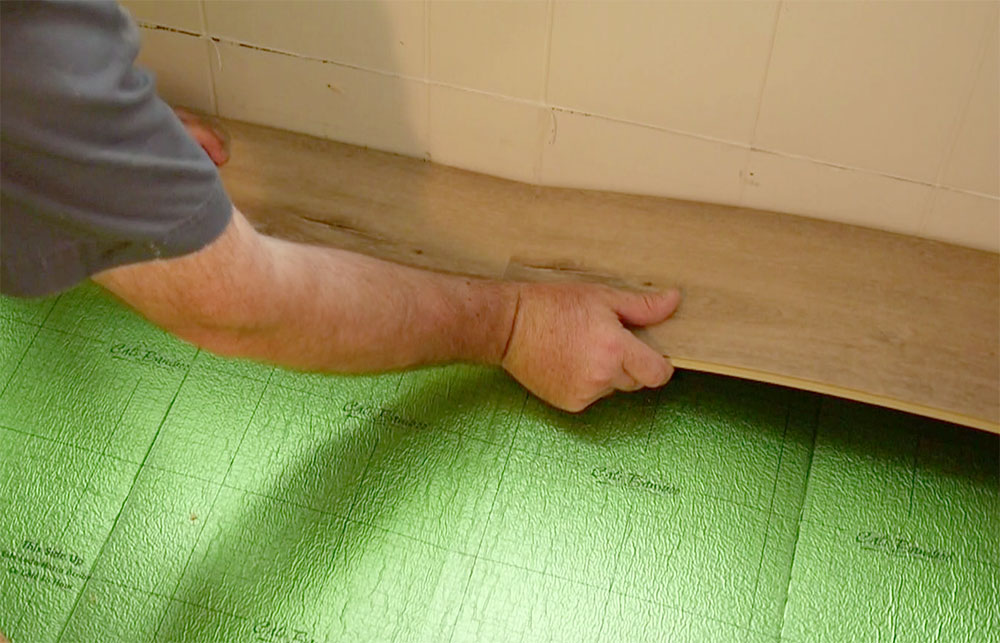
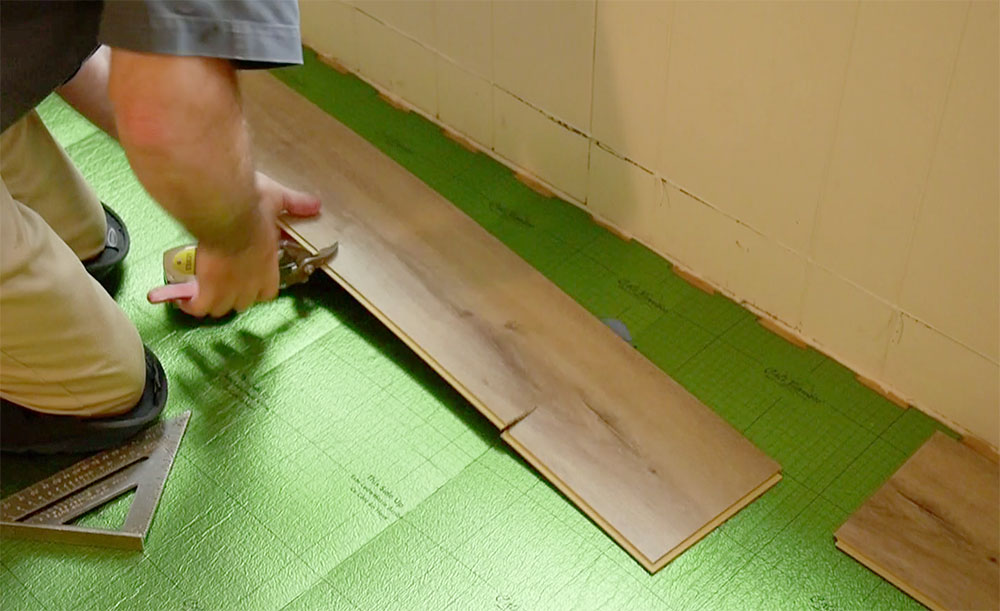
Dave started on the left side of the room. He used the spacers to create the proper expansion gap, and he measured to his first chalk line to ensure the planks were straight. Cali Bamboo vinyl planks feature a click-lock system that makes installation very quick, and the result is a waterproof joint. Often Dave used a piece of scrap as a tapping block to snug up the joint.
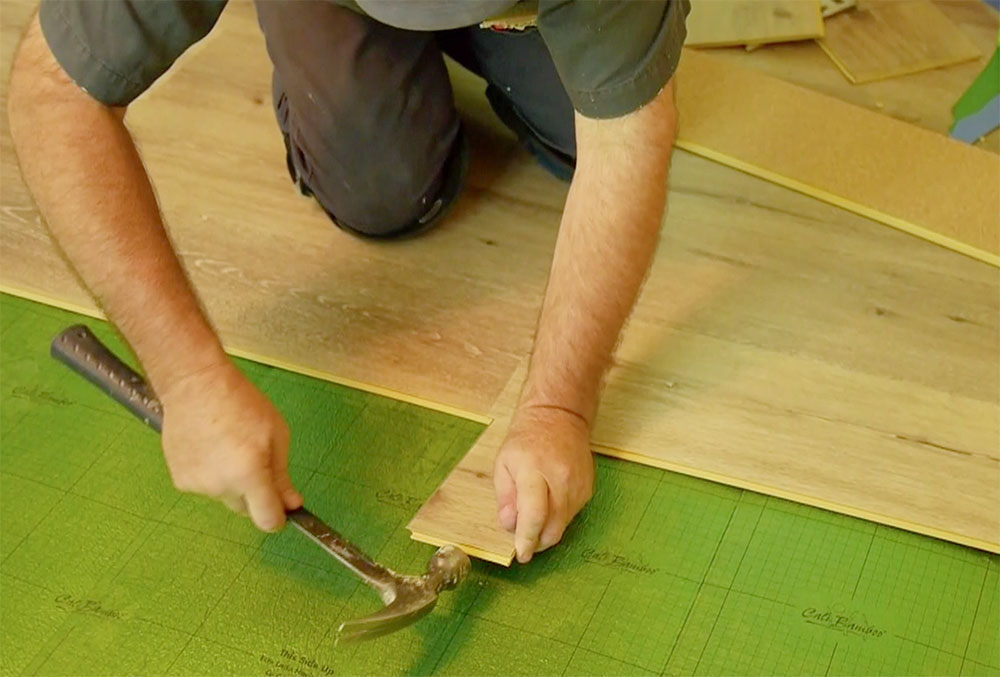
Cutting Vinyl Planks
Another benefit of this flooring is that you don’t even need power tools to cut the planks. Dave would grab a straight-edge, cut a score line with a utility knife and snap the workpiece much like drywall. It’s quick and leaves no mess. Often, Dave would be able to reuse the remaining piece (if it was at least 8″) to start the next course.
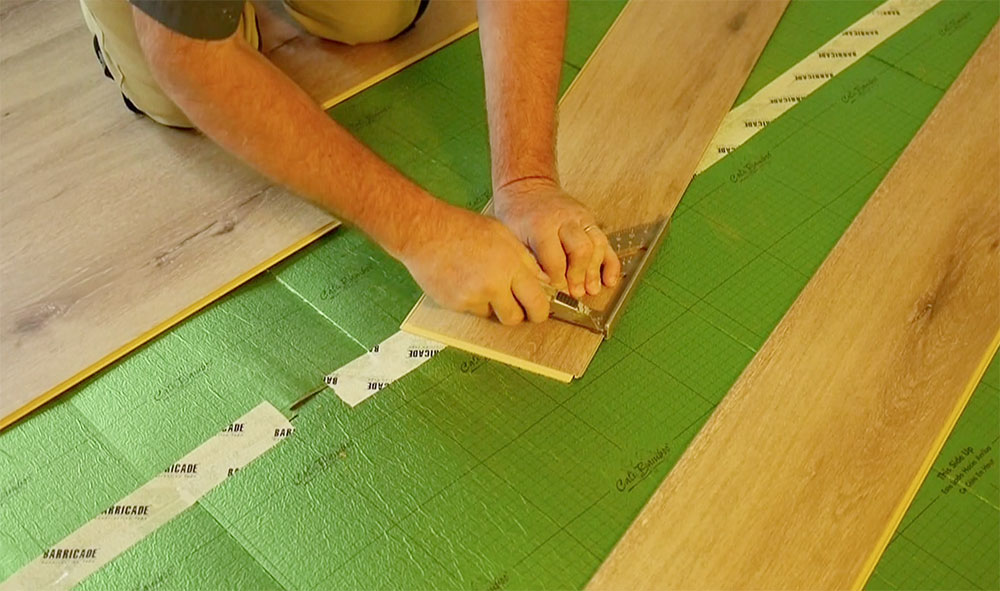
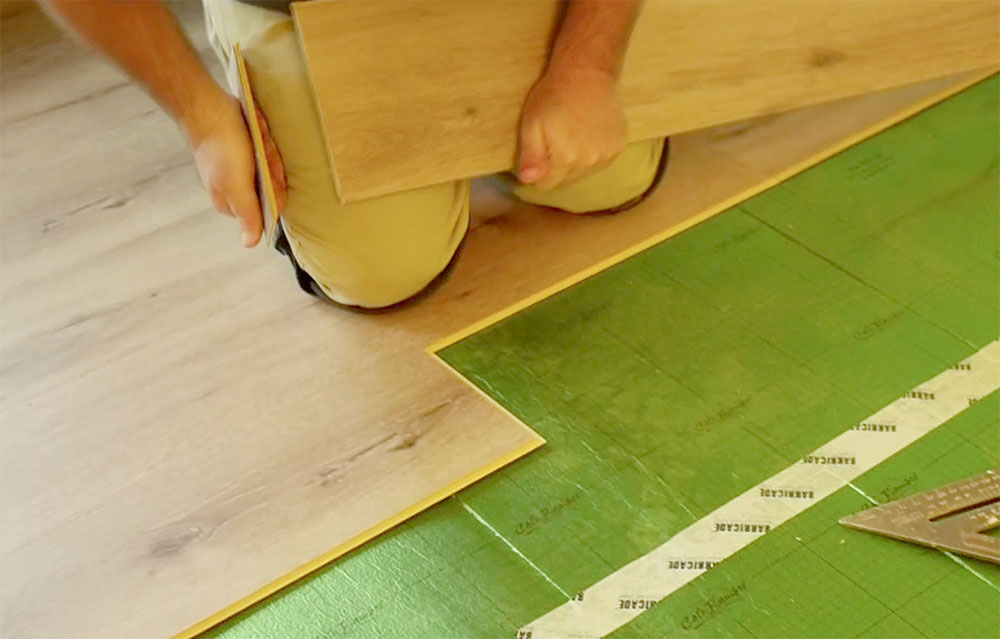
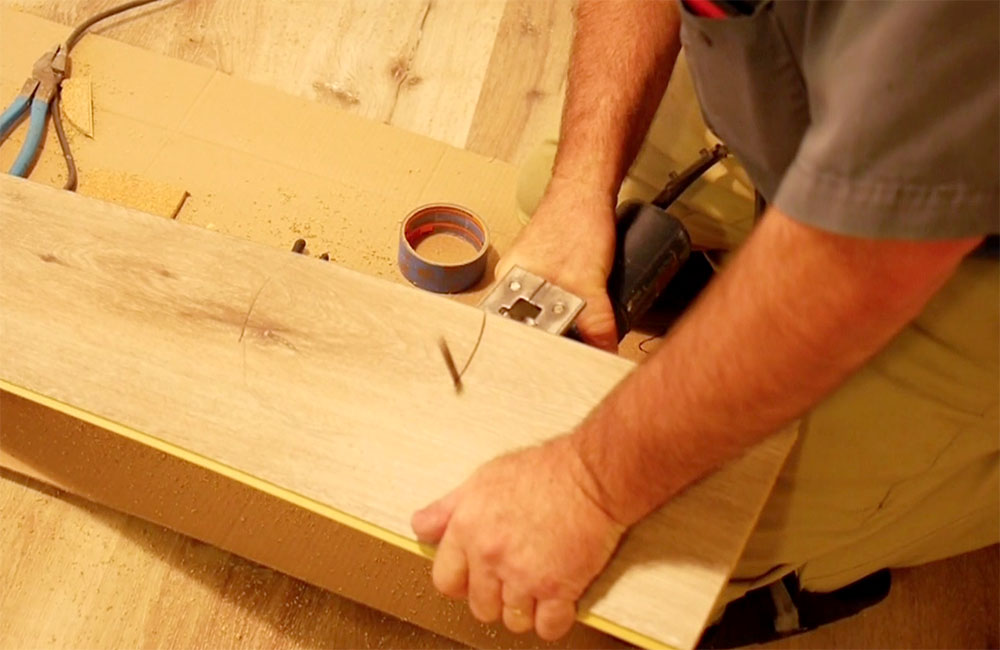
At other times, Dave would use snips, a jigsaw or multitool to cut the planks around door jambs, air registers, stairs, and other odd angles.
Continuing the Install
Dave and his team continued the install in much the same manner, taking care to stagger joints by at least 8″ and pulling planks from different boxes. It’s recommended to account for about 5% waste. However, Dave and his team were extremely efficient with very little scrap leftover. It’s important to inspect each piece before you install to look for damage or defects and set those pieces aside. Dave continuously checked the distance to the nearest chalk line and make slight adjustments to keep the floor straight.
The vinyl floor extends underneath appliances like the washer and dryer, the refrigerator and the stove. However, it does not go underneath the kitchen cabinets or other fixed objects.
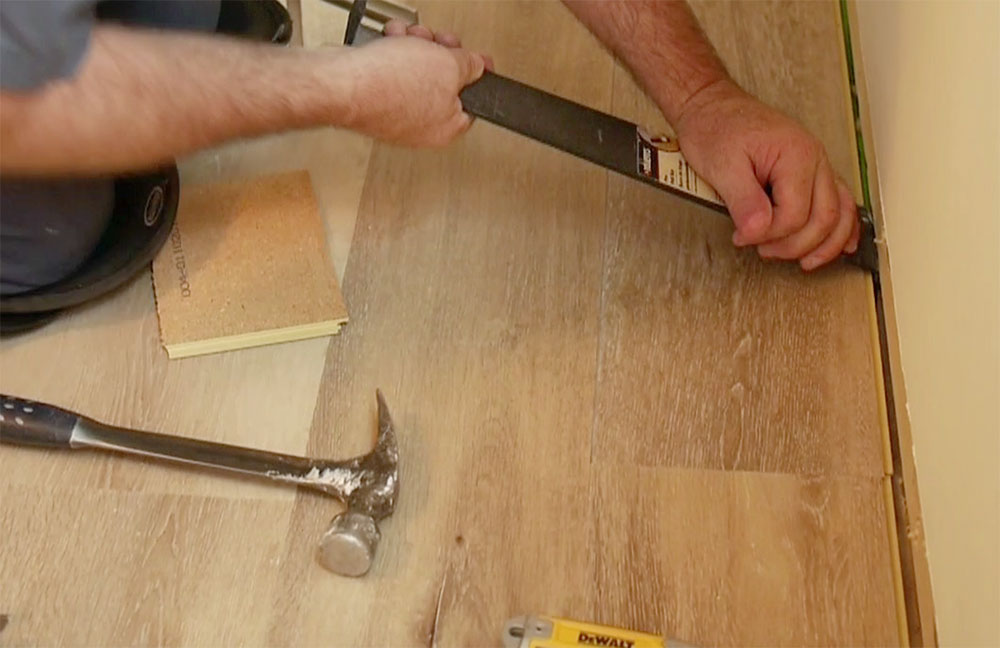
In some areas, Dave ripped the last course of planks to fit, again allowing room for expansion. Walls are not always 100% straight so he measured each piece individually before cutting. Dave used a double-sided prybar and rubber mallet to snug up the joint.
Transitions & Molding
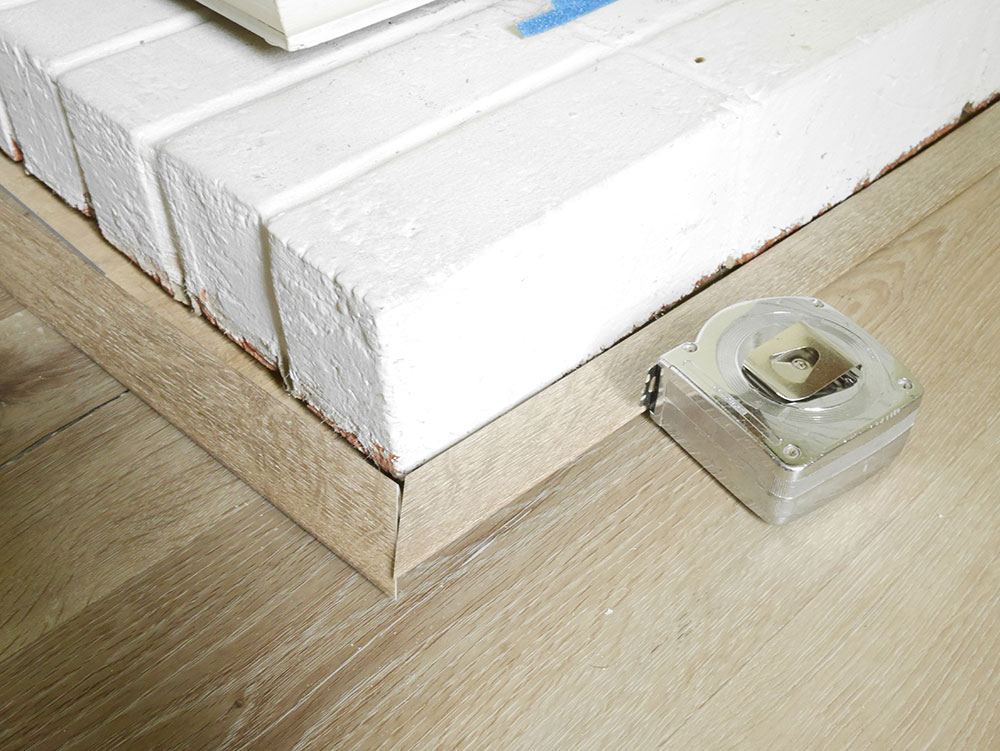
The expansion gap around the walls is concealed with baseboards and optional shoe molding (not installed on this job). Around the stairs, door threshold and cabinetry, Dave used quarter round. Cali Bamboo offers a variety of trim options and stair nosing to match the floor. Dave installed a threshold molding around the fireplace brick, and he used a construction adhesive to glue it down to the subfloor. It’s important to note that all the transition strips and molding are not fastened to the vinyl floor. Things like closet by-pass door guides are attached to the subfloor with room for the floor to expand and contract.
The Finished Product
This floor looks amazing, and Dave and his team did a great job!


Pin for Later
Found this pro-follow on how to install floating vinyl flooring helpful, but not ready to start your project? No problem! Pin it for later and share it with your friends.

This type of flooring is immensly popular in the UK nowadays. The difference in our homes is that we generally have floorboards underneath
Since last year, I’ve seen vinyl flooring everywhere and I really starting to dig the look for my own home! Good to know there’s such a great how-to for it if I actually decide to do it!
Hey, Ethan! Thank you for the article!
I usually read articles and authors suggest asking companies to install flooring but I always love to do everything myself so DIY install is what I’m looking for.
I’ve installed laminate before but not vinyl flooring so your tips are helpful.I’d say that installing process is not very different, although, of course, there are some differences.
By the way, where did you buy that vinyl flooring (in video)?
Hey John,
It’s mentioned in the video: Cali Bamboo is the name of the company, and they installed some of their luxury vinyl planks, along with an underlayment from the same company.
LV flooring is similar to sheet vinyl, but it’s thicker, tougher and easier to install. It comes in tiles and planks.I used a product called Adura LockSolid. It’s a floating floor which means it isn’t fastened to the subfloor—it just lies there.
[…] Closer. A blog 10 years strong, OPC is a DIY site for the whole family, sharing everything from how to install floating vinyl floors, to tons of free printables and Home Depot coupons. Jocie lives in a suburb of Baltimore, MD with […]
Thanks for the tip of using transition strips around the fireplace brick. I just laid LVP in my living room with a fire place and was going to use quarter round, but I think the transition will look better.
Definitely installing Floating Vinyl Flooring requires thorough preparation, accurate measuring and careful cutting to install it properly. Thank you for taking the time to provide such an informative and helpful post.
If you were installing vinyl flooring over kitchen vinyl would you install over it or remove it?
Thanks
Thank you for being such a reliable source of info when other sites are already filtering their contents (what to go live and not). Im disappointed with them. But you’re blog is still here so, yay! | Bathroom remodel Frisco