

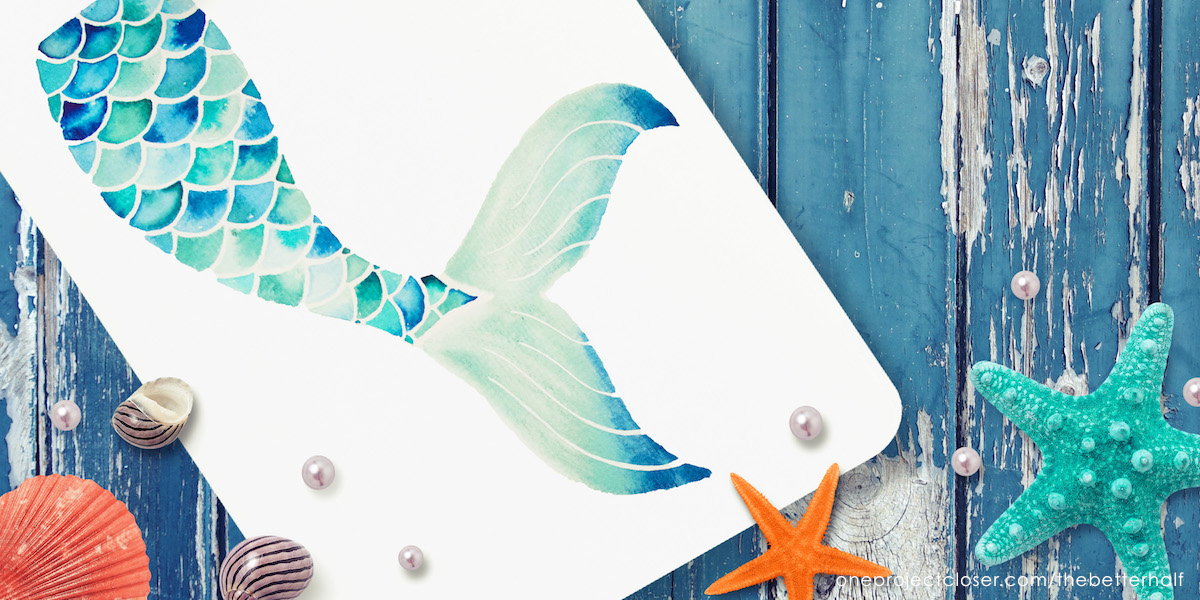
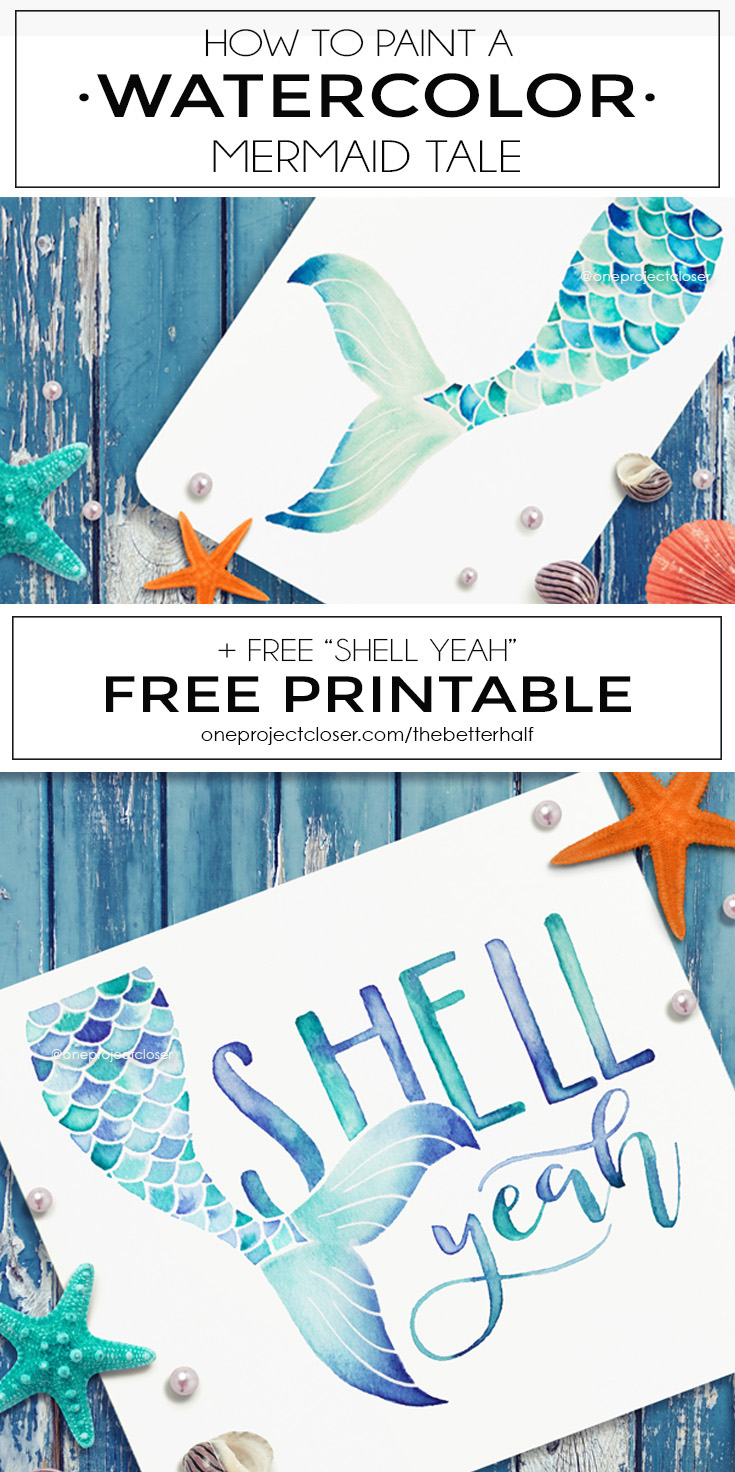
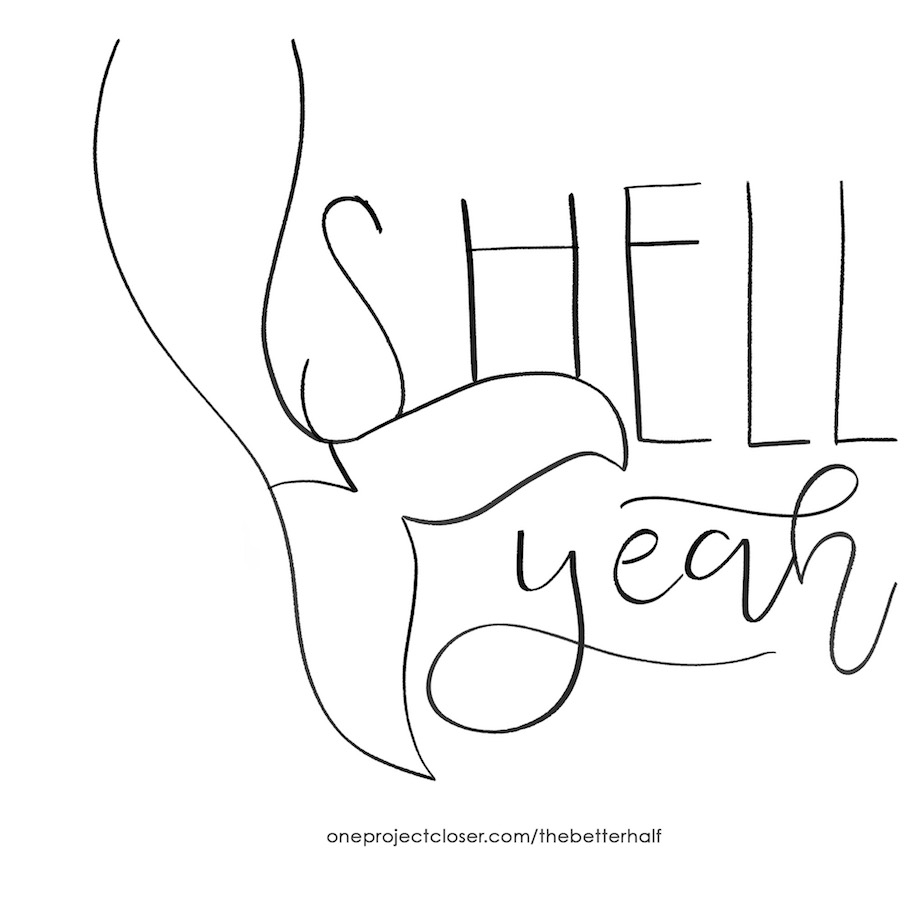
Summer is finally here and I’ve got just the project to get you in the mood. Today, I’ve teamed up to bring you easy tutorial – how to paint a watercolor mermaid tail and Shell Yeah hand lettering, along with five more amazing mermaid themed hand lettering tutorials and printables from some of my favorite bloggers! First, I’ll share my own tutorial + printable with you, but be sure to make it to the end for more mermaid love!
How to Paint a Watercolor Mermaid Tail
Make Time: 30-60 minutes (depending on skill and size of art)
Cost: Under $5
Difficulty Level: Easy-Moderate
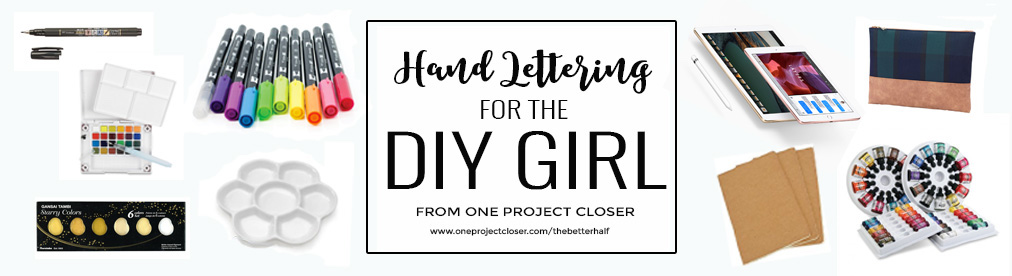
Materials Needed:
- 140 lb Cold Press Watercolor Paper
- No. 2 watercolor brush
- Printable Stencil
- [amazon_textlink asin=’B0100KESNE’ text=’White Jelly Roll Pen’ template=’ProductLink’ store=’opcwp-20′ marketplace=’US’ link_id=’f69efa81-6399-11e8-ad64-616be8eb2eac’]
- [amazon_textlink asin=’B005WJX9OS’ text=’Watercolor ‘ template=’ProductLink’ store=’opcwp-20′ marketplace=’US’ link_id=’7e432b51-6398-11e8-ac24-65d0b959b49a’]
- Pencil + Eraser
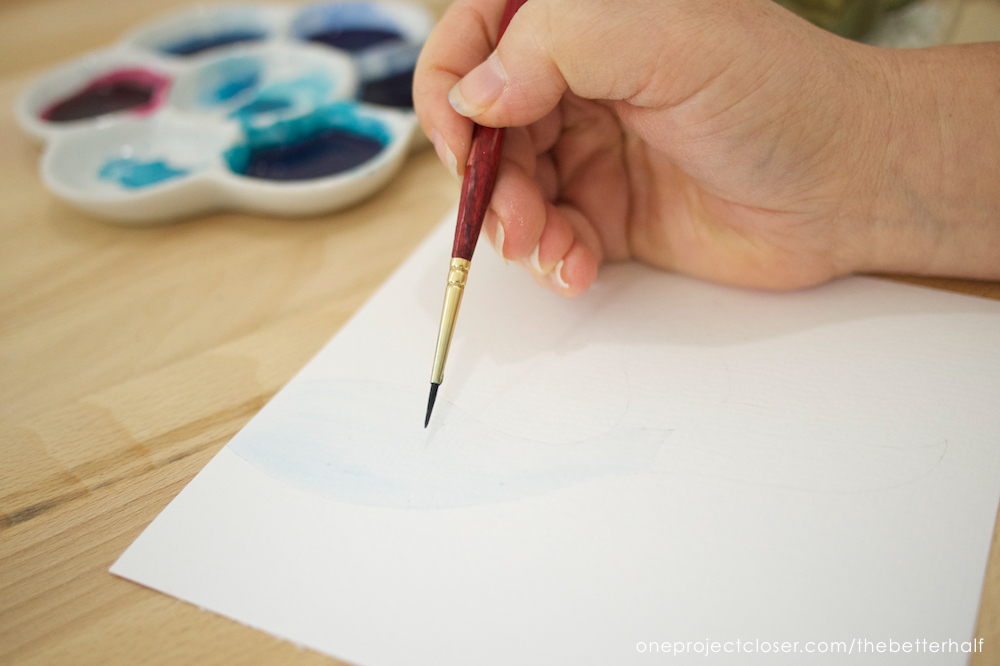
First, draw the mermaid tail onto your watercolor paper. You can also trace the Printable Stencil onto the watercolor paper VERY lightly with a pencil. (Be sure to resize the stencil when printing to the desired size) You can use a light box or carbon paper to transfer it. Then lightly erase your pencil marks until you can just barely see the design.
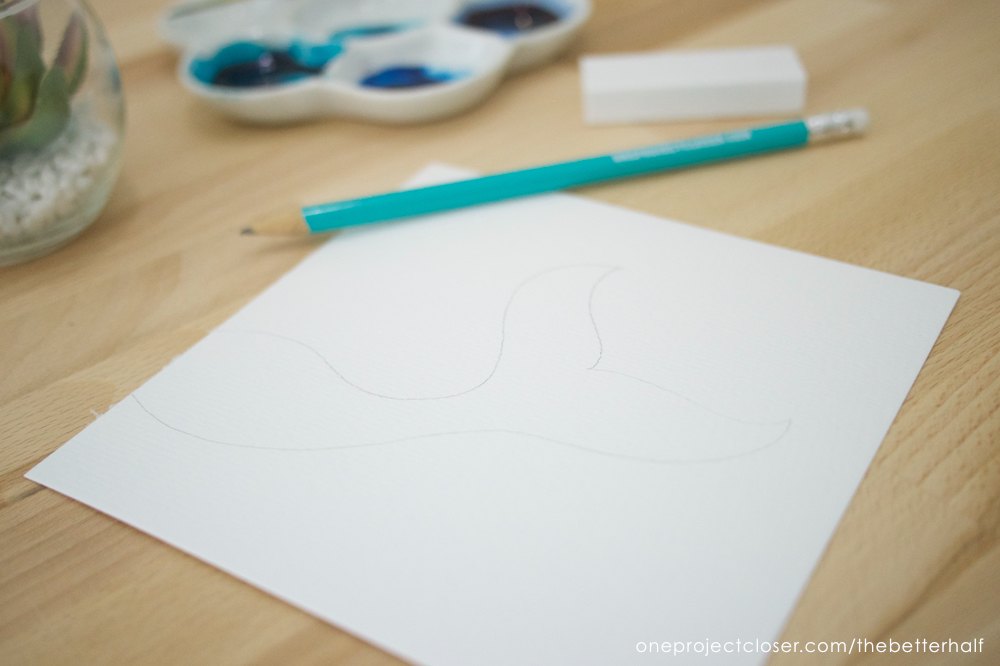
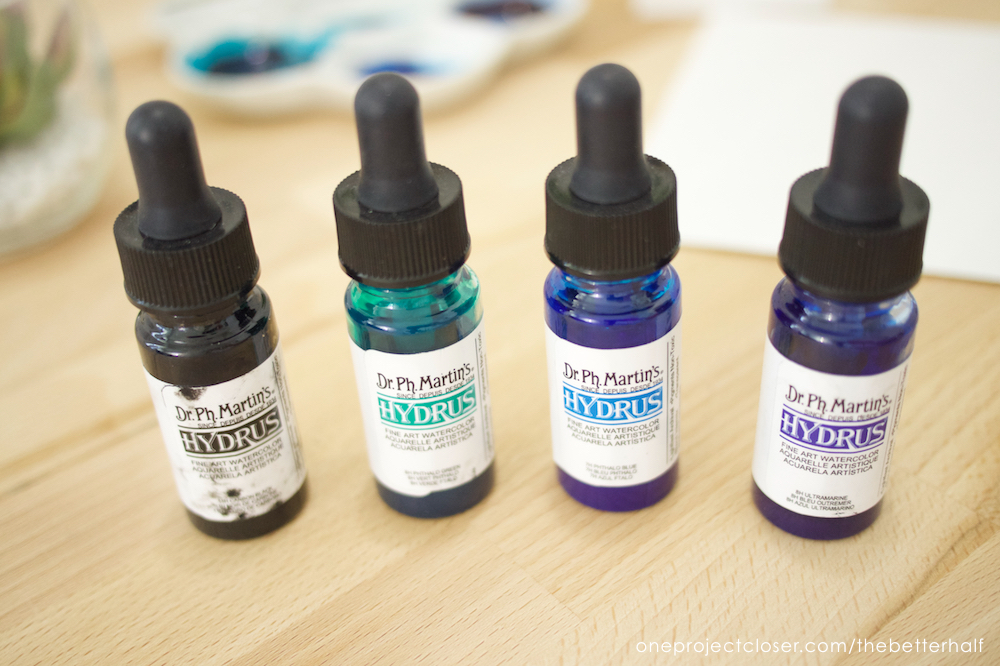
Select your color palette. I enjoy using colors next to each on the color wheel so they blend to create lots of different color variations. I used Teal (Blue and Green) and Dark Blue, with a touch of black added to each so they weren’t too bright. I mixed my own colors using Dr. Ph Martin’s Concentrated Watercolors.
I like to test out my colors first, looking at color and saturation, before starting.

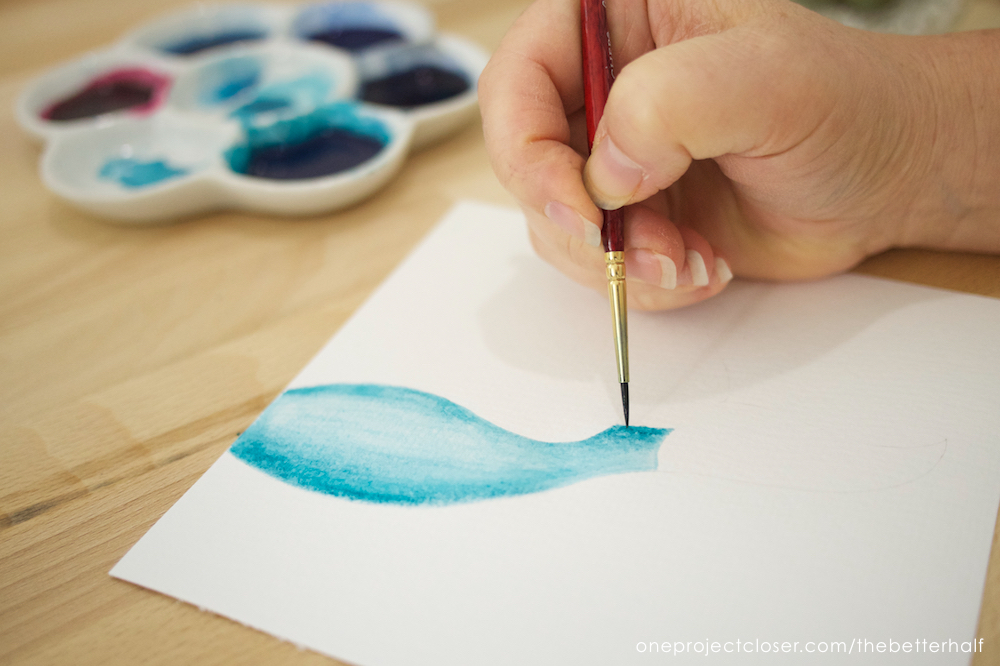
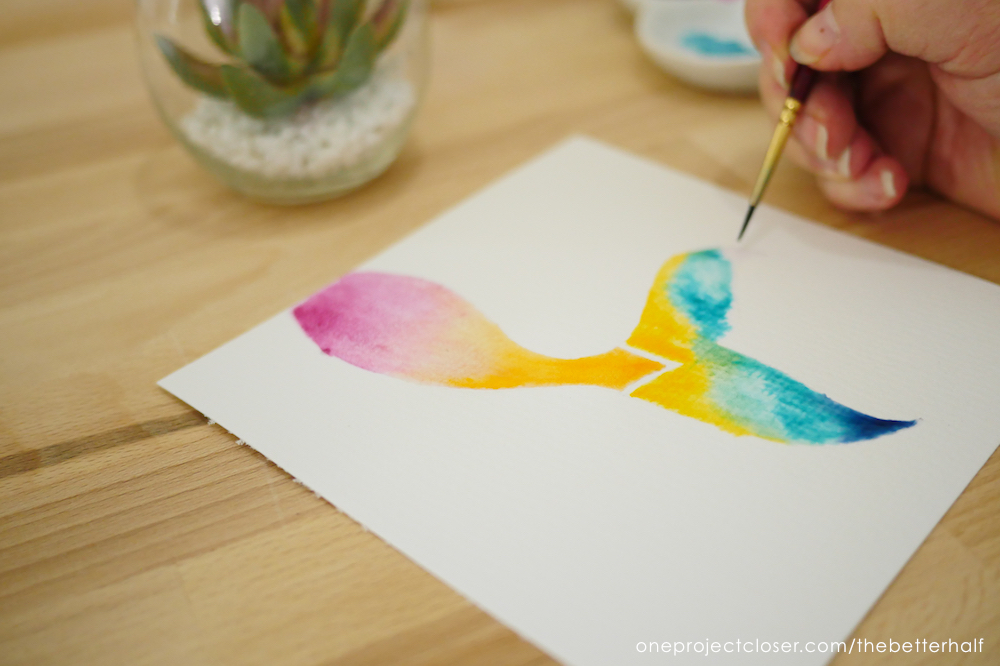
Starting at the top of the mermaid tail, create small half circles. The smaller your tail, the more difficult it will be to create color variation and, I think, its just slower in general because its a smaller canvas. Change the color and saturation from one half circle to the next. I sometimes clean my brush and sometimes allow the natural mixing of colors.
If painting a smaller tail, use a smaller brush, like a No. 1 watercolor. If painting a larger tale, use a No. 3 or 4 brush.
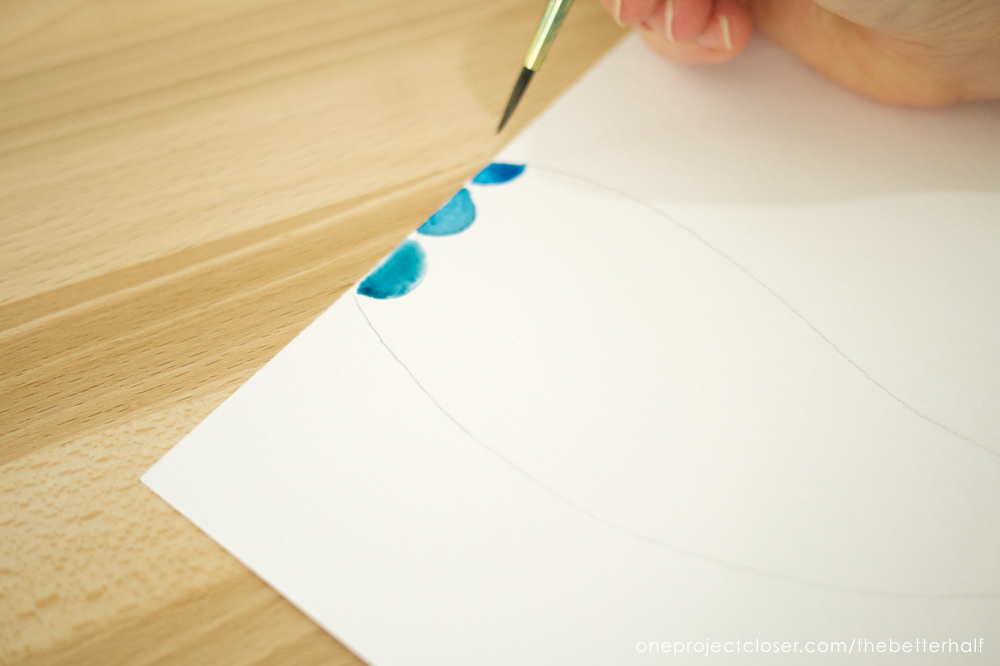
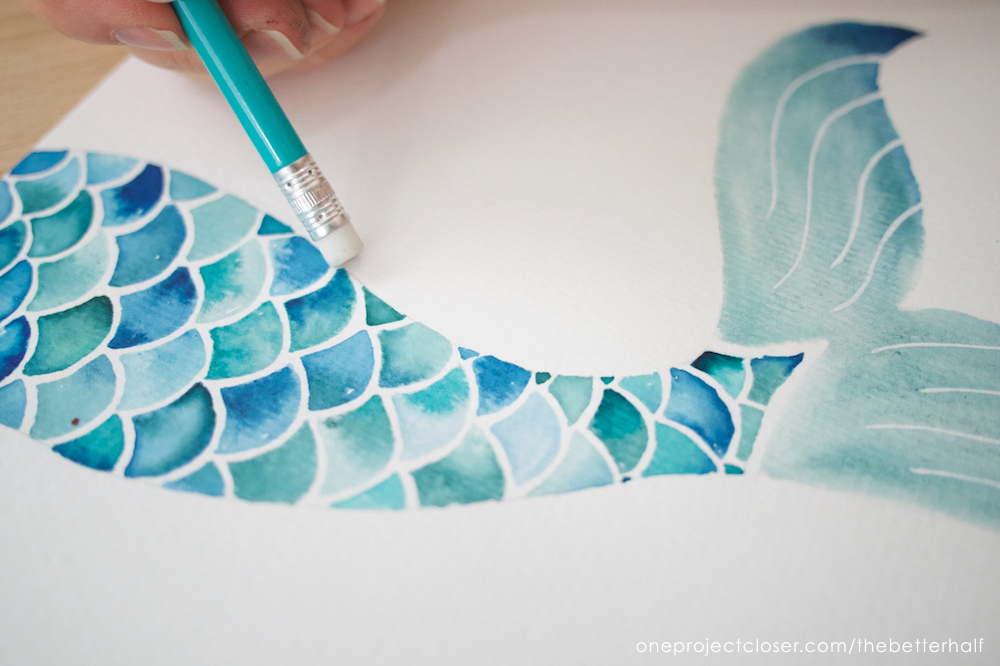
Starting with the second row, begin your half circle at the center of the circle above it and fill between it and the center of the half circle next to it. This creates a scale appearance.
Once I paint the scale, I go back and dab different colors into the scale or even just water to create color and texture within the scale. Don’t think too much about it.
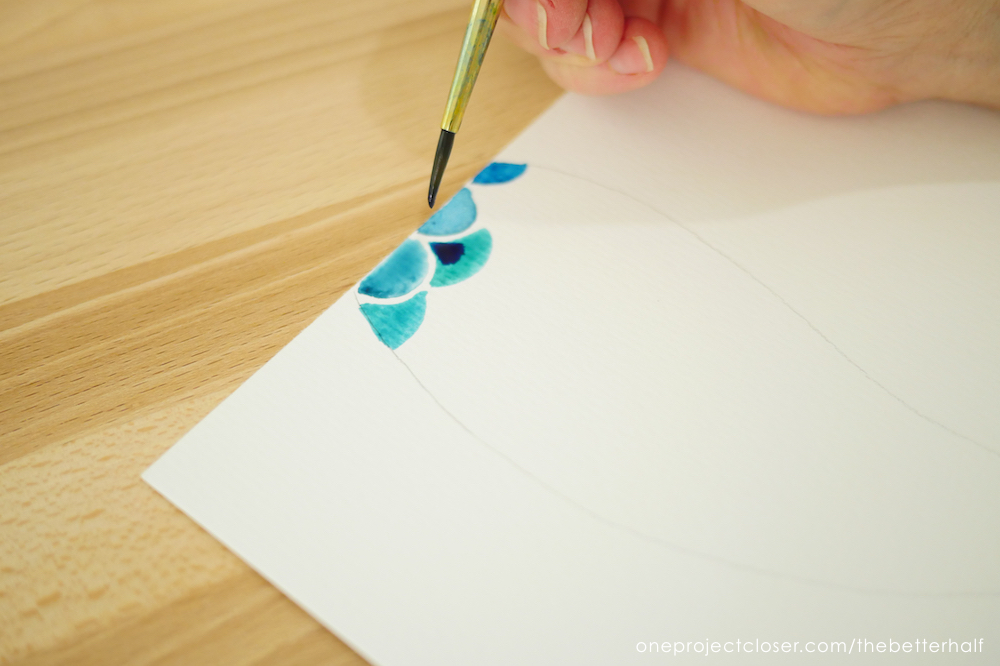
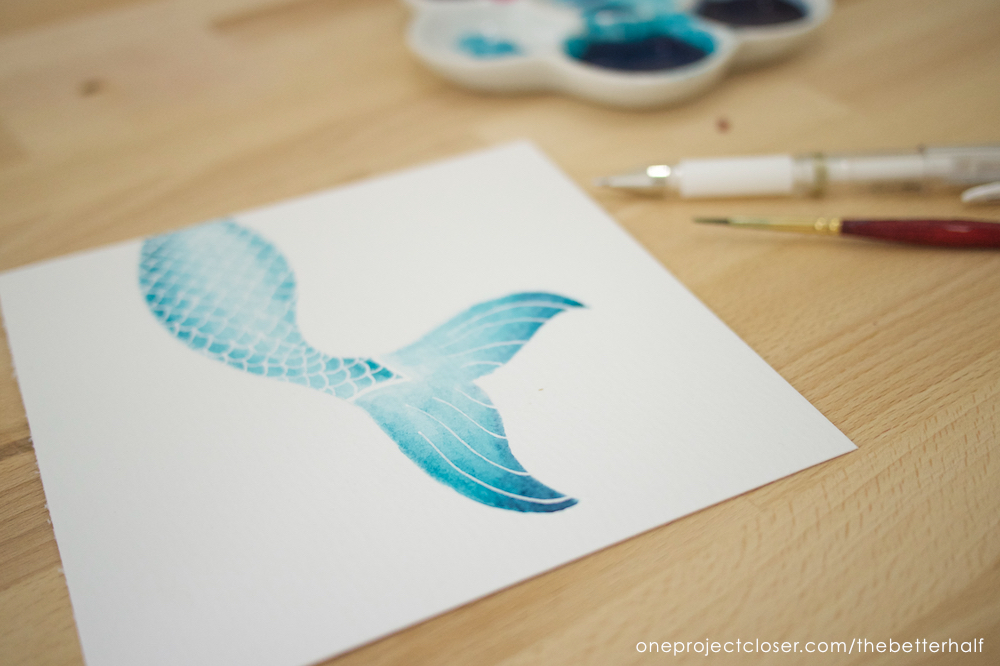
Continue painting scales until you reach the tail line. If there is a bend to your tail, slowly make the outside scales a little larger than the inside scales until your scales are aligned with the tail.
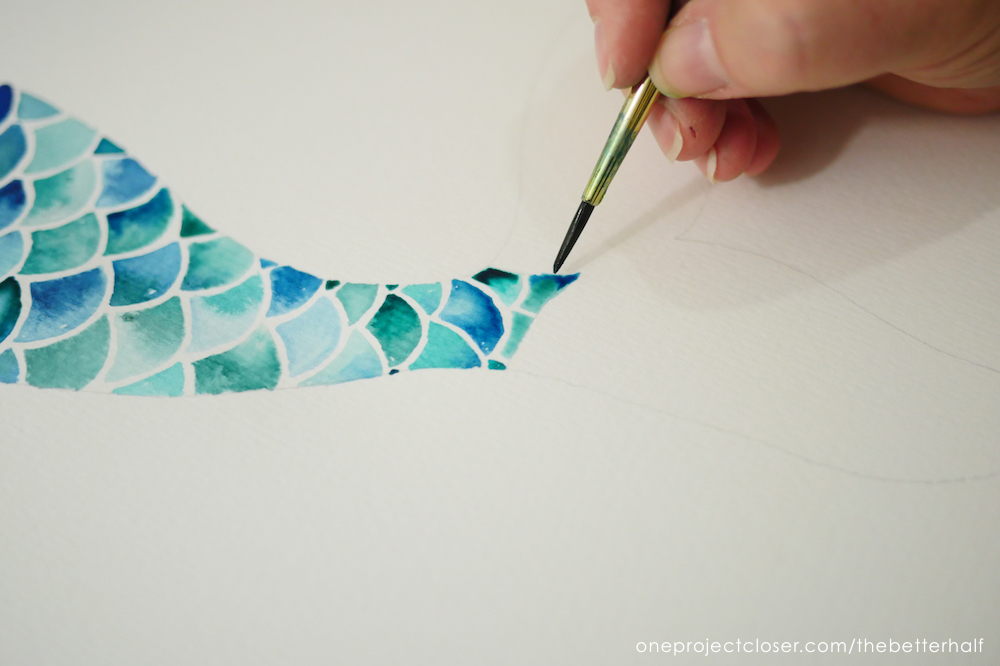
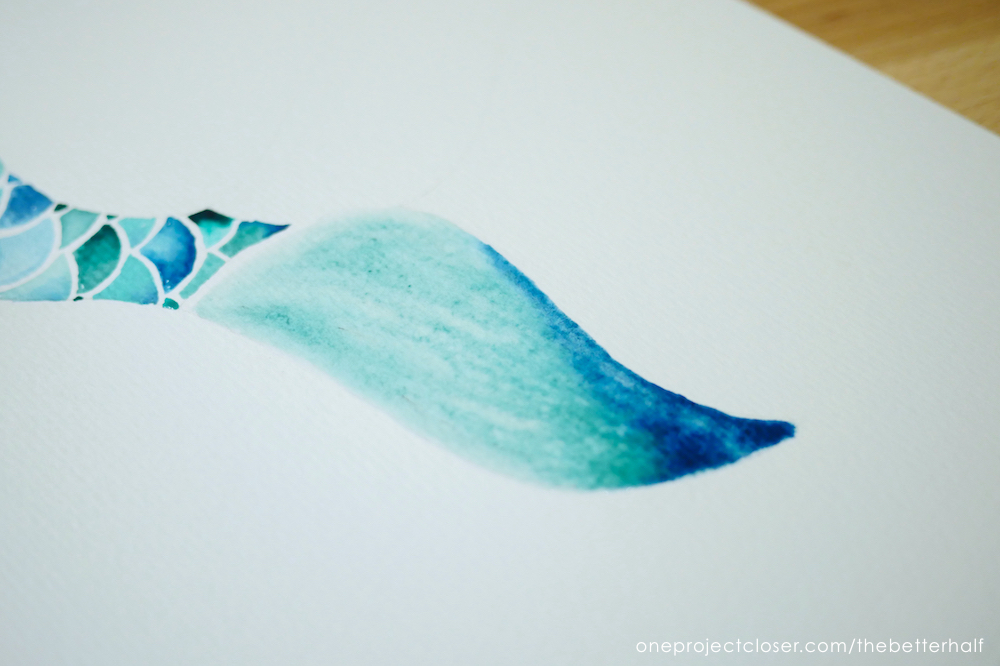
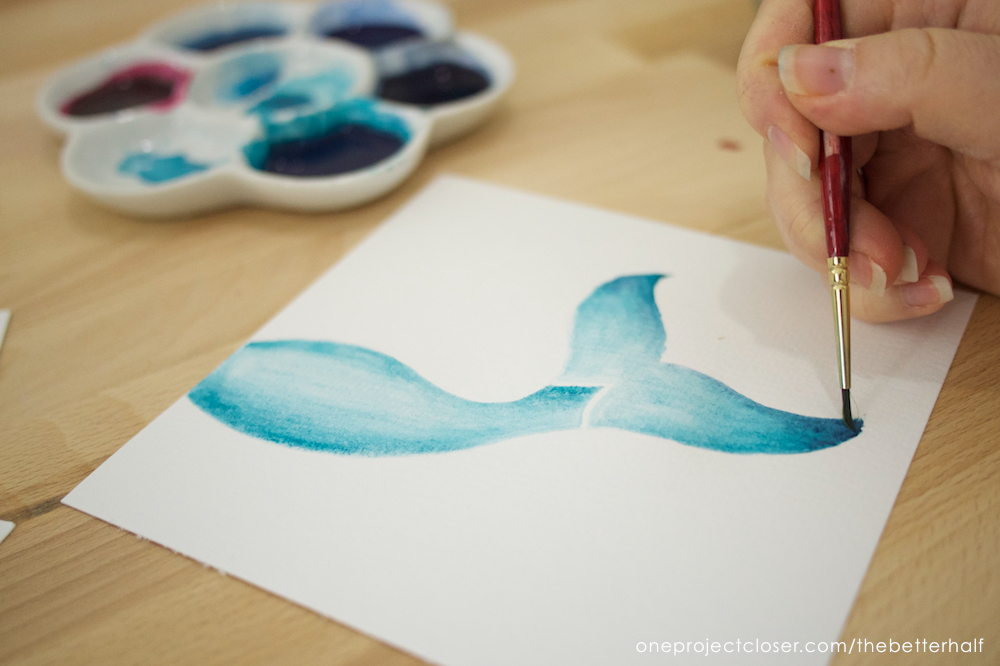
For the bottom of the tail, fill in your outline with water first. If its a larger tail, you may want to paint one side at a time.
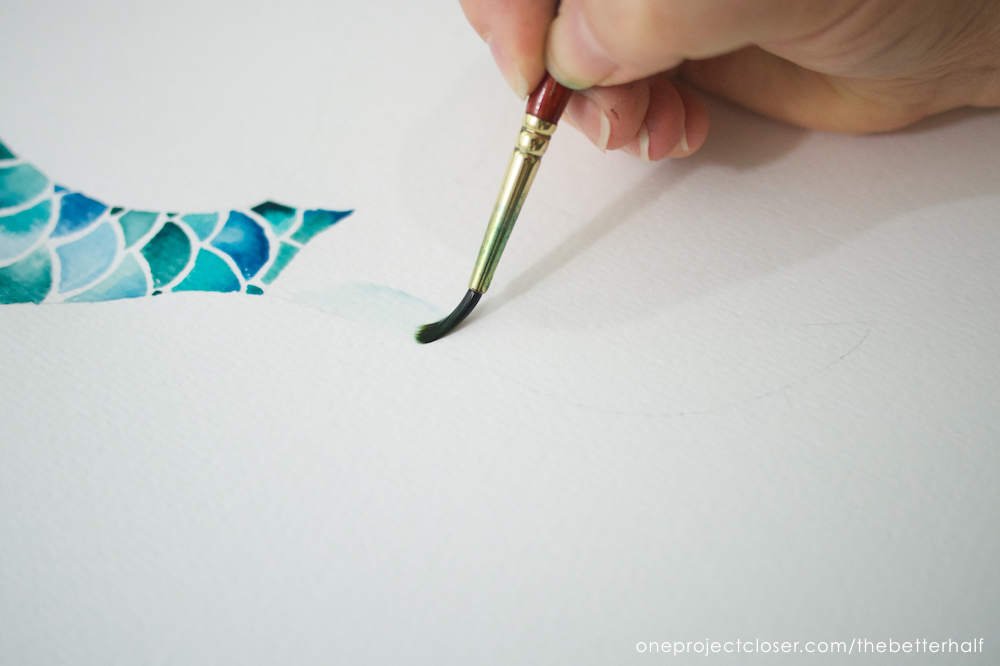
Then, fill in with a lighter shade of watercolor, quickly adding a deeper shade into the tips of the tail. If it is not as saturated as your would like, allow it to dry and repeat. If you are painting the sides of the tail separately, be sure to keep the connecting edge wet so you do not have a hard edge.
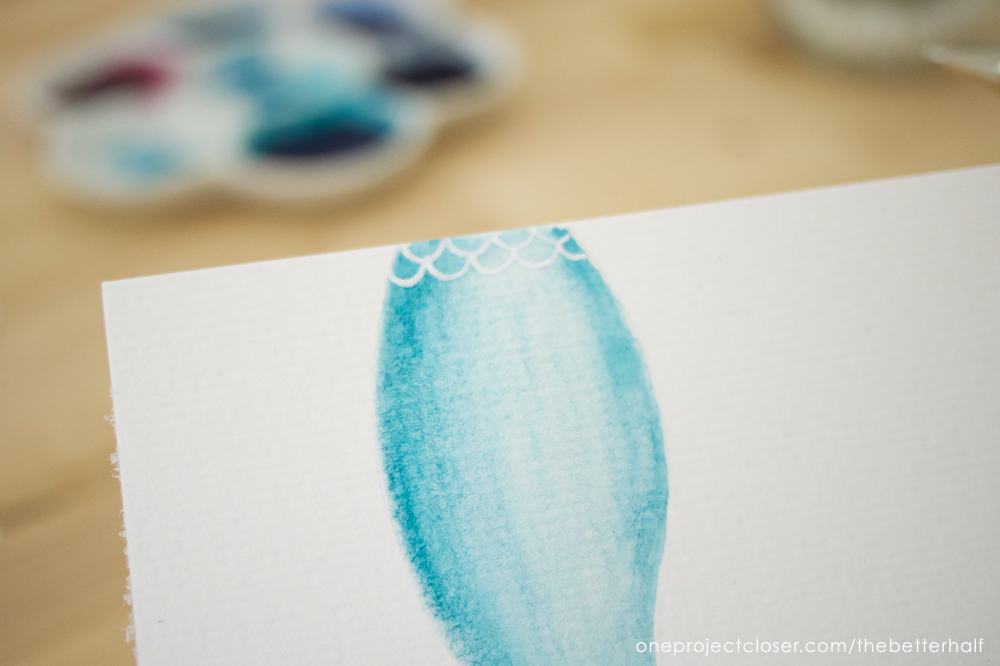
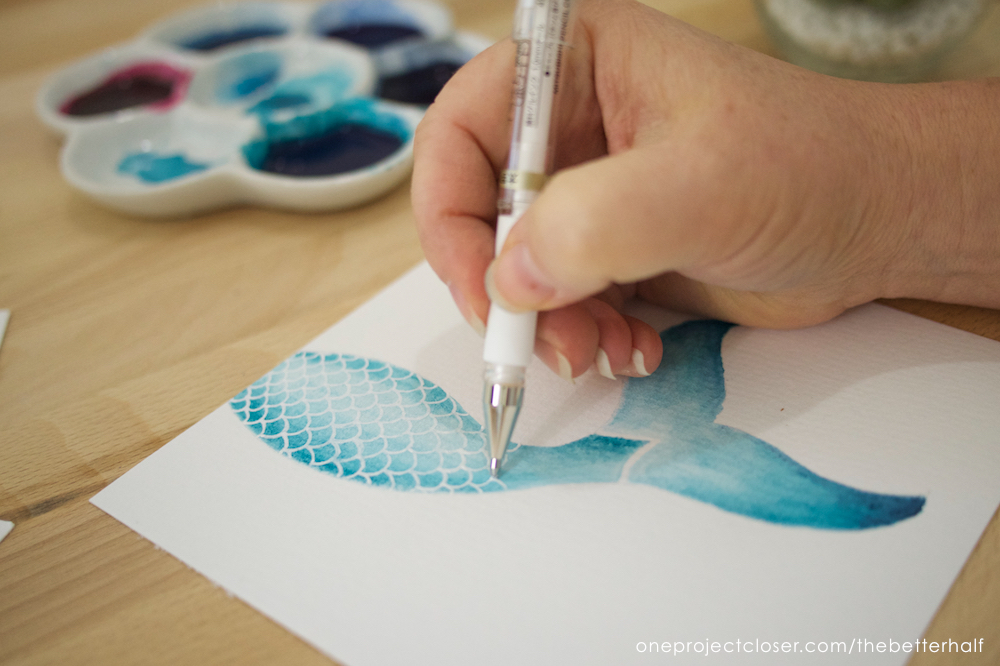
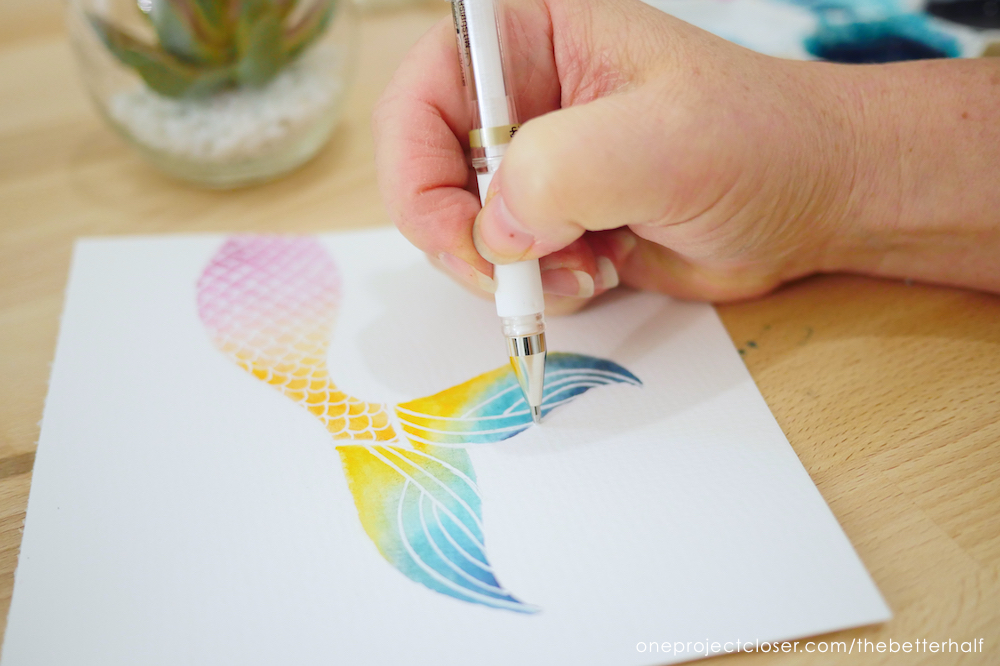
When completely dry, use a white jelly roll pen to fix any errors in the scales you may have made (I had a few of those) and draw lines onto the tail.
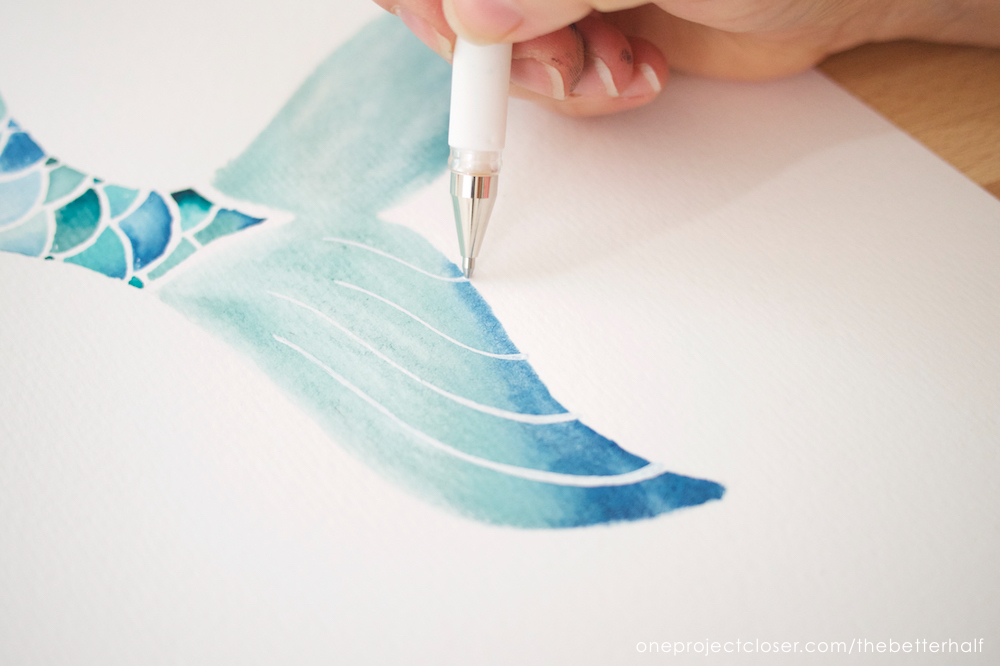
Erase any pencil lines that are remaining from the tail.
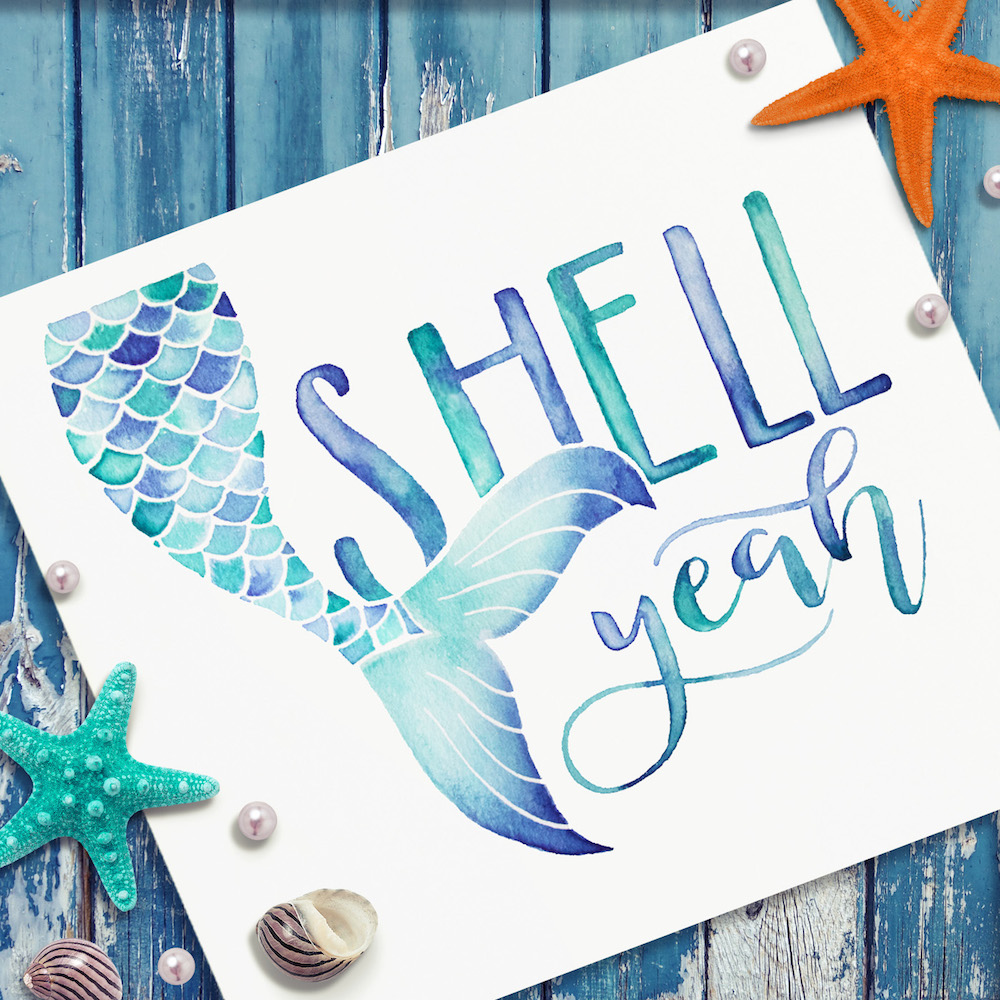
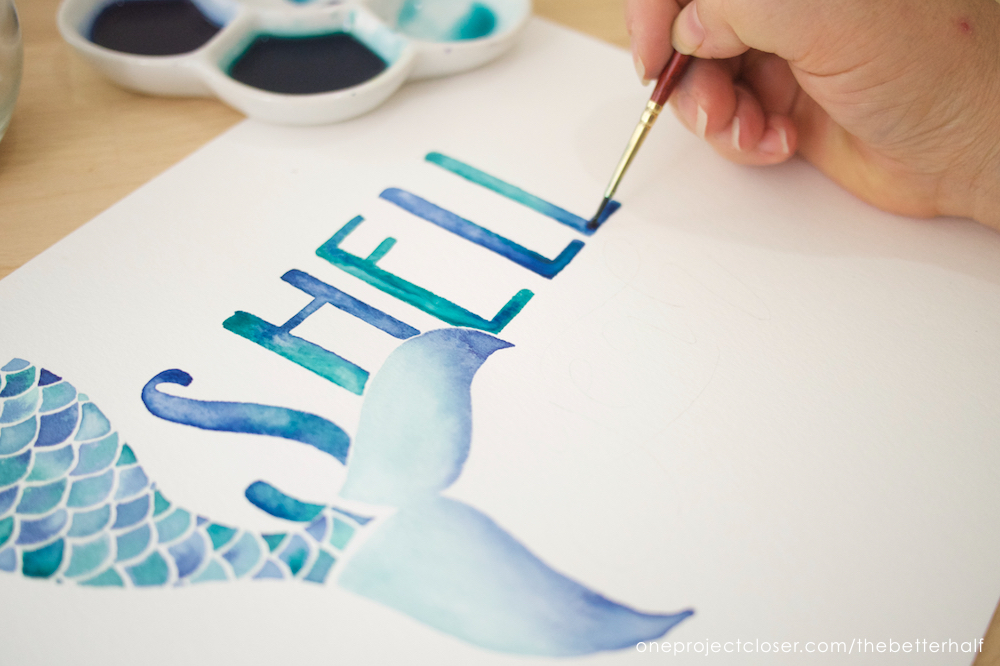
Finally, trace the “SHELL yeah” with your watercolor and brush, using a similar technique you used for the scales, changing colors and dabbing in other colors and water to create texture.
Do the scales seem a little overwhelming??? I have a two alternatives that are just as fun!
Single Color Watercolor Mermaid Tail
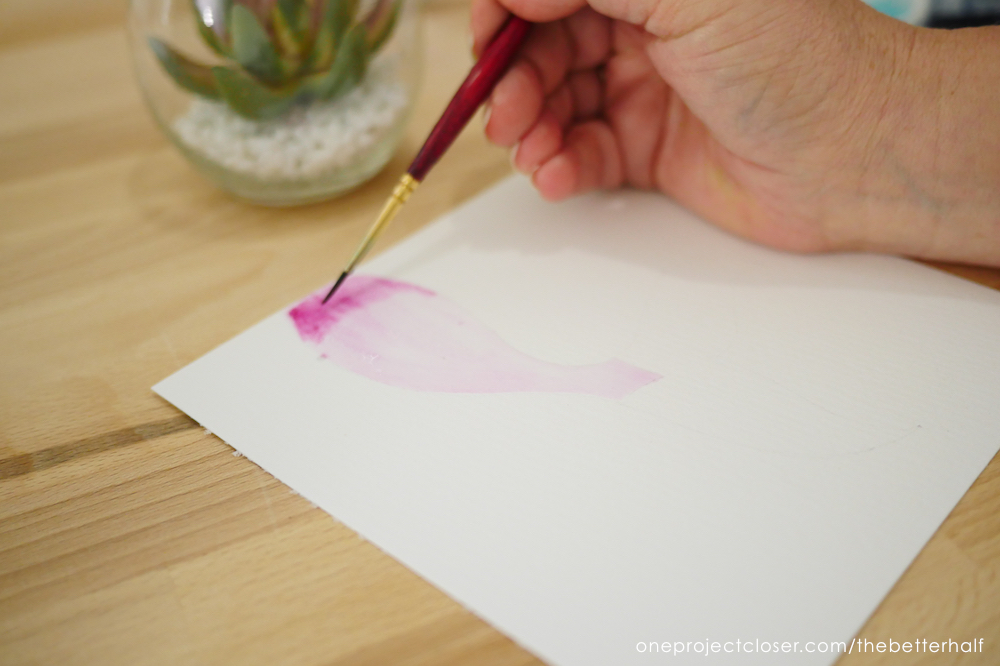
Sketch your design just as before (or trace), lightly erasing the lines until you can just see them. Next, fill in with water the top portion of the tail.
Then, starting at the outer edges, paint inward. If the outer edges are not dark enough, working quickly, add more paint to the outside.
Paint the tail as before.
Once completely dry, use your White Jelly roll pen to draw on the scales and details in the fin.
Rainbow Mermaid Tail
This is a slightly different version than the Single Color tail, but just as easy and uses the same concepts.
Again, after sketching your design, fill in the top half with water first. Then, add one color at the top, slowly painting about 1/3 to 1/2 down the tail. Go back and add more color to the top, if needed.
Then, using a color adjacent on the color wheel, add color starting at the bottom and work your way about 1/3 to 1/2 up on the tail. As you do this, you will be blending the two colors together in the middle, using more water than paint.
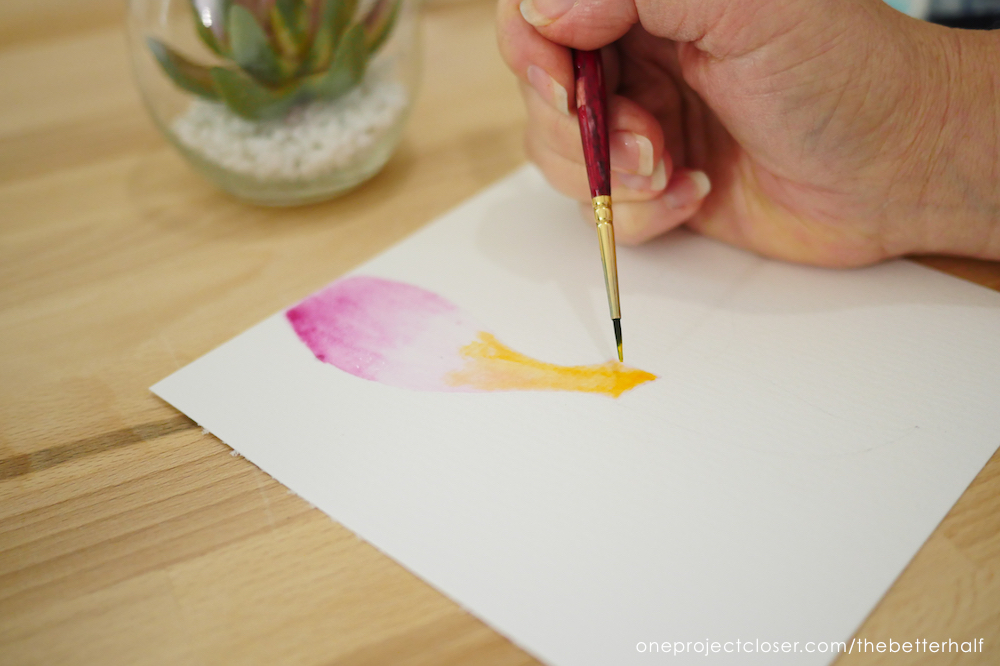
Work quickly and keep adding color until you are happy with the blend of the colors.
Use the same process for the tale, starting with water and using the same color as the bottom of the main tail (yellow) and the other adjacent color on the color wheel (in this case, blue/green).
Once completely dry, use the White Jelly Roll pen to add scales and texture to the fin. When dry, remember to erase any pencil marks remaining.
Free Shell Yeah Printable
All this just way too much work? Let me do the work for you! Download this free Shell Yeah printable here. This printable is for personal use only and may not be sold, altered, or claimed as your own.
If you love this printable, subscribe to my newsletter and also receive access to exclusive printables and SVGs!
More Mermaid Hand Lettering Tutorials + Printables
Like this? Make sure to hop around and check out the other FIVE mermaid themed hand lettering printables & tutorials below!
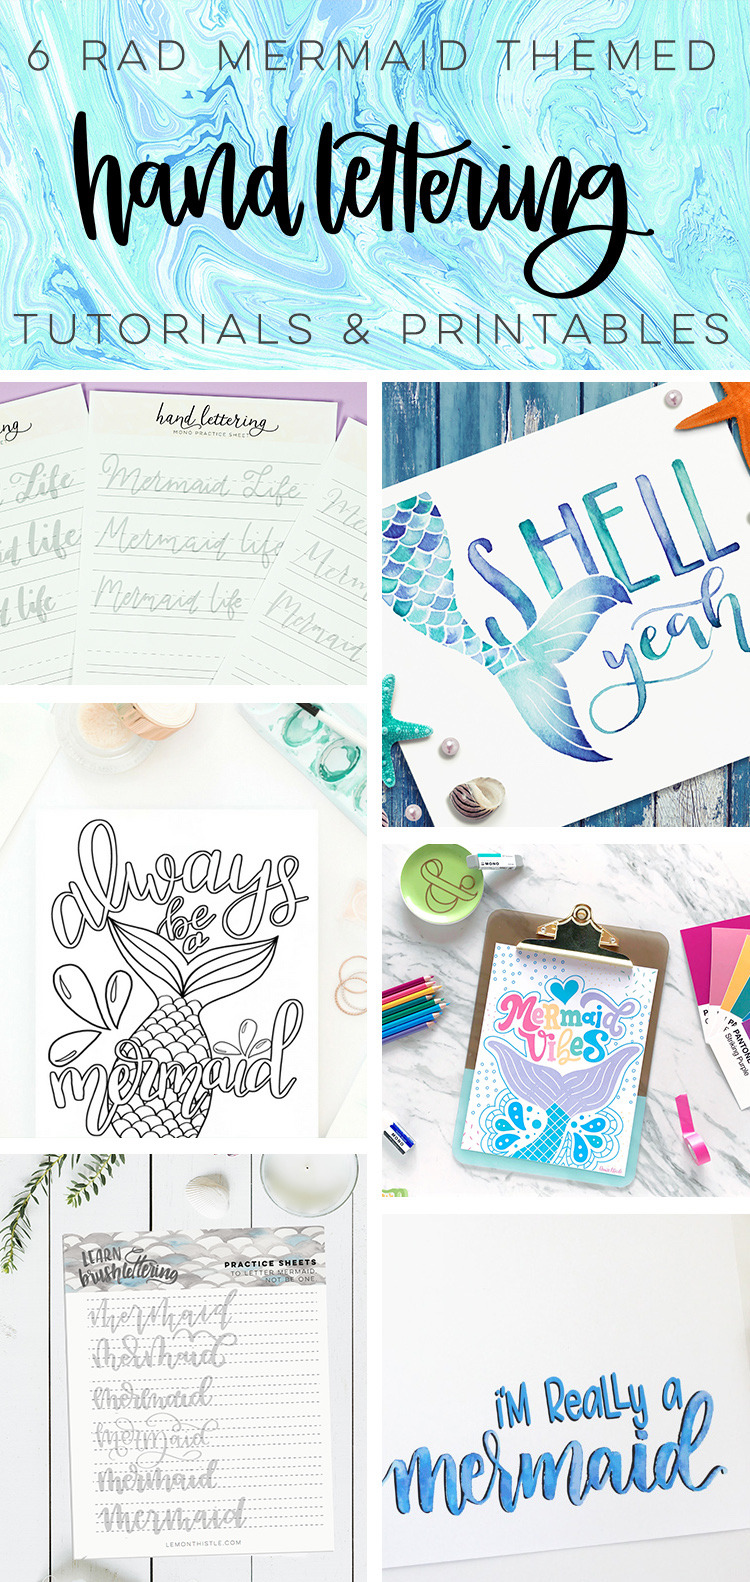
Left to right, top to bottom:
Mermaid Life Hand Lettering Practice Sheets – Printable Crush
Shell Yeah! Mermaid Tail Watercolour Tutorial – One Project Closer
Always Be a Mermaid Hand Lettered Coloring Sheet – Here Comes The Sun
Mermaid Vibes Hand Lettered Coloring Page – Dawn Nicole Designs
Mermaid Brush Lettering Practice Sheet – Lemon Thistle
I’m Really a Mermaid Free Printable – Liz on Call
Pin for Later
Love this project but don’t have time to paint right now? No problem! Pin this image to save for later and share with your friends!

Jocie Hagan
One Project Closer
Come say hi on Facebook, Instagram, & Pinterest!
Want to learn to hand letter and make amazing, personal decor for your home?
Learn now with Busy Girl’s Guide to Hand Lettering!
**Use the code HAPPY5OFF to get $5 off the course price**

Thank you. Excellent work
Can you give me an idea on how to do something like this on wood thank you
Love the great ideas. My 5yr old granddaughter and I will try a couple of these projects probably. She loves mermaids, the ocean and unicorns.