
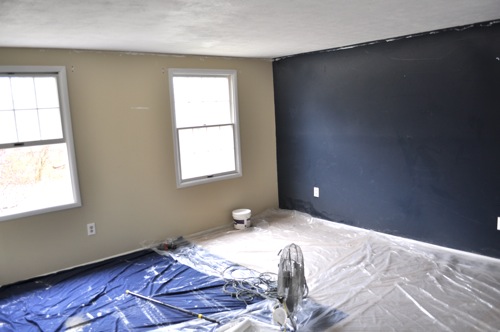
Last week I shared how SYLVANIA got in touch with us about participating in their Room Makeover Challenge. Today’s post will walk you through all the aspects of the bedroom remodel and how we tackled various challenges. To recap, we needed to address the stipple ceiling, paint every surface, install new outlets, light switch and black-out shades.
SYLVANIA sponsored the Room Makeover Challenge to remind everyone of how easy it can be to conduct a weekend room makeover, and consider how LED light bulbs can play a part. I can honestly recommend their A-line, 12watt LED as it puts out great light, has a tremendous lifespan and huge energy savings. LED’s are a significant investment, but, like one reader told me, you can slowly convert your house one bulb at a time. If you’d like to learn more about SYLVANIA, head over to their Facebook page. You can even enter to win great daily prizes, like a SYLVANIA LED Ultra light bulb. Entries also count towards the grand prize – a $1,000 gift card to Lowe’s!
Stipple Ceiling
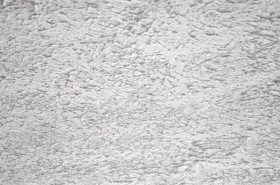
The first challenge we encountered was the stipple ceiling. Stipple ceiling is a textured ceiling resulting in a stalactite-like pattern. It’s common to find stipple ceilings in 30 year old houses as it was so easy for builders to apply. It made mudding over drywall very fast because you didn’t need to achieve a uniform, smooth finish before painting. While stipple is great for hiding defects, it also hides a lot of light. Removing a stipple ceiling eliminates the tiny shadows resulting in a room that feels bigger.
Not only is stipple ceiling not in vogue, there is a serious health concern. Many textured ceilings contain asbestos and it’s suggested that you can find it in homes built into the late 1980’s. Asbestos-based building products were banned in 1978, but contractors were allowed to exhaust their inventory before making the switch. If you plan on working on a stipple ceiling, take the time to send a sample to an asbestos testing lab. The risk is too great!
Fortunately, the stipple in this bedroom did not contain asbestos. Our method of removing a stipple ceiling is to sand down the stalactites. It doesn’t fully remove the texture but creates similar results. We used a Milwaukee random orbit sander to sand over the stipple. It creates a lot of dust and we made sure to use a mask and eye protection. Additionally, we setup a box-fan to pull air out the window. The sanding only took about 45 minutes and a handful of sanding pads.
Painting the Ceiling and Walls
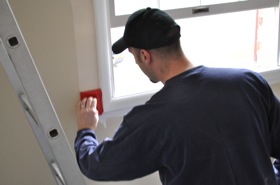
Next up we needed to paint the ceiling and walls. A fresh coat of paint is one of the easiest and cheapest ways to make a room look like new. I always encourage people to paint their ceilings white for two reasons- white ceilings make the room feel larger and it provides a baseline color for comparing the wall color. I also suggest painting the walls a neutral color as it’s much easier to swap out bold-colored accessories.
Before any paint job, you need to perform some prep. The right preparations will go a long way toward making sure you have a professional looking paint job. Many people have very strong feelings about the best brand of paint but I think a lot of problems can be avoided. Here are the steps you should take before starting to paint:
- Remove all the fixtures, wall-hangings and screws, outlet and switch covers from the walls
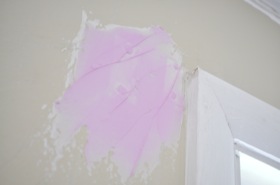
- Patch any holes, divots and rough patches on your walls.
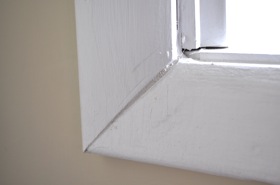
- Use wood filler on gaps in the trim work.
- Clean the walls to remove cobwebs and dust. This was especially important for our makeover as we had so much dust from sanding the ceiling. I used a sponge and two rinse buckets.
- Tape off areas like trim as needed.
- Prime over dark colors and drywall compound
We painted two coats of ceiling white to ensure very nook was covered. We painted the walls a khaki color and the trim white. I like to use an edger tool around the trim and ceiling. I know many people don’t like this method but it works well for me.
Replacing Outlets, Switches and Covers
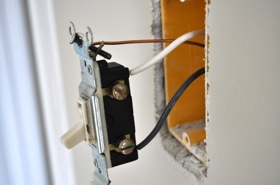
Another very easy and inexpensive way to freshen up a room is to swap in new outlets, switches and covers. Older homes often have off-white hardware and covers with rounded edges. We decided to install white receptacles, light switch and covers. Before performing any electrical work, flip the associated breaker and check to make sure outlets and switches are not powered. You can perform a simple test using a lamp.
You’ll often find push-in wire, electrical receptacles. These are very convenient and easy to install. There’s a small opening to release the wire and you simply push it into the new receptacle. Make sure you read the provided documents to understand the limitations on this type of outlet. For more information about home wiring, consider picking up a copy of Stanley Complete Wiring.
Installing Black-Out Shades
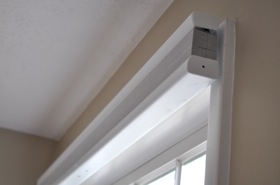
Room darkening shades are designed to block all or most outside light while light filtering shades permit a soft glow. We choose cellular, room-darkening shades that include a thin membrane inside each cell to block light. Lowes offers Levelor brand shades that can be trimmed to fit your windows but expect the trimmed edges to stick. Carefully expand each blind to prevent ripping. You can mount window treatments inside or outside the frame. With the older style of window, we needed an outside mount. Most manufacturers include a sort of universal mount so read the instructions carefully to ensure the proper orientation.
There you have our weekend makeover. All together, this project took about 25 man-hours to complete. It makes for long days, but you can complete everything in the course of a weekend.
This post is sponsored by SYLVANIA. We received a Lowes gift card for our participation, but the review and opinions are our own.


Good stuff! I was that reader who is progressing to LED bulbs one light at a time (can we say, One Bulb Closer?!). I followed your lead and “liked” the Sylvania FaceBook page, and a day or so later I received an email that I had won their Power Failure Light. It arrived by FedEx yesterday, and I’m thrilled with my freebie! Thanks for tipping me off!
Thank for the great tips about Sylvania, got any more home remodeling tips?
I’m looking forward to seeing how the room comes together! Is that a dark accent wall?
Wow can’t wait to see the finished product!
“Asbestos-based building products were banned in 1978, but contractors were allowed to exhaust their inventory before making the switch.”
Really!!!? I mean they knew what that stuff could do to ones lungs and yet they allowed it to be used because… well… they had it on hand? That angers me to no end! My Dad suffered from Asbestosis in the later part of his life due to working around it, not with it, during his years in the Army Air Corp and in construction so I do know what it can do to someone. I can’t imagine knowing that and yet allowing it to be used just because you have it on hand! Sad.