

Merry Christmas Eve!!! I am soooo excited for tomorrow! As I sit here and type, I’m listening to Christmas music cozied up in a warm sweater and blanket. Adding to the excitement, cold air has moved into Baltimore region and I’m really hoping for a WHITE CHRISTMAS!! …even if it’s just a dusting.
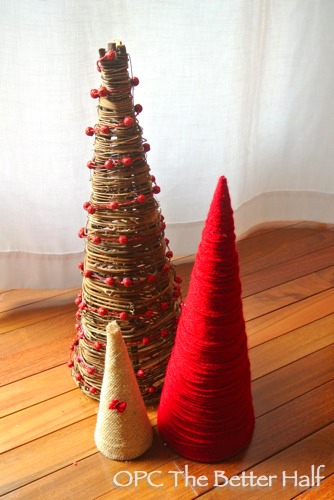
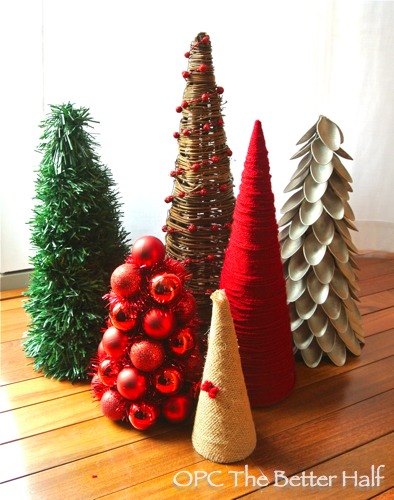
I realize I may have formed a Christmas Tree addiction at this point. But in my defense, I made more trees because Kim said she could use some Christmas decor for her new mantel. haha Although now that I have made them, we may have to switch decorations year to year because I really love these trees!
These trees would make for wonderful last-minute and CHEAP Christmas decor or table centerpieces.
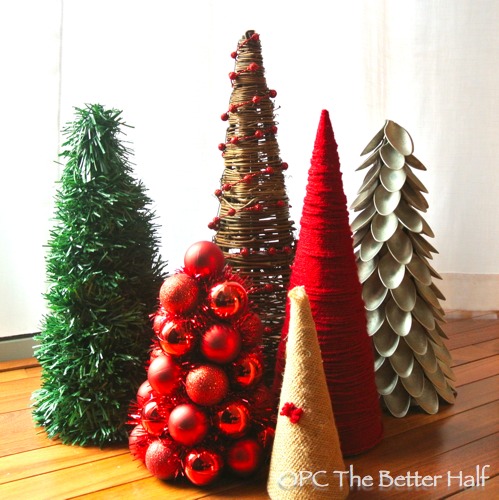
They were soooo easy, it feels embarrassing posting about (I know, I’ve said that before), but here ya go!
Stick and Glitter Tree
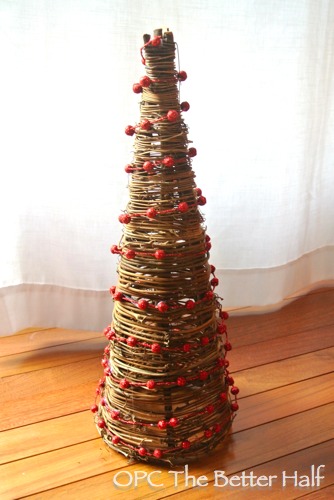
I like to call this tree “Rustic Fab” because it brings together the rough, outdoors look of the sticks with a pop of glittery festiveness! This one of favorite trees, second to the Plastic Spoon Tree.
Materials:
- Stick Christmas Tree
- Glitter Ball Garland
- Hot Glue
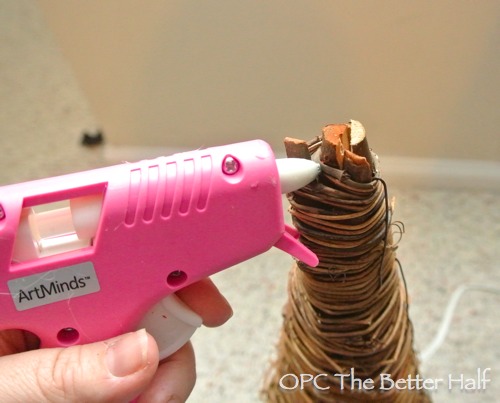
I found this Christmas tree form made of sticks from Hobby Lobby for $7.99 but it was 50% off. Then I bought some garland with little glittery red balls on it for $3.99, but again, it was 50% off. So in total, I spent $6 on this tree, which is a GREAT price since it is so tall and beautiful!
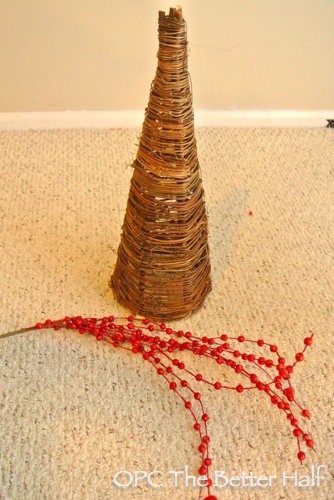
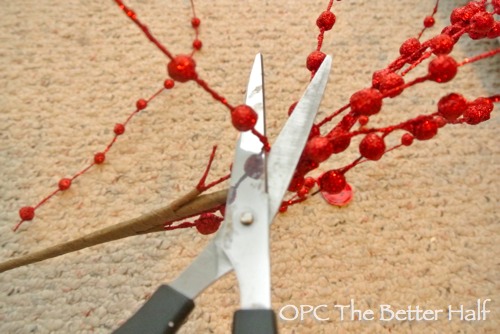
I originally was going to cut the balls off the garland (no, I’m not a man-hater) and glue them to the tree, but then changed my mind and cut the garland off at the bottom so they were a series of singular strands.
After letting my hot glue gun heat up, I started by gluing the end of one strand of garland to the top of the tree.
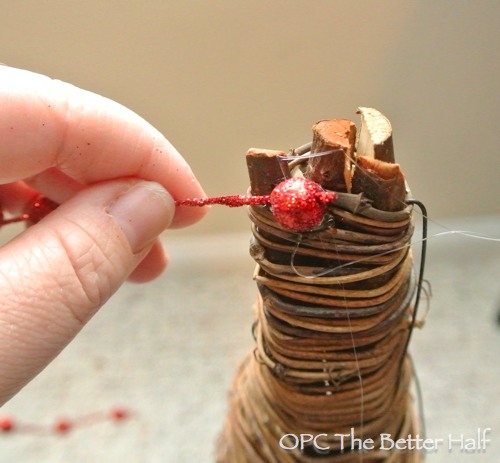
Once the glue was dry, I wound the strand around the tree, working my way downward. At the end of the strand, I glued the last ball to the tree, gluing only the beginning and end of the strand.
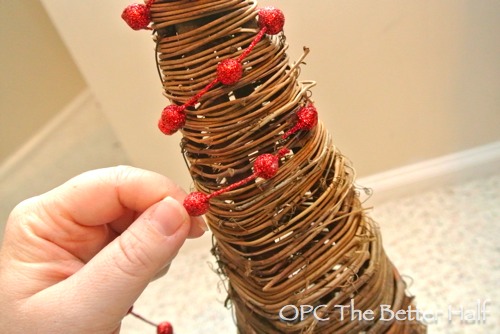
Once the glue was cool, I grabbed another strand of garland and lined it up with the end of the previous strand, and repeated the process.
I kept on doing that until I was at the bottom of the tree. It really was that easy!
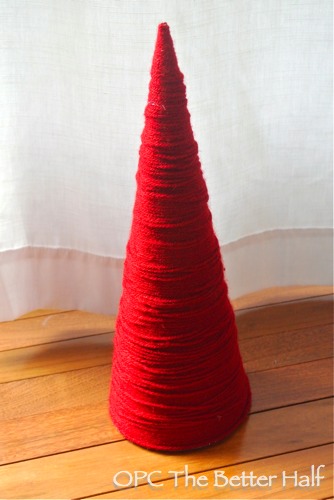
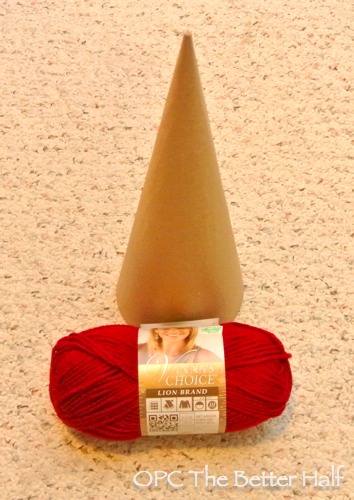
Yarn Tree
I have seen yarn trees ALL OVER the blogs and pinterest this year. They are quick, easy, and cheap. Plus they look great in lots of different colors! I thought a yarn tree would be a great way to accentuate the red glitter garland on the stick tree and still be somewhat casual. On its own, it’s not very impressive, but it is really beautiful along with the other trees.
Materials:
- Yarn
- Cardboard Tree Form
- Hot Glue
I bought this cardboard tree form several weeks ago from Michael’s in their seasonal crafts section. I think I only spent a dollar or two on this large one and less than that for the smaller size. I then bought the yarn at Hobby Lobby for $2.50 (on sale). In all, it cost about $5, but I had a TON of yarn left over for some future craft.
At first, I tried wrapping the yarn from the bottom up and the yarn kept sliding up. ARGH!
So I started again from the top, hot gluing periodically to keep the yarn from sliding up still. It worked really well, but if I had to do it over, I may have used a slow drying glue underneath all of the yarn to keep in permanently in place.
Burlap Tree
This was by far the quickest tree and, besides the cardboard tree form, I used all materials I had on hand. If I had to do it over again, I may have done a larger tree in burlap roses like Sheila from Plum Doodles.
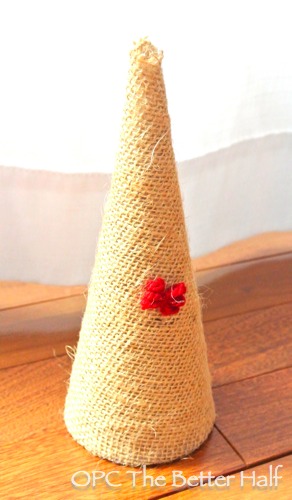
Materials:
- Cardboard Christmas Tree Form
- Burlap
- Yarn
- Hot Glue
Another super easy tree, don’t laugh at me. But it is a super cute little tree. I love its simplicity and how it ties to two other trees together. I spent maybe $1 on the cardboard form at Michael’s and then used a small bit of leftover burlap and yarn from previous projects.
First, I placed a bead of hot glue dow the back seam of the cardboard tree and then placed one edge of the burlap along it.
When the glue was dry, I cut off any fraying hanging off the hot glue.
Then I wrapped the burlap around the tree and glued it on top of the other bead of hot glue. Once dry, I cut off any excess.
It looked a little plain with just the burlap so I made a little mini bow using yarn and a fork.
Wishing you a very Merry Christmas filled with love, peace, and family!


I’m glad I wasn’t drinking my morning cola (yeah, no coffee for me)- I probably would have spewed it everywhere after reading the man-hater comment- ha! All your trees are adorable- thanks for some great ideas and an unexpected laugh this morning! Oh, and thank you for mentioning my burlap roses topiary. Have a wonderful Christmas! 🙂
These new ones look great! I love how you have included where you found materials and how much you spent. I really like the stick tree with garland1
What an adorable little forest your have made Josie!
I tried SO HARD to find those blasted cardboard cones!!! I looked at about 6 different craft stores and couldn’t find them. I wanted to make some trees so badly too! Guess I’ll have to start even earlier this year to find them.
I found some stryofoam cones at the $ tree. Love the spoon tree!