
 This week’s Before and After is brought to you by Melanie in Richmond. Melanie didn’t leave a blog address with her submission, so we’re not sure whether she has a blog or not. But, when you see her Before and After story below, I’m sure you’ll agree she should have one if she doesn’t already. (Apparently there are actually folks who work on their homes and don’t blog about it–shocking!)
Melanie’s Before and After is a superb restoration of rustic wood floors in her Richmond, VA Rowhome. The result is a beautiful floor with a lot of character. It’s a bold design move, and one that paid off.
As a result of her submission, Melanie is automatically entered into our contest for a $50 home improvement gift card. And, as always, OPC will make a $25 donation to Habitat for Humanity in her honor.
Continue reading below Melanie’s post for this week’s Habitat Quick Fact, and a link where you can financially contribute to Habitat or locate a local affiliate where you can volunteer.
Rustic Wood Floor Restoration by Melanie
So about three months ago Kris and I decided to test what was under our black and white checkered vinyl kitchen floor. I didn’t mind the look of our kitchen, other than it being kind of mini and not having any drawers. I like my original wood cabinets and the Formica countertop….. But I really didn’t like the floors. So, we did some investigating and this is what we uncovered.
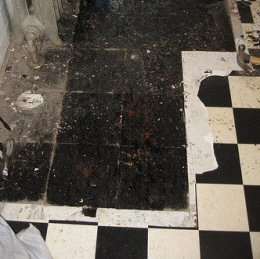
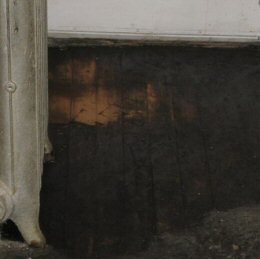
Underneath the black and white vinyl was red and white checkered linoleum tiles. These things took us (Kris) a few days to chip away at, which exposed this black tar…..also known as cutback adhesive. We tried tons of adhesive removers, all unfortunately pretty harsh since the safer methods we heard about just weren’t cutting it. After about a month of working on small sections each night after work and living with plastic on our floors we got as much of it up as we could. We were also simultaneously demo-ing our existing basement stairs and pantry, having new ones built by our green builder friends at New Earth and creating a 5 ft. opening between our kitchen and pantry.
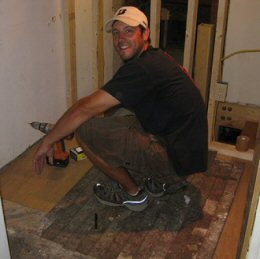
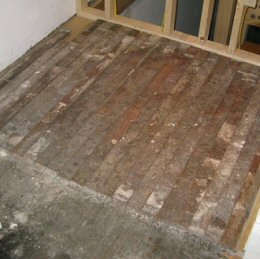
After as much of the cutback was off as we could handle and the “new” floor was in place, it was time to rent the floor sander. I believe we needed a drum sander for this amount of adhesive, but the man at Home Depot suggested an orbit sander, called U-Sand-It. It took driving back, buying lots more sand paper and extending our contract from 4 hours to 24 hours…..but eventually we got it to a point we were happy with.
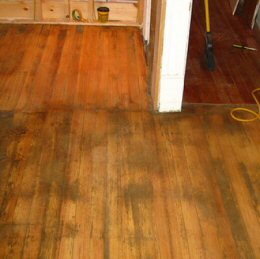
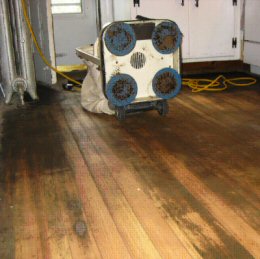
Some of the black marks from the adhesive….or possibly water damage (who knows, the floor is 90 years old) didn’t come off, but hey, if we wanted a new looking floor we could have bought one! Next was time to finish it off!
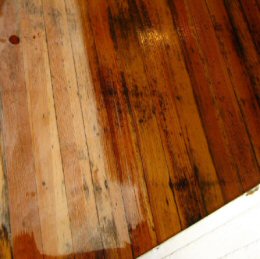

We used an oil based semi gloss polyurethane because that is what is on the rest of the floors and we have liked it so far. The first coat, by recommendation of my dad, we cut with half paint thinner. It made it easy to get used to applying the finish with the wool mop head that Home Depot suggested, and then we progressively used less paint thinner in each coat until the fourth and final coat was all polyurethane. This is how is looked before drying….it is not this shiny at all anymore and we love it!
Thanks from OPC!
Melanie, thanks so much for submitting your article to our Before and After event… Your rustic floors are great… quite a restoration!
Habitat Quick Fact
One of Habitat’s most lauded strengths is that they do not merely provide hand-outs in communities. They engage the community; each Habitat house is built by and for partners within their program. From Habitat’s web site:
How does [Habitat] work?
Through volunteer labor and donations of money and materials, Habitat builds and rehabilitates simple, decent houses with the help of the homeowner (partner) families. Habitat houses are sold to partner families at no profit and financed with affordable loans. The homeowners’ monthly mortgage payments are used to build still more Habitat houses.Habitat is not a giveaway program. In addition to a down payment and the monthly mortgage payments, homeowners invest hundreds of hours of their own labor — sweat equity — into building their Habitat house and the houses of others.
To read more general facts about Habitat, visit their Frequently Asked Questions page.
If you’re inspired by Habitat’s mission as much as we are, please consider giving financially. You could match our $25 donation today. Just follow this link to Habitat’s online donation page.
If you did give to Habitat this Summer, either because of this program or for any reason, please let us know so we can honor you in an upcoming article.
How Can I Submit an Article?
There’s plenty of weeks left this Summer and more room for articles. If you have a Before and After project that you’ve finished, consider submitting it! Odds are, you’ll get picked, make a difference for a Habitat homeowner, and have a chance to win the $50 gift card.
Submit articles to oneprojectcloser@gmail.com.
What do you think? Have you ever restored original hardwoods? Leave Melanie a note and let her know what you think!


FYI on future projects–that black stuff you spent so long chipping away at very likely had asbestos in it. take precautions next time.
I, too, ran into that “black” stuff when remodeling my basement. I removed two layers of old tile and the bottom layer that was attached to the concrete had this black stuff that looked like tar. I wasn’t sure what it was, and still don’t know. Anyway, it is a bear to remove. The product “Oops” that you can get at a hardware store does take it off.
While restoring wood floors can be a great project to take on there are a couple of points to consider.
I agree with aa on that because asbestos is something you want to avoid at all costs if possible.
There are some engineered hand scraped that you can glue or nail down that are pre finished and a lot of the messy labor is avoided.
These products come with a warranty and they go together quite easy in most cases.
We are in the middle of a similar renovating project. If you boil water, then apply some to the exposed adhesive and it softens it, it’s not true cutback and has no asbestos.
Even if it was true cutback, the risk of asbestos exposure is minimal. Plus, a new floor costs $$$ and is tougher on the environment. I salute your hard efforts here.