

Thank you so much for joining us at One Project Closer for this tutorial on how to make a Simple DIY Star Wars Chalkboard Art Wall. This post is sponsored by the Home Depot Prospective Campaign. Post may also contain affiliate links. Opinions (and typos) are 100% our own, and we appreciate you supporting our site in order to continue to provide free content to our readers.
Difficulty Level: Easy
Materials Needed:
- Chalk
- Chalkboard Paint
- Paint Roller + paint supplies
- Star Wars Prints, Unframed
- 19 feet of 1×2″ pine board,
Tools Needed:
- Bosch Laser Distance Measurer
- Bosch Self Leveling Cross Line Laser
- Brad Nailer
- Miter Saw
- Tape Measure
Be sure to check out our amazing Home Depot Coupons before you buy to save yourself some money!
Bedroom Before!
When we first moved into our home five years ago, our oldest daughter, Isabella had this bedroom and we didn’t do too much with the room. But then, two years ago, we played musical bedrooms and moved my office upstairs from the basement. Lucy moved into this room. While we didn’t do much with decorating, Ethan built her a new loft bed.

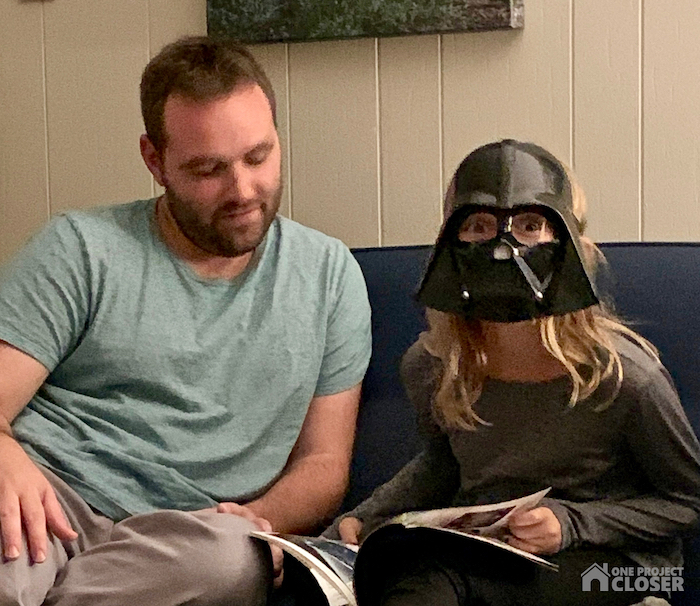
In the past 9 months or so, Lucy has started reading and listening to the Star Wars books, and then we watched all the movies in the past 2 months as a family. To say she loves Star Wars and Darth Vader is an understatement. Her love grew exponentially when gifted a Darth Vader mask from her “Uncle JJ” (good family friend) – this is the two of them reading Star Wars books together.
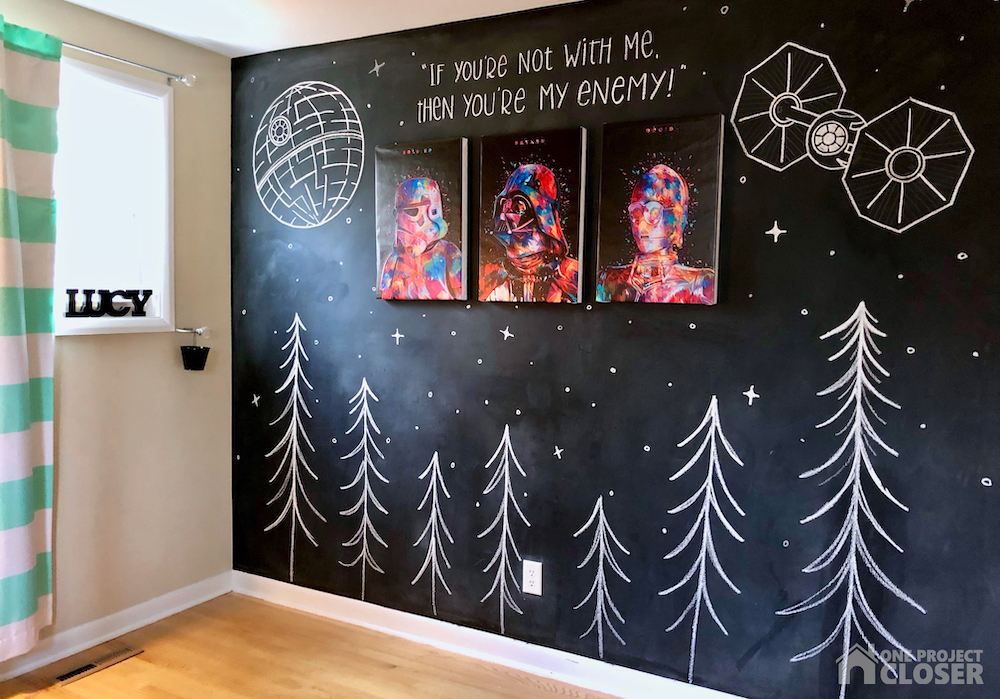
This is really the first time she has really had a specific enough interest to give her room a theme. She’s been wanting an all black room, which gives me nightmares about painting over one day, but I agreed to making one of the walls a chalkboard wall. Eventually, I’ll also be sewing curtains to go under her loft bed that are Darth Vader sugar skulls. She is a total badd ass, right?
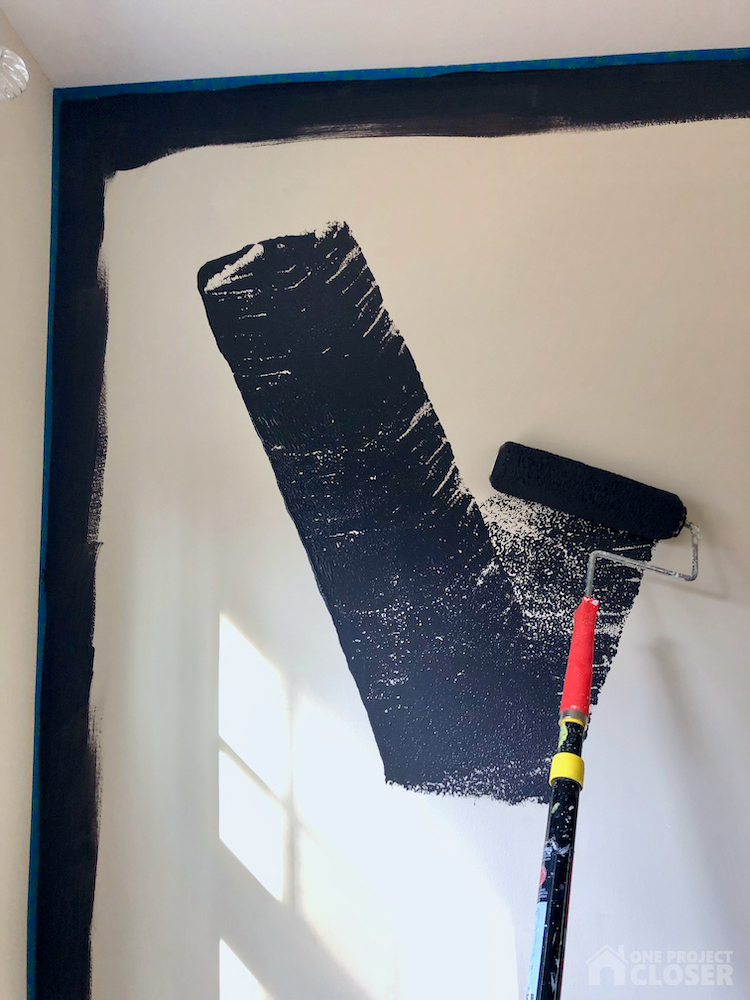
STEP ONE: PAINT
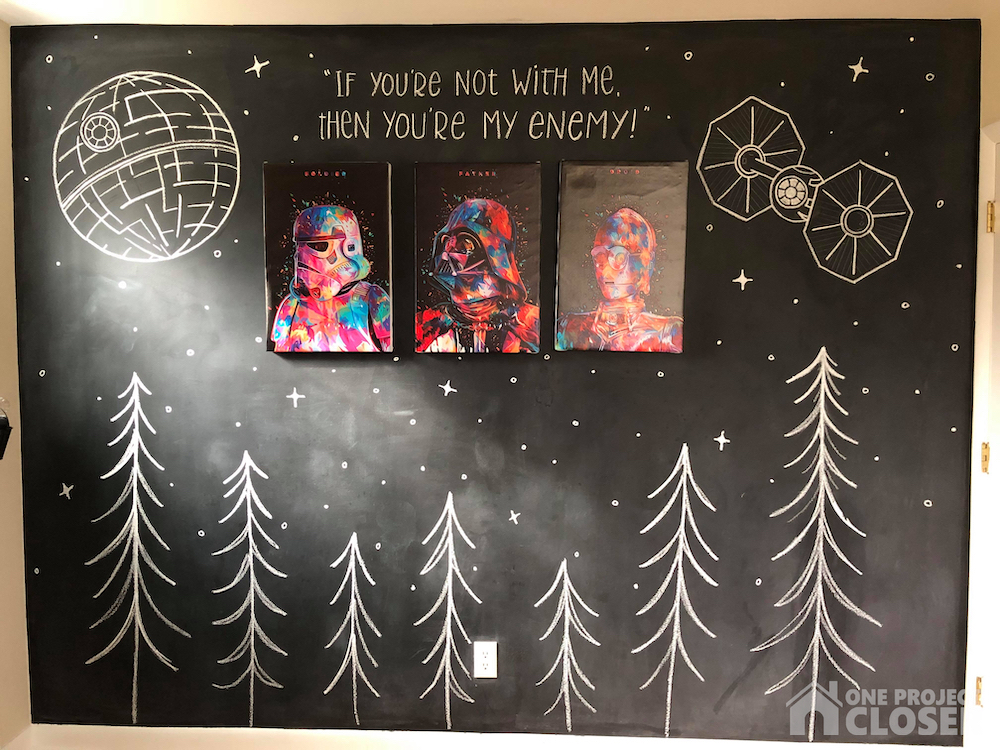
Painting the chalkboard wall was quick and easy, but took two good coats, meaning two quarts of paint. I made sure to prep and lightly sand the walls so the paint would be smooth. Follow the directions on the can, but I waited for the paint to cure a couple days, then covered the wall in a light layer of chalk, and then erased it with a clean cloth. This helps the chalk erase better.
STEP TWO: CANVASES
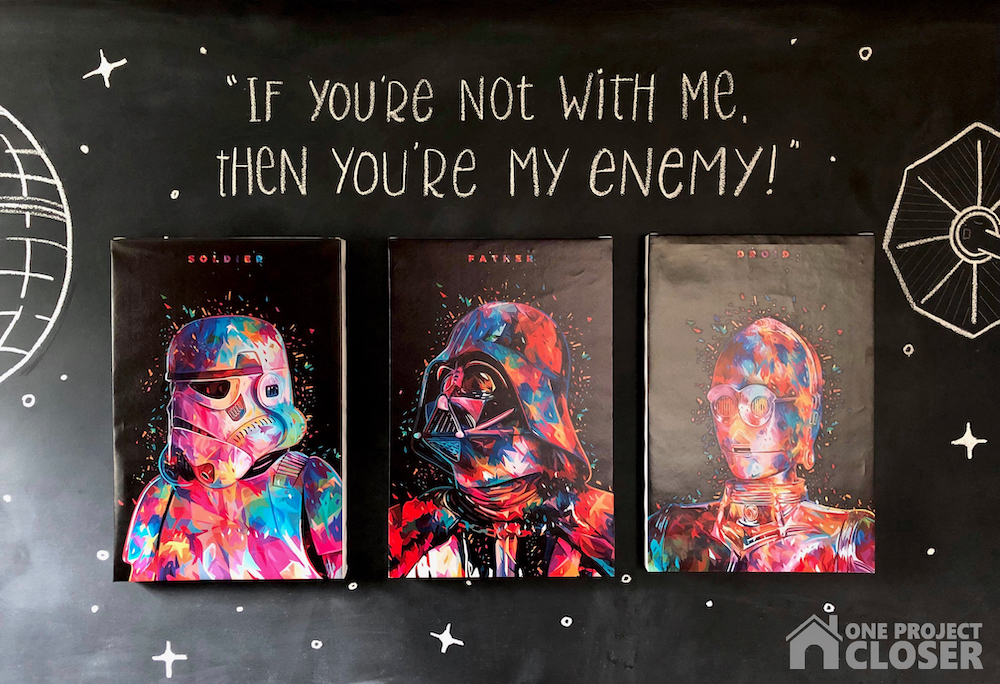
While the chalk art is the big attraction, I also wanted to add some color to the call, to tie it to the teal in the curtains. I found these canvas prints on Wish.com for cheap, and ordered them in the biggest size they had. They ended up sending th wrong size (16×22) so my money was refunded! Great customer service, and while I was disappointed they were smaller than desired, I was happy for my almost free art. Also, these ship from overseas, so expect to wait a month.
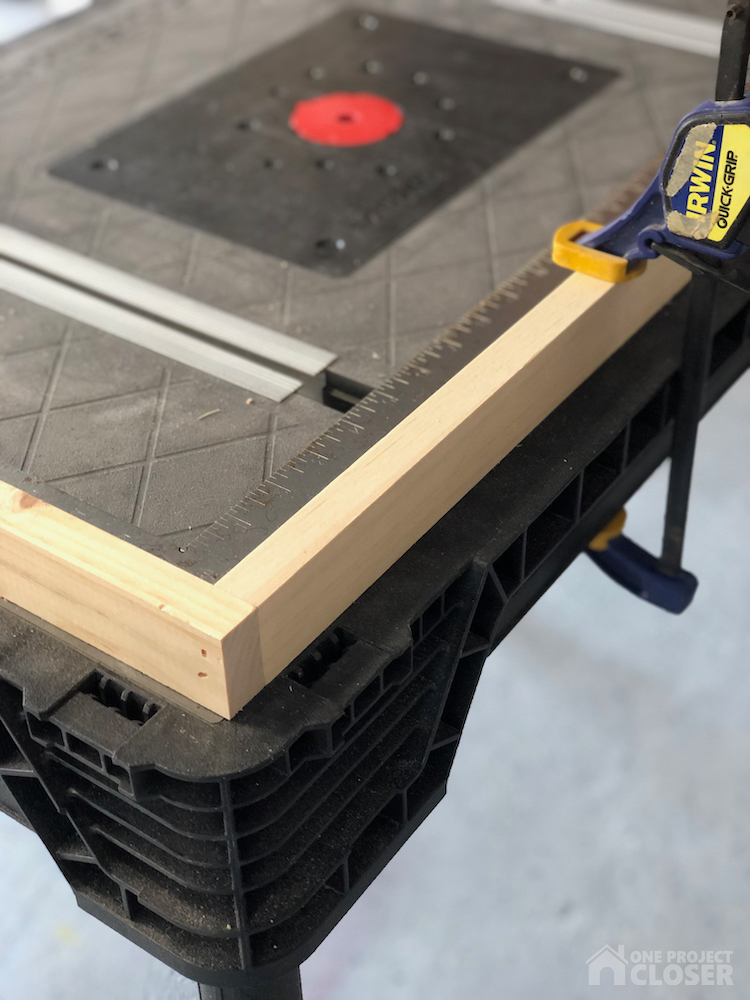
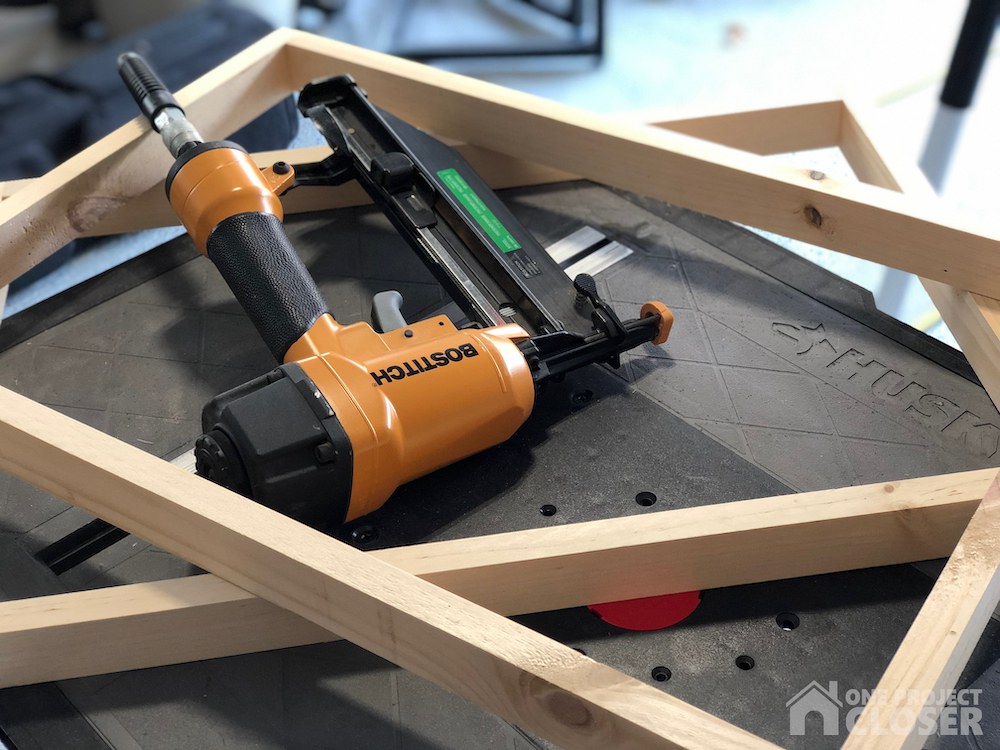
While the chalkboard wall cured, I made frames for these beautiful prints, using 1×2″pine and a brad nailer. The top and bottom measure 16 inches, and the sides measured 22.5 inches, then I nailed them together making sure the joints were square. In all, it cost me about $6!
STEP THREE: HANG PICTURES
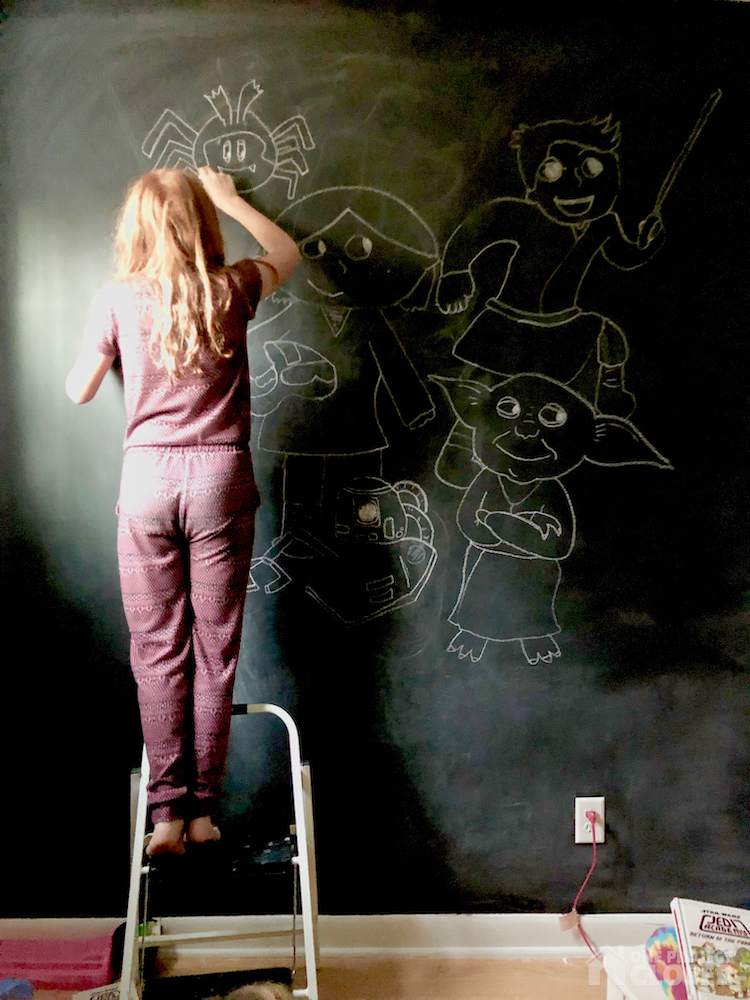
Life got a little busy before I could hang the pictures, so the kids attacked the chalkboard wall to create their own art inspired by the Jedi Academy Series!
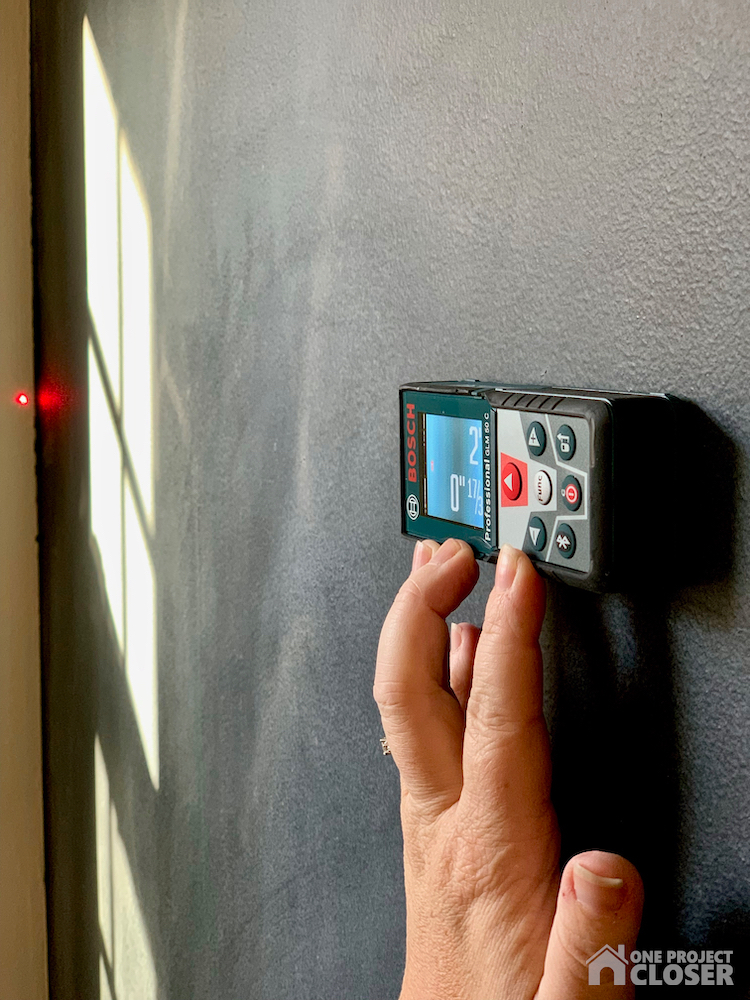
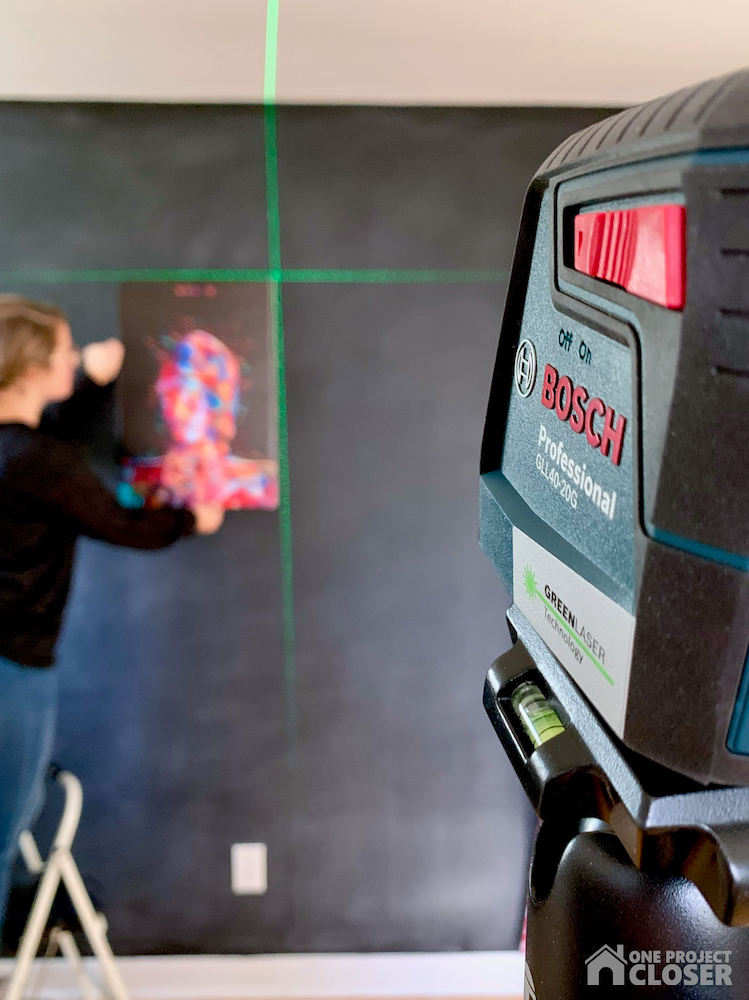
But then they erased it and gave me a window to put up the canvases. For this, I always use my handy Bosch Laser Distance Measurer and Bosch Self Leveling Cross Line Laser – they make the job so much easier and faster. I set up my laser level first, using my tripod (or a nearby piece of furniture if I’m feeling lazy) and then I use the Distance Measurer to find the center point and two adjacent points along the level line. The whole process is under 5 minutes and I don’t end up putting multiple holes in the wall. I really like that both these Bosch products are small, portable and have vibrant lines even in daylight. Well worth the investment if you do a lot of decorating or murals.
STEP FOUR: CHALK
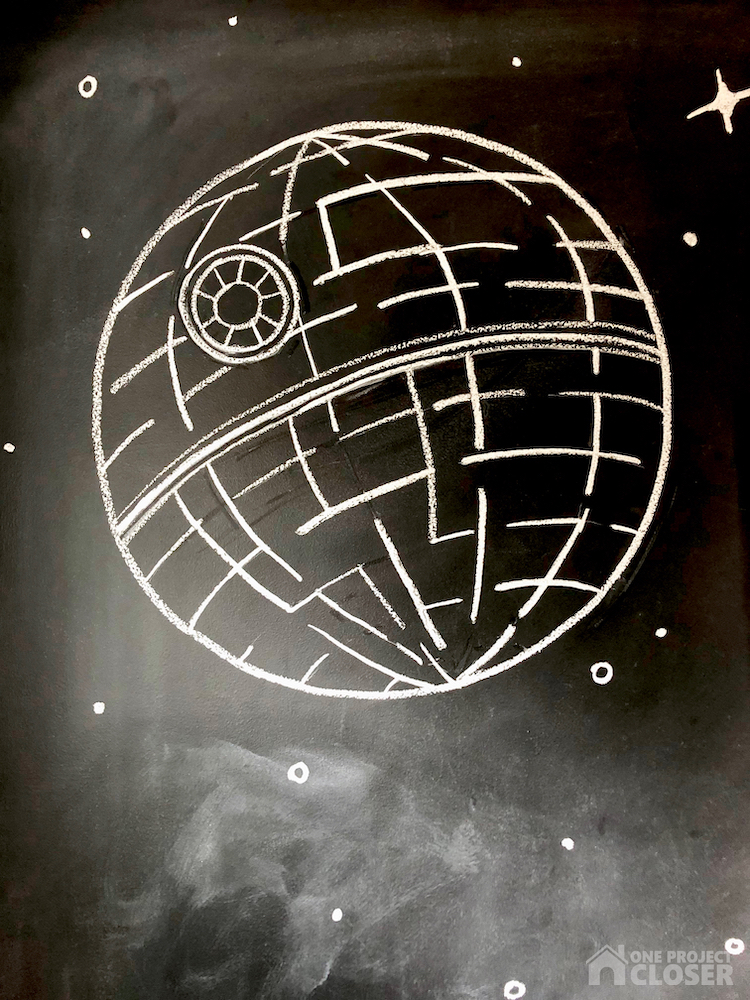
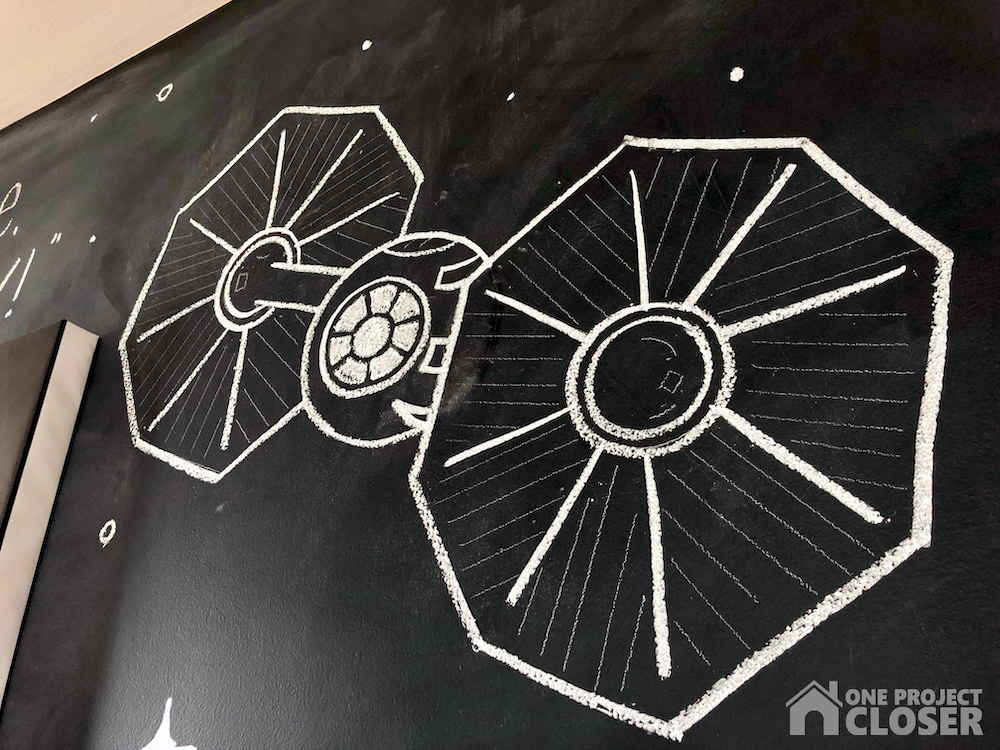
Now I recognize, some people may have opted to hang the canvases AFTER doing the chalk art, but I wanted to know what space I was working with. So I hung them first and starting drawing. Also, by this stage, I was ready to be done and move onto a new project. Not the smartest approach, but that’s the truth. So I didn’t sketch out my design or figure out my lettering, I just went for it. I’m super happy with the Death Star and Tie Fighter, but wish I had put a little more effort into the lettering. Full disclosure: Lucy wanted the darkest quote she could find. We eventually agreed on this one, but it will likely change. LOL
PIN FOR LATER
Love this and want to share it with your friends or just save it to be inspired later? PIN IT!


Jocie Hagan
One Project Closer
Come say hi on Facebook, Instagram, & Pinterest!

Want to learn to hand letter and make amazing, personal decor for your home?
Learn now with Busy Girl’s Guide to Hand Lettering!
**Use the code HAPPY5OFF to get $5 off the course price**

What an awesome idea and execution!
[…] Post we love: “Simple DIY Star Wars Chalkboard Art Wall“ […]