
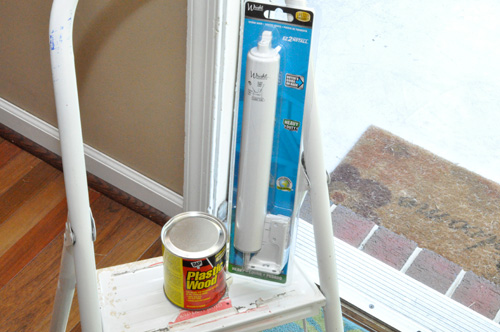
The saga of our front door continues! I mentioned yesterday that our storm door was in our sites for repainting. Well another problem we faced was the old storm door closer had broken. As you’ll see in the pictures, where it was anchored to the door jamb was in poor shape so it came as no surprise when the metal bracket broke. For this project, I tried something new. Since I was skeptical about the condition of the door jamb, I picked up some DAP Plastic Wood. It worked well, but I hit one snag along the way. Maybe you’ll see the problem before I point it out.
DAP Plastic Wood is a wood filler that acts like real wood after it hardens. It can be sanded, stained, cut, drilled, and painted just like real wood. Most importantly, it can hold screws like real wood too.
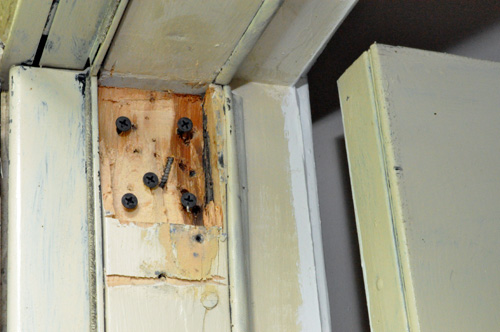
Our door closer is mounted at the top of our door, and I’m actually surprised it held on for as long as it did. Check out these pictures to see why.
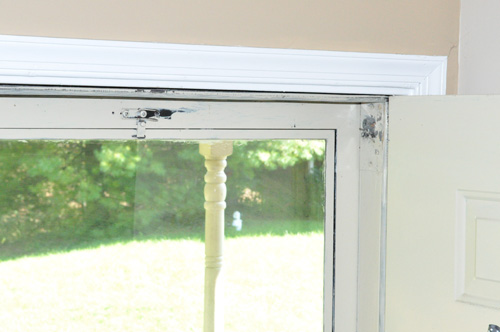
Not all the screws are visible in this picture but I counted 11 all together (securing the metal plate and the closer bracket). For that reason I wasn’t sure what to expect when I pulled the metal plate off.
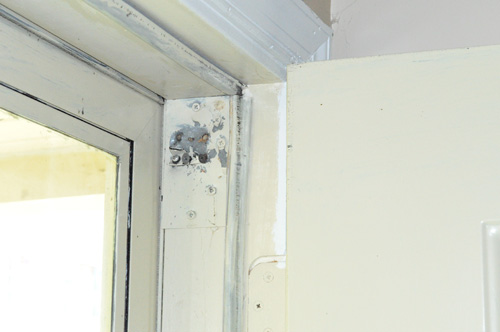
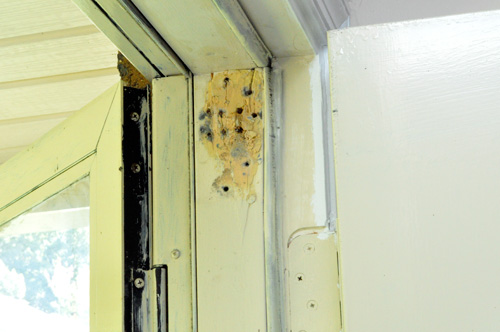
Using my Dremel MultiMax, I cut away some of the questionable wood. The surface layer sort of flaked. Fortunately, I quickly found solid wood underneath.

Next, I borrowed a tip from Peter over at Dover Projects and put in a few screws hoping they’d provide the wood filler with some extra grip. Has anybody else done this?
The instructions for DAP Plastic Wood state that you should apply it in thin layers, and let each layer dry before adding another. I didn’t think my door jamb needed that much so I smeared a big glob in place.
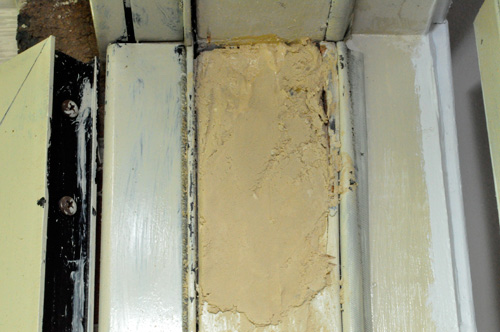
I was wrong. I’ve learned that if you apply too much filler at one time, it will take days to dry. Even after I thought it had hardened and attempted to mount the door closer, I quickly realized the error of my ways (because the bracket started sinking into the filler!). I gave it some more time and cut out the small, damaged section. Here we are on attempt numero dos after drying and sanding.
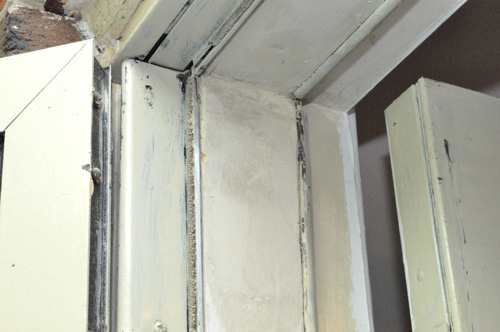
After some painting, I installed the new door closer. You might notice that the storm door has some fresh paint too. More on that tomorrow.
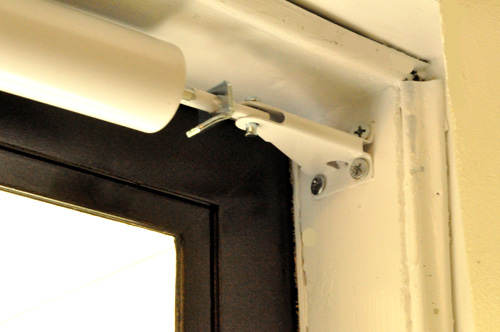
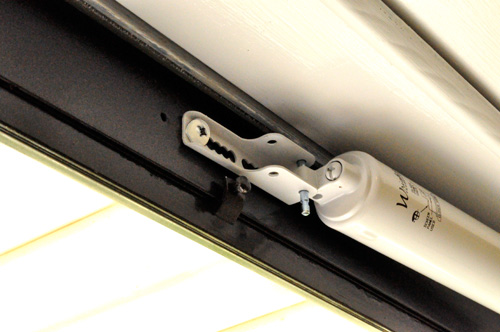
I’m pretty pleased with how it turned out. I still need to perfect my wood filler technique, but that’s mostly because I can be a bit of a perfectionist.


I use the 2-part epoxy type wood fillers (Minwax brand typically). It’s an exothermic reaction and is hard enough to sand in 20 minutes or less. I’ve used it to rebuild a pitted mount for a storm door as well. Once sanded and painted it looks and acts just like wood.
I like the idea of adding screws in there for structure. Did they interfere with the bracket mount?
I looked for the two-part epoxy but either missed it or my local HD doesn’t carry it. 20 minutes is quick!
I had a rough idea where I would need to put the bracket screws so I was able to avoid interference.
I have treated the old doors and windows on our house with the 2-part filler from http://www.rotdoctor.com/
It is pricey- but works wonders.
I saw a similar product at Menards recently. It may have been the Minwax brand, I can’t remember. I am curious if it is as strong as the Rot Doctor.
I too would be concerned about adding screws. Murphy’s Law you know? Instead I’d have drilled holes and pushed in wooden dowels to give it added strength without the worry of hitting a screw when trying to attach the door hardware.
I’ll have to check out the epoxy by Minwax and Rot Doctor for any repair I may come upon when restoring used furniture. Thanks Jeff and Carol.
Wood dowels are more for cabinetry. Murphy’s law is improperly cited here. Planning is the rule. Knowing where the final hardware is going makes locating reinforcements easy! Plastic Wood Definitely benefits from them in deep fills, but one should use the epoxy filler that will stand on it’s own.
Never heard of this product before having old windows here with wood frames this just might be a good product to bring them back to “normal”. I’ll be sure to let it dry before laying it on too quick. I assume its like drywall compound in that sense.
I WISH it was like spackle in MANY senses. Comparing it to spackle is going to lead to trouble. Drywall compound (spackle) is far easier to apply for a rather long period. Plastic Wood becomes unworkable very fast and long before it cures! Plastic Wood usually has me tearing my hair out. You cannot count on it’s condition on the store shelf. I just bought a can it was barely moist. As soon as it was applied it crumbled into a useless granular pile of crap.
Dude, you totally hijacked my blog post
http://runninggod.blogspot.com/2010/04/putty-versus-filler.html
just kidding
Hehe! Isn’t that stuff awesome? I was skeptical at first that it would harden enough to hold screws but it obviously does. Glad we both got our door jambs fixed.
I don’t know why I keep buying Plastic Wood! I can’t count on it being fresh enough to use. Work time is barely better than ZERO. And it’s lacquer base is extremely toxic and carcinogenic. If you can’t find epoxy based filler, and why bother looking(?), grab a block of wood and run it down on your belt or disc sander and then just mix the pile of sawdust with your favorite epoxy!
Plastic Wood is basically sawdust, lacquer, and a little stain. It costs $5 or more for 4/10 of an oz.! That’s just insane!
Serious wood craftsmen almost never buy wood filler. Even back in shop class I was taught to mix sawdust with wood glue. If you use epoxy or even fiberglass resin (the resin that is applied to fiberglass) it’s infinitely easy and predictable to work with. Plastic Wood is not a woodworker’s staple. It’s a tourist trap.
I have just used DAP plastic wood for the first time on the bottom of an exterior door frame. It filled in the rotted out area but I did have to go back for a second can – got the larger one this time as it seems there is a big pocket of air in the cans. The first can was a little dry. I’m not to the sanding part, so will see how long it takes to dry. I didn’t like the way it appeared bumpy after applying and ran the putty knife along it to make sure I had applied it evenly.