
Today we’ve got a guest contribution from Ross, one of our regular readers. Ross built the OPC workbench, and then he followed it up with a terrific companion workbench of his own design.
When setting up my garage workshop after a recent move, I first made the heavy-duty workbench following the tutorial Ethan wrote. It’s already seen a fair bit of usage and I’m sure it will be used for many years to come. If you haven’t made one already, I recommend it!
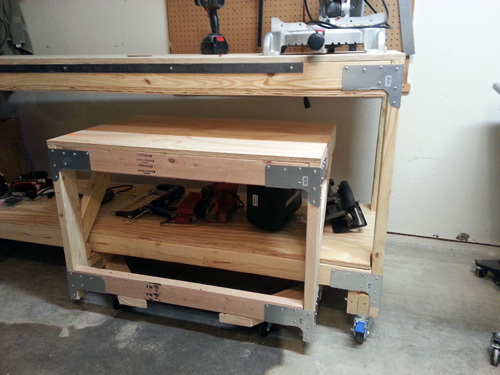
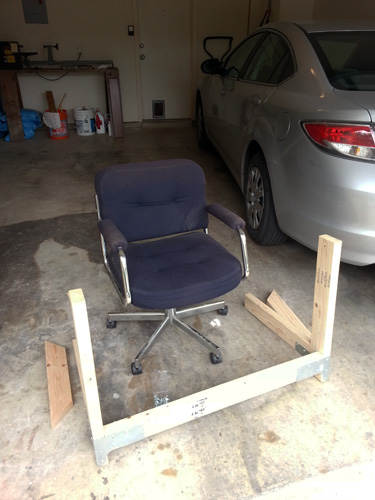
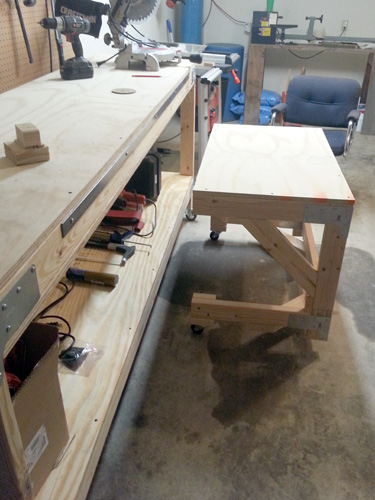
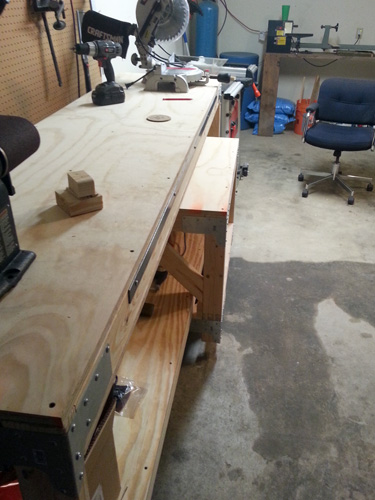
If you follow the plans to make the heavy-duty workbench, you’ll find that after buying two 4×8′ plywood sheets, you’ll rip them down to four 2×8′ sheets and use three of them (two for the shelves and one for the torsion box on the top shelf). Wanting to further compliment the garage with another workbench, I set out to make a smaller workbench with the remaining 2×8′ sheet of plywood.
In addition, I also had the following goals:
- To save space in the garage (two car garage that I park one car in), I wanted the bench to be able to fit underneath the main workbench.
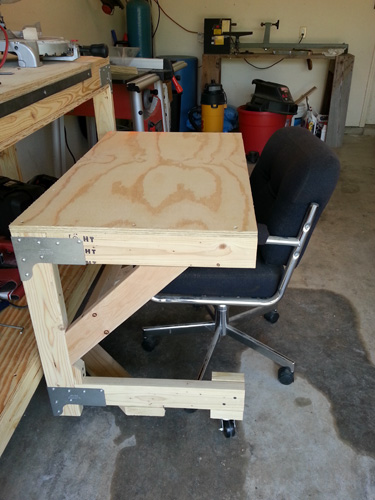
- Doing a fair bit of hand/detail projects, I wanted a lower table that I could fit over my shop chair for activities such as sanding or gluing.
- Additionally, I wanted to be able to wheel it around the shop along with my chair.
The bench I made has a final length of 40″ and is about 29″ high (I kept the width the same–24″). Specific dimensions may vary based on the height of the bottom shelf of your heavy-duty workbench as well as the desired height of the companion bench.
(Note: the design isn’t perfect and could certainly be improved upon. Share your ideas in the comments section below!)
Materials
- 3/4″ 2×8′ sheet of plywood
- 2x4s for the following components – (4) 8′ lengths should do it:
- (2) 37″ pieces for the back
- (4) 20-1/2″ pieces for sides
- (2) 26″ pieces for the back legs
- (4) 20″ pieces for the trusses (sides and bottom)
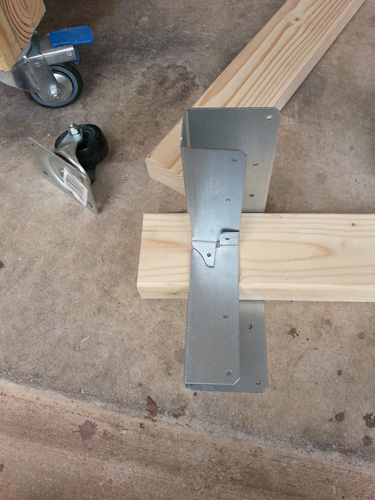
- (4) Simpson rigid tie connectors
- A box of #8 1-1/4″ screws
- (~10) 3-1/2″ screws for the trusses and front casters
- (~10) 1-1/2″ screws for attaching the plywood on top
- (4) non-locking casters – no particular weight rating, just not flimsy ones
- Liquid Nails (to improve strength of attachment joints)
Step 1 – Cut Lumber to Size
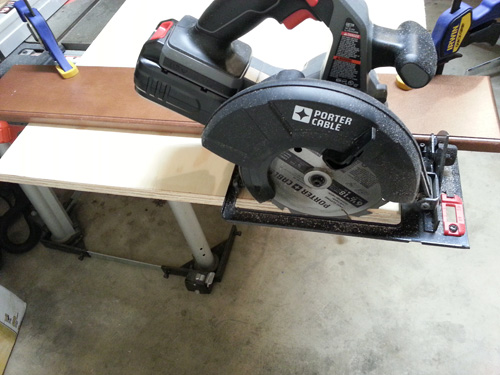
First, I cut the plywood sheet to the desired length. This was easily accomplished with a circular saw, and I clamped a spare board to act as a straight edge for the saw.
I cut the 2×4 sections to length, waiting on the trusses until after attaching the body frame.
After cutting the body sections to length, I laid out the pieces to make sure they looked about the size I wanted.
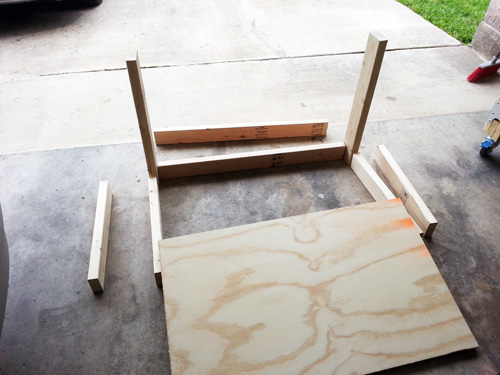
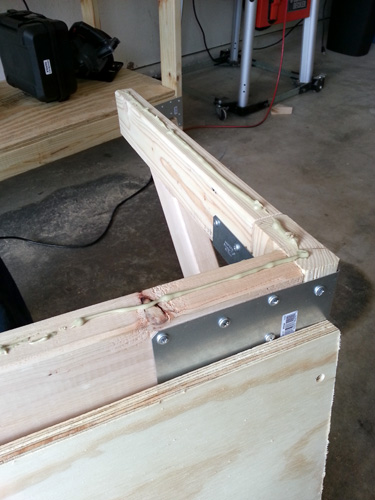
Step 2 – Attach Frame
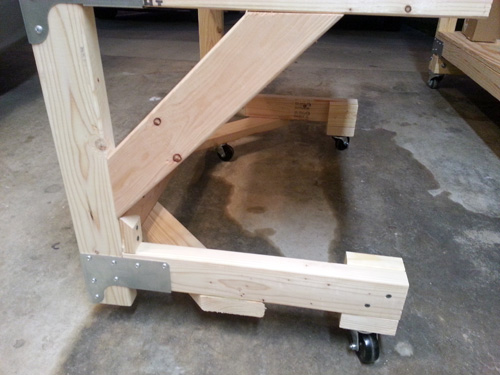
When I was happy that the length and height would work, I went about attaching the tie connectors in the 4 corner joints. As a small tip, I’ve found it easiest to drill in the inside screw after attaching just a couple of screws on the outside. If you save the inside one for the end, it might be hard to line everything up.
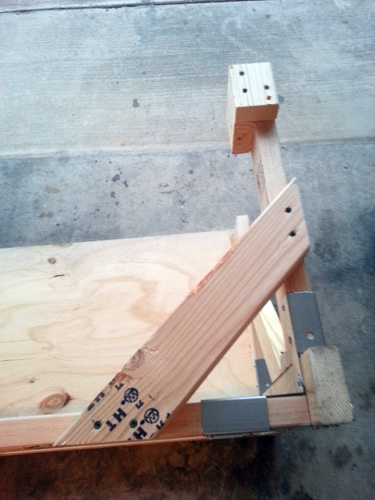
Step 3 – Cut and Attach Trusses
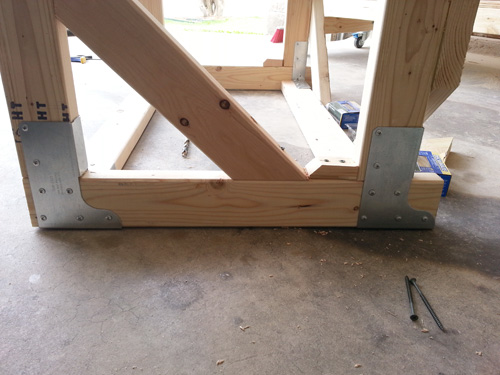
It was at this point that I realized that my initial plans for the bench didn’t take into account that the tie connectors extended below the joint (silly, I know). I had been planning on placing the casters right on the rear joint. I improvised a fix by adding some bottom trusses for the rear casters. I mitered two boards with 45° ends, approximately 20″ on the long side, and I attached these to the bottom of bench.
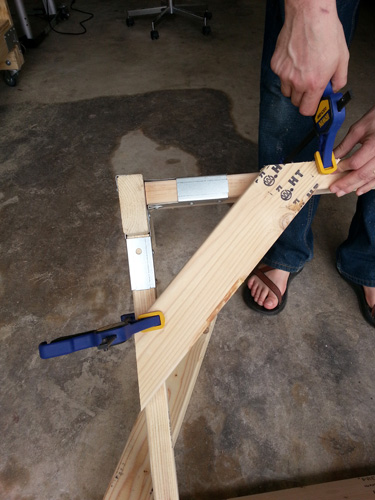
I used the 3″ screws for the trusses, and I drilled pilot holes to prevent any splitting. After attaching all the tie connectors and bottom trusses, here’s how it looked.
When planning the bench, I asked my engineer brother-in-law about the trusses and he said: “If you were to place a 300 lb load on the front edge of the bench you would create about 1000 lbs of internal force in each of the lower corner joints.” While I’m not planning to put that much weight on the bench, I wanted to be sure it would hold up. Without side trusses, the bench would be pretty weak so I cut some pieces about 20″ long.
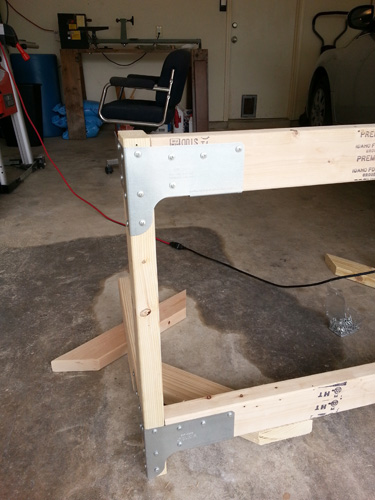
Additionally, I screwed a small section of 2×4 in the very bottom corner joint. My thinking was that it would help support the downward force of the truss and further reinforce the joint.
Step 4 – Attach Top
At this point I attached the plywood top to the frame. I countersunk holes around the edges, laid down a bead of Liquid Nails, and screwed on the top.
Because of the added truss for the rear casters, I needed to attach a few blocks to the 2×4 side pieces for the front casters. I used Liquid Nails and some longer screws (pre-drilling the holes) to accomplish this. It isn’t an ideal solution, but it seems to work.
Step 5 – Attach Casters
Next, I attached the casters. For the rear ones, the further back they are positioned, the better the weight distribution will be.
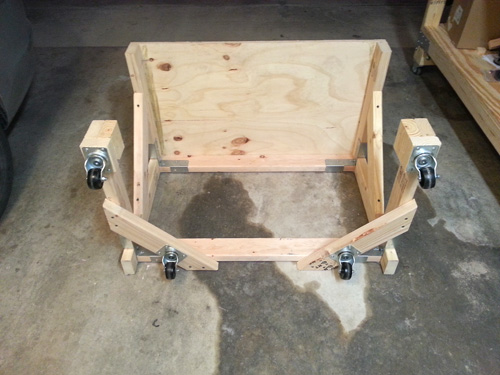
Step 6 – Try it out!
If you’re following along, hopefully all your measurements were correct and the bench fits well under your heavy-duty workbench!
What do you think? Would a companion bench work well for your workshop? How can the design be improved for rigidity (trusses, casters)?

Looks very strong. Great job! I like the nesting feature.
Are you going to mount a drawer or two in the open front of the bench? If not, you could hinge a couple of legs up there and when you needed more support, swing them into place to span the gap in the front corners (the vertical gap). It would still store tight to your other bench but hold heavy tools and projects when you needed it to.
Don’t get me wrong though, I think your bench is an excellent solution as is to the space problem we all have. Great job!
That’s a great suggestion, and one I briefly thought about but didn’t get around to adding. It’s a pretty simple addition, too. My use so far hasn’t warrented the need for it–I’ve been pretty careful with what I put on the bench, but I can see adding this in the future just to be certain.
Thanks for the feedback!
Nice work, I doubt that you will have any problems with putting too much weight on the bench to cause issues with the cantilever, remember to get that 1000lb load, you would have to have 300lbs centered on the front edge of the table, not evenly distributed over the whole surface.
Great idea – really like the nesting idea, saves a ton of space.
Nice job! I like the way that it is easily stored,
Great job. I can see it being used as a portable work station.
Is it possible for it to still nest under the main workbench and yet function as a portable miter saw bench?
Very innovative and very detailed assembly instructions. Thanks for taking the time to share.
Just a tip; ‘= feet, “=inches,if you didn’t know that it would be hard to build with those measurements,you have it all as feet. when I think some are inches
I love working in my shop as well. However working in a pair of sandals is not the best type of foot protection.We all have dropped something in our shops.
Here is a big tip: Please never weld in sandals!
Excellent work bench! making legs a little longer and not using casters and topping with a sheet of hardboard, this could be an excellent hobby work bench. By using screws to hold the hardboard on, it can be replaced should it be really messed up.
As an alternative, two 2 x 4 sheet of MDF, sealed would provide a very flat work surface, 🙂